


SIG Ryan STA special kit by Maxy Hester
 07-07-2016, 05:40 AM
#226

Thread Starter

Join Date: Nov 2006
Location: Santa Teresa, N.M.
Posts: 168
Likes: 0
Received 0 Likes
on
0 Posts
After thinking about it and your post, it would be pretty negligent NOT to fab new elevators at this time. I am leaning toward hollow core built up elevators as used in modern plane builds, then adding stringers for appearance. That's today's agenda, now I can build in better options for remounting. Thanks. (2 cents accepted, rubs them together...)!
 07-07-2016, 06:21 AM
#227

After thinking about it and your post, it would be pretty negligent NOT to fab new elevators at this time. I am leaning toward hollow core built up elevators as used in modern plane builds, then adding stringers for appearance. That's today's agenda, now I can build in better options for remounting. Thanks. (2 cents accepted, rubs them together...)!
 07-09-2016, 02:37 PM
#228
Thread Starter
Join Date: Nov 2006
Location: Santa Teresa, N.M.
Posts: 168
Likes: 0
Received 0 Likes
on
0 Posts
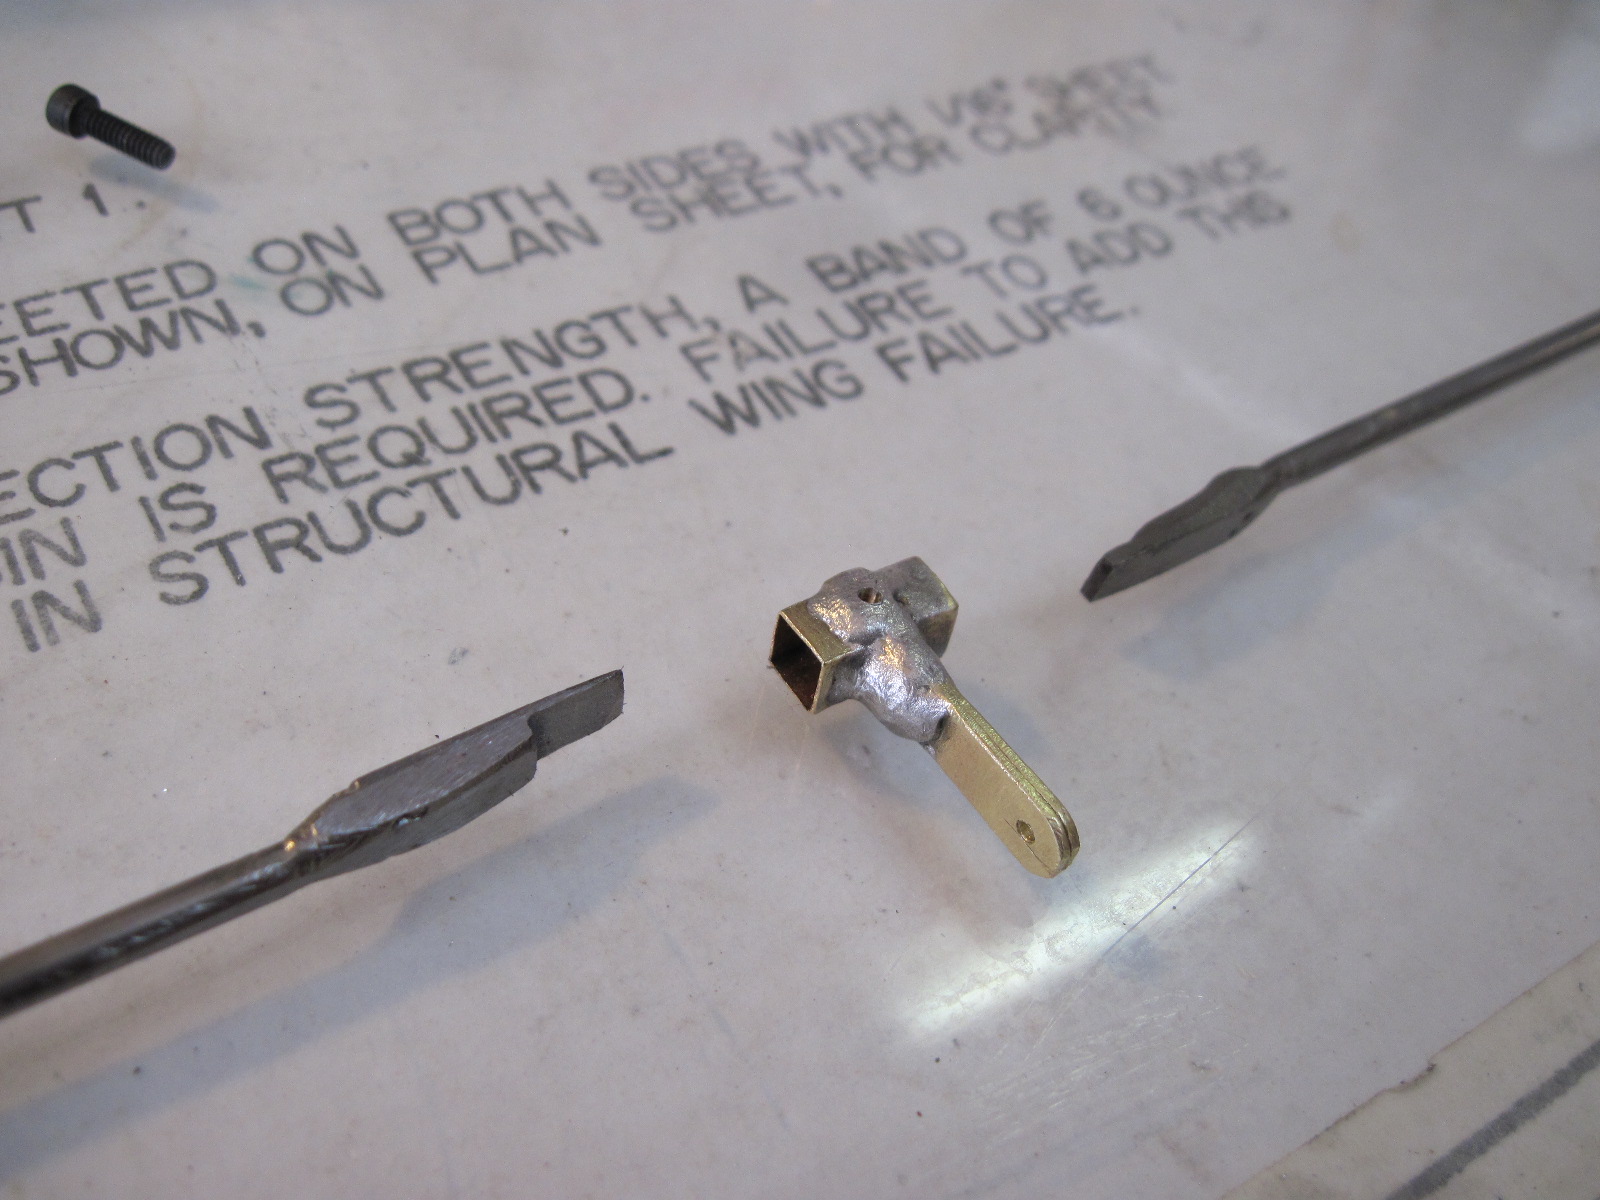
Thus far I have completed part of the pair of elevators, and today I have been carefully MIG welding parts for this plane. What is going on here is an attempt to lock all the components of my new elevator tie/control rod together so as to be fastened with a single screw. One of the rod ends will be threaded to receive the fastener. The other will be pass thru, more filing to complete the fit is needed then drill and tap the hole.


07-11-2016, 01:58 PM
#231
Thread Starter
Join Date: Nov 2006
Location: Santa Teresa, N.M.
Posts: 168
Likes: 0
Received 0 Likes
on
0 Posts
So I had a FAIL. while attempting to drill, the bit skidded to the side when encountering the piano wire. Resulting in what the photo represents.
I went back and dug up some scrap material 1/4 inch steel plate. drilled the 1/8th holes for the wire and some 3/32 for the weld bead. The steel also helps to absorb the heat letting me turn up the amps to get better penetration in the weld, that damn wire is tough!! So I am where I left off yesterday. Let's hope tomorrow is better...


I went back and dug up some scrap material 1/4 inch steel plate. drilled the 1/8th holes for the wire and some 3/32 for the weld bead. The steel also helps to absorb the heat letting me turn up the amps to get better penetration in the weld, that damn wire is tough!! So I am where I left off yesterday. Let's hope tomorrow is better...
07-15-2016, 10:25 AM
#236
Thread Starter
Join Date: Nov 2006
Location: Santa Teresa, N.M.
Posts: 168
Likes: 0
Received 0 Likes
on
0 Posts
Had a setback with the brass hinge idea. Have spent the day re-fabricating nylon hinges that can flex a little and take the vibration abuse. The brass was awesome looking but that **** broke while I was bending the 2nd rod. The nylon will probably last just as long.


07-21-2016, 11:31 AM
#238


Join Date: Jan 2014
Location: Eppendorf, Saxonia, Germany
Posts: 129
Likes: 0
Received 7 Likes
on
7 Posts
I love Your solid metal work. As additional for Your new elevator I suggest to work out the trimflaps > it will take not so many time but it looks great

by the way > red is added

by the way > red is added
07-22-2016, 05:31 AM
#240
Thread Starter
Join Date: Nov 2006
Location: Santa Teresa, N.M.
Posts: 168
Likes: 0
Received 0 Likes
on
0 Posts
There it is!....
That is one SEXY airplane, I was considering adding in some details with the flitemetal. You're teasing me with the wonderful work displayed in your photos.
That is one SEXY airplane, I was considering adding in some details with the flitemetal. You're teasing me with the wonderful work displayed in your photos.
07-22-2016, 08:51 AM
#241
Join Date: Jan 2014
Location: Eppendorf, Saxonia, Germany
Posts: 129
Likes: 0
Received 7 Likes
on
7 Posts
Sorry my friend, but I`m driven by one of my buddies. Everytime when he visited me he says, hey looks great but if You add this detail or this it will be even better.....
This ist the reason for my delay by maiden flight, normaly it should be in May. Now I`m glad when I can manage it at the end of August.
This ist the reason for my delay by maiden flight, normaly it should be in May. Now I`m glad when I can manage it at the end of August.
Last edited by thomasmuckus; 07-22-2016 at 12:49 PM.
07-23-2016, 07:13 AM
#242
Thread Starter
Join Date: Nov 2006
Location: Santa Teresa, N.M.
Posts: 168
Likes: 0
Received 0 Likes
on
0 Posts
Cramming to finish...
These photos show that the elevator is complete sans the cover and paint. The setup is ready and the upgrade was definitely worth the hassle and time.
I did get the smallest servos that were available, I didn't realize this until they arrived. Take note, You gets what you orders late at night, half awake, shopping for solutions to self made issues.
These are metal gear, just soo small. I do think that 40 oz.in of tq. should do at low throttle for flap operation. I plan to increase torque with small horn length. It's all good compared to the slop I had to deal with using linkage. This is a good example of insanity: I new better than to try a single servo and linkage, but I did it anyway thinking I could make it work this time! can u say FAIL?
The on-board glow will also take on another challenge. I ordered some adjustable voltage step-down regulators from the robot shop. I intend to eliminate the battery here and tap into the flight battery for power. So far it's like this: Main power for radio & servos, Brake operation, and On-board Glow from a single power source.
07-23-2016, 07:42 AM
#244
Join Date: Jan 2015
Location: Metamora, Michigan U.S.A.
Posts: 284
Likes: 0
Received 0 Likes
on
0 Posts
40 in. Ounce servos are fine for throttle, I'd go spend more money. Analog servos only can push as hard as pushed upon unlike digital. I wouldn't chance the servo issues.
07-23-2016, 01:52 PM
#245

I am always surprised about how big the following is on this kit. It takes a lot of work to make this plane as nice as jwharkinz's !
If you want to hear a funny story about this kit... read below.
One time my buddy and I went to an estate sale.. he picked up a few planes... boxes of odd loose stuff, and I bought a garbage can full of plans. At the end of the sale they were telling people to just grab the odds and ends and take them home. Lots of things got left scattered around on tables. Well my buddy ended up with a half built kit and a bunch of parts but no idea what it was.. it was pretty boxy, and obviously and old school kit. A week or so later we went to another sale and there was that same airplane stuff for sale cheap.. and free again. this time my friend says,
"I think that fuse is for a Maxy Hester STA, I wish the whole kit was there."
Another two weeks go by and My friend and I dig thru the boxes of odds and ends, and my garbage can full of plans... Out comes a set of Plans for the STA. My friend takes them home and compares them to the unidentified kit parts ..sure enough.. the free fuse and parts we had kept avoiding for the last two sales were the OTHER HALF OF HIS KIT !
We never saw them again ! hahahahah
07-28-2016, 10:23 AM
#247
Thread Starter
Join Date: Nov 2006
Location: Santa Teresa, N.M.
Posts: 168
Likes: 0
Received 0 Likes
on
0 Posts
Getting closer to completion
In a couple photos you can see where I swapped the battery for a voltage reducer regulator and the whole thing now weighs 1/2 oz. less than just the battery! Hope this works as well as it does on paper. The servos are fully programmable digital, and will be compatable with the radio as well. They're small but badass. With some smaller horn length I can get each one to around 48-50 oz. inch. That's more than the original plans had, I will keep an eye out for any issues here tho. Getting ready to finish the wheel pants in flitemetal. Then the polishing...


In a couple photos you can see where I swapped the battery for a voltage reducer regulator and the whole thing now weighs 1/2 oz. less than just the battery! Hope this works as well as it does on paper. The servos are fully programmable digital, and will be compatable with the radio as well. They're small but badass. With some smaller horn length I can get each one to around 48-50 oz. inch. That's more than the original plans had, I will keep an eye out for any issues here tho. Getting ready to finish the wheel pants in flitemetal. Then the polishing...
07-30-2016, 09:42 AM
#249
Thread Starter
Join Date: Nov 2006
Location: Santa Teresa, N.M.
Posts: 168
Likes: 0
Received 0 Likes
on
0 Posts
ONE !
as in one wheel pant covered.
I covered the elevators and the wheel pant pieces, now they will be painted to match. Gonna finish the other wheel pant this weekend(yea, it takes that long). I learned that getting greedy and rushing the application does NOT pay off.
... some pics


as in one wheel pant covered.
I covered the elevators and the wheel pant pieces, now they will be painted to match. Gonna finish the other wheel pant this weekend(yea, it takes that long). I learned that getting greedy and rushing the application does NOT pay off.
... some pics