


Meister Scale Zero - step by step
 07-01-2012, 04:37 AM
#1

Thread Starter
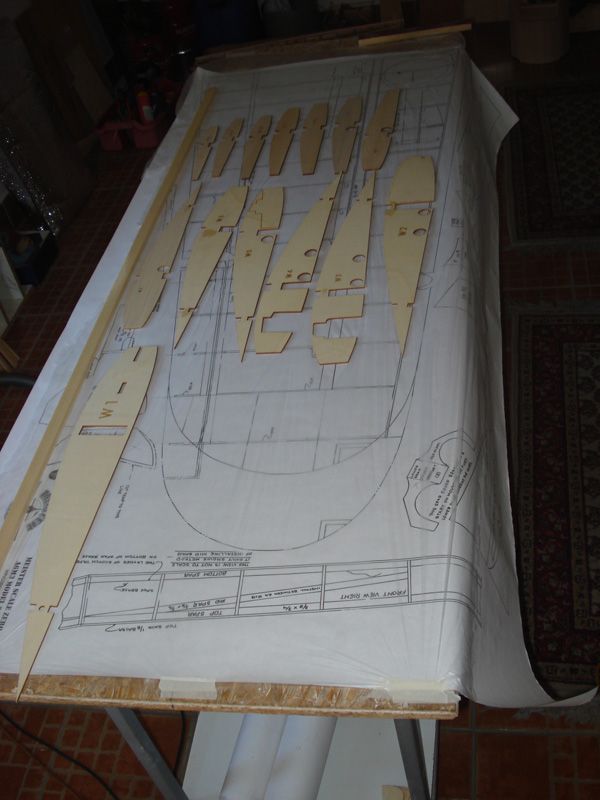
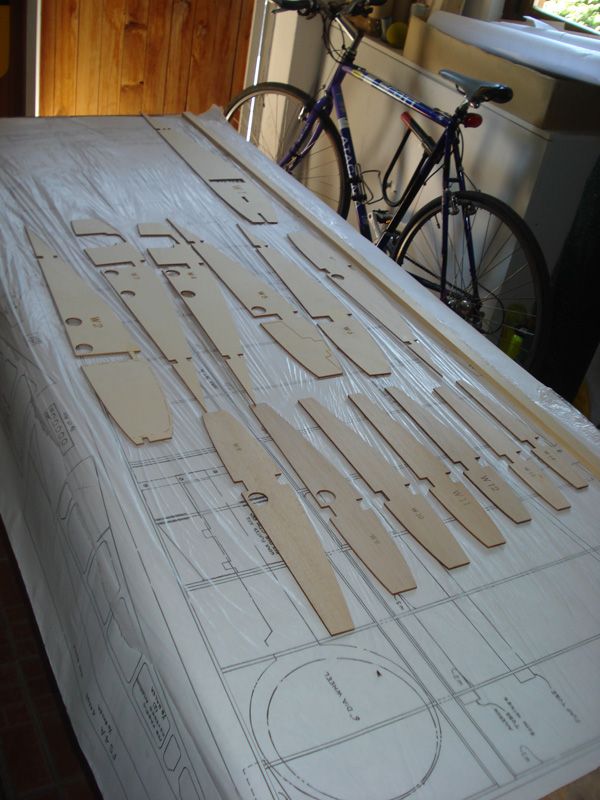
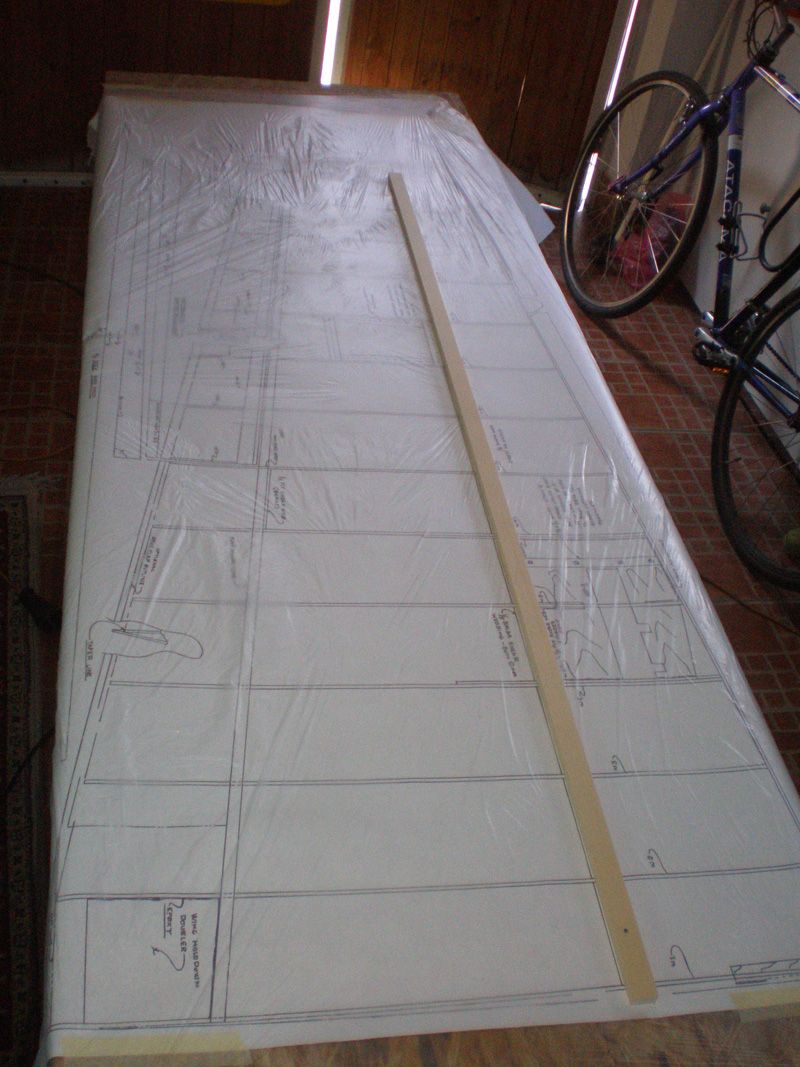
As the title says, this will be my next Meister Scale project... Plan was to made Meister Focke Wulf, but I get opportunity to buy parts and plans for Meister Zero, and I don't want to miss it.
Story is interesting, because I bring, from my Top Gun trip this year, short kit, plan, cowl, and some other parts, to my friend, who want to made this model.
He start working on fuselage, and made very nice job on it, but few day ago he called me, and sad that want to sell everything.
In meantime he bought a lot off balsa, I think it's enough for this project, and for price he ask, I take all from him...
This building will be interesting, because Wayne and Garry made Meister Scale Zeros also. Only difference between our models is I will made Zero with wooden fuselage.
I will made a lot of pictures, of all building steps, same like on my Meistre P 47 topic ( http://www.rcuniverse.com/forum/m_10794600/tm.htm ), but for first steps in fuselage building process, please visit Zero page on our Serbian Forum:
http://www.rcfly4um.org/index.php/topic,9574.0.html
That is part of building I wasn't made, but it can be interesting for modelers which want to made Meister Scale Zero with wooden fuselage.
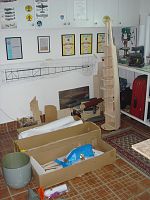
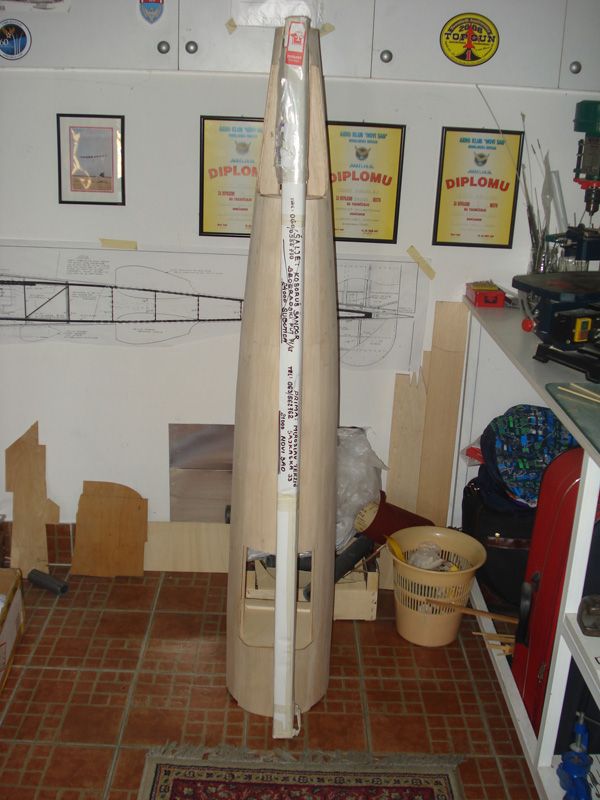
Today my friend come to me bringing fuselage and other parts...


Regards
Mirce
Story is interesting, because I bring, from my Top Gun trip this year, short kit, plan, cowl, and some other parts, to my friend, who want to made this model.
He start working on fuselage, and made very nice job on it, but few day ago he called me, and sad that want to sell everything.
In meantime he bought a lot off balsa, I think it's enough for this project, and for price he ask, I take all from him...
This building will be interesting, because Wayne and Garry made Meister Scale Zeros also. Only difference between our models is I will made Zero with wooden fuselage.
I will made a lot of pictures, of all building steps, same like on my Meistre P 47 topic ( http://www.rcuniverse.com/forum/m_10794600/tm.htm ), but for first steps in fuselage building process, please visit Zero page on our Serbian Forum:
http://www.rcfly4um.org/index.php/topic,9574.0.html
That is part of building I wasn't made, but it can be interesting for modelers which want to made Meister Scale Zero with wooden fuselage.
Today my friend come to me bringing fuselage and other parts...
Regards
Mirce

 07-04-2012, 01:11 AM
#5
Thread Starter
While I waiting on P 47 to come back from painting, I was working on Zero.
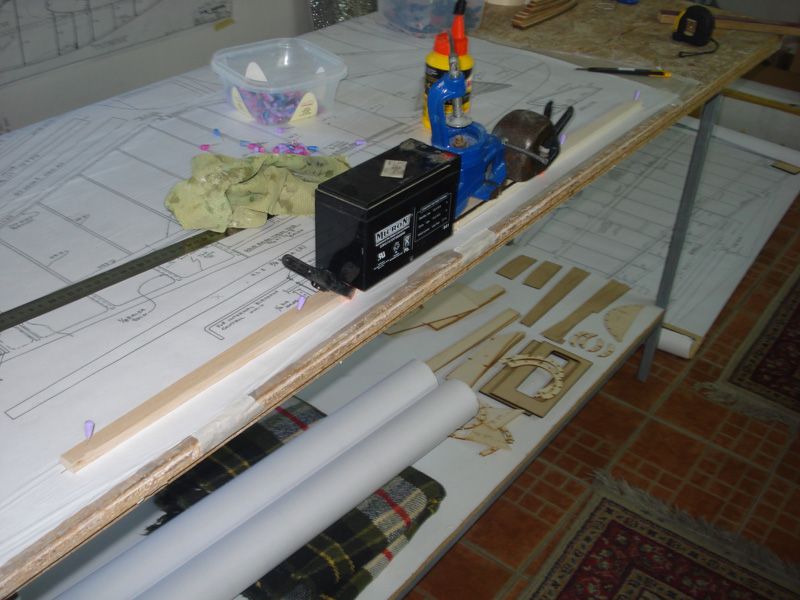
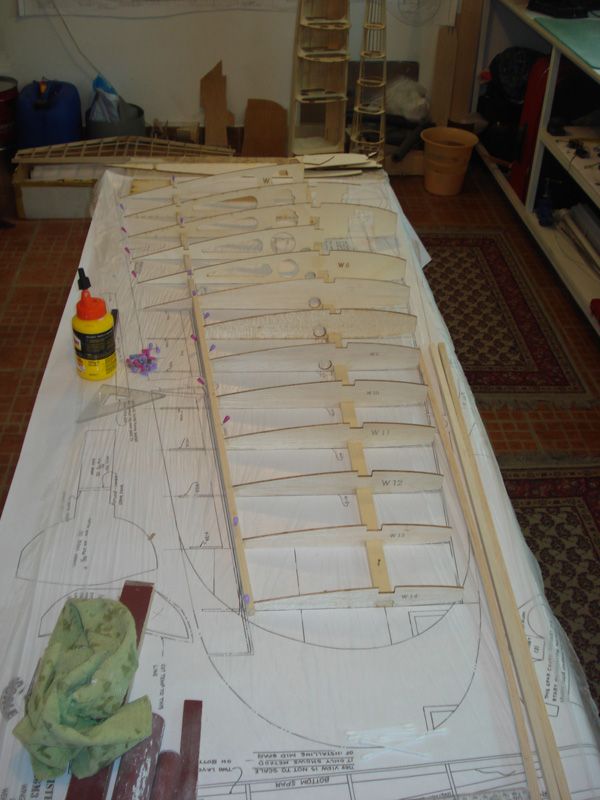
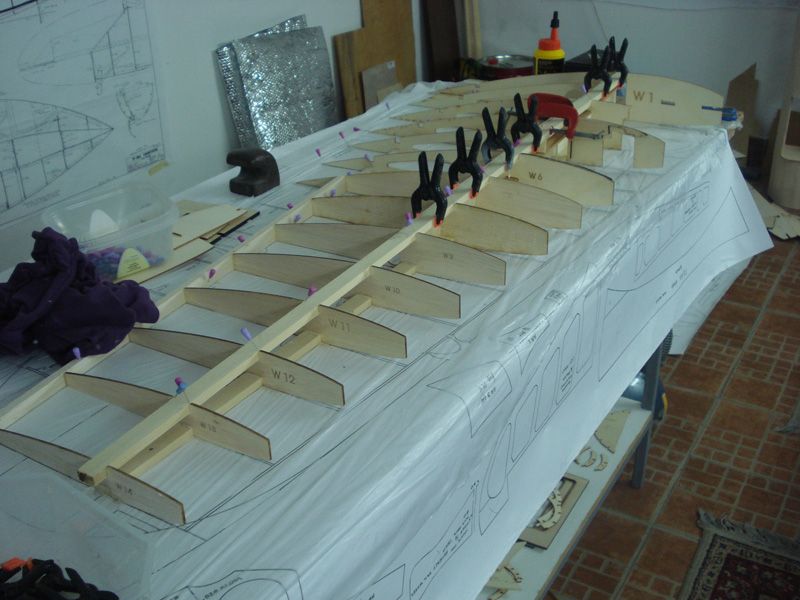
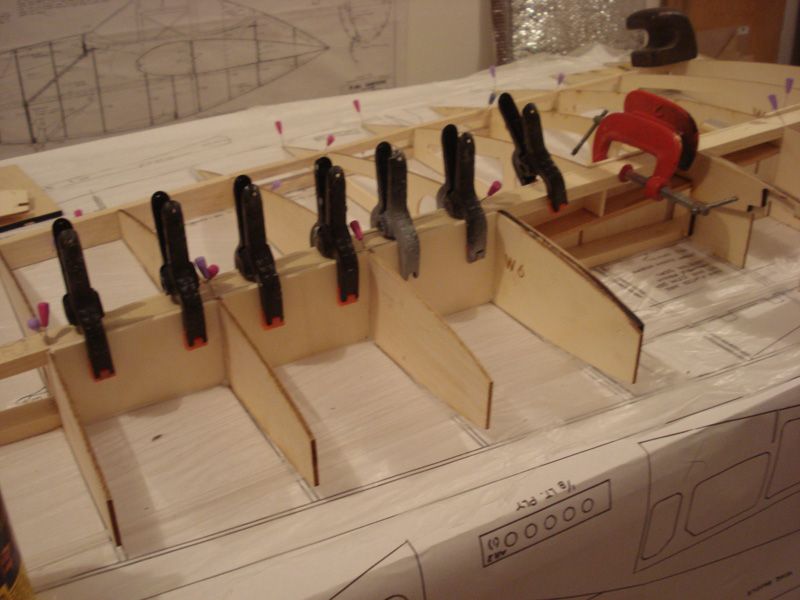
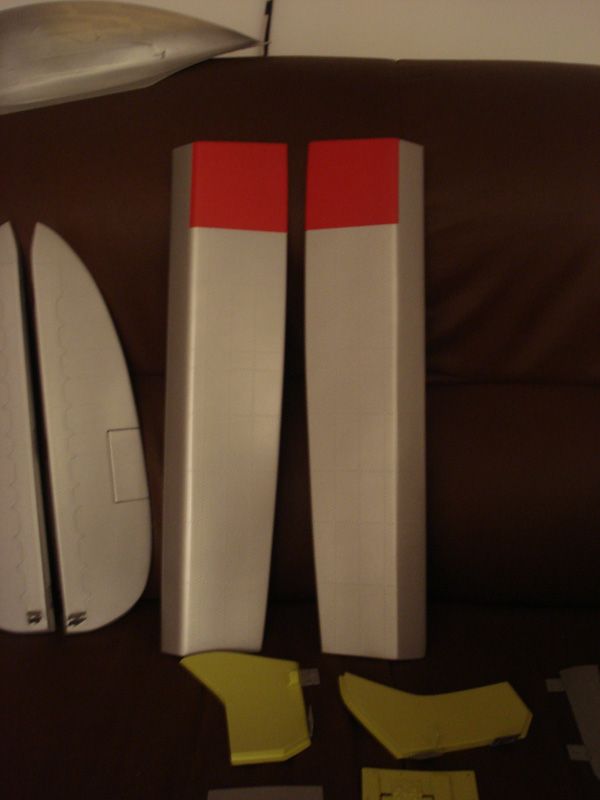
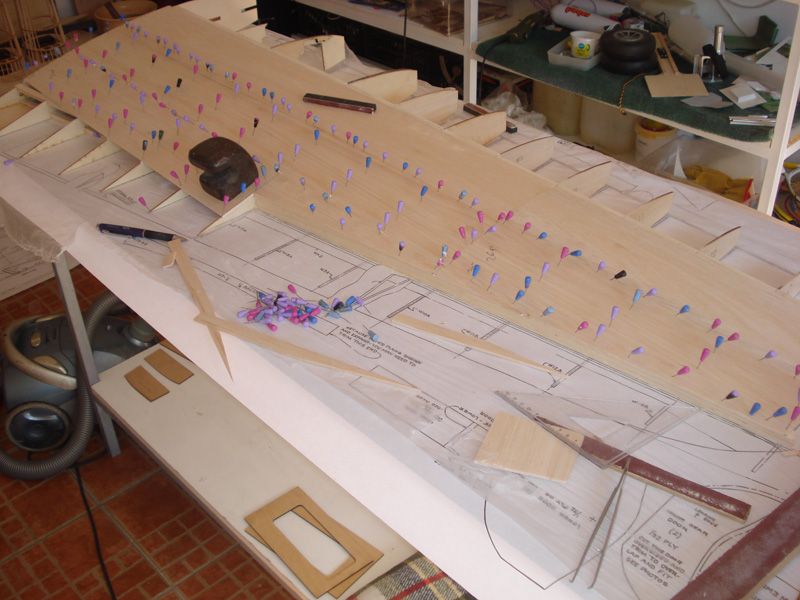
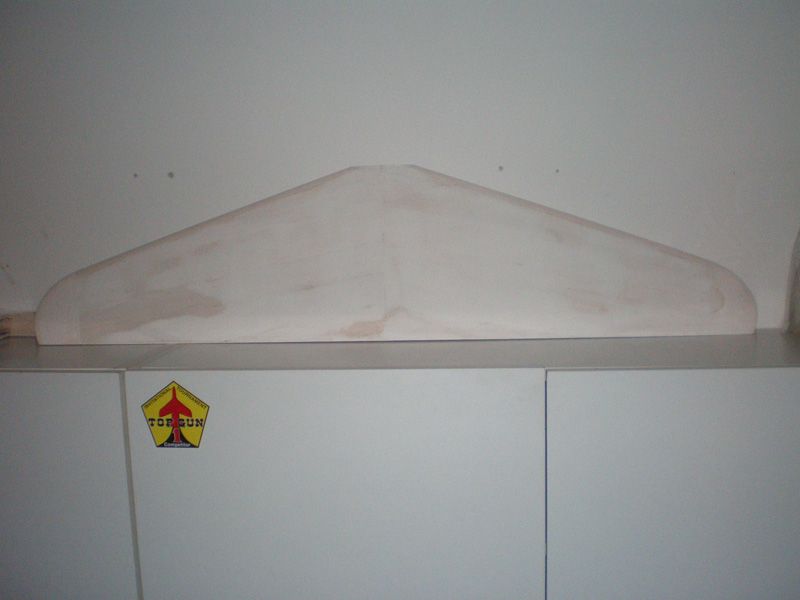
I start work on elevator first. Like everything on this model, elevator is huge also, it have span from 117 cm!!!
I must made rear elevator part first, on which will come all ribs. That part is made from 10 mm balsa, and ply which come in the middle. For gluing I used white glue...
Than I glued middle and outer ribs...
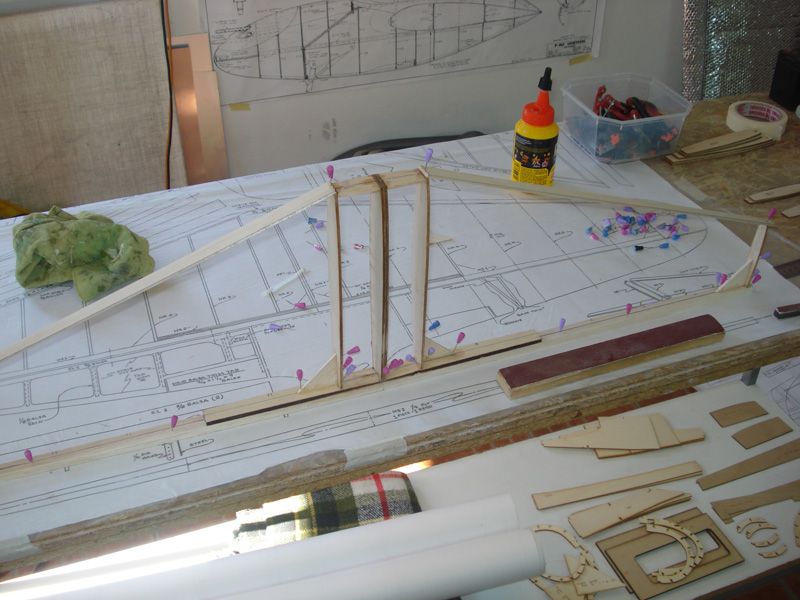
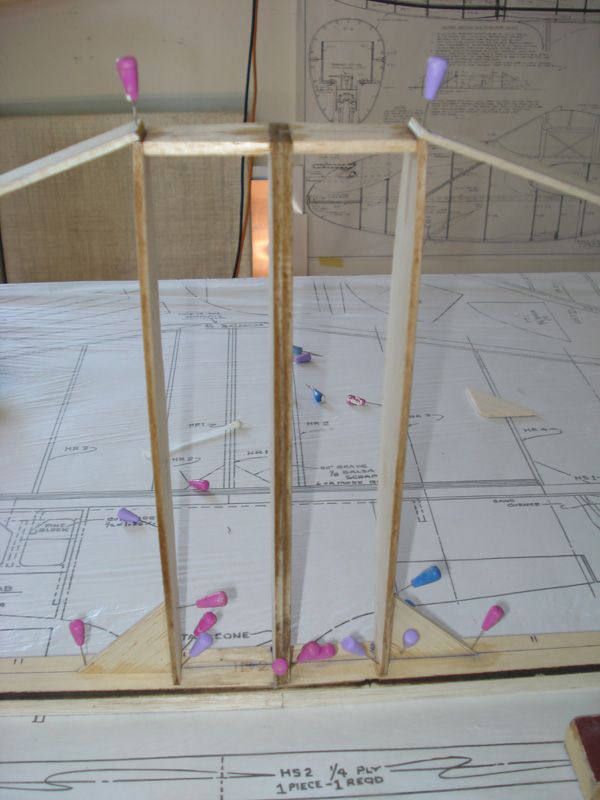
On that ribs, in front, come 3 mm balsa plate, and after that all other ribs...

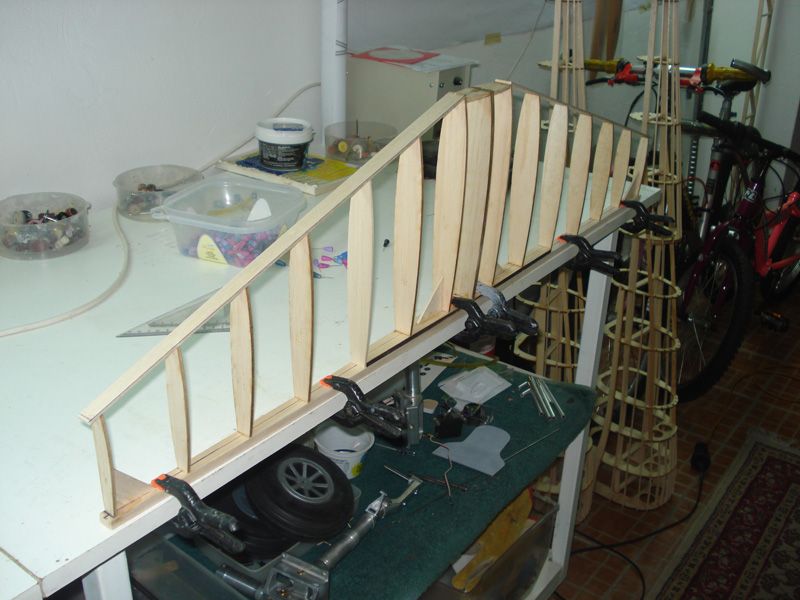
Balsa for leading edge is very straight...
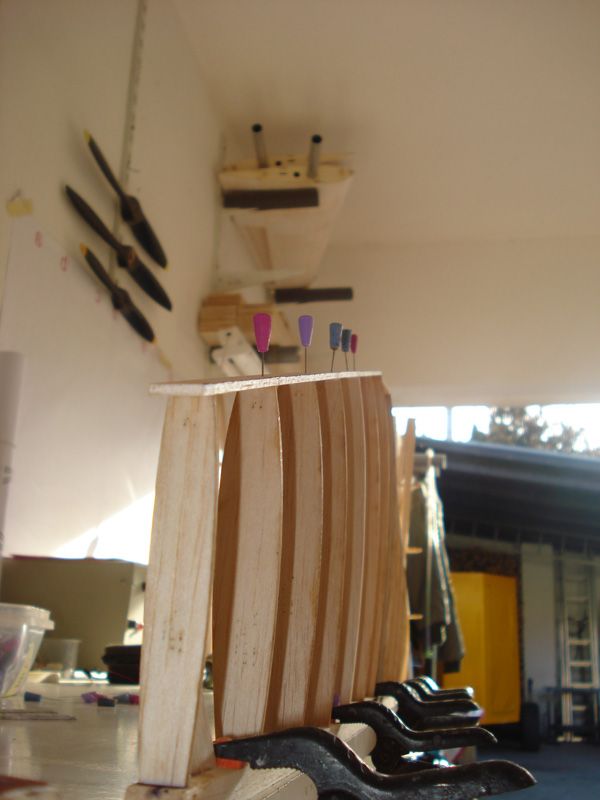
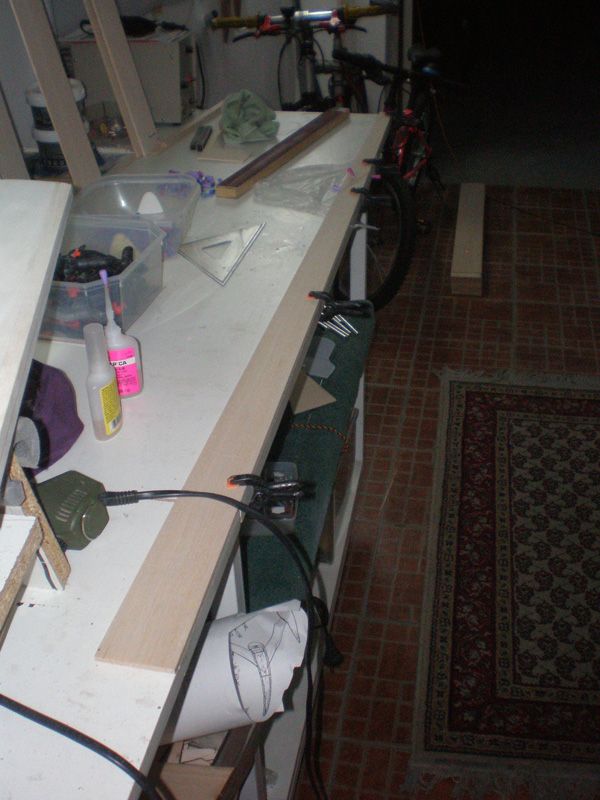
In this stage I little change a plan, and add fir spars 6 x 3 mm...
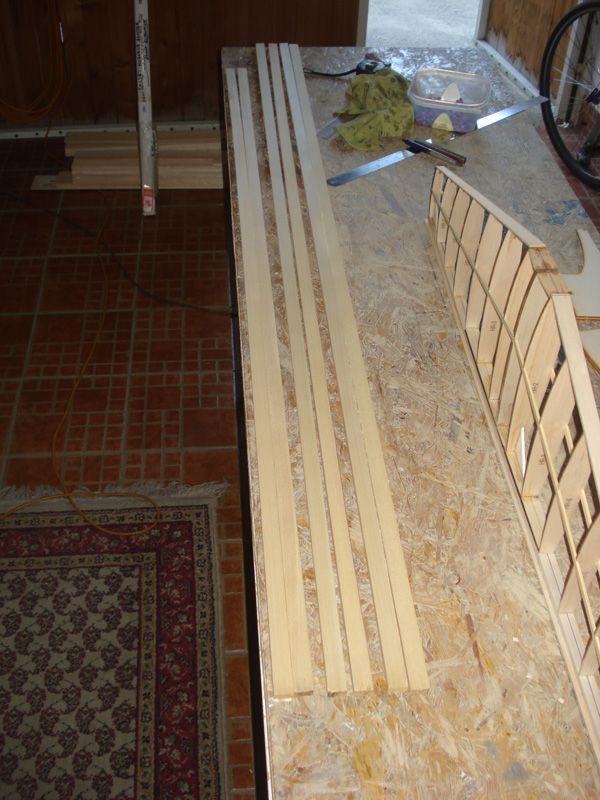
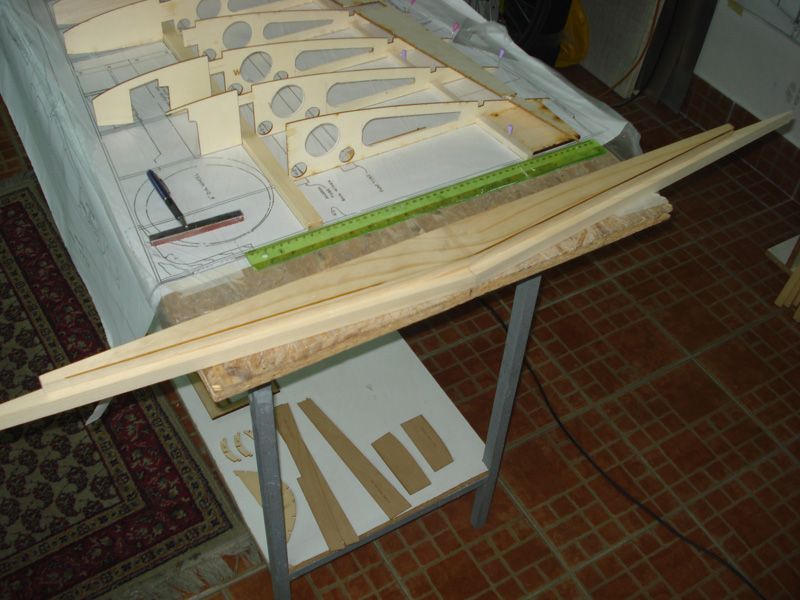
Today I get spars. It's, like everything else on this model, so huge...
Spars are 20 x 10 mm, and 1400 mm long...

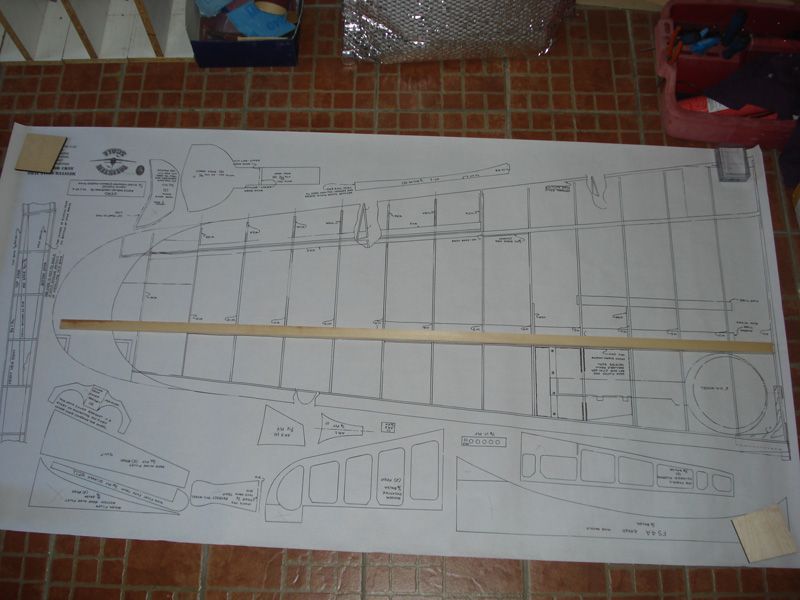
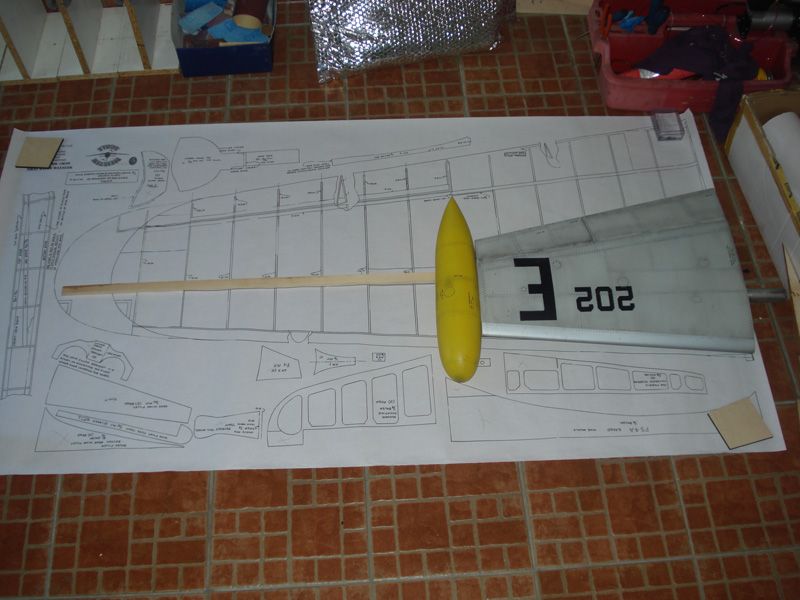
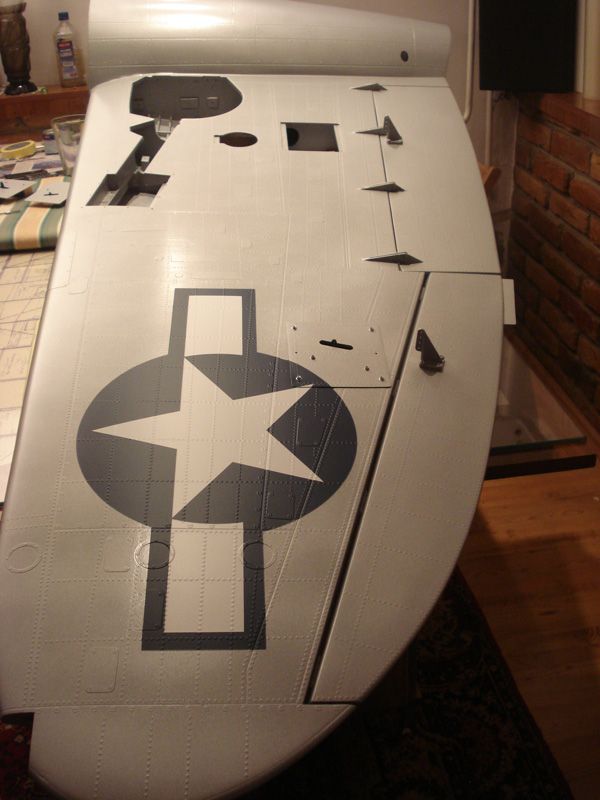
Today I will start working on wing. But before that, check this picture, wing is from my Ziroli jet F9F Panther...
Regards
Mirce
I start work on elevator first. Like everything on this model, elevator is huge also, it have span from 117 cm!!!
I must made rear elevator part first, on which will come all ribs. That part is made from 10 mm balsa, and ply which come in the middle. For gluing I used white glue...
Than I glued middle and outer ribs...
On that ribs, in front, come 3 mm balsa plate, and after that all other ribs...
Balsa for leading edge is very straight...
In this stage I little change a plan, and add fir spars 6 x 3 mm...
Today I get spars. It's, like everything else on this model, so huge...
Spars are 20 x 10 mm, and 1400 mm long...
Today I will start working on wing. But before that, check this picture, wing is from my Ziroli jet F9F Panther...
Regards
Mirce
07-04-2012, 06:05 AM
#6
Senior Member
Join Date: Jun 2003
Location: coral springs,
FL
Posts: 167
Likes: 0
Received 0 Likes
on
0 Posts
Well, here we go again. Another Meister built by Mirce. And with a wood fuse. Just can't keep Mirce away from wood building. I'm sure the quality will be just as good as the 47. Keep it up my friend.......Meisterland South will be watching.........Doug
07-04-2012, 11:48 AM
#7

Join Date: Jun 2009
Location: china,
ME
Posts: 192
Likes: 0
Received 0 Likes
on
0 Posts
I've been working on the same plane, building the mod 32.
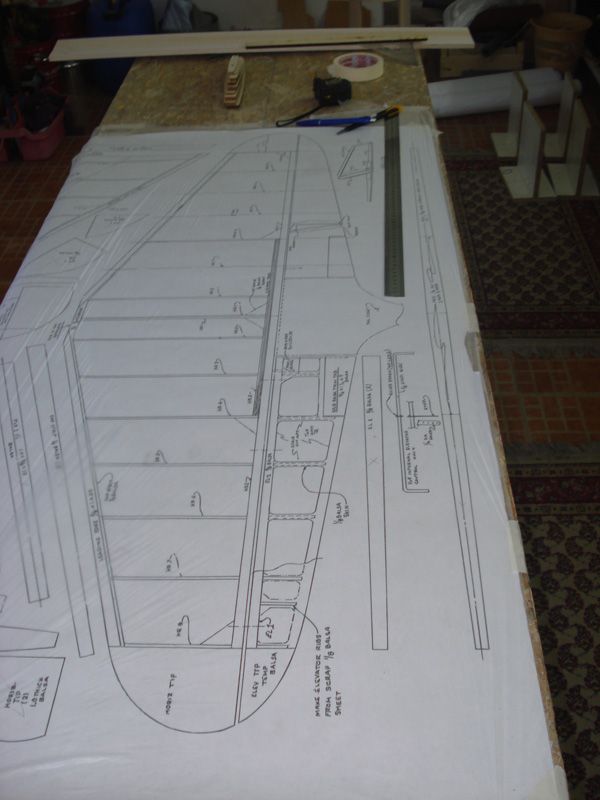
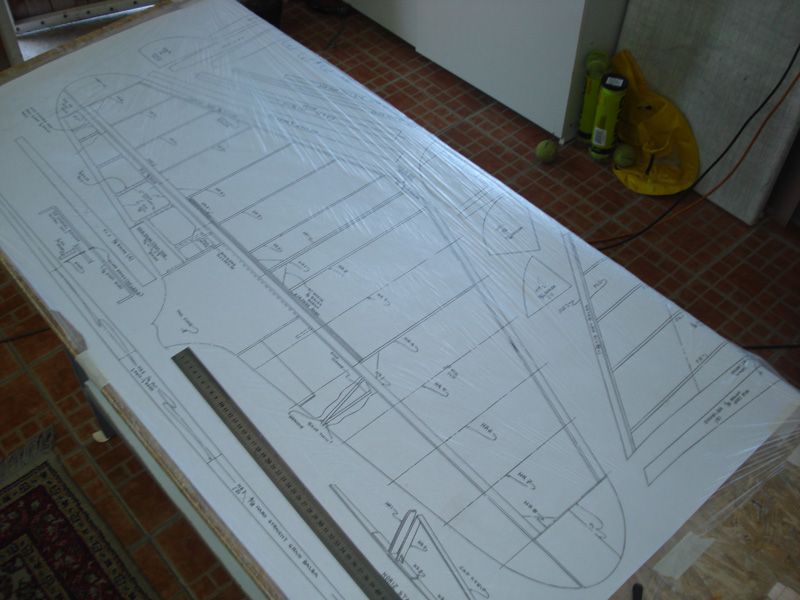
Can't help to notice your plans are so clean, mine are smudged in many places and I have to work at trying to decipher what is indicated. Its as if someone wiped parts of the sheet before the ink dried.
Of course I bought the plans alone and it looks like you have the kit. Maybe that's where the good plans go, to the kits.
I'm getting ready to build the wing, my first. I've got the tail mostly done (just need to do some detail sanding on the elevator and vert. stab) and have the tail wheel waiting in the wings. Suppose I need to save my pennies for the main retracts next.
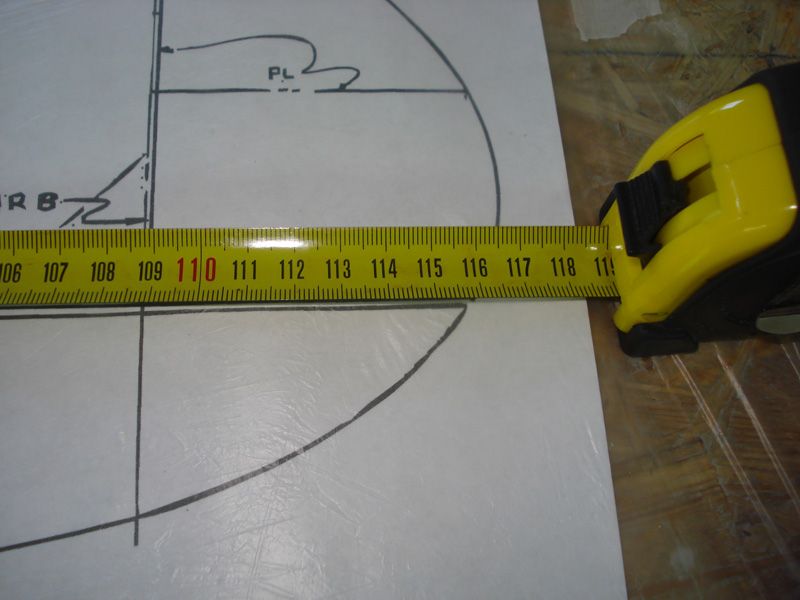
BTW, do you know what "PL" stands for?
Can't help to notice your plans are so clean, mine are smudged in many places and I have to work at trying to decipher what is indicated. Its as if someone wiped parts of the sheet before the ink dried.
Of course I bought the plans alone and it looks like you have the kit. Maybe that's where the good plans go, to the kits.
I'm getting ready to build the wing, my first. I've got the tail mostly done (just need to do some detail sanding on the elevator and vert. stab) and have the tail wheel waiting in the wings. Suppose I need to save my pennies for the main retracts next.
BTW, do you know what "PL" stands for?
07-05-2012, 01:57 AM
#8
Thread Starter
Hello Doug, yes another Meister Scale... Third will be also Meister Scale - Foke Wulf...
I like Meister Scale models, it's sooooo easy for building, looks great, and modelers talk to fly great. What more you need...
All in all, I enjoyed very much in this building. I will use some my methods, but, at the end, result will be same...
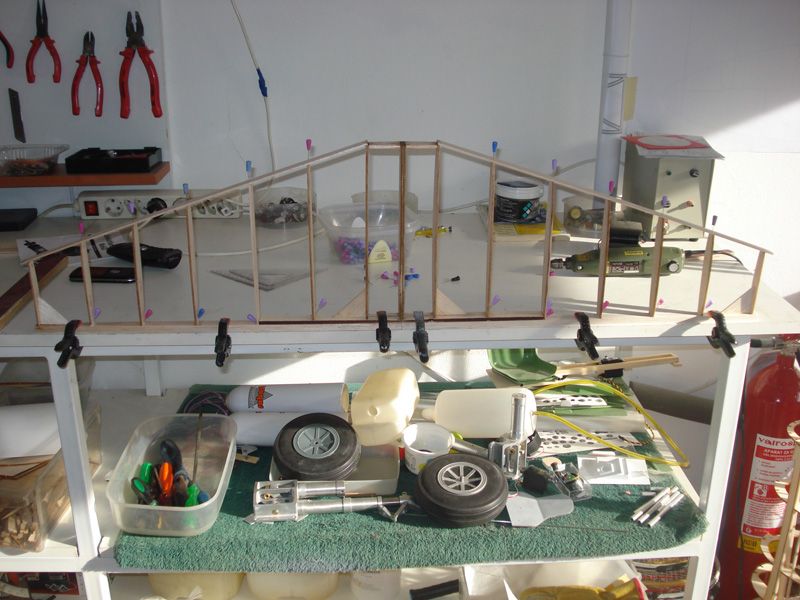
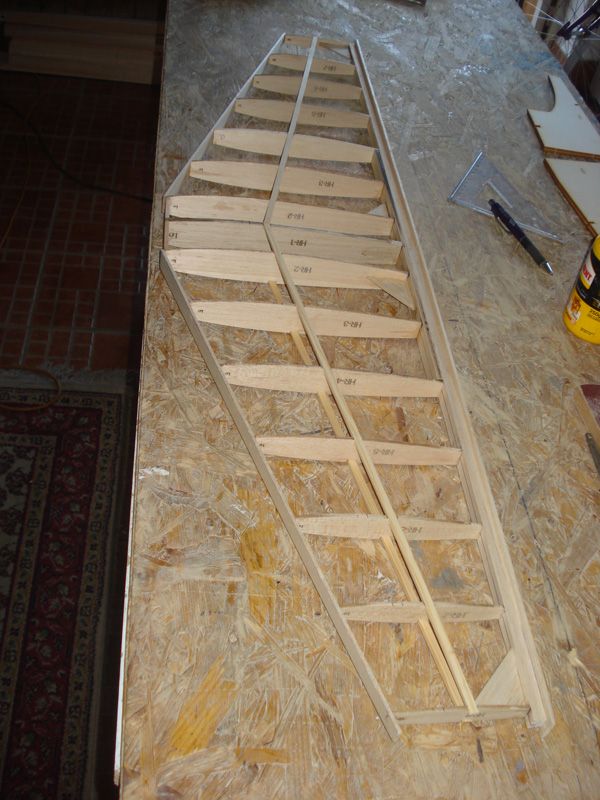
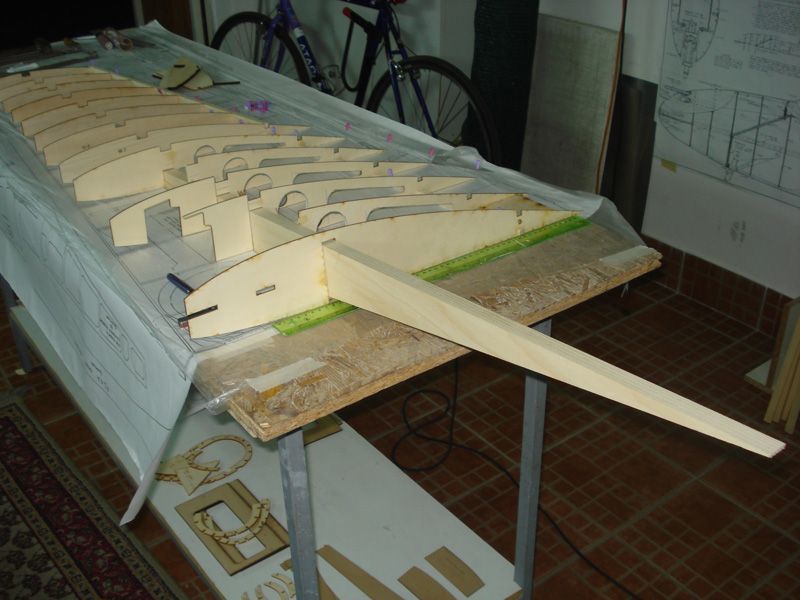
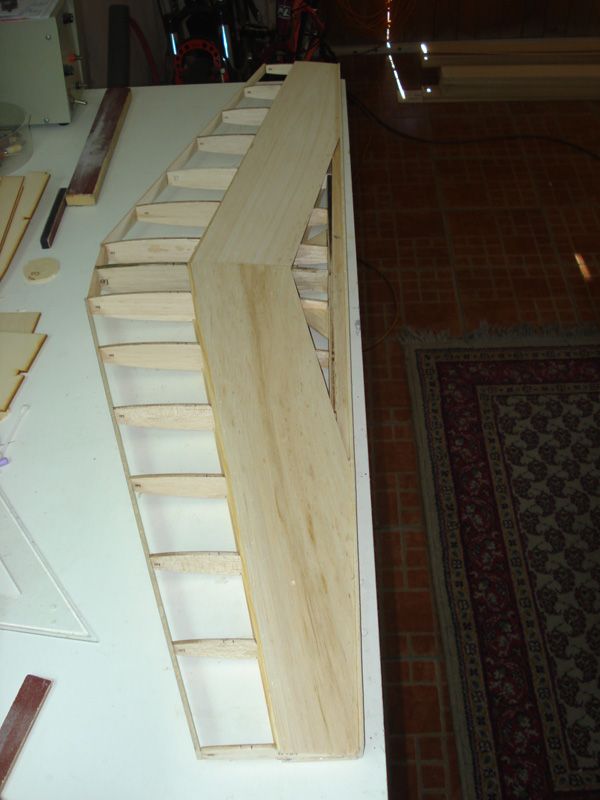
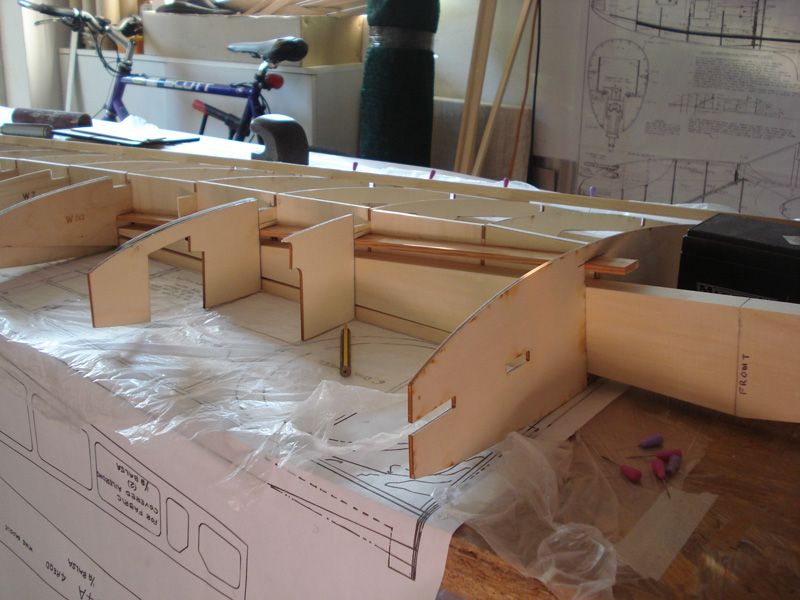
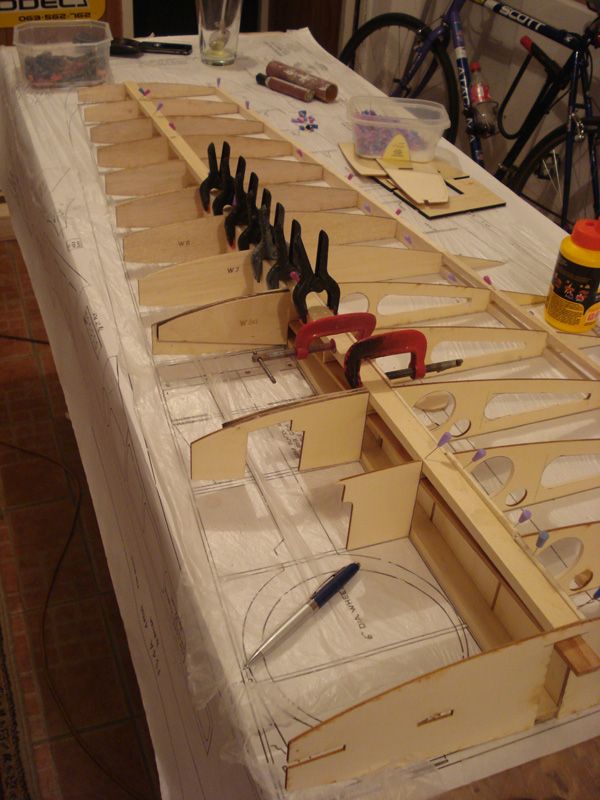
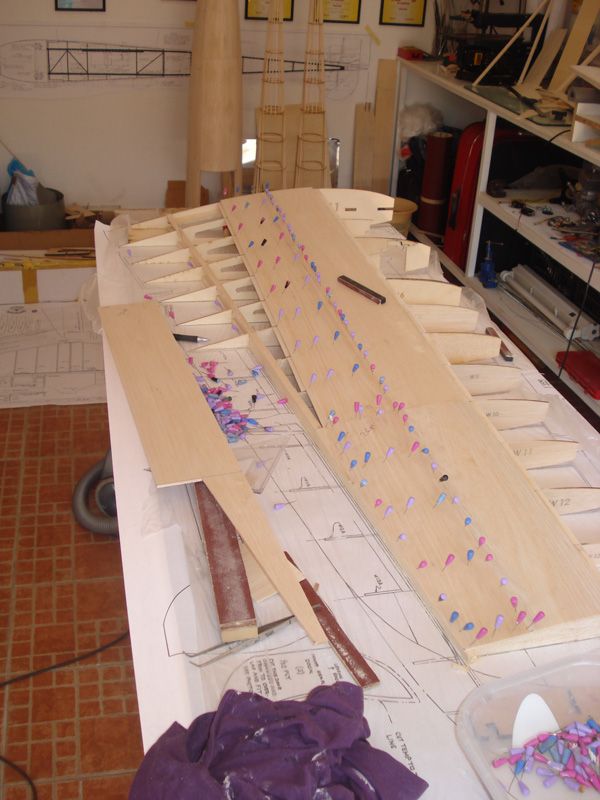
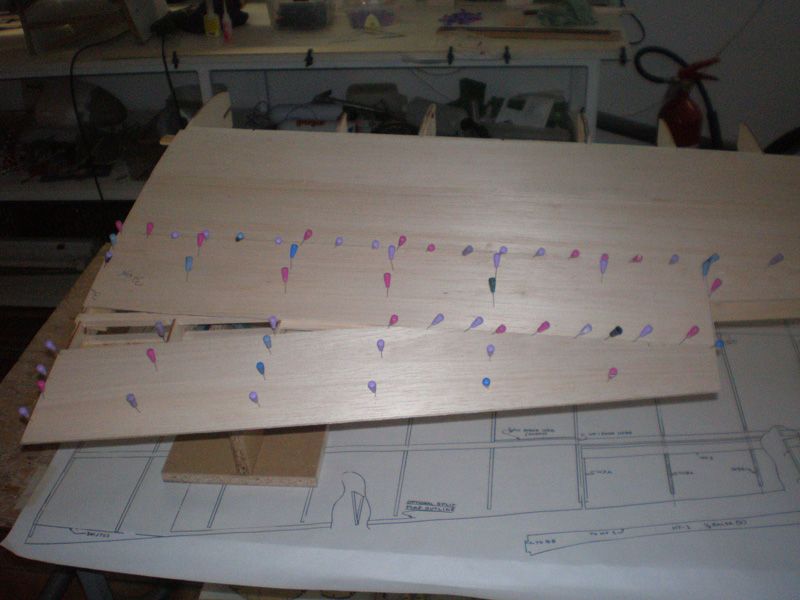
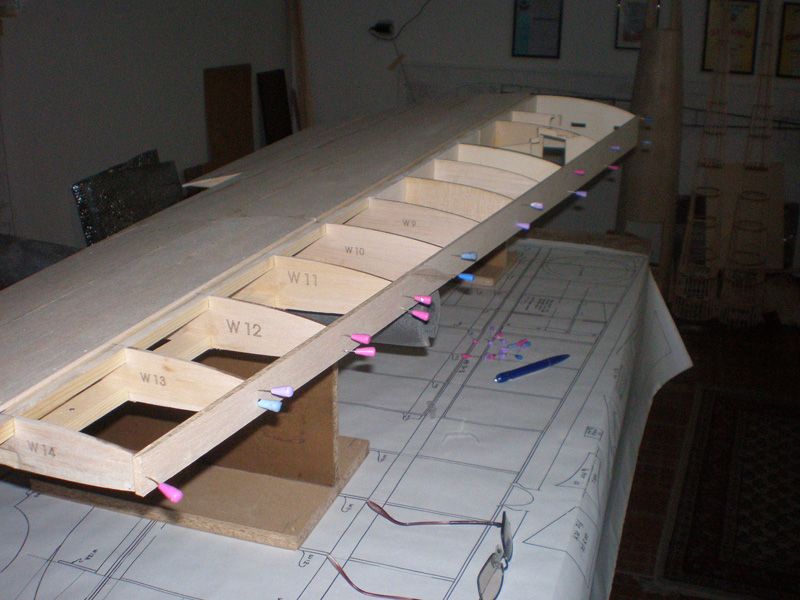
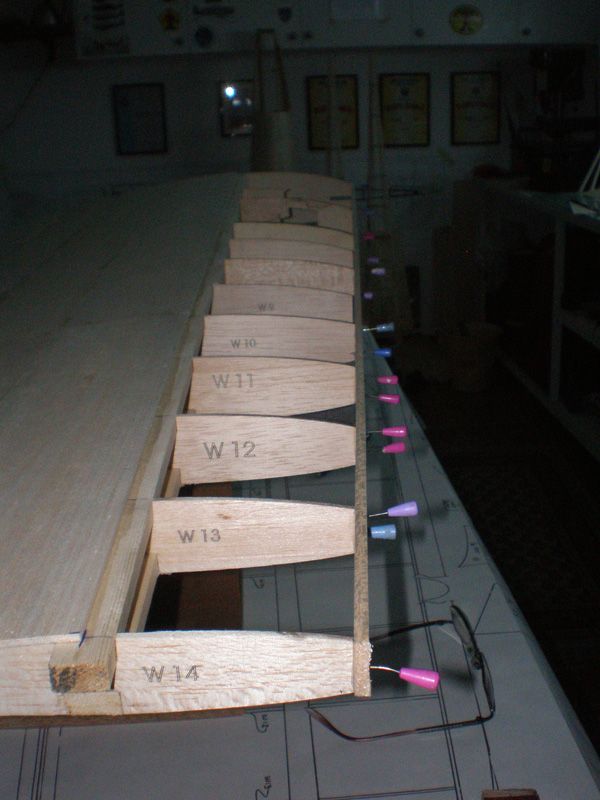
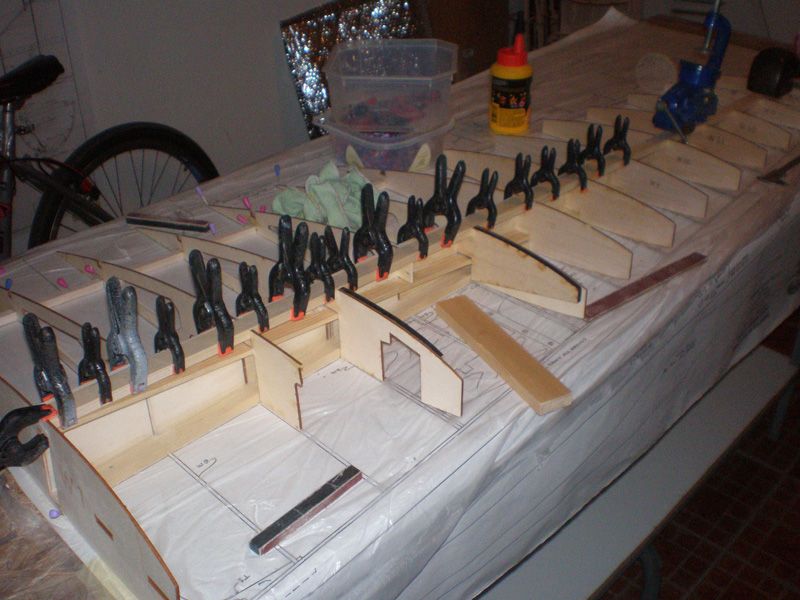
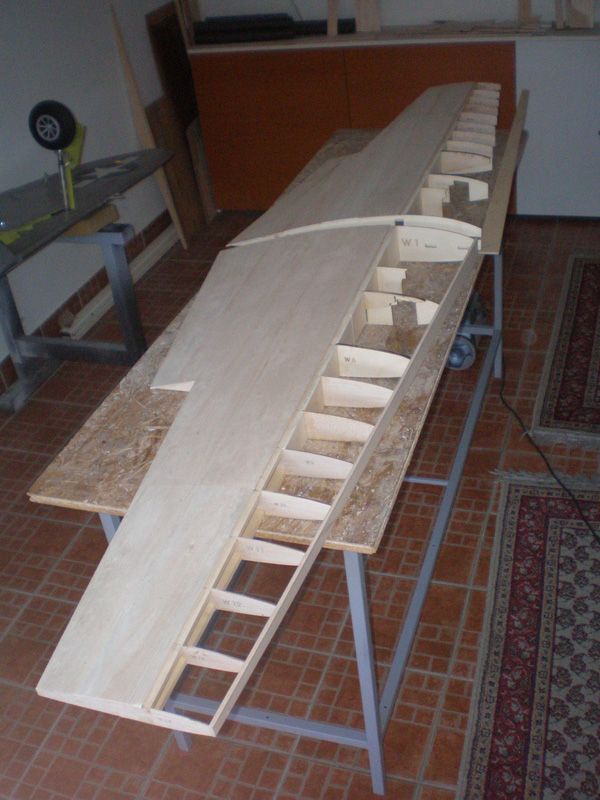
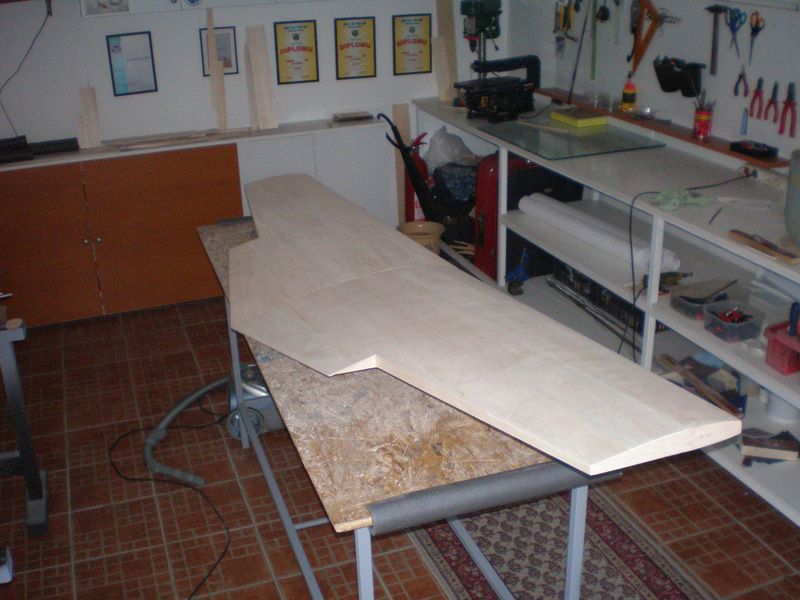
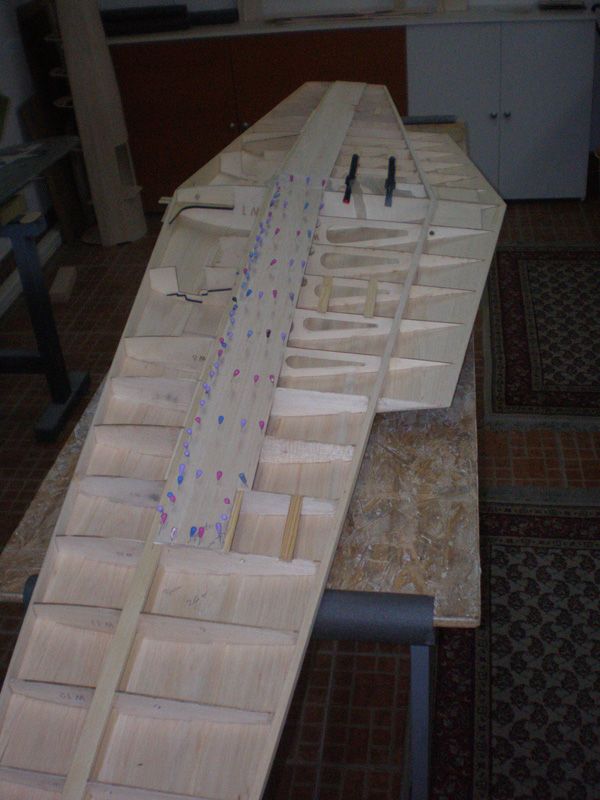
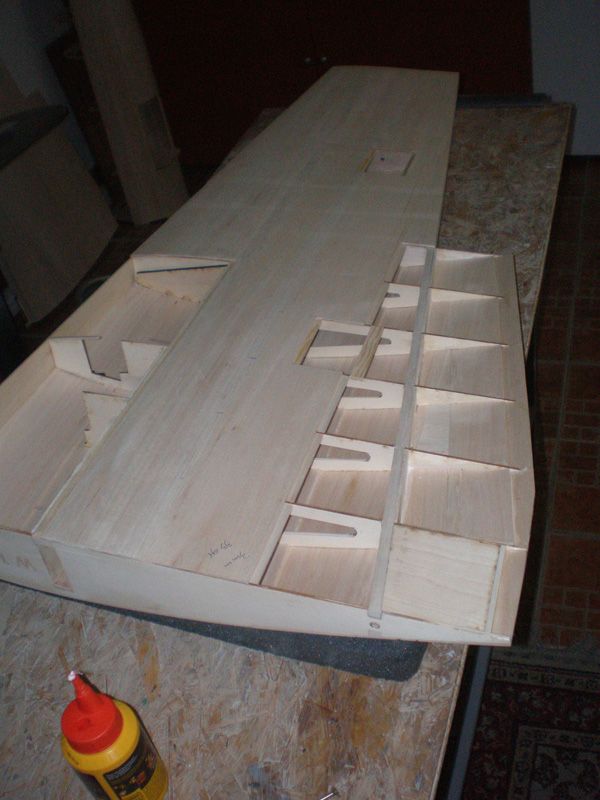
Yesterday I start building right wing half. I will made two parts wing...
I ordered spars, from my friend, and as soon as I get them, started with the building...
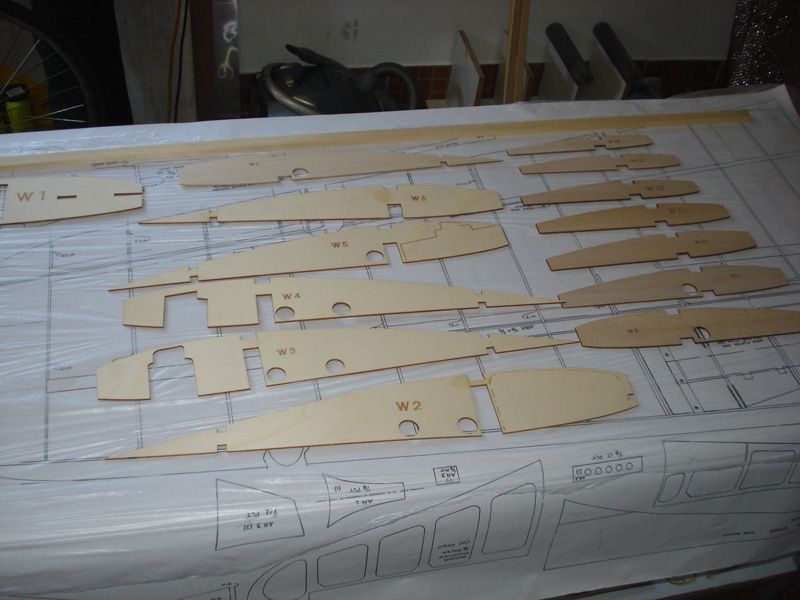
At the evening wing look like this...
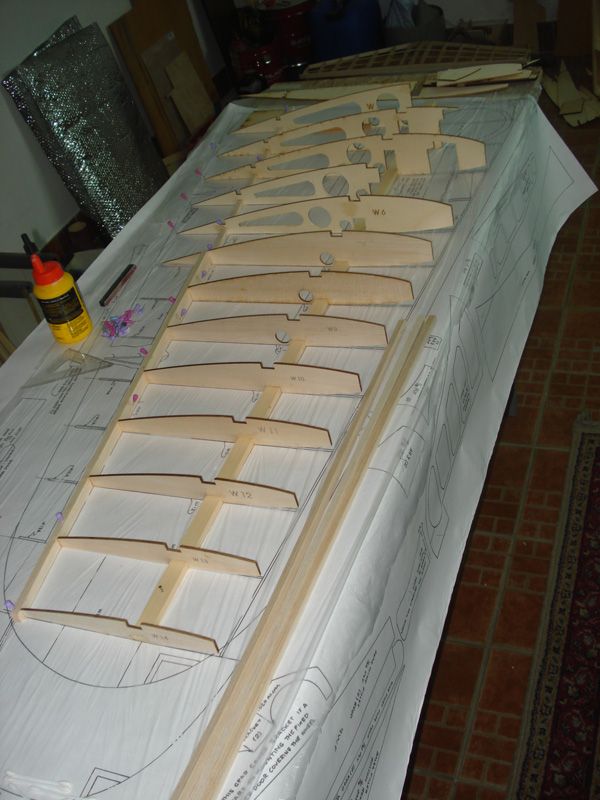
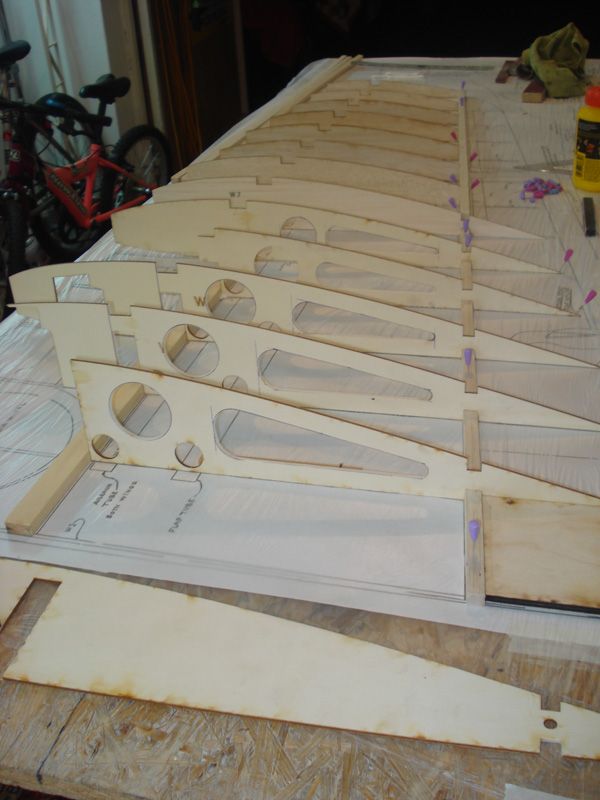
I made few holes on every ribs, and shaved about 45 grams on this wing half. You can see that some ribs are broken, yes unfortunately that's happen during transport...
Never mind, I will fix it later...
When I was coming back from Top Gun, bringing with myself Zero kit, I must cut wooden wing joiner on two half, because it's so long, that cant be placed in my suitcase. Yesterday I give one half to my friend carpenter, and he will made new wing joiner.
Now I must wait on it to can continue my building progress. Hope I will get it today or tomorrow...
Now, I have question for you guys, does I need gears before putting gear mounts on their place?
Are gear mounts made or good for Siera gears?
On my Meister P 47, I have problem with this parts, I glued gear mounts and latter when I put gears on it I saw that gears wasn't come inside properly in the wing. So, I must soot out gear plates, and gluing it again under other angle.
I don't want to have same problems on this model, so please give me advice, can I put gear plates now, or to wait to get gears?
Regards
Mirce
I like Meister Scale models, it's sooooo easy for building, looks great, and modelers talk to fly great. What more you need...
All in all, I enjoyed very much in this building. I will use some my methods, but, at the end, result will be same...
Yesterday I start building right wing half. I will made two parts wing...
I ordered spars, from my friend, and as soon as I get them, started with the building...
At the evening wing look like this...
I made few holes on every ribs, and shaved about 45 grams on this wing half. You can see that some ribs are broken, yes unfortunately that's happen during transport...
Never mind, I will fix it later...
When I was coming back from Top Gun, bringing with myself Zero kit, I must cut wooden wing joiner on two half, because it's so long, that cant be placed in my suitcase. Yesterday I give one half to my friend carpenter, and he will made new wing joiner.
Now I must wait on it to can continue my building progress. Hope I will get it today or tomorrow...
Now, I have question for you guys, does I need gears before putting gear mounts on their place?
Are gear mounts made or good for Siera gears?
On my Meister P 47, I have problem with this parts, I glued gear mounts and latter when I put gears on it I saw that gears wasn't come inside properly in the wing. So, I must soot out gear plates, and gluing it again under other angle.
I don't want to have same problems on this model, so please give me advice, can I put gear plates now, or to wait to get gears?
Regards
Mirce
07-05-2012, 08:21 AM
#9
Senior Member
Join Date: Jul 2007
Location: Wetumpka,
AL
Posts: 177
Likes: 0
Received 0 Likes
on
0 Posts
Hello Mirce,
It's nice to see you building another favorite of mine. I wish you well.
I have found it is always best to have the retracts in hand before glueing the plates/rails in the wings. I actually bolt my gear to the rails before adding glue to insure they lay flat and it's easier to trim the ribs if this is required.
If you buy the Sierra retracts, you will not regret it. I consider them the best available.
Good luck,
Jerry
07-05-2012, 08:57 AM
#10
Thread Starter
Thanks Jerry, I know that having retract is best option, but want to know specifically, from someone who has made this model, and use Siera gears, does need to change something on ribs and plate?
Mirce
Mirce
07-06-2012, 04:54 PM
#12
Thread Starter
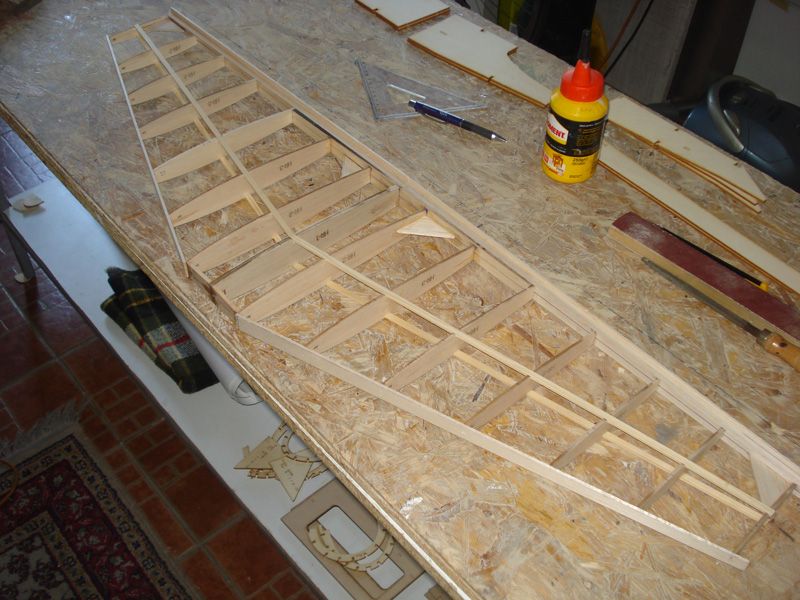
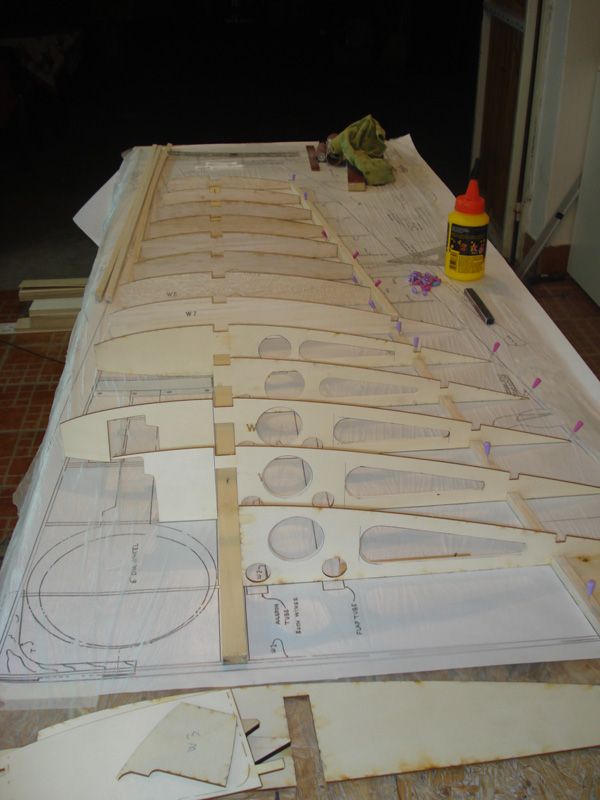
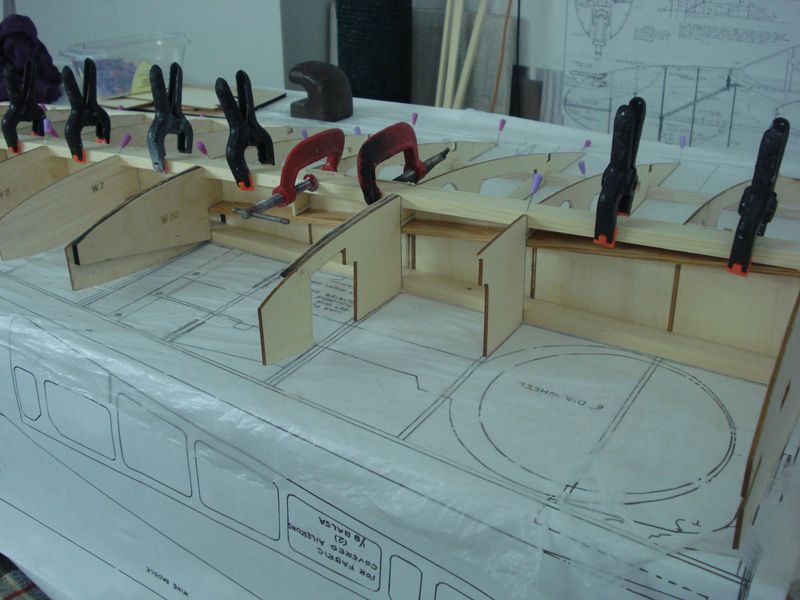
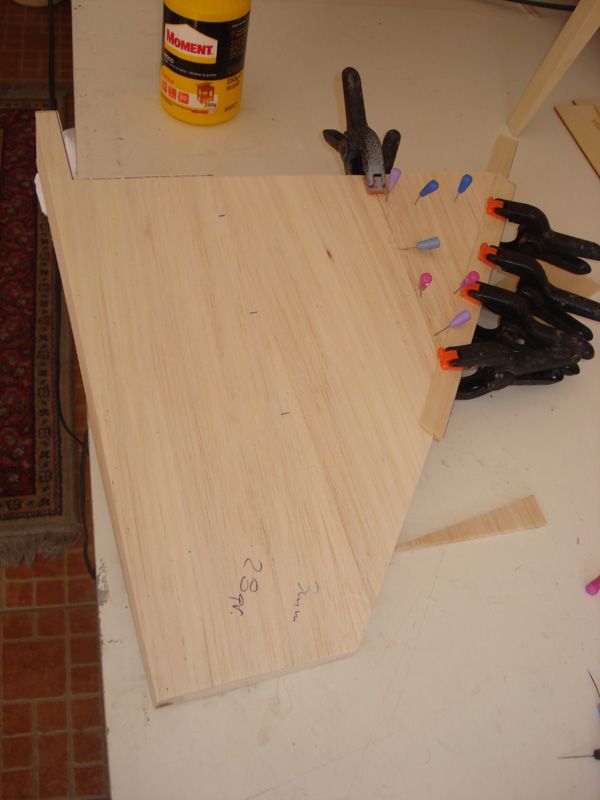
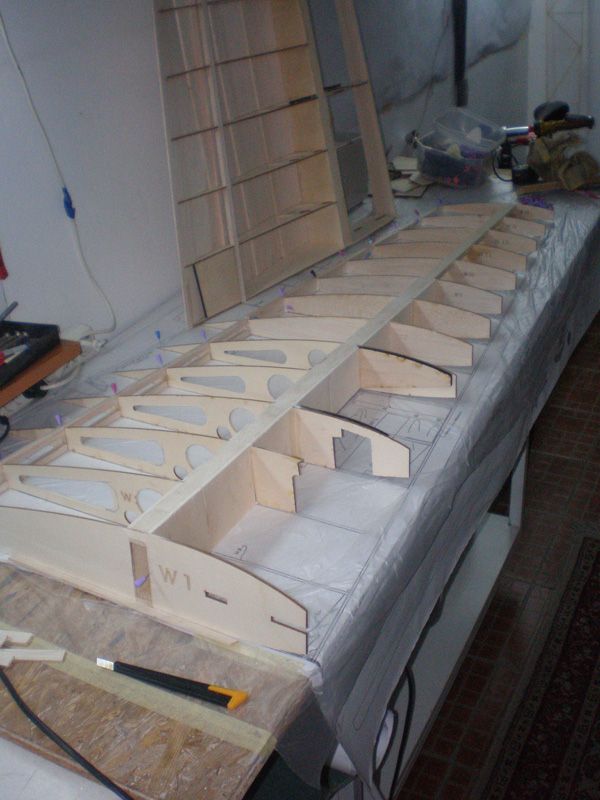
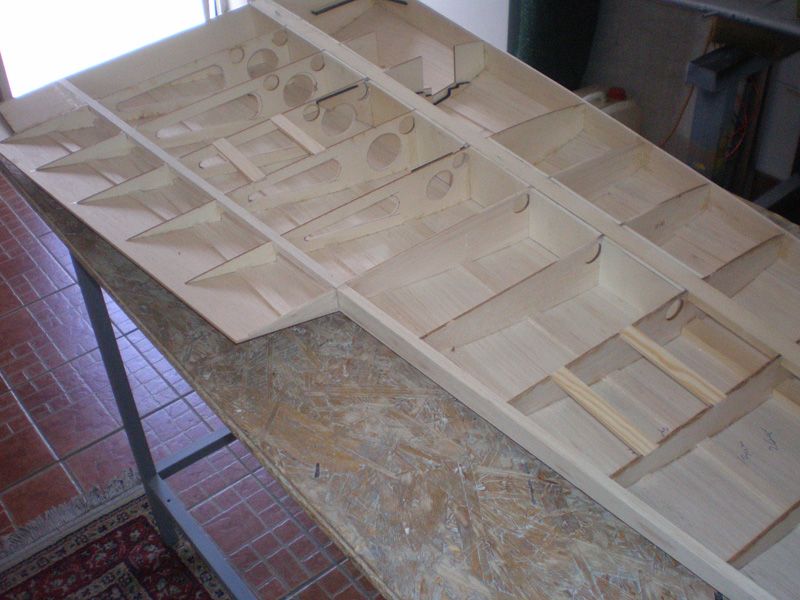
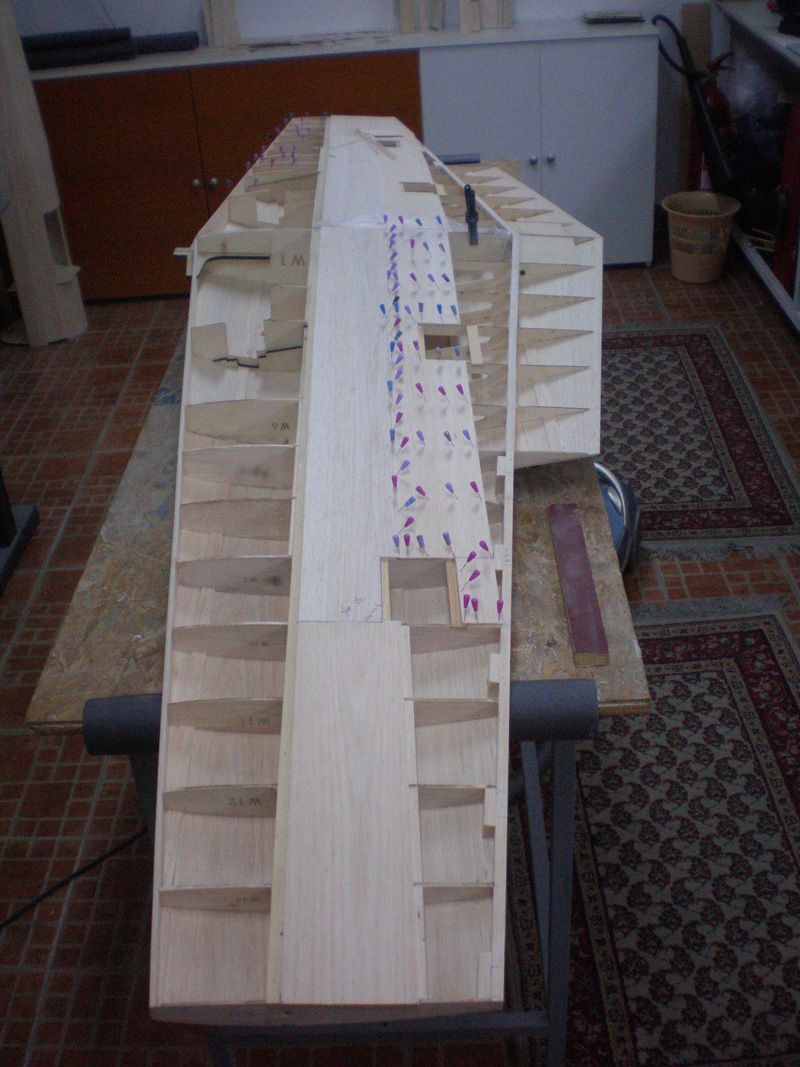
Yesterday I got wing joiner for Zero. My friend cut to the proper measure wing joiner for Meister Foke Wulf also.
I placed wing joiner in the wing to see is everything OK. It lying perfect...
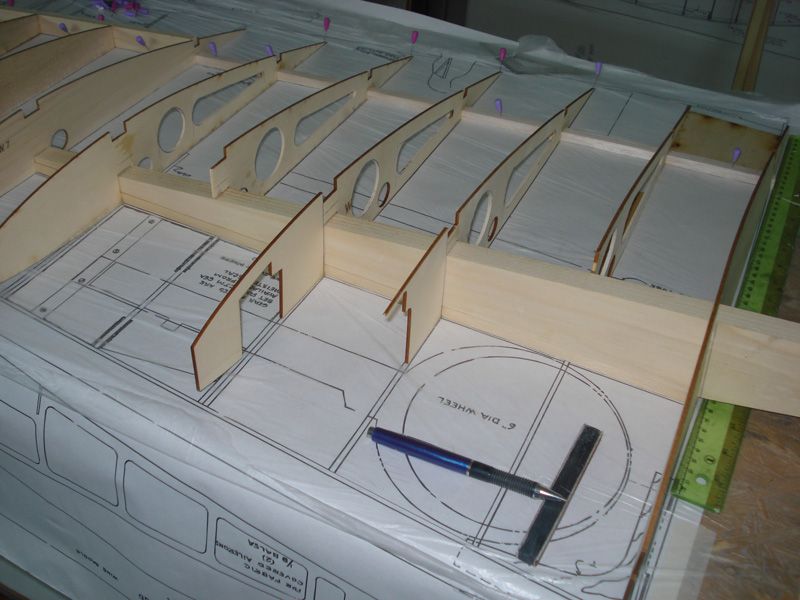
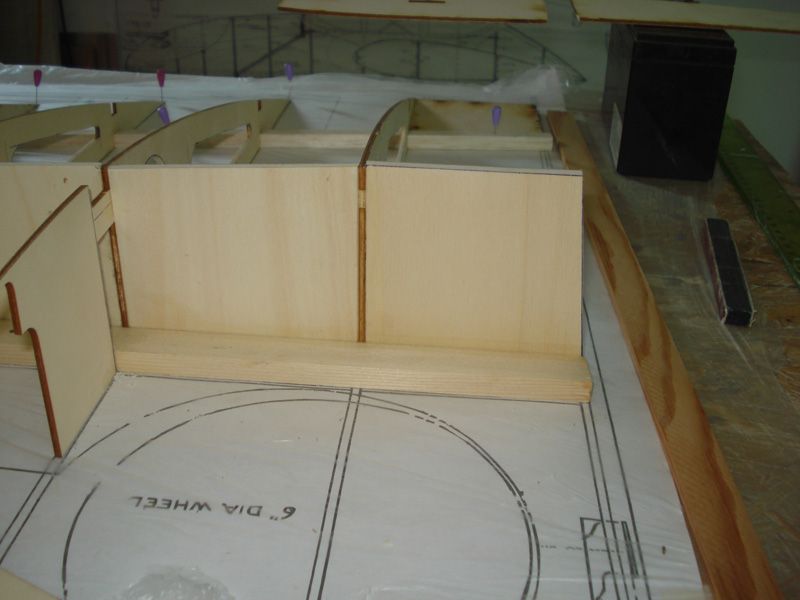
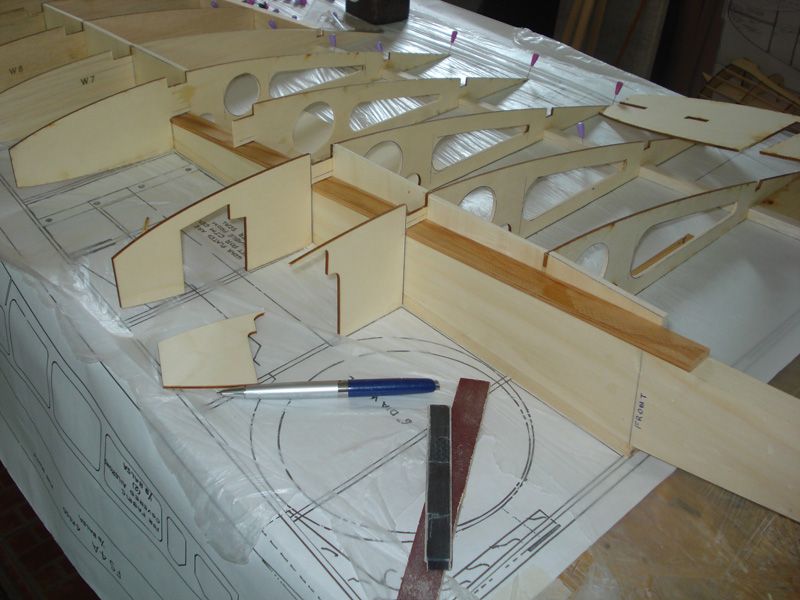
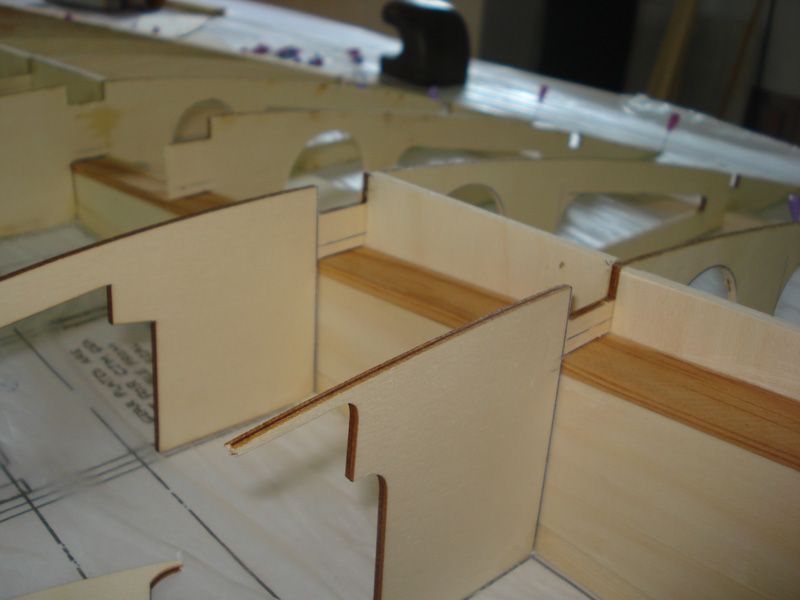
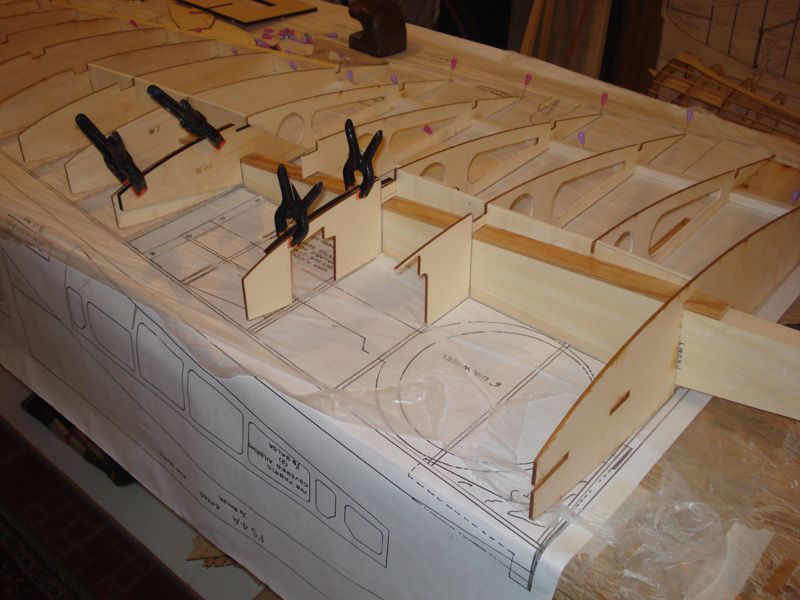
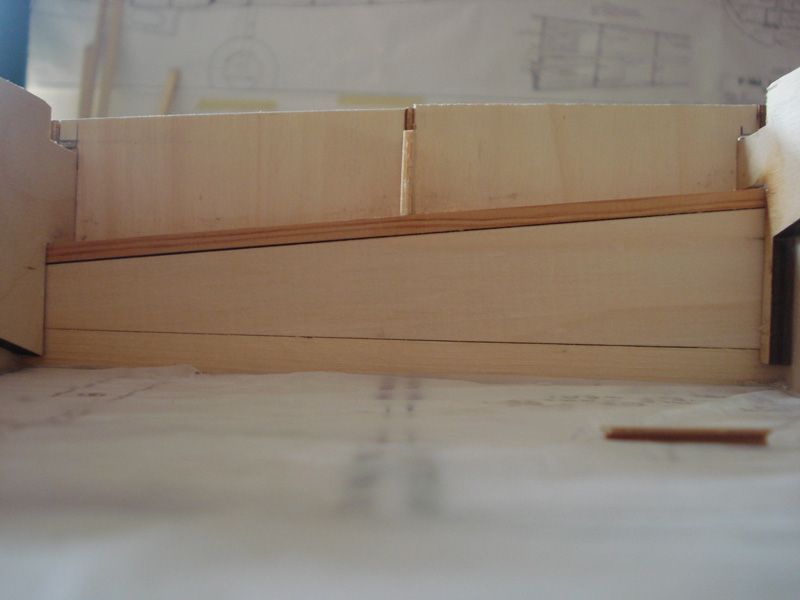
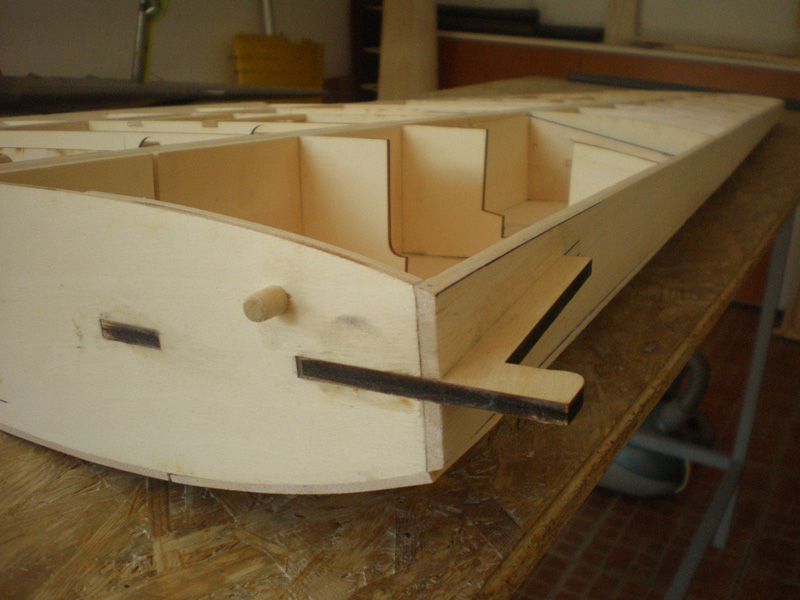
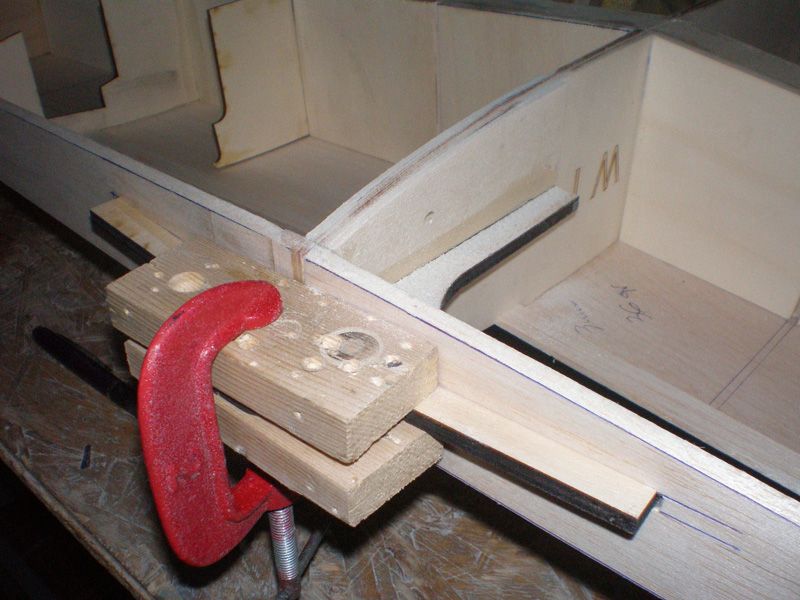
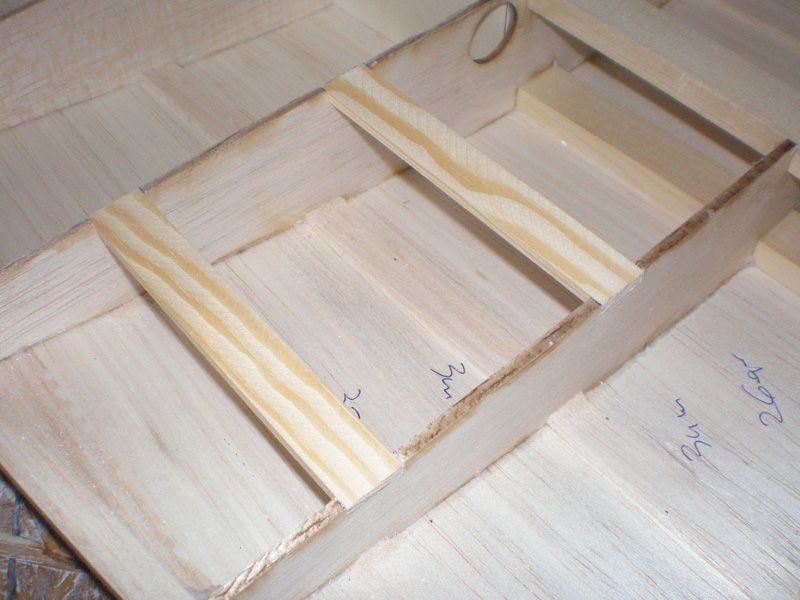
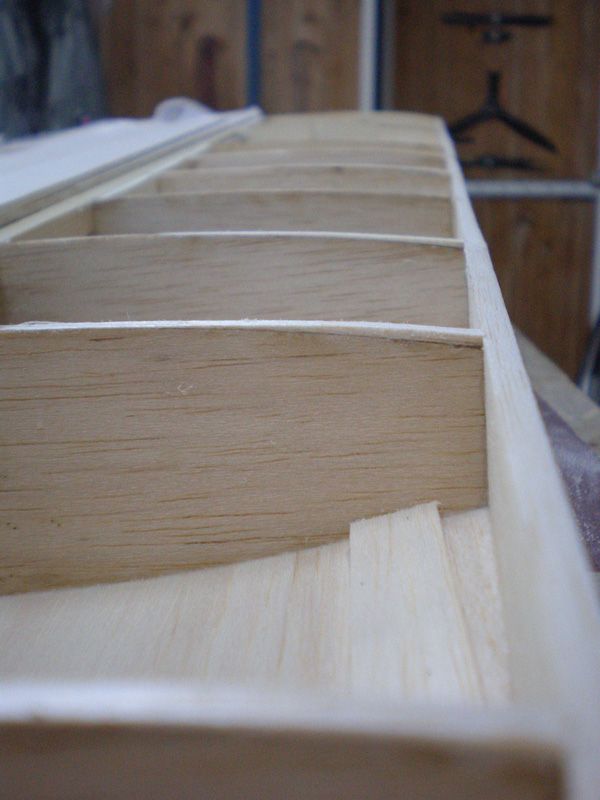
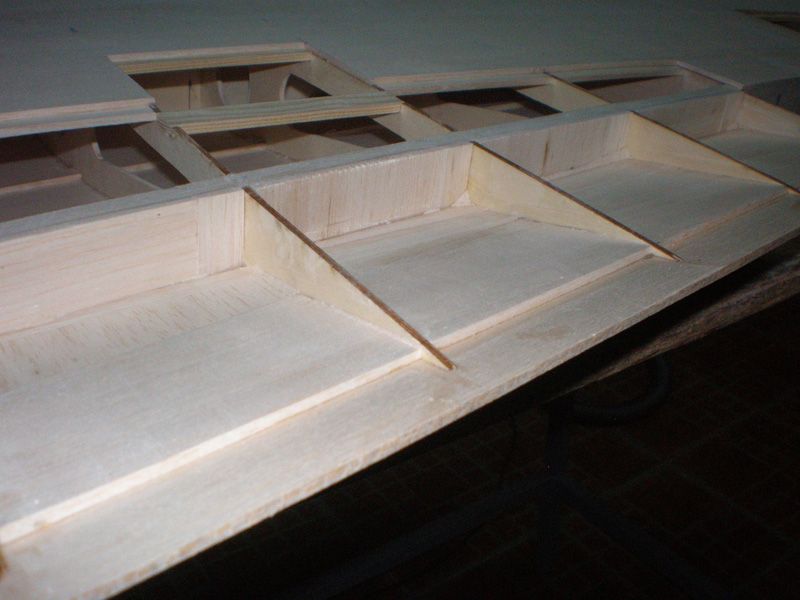
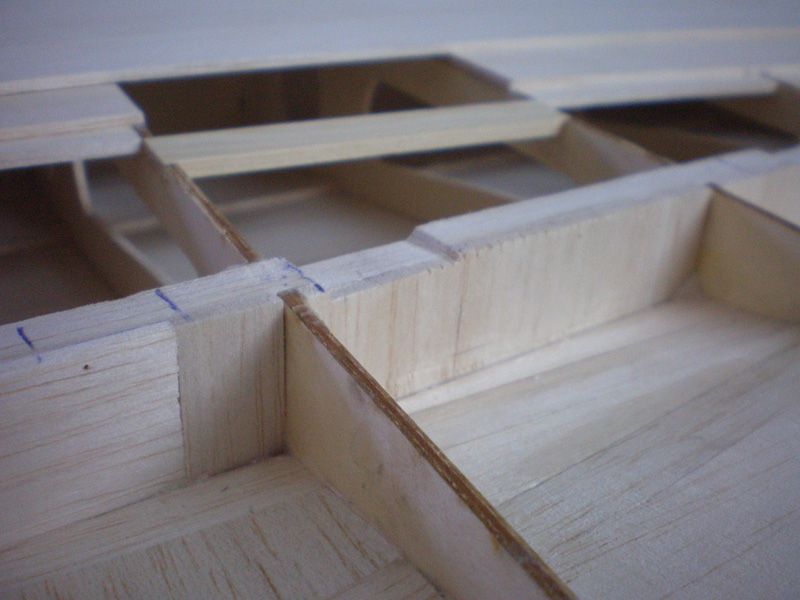
Next step was to made rear side of the box which will connect spars and ribs. I got strong construction, and now can work easier with wing joiner, and that part of the wing...
I made all those parts from poplar ply.
For now, rear plates are not glued between rib 4 - 6...
Plywood which is by the first rib have angle same like middle of the wing joiner...

I take a lot of care to wipe all glue from the side where wing joiner will come...
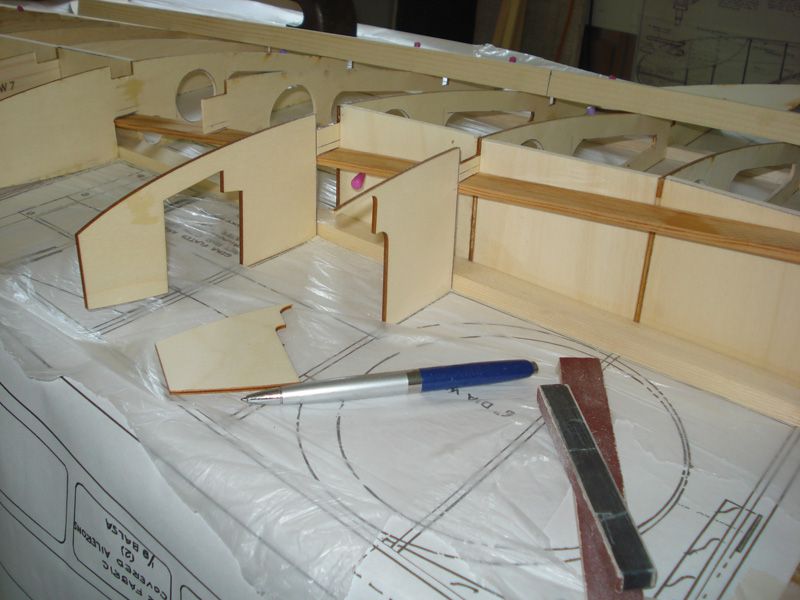
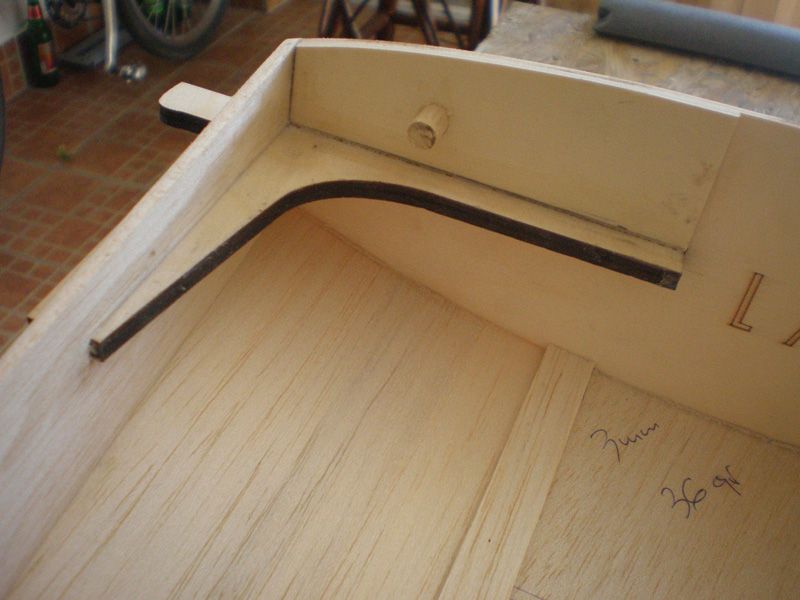
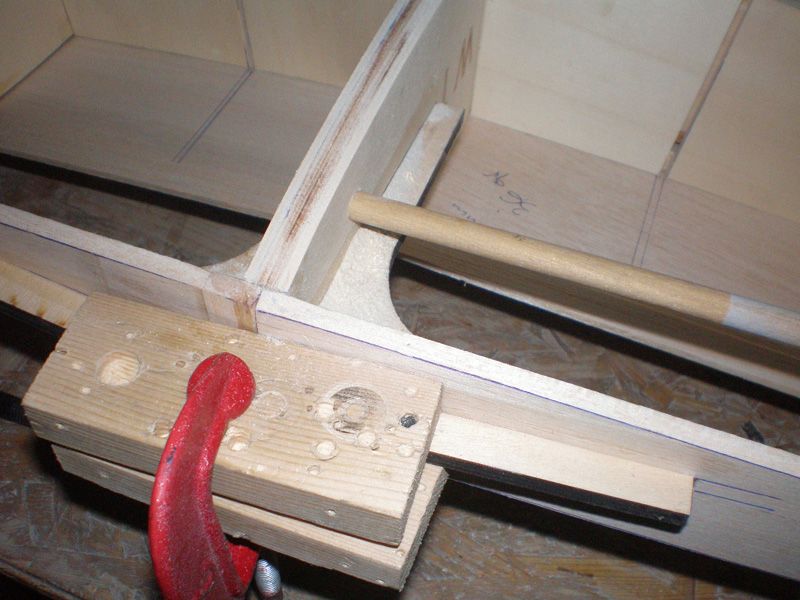
Now I study plan to see what Meister Scale told about mid spar. I saw that they made it from parts which will be glued between ribs...
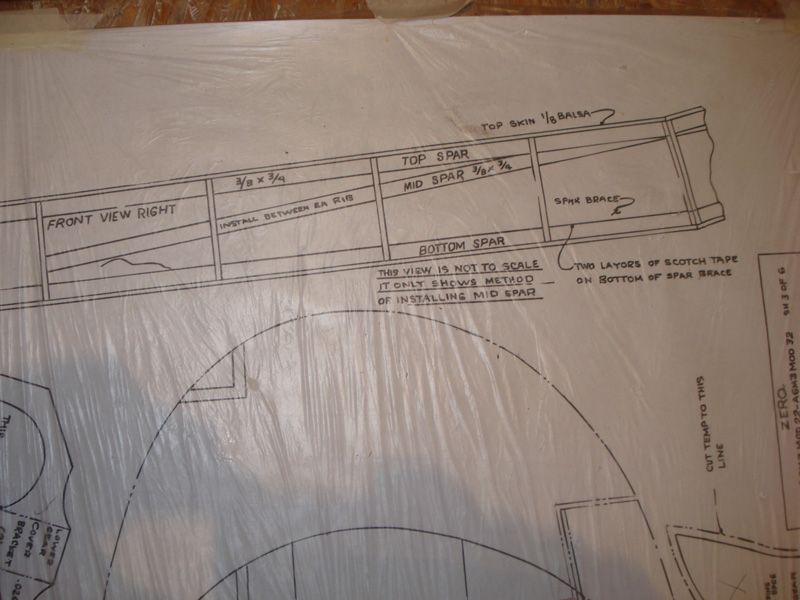
I have other idea, so I made mid spar from one piece, and put it on the wing joiner. I need to be very precise when was increased opens on ribs...
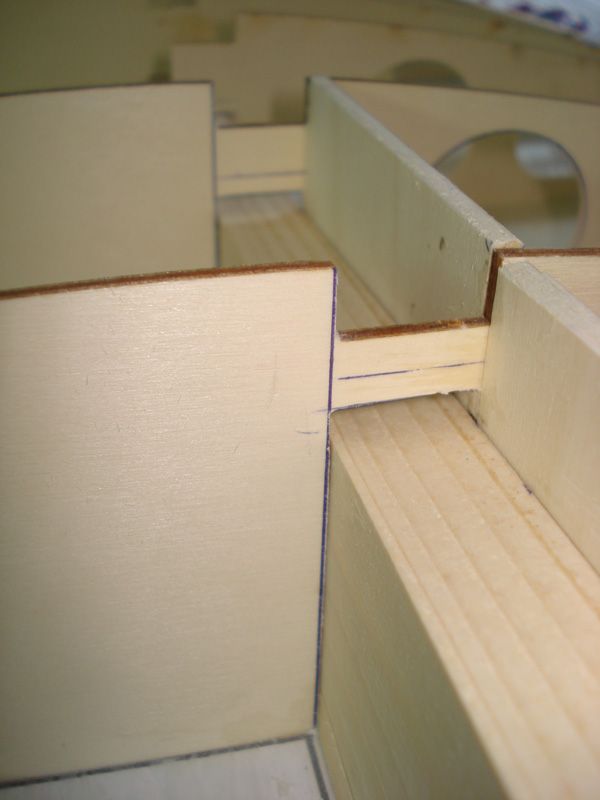

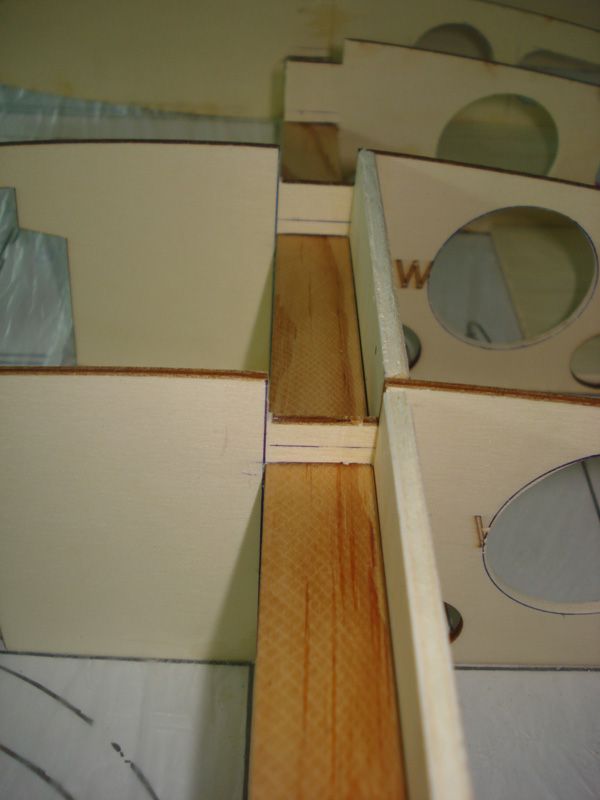
When you take wing joiner out, mid spar will stay like this. Don't forget, mid spar is not glue yet...
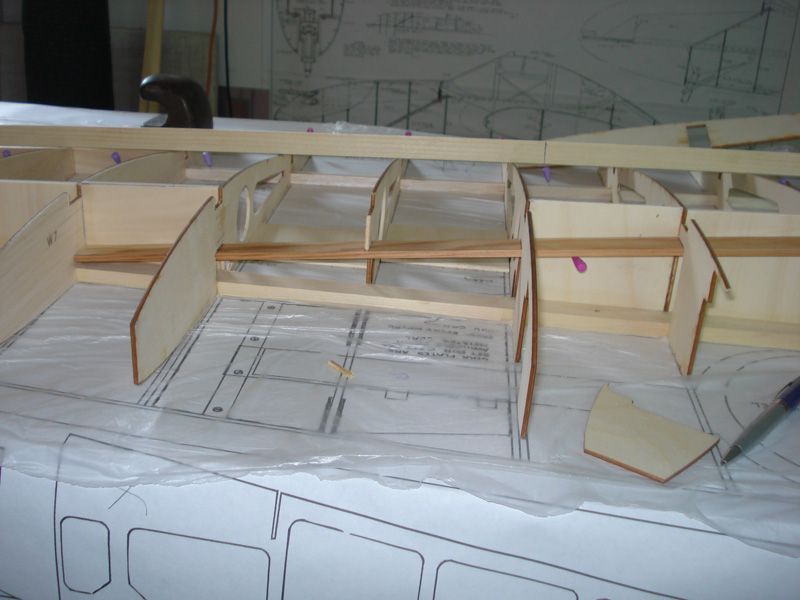
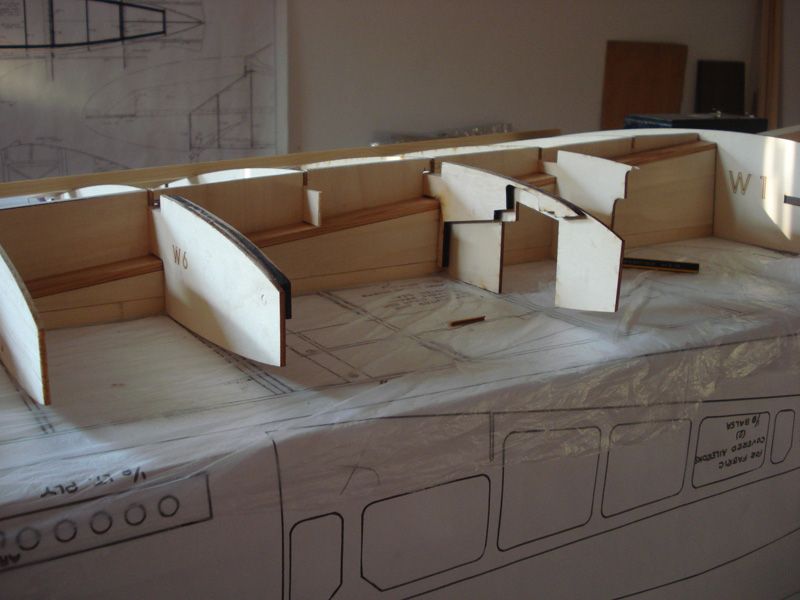
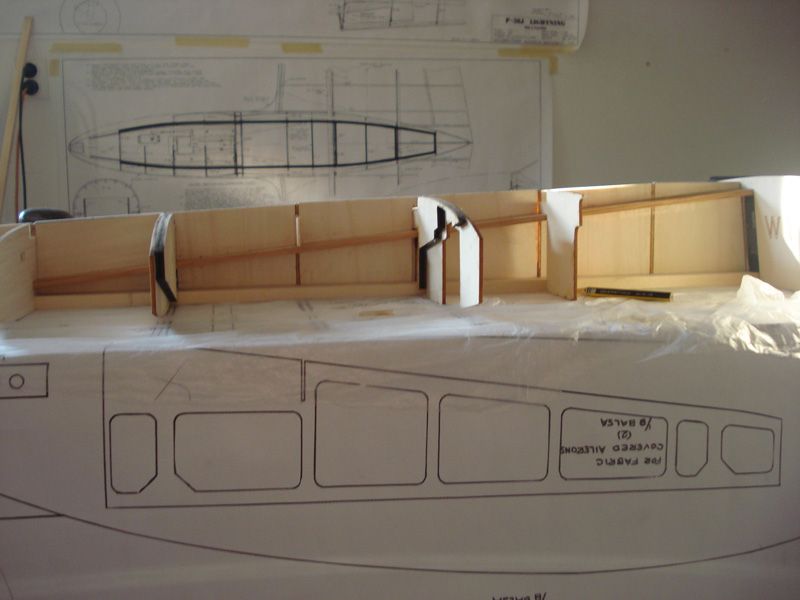
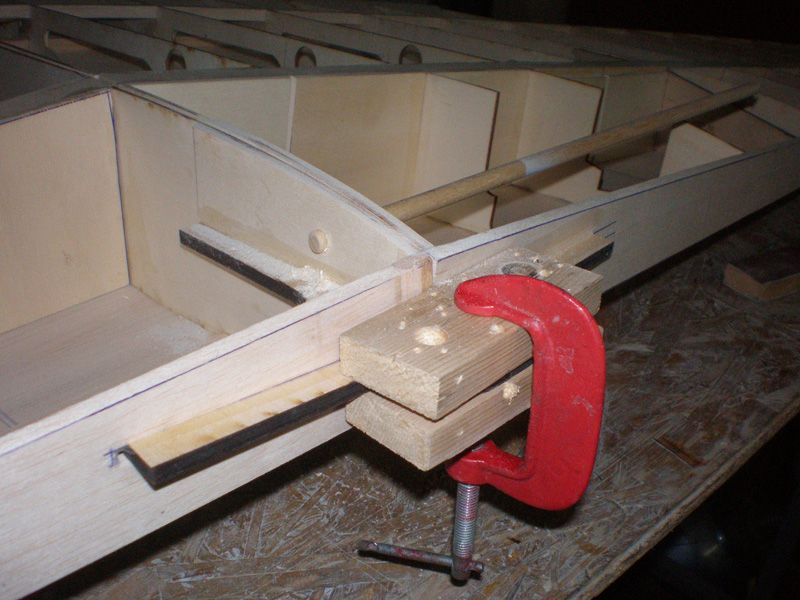
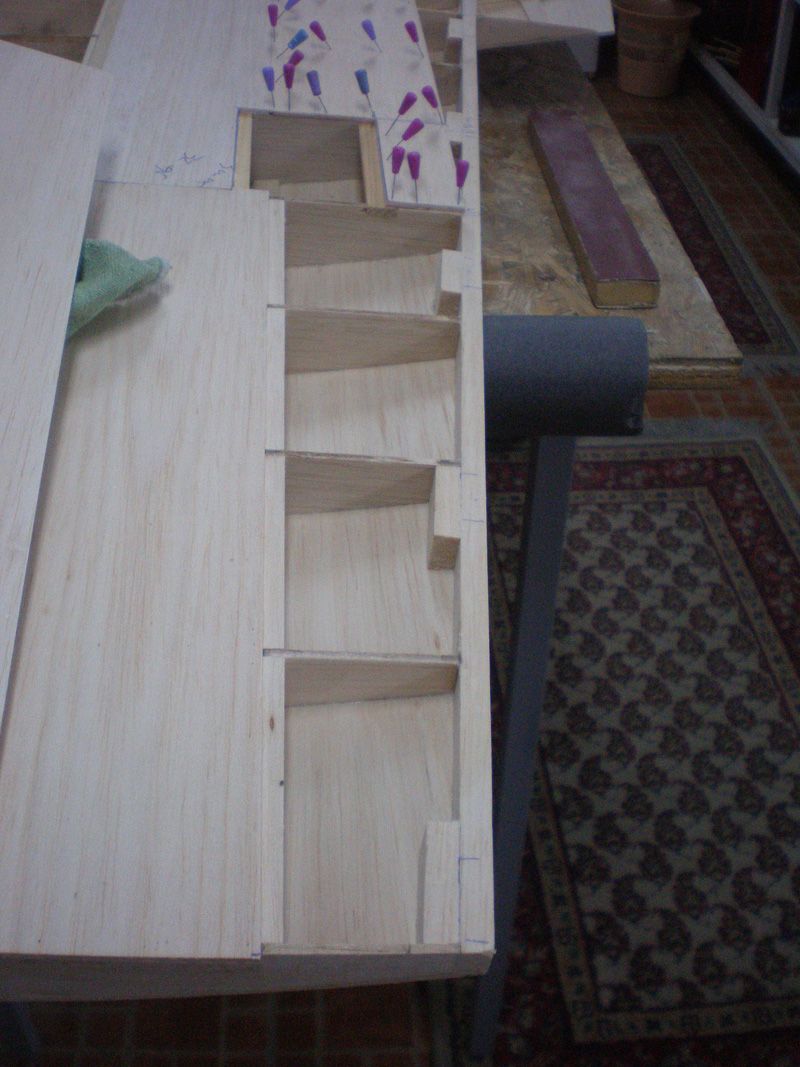
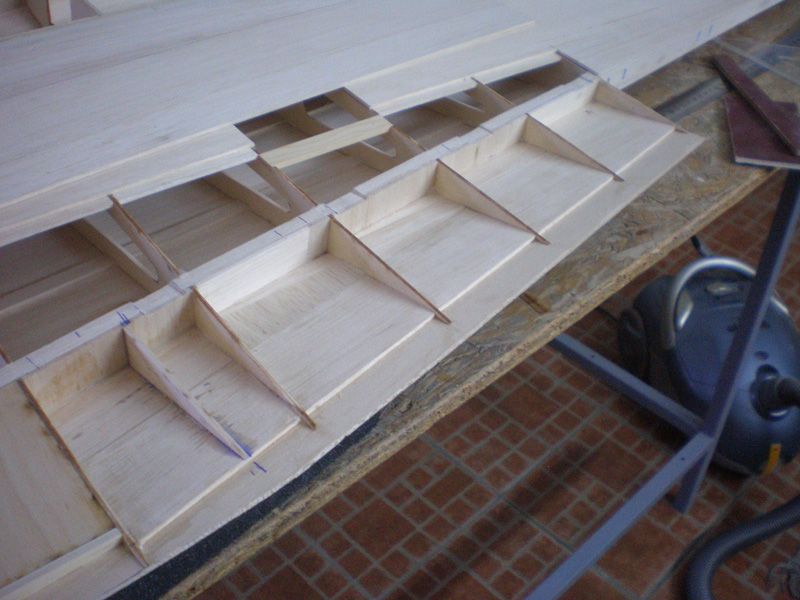
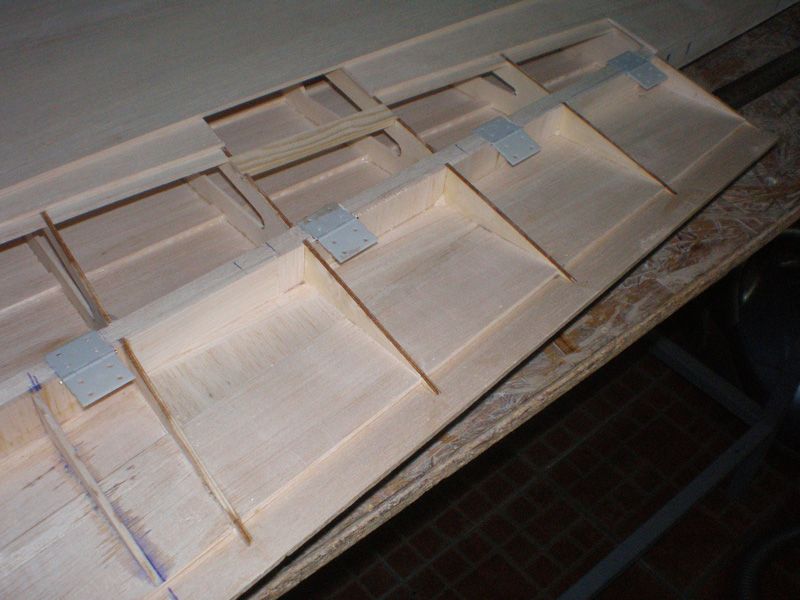
Now come moment to glue half ribs for landing gear pate. I must do that, because without it I can't continue work on wing.

But, I will not glued plates until I get landing gears.
I call Dino, and he told me that in one - two weeks he can get landing gears from Siera.
In meantime I continue work on elevator...
That's all for tonight... Bye
Mirce
I placed wing joiner in the wing to see is everything OK. It lying perfect...
Next step was to made rear side of the box which will connect spars and ribs. I got strong construction, and now can work easier with wing joiner, and that part of the wing...
I made all those parts from poplar ply.
For now, rear plates are not glued between rib 4 - 6...
Plywood which is by the first rib have angle same like middle of the wing joiner...
I take a lot of care to wipe all glue from the side where wing joiner will come...
Now I study plan to see what Meister Scale told about mid spar. I saw that they made it from parts which will be glued between ribs...
I have other idea, so I made mid spar from one piece, and put it on the wing joiner. I need to be very precise when was increased opens on ribs...
When you take wing joiner out, mid spar will stay like this. Don't forget, mid spar is not glue yet...
Now come moment to glue half ribs for landing gear pate. I must do that, because without it I can't continue work on wing.
But, I will not glued plates until I get landing gears.
I call Dino, and he told me that in one - two weeks he can get landing gears from Siera.
In meantime I continue work on elevator...
That's all for tonight... Bye
Mirce
07-08-2012, 05:53 PM
#13
Thread Starter
Right now I'm working on three fronts: Meister P 47 & Zero, and Ziroli P 38...
On Zero I made elevator. I sanded it, and add first thin layer of acrylic filer...

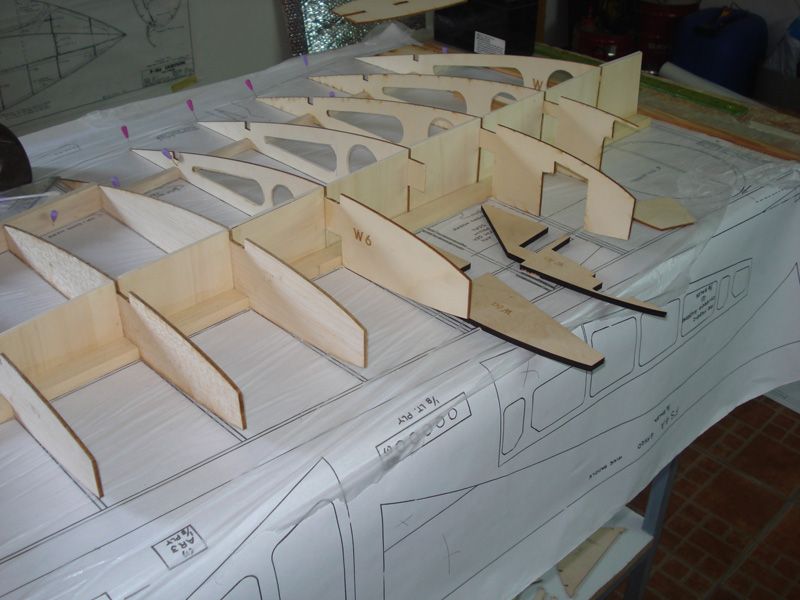
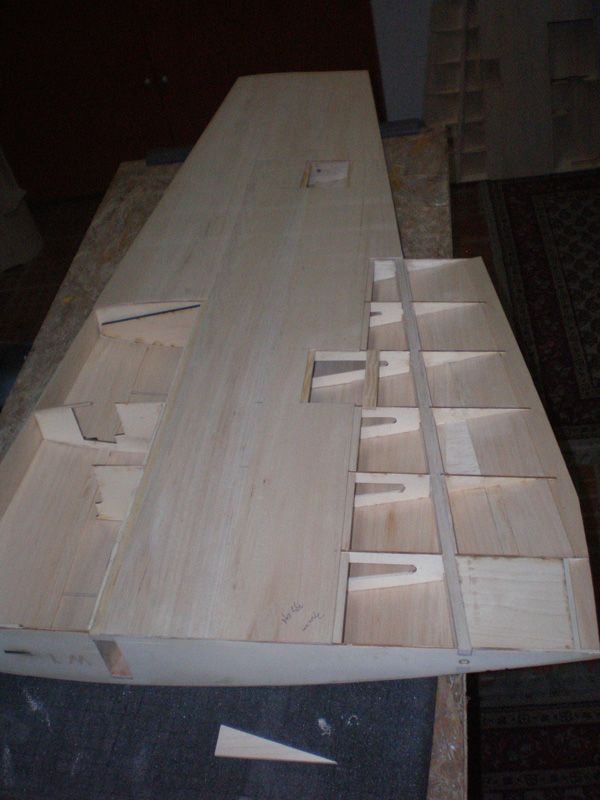
Mid spar is installed. This was very precision work, because I must take care not remain adhesive in wing joiner tunnel...
When the glue has dried, I glued upper spar...

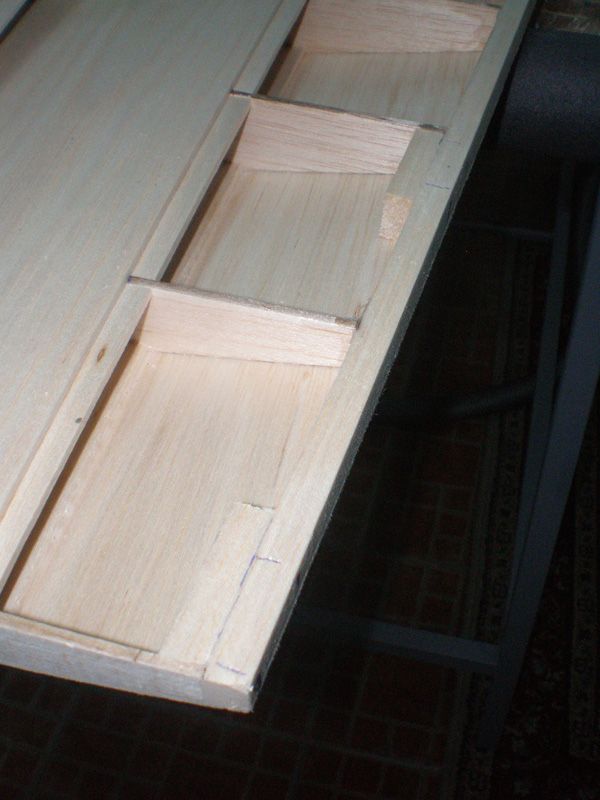
Next was to instal rear balsa spar...

...and after that I made front ply plate for boxes between spars and ribs...
Regards
Mirce
On Zero I made elevator. I sanded it, and add first thin layer of acrylic filer...
Mid spar is installed. This was very precision work, because I must take care not remain adhesive in wing joiner tunnel...
When the glue has dried, I glued upper spar...
Next was to instal rear balsa spar...
...and after that I made front ply plate for boxes between spars and ribs...
Regards
Mirce
 07-11-2012, 02:58 AM
#15
Thread Starter
Thanks Wayne...
In meantime, I continued to work in parallel on few Zeros parts.
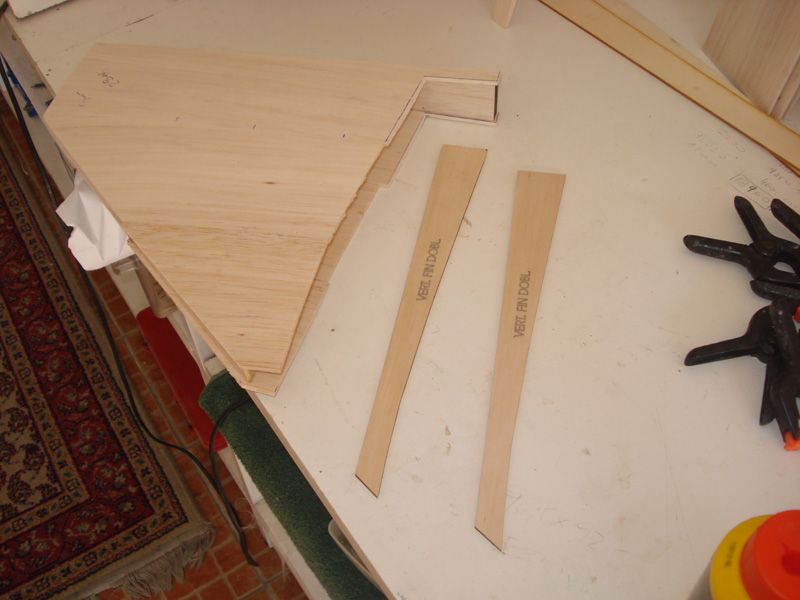
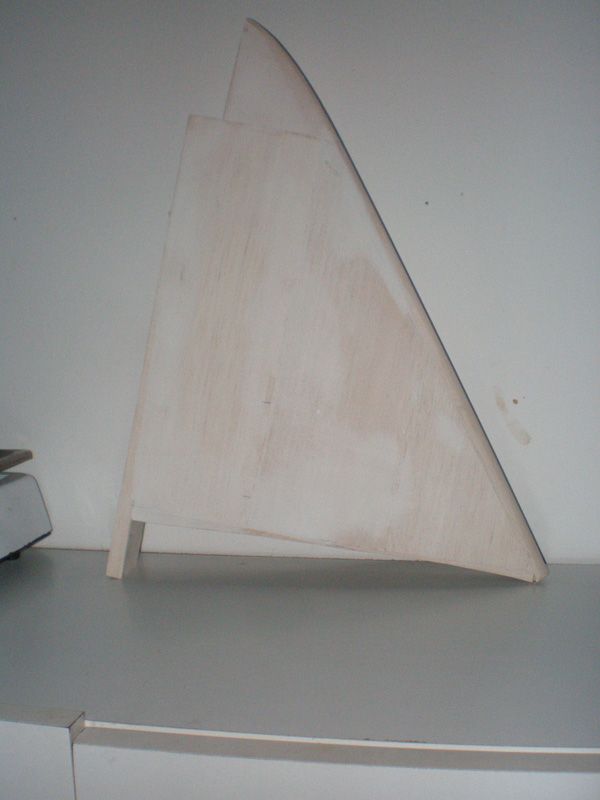
First I made rudder...

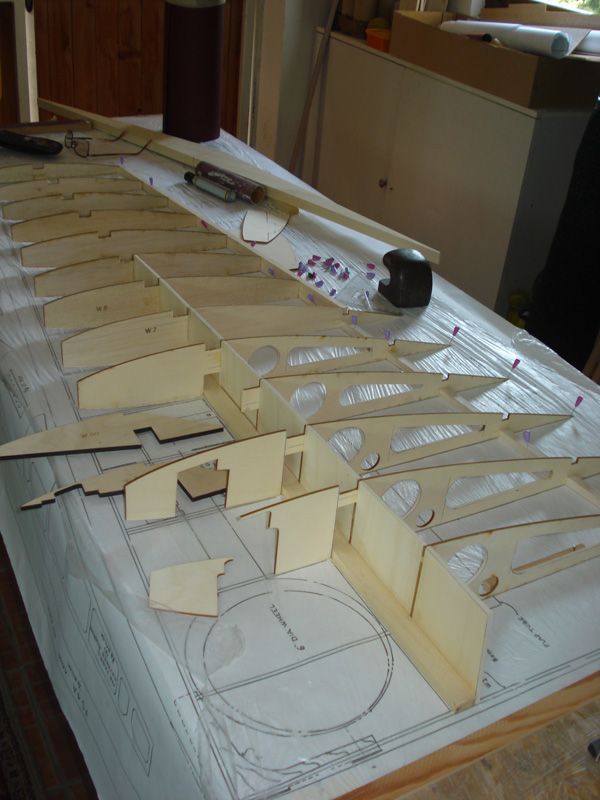
I continue working on spar boxes...


On elevator I add balsa leading edges...

Than, first balsa plates on rudder...
...after that on wing...
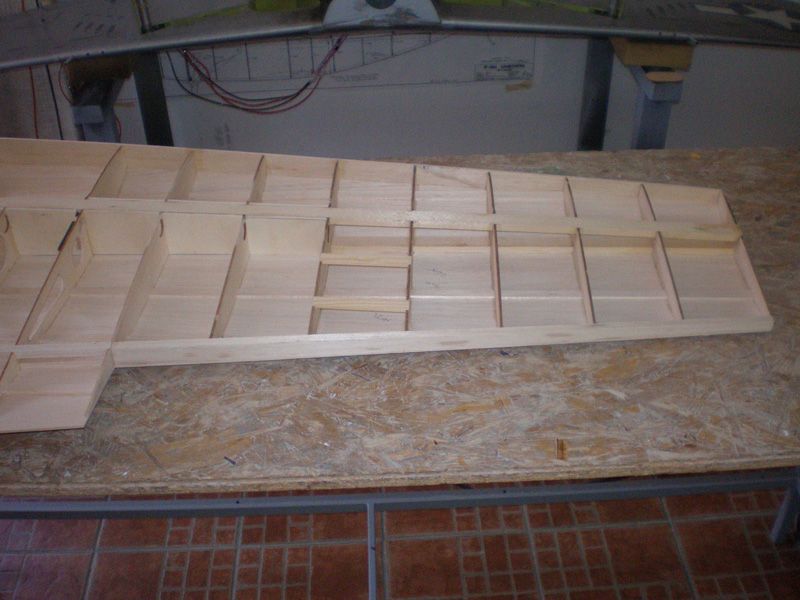
All boxes are finished...

Elevator leading edge is rough sanded...
I must put a support, because first ply rib was curved. After gluing all top balsa plates I will remove those support...
Small balsa strips was adding for better seating next balsa plate...
Those plates are 15 mm wide...
Than next balsa plates, first on rudder...
...and latter on wing too...
Again...
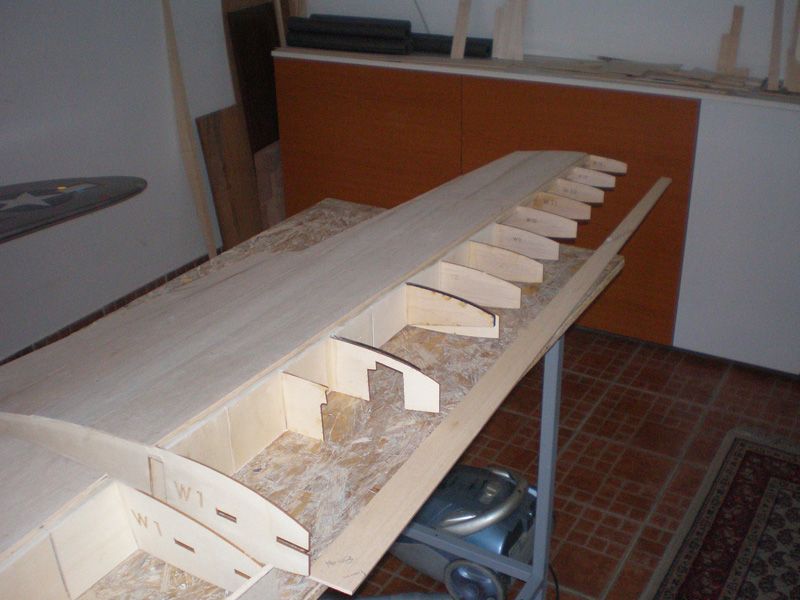
Finally I removed wing from the working table...
In bottom rudder part I glued next part...
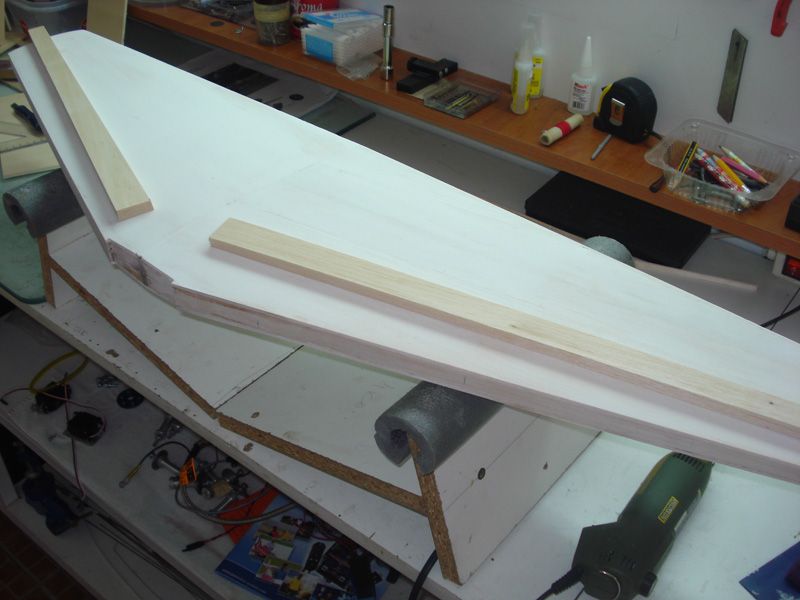
Wing leading edge is more than 1,3 meter long. I must made balsa plate for leading edge from two parts...
Than I glued it in front of the wing...
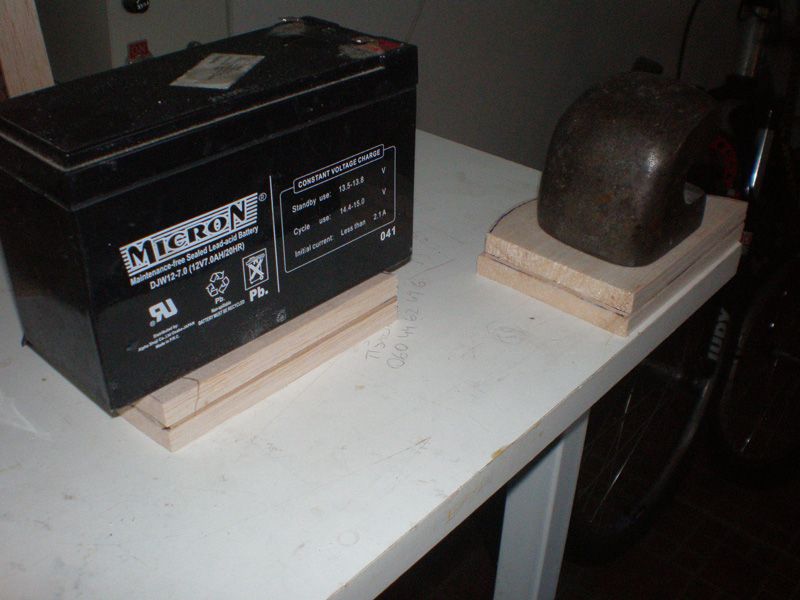
This model is so huge, but very easy to build. Luckily I find landing gear big enough...
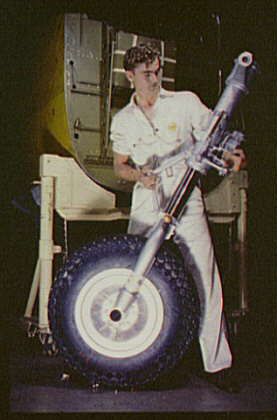
He, he...
Regards
Mirce
In meantime, I continued to work in parallel on few Zeros parts.
First I made rudder...
I continue working on spar boxes...
On elevator I add balsa leading edges...
Than, first balsa plates on rudder...
...after that on wing...
All boxes are finished...
Elevator leading edge is rough sanded...
I must put a support, because first ply rib was curved. After gluing all top balsa plates I will remove those support...
Small balsa strips was adding for better seating next balsa plate...
Those plates are 15 mm wide...
Than next balsa plates, first on rudder...
...and latter on wing too...
Again...
Finally I removed wing from the working table...
In bottom rudder part I glued next part...
Wing leading edge is more than 1,3 meter long. I must made balsa plate for leading edge from two parts...
Than I glued it in front of the wing...
This model is so huge, but very easy to build. Luckily I find landing gear big enough...
He, he...
Regards
Mirce
07-13-2012, 09:17 PM
#16
Senior Member

Join Date: Jul 2012
Location: , CA
Posts: 433
Likes: 0
Received 0 Likes
on
0 Posts
Enjoying your build and pics. Just drooling myself over the meister zero. Had a bf 109 g meister that will always hold a place in my heart.
08-24-2012, 02:26 AM
#17
Thread Starter
After successful maiden flight with Meister P-47, I continued work on my Meister Zero. OK, I was working in meantime, but now I gonna give "full throttle" on this project...
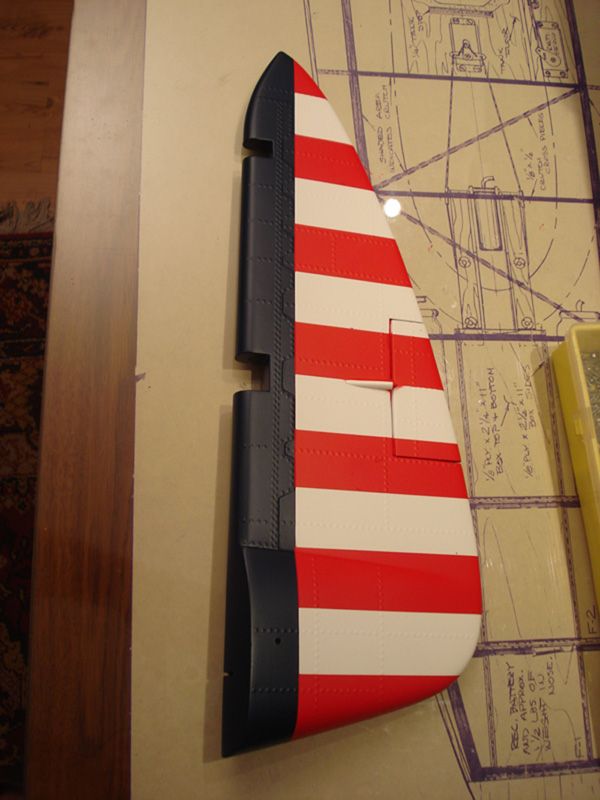
On elevator I made ends from balsa, but in middle I put thin ply...
After sanding elevator was ready to set on the fuselage. Alignment was perfect...
Rudder also lay perfectly...


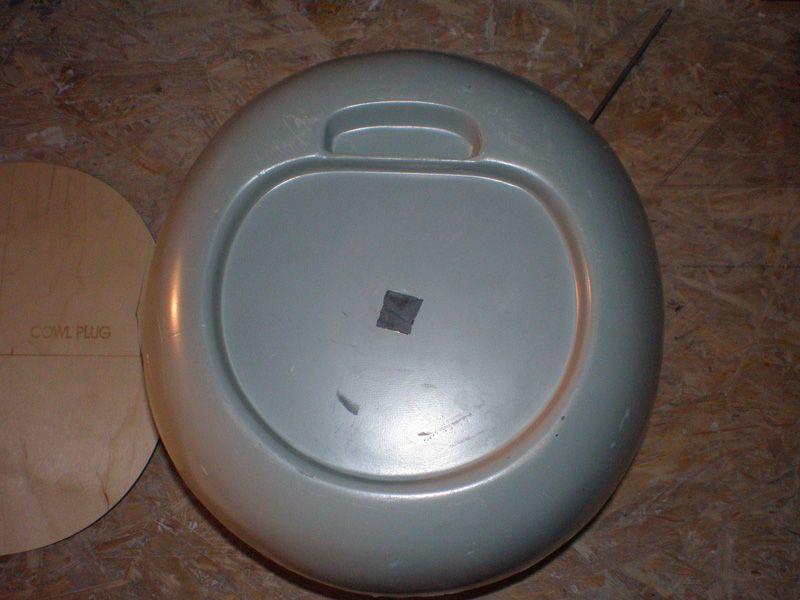
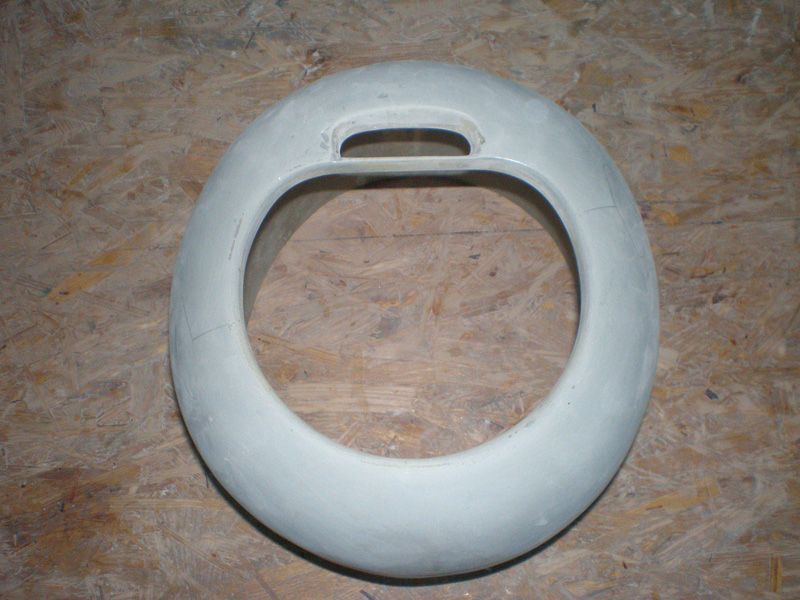
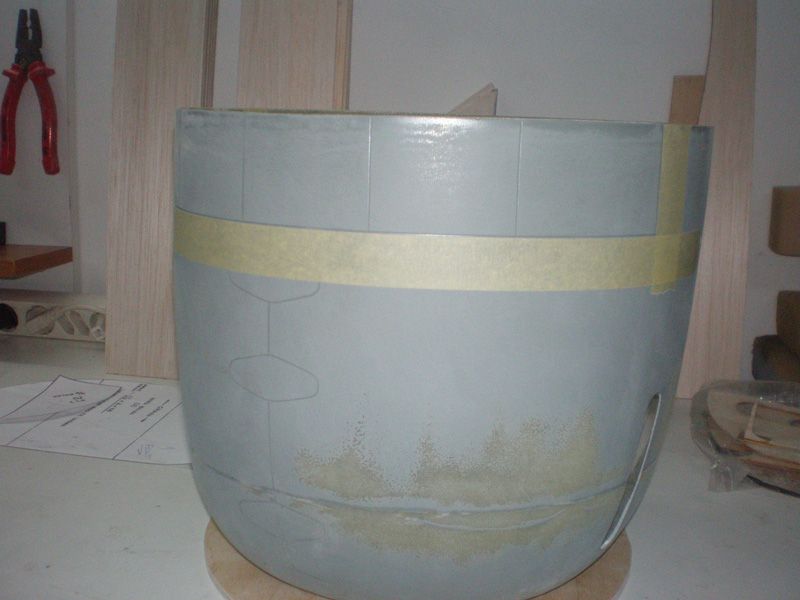
For the rear of the fuselage I bought plastic part...
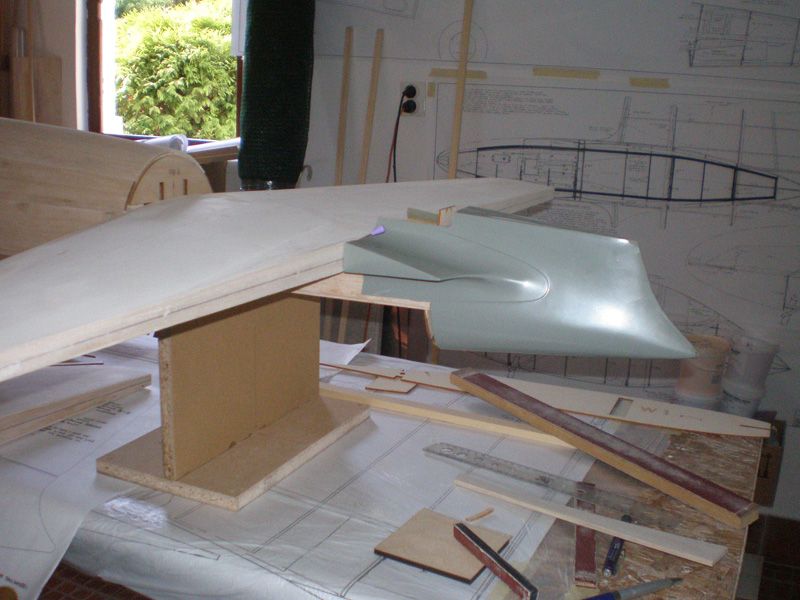
It fit very nice, but weight is not small. I think that will sand it inside with my Proxon to reduce weight. Zero is short in front and every gram on the back of the model can made problem on CG.
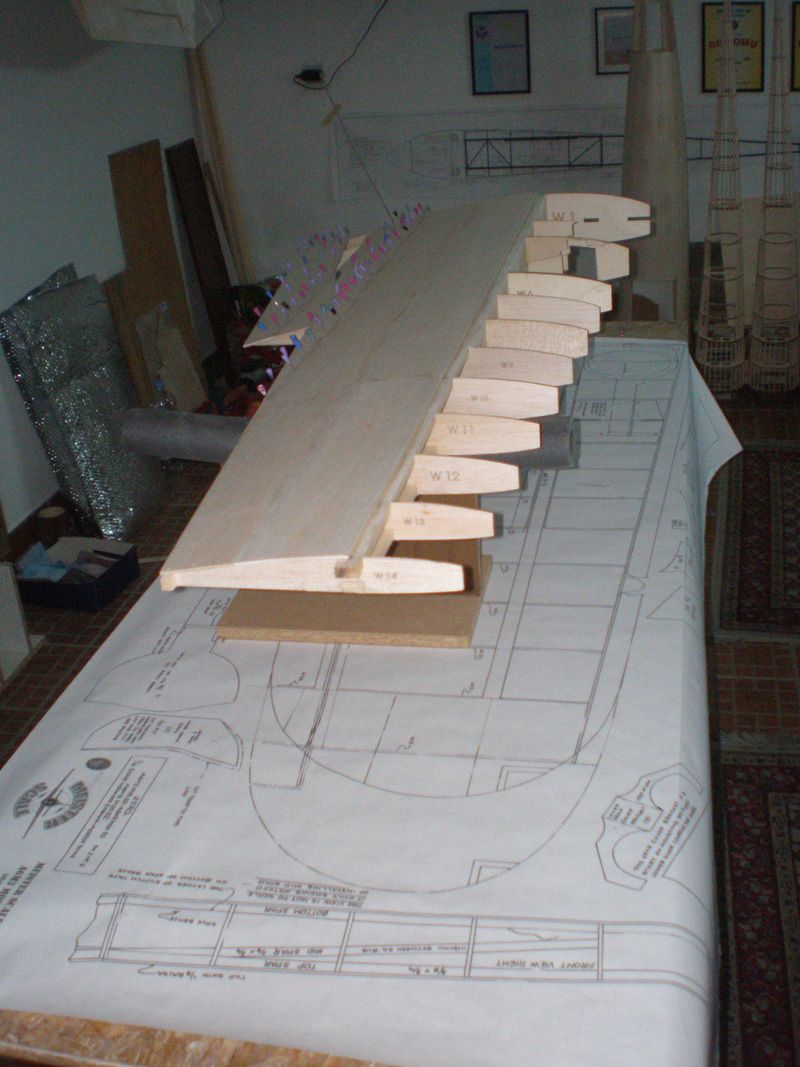
I start working on other wing half...

Wing (even without wing tips) is very huge...
To be continued...
Mirce
On elevator I made ends from balsa, but in middle I put thin ply...
After sanding elevator was ready to set on the fuselage. Alignment was perfect...
Rudder also lay perfectly...
For the rear of the fuselage I bought plastic part...
It fit very nice, but weight is not small. I think that will sand it inside with my Proxon to reduce weight. Zero is short in front and every gram on the back of the model can made problem on CG.
I start working on other wing half...
Wing (even without wing tips) is very huge...
To be continued...
Mirce
 08-27-2012, 06:12 AM
#19
Thread Starter
In last few days, here was so hot, temperature was almost 40 degrees Celsius... I was working only at evening and night...
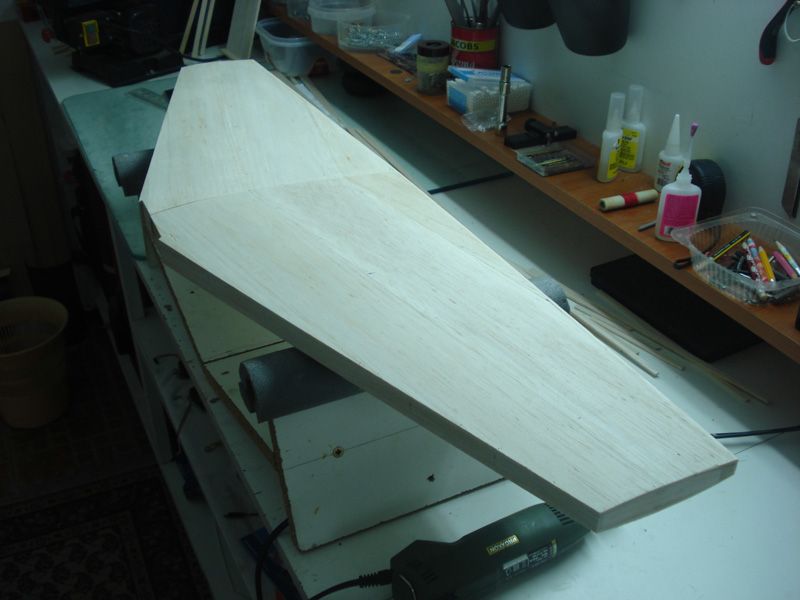
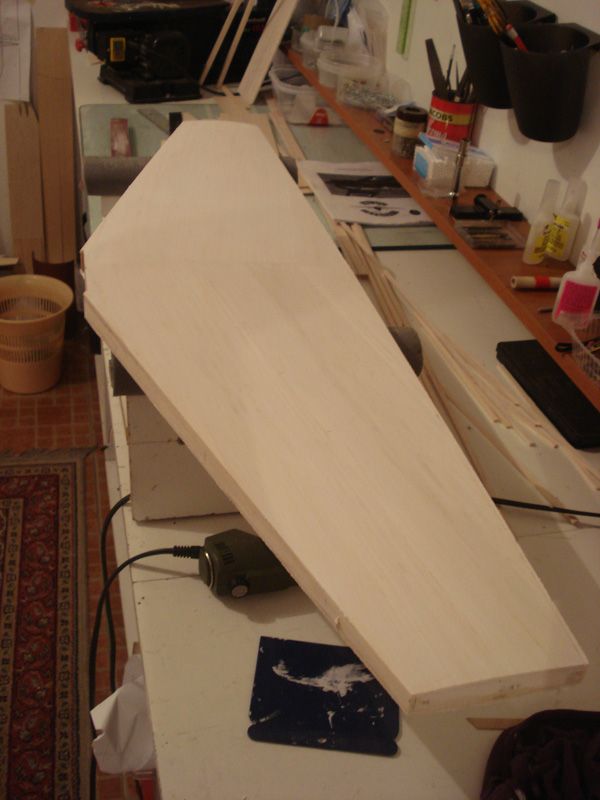
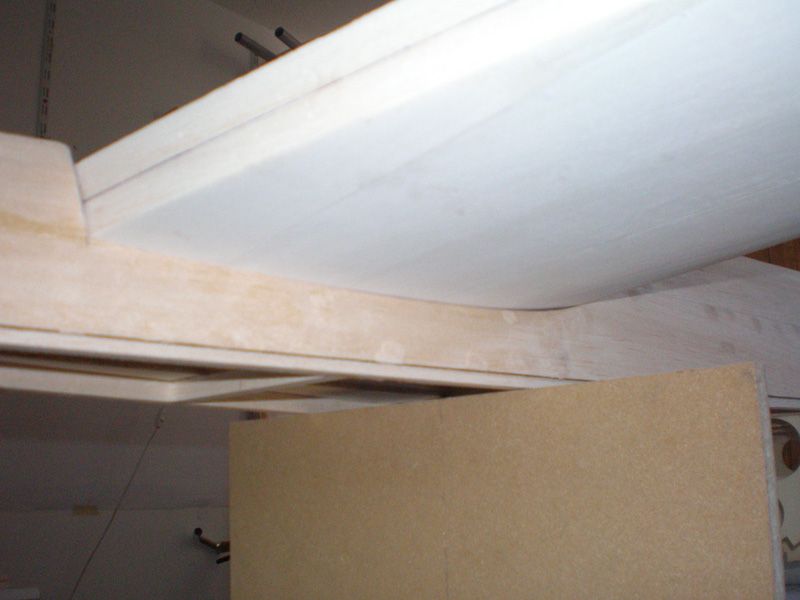
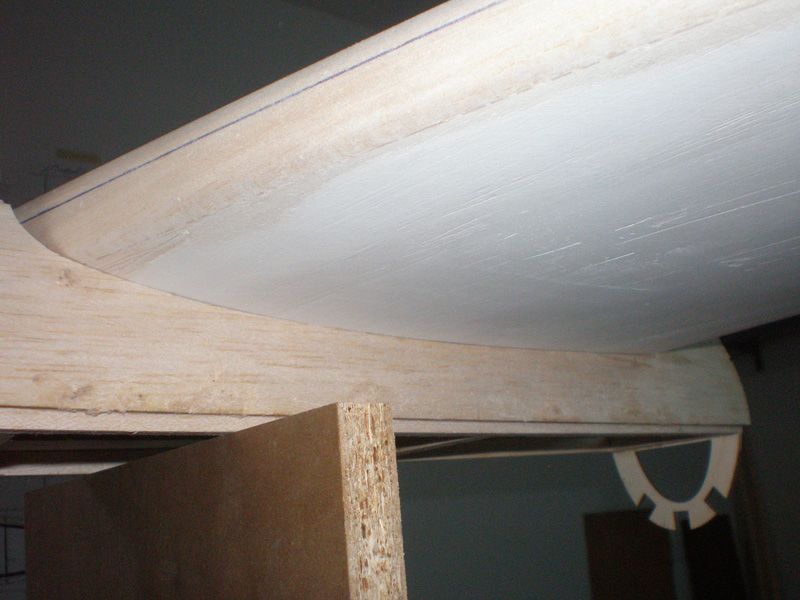
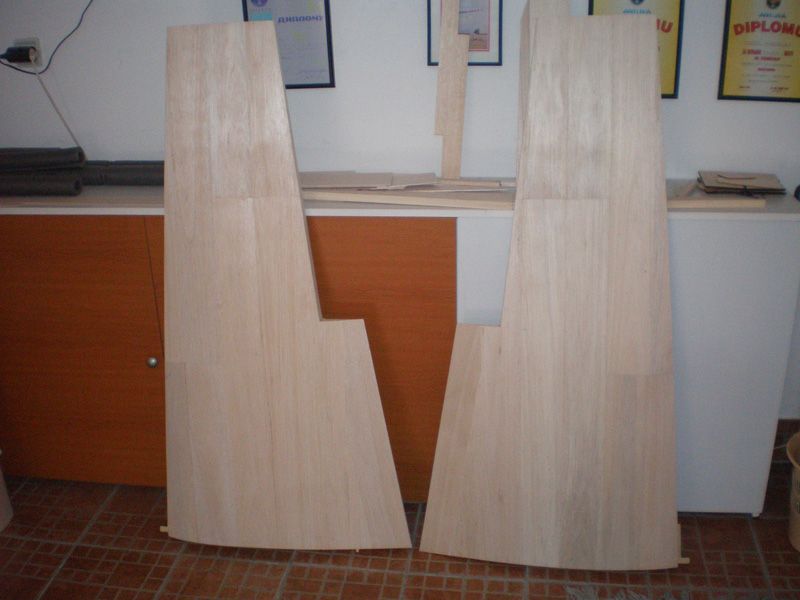
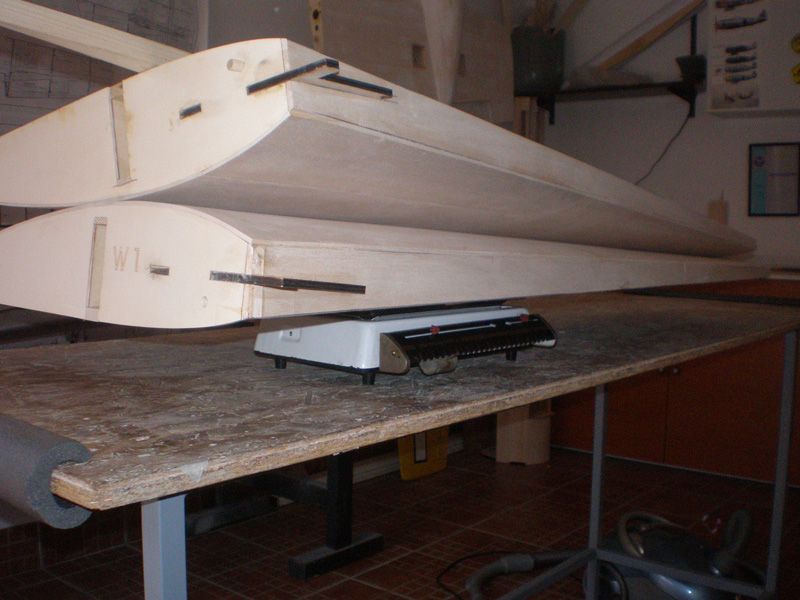
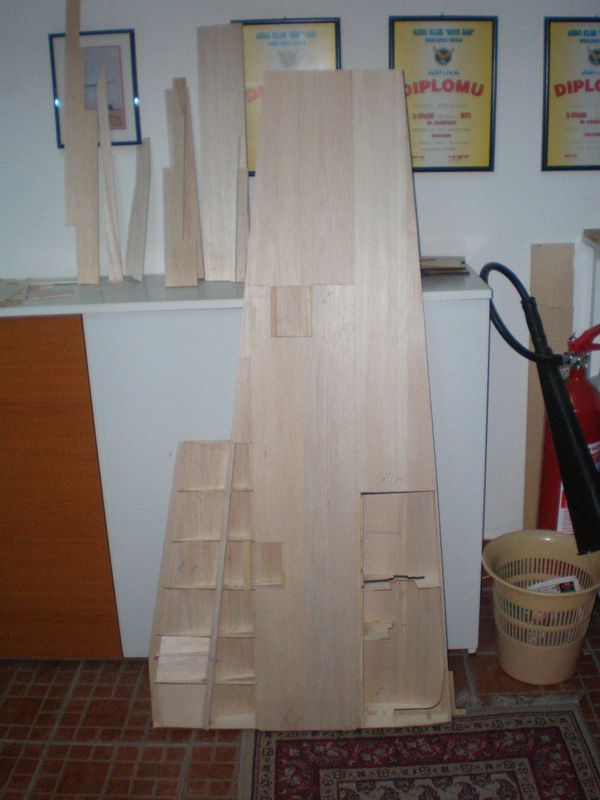
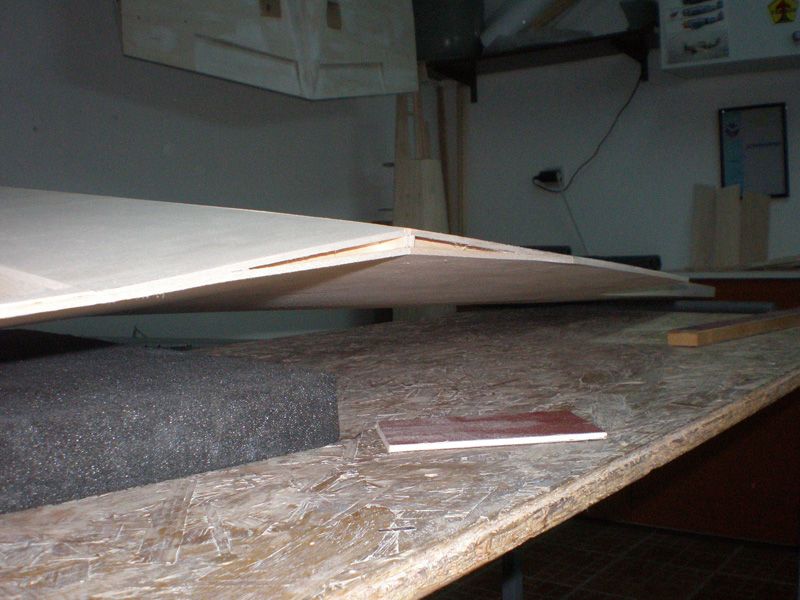
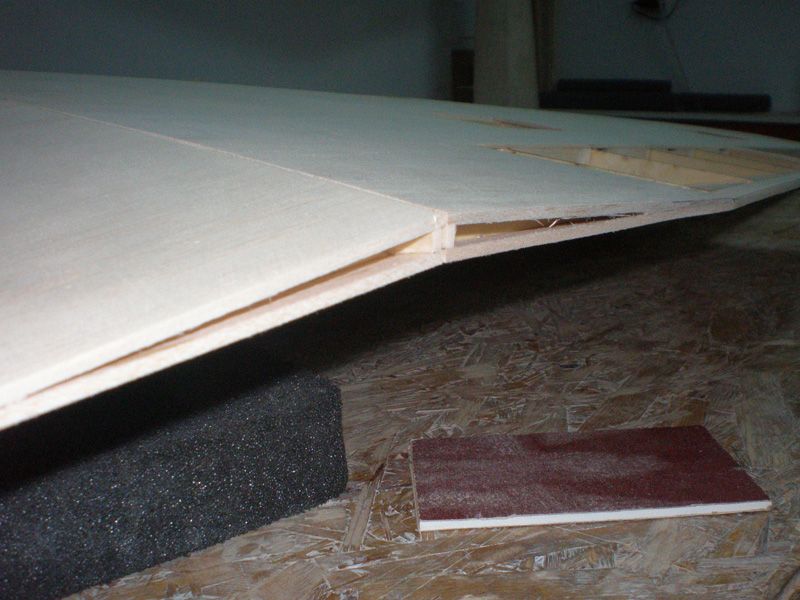
Both wings half are now coated on the upper side with balsa plates...
But before that I made few small details on the wing.
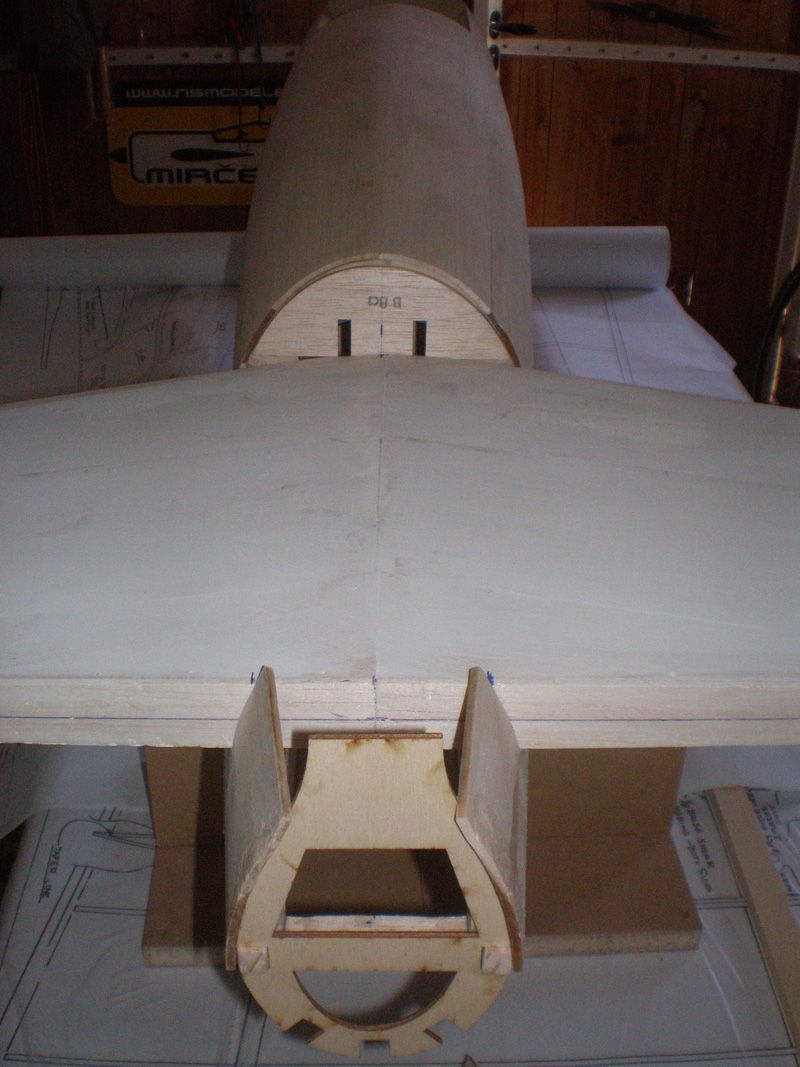
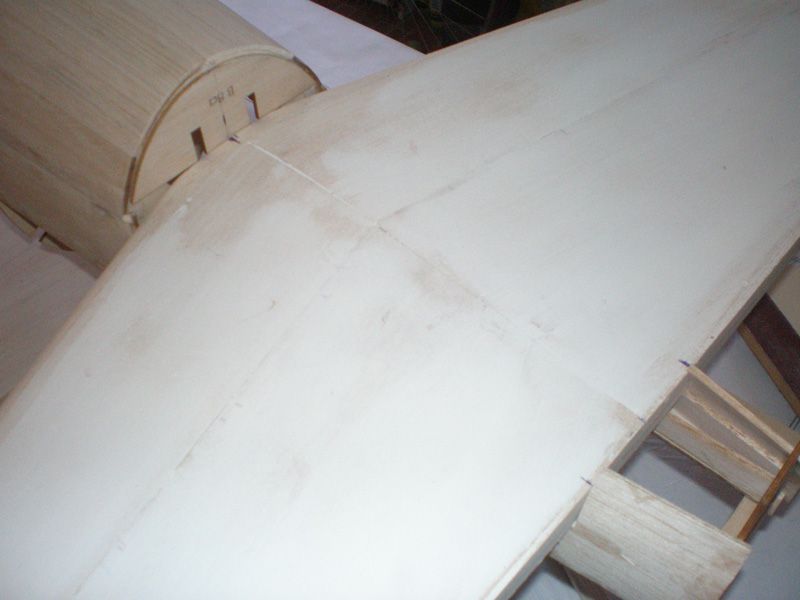
First I glued ply part in every wing half, for connecting wing with fuselage. System is same like on Meister P-47, one side was glued in rib number 1, and other side was in leading edge...
For ideal alignment I add one 8 mm wooden pin. Before that I glued 2 ply plates on each inner wing side. Than I alignment both wing side...
Hole for wooden pin was made within...
On the rear side of the wing rib number 1, is also one 8 mm wooden pin. Those pins are just for perfect alignment of both wing half...
Zero wing is so huge, in this phase (without wing tips) it's bigger than Meister Scale wing of P-47...
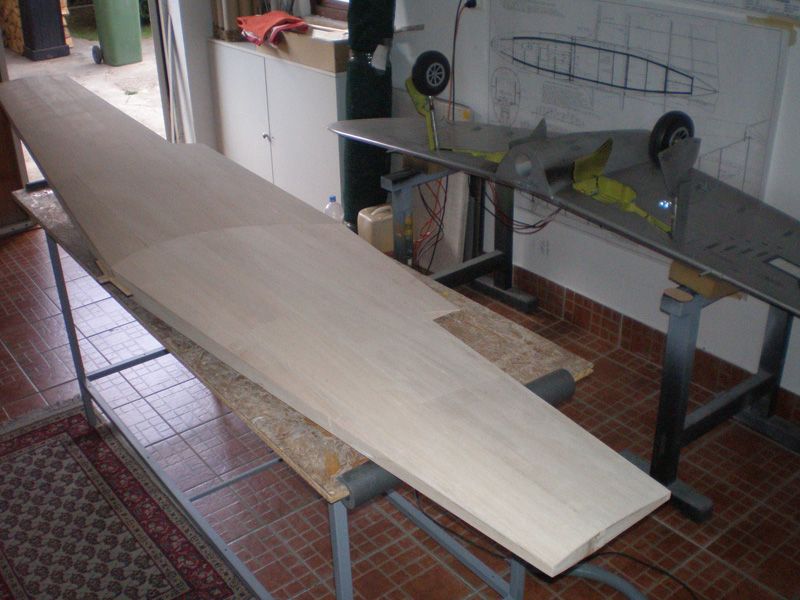
On lower wing side I glued 15 mm wide plates. Half of that plates will go under balsa, and in other half will be screwed plates for flap and ailerons servos. This is same method I used on all my models...
I measure wing in this phase...
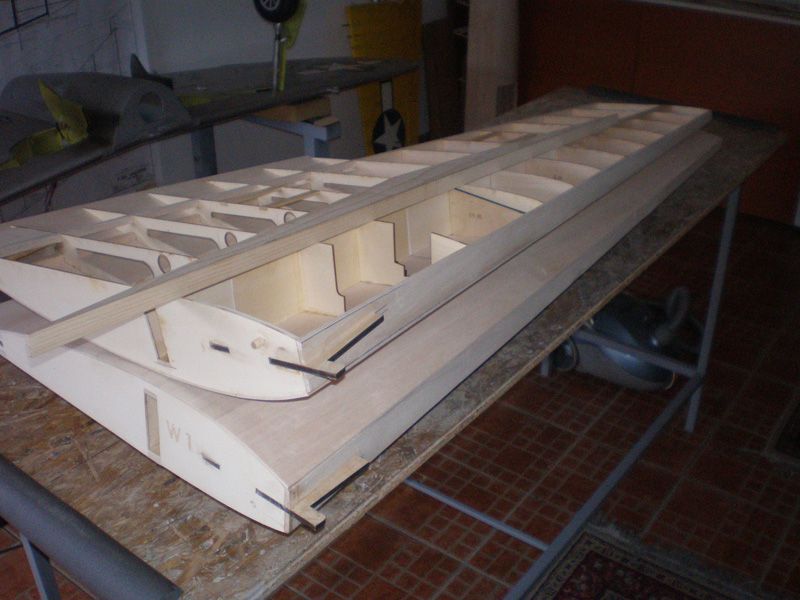

It's 2650 grams - 5,85 lbs...
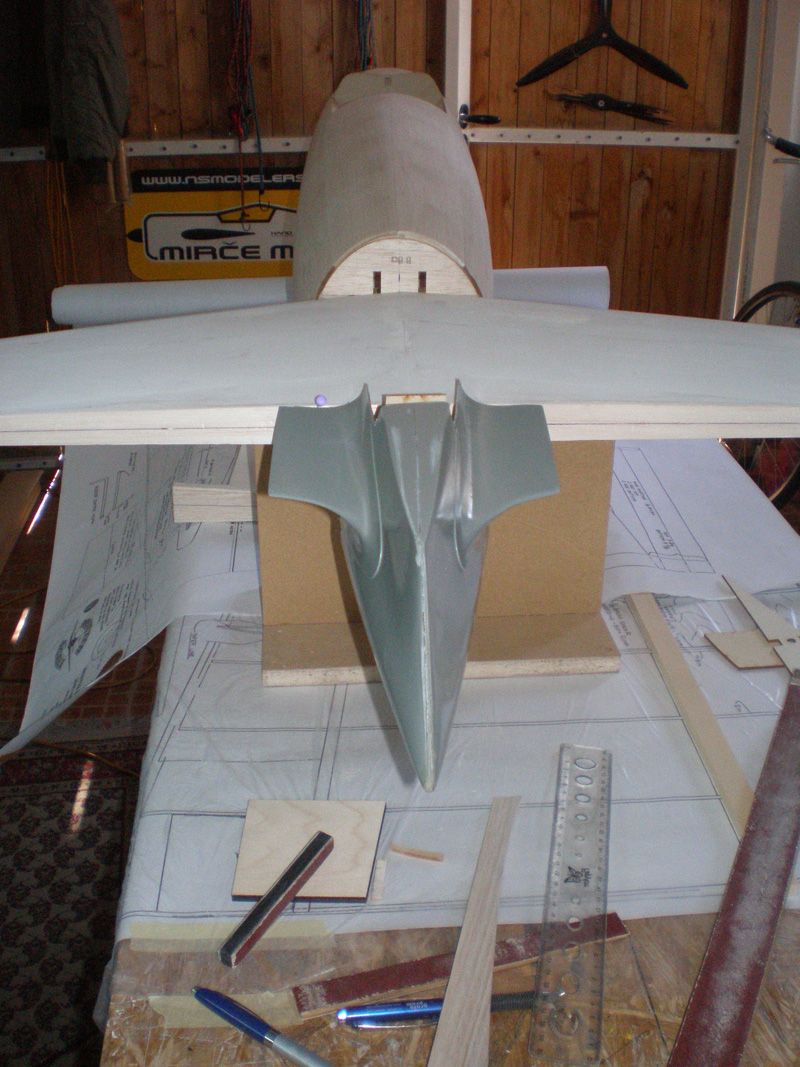
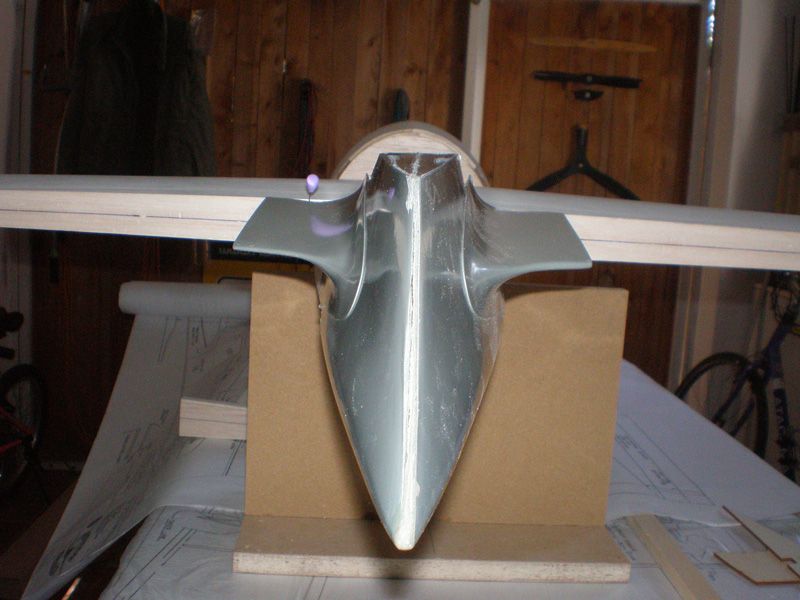
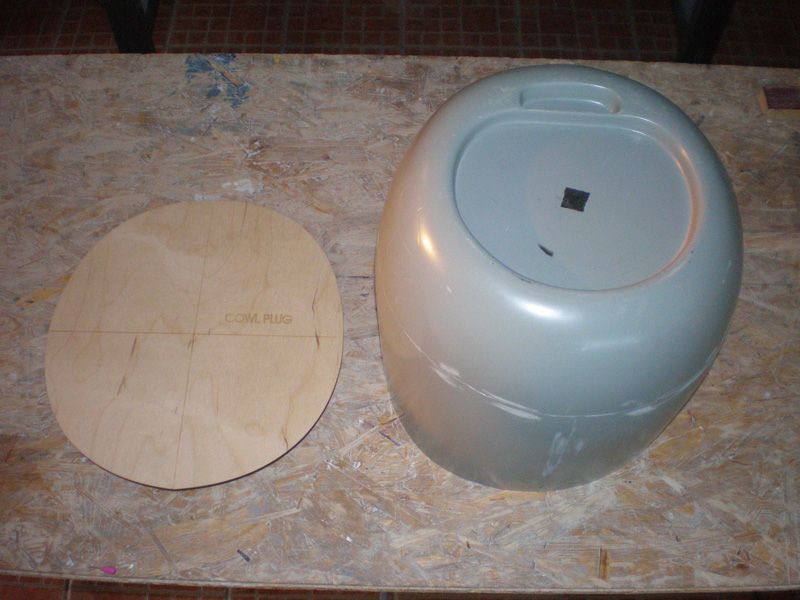
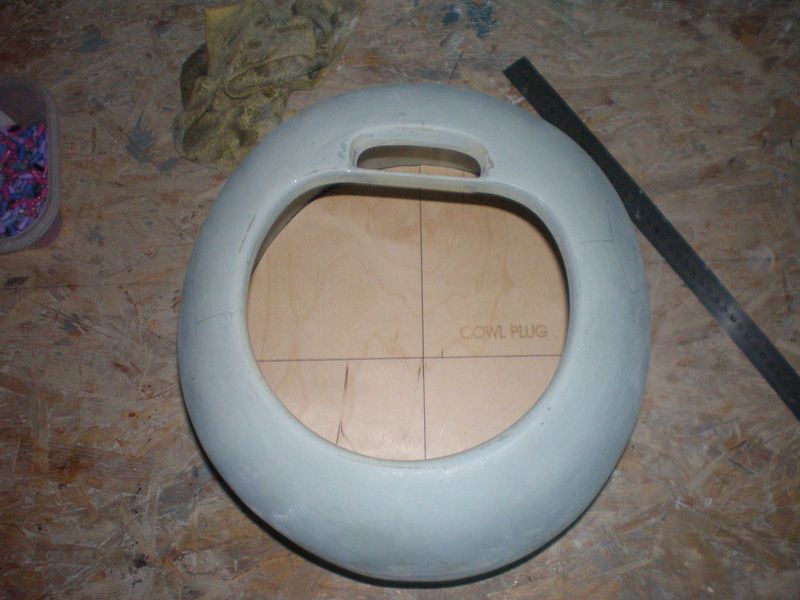
I start working on cowl too...
First I made holes on the front...
This cowl is made from three pieces, but joiners are not so smooth like on Meister P-47 cowl. It is not something awfully, but need filler and some work...
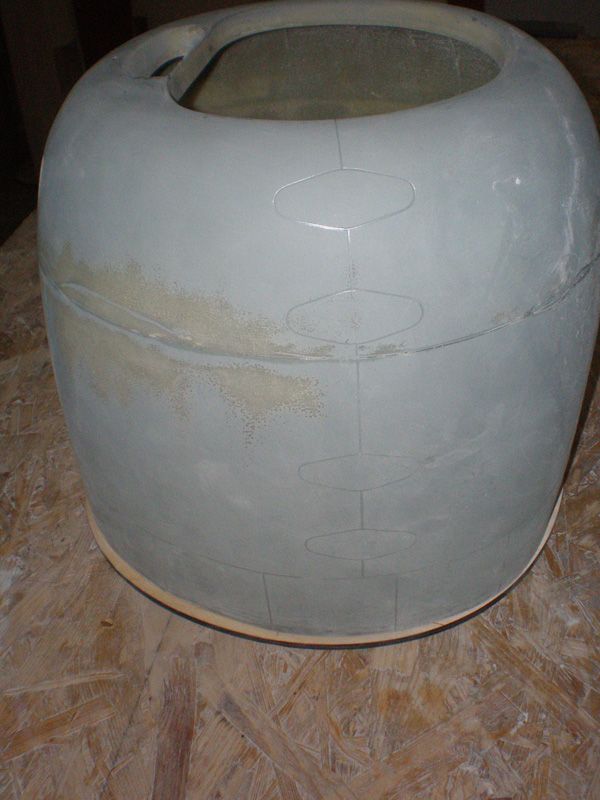
On cowl are cast lines for guns holes.
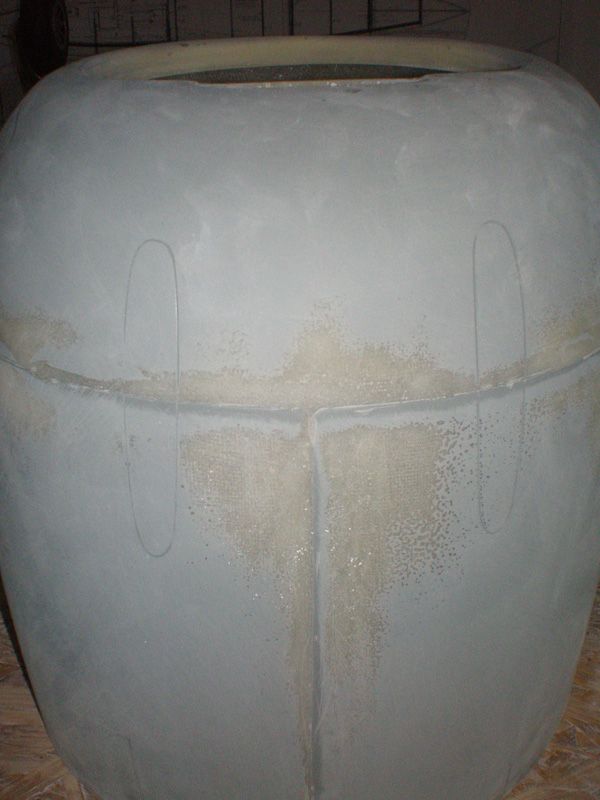
I used it for starting point...
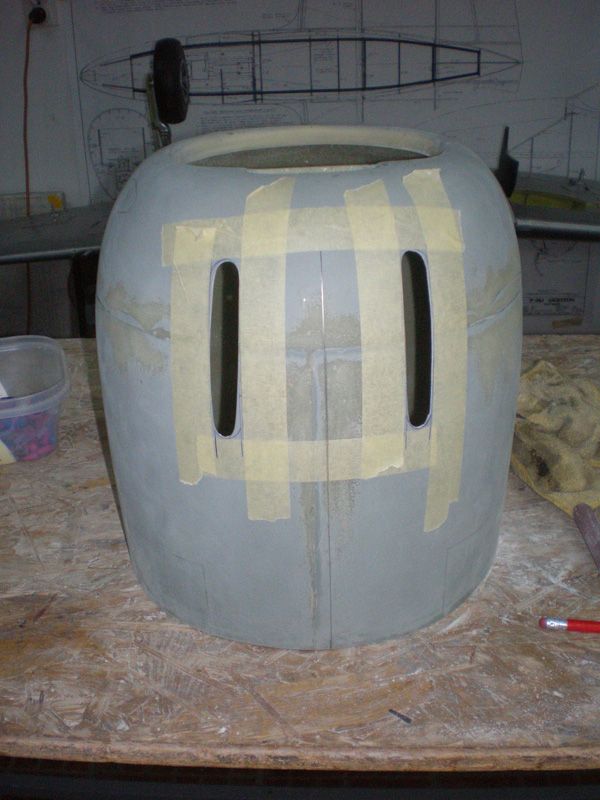
In that holes, later will come plastic tubes...
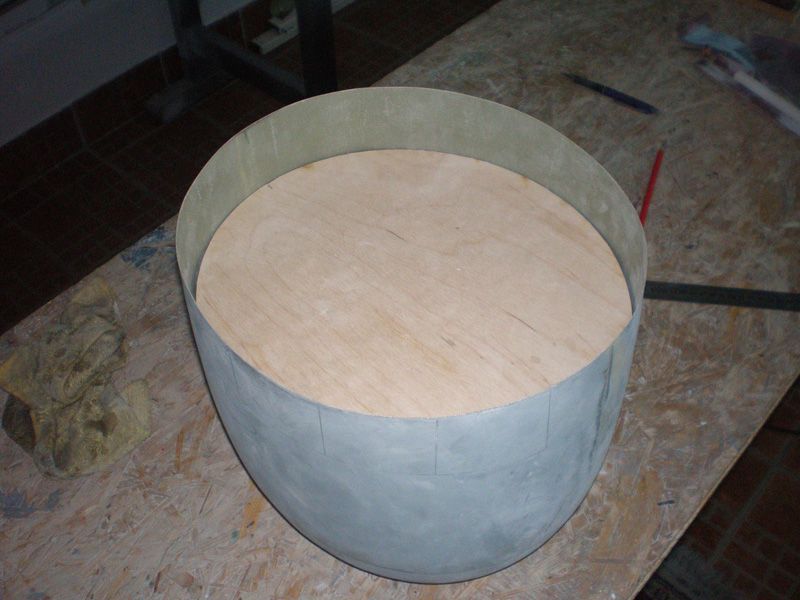
Bigger job was on the cows plate. It is wider for about half of centimeter all around.
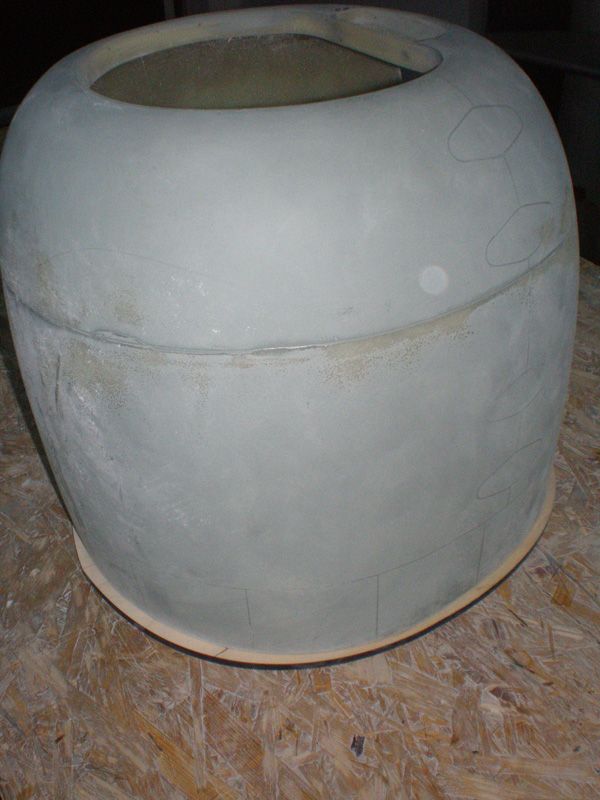
I made on my vinyl cutter machine foil template, which I glued on ply plate. It is not right circle, dimension is 315 x 290 mm. Unfortunately i forget to made photo of that...[&o]
But, never mind, more important is that now ply plate come inside of the cowl...
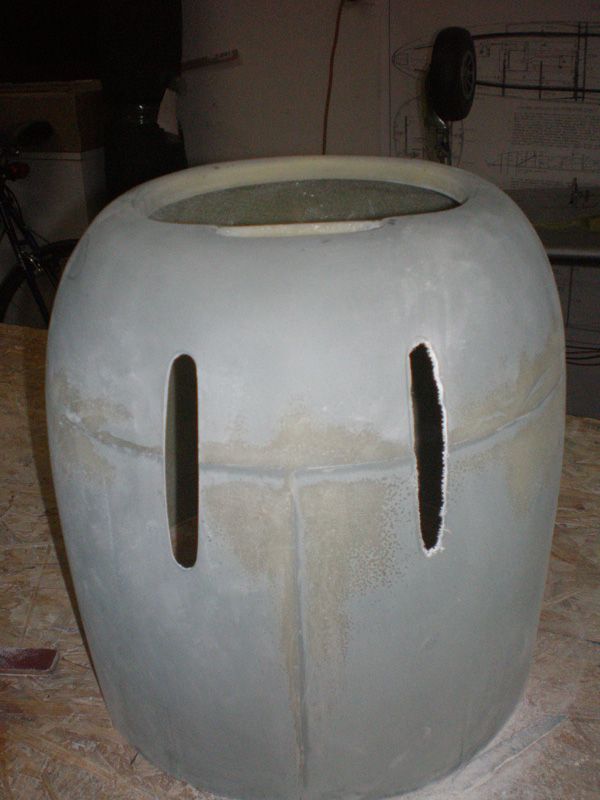
Next step is to cut out cowl cooling flaps, because I will made it from thin aluminum, and they will be more open...
That's all for now...
All the best
Mirce
Both wings half are now coated on the upper side with balsa plates...
But before that I made few small details on the wing.
First I glued ply part in every wing half, for connecting wing with fuselage. System is same like on Meister P-47, one side was glued in rib number 1, and other side was in leading edge...
For ideal alignment I add one 8 mm wooden pin. Before that I glued 2 ply plates on each inner wing side. Than I alignment both wing side...
Hole for wooden pin was made within...
On the rear side of the wing rib number 1, is also one 8 mm wooden pin. Those pins are just for perfect alignment of both wing half...
Zero wing is so huge, in this phase (without wing tips) it's bigger than Meister Scale wing of P-47...
On lower wing side I glued 15 mm wide plates. Half of that plates will go under balsa, and in other half will be screwed plates for flap and ailerons servos. This is same method I used on all my models...
I measure wing in this phase...
It's 2650 grams - 5,85 lbs...
I start working on cowl too...
First I made holes on the front...
This cowl is made from three pieces, but joiners are not so smooth like on Meister P-47 cowl. It is not something awfully, but need filler and some work...
On cowl are cast lines for guns holes.
I used it for starting point...
In that holes, later will come plastic tubes...
Bigger job was on the cows plate. It is wider for about half of centimeter all around.
I made on my vinyl cutter machine foil template, which I glued on ply plate. It is not right circle, dimension is 315 x 290 mm. Unfortunately i forget to made photo of that...[&o]
But, never mind, more important is that now ply plate come inside of the cowl...
Next step is to cut out cowl cooling flaps, because I will made it from thin aluminum, and they will be more open...
That's all for now...
All the best
Mirce
08-31-2012, 04:33 PM
#20
Thread Starter
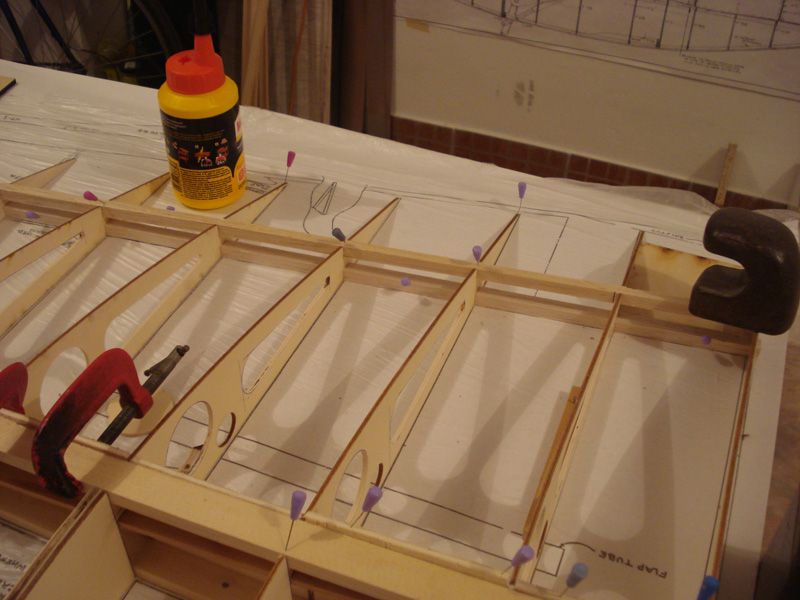
In last few days I was working on bottom wing side...
First I glued few balsa plates in the middle...
Then I must made few jobs before adding other balsa plates.
In the front, on some ribs I must add balsa stripes, because some ribs was lower than leading edge.
For ailerons I will use 5 classic hinges with pin inside. For them I must glued balsa blocks...

This blocks connect upper and lower balsa planks...
On the wing tip, before start working on tips, I installed carbon tubes for wires for lights in wing tips.
Zero haven't landing light, so that is one job less on this model...
Every area between ribs, under upper planks, on flaps part was reinforced with one more 3 mm balsa plate.
I connect balsa spars again with 3 mm balsa. On that vertical balsa will come fir plate in which will be screwed flaps hinges.
For flaps I will use 1,5 mm thin G-10 plate. It is ideally flat and enough strong. Because Zero flap don't need gap between flaps and wing, installation will be easier than on P-47...
Yesterday I sand wing, and all edges. Wing is very rigid...
Regards
Mirce
First I glued few balsa plates in the middle...
Then I must made few jobs before adding other balsa plates.
In the front, on some ribs I must add balsa stripes, because some ribs was lower than leading edge.
For ailerons I will use 5 classic hinges with pin inside. For them I must glued balsa blocks...
This blocks connect upper and lower balsa planks...
On the wing tip, before start working on tips, I installed carbon tubes for wires for lights in wing tips.
Zero haven't landing light, so that is one job less on this model...
Every area between ribs, under upper planks, on flaps part was reinforced with one more 3 mm balsa plate.
I connect balsa spars again with 3 mm balsa. On that vertical balsa will come fir plate in which will be screwed flaps hinges.
For flaps I will use 1,5 mm thin G-10 plate. It is ideally flat and enough strong. Because Zero flap don't need gap between flaps and wing, installation will be easier than on P-47...
Yesterday I sand wing, and all edges. Wing is very rigid...
Regards
Mirce
 09-04-2012, 12:15 AM
#24
Thread Starter
Thanks guys for comments... No building holiday in my "firm", for me holiday is when I build model
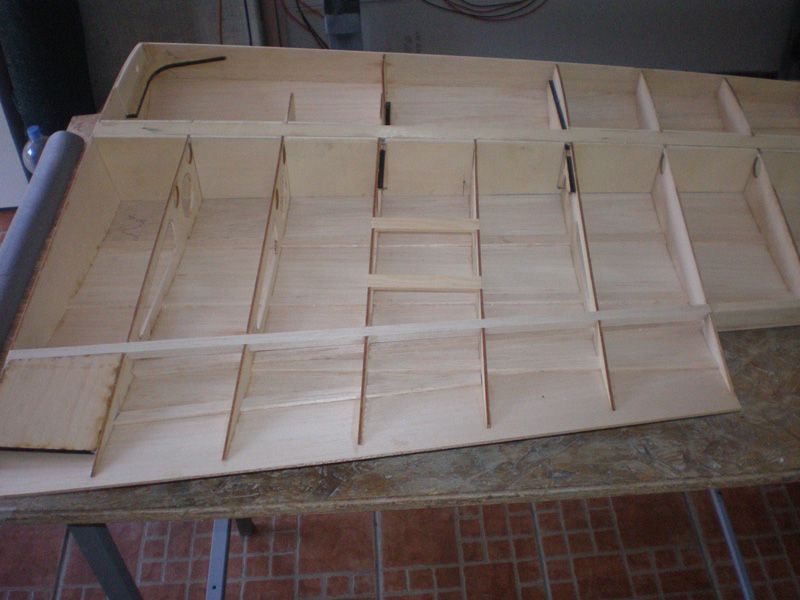
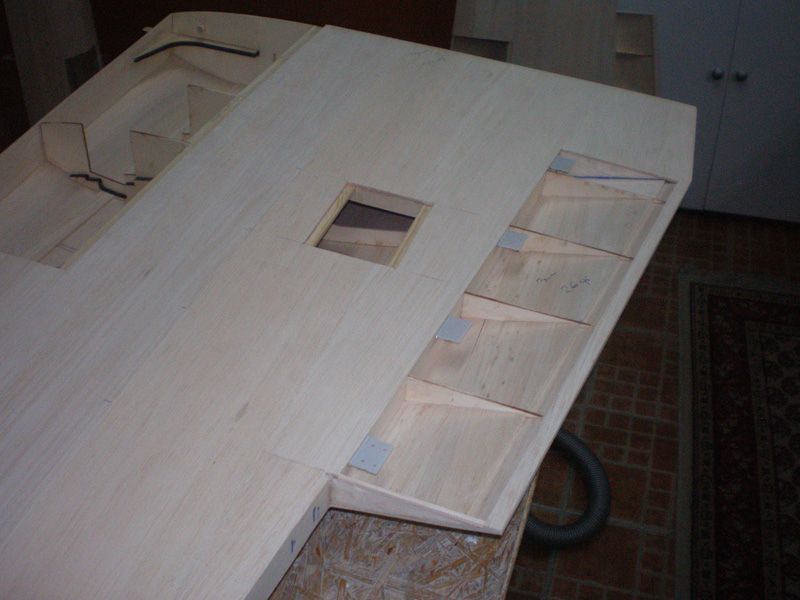
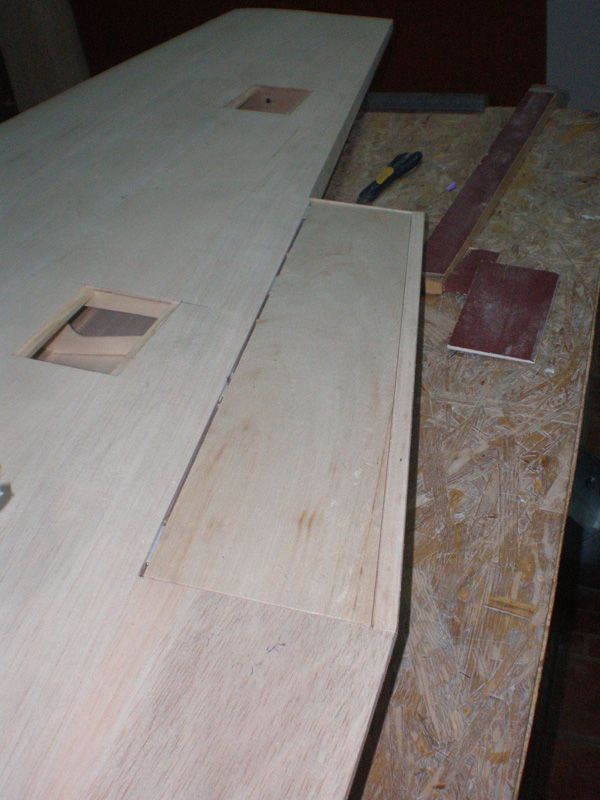
In mean time I prepare everything for flaps installation. First I glued balsa rib which is last rib on the side near middle of the wing...
Than I made 4 gutters for flap hinges...
Next was to add balsa plank on the wing and few strips on last rib and trailing edge...
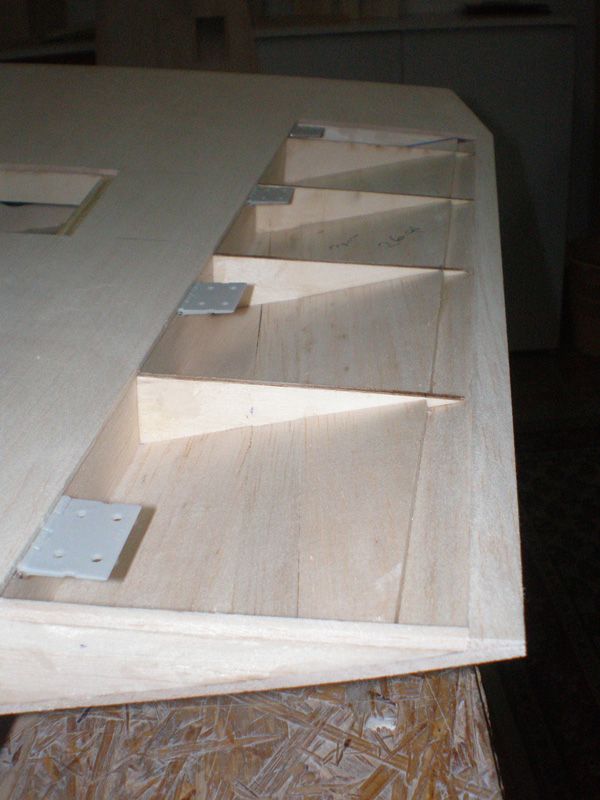
Sanding those trailing edge was easy, because bottom wing side is flat...
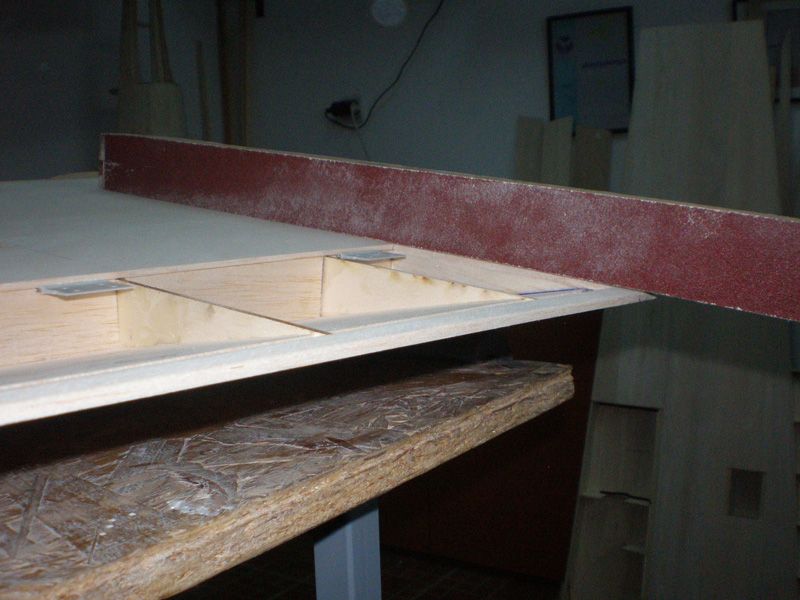
My plan is to made flaps from two parts, inside part from 1,5 mm thin G 10 and upper balsa plate from 1,5 mm too. That give 3 mm flap, same like wing plank. G 10 will have holes to reduce weight. 1,5 mm G 10 is enough rigid for this purpose. You can find tiner G 10 plates, but it's much "softly"...
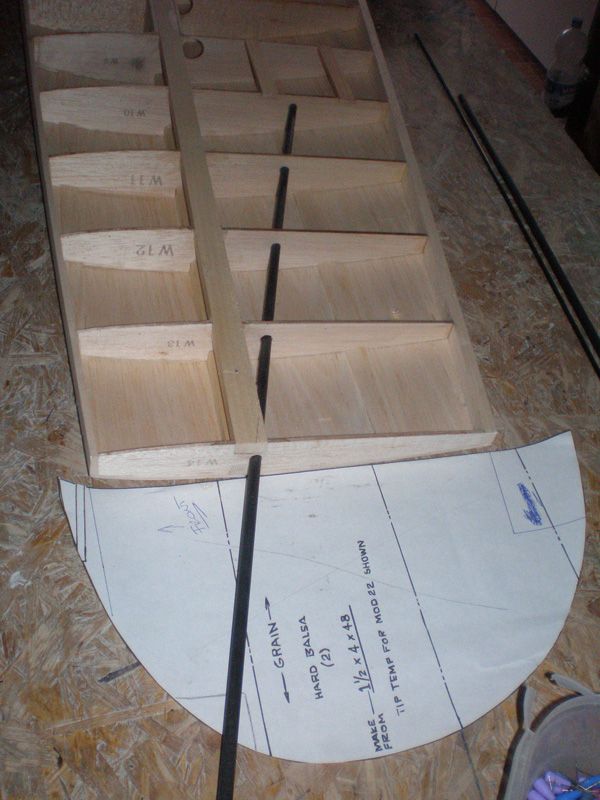
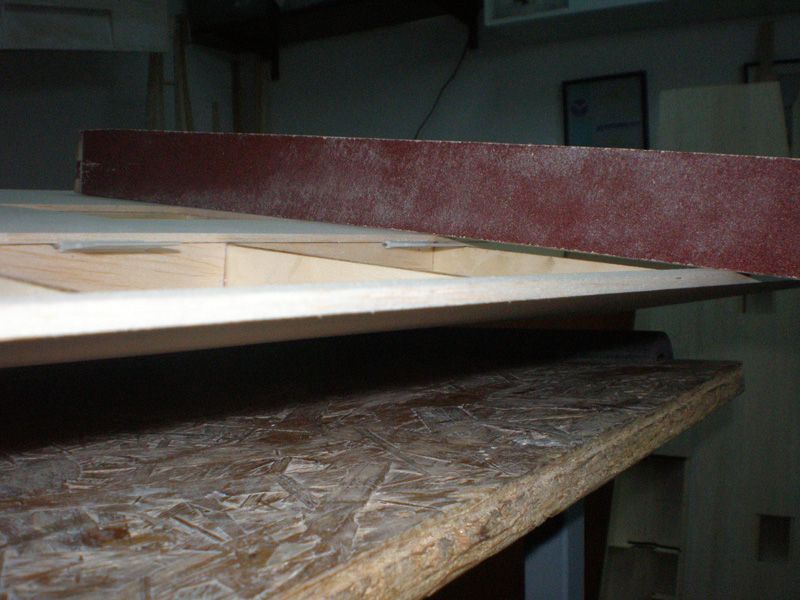
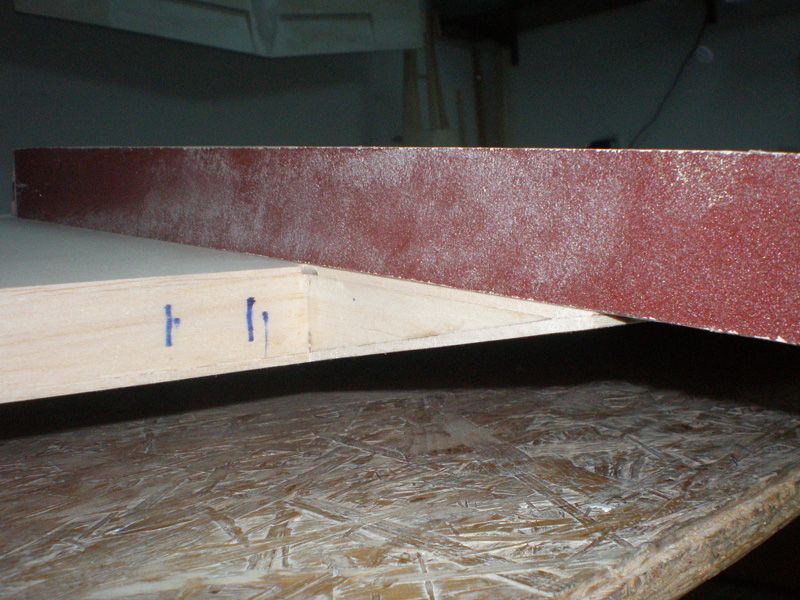
Before order G 10 plates I must made template from balsa...
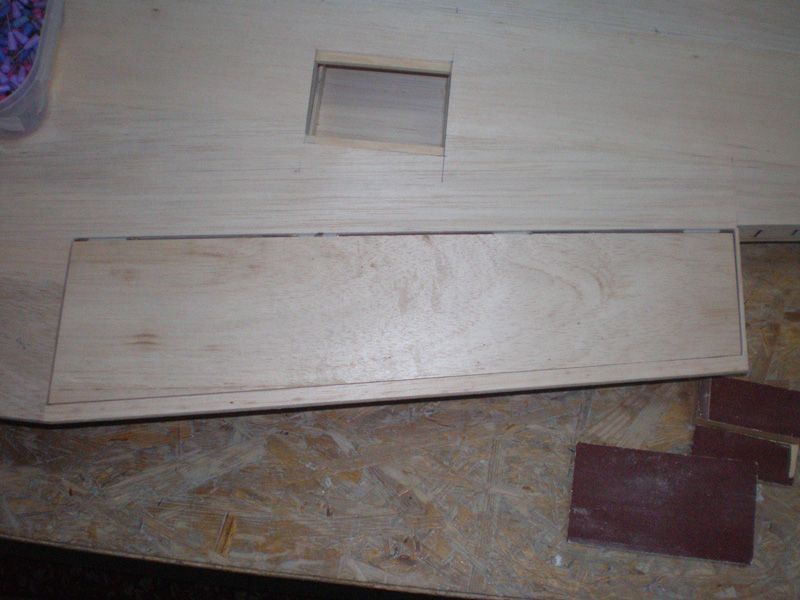
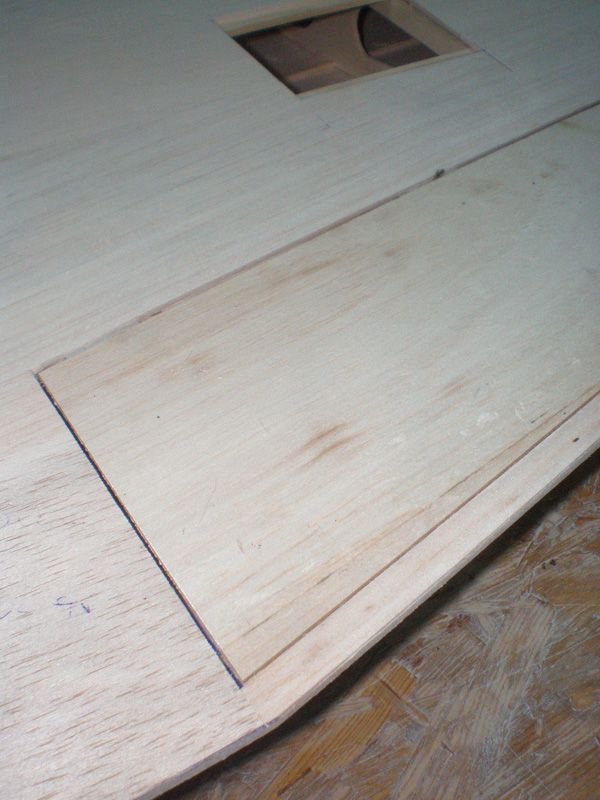
I will scan this part, draw openings, and file send to firm where will made two flap plates for my Zero.
Middle of the wing is pretty symmetrical...
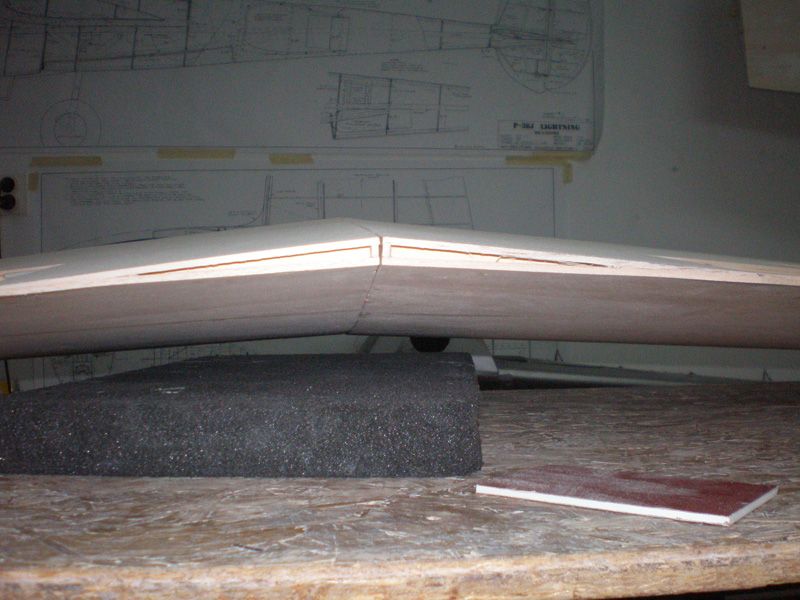
It will come balsa strips, but that after I put wing on the fuselage...
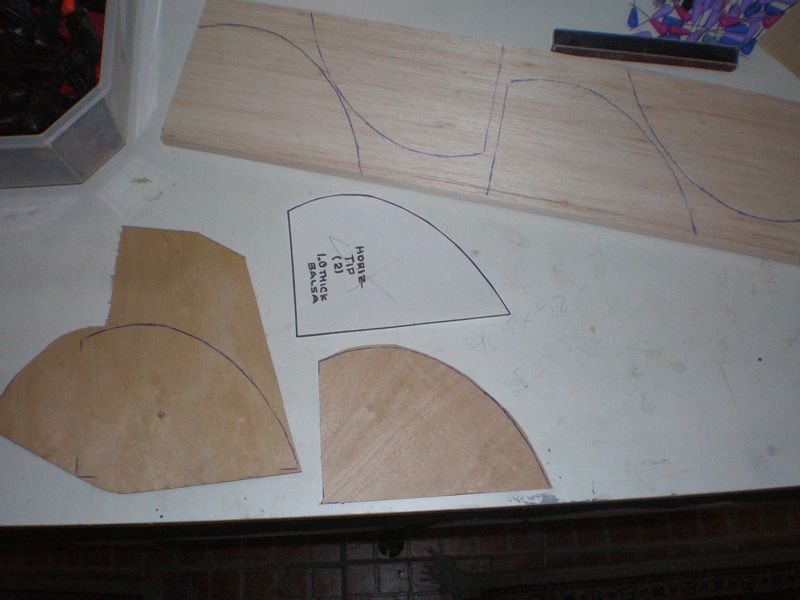
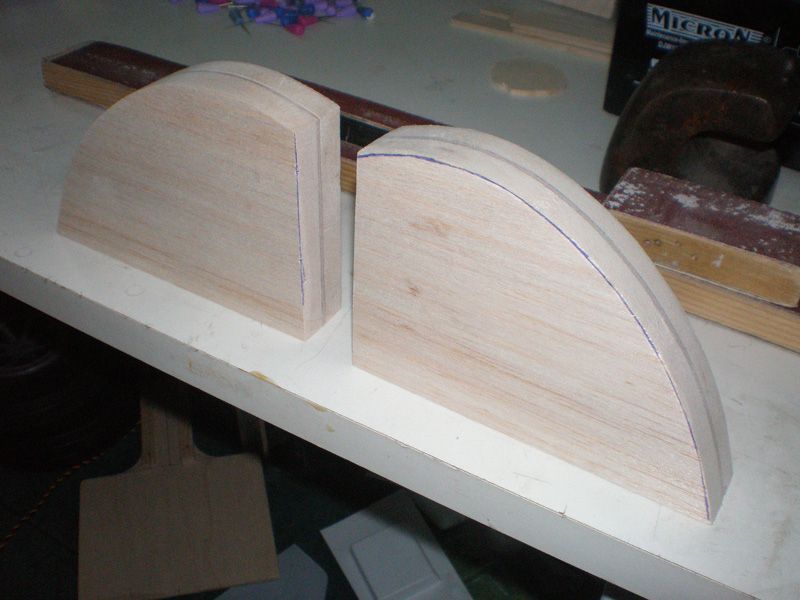
Now, until wait to get G 10 plates, I will work on round wing tips, ailerons, and start working on the fuselage...
No ennui for me...
Regards
Mirce
In mean time I prepare everything for flaps installation. First I glued balsa rib which is last rib on the side near middle of the wing...
Than I made 4 gutters for flap hinges...
Next was to add balsa plank on the wing and few strips on last rib and trailing edge...
Sanding those trailing edge was easy, because bottom wing side is flat...
My plan is to made flaps from two parts, inside part from 1,5 mm thin G 10 and upper balsa plate from 1,5 mm too. That give 3 mm flap, same like wing plank. G 10 will have holes to reduce weight. 1,5 mm G 10 is enough rigid for this purpose. You can find tiner G 10 plates, but it's much "softly"...
Before order G 10 plates I must made template from balsa...
I will scan this part, draw openings, and file send to firm where will made two flap plates for my Zero.
Middle of the wing is pretty symmetrical...
It will come balsa strips, but that after I put wing on the fuselage...
Now, until wait to get G 10 plates, I will work on round wing tips, ailerons, and start working on the fuselage...
No ennui for me...
Regards
Mirce
09-05-2012, 01:01 PM
#25
Junior Member
My Feedback: (9)
Join Date: May 2011
Location: Grand Blanc,
MI
Posts: 29
Likes: 0
Received 0 Likes
on
0 Posts
Woohoo!!
Mirce my friend, you will have this one done well before Christmas.
With this in mind... You will need to start thinking about a winter project. hehe
Eddie
Mirce my friend, you will have this one done well before Christmas.
With this in mind... You will need to start thinking about a winter project. hehe
Eddie