


Build a Miss Ashley - Revisited
 02-26-2018, 05:11 PM
#126

Thread Starter
Join Date: Nov 2007
Location: Fritch,
TX
Posts: 2,060
Likes: 0
Received 0 Likes
on
0 Posts
The gear length should be between 1 3/4" to 2 1/4" (to the axel). Start at 2 1/4" and verify that there is approximately 1/2" prop clearance when the wing is at zero incidence.
On the second model the wheels did not have bearings. The axels were moved forward and the gear were shortened to reduce nose over during a power push. Full up elevator was required during this style of launch.
On the second model the wheels did not have bearings. The axels were moved forward and the gear were shortened to reduce nose over during a power push. Full up elevator was required during this style of launch.
Last edited by sahartman21; 03-13-2018 at 03:09 PM.
 02-27-2018, 09:55 AM
#127
Thread Starter
Join Date: Nov 2007
Location: Fritch,
TX
Posts: 2,060
Likes: 0
Received 0 Likes
on
0 Posts
I added some tail weight to balance the model at 3 7/8" back from the front of the wing saddle.
The tape was later removed and I plan to use about 0.35 ounces of lead-epoxy mix (the weight of the lead tape used) instead of the tape. This will be installed at the rear of the model inside the fuselage.
The tape was later removed and I plan to use about 0.35 ounces of lead-epoxy mix (the weight of the lead tape used) instead of the tape. This will be installed at the rear of the model inside the fuselage.
Last edited by sahartman21; 03-10-2018 at 08:34 AM.
03-03-2018, 11:54 AM
#128
Thread Starter
Join Date: Nov 2007
Location: Fritch,
TX
Posts: 2,060
Likes: 0
Received 0 Likes
on
0 Posts
The first flights on the Miss Ashley were uneventful. The model needed some aileron trim and some down trim to fly to my satisfaction. I also added some tail weight to increase the elevator sensitivity and quickly turn back on #1 pylon. In my opinion this version of the model, standard long nose, tracked better than the one that I shortened the nose in the earlier thread.
On race day the model flew better than I did and my first couple of races were flown very wide around #1 pylon. An adjustment was made and during the next race the course was better around #1 but I had a midair between #2 and #3 pylon. We must have just barely touched the models as I didn't realize there was a midair until I inspected my model after the race. I was missing half of the horizontal stabilizer and therefore the backup model was brought out.
Both models were fast as any that I raced. Unfortunately my flying skills were not quite up-to-par but I managed to get a 1:10 for an 11 lap race. The good thing is that I managed to finish the Phoenix QM40 Classic and bring home both of my models.
Last edited by sahartman21; 03-10-2018 at 08:34 AM.
03-03-2018, 12:04 PM
#129
Thread Starter
Join Date: Nov 2007
Location: Fritch,
TX
Posts: 2,060
Likes: 0
Received 0 Likes
on
0 Posts
I've continued on my other Miss Ashley. The cutout template was taped on and I used a model knife to mark the location of the cuts.
The template is a big success and it saved me significant time on cutting out the hole. Below are the pictures:
The template is a big success and it saved me significant time on cutting out the hole. Below are the pictures:
03-08-2018, 05:51 PM
#130
Thread Starter
Join Date: Nov 2007
Location: Fritch,
TX
Posts: 2,060
Likes: 0
Received 0 Likes
on
0 Posts
Below are links to the carbon fiber products used in the model:
7 and 14 thousandths carbon fiber laminates:
http://www.cstsales.com/carbon_laminates_48.html
Carbon Fiber Tow (12K)
http://www.cstsales.com/carbon_tow.html
This site provides tanks and motor mounts
http://www.darrolcady.com/Jett_Produ...t_products.htm
7 and 14 thousandths carbon fiber laminates:
http://www.cstsales.com/carbon_laminates_48.html
Carbon Fiber Tow (12K)
http://www.cstsales.com/carbon_tow.html
This site provides tanks and motor mounts
http://www.darrolcady.com/Jett_Produ...t_products.htm
Last edited by sahartman21; 03-11-2018 at 05:11 PM.
 05-12-2019, 06:12 PM
#134
Thread Starter
Join Date: Nov 2007
Location: Fritch,
TX
Posts: 2,060
Likes: 0
Received 0 Likes
on
0 Posts
https://www.theworldmodels.com/store...ctric-Retracts

 05-06-2023, 05:25 PM
#137
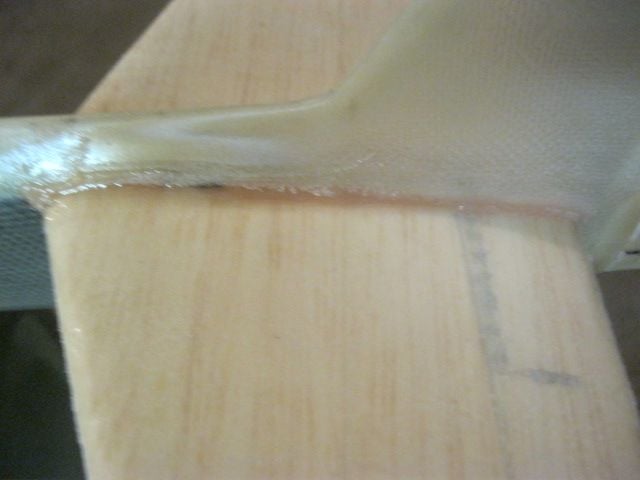
During the Ashley MM build thread the fuselage nose cone was identified as having some down thrust. This is also seen with the pictures here.
The nose cone measured about 2 to 2 1/2 degrees of down thrust compared to the wing.
I reduced the down thrust by shaping the nose cone with a Dremel tool. I marked a 1/32" cut on the top of the nose cone and used the tools to reduce the down thrust. It now has a small amount of down thrust, possibly 1 degree.
This process took about 15 minutes to accomplish and was not difficult to address.


