


help with ys 1.20
 07-29-2015, 10:48 AM
#1

Thread Starter
Join Date: Nov 2013
Posts: 282
Likes: 0
Received 0 Likes
on
0 Posts
Ok guys I picked up a plane with a ys 1.20 with pump I found a manual it shows a check valve in the middle of line one line. But it doesn't have it.
But he does have the tank set up with a third line coming out the bottom of the cowl. I did run motor it runs great. But the tank builds up air pressure when I fill it.
Any ideas?
But he does have the tank set up with a third line coming out the bottom of the cowl. I did run motor it runs great. But the tank builds up air pressure when I fill it.
Any ideas?

 07-30-2015, 02:06 AM
#4

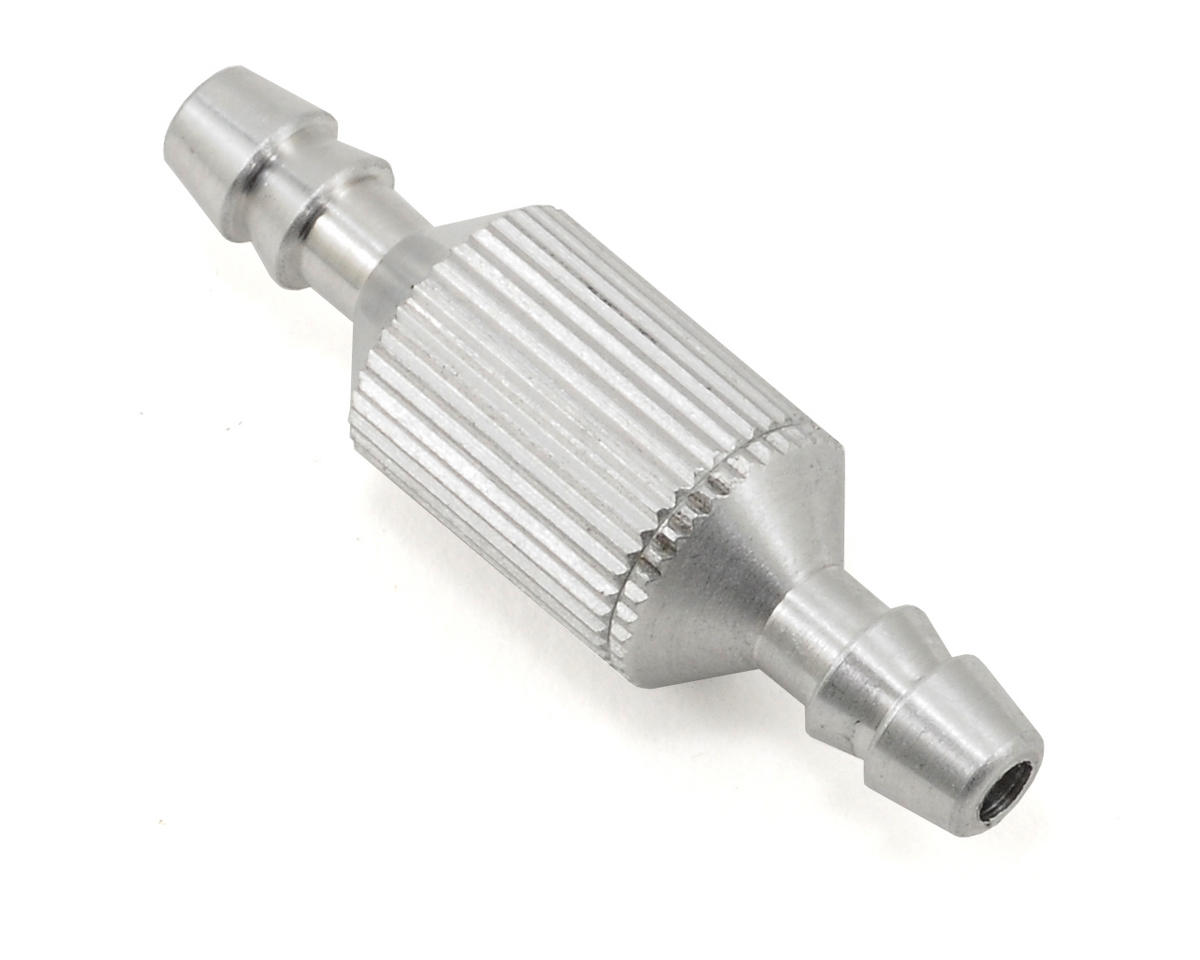
The oem check valve looks very much like a fuel filter,,If your tank is holding pressure then you must have the check valve in place. YS engines use that tank pressure vs. muffler pressure,, that's normal
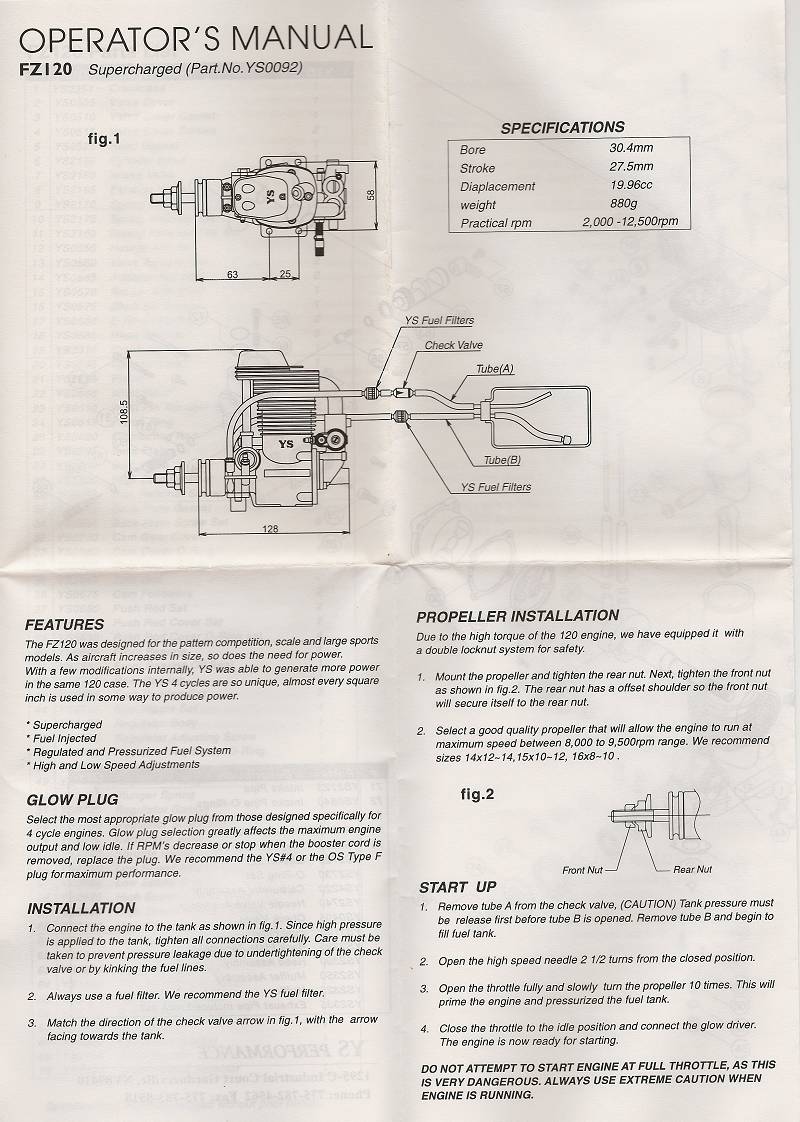
the third line is likely just for fueling and refueling
It looks like this,,,
120 plumbing
good luck
the third line is likely just for fueling and refueling
It looks like this,,,
120 plumbing
good luck
Last edited by scale only 4 me; 07-30-2015 at 02:14 AM.
07-30-2015, 05:38 AM
#5

The plumbing for all YS engines including the .45 and .61 two strokes is the same and the one way check valve must always be in place. This is what allows the tank to build pressure and move the fuel. The exact locations of the pump inlets and the the returns lines will vary from model to model.
The stock check valve which scale for me shows a picture has an arrow and this arrow must point in the proper direction that is show in all the diagrams posted above. This arrow is a little indistinct on the stock one so be careful of the direction its pointing, this is vital.
I beleve central hobbies has aftermarket check valves that are far better marked
After running the tank will always hold pressure for some time so when fulling its best to make sure you releve this pressure by removing the the return line first never the feed line sometime if now it can squirt for six feet or more.
I use to recommend only use Hayes tanks with YS and not the common bung type. Al;so a good practice is to wrap the tank with filament tape to help prevent splitting.
John.
07-30-2015, 07:24 AM
#6
Thread Starter
Join Date: Nov 2013
Posts: 282
Likes: 0
Received 0 Likes
on
0 Posts
Ok yes then indo have the check valve.
Ok so when I filled it the other day I just used the 3rd line and at about 3/4 full I could see tank building pressure Soni stopped.
So how do you think I should fill from now on?
From what I'm getting from instructions I should remove line a then when pressure is gone then fill thru 3rd line with line an still unplugged?
07-30-2015, 10:07 AM
#7
Hi
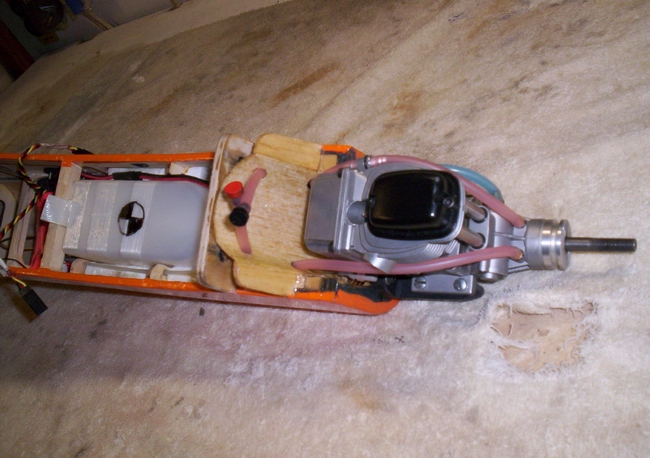
Recommend you get rid of the third line and use only a tank (preferably Hayes which eliminates bung plug problems) with a upper vent line and a clunk line. Also suggest you plumb your engine exactly as indicated in the YS drawing that scale for me posted above with one exception. That suggestion is to add two tee's to each line making sure the tee on the vent line is on the tank side of the check valve Now two short pieces of fuel line is added to each tee enough to protrude below the fuselage a tad in the cowlings air outlet hole at the bottom. both of these lines are plugged with a line plug.
Fueling is done by first removing only the plug in the vent line (notice in my picture one of the plugs is painted red) If you remove the clunk line first that will allow residual pressure in the tank to squirt fuel all over you. After the vent line is unplugged and the pressure has vented you now fuel from the other line (clunk line) and when full it will shoot out the unplugged vent line. After fueling it is important to replug both lines.
Also notice in my picture it shows how to use filament tape to reinforce the tank.
John
Last edited by JohnBuckner; 07-30-2015 at 10:11 AM.
07-30-2015, 10:12 AM
#8
Ok yes then indo have the check valve.
Ok so when I filled it the other day I just used the 3rd line and at about 3/4 full I could see tank building pressure Soni stopped.
So how do you think I should fill from now on?
From what I'm getting from instructions I should remove line a then when pressure is gone then fill thru 3rd line with line an still unplugged?
Ok so when I filled it the other day I just used the 3rd line and at about 3/4 full I could see tank building pressure Soni stopped.
So how do you think I should fill from now on?
From what I'm getting from instructions I should remove line a then when pressure is gone then fill thru 3rd line with line an still unplugged?
you can buy as a set here
http://www.hangar-9.com/Products/Def...?ProdID=HAN115
good luck
Last edited by scale only 4 me; 07-30-2015 at 10:15 AM.
08-06-2015, 05:05 PM
#12

My Feedback: (-1)
With the YS engine there are two places to go when the engine starts to run different then it was last week. Every YS pattern pilot has extra diaphragms in there flight box. The glow plug and diaphragms are about the only two parts that will give you a problem. I use the old 120 and the newer 110s and they have different diaphragms. I get mine from Central Hobbies and order the gasket and diaphragm for the 120s and the 110s just have a diaphragm. At the end of the day I run the engine dry before I leave the field. If I know the engine will be stored and not used for any length of time I open the regulator and clean out any fuel and oil then put the cover with the diaphragm back on but loose so there is no pressure on the diaphragm.
There are several different models of the YS engine too and the older ones are hard to ID. When they went to the FZ it became a lot easier but still, the best place to get info/help with the YS engine is in the YS factory support forum.
These are my all time favorite glow engines,due to the availability of the parts and the trust and help YS gives to there users I pretty much gave up using the OS four strokes, my number two favorite.
Forgot, if you have any crud in the regulator it will act just like a bad diaphragm. Flushing out the passages is also easy if needed.
Last edited by Gray Beard; 08-06-2015 at 05:07 PM.
08-06-2015, 06:46 PM
#16
My Feedback: (-1)
The YS is a bit different then any other four stroke so you can't compare it to an OS or Saito. If you read the item I posted it will show you. The diaphragm is inside the regulator housing. Just two screws gets you there. I don't know the model of engine you have, I have a couple of the 120 models, the NC F and FZ. I know nothing about the DZ models.
What mistake most people make with a YS is they can't keep there hands off the big brass regulator screw!!!!!!!!!!! It's easy to adjust on the FZ model but to tune the others that don't have the low end adjuster screw you have to balance the high end and that brass screw.
It's all covered in the YS forum or on a hundred different how to articles. The big trick is to keep your hands off things once the engine is in tune.
08-06-2015, 07:27 PM
#17
My Feedback: (-1)
I have a couple of the YS engines on my bench getting ready for some work. I just went out and used a .91 to show you the regulator and diaphragm. This one needs a new diaphragm!!I bought the engine as a parts engine but when I got it home I discovered all it needed was new bearings. Someone started to do the work but quit?? I don't have the hart to just use it for parts so 20 bucks for the engine and the cost of a set of bearings. I have the Bowman rings in stock.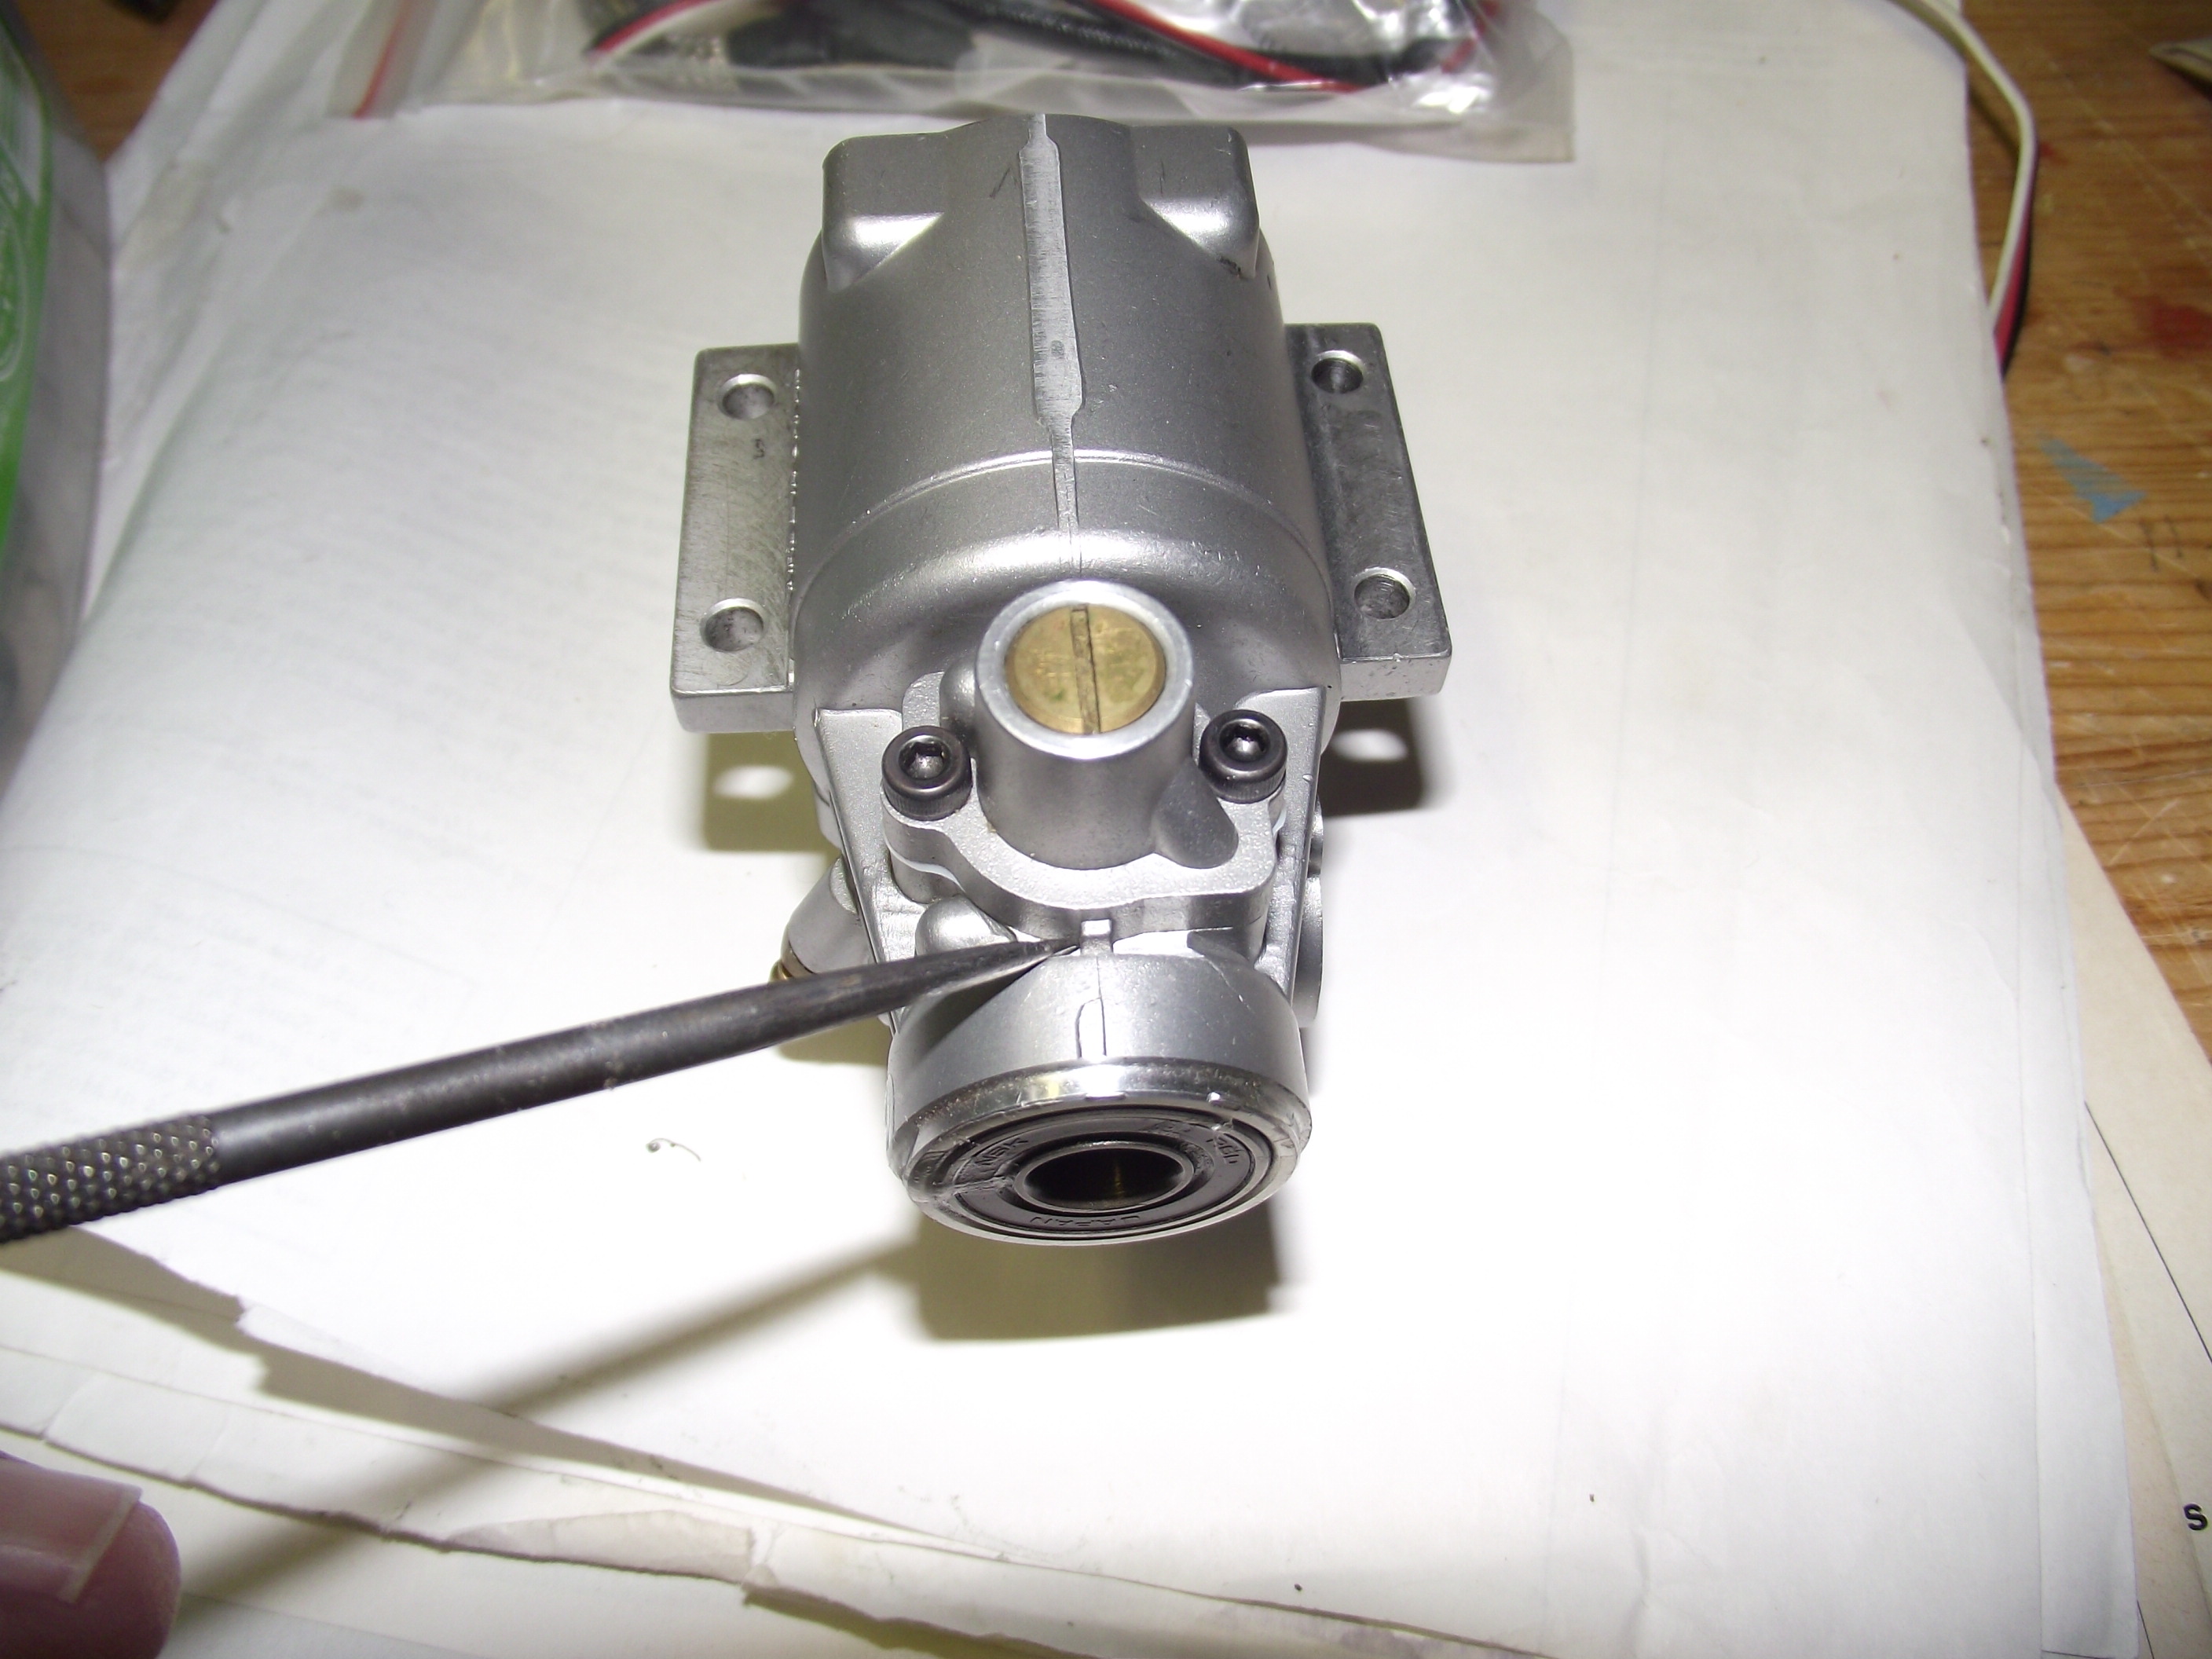
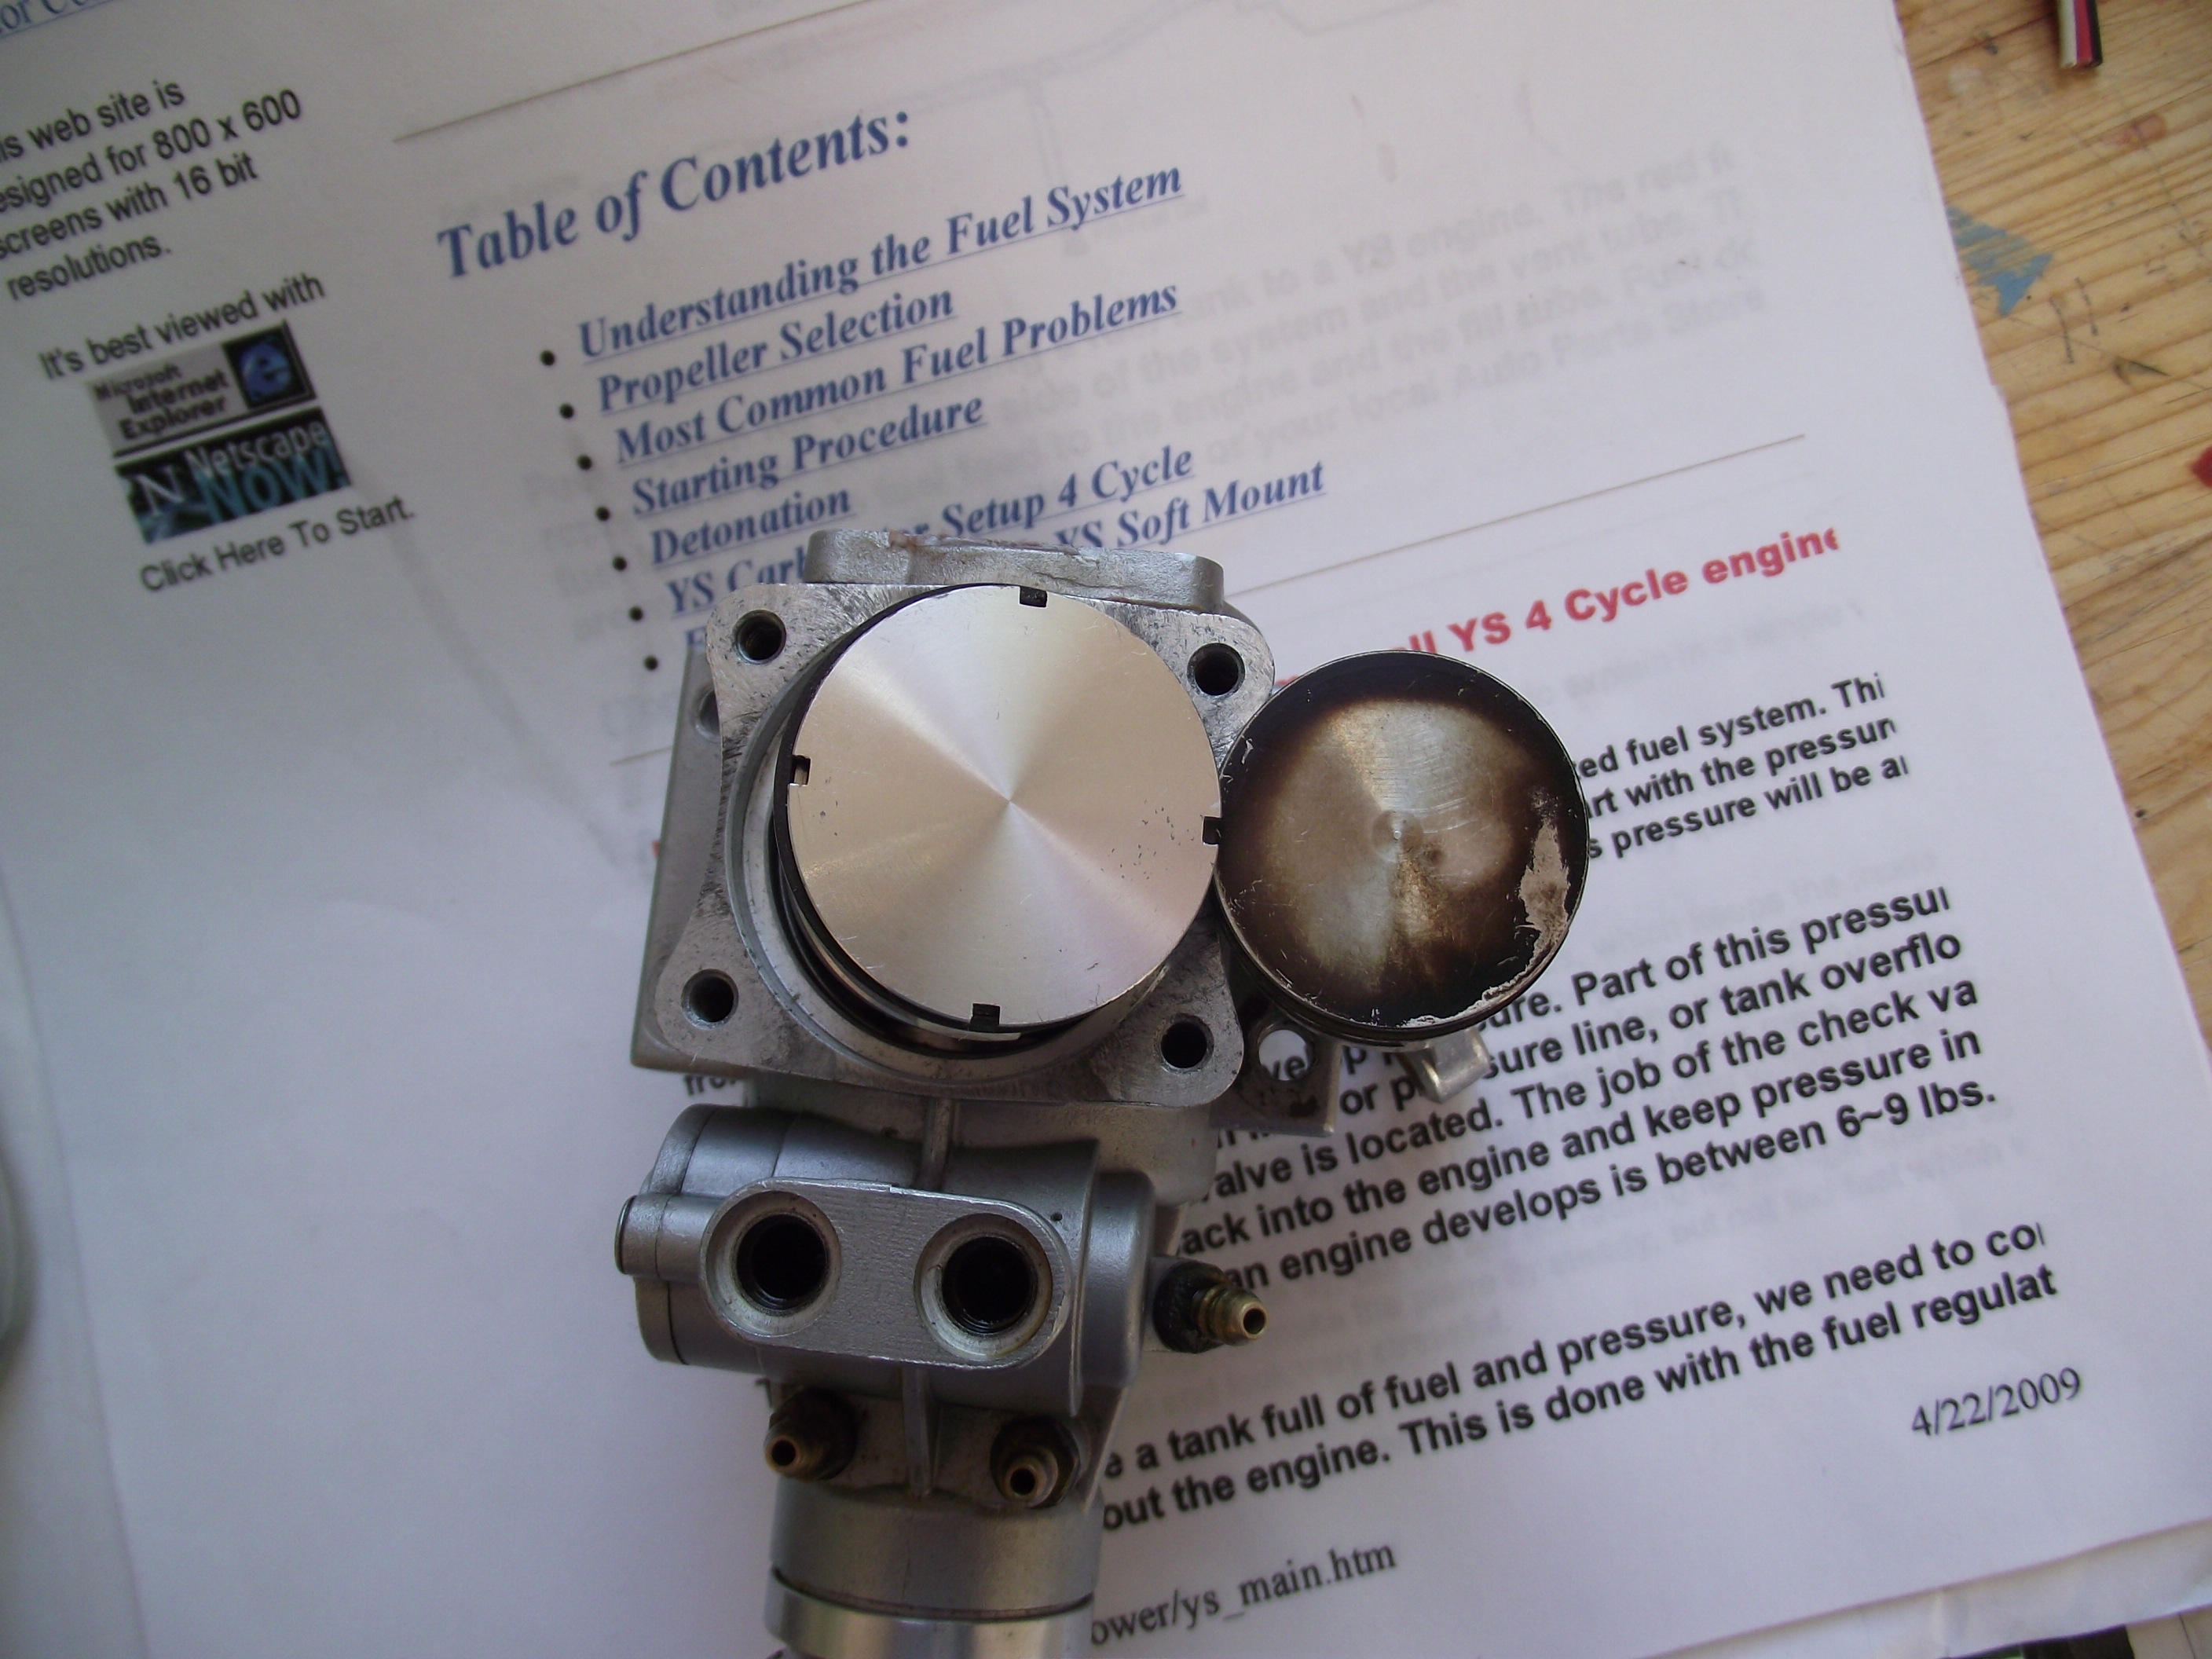
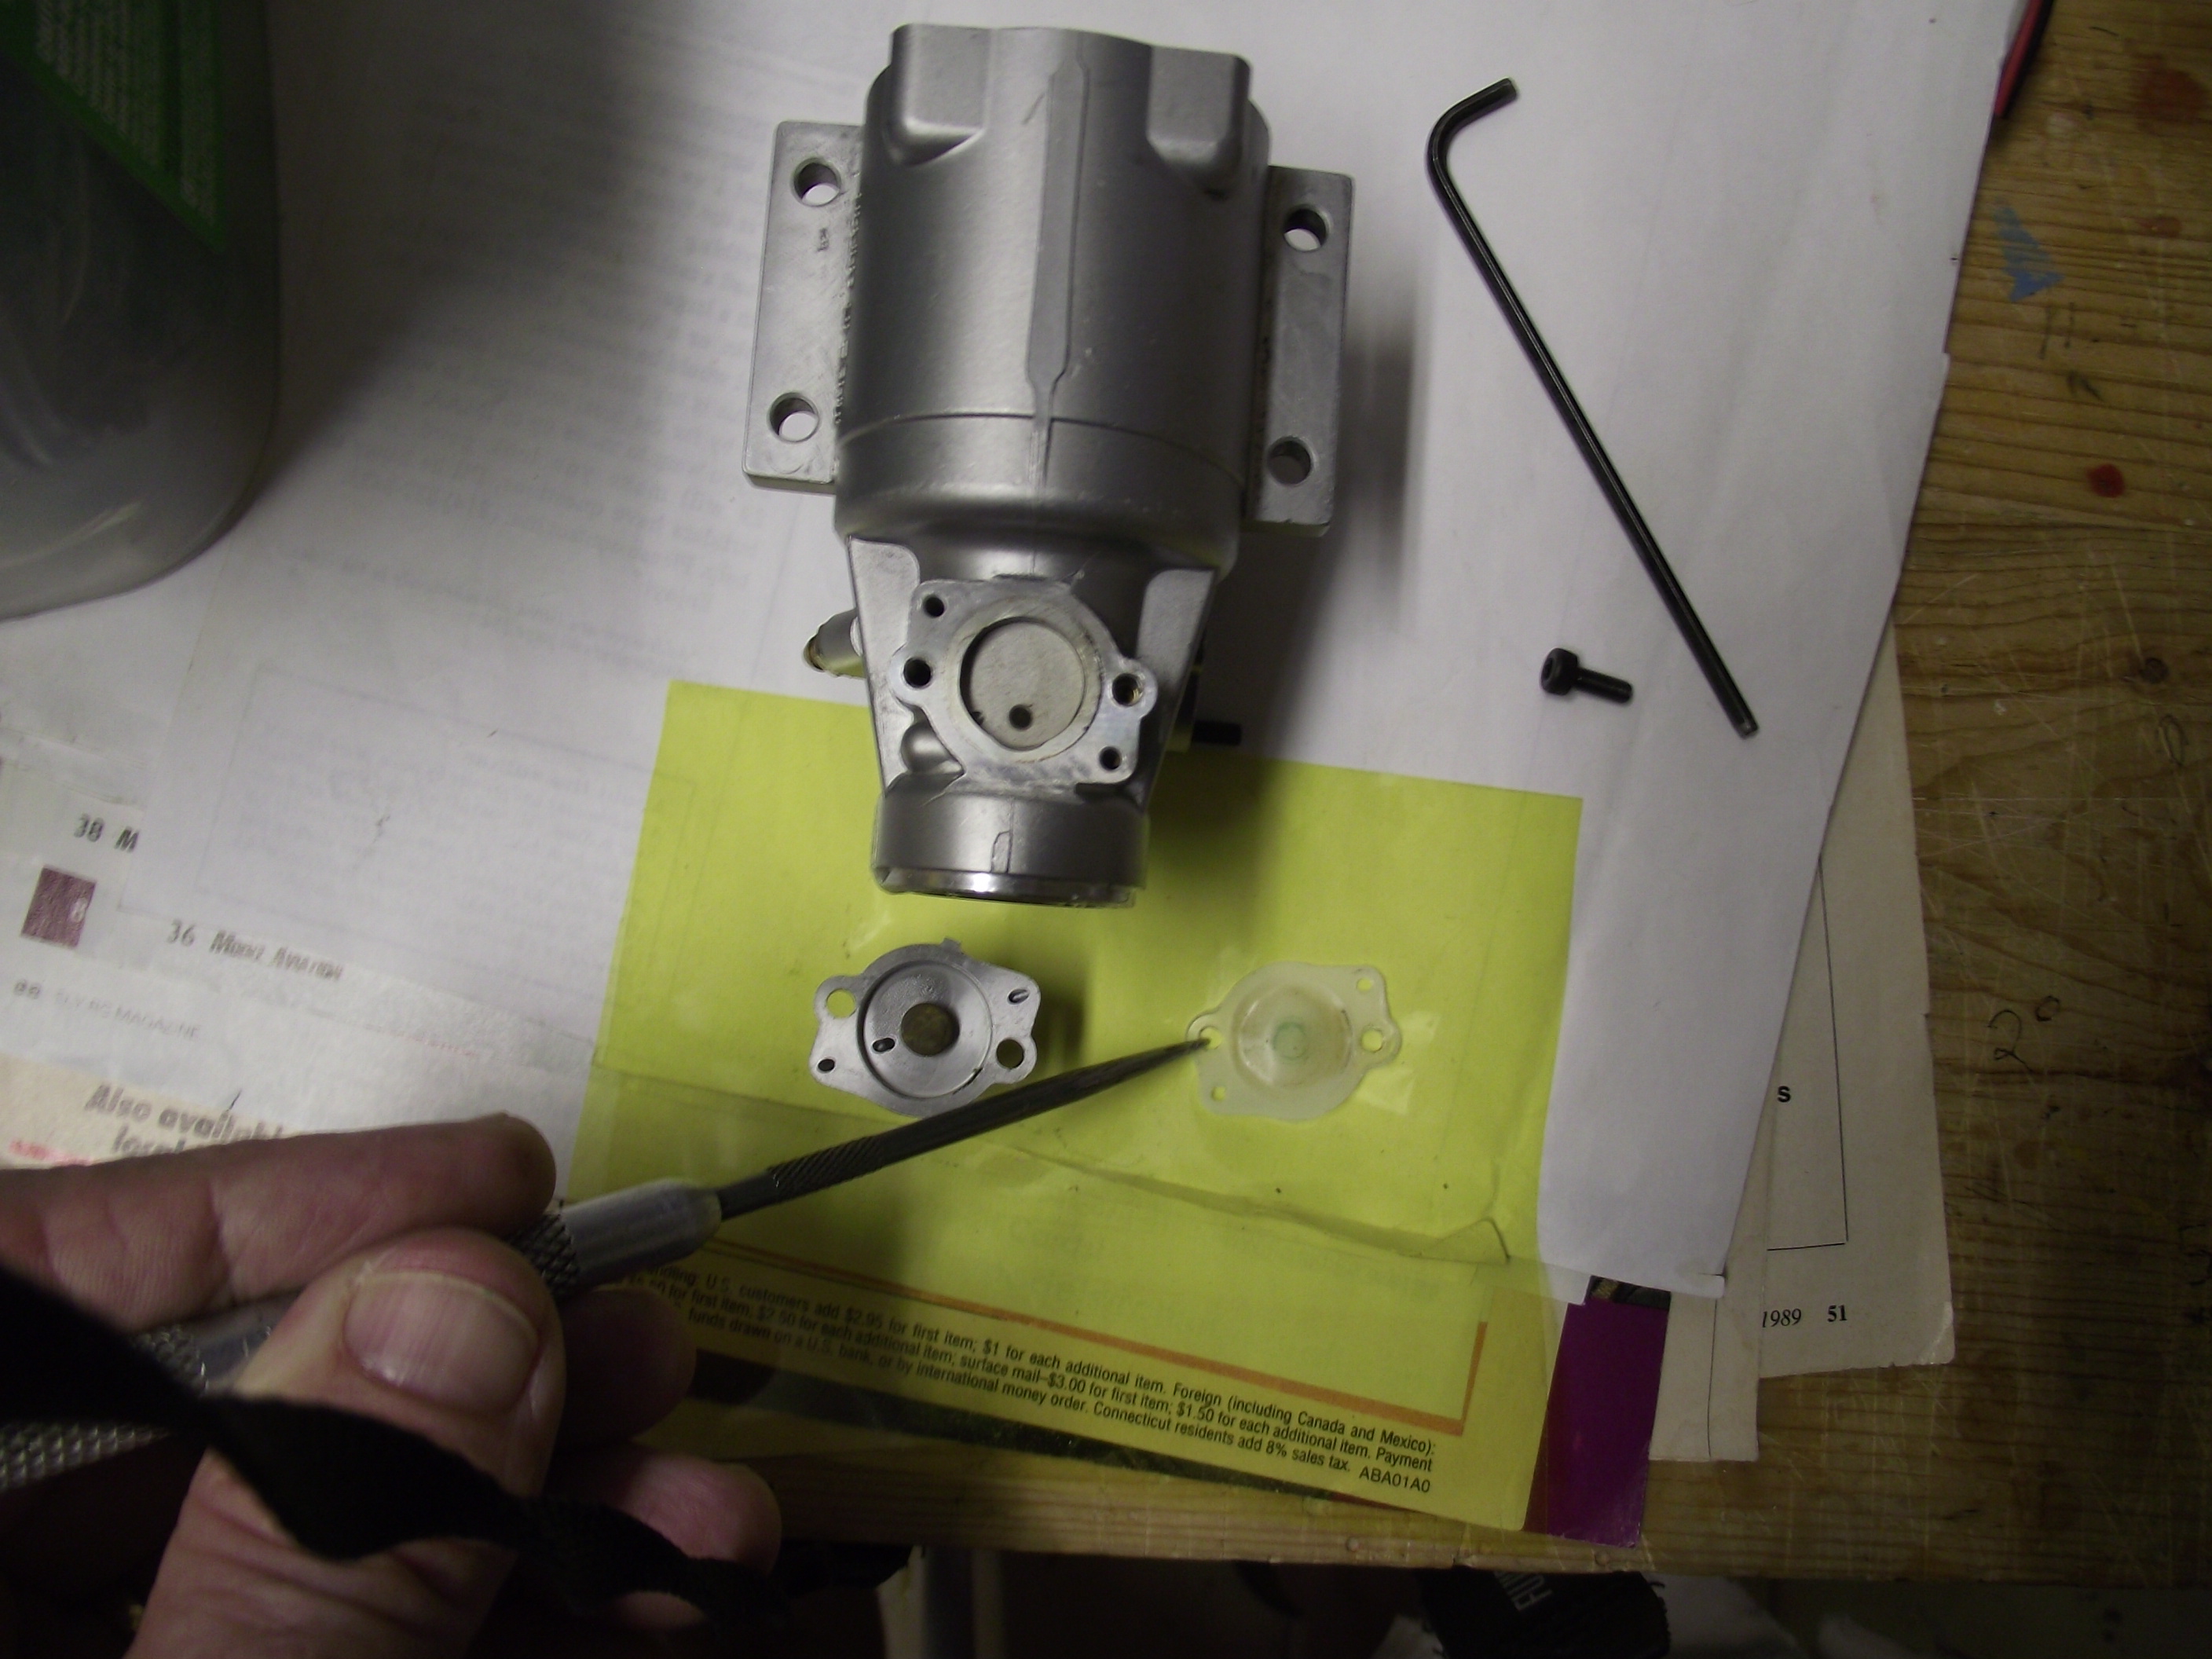 First photo is the regulator, note the little block I have the pointer on, this goes to the front. The pointer in number two is on the diaphragm. This model engine has the low in air adjuster so the usual adjustment for the brass screw is flush with the regulator cover. Most all of the how to articles will tell you in detail what this screw does. Most new people to YS just have to twist it as part of there tuning like they are tuning a two stroke or something then wonder why they can't get there engine to run correctly?
08-06-2015, 11:20 PM
#18
My Feedback: (66)
John Hayes is not making tanks anymore and they only went to a 16 ounce size which is a bit small for the 120.
Tetra Crank tanks are the best tanks and the ones I use for use on all of my YS engines.
Are you just rich on the needle or is it spiting excess fuel then going clear on the exhaust in a cycle?
Tetra Crank tanks are the best tanks and the ones I use for use on all of my YS engines.
Are you just rich on the needle or is it spiting excess fuel then going clear on the exhaust in a cycle?
08-07-2015, 02:57 PM
#23
My Feedback: (-1)
You can also look at photo number one where I have the pointer sitting on the casting block showing you the front. I also used to mark the case and housing with a line to match up to, it works but knowing the front from the back is better. I can tell my early engines from my newer ones when I see the mark. At some point knowing the front from the back finally sunk into my head.

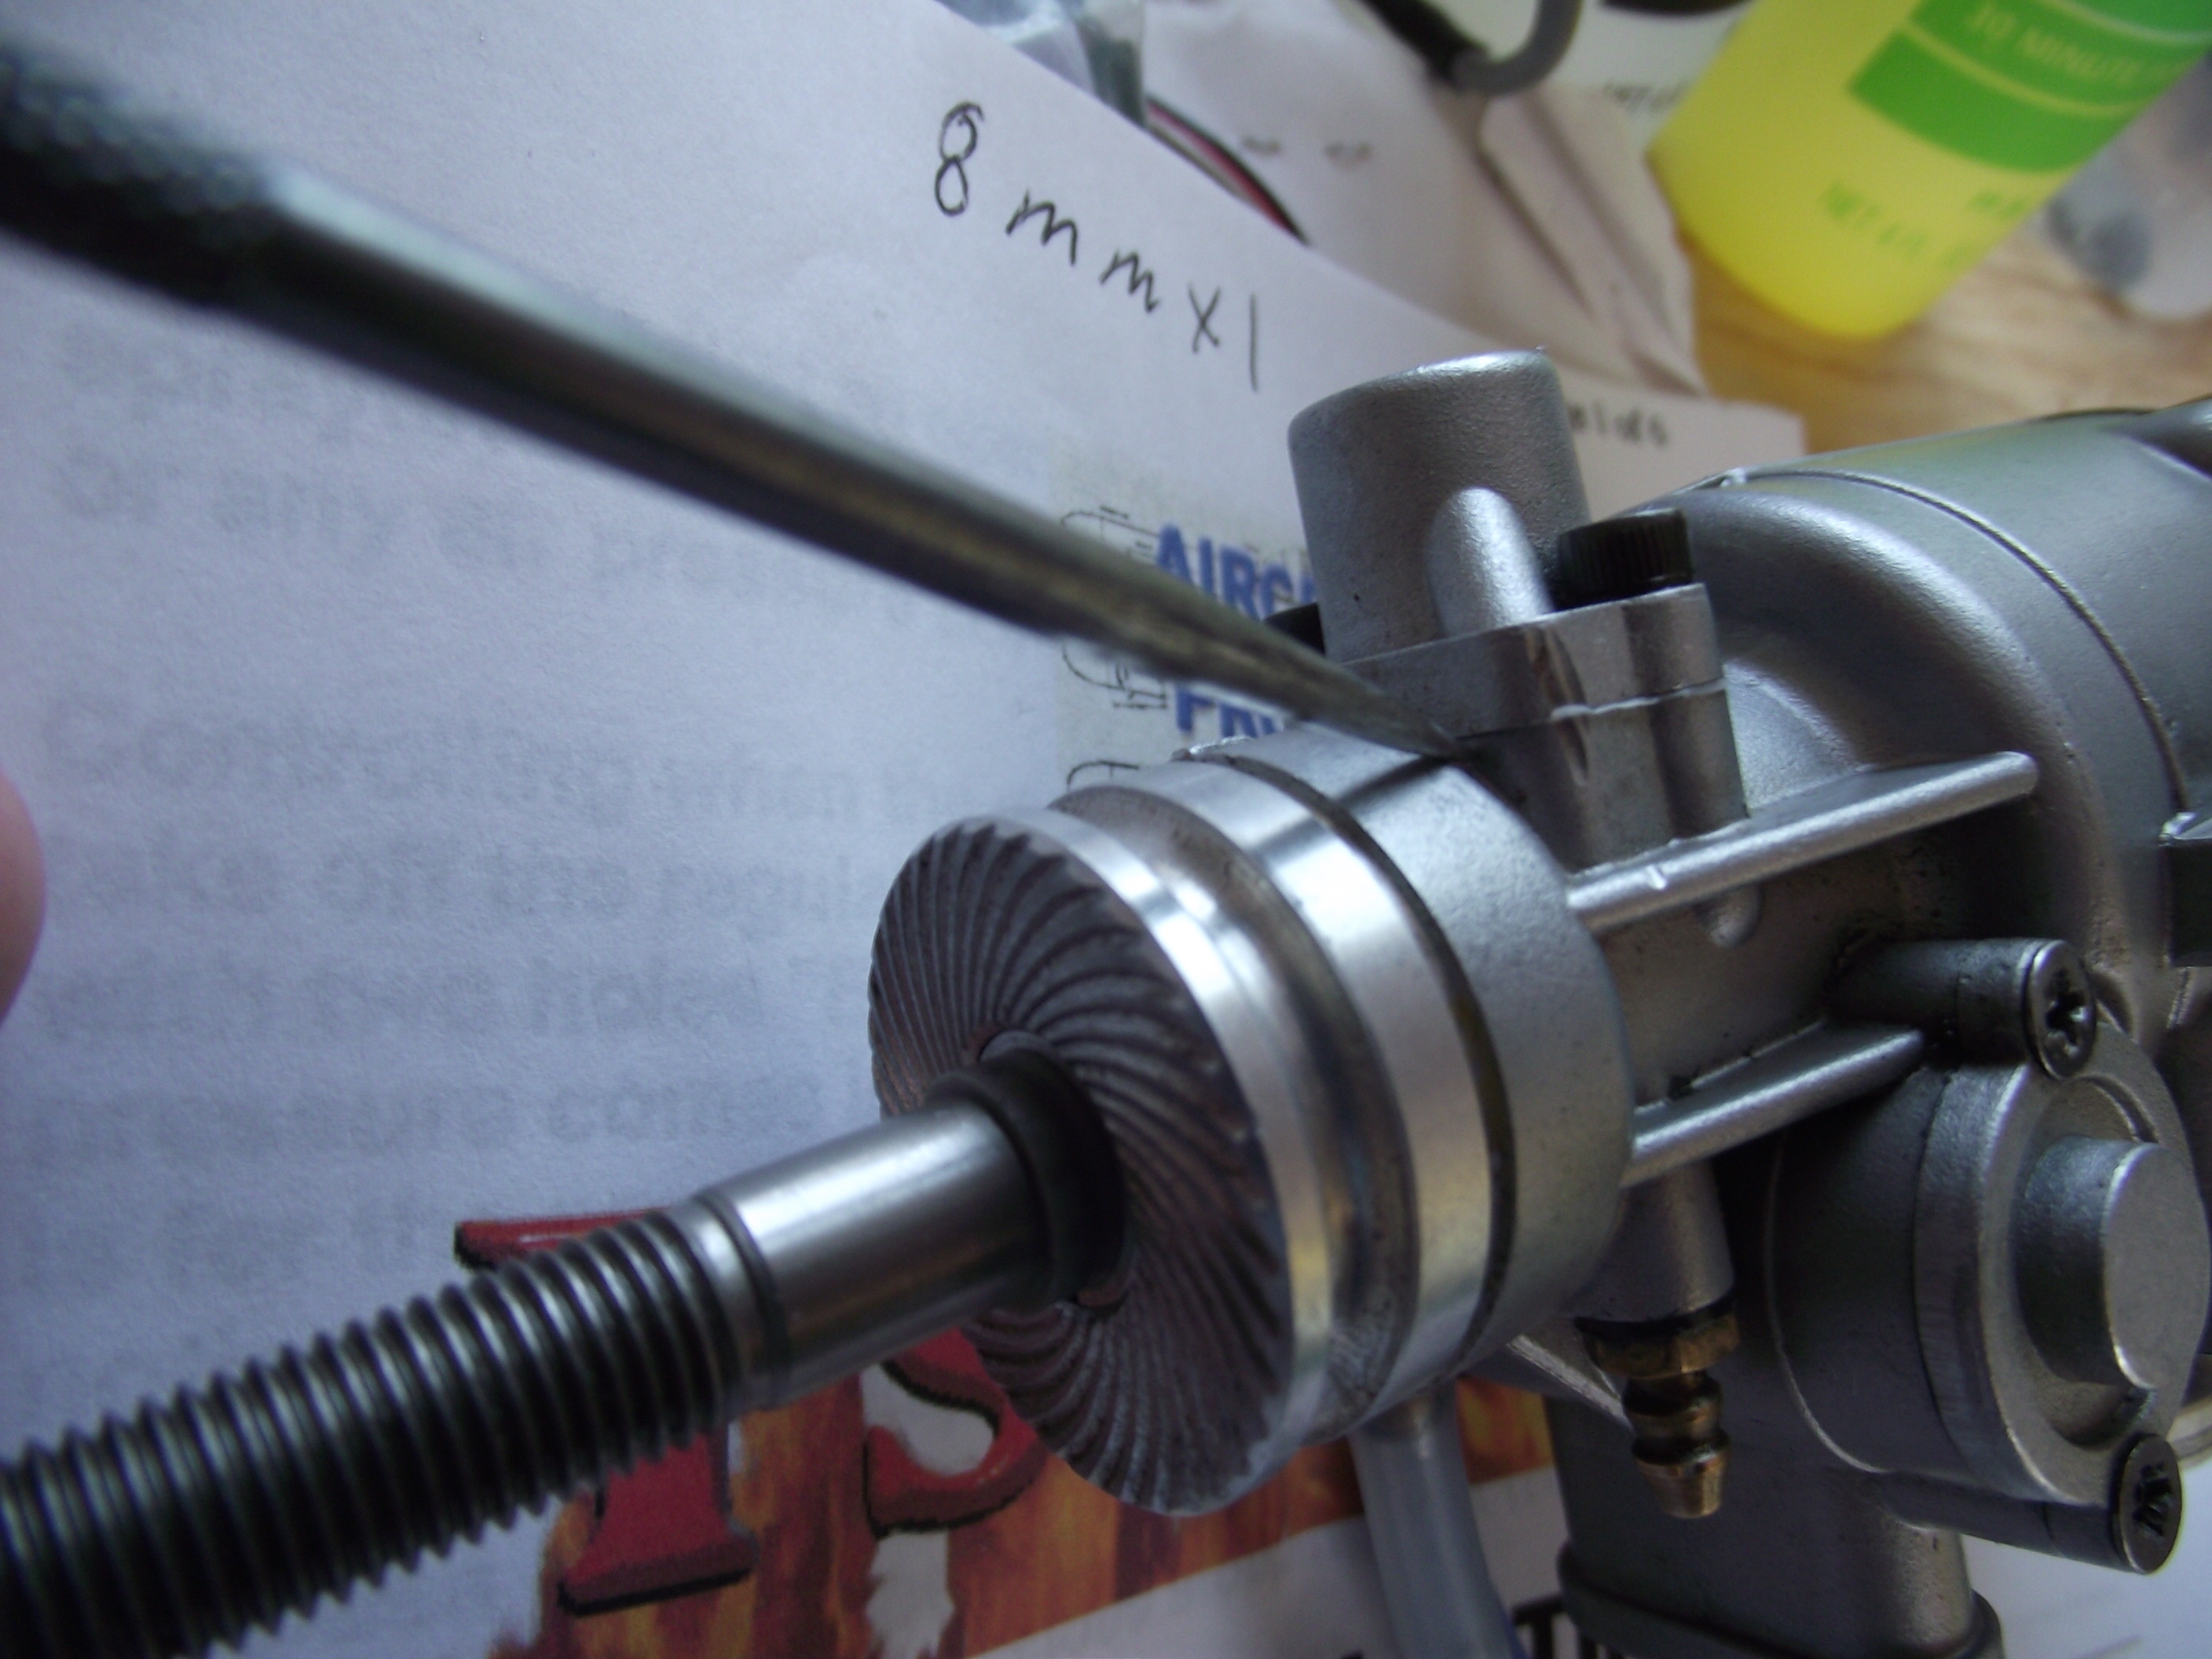
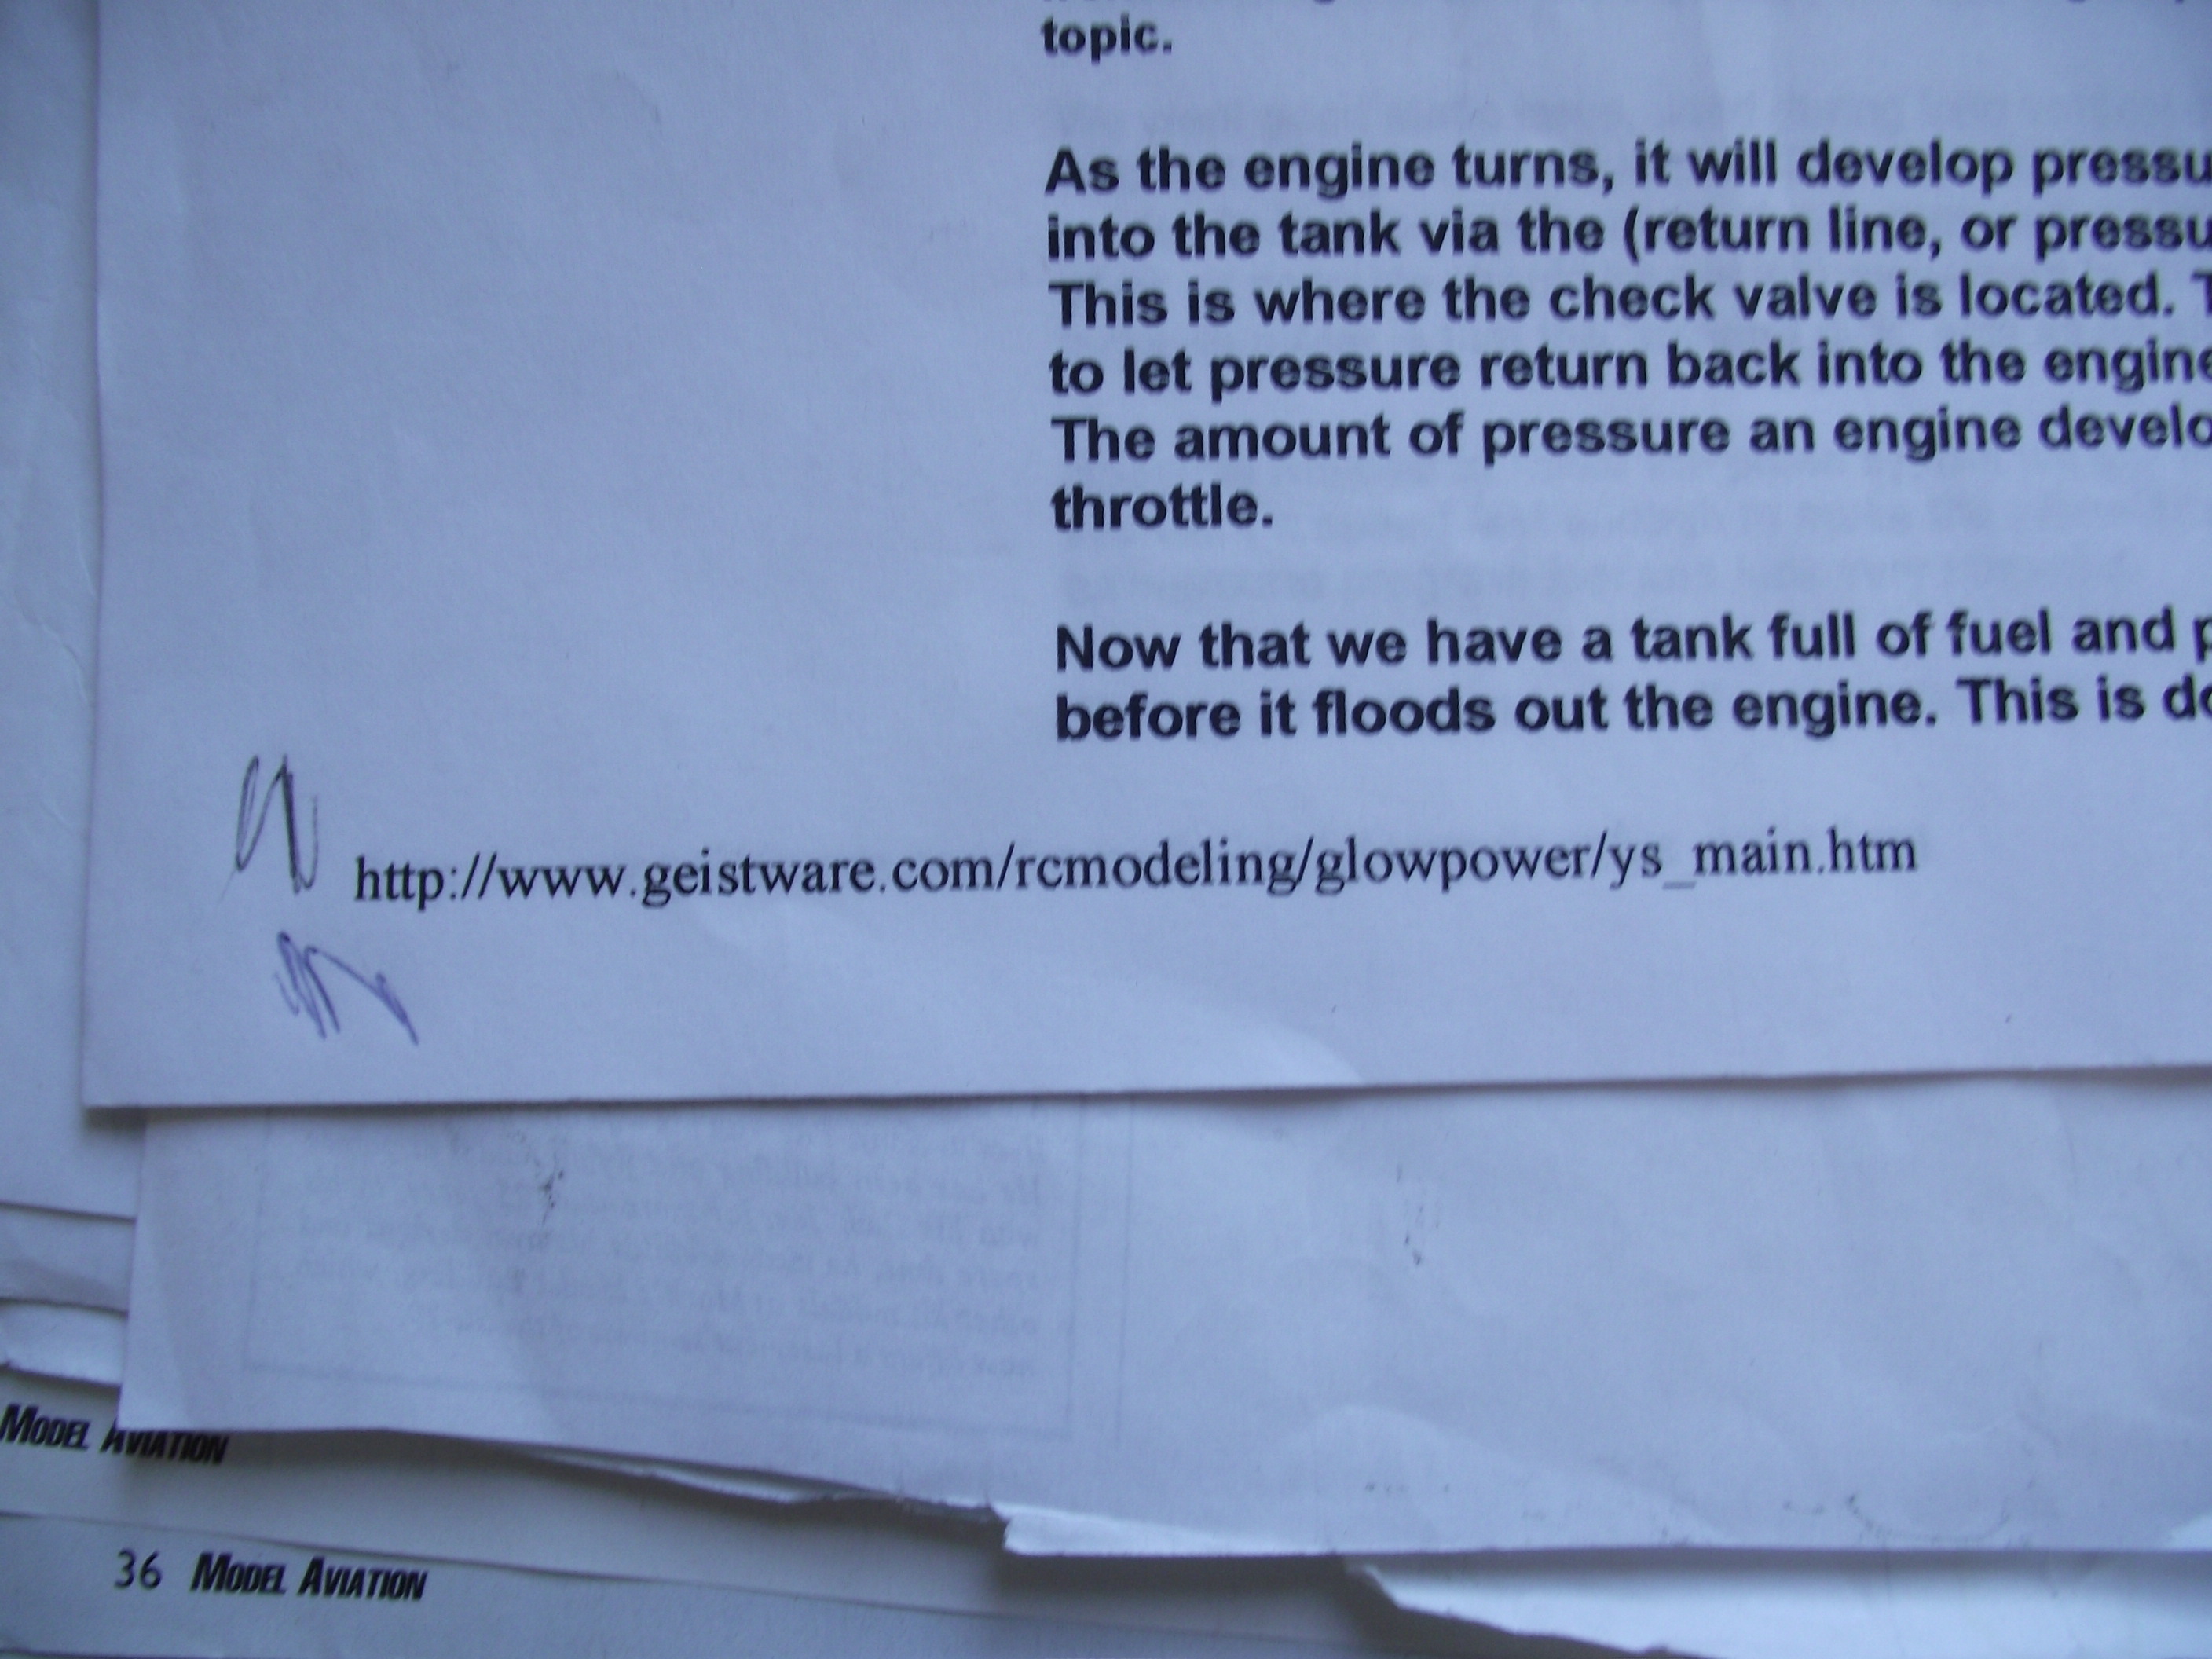 I was just out in the shop so took a couple of photos of two different 110s with the guide markings I ground into the case to make sure I had the diaphragm cover on correctly. Another little FYI. Years ago if you sent in your engine to YS servide they had the jig set up and ported the piston for you for free. It was just 4 or 5 little holes drilled in the piston top and the purpose was to put pressure behind the ring for a better seal. It worked so well that the YS factory started doing it on new engines. The 4 ports on the 110 are factory, the other piston is an old .91 without porting. I tossed in a page with an address for you to pull up too.
Last edited by Gray Beard; 08-07-2015 at 03:24 PM.
08-07-2015, 05:05 PM
#25
My Feedback: (-1)
As I recall there was only one diaphragm used in the 120. Just the diaphragm and a gasket. Look it up on Centrals web site. Buy 3 of them. I buy them just as a filler when ordering from Central to offset the shipping on the small orders I make. I need to place an order myself but waiting until fall when I start flying a lot more. I hate getting up early to beat the heat and wind!!!
Last edited by Gray Beard; 08-07-2015 at 05:23 PM.