2nd Build: Outrigger Airboat
 12-21-2010, 03:39 PM
#26

Thread Starter

I'm going to make my engine stand out of 3/32" aluminum plate, and I wanted to know if I braised the pieces together (there will be 2 sides and a top piece) will it be strong enough? The Braising rods I have are self-fluxing and the box says they can be used to repair carb bowls, outboard motor cases, etc. I am assuming it should hold fine - I'm not going to put an elephant sized engine on it. The engine stand is 6" long with an overall height of 5.5" plus the top of the radial mount. The top of the mount will be about 1" and taper out to fit the width of the hull (3.5")
 12-21-2010, 05:21 PM
#27
Senior Member
Join Date: Dec 2009
Location: winter haven, FL
Posts: 234
Likes: 0
Received 0 Likes
on
0 Posts
braising rods will not work on alumiunum
mig wire welder or tig welding
or alumuweld rods and propane torch i have used these and they work good
mig wire welder or tig welding
or alumuweld rods and propane torch i have used these and they work good
12-21-2010, 06:26 PM
#28
Thread Starter
ORIGINAL: 71dartswinger
braising rods will not work on alumiunum
mig wire welder or tig welding
or alumuweld rods and propane torch i have used these and they work good
braising rods will not work on alumiunum
mig wire welder or tig welding
or alumuweld rods and propane torch i have used these and they work good
12-25-2010, 08:01 AM
#30
Thread Starter
The aluminum braising failed. I dont think my torch is getting the whole piece hot enough. I was able to get a bead of fill down to tin the surfaces but keeping the whole bead hot enough to join the two pieces is impossible. I also think the braising rods I have melt at too hot of a temp. For now, I'm going to plan B on the engine stand.
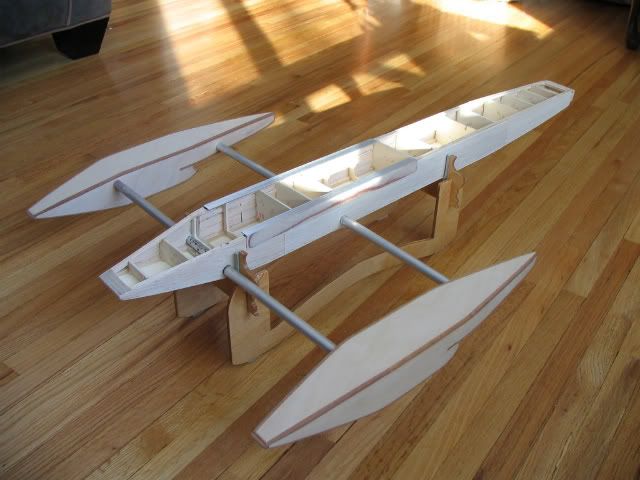
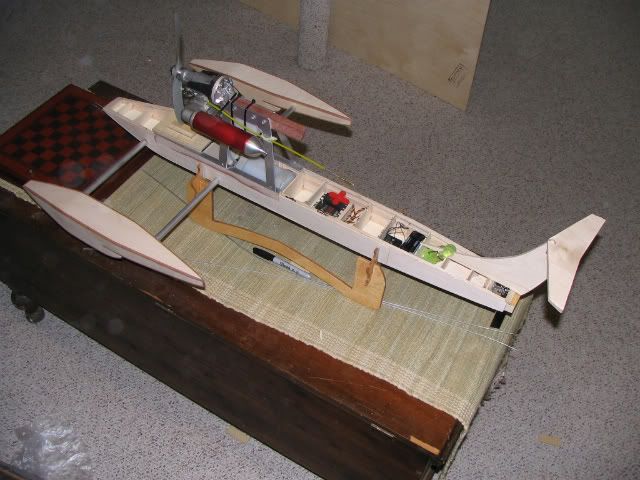
Progress on the hull has been slow but nice-ish.. I have the outer skin to go on yet and finish running the mechanical stuff before putting the lid on it. Weight as pictured 2lb 6oz and with all of the stuff yet to go into it piled on top I got 4lb 9oz so I think my 5lb RTR weight goal shouldn't be too far off. I didnt want to go much heavier since I'm only going to be running a .46 on it. The way I built it, I think I could put a 60 series engine on it and have the hull hold together I just dont know if it'll float standing still or not. When its done I'll put it in the bath tub and pile weight on to see just how much it can handle... Anyway - enough of my babbling.. Take a look and tell me what you think.
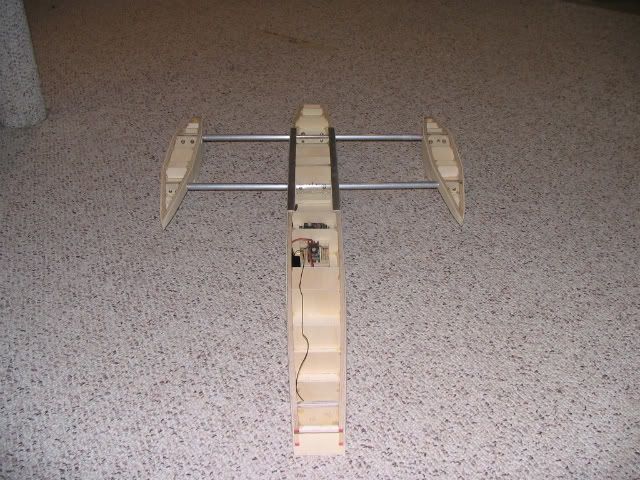

Progress on the hull has been slow but nice-ish.. I have the outer skin to go on yet and finish running the mechanical stuff before putting the lid on it. Weight as pictured 2lb 6oz and with all of the stuff yet to go into it piled on top I got 4lb 9oz so I think my 5lb RTR weight goal shouldn't be too far off. I didnt want to go much heavier since I'm only going to be running a .46 on it. The way I built it, I think I could put a 60 series engine on it and have the hull hold together I just dont know if it'll float standing still or not. When its done I'll put it in the bath tub and pile weight on to see just how much it can handle... Anyway - enough of my babbling.. Take a look and tell me what you think.
01-07-2011, 03:42 AM
#31
Thread Starter
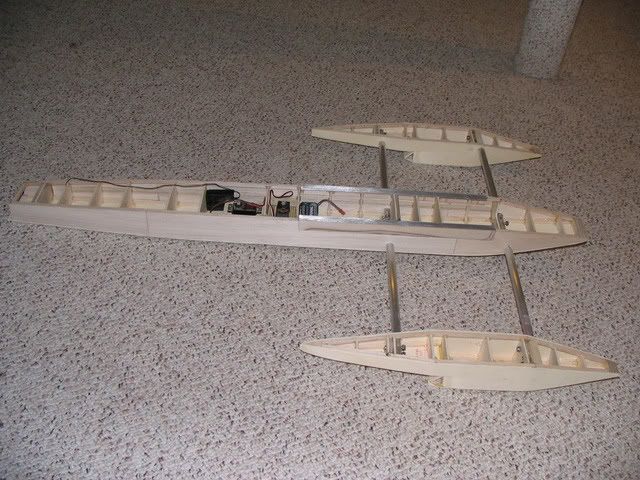
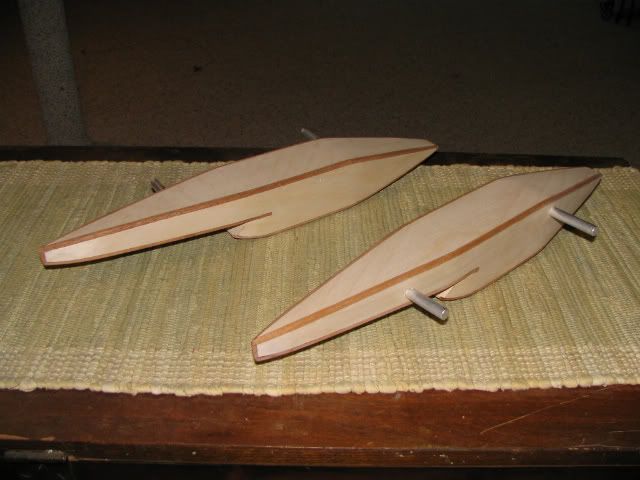
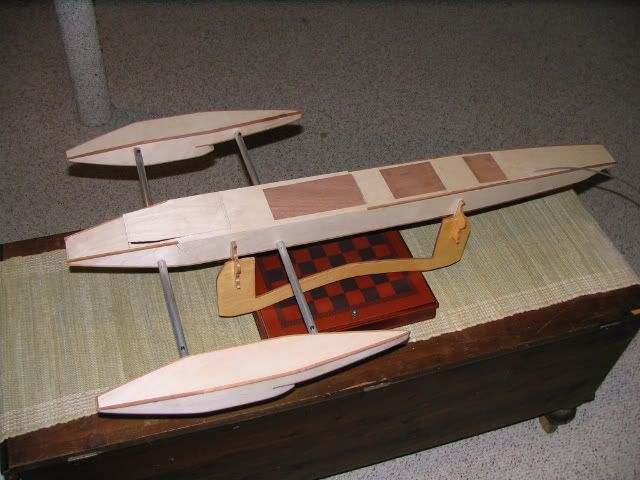
Working on getting the sponsons done, getting a rudder and engine stand made and get the mechanical linkages set up. Here's a progress update on the sponsons.. What do you folks think? The brown strips are mahogany.


01-08-2011, 11:53 PM
#32
Thread Starter
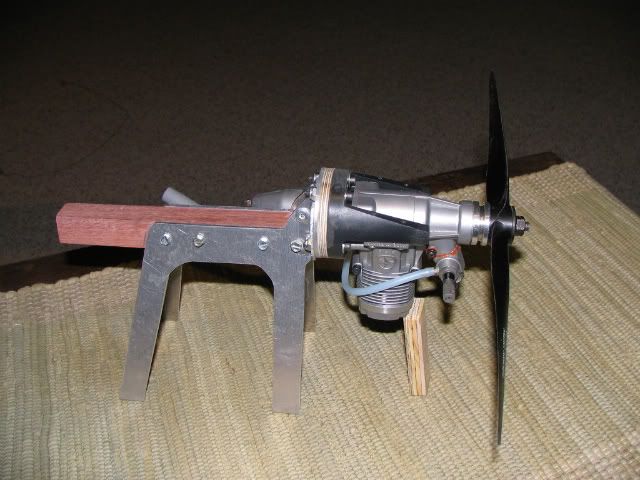
Homebrew engine mount almost done. Don't have a CNC or sheet metal break, so this is the best I could come up with for now. not totally done - still have a little more to do before I'd think about running the engine on it.

Sure would be nice to have a Tig or Mig welder right about now......
Sure would be nice to have a Tig or Mig welder right about now......
01-09-2011, 09:22 AM
#33
Thread Starter
Here's a closeup of my redneckin' skills. The underachieving bracing I used since my original plan failed. (why can't I have a full metal shop and wood shop in my basement??) I really really hope this will hold together with the TT on it.
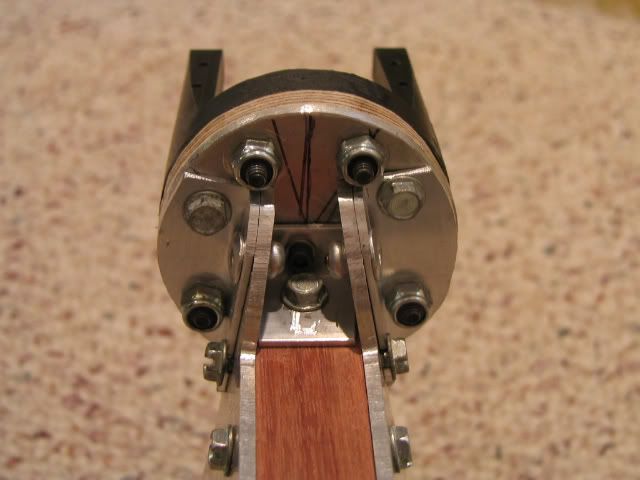
I'll be using 3M 5200 sealant on all of the parts/screws as extra insurance it stays together. If I had a sheet metal break, It'd be all aluminum with some nifty weight reduction holes in it.
I'll be using 3M 5200 sealant on all of the parts/screws as extra insurance it stays together. If I had a sheet metal break, It'd be all aluminum with some nifty weight reduction holes in it.
01-09-2011, 05:34 PM
#34
Member
Join Date: Dec 2009
Location: Parrish, FL
Posts: 39
Likes: 0
Received 0 Likes
on
0 Posts
yea its kinda hard to keep up with these guys who have machine shops, but to mee once you've bought all the equipment to have a machine shop it becomes a little more than just a hobby. I have a saw-zaw and a grinder and seem to get by but just barely I tell ya. Im not big on the outrigger type boats but it looks like its coming along nice
01-10-2011, 06:35 PM
#35
Thread Starter
ORIGINAL: stumpjumper1280
yea its kinda hard to keep up with these guys who have machine shops, but to mee once you've bought all the equipment to have a machine shop it becomes a little more than just a hobby. I have a saw-zaw and a grinder and seem to get by but just barely I tell ya. Im not big on the outrigger type boats but it looks like its coming along nice
yea its kinda hard to keep up with these guys who have machine shops, but to mee once you've bought all the equipment to have a machine shop it becomes a little more than just a hobby. I have a saw-zaw and a grinder and seem to get by but just barely I tell ya. Im not big on the outrigger type boats but it looks like its coming along nice
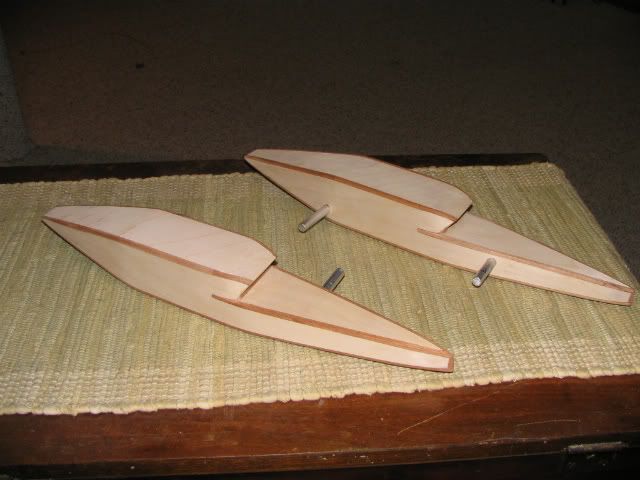
on a side note: The sponsons are almost done. I have a little more trimming to do but otherwise ready to get stained and finished. As soon as I get my hands on a rudder, I'll get the tub done and have a complete boat.
01-16-2011, 07:32 AM
#36
Thread Starter
The sponsons are done. I have them sanded and ready for finishing. I'm still waiting for a rudder to finish the center tub. I didn't want to set the control cables and skin it until I have the rudder because I don't know the exact place the cables need to be just yet. I should have something in a week or two, hopefully. Progress is on hold until I get that rudder.. (I hate the waiting game...)
01-17-2011, 09:19 AM
#37
Senior Member
Join Date: Apr 2004
Location: Eden Prairie ,
MN
Posts: 551
Likes: 0
Received 0 Likes
on
0 Posts
The sponsons look beautiful. how are you going to finish them? light fiberglass - looks hard with the slightly rounded edges. Spar Varnish? something clear I hope, cuz you dont wanna cover up the purdy wood.
01-22-2011, 10:12 AM
#38
Thread Starter
ORIGINAL: dadkins
The sponsons look beautiful. how are you going to finish them? light fiberglass - looks hard with the slightly rounded edges. Spar Varnish? something clear I hope, cuz you dont wanna cover up the purdy wood.
The sponsons look beautiful. how are you going to finish them? light fiberglass - looks hard with the slightly rounded edges. Spar Varnish? something clear I hope, cuz you dont wanna cover up the purdy wood.
Final sheen will be a satin sheen - I am using waterbased satin because in my workings with it at work, it makes a VERY slick surface. Far slicker than a gloss (epoxy sets as a gloss) so I am hoping this will help it get a little more speed.
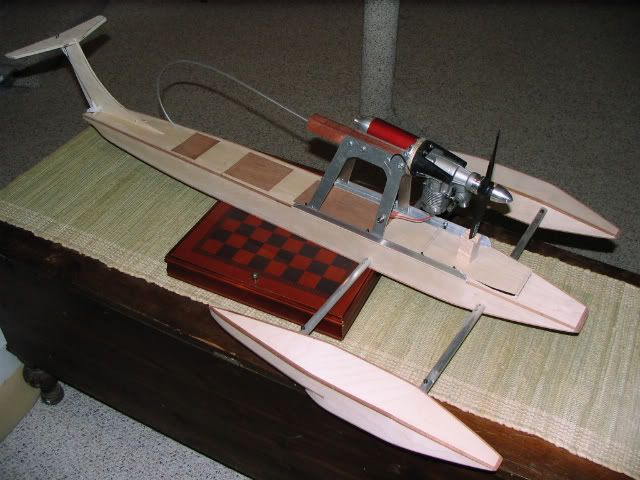
I made a stand for it - this should make it easier to set it up and get it started when I go run it.
 01-24-2011, 06:23 PM
#40
Thread Starter
ORIGINAL: jg2009
You are doing a fine job on your build, Looking forward to seeing the finished product.
You are doing a fine job on your build, Looking forward to seeing the finished product.
01-30-2011, 02:54 PM
#41
Thread Starter
I couldn't find a shop to make a rudder in a timely fashion, and money is a little tight to buy a ready-made speedmaster or equivalent rudder.. So I made this one. No drill press, no band saw.... Just a jig saw, a dremel, and a milwaukee drill. The metal is 3/16" thick, I'm going to shave the blade area down to about 1/16" at the front and 1/8" in the back. Metal control horns, and some ball-and-cups will finish the pull-pull linkage I'm going to use. I'm going to incorporate a fail-safe into the rudder in case of a strike thus the ball and cups.
The blade is 4 1/4" total length x 3/4" wide. There should be about 3 1/2-3 3/4" of blade in the water - this should be more than enough to steer well.
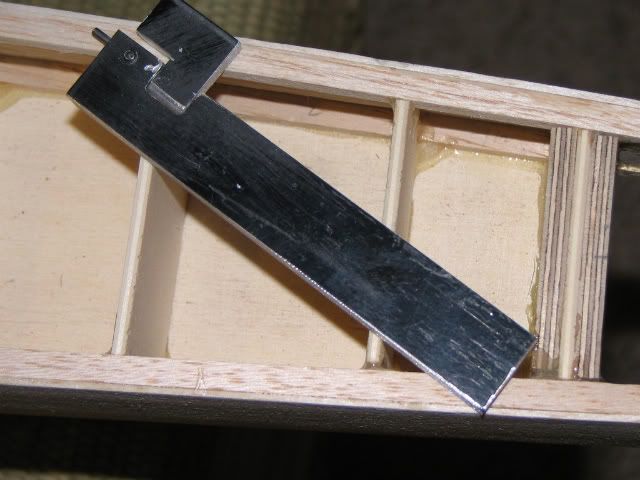
The blade is 4 1/4" total length x 3/4" wide. There should be about 3 1/2-3 3/4" of blade in the water - this should be more than enough to steer well.
02-11-2011, 07:42 AM
#42
Thread Starter
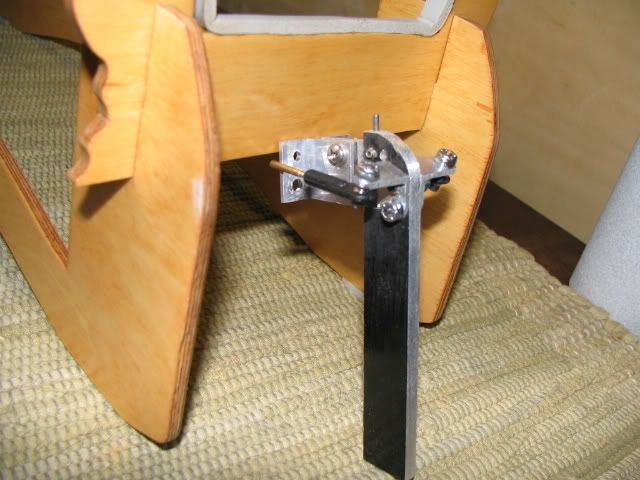
Other than sharpening the rudder blade, This thing is ready to go on. It took some time to get the rudder throw to work in the allotted space without hitting the hull. I also had to account for a break-away. Lesson learned: Don't build the hull until you have a rudder in hand. This should work relatively well - I'm using a pull-pull to eliminate the chance of slop. I might just try for a speed record if the thing doesnt sink first.

02-11-2011, 02:54 PM
#44
Thread Starter
ORIGINAL: Ozpulse
Thats some very nice work mate.
Cant wait to see this run!
Thats some very nice work mate.
Cant wait to see this run!
Going to bench-run the TT .46 maybe tomorrow and test out the new muffler..

 03-19-2011, 05:23 PM
#47
Thread Starter
Been trying to find the time to get the skin on this beast.. Made some progress as time permitted. Bottom is almost done - just some finishing details in the transom/rudder area. Once this is done I'll get the top skin on and get the hatch covers cut. I'll finish the top edge trim the same as the bottom - mahogany strips. I have some 1/32" mahogany sheets to use for the hatch covers, top skin will be the same 1/32" birch ply as the sides/keel. Should look pretty killer when its all stained and finished.
03-27-2011, 06:20 PM
#48
Thread Starter
Well, I have the top plate ready to glue on. After the plate is on I have some mahogany trim to get on it, and I have some tweaking of the controls to do. I have to sharpen my homemade rudder yet too. I have 1 coat of stain and 6-8 coats of polyurethane planned to finish the hull. I started cutting the first pieces for the hull's frame back in mid-November so I'll be at about 5 months of build time on this one. 2 months longer than my flatbottom build. Time has been tricky more recently with a recent spike in work loads at work.. The end is near, though.

04-04-2011, 07:11 PM
#49
Thread Starter
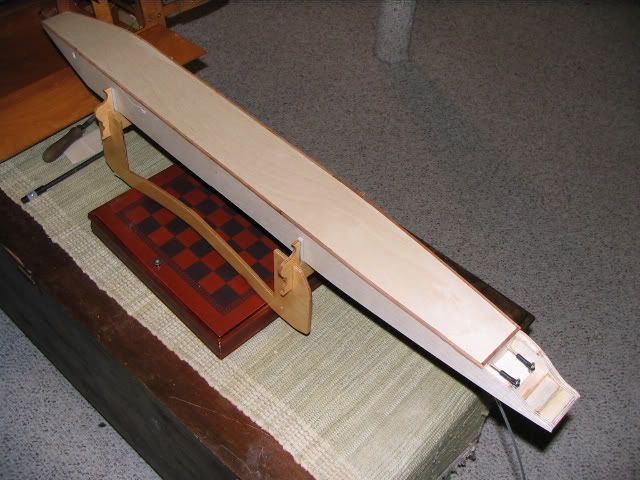
More progress! Not much left before I can start bolting everything on.. Just a teeny bit of work left on the tub but otherwise about 95% complete. I have some anti-glare lexan for the GPS's home up front, and I have a piece for over the fuel tank should I need to be able to see.. (the Mahogany plate will probably be for display and I'll use lexan for running it). The gap in the trim on top is intentional - the engine mount's rails would cover it up anyway so I left it out. I should have the engine mountable this week as well as everything else going on. The wing needs some work, but is almost ready for a rough fitting..
04-09-2011, 04:48 PM
#50
Thread Starter
Making final mock-up before finishing the hull. I am going to wait to mount the engine until I can do a float test in the bath tub to find a good spot for the engine. Should have a few coats of finish on tomorrow.