


finish my first airboat "Puddle Jumper"
 06-02-2016, 03:20 PM
#1

Thread Starter

Hi all i finally finished my air boat after much head scratching and throwing things in the bin
i started with some plans i down loaded from google images
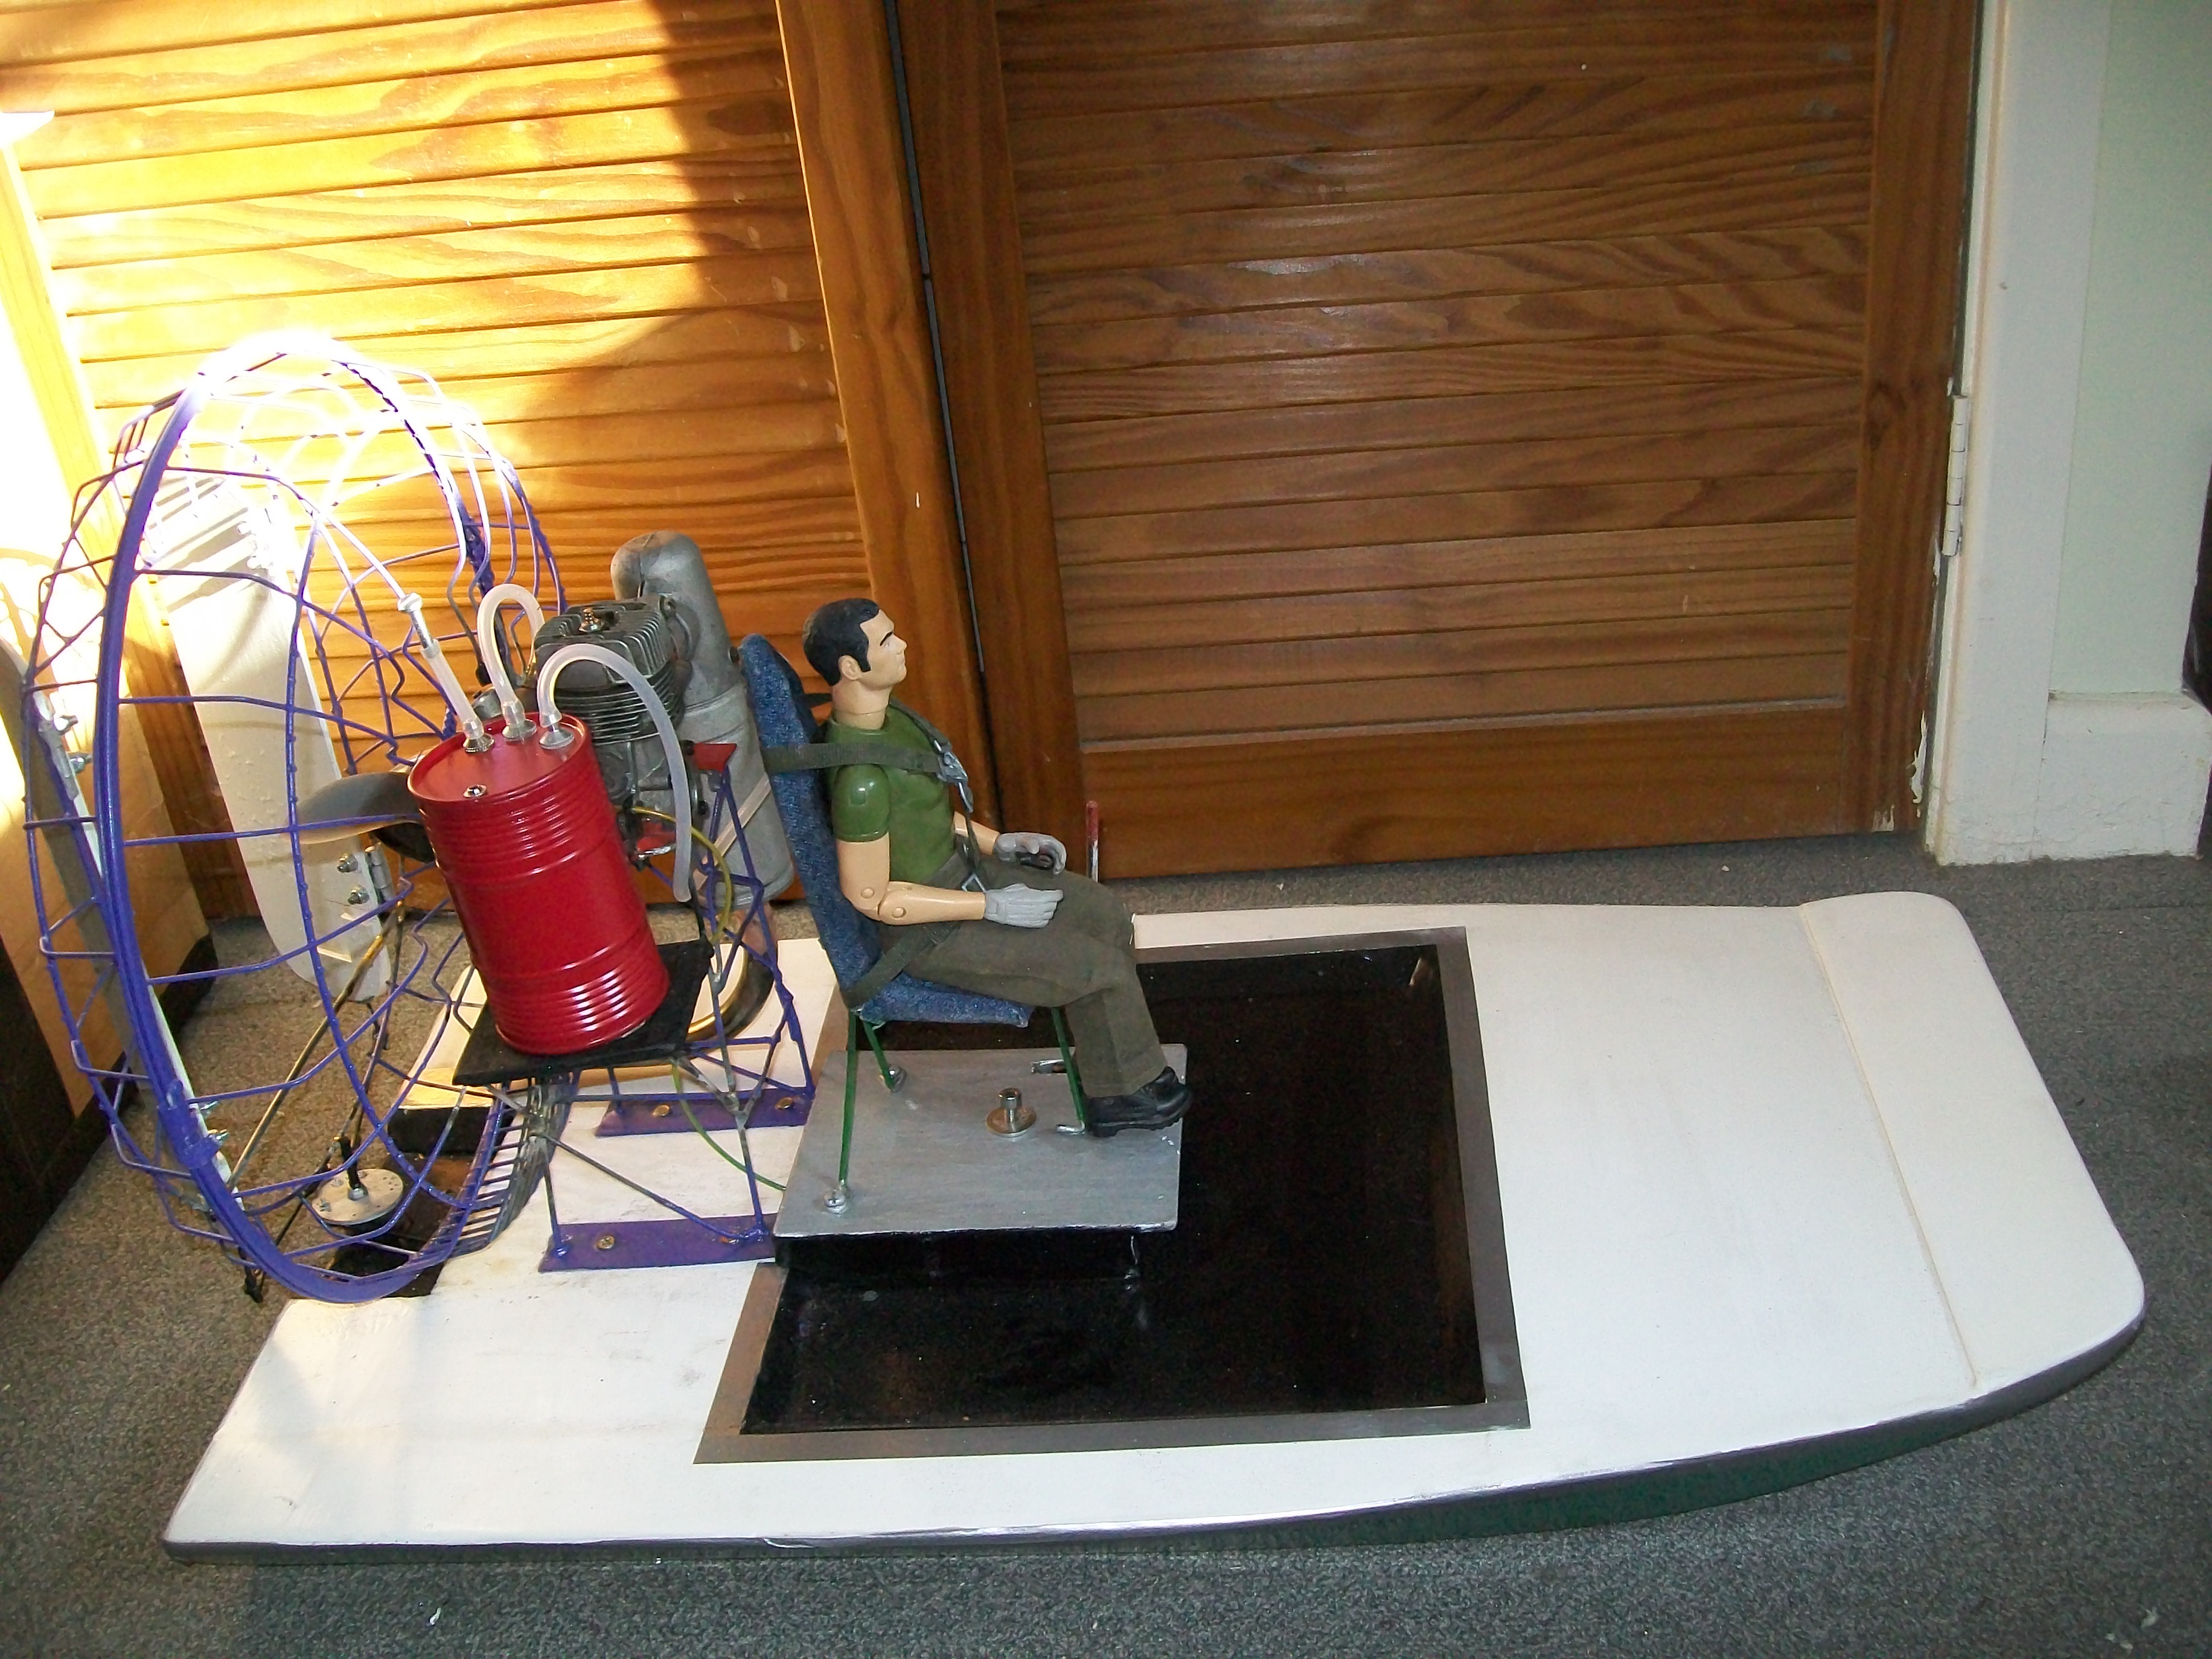
cut up an old electric fan for a prop gard and hay presto one air boat well it wasn't quite that simple
here are some pictures of the build


i started with some plans i down loaded from google images
cut up an old electric fan for a prop gard and hay presto one air boat well it wasn't quite that simple
here are some pictures of the build
Last edited by Paulekins; 06-02-2016 at 03:22 PM. Reason: spelling
 06-02-2016, 05:06 PM
#2
Wow, awesome build and looks good too. What size engine are you using, and do you have a finished all up weight? Just trying to figure out how mine stacks up as I am using a .40 and weight before refinishing, hatch, and fuel tank is at 5 pounds. Thank you.
06-03-2016, 08:35 AM
#3
Thread Starter
hi it has a tiger 40 engine and it weighs in at a massive 10lb 12oz with battery and a full tank of fuel it dose float but its a bit tail heavy
will have to see how it looks under power to see if i need to move some weight forward
will have to see how it looks under power to see if i need to move some weight forward
06-03-2016, 09:23 AM
#4

At nearly 11 pounds, a .40 isn't going to move that boat very well. My 8lb flat bottom boat with a 11cc (.65) engine barely went 25mph. Speed isn't the biggest concern, but if it can't get going fast enough to plane off, it's going to either want to dive (submarine) or just not move/steer very well.
My Selph Inflicted .40 series flat bottom boat is about 6-6.5 pounds and is powered by a .45 diesel. Untested on water, but it goes about 25mph on grass.
Try to lighten the boat up if you can - shifting weight around can help some.. But most often the best solution is to move the engine forward if it's riding on the keel. Moving the engine forward will take pressure off the bow if it's really digging in up front.
06-04-2016, 10:28 AM
#6
Thread Starter
moving the engine forward is a possibility but involves a lot of work moving servos changing linkages and altering the fan guard and reworking the deck
i am not sure how i will be able to remove weight though
the body is built from 3mm ply the spaces under the decking are filed with expanding foam so no weight there
the fuel tank (red barrel ) comes in at 140g plus 100ml of fuel
and the engine mount and fan guard cant weigh much being just a wire frame
so i am not sure where i will loose the lbs
06-07-2016, 12:54 PM
#8
Thread Starter
i never new tuning an engine could be such a pain in the a@#@s
hvaeing a heck of a prob just getting it started let alone tuned
i will figure it out eventually lol
unless there is some one out there that can give me an idiots guide to tuning
hvaeing a heck of a prob just getting it started let alone tuned
i will figure it out eventually lol
unless there is some one out there that can give me an idiots guide to tuning
06-07-2016, 03:47 PM
#9
First - ensure the glow plug is good. If the element in the plug isn't shiny, put a new one in. Next, have fresh fuel on hand. Now, richen both needles half turn from where they are now. Prime the engine by holding a finger over the carb with throttle set wide open. Flip prop until fuel reaches the carb. Flip once more. Clip the glow driver on and flip the prop smartly counterclockwise. If it doesn't fire in 4-5 flips, plug carb and flip one more time with throttle wide open. Flip until it fires. Keep the glow driver on it until the engine runs steady. Rev up to at least half throttle and if it doesn't quit, go to WOT. If it's running rough/smokey and unsteady, turn the main needle in until it cleans up and runs steady. If you keep turning the needle in until it starts to slow down a little, back the needle back out 1/4 then or until it runs smooth and steady again. Bring to idle and let it idle for a bit. Throttle up to WOT and note how the engine sounds as its revving back up. Slow revving and rough running, the idle mixture is too rich. Lean in small increments until it throttles to WOT clean and crisp. If it cuts out at all throttling to WOT from idle, richen the idle needle in small increments until it throttles smoothly. Once idle is set, run back to WOT. Let it run at WOT for a few seconds and give the fuel line a momentary pinch. If the engine cuts out, the main needle is lean. No change in rpm, it's at peak (this is the setting you want when the tank is nearly empty). If it speeds up slightly, this is the setting you want at a full tank.
06-08-2016, 11:54 PM
#10
Thread Starter
ok thanks for the info i will have another go later on this week
something i did notice was that the spray bar is upside down which wont help things
i have now put it the correct way up with the spray spraying into the carb instead of out of the carb lol
also i think i may have the rudders too far apart so with that and being back end heavy
i might end up redesigning the whole back end
ah well such is life
we will see how it goes once running
Last edited by Paulekins; 06-09-2016 at 12:01 AM.
06-11-2016, 11:55 PM
#13
Thread Starter
this is more of a foot note
just been reading through the threads which reminded me of a little tip that may make things a bit easier
when cutting out the templates instead of copying the dimensions onto your plywood
what i did (tip) i rough cut out the paper templates and pasted them to the ply wood
that way all the measurements are ready to cut out saves a lot of time and scribbling
06-20-2016, 07:06 AM
#15
Thread Starter
well finally let it see water
first attempt it was sitting way down on its bum and flipped over on a slow turn
so moved the engine and frame work forward by 1 1/2 " and added some lead to the bow
and took it out again and hey we have an air boat that moves at a reasonable speed
but it just sits too low in the water at low speed and at high speed the bow lifts nicely but it still sticks its bum under water
and with moving things forward it isn't as water tight as it was so after about 4mins the control box is full of water and it now chugs along like a tug
so i think a MK 2 is called for similar design but much much lighter and a bigger engine (.61)
carbon fiber for the fan guard and no expanding foam just good seals and an air frame type hull
06-23-2016, 11:17 AM
#16
Thread Starter
just managed to put a video up on you tube of the puddle jumpers first water trials
https://www.youtube.com/channel/UCYbg3RsYFmZPG8uUKGR7WyA
https://www.youtube.com/channel/UCYbg3RsYFmZPG8uUKGR7WyA
07-17-2016, 01:56 PM
#17
Thread Starter
well all was going well with things until i slipped on the bank dropped my DX6i and watched as the air-boat crash into the bank
https://www.youtube.com/watch?v=-wTygGmKFj8
https://www.youtube.com/watch?v=-wTygGmKFj8
07-17-2016, 01:58 PM
#18
Thread Starter
what a mess
the bow was easily fixed with some filler and a bit of paint
but the propeller guard well that's in the bin along with the engine mount
it was all too badly bent out of shape to do anything with
i made a new engine mount from a couple of blocks of wood
and replaced the fuel tank with a standard tank and mounted that parallel with the carb
as i was having probs with the fuel mix going from rich through to lean as the fuel went down in
the barrel
next was to sort out the mounts for the rudders this was a 1"x1" piece of wood cut in half
diagonally down the length giving me two triangular supports for the rudders with bracing across
the two and diagonal supports to help stabilize everything
last to sort out is the propeller guard for this i thought i would have a go at bending some 3mm carbon fiber rods
just to see how far they will bend as i want to use these on the MK2
and i was surprised to see i could bend them into a 10" circle
that's it basically a touch of paint and all done and working
when i have time i will take it down the pond for a splash about
07-17-2016, 11:26 PM
#21
Thread Starter
i would not say minimal damage i had to replace the whole back end of the air boat
it hit the bank so hard that the G force bent the engine mount (steel rods ) and threw the propeller guard into the prop
(again made from steel )
the pilot fortunatelly was wearing his 4 point harness but his arms and legs were stretched out in front of him
so not quite minimal

but all is well now
this was my first airboat build and i learned a lot in the build and the Mk 2 will be a lot better
it hit the bank so hard that the G force bent the engine mount (steel rods ) and threw the propeller guard into the prop
(again made from steel )
the pilot fortunatelly was wearing his 4 point harness but his arms and legs were stretched out in front of him
so not quite minimal
but all is well now
this was my first airboat build and i learned a lot in the build and the Mk 2 will be a lot better


