


The Sandman cometh..... ( AKA *** is a Holden HX Sandman Overlander....?!! )
 01-13-2015, 05:04 PM
#101

Thread Starter
Join Date: Jan 2004
Location: Queens,
NY
Posts: 559
Likes: 0
Received 0 Likes
on
0 Posts
Okay...finally up to date! Lol!
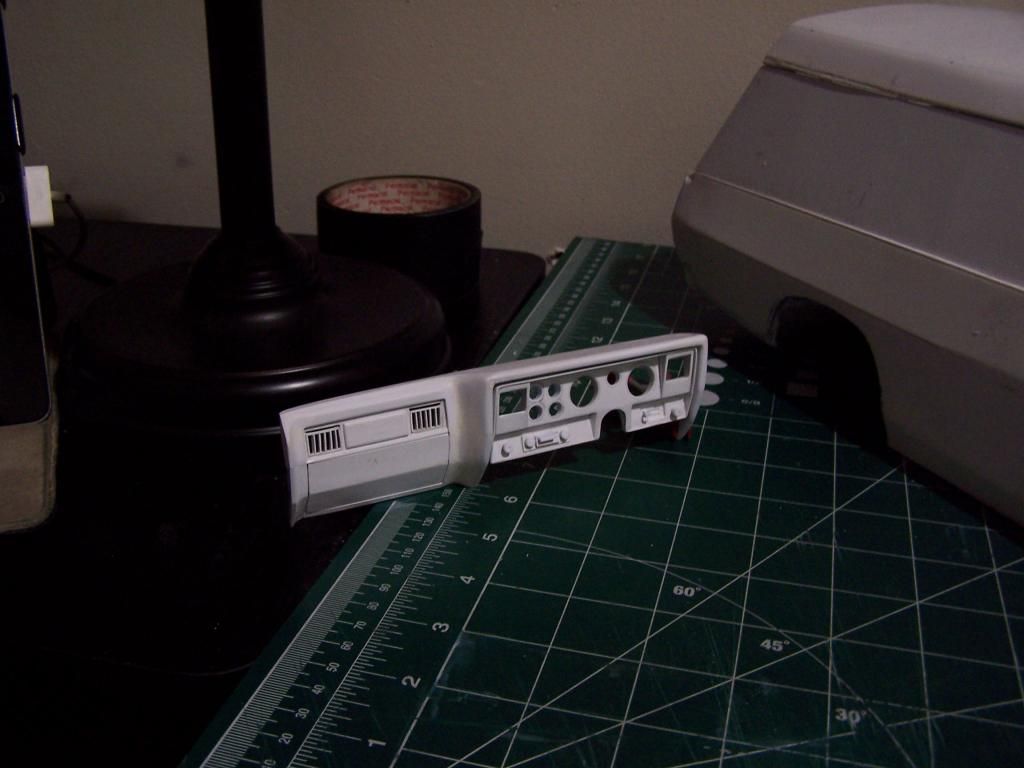
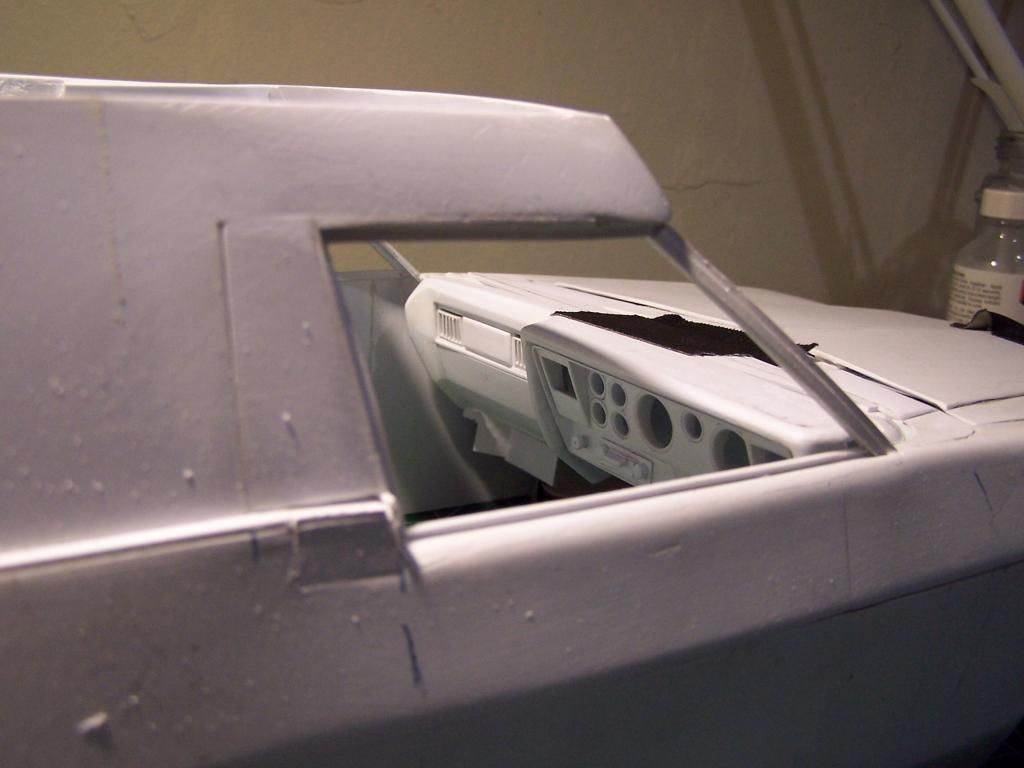
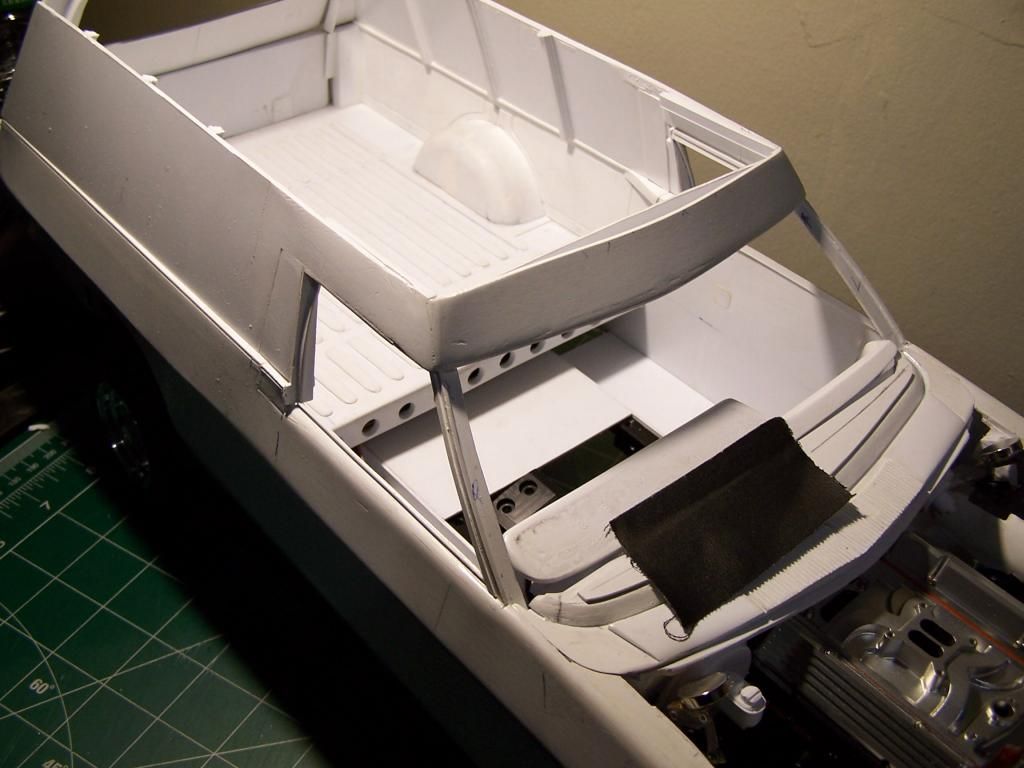
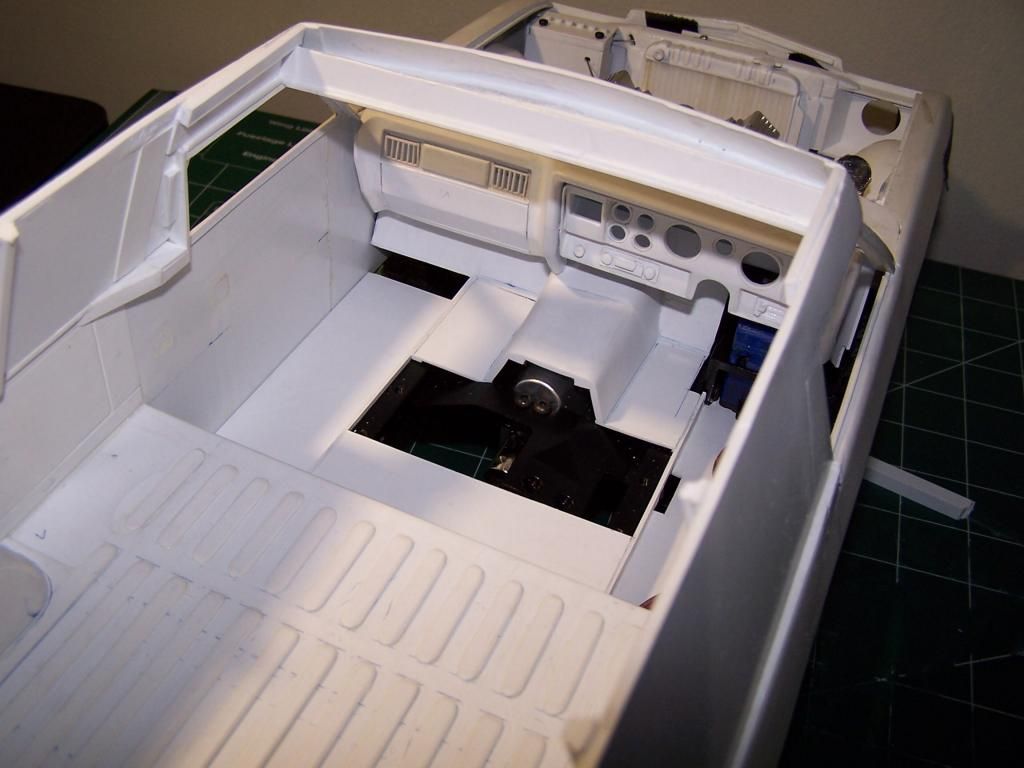
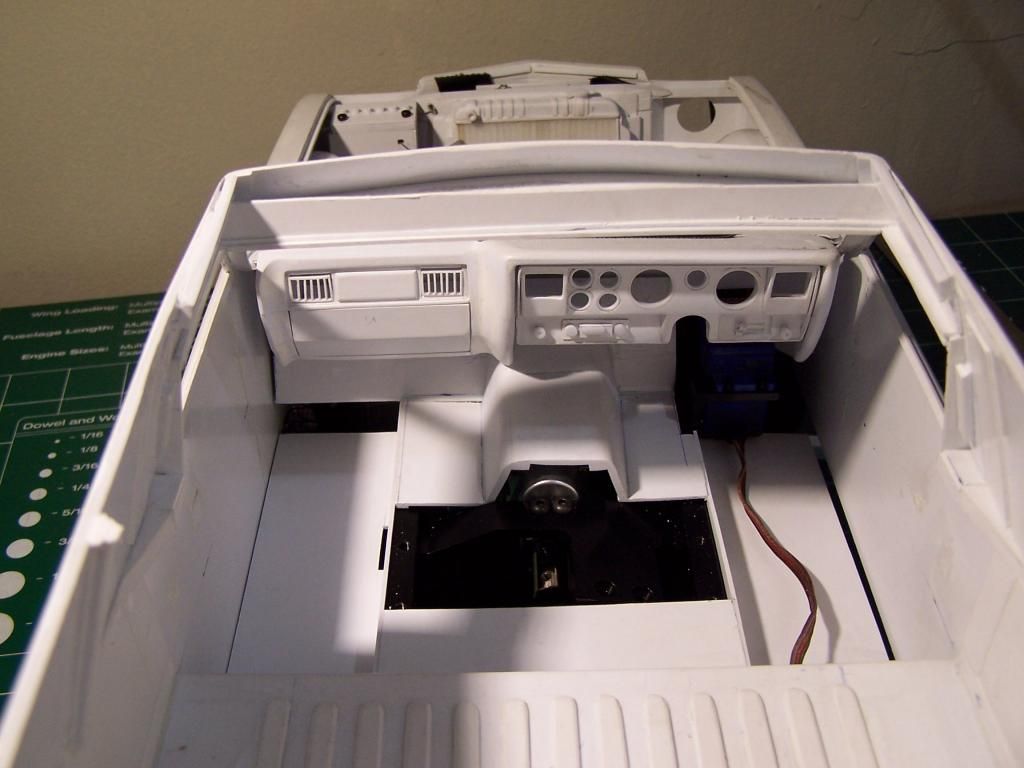
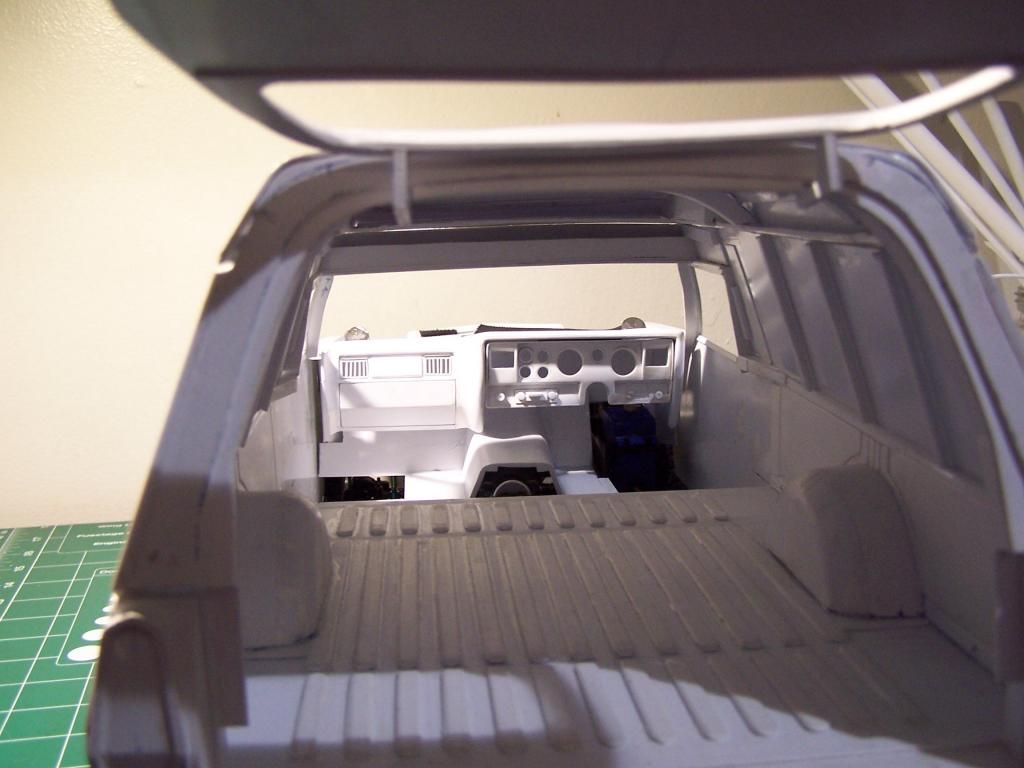
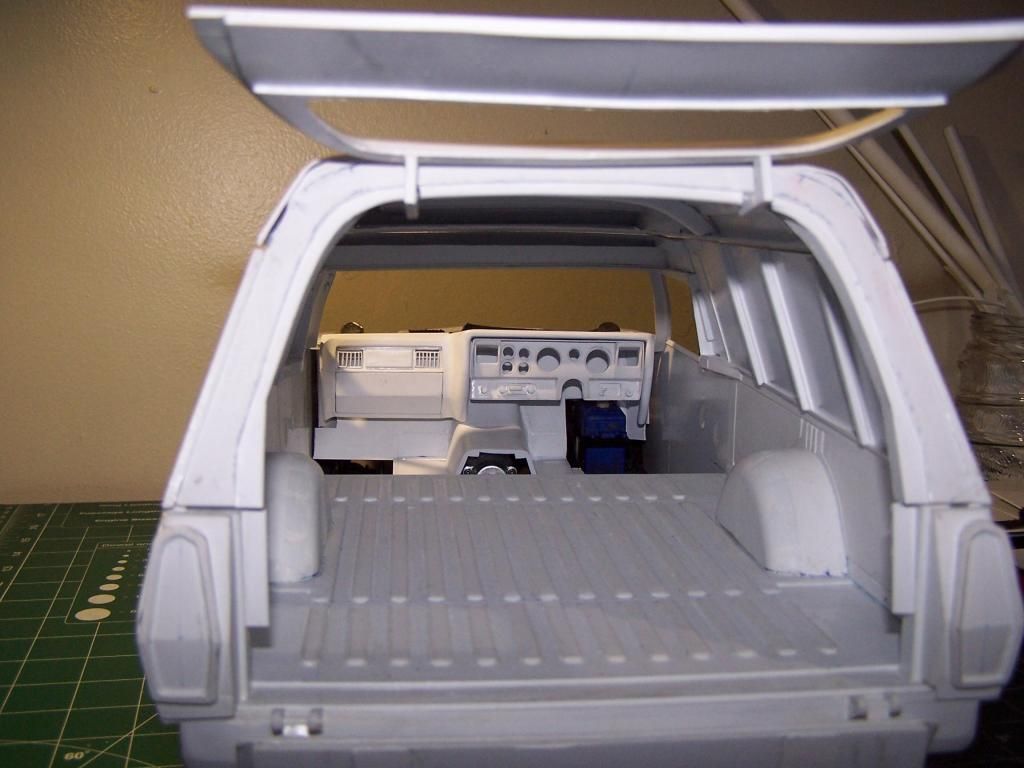
Still working on the dashboard...getting there slowly ....so many angles and curves....still have some areas to putty some more and sand some more...
Was really tempted to make the glove box functional, but decided not to...lol! Still need to make the steering wheel and column as well as the piece that goes below the steering wheel column, at the bottom of the instrument panel...also need to adjust the area where the dash board sits ..... Also need to make the vents for the instrument panel...lol!


") 02-15-2015, 06:46 AM
02-15-2015, 06:46 AM
#104
Thread Starter
Join Date: Jan 2004
Location: Queens,
NY
Posts: 559
Likes: 0
Received 0 Likes
on
0 Posts
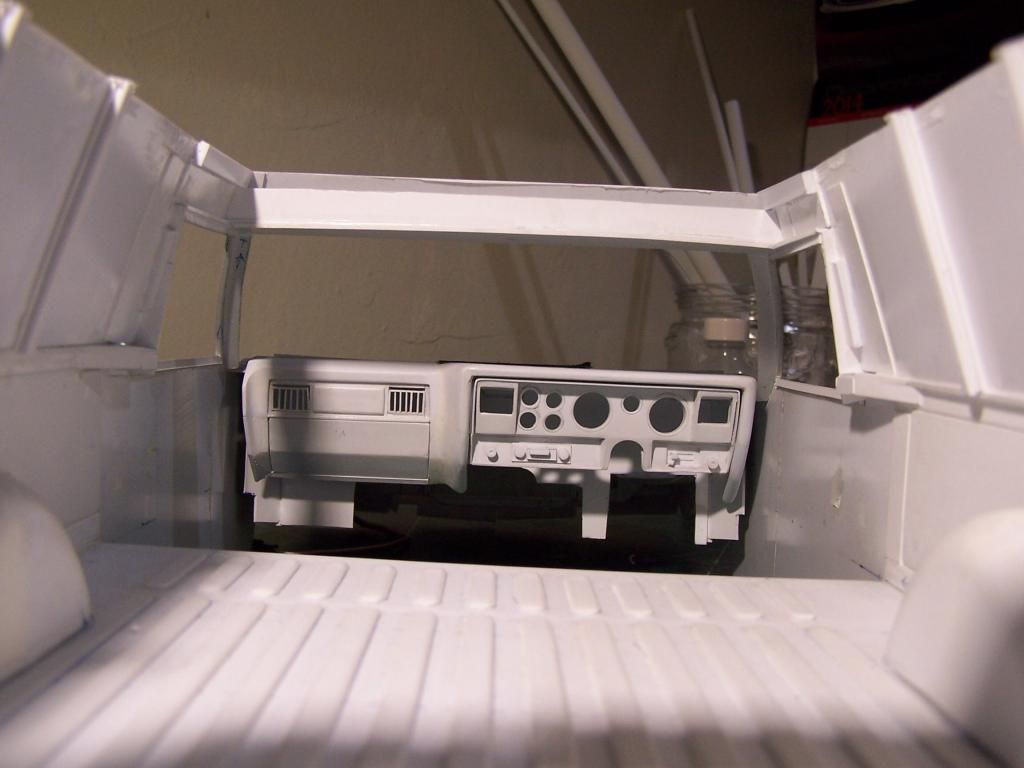
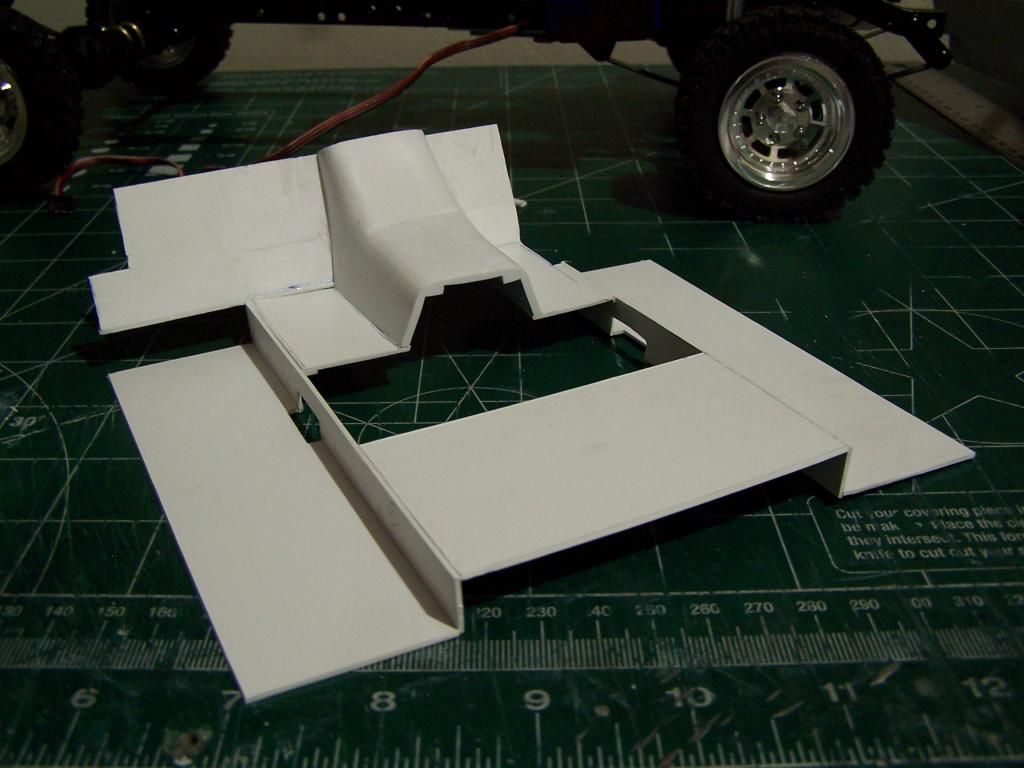
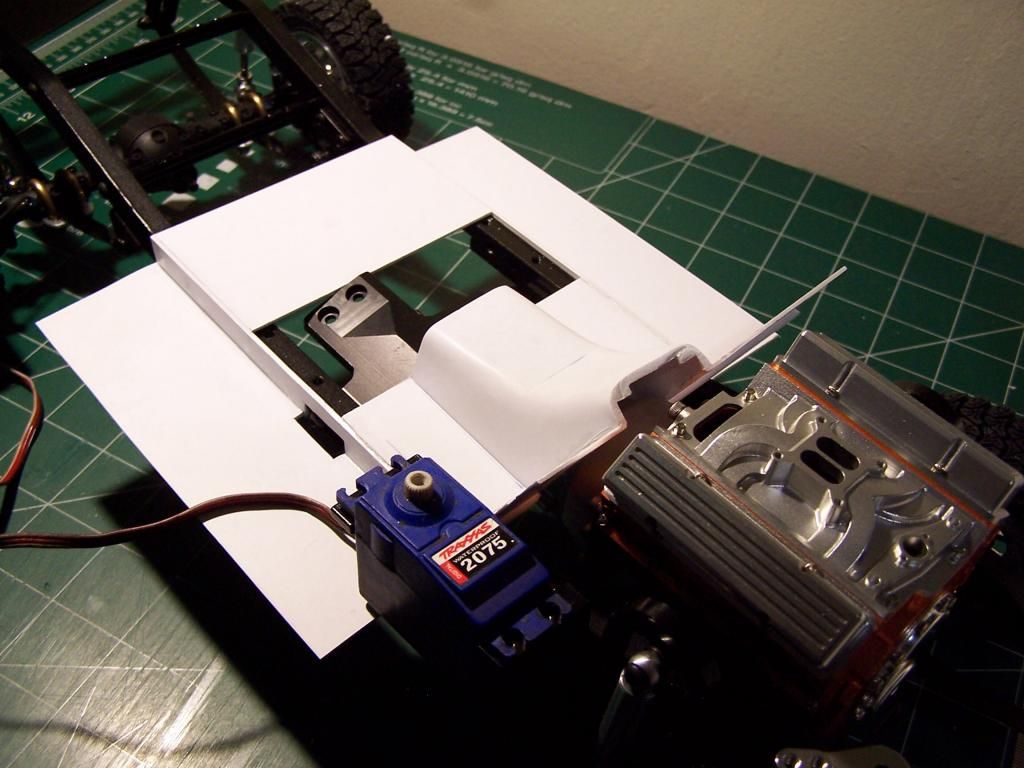
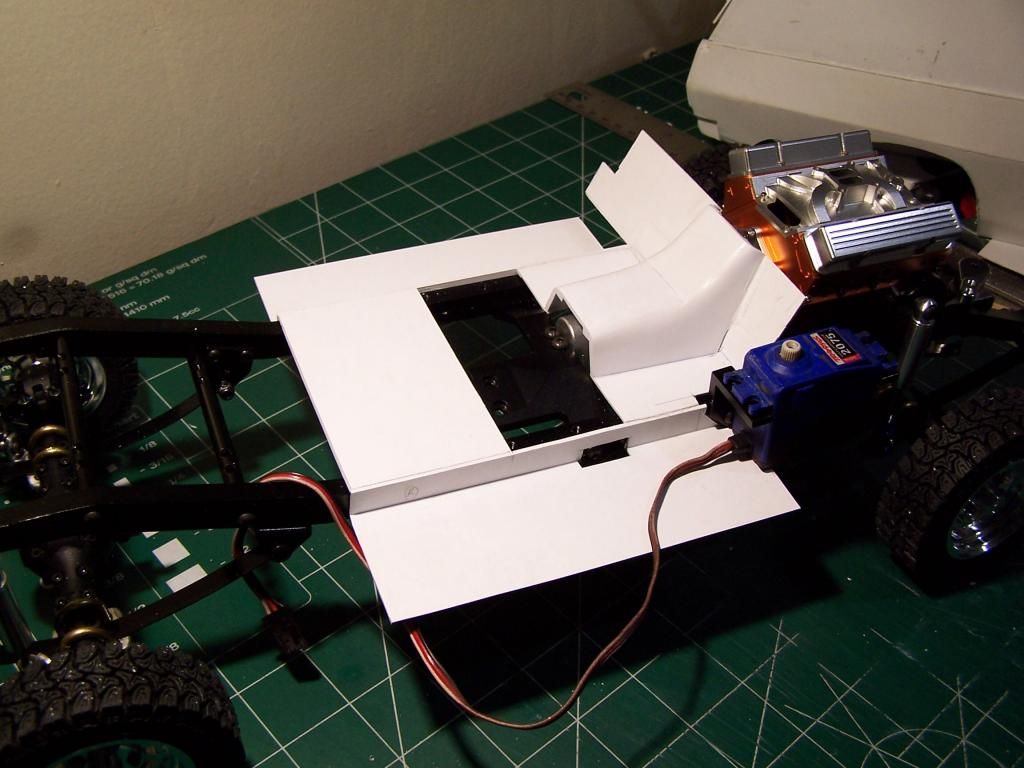
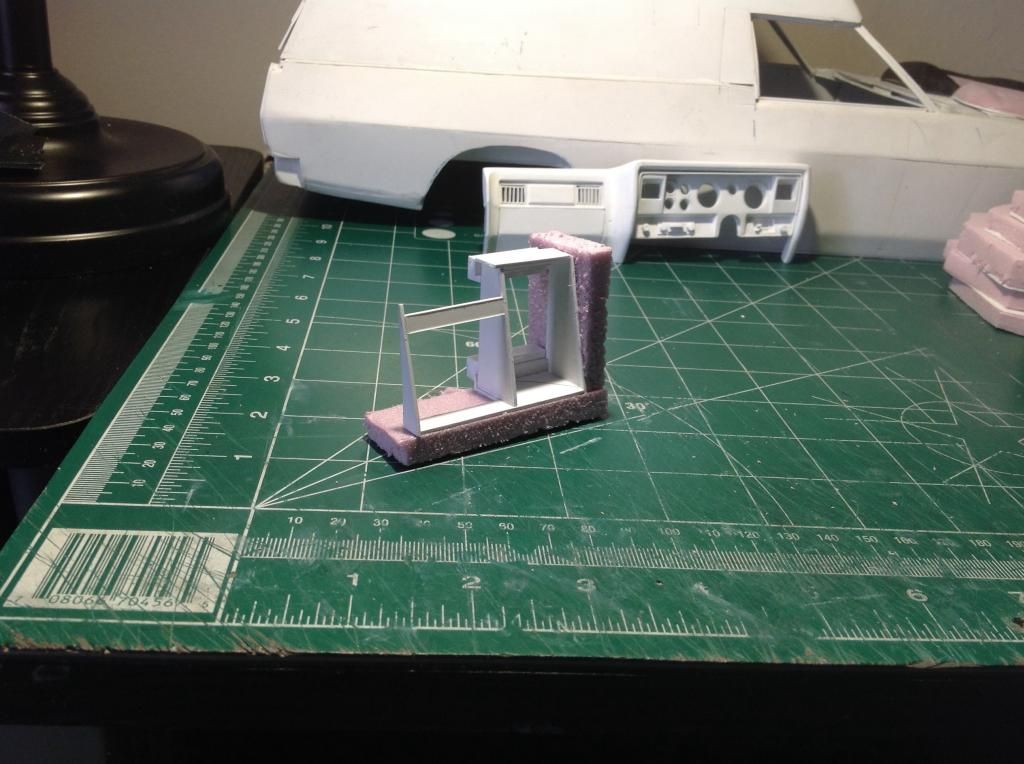
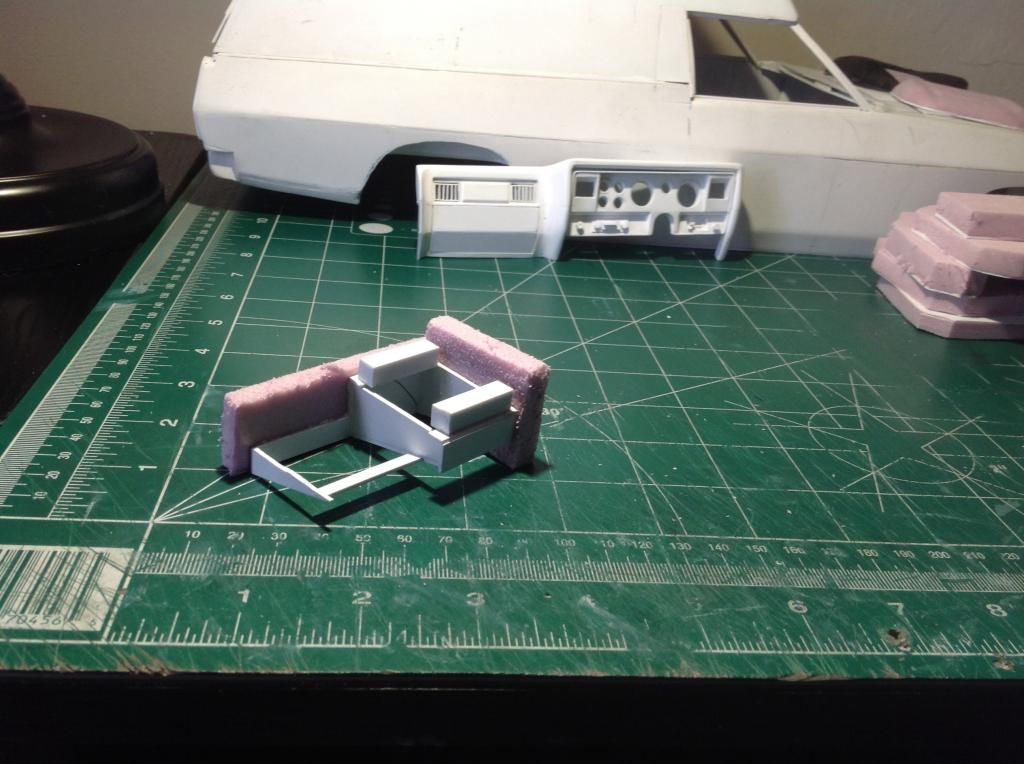
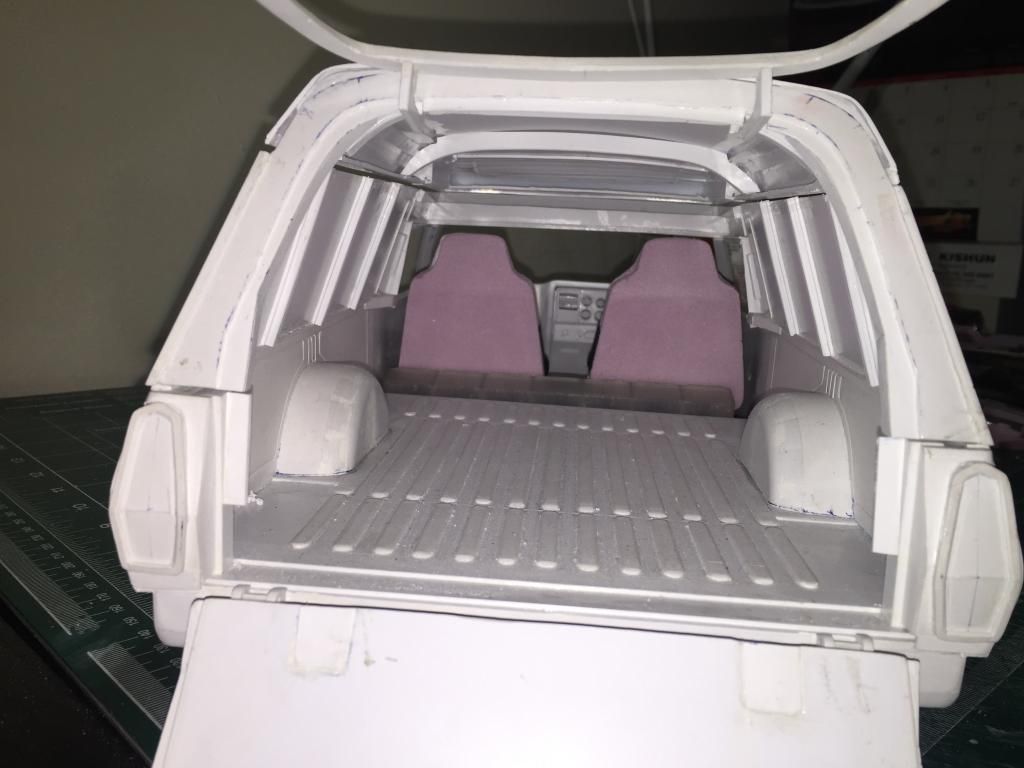
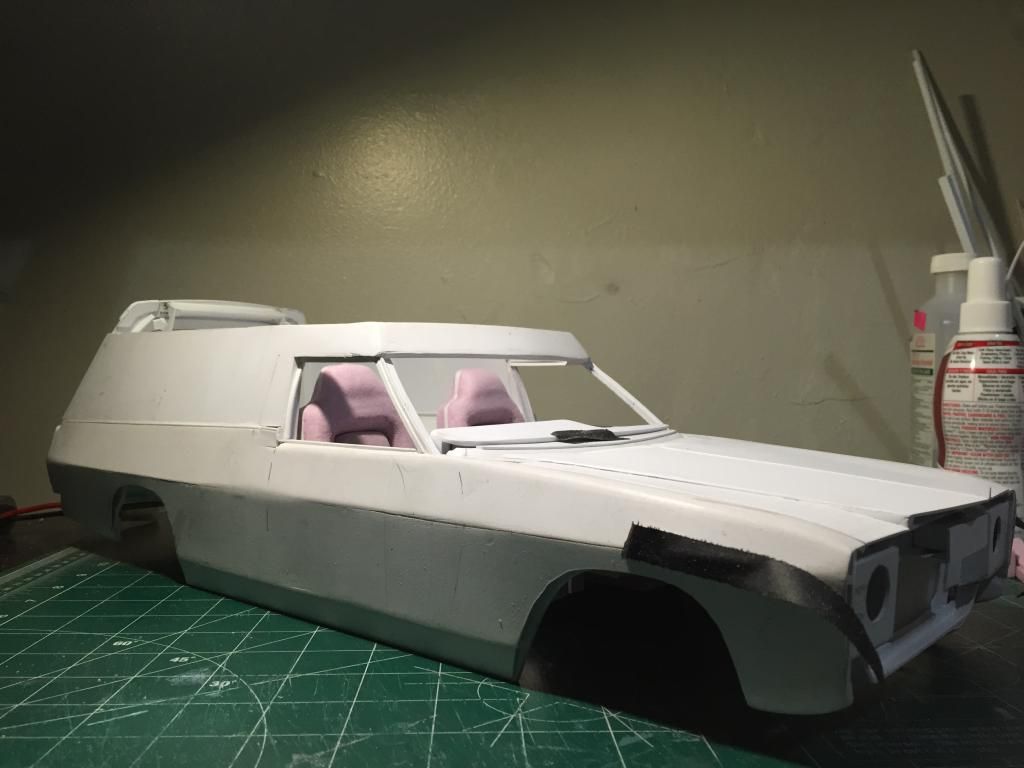
Been trying to wrap my head around the flooring...:blink:...lol! Eventually decided to rebuild it with a 'step down' at the sides of the chassis so the outer sides lines up with the bottom of the body. Couldn't figure any other way of doing it without having that section raised over the chassis...:banghead:
I was planning to do bucket seats as the Sandman is outfitted with them, but I think I will try to make the bench seat instead, as it will probably hide most of the raised area. This means that I will also have to consider making it a column shifter :blink:
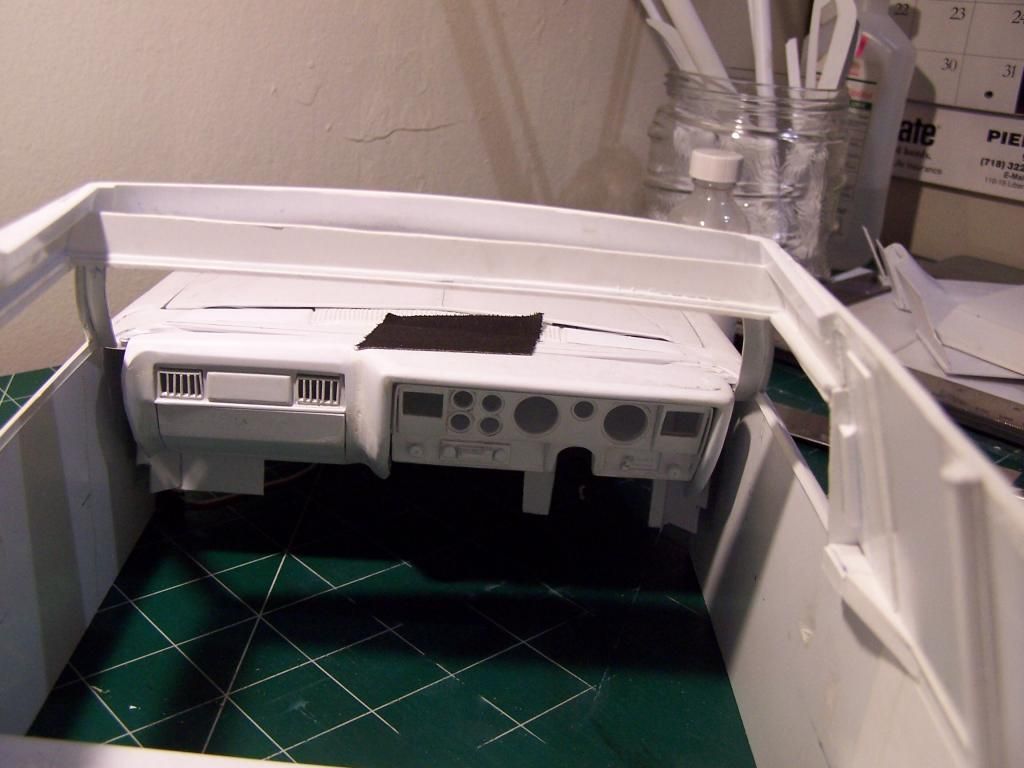
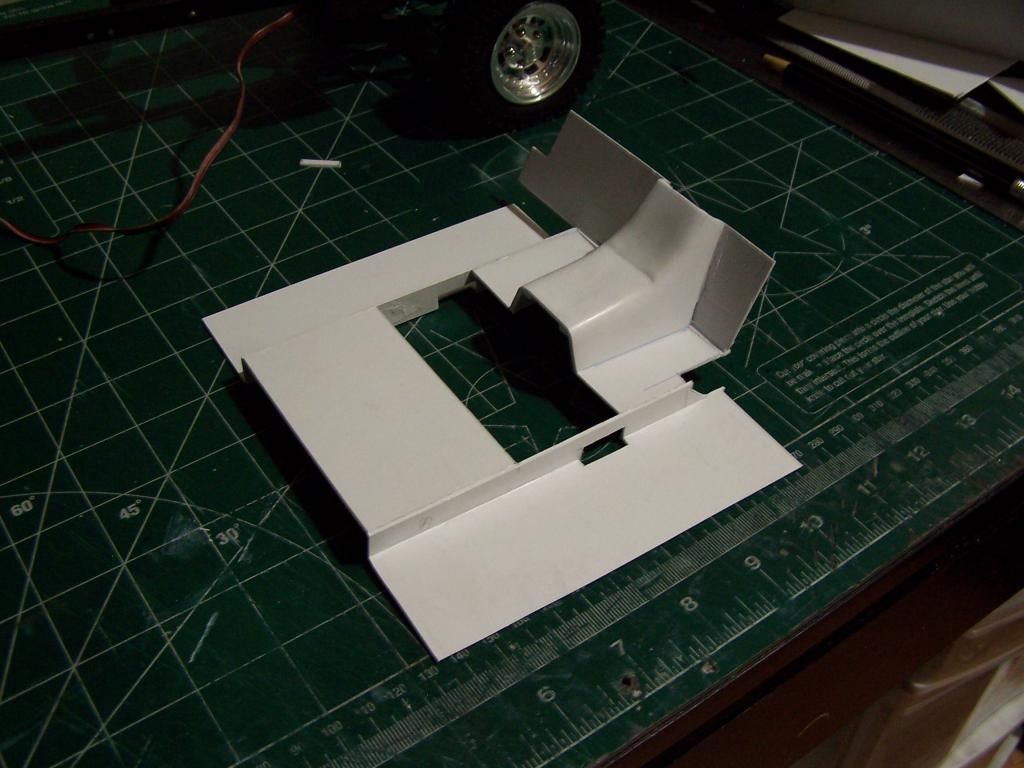
Anywho, some pics.... Will try to wrap up the flooring tomorrow and start on the seat. Will also try to properly fit the dashboard in as well...

I was planning to do bucket seats as the Sandman is outfitted with them, but I think I will try to make the bench seat instead, as it will probably hide most of the raised area. This means that I will also have to consider making it a column shifter :blink:
Anywho, some pics.... Will try to wrap up the flooring tomorrow and start on the seat. Will also try to properly fit the dashboard in as well...


 02-15-2015, 06:49 AM
#105
Thread Starter
Join Date: Jan 2004
Location: Queens,
NY
Posts: 559
Likes: 0
Received 0 Likes
on
0 Posts
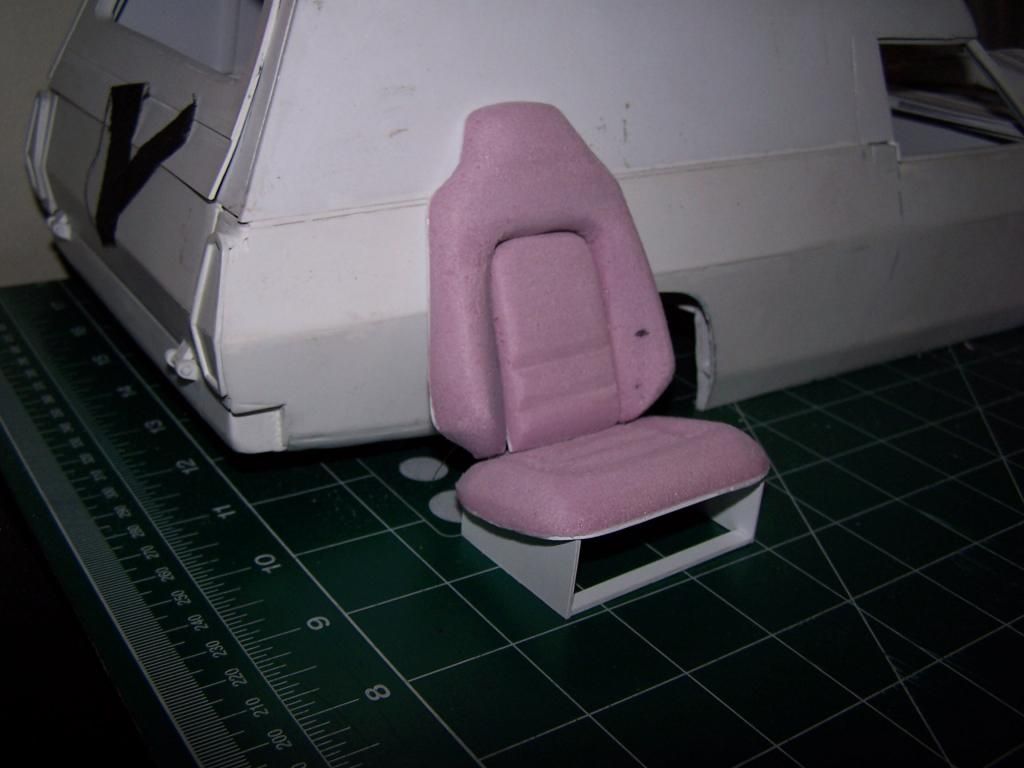
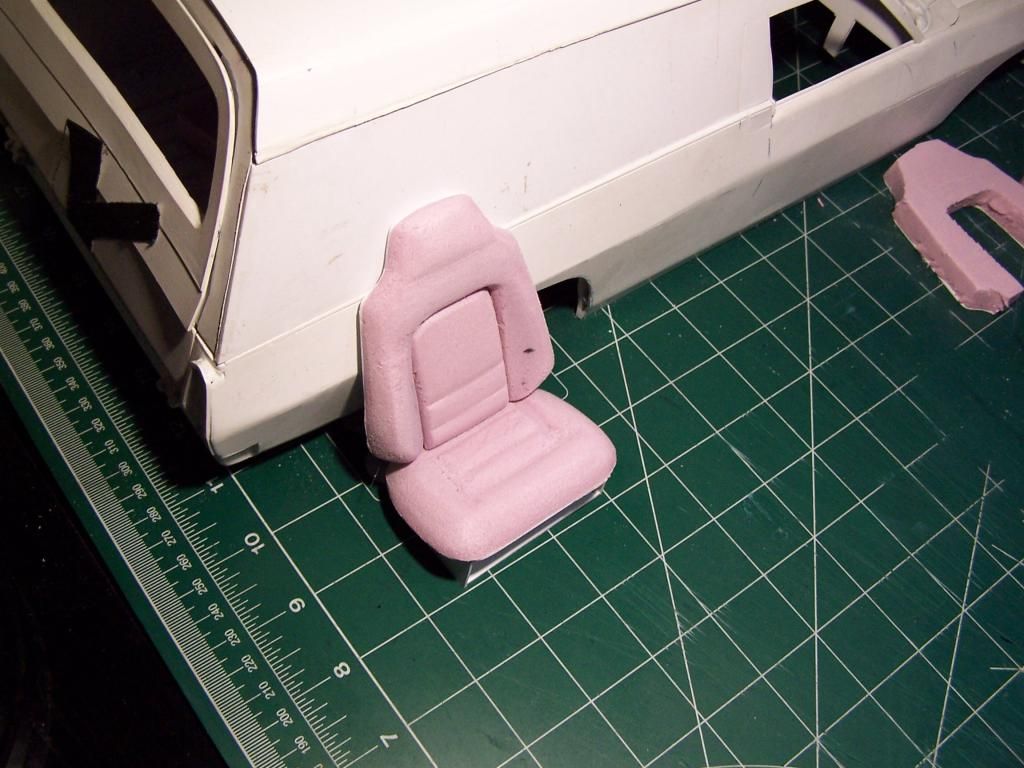
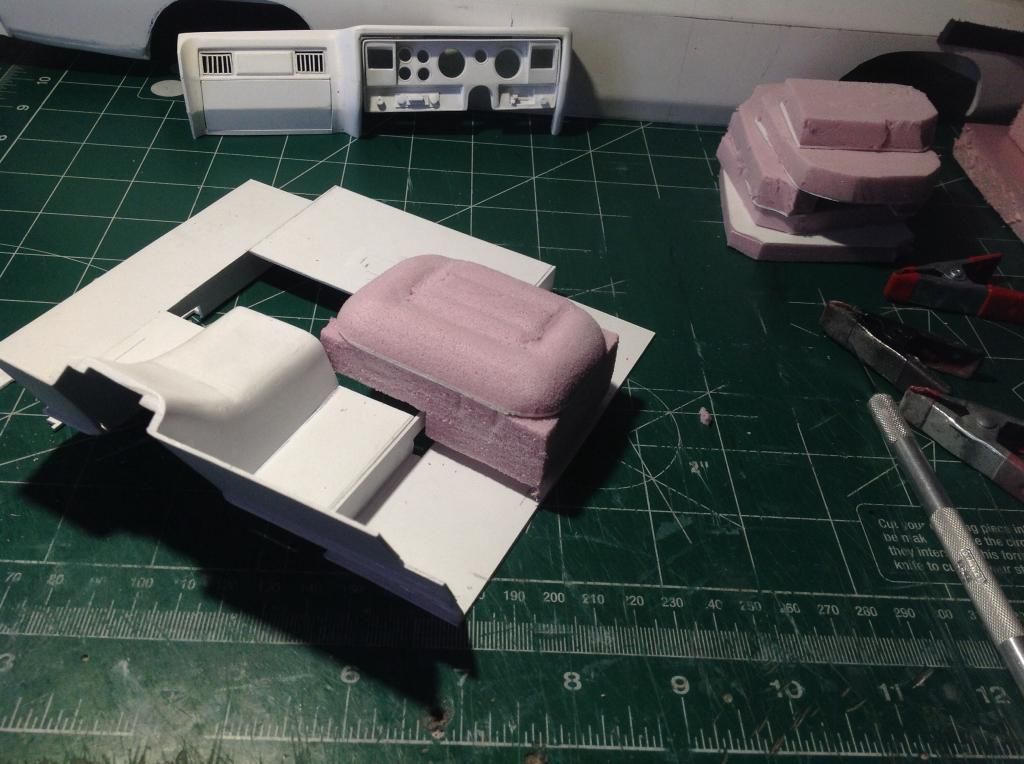
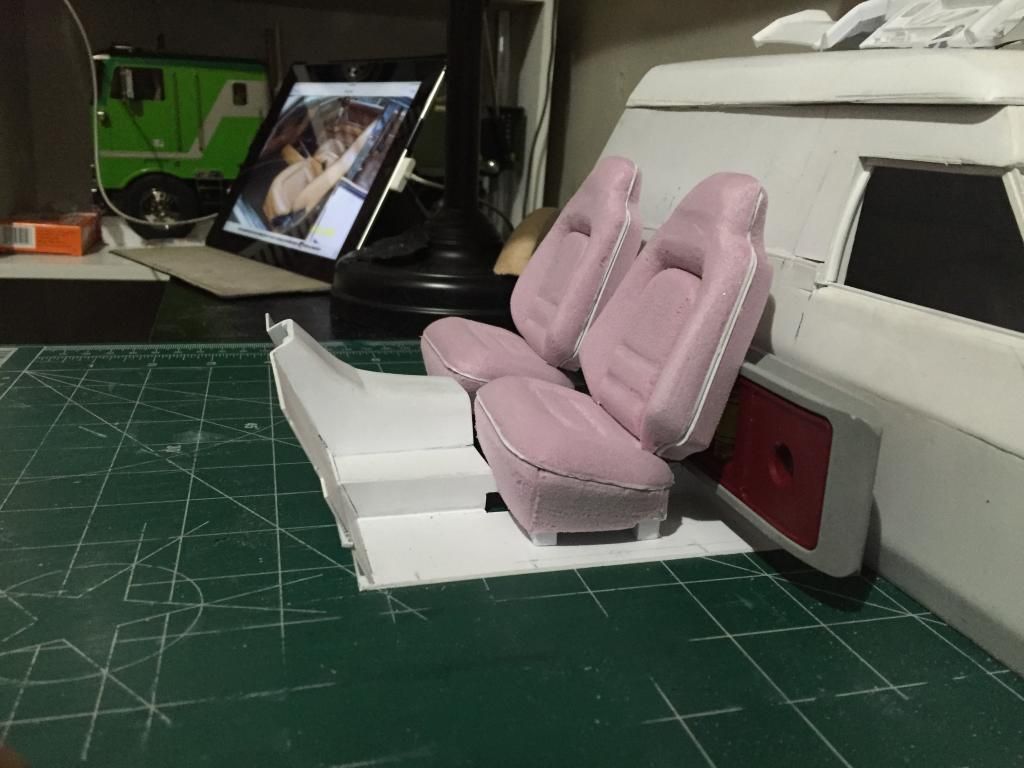
Managed to get one bucket seat done .... Well almost... Still need to complete the bottom of the seat where you see the styrene, and glue some foam to it and shape it a bit...haven't done that as I will need to cut part of the bottom area to fit the 'step down' area on the chassis.
Still don't think I have the correct sand paper, been trying several grits....so it's not perfect...I may re-do them though...maybe after painting them I'll be able to putty the imperfect areas to get a better finish!
Anywho...some pics... Will try to complete the bottom piece as well as the back area tomorrow and then start on the other seat...!
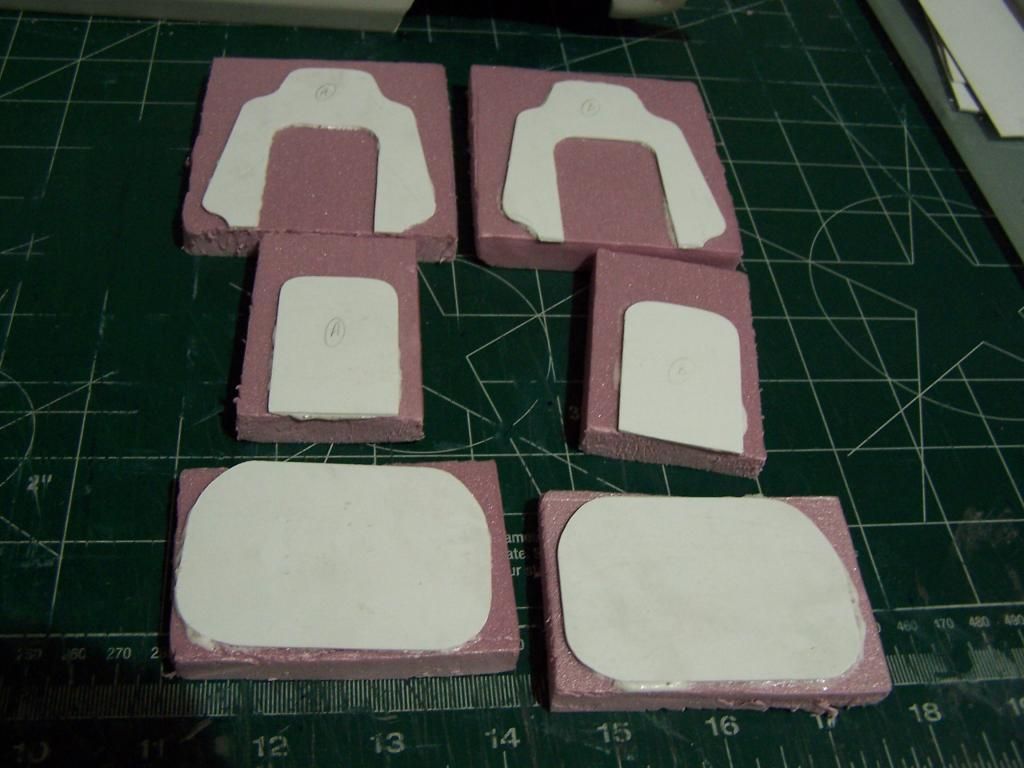


 02-15-2015, 06:51 AM
#106
Thread Starter
Join Date: Jan 2004
Location: Queens,
NY
Posts: 559
Likes: 0
Received 0 Likes
on
0 Posts
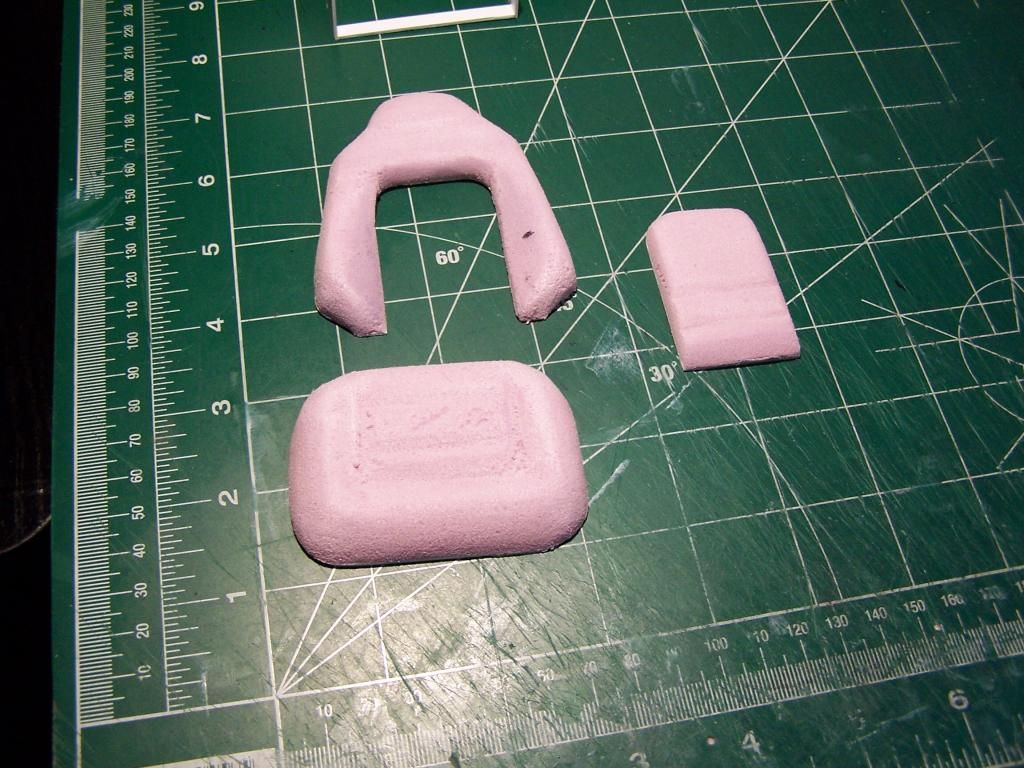
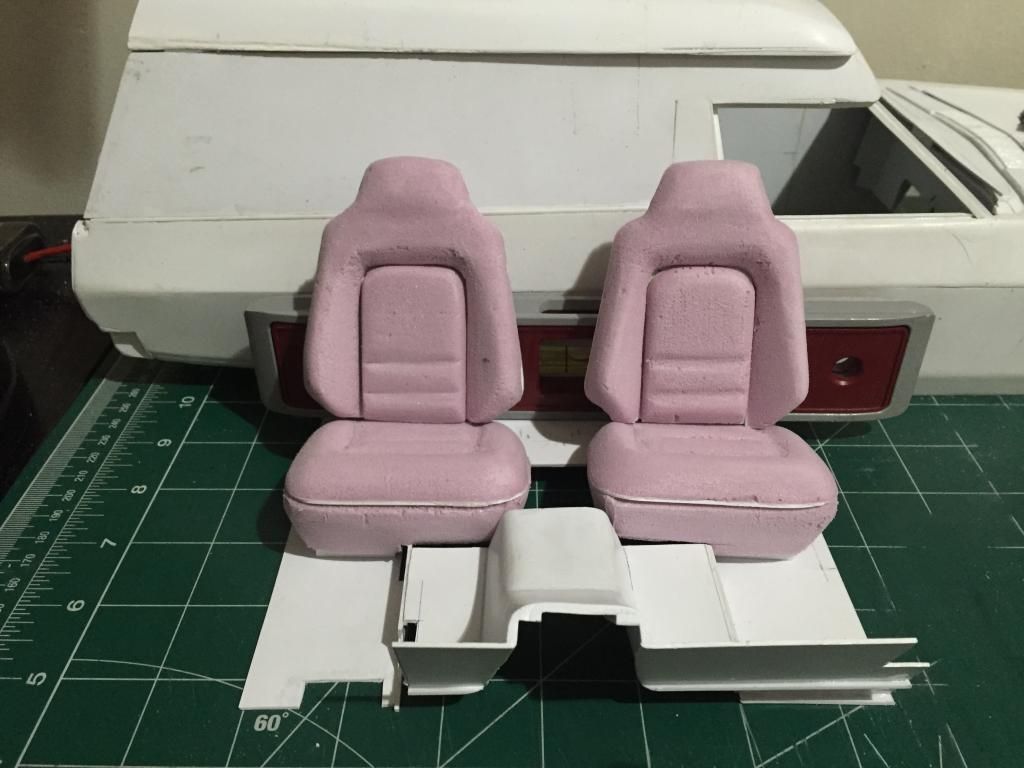
Been working on the bottom of the seat where it will fit on the chassis...kinda looks like a component for something else lol... And it's gonna be covered up....ha!
Well....some pics...you kinda get the idea ....Still need to shape and file it to match the seat...lol!
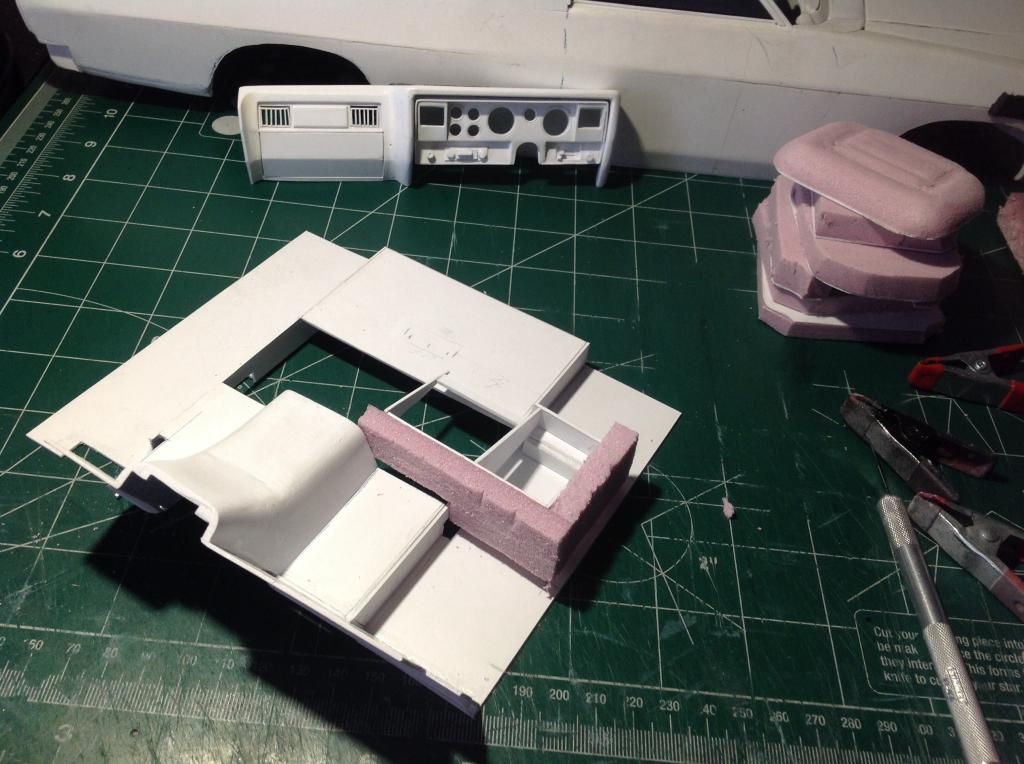
Well....some pics...you kinda get the idea ....Still need to shape and file it to match the seat...lol!


 02-15-2015, 06:52 AM
#107
Thread Starter
Join Date: Jan 2004
Location: Queens,
NY
Posts: 559
Likes: 0
Received 0 Likes
on
0 Posts
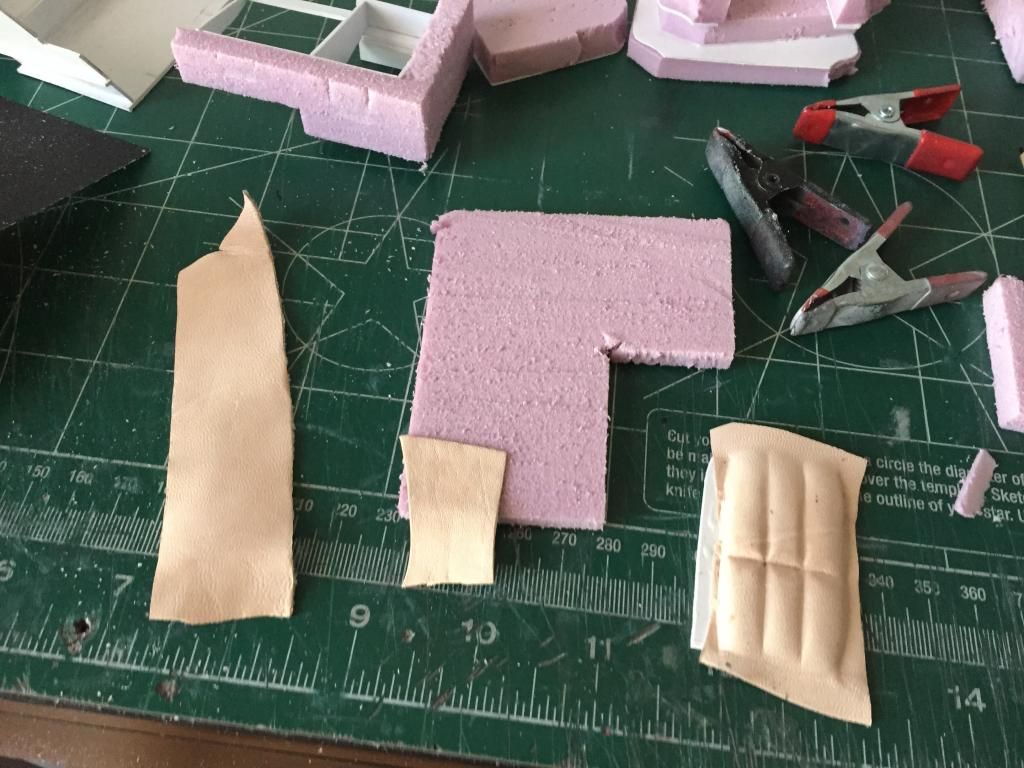
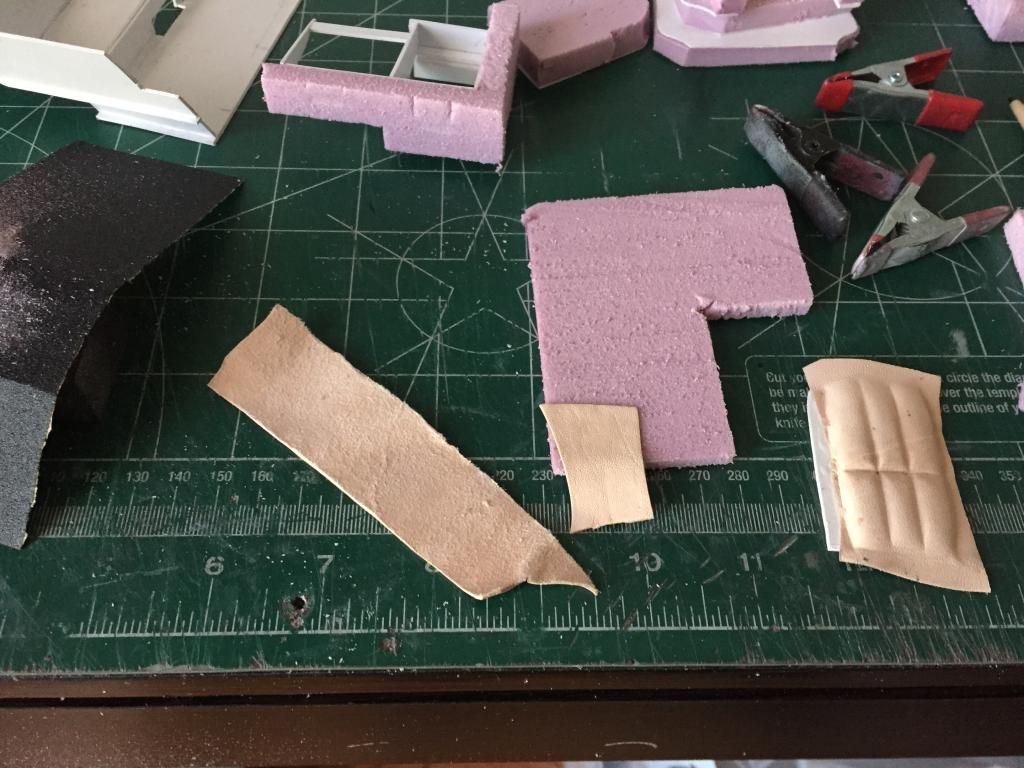
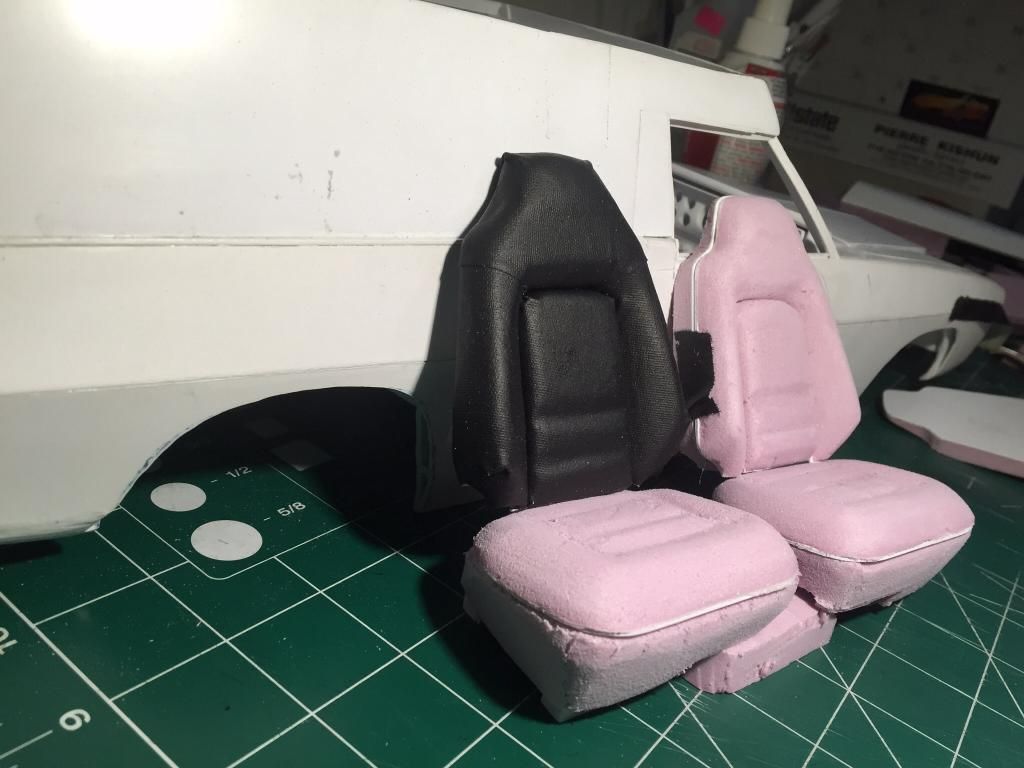
Decided to go a different route from painting the foam...lol! Picked up some soft sheepskin leather (about 0.8mm thick), also picked up some leather dye, tan for the front and white for the couches and wall panels in the rear!
This is uncharted virgin territory for me, so hoping that there's a lot less 'oh ****e!' moments and more 'Hell Yeah!' ones in the next coupla days...lol. :rofl:
Anywho...some pics of the test subjects ... The piece on the right I used the gorilla glue but had to clamp it in order to bond...
This is uncharted virgin territory for me, so hoping that there's a lot less 'oh ****e!' moments and more 'Hell Yeah!' ones in the next coupla days...lol. :rofl:
Anywho...some pics of the test subjects ... The piece on the right I used the gorilla glue but had to clamp it in order to bond...

 02-15-2015, 06:53 AM
#108
Thread Starter
Join Date: Jan 2004
Location: Queens,
NY
Posts: 559
Likes: 0
Received 0 Likes
on
0 Posts
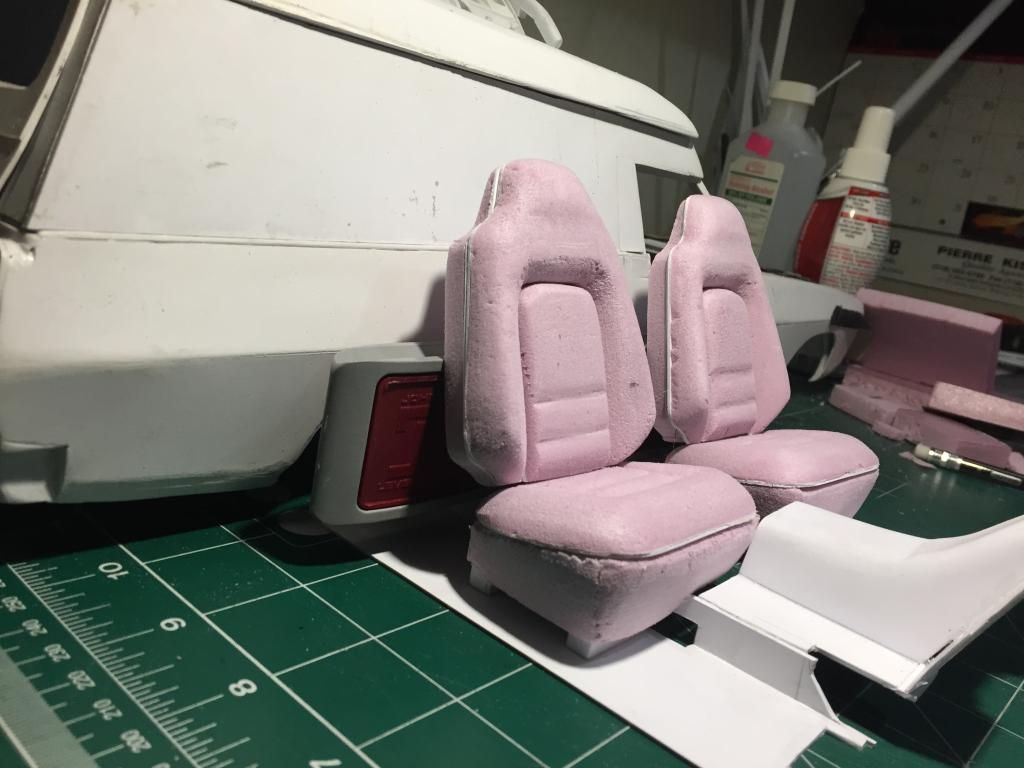
Getting there with the bucket seats.....taking longer than I thought...just need some fine tuning a bit, although I think that the leather is gonna hide most of the imperfections of the foam...I hope...lol!
Will start on the couches tomorrow.....as well as try to figure out the amount of leather required for the buckets. If I could determine that, I will start the dyeing process as well...
Some pics...
Will start on the couches tomorrow.....as well as try to figure out the amount of leather required for the buckets. If I could determine that, I will start the dyeing process as well...
Some pics...


 02-15-2015, 06:54 AM
#109
Thread Starter
Join Date: Jan 2004
Location: Queens,
NY
Posts: 559
Likes: 0
Received 0 Likes
on
0 Posts
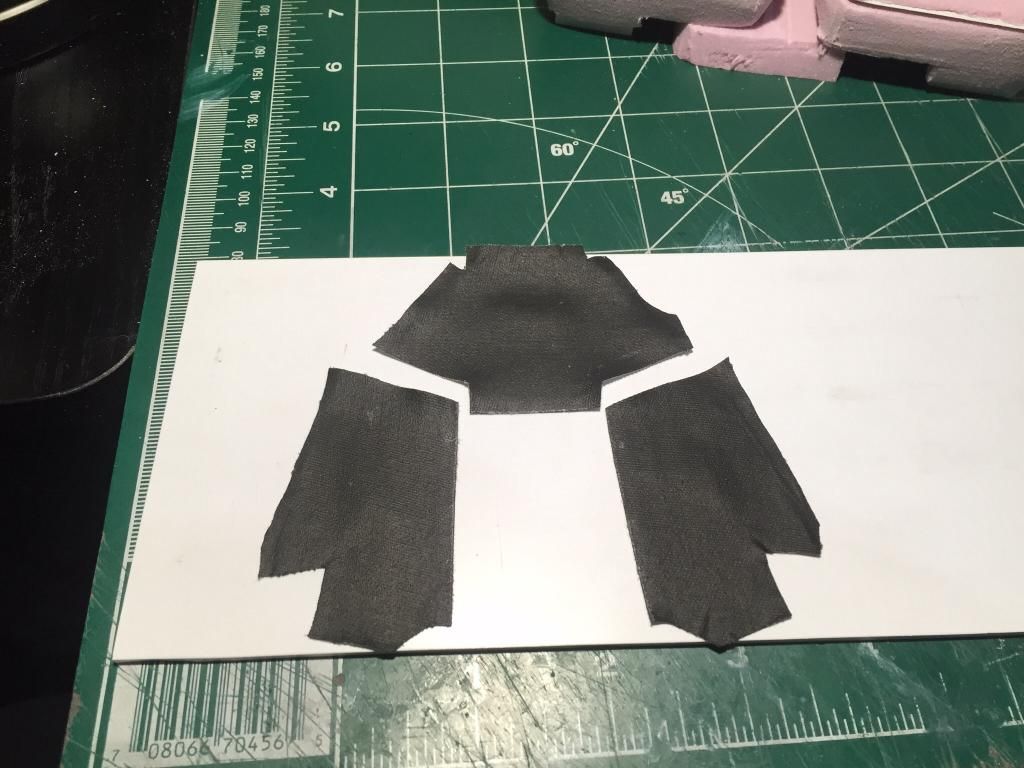
Hey guys...this is how I'm doing the patterns ....I'm using gaffers tape (I think that's what it's called. It's kinda low tack so won't damaged the foam). I'm hoping that I can get the leather cut like this and bonded properly to the foam.
Lol...it actually looks pretty good with the tape on the foam...! Notice how it completely hides all the defects or faults in my filing and sanding? Lol....!


Lol...it actually looks pretty good with the tape on the foam...! Notice how it completely hides all the defects or faults in my filing and sanding? Lol....!


