


Dark Impact - Lunchboxer style..

 02-20-2009, 01:36 PM
#3752
Senior Member
Join Date: Apr 2007
Location: daytona beach,
FL
Posts: 274
Likes: 0
Received 0 Likes
on
0 Posts
well,
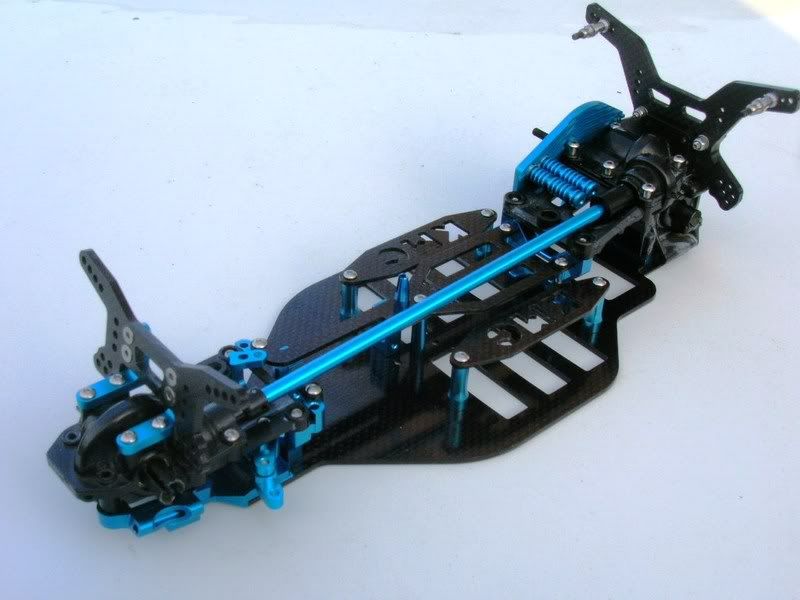
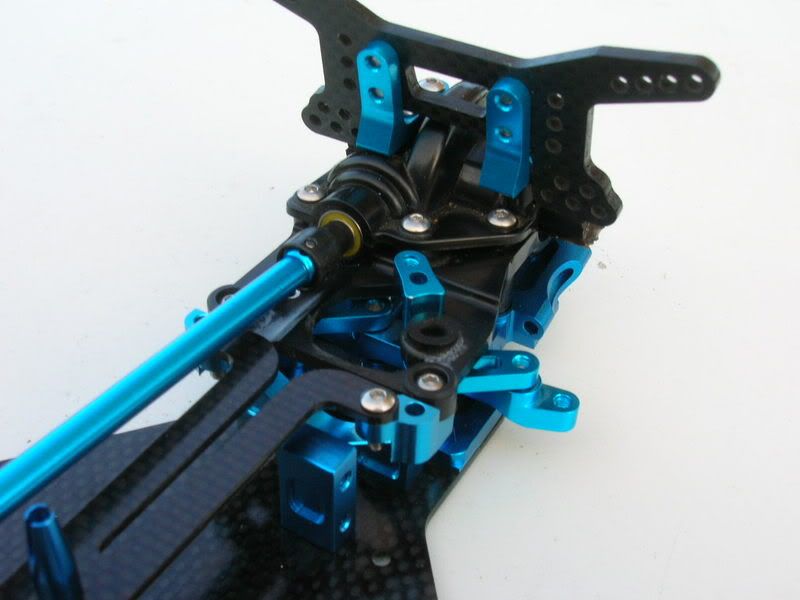
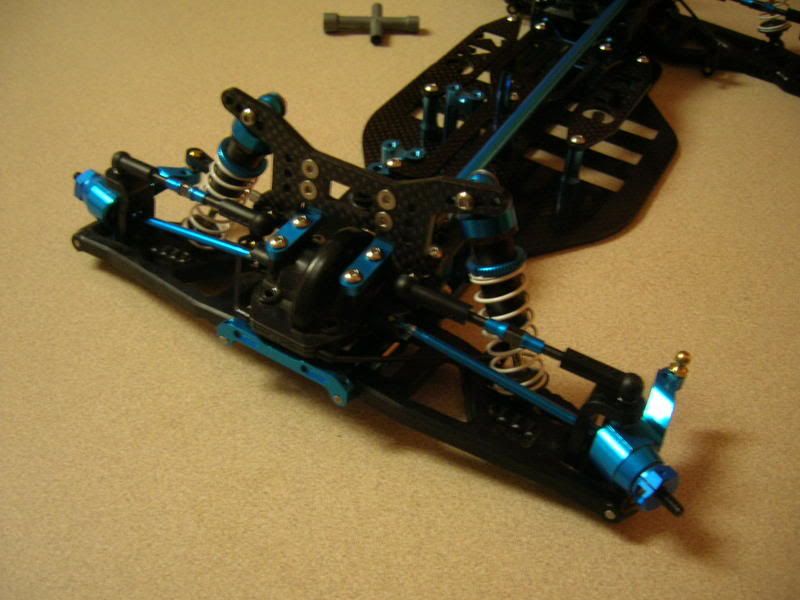
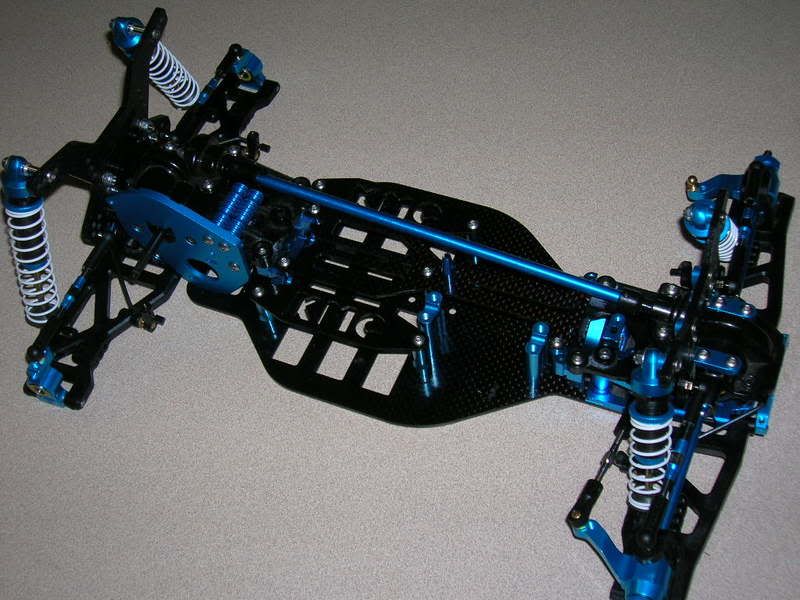
here are a couple more pics of what i have built so far.
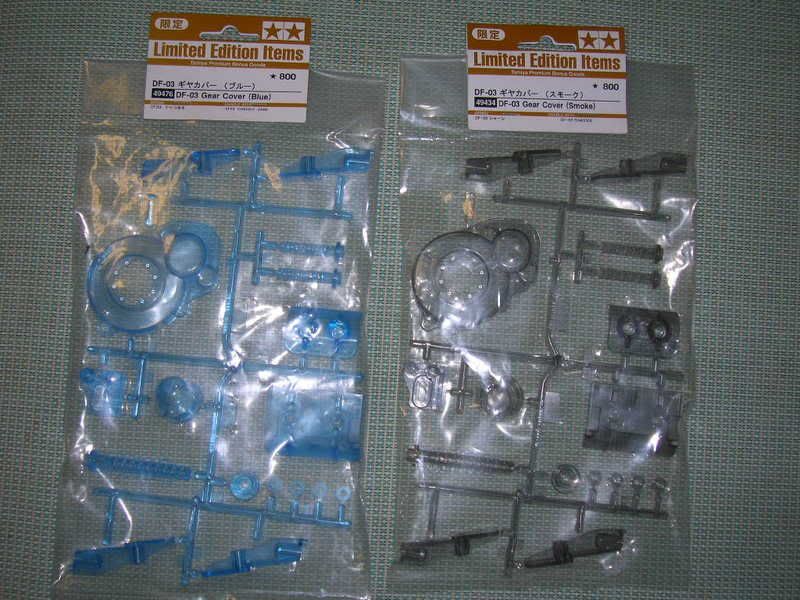
and here are the smoke and blue clear parts
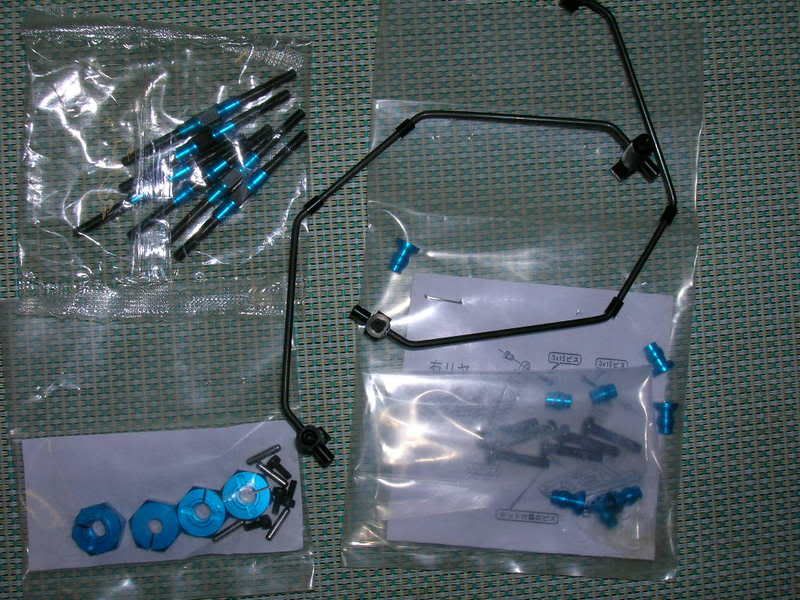
5 Star knuckles and boca ceramic bearings
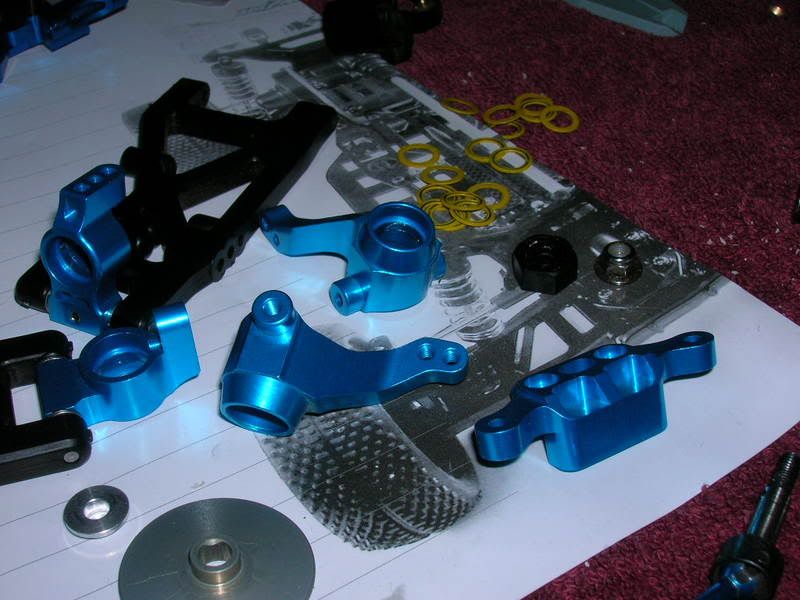
some tamiya hard turn buckles, bharz anti roll system, 5 star hexes, all the goodies!
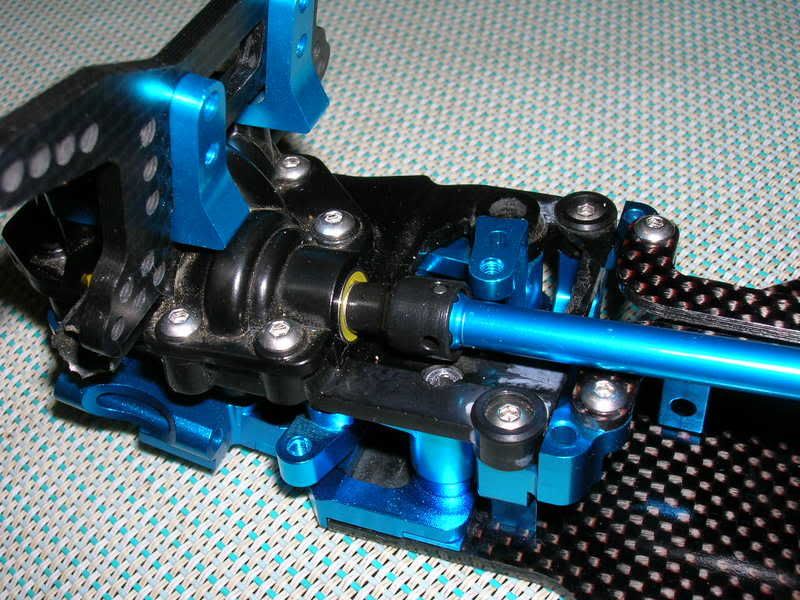
5 Star driveshaft, yes its a CVD on the front end.
lots of nice blue!!
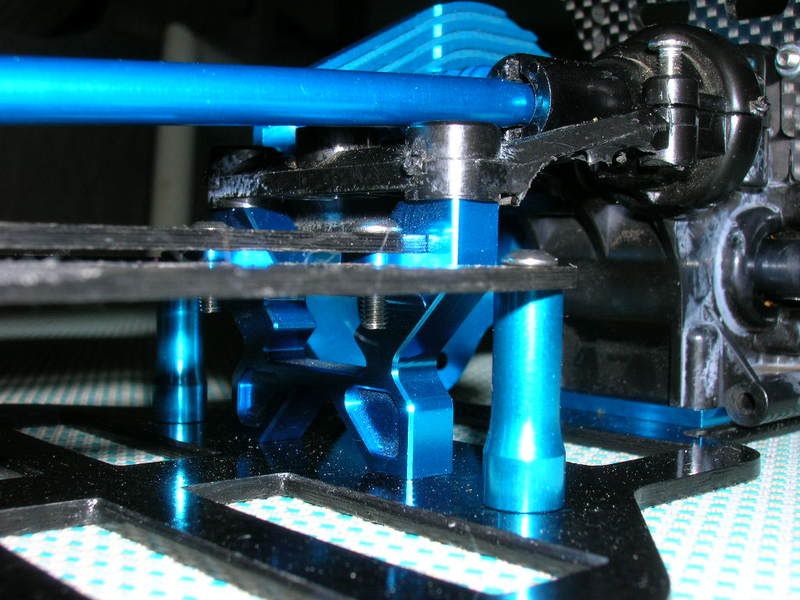
here are a couple more pics of what i have built so far.
and here are the smoke and blue clear parts
5 Star knuckles and boca ceramic bearings
some tamiya hard turn buckles, bharz anti roll system, 5 star hexes, all the goodies!
5 Star driveshaft, yes its a CVD on the front end.
lots of nice blue!!
02-20-2009, 01:50 PM
#3753

Thread Starter

Looks great! Why would one need a CVD at the center driveshaft.. unless the chassis is bending like crazy!! 
Looks trick, though!! [sm=thumbs_up.gif]
Looks trick, though!! [sm=thumbs_up.gif]
02-20-2009, 02:23 PM
#3754
Senior Member
Join Date: Apr 2007
Location: daytona beach,
FL
Posts: 274
Likes: 0
Received 0 Likes
on
0 Posts
i wasnt sure why it would be needed either. the only thing i could think of is that it will solve any problems with slop in the driveline.
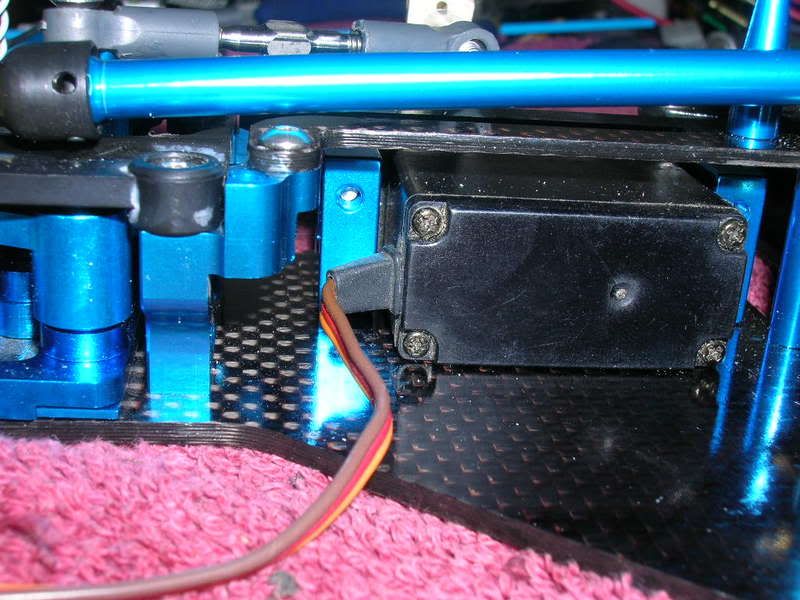
one cool thing about this chassis. if you look at one of the pics of the front you will notice it came with some servo mounts that will allow you to lay the servo down directly behind the front gear box assembly. i thought this was rather nice for lowering the CG, and also allowing the body to sit very low.
one cool thing about this chassis. if you look at one of the pics of the front you will notice it came with some servo mounts that will allow you to lay the servo down directly behind the front gear box assembly. i thought this was rather nice for lowering the CG, and also allowing the body to sit very low.
02-20-2009, 02:25 PM
#3755
Thread Starter
A dogbone wouldn't have too much slope either, though... (since there's no angle changes) Who knows...
Yeah, lay down servo is nice.. you need to run the saddle pack on this chassis, so you got no choice anyway!! Hee..
Any idea what servo you will use in it yet?!
Yeah, lay down servo is nice.. you need to run the saddle pack on this chassis, so you got no choice anyway!! Hee..
Any idea what servo you will use in it yet?!
02-20-2009, 02:53 PM
#3756
Senior Member
Join Date: Aug 2006
Location: , TN
Posts: 939
Likes: 0
Received 0 Likes
on
0 Posts
Wow man that thing is going to be trick! I like the see through blue plastic parts, pimpin! Did you seal the edge of those carbon pieces with ca glue? On the stock chassis has anyone had any issues with it cracking? I have also had problems out of the front outdrive cups chipping and chunks gone out of them etc...I will try and take some pics of the damage over the weekend...I am trying to figure out if the hardened drive outdrive cups would help or not
02-20-2009, 04:18 PM
#3757
Senior Member
Join Date: Apr 2007
Location: daytona beach,
FL
Posts: 274
Likes: 0
Received 0 Likes
on
0 Posts
(Lunch)
i think i meant slop, not slope. just less rattling of parts. either way. it should hinder performance at all.
probably just using a hitec. i have a digital servo laying around somewhere.
looking to buy some SMC saddle packs for this next week.
(86...)
CA already run around the edges! dont know if i will use the see through parts, they have been known to be a weaker plastic
02-22-2009, 09:36 PM
#3759
Senior Member
Join Date: Apr 2007
Location: daytona beach,
FL
Posts: 274
Likes: 0
Received 0 Likes
on
0 Posts
thanks for the compliments guys.
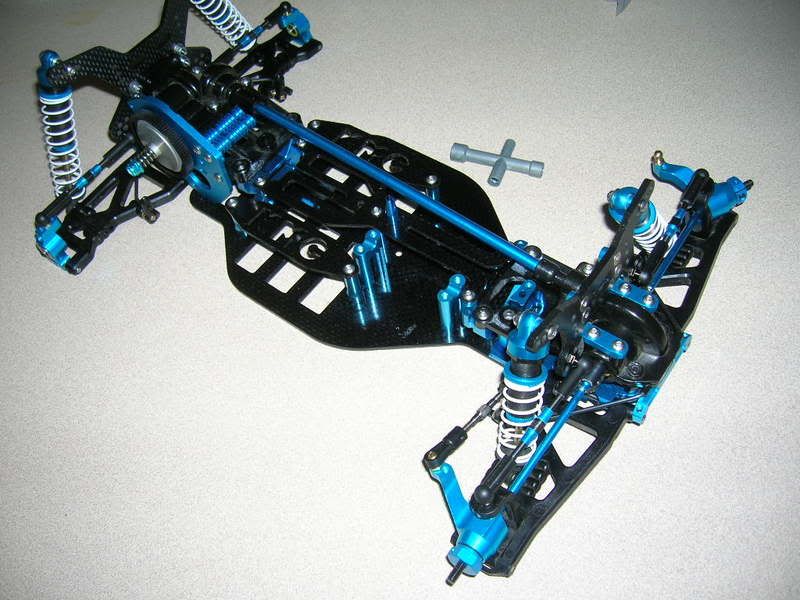
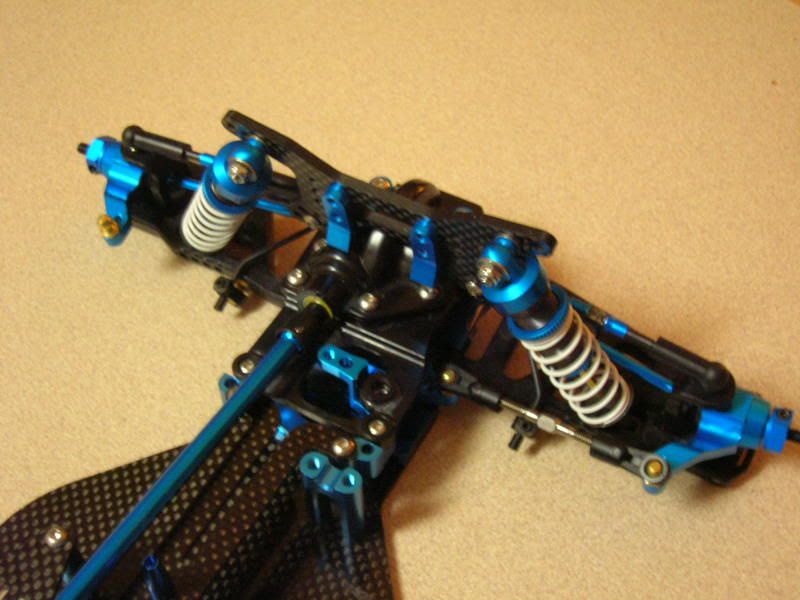
here are some more completed pics. I had a couple hick-ups in the building. i found out that i wont be able to use the lay down servo mounts successfully. the servo saver comes in contact with the bottom pate. wil have to she if i can get a different servo saver.
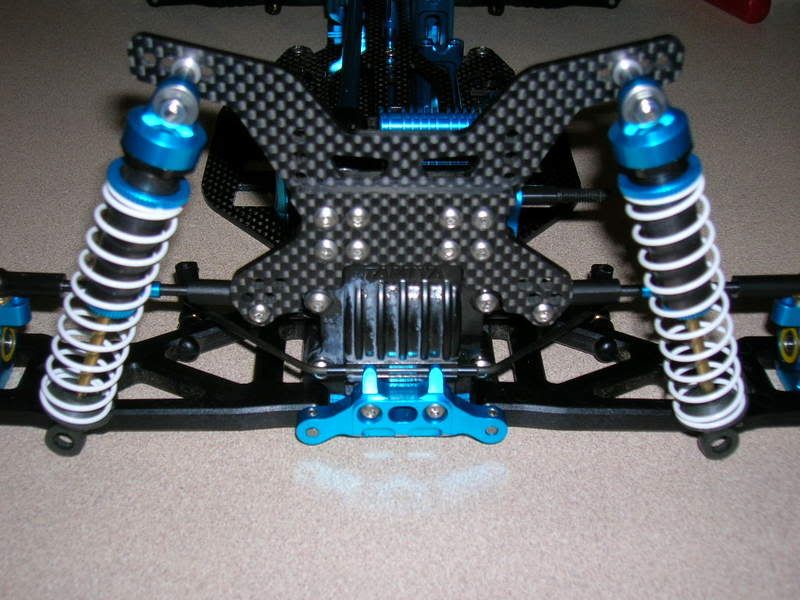
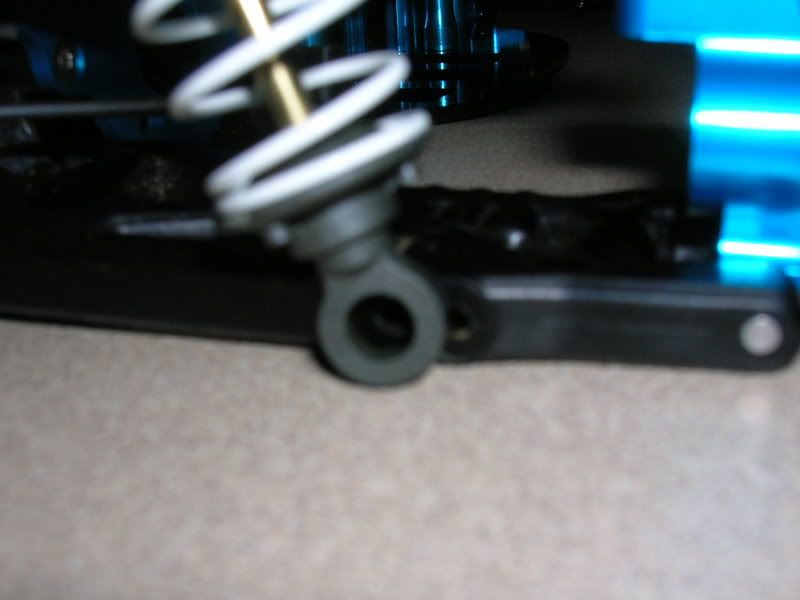
gotta find some ball studs to mount the shocks. the bottom ball mounts are bigger than the stock tamiya mounts. Does anyone know what size ball mounts i can use in there?
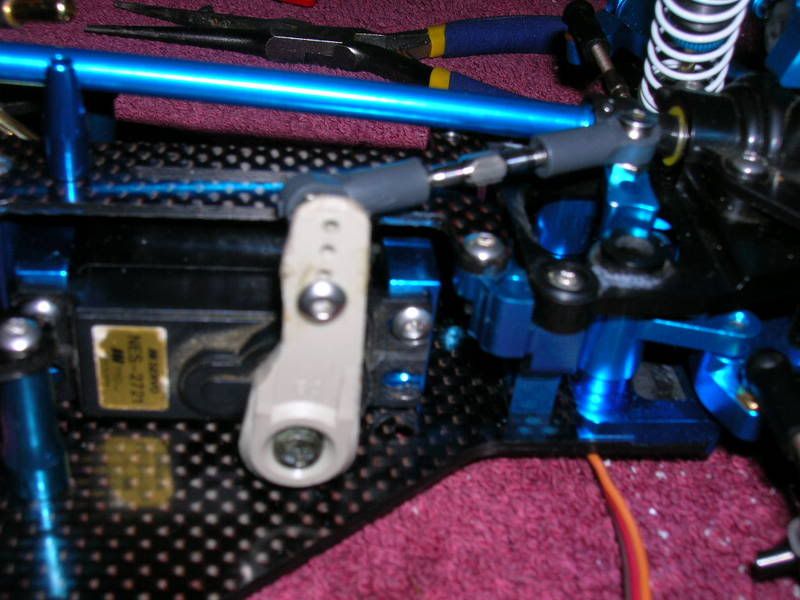
I also need to get a couple more turnbuckles for the steering links, and for the servo, since it so much closer to steering assembly.
some pics for those who like to look at pics.
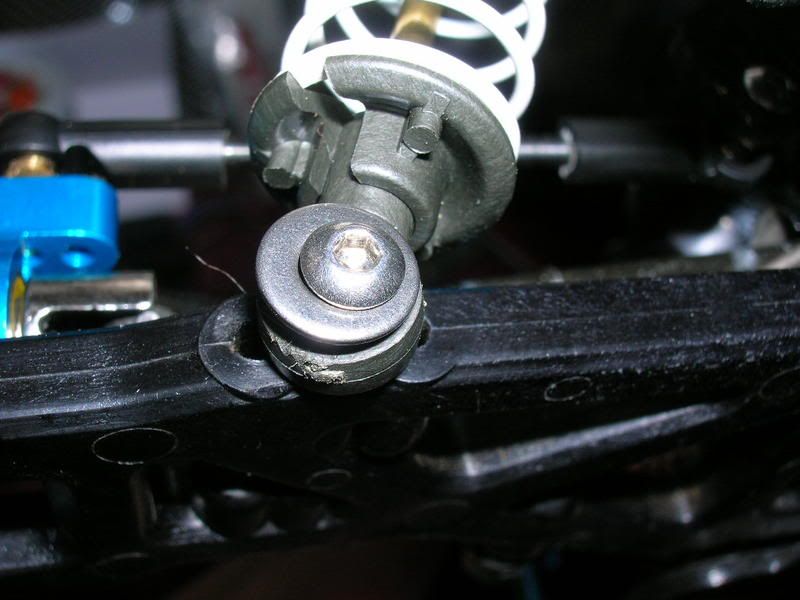
sorry about the fuzziness. i cant figure out what size ball i need to fit in here

kawada slipper, i can only assume its the inch conversion that is available for this chassis.
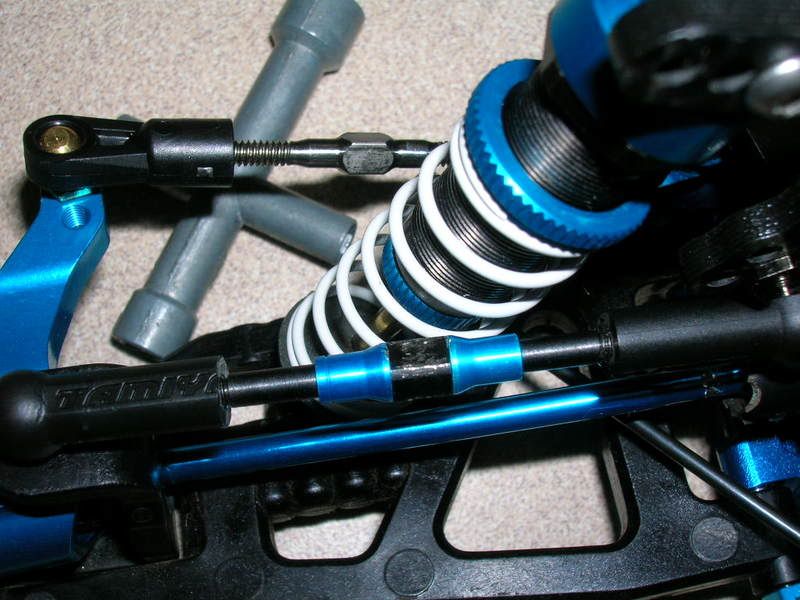
and in this pic, you can see how i had to cut down the stock tamiya ball cups inorder to make the hard tamiya turnbuckles fit.
here are some more completed pics. I had a couple hick-ups in the building. i found out that i wont be able to use the lay down servo mounts successfully. the servo saver comes in contact with the bottom pate. wil have to she if i can get a different servo saver.
gotta find some ball studs to mount the shocks. the bottom ball mounts are bigger than the stock tamiya mounts. Does anyone know what size ball mounts i can use in there?
I also need to get a couple more turnbuckles for the steering links, and for the servo, since it so much closer to steering assembly.
some pics for those who like to look at pics.
sorry about the fuzziness. i cant figure out what size ball i need to fit in here
kawada slipper, i can only assume its the inch conversion that is available for this chassis.
and in this pic, you can see how i had to cut down the stock tamiya ball cups inorder to make the hard tamiya turnbuckles fit.
02-23-2009, 03:19 PM
#3761
Senior Member
Join Date: Apr 2007
Location: daytona beach,
FL
Posts: 274
Likes: 0
Received 0 Likes
on
0 Posts
ORIGINAL: Lunchboxer
Are those the Tamiya shocks but w/ alloy caps?!
Are those the Tamiya shocks but w/ alloy caps?!
sure are. definately a hopped up car.
any ideas on what ball ends those are?
02-23-2009, 04:39 PM
#3762
Thread Starter
I have the TRF buggy shocks at home, and it looks like it has those weird ball connector that uses those weird plastic ball.. see a pic (I wish the pic is larger) from Tamiya website.. I think it is meant to fit those plastic fitting... and a machine screw goes through it..
02-23-2009, 04:47 PM
#3763
Senior Member
Join Date: Apr 2007
Location: daytona beach,
FL
Posts: 274
Likes: 0
Received 0 Likes
on
0 Posts
man!
can you get a measurement on the size of the ball for me? if not, i won't be able to get these mounted, and i am trying to get them mounted asap.
4mm? 7mm? the product sheet said 5mm, i think i could get some of those at the LHS
can you get a measurement on the size of the ball for me? if not, i won't be able to get these mounted, and i am trying to get them mounted asap.
4mm? 7mm? the product sheet said 5mm, i think i could get some of those at the LHS
02-27-2009, 08:35 AM
#3767
Senior Member
Join Date: Apr 2007
Location: daytona beach,
FL
Posts: 274
Likes: 0
Received 0 Likes
on
0 Posts
here are some updates... its coming along slowly now that i am realizing some parts i need.
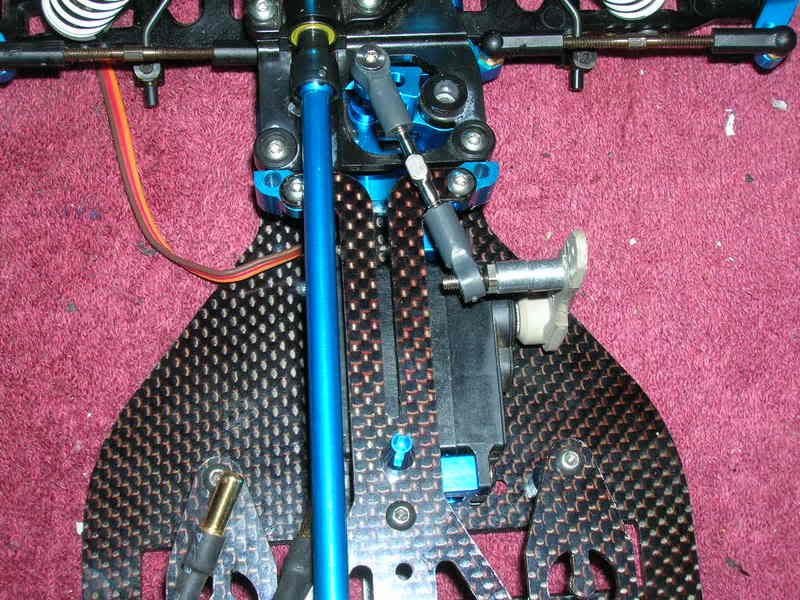
i have some pics of the servo mounted on its side. i have a servo saver to put on there, but the arm was just used so i could fir the stand offs.
check it out.
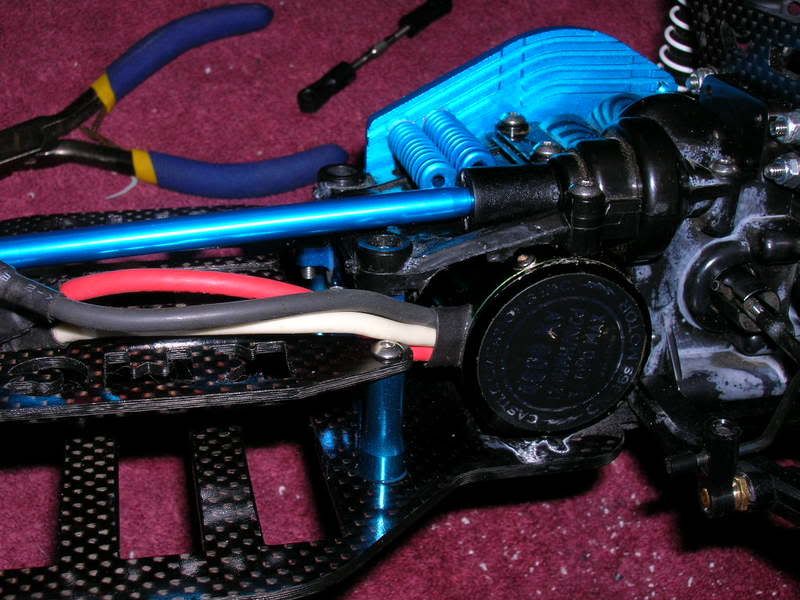
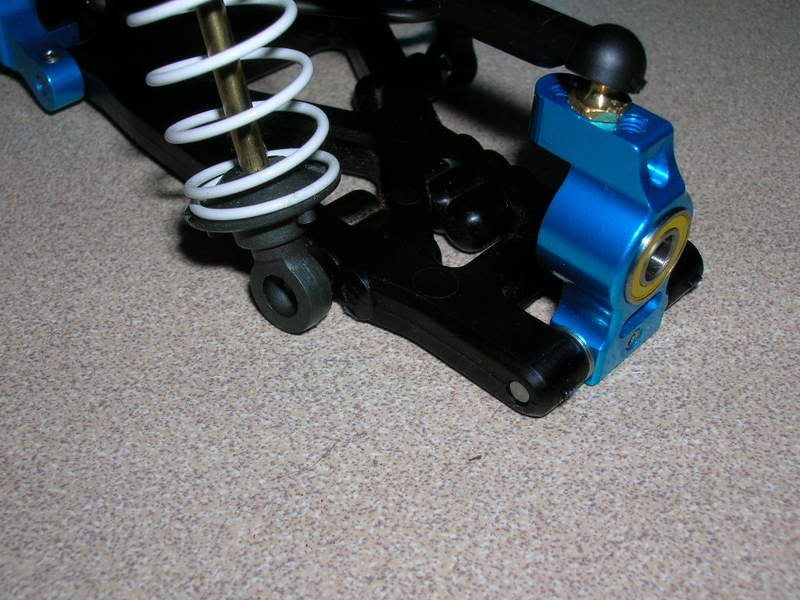
the shock mounts. i used traxxas 6.8mm balls, and then put the washer on there to hold them in place
you can see the 4600 in there. its hard to tell, but you can see the near side of the cutout is more rounded off because that is where i had to dremel it to get the motor to fit.
i also had to grind down the bumper so it was not a square corner that would collect lots of dirt. better at a taper i think.

i have some pics of the servo mounted on its side. i have a servo saver to put on there, but the arm was just used so i could fir the stand offs.
check it out.
the shock mounts. i used traxxas 6.8mm balls, and then put the washer on there to hold them in place
you can see the 4600 in there. its hard to tell, but you can see the near side of the cutout is more rounded off because that is where i had to dremel it to get the motor to fit.
i also had to grind down the bumper so it was not a square corner that would collect lots of dirt. better at a taper i think.
02-27-2009, 09:14 AM
#3768
Thread Starter
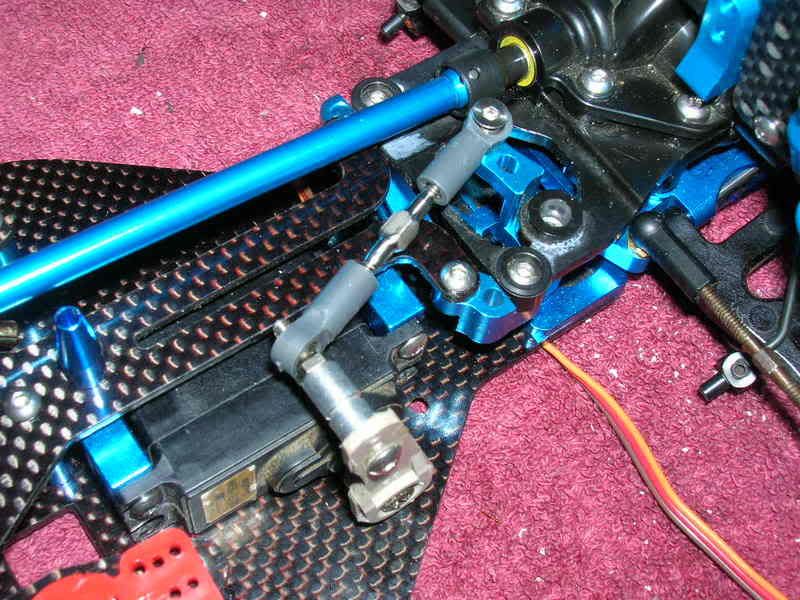
Do you have concern w/ the angle on the turnbuckles between steering servo and the bell crack arm??
Seems like the center driveshaft clears the steering servo just fine, so can't you push the servo to the left of the chassis? Maybe mount the servo on the other side of the ear? (might have to Dremel the servo mounting ears to flat on the top side..)
Just throwing ideas...
Seems like the center driveshaft clears the steering servo just fine, so can't you push the servo to the left of the chassis? Maybe mount the servo on the other side of the ear? (might have to Dremel the servo mounting ears to flat on the top side..)
Just throwing ideas...
02-27-2009, 01:50 PM
#3769
Senior Member
Join Date: Apr 2007
Location: daytona beach,
FL
Posts: 274
Likes: 0
Received 0 Likes
on
0 Posts
hmmm, let me see if i can picture this in my head.
do you mean just flip the servo so the arm is facing the other way? of just moving the servo mounting blocks more tot he left to move the servo more to the left? i think that might work, but i would have to drill holes in my beautiful chassis.
i think that idea would work well though. the stand offs i have on the servo arm would need a little work, but i think i could get them to the correct angle.
02-27-2009, 01:53 PM
#3770
Thread Starter
If you re-drill the hole, obviously that's the best.. but alternatively, I was thinking just move the servo from on top of the servo mount to "behind" the servo mount, and put the screw from the back side... like I said, might have to Dremel out the ribs on the servo ears a little bit, to make it a flat mounting service, but might work...
02-27-2009, 02:14 PM
#3771
Senior Member
Join Date: Apr 2007
Location: daytona beach,
FL
Posts: 274
Likes: 0
Received 0 Likes
on
0 Posts
OOOHHHH
duh. that would be much easier to accomplish. would have to make sure it wouldnt come in contact with the top plate if its moved, but there are two mounting positions, i already have it on the inner most postion, but maybe by changing it around as you suggested i can get the desired angle!
duh. that would be much easier to accomplish. would have to make sure it wouldnt come in contact with the top plate if its moved, but there are two mounting positions, i already have it on the inner most postion, but maybe by changing it around as you suggested i can get the desired angle!
02-27-2009, 02:40 PM
#3773
Senior Member
Join Date: Apr 2007
Location: daytona beach,
FL
Posts: 274
Likes: 0
Received 0 Likes
on
0 Posts
the test will come tonight.
the hardest thing is going to be sealing the chassis to help keep dirt out... i dont think i will be able to do that at all though.
the hardest thing is going to be sealing the chassis to help keep dirt out... i dont think i will be able to do that at all though.
02-27-2009, 02:43 PM
#3774
Thread Starter
I know other brands of buggy, some of them have a lexan underbody tray.. you can try to see if you can find one and try to fit that to your DF-03.. that should help.. ! Otherwise, well, just run it and enjoy it..