


My new project car - TA05v.2 R chassis kit (Tamiya #84159)
 01-22-2011, 04:19 PM
#51
Banned
Thread Starter
Join Date: Sep 2010
Location: Northampton,
MA
Posts: 1,766
Likes: 0
Received 0 Likes
on
0 Posts
ORIGINAL: ElectricGuy007
Here's my yokomo with a latemodel body on it.
But yeah TA-05 stuff fits my car, as well as AE body posts.
Here's my yokomo with a latemodel body on it.
But yeah TA-05 stuff fits my car, as well as AE body posts.

Some other hop-ups that could fit, if you can fit 1st gen TA05 parts, is some of the stuff from the TA05-IFS or IFS R. Now I'm not familiar with your car, so I probably won't mention the front end IFS itself.
Could you send me a link to the manual for your car?
 01-23-2011, 02:10 AM
#52
Senior Member

cool looks like i am getting the carbon plastic chassis for my tb03, i can bend the stock with my hand a little.
02-24-2011, 06:55 PM
#53
Banned
Thread Starter
Join Date: Sep 2010
Location: Northampton,
MA
Posts: 1,766
Likes: 0
Received 0 Likes
on
0 Posts
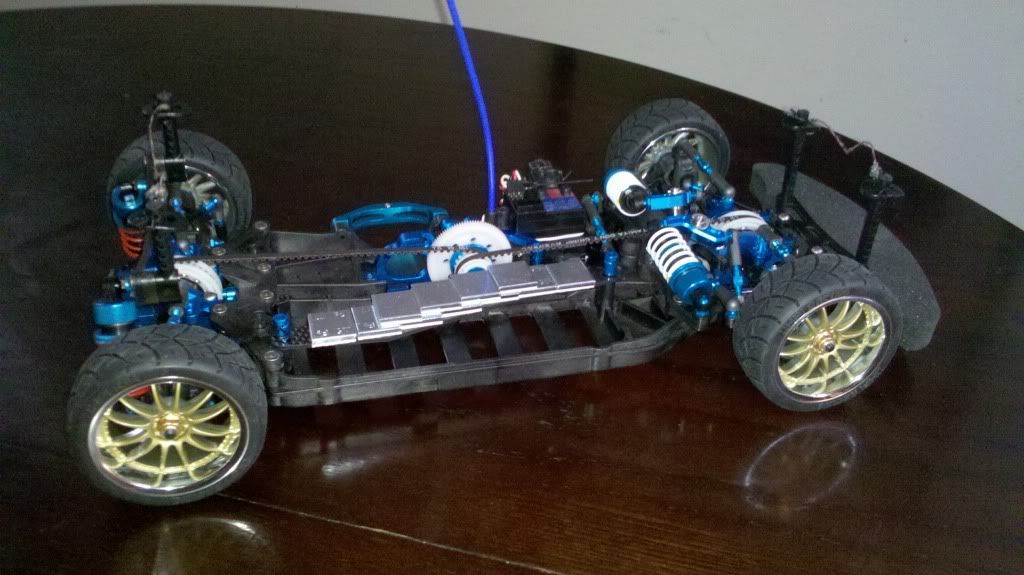
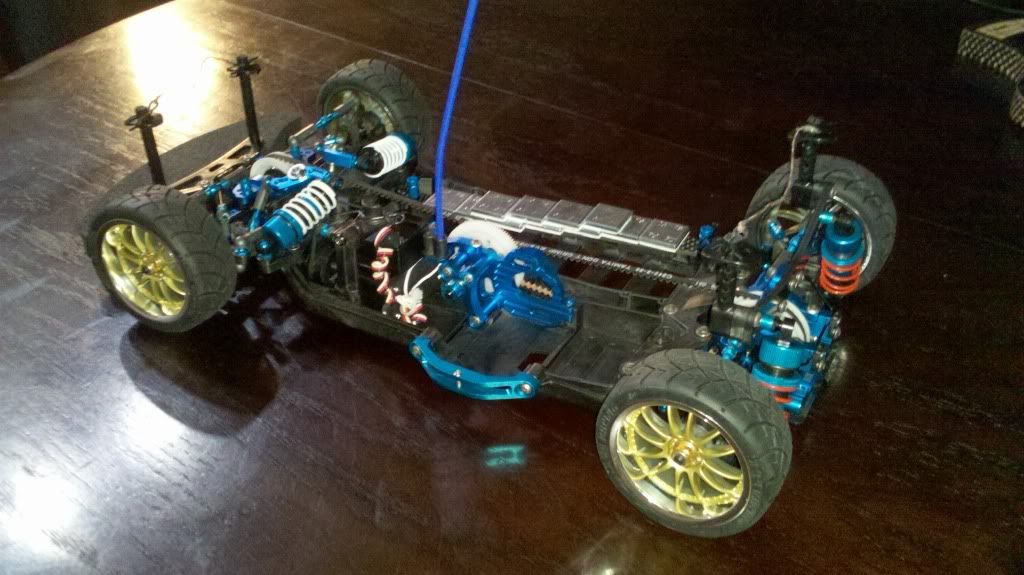
Updated rolling chassis with about half the electrics installed:
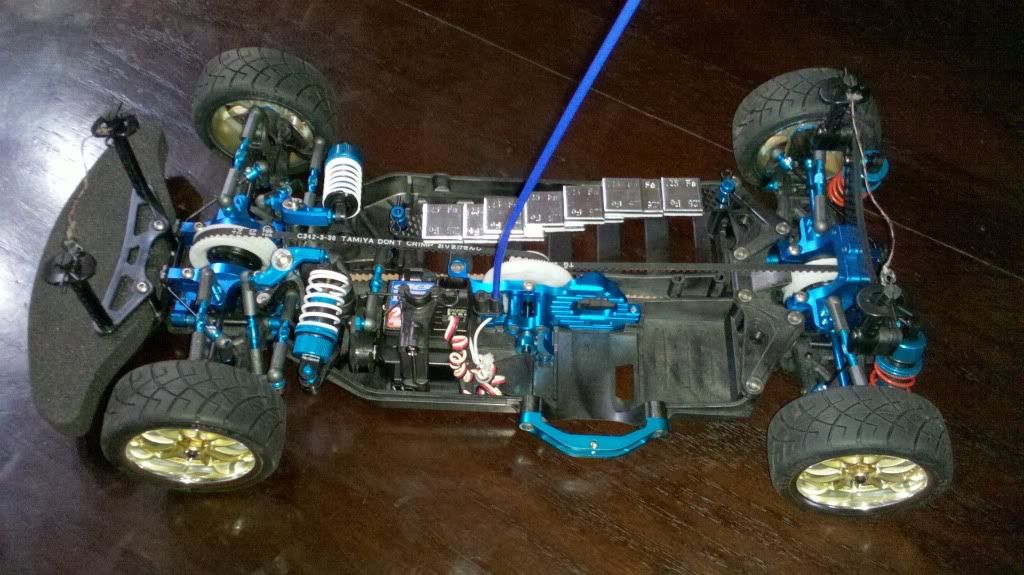
Has anyone tried to use the TA05 Blue Aluminum Transponder Stay on the Ver.II kit? I've got one installed on my TA05-R but that part also bolts into one of the steering servo flanges. If the part is threaded all the way thru then I should be good. The TA05-R's part screws in from the top, and the V2 R's same part screws in from the bottom b/c of the newer and easier design.
Again. I want to get away from the aluminum turnbuckles. If they can slightly bend while move it wrong while I'm tuning it up, I am very concerned what will happen on the race track, or worse, bashing it out in a parking lot. The TRF Titanium turnbuckles I got for my TA05-R are bulletproof, but costly. But, because they're blue anodized and from Tamiya, what the hell . . . . . The car won't see the carpet track until it's discontinued LOL j/k
Has anyone tried to use the TA05 Blue Aluminum Transponder Stay on the Ver.II kit? I've got one installed on my TA05-R but that part also bolts into one of the steering servo flanges. If the part is threaded all the way thru then I should be good. The TA05-R's part screws in from the top, and the V2 R's same part screws in from the bottom b/c of the newer and easier design.
Again. I want to get away from the aluminum turnbuckles. If they can slightly bend while move it wrong while I'm tuning it up, I am very concerned what will happen on the race track, or worse, bashing it out in a parking lot. The TRF Titanium turnbuckles I got for my TA05-R are bulletproof, but costly. But, because they're blue anodized and from Tamiya, what the hell . . . . . The car won't see the carpet track until it's discontinued LOL
j/k
02-24-2011, 08:01 PM
#54
Senior Member
Join Date: Oct 2010
Location: Aurora, CO
Posts: 437
Likes: 0
Received 0 Likes
on
0 Posts
Very nice!
I decided on the chassis kitI wanted, a TA05 IFS-R #49491, and got outbid on the first one to come up on ebay.
In the meantime I'm amusing myself with a DB01-R kit.
I decided on the chassis kitI wanted, a TA05 IFS-R #49491, and got outbid on the first one to come up on ebay.
In the meantime I'm amusing myself with a DB01-R kit.
02-24-2011, 08:54 PM
#55
Banned
Thread Starter
Join Date: Sep 2010
Location: Northampton,
MA
Posts: 1,766
Likes: 0
Received 0 Likes
on
0 Posts
ORIGINAL: Moontan13
Very nice!
I decided on the chassis kitI wanted, a TA05 IFS-R #49491, and got outbid on the first one to come up on ebay.
In the meantime I'm amusing myself with a DB01-R kit.
Very nice!
I decided on the chassis kitI wanted, a TA05 IFS-R #49491, and got outbid on the first one to come up on ebay.
In the meantime I'm amusing myself with a DB01-R kit.
because the IFS-R uses 1st gen TA05 series parts, along with that Tamiya carbon reinforced lower deck. It's more expensive than the same for the V2 series, but is completely race-ready with lightening holes and Lipo-friendly battery strap tape slots, if you opt for it. The V2 series carbon reinf lower deck that I got from Tamiya didn't come with those features, but doesn't need any of it b/c its lighter and is Lipo-friendly.Original Tamiya R series kits - genuine ones with zero aftermarket parts - get high bids on ebay. I paid a hundred each for two vintage Tamiya Tamtech 1/24th scale cars over two years ago, and if I look again for em anywhere, they'll only be on archive pages.
Original 1/12th scale Rothman's Porche anyone? I bet that thing, with a Technigold motor, would give my TA05-R a thorn in its side . . . . . The TA05-R would have a 17.5 pro stock BL motor, so that levels the playing field, sort of
 05-01-2011, 03:26 PM
#56
Banned
Thread Starter
Join Date: Sep 2010
Location: Northampton,
MA
Posts: 1,766
Likes: 0
Received 0 Likes
on
0 Posts
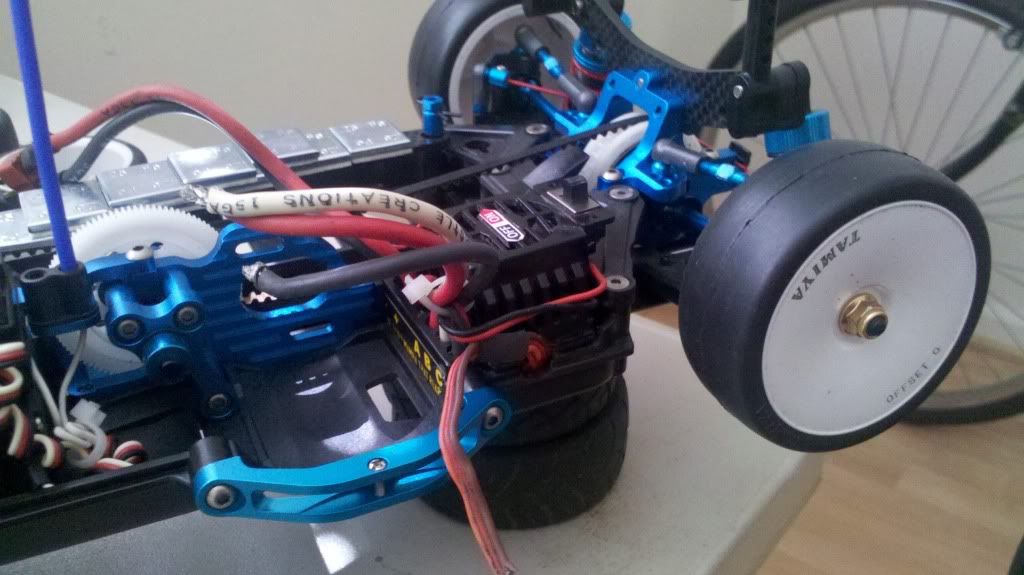
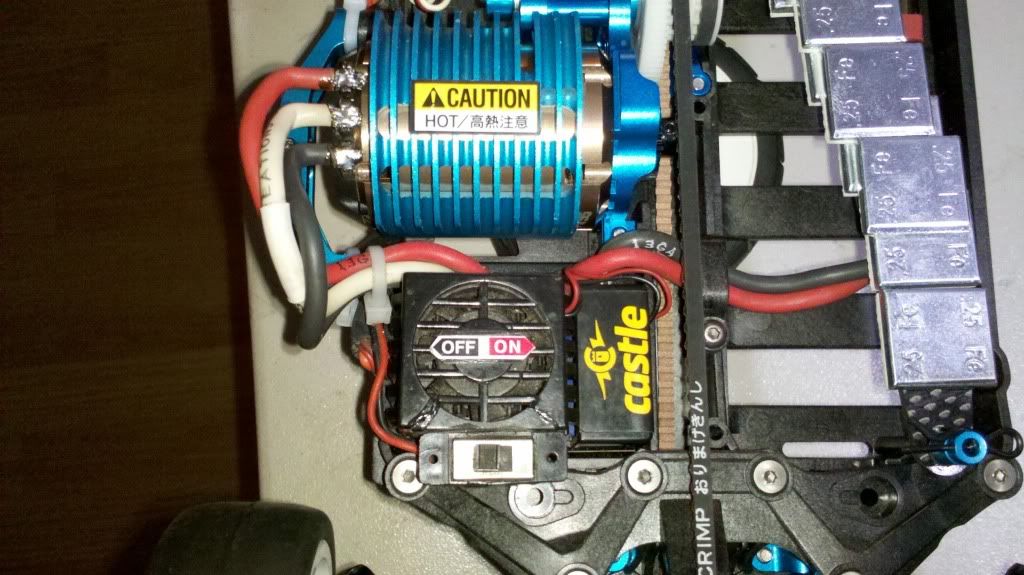
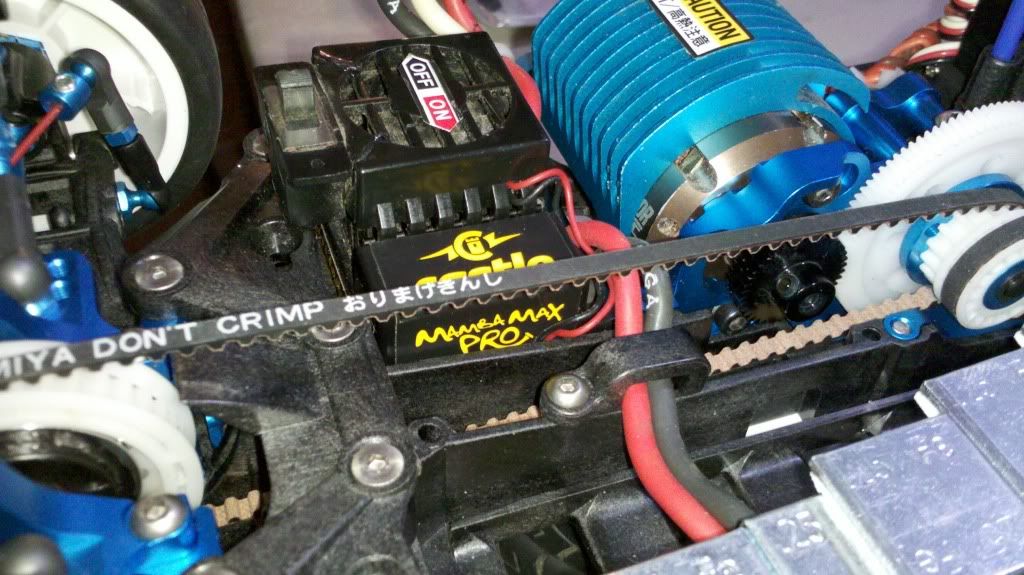
My TA05-R needed some serious down time, so I tore the whole car down, labeled the front and rear diffs, put some sub-assemblies in neat little bags, and ordered replacement parts to rebuild it and hopefully shelf queen it this time and only pull it out as a backup car at the races. I then realized that I had my chance to see if my Mamba Max Pro would fit it the ver.II R. I looked at the size specs three times over the past six months or so, and it seemed to be able to just fit snug against the existing dimensions in the esc compartment. I glued the ON/OFF switch to the side of the cooling fan, and made it so that it's flush on top.
The esc's receiver wire harness and sensor port are on opposite sides of the case, and again, there was no room for me to add a slave cable/ sensor cable to the motor. That wasn't the biggest problem though. I kept looking at the lower deck on my older TA05 and thought to myself, oh yay - Dremel time all over again. The esc fit in all nice, but the lip edge on the side of the chassis was too tall and wouldn't let one side of the esc to sit down all the way into the compartment.
I checked and double checked both the esc and compartment to see what I could do. First off, I was able to pull the heat-shrink tubing out of the case where the receiver wire comes out, and then I used a sharp file to make a channel up along the cooling fan housing wall. I re-checked the fit, and that made things a lot better. But that lip on the chassis kept that same side from seating all the way down into the compartment.
I pulled out the Dremel tool and only had to mill out 1/8th of an inch of the top lip, and also made a relief in the middle for the same receiver wire harness. Then it became a drop-in fit, albeit the sensor harness. I'd have to tunnel a small channel on the inside of the compartment to make that work, on the other side near the center reinf. spine near the belt well.
The only thing that backfired on me was the pre-glued ON/OFF switch on the esc. The bottom of the switch is hitting the rear chassis stiffener. A small problem, but nothing huge. I cleaned up all the mill work and added some double-sided foam tape and the esc is in there - like ragoo
