


Tamiya Nissan R91CP Build Thread (High Resolution Pictures)
 07-04-2012, 07:58 AM
#1
Senior Member
Thread Starter
Join Date: Nov 2008
Location: Wayne, NJ
Posts: 409
Likes: 0
Received 0 Likes
on
0 Posts
Tamiya recently Re-Released the Nissan R91CP. The car was originally made to commemorate Nissan's victory of the Daytona 24 hour race in 1992. The car feature's the same chassis as the original, with minor differences. Group C cars aren't all that popular on RCU, at least from what I can see, so I decided to dedicate a thread on building one of them. I am often busy, but I will do the best I can to keep this thread updated.
Well, lets get started:
Here's the complete package deal: The car, Futaba Radio System, all the paints, both Acrylics and Sprays, and a TEU-104 BK Speed Controller- Purchased from Tower Hobbies.

The first step of assembly is painting the wheels with Tamiya X-11 Chrome Silver Acrylic. I used two coats of it, to make sure I had full coverage.

Here's is the fine-tip type brush I used. With a brush like this painting along the ridge is fairly easy. A steady hand and patience helps too.

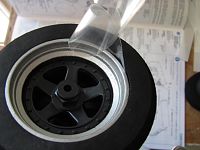
The Tires are finally ready for installation after that tedious painting! Double sided, clear tape, is used to secure the tires to the wheels.
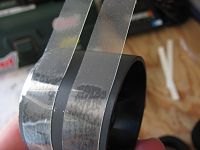
Below are two pictures of what can happen when applying the tires, snagging, or the tape catching the tire, should be avoided.
How it should look. Notice how the tape is both smooth, and flat, between the wheel and tire.
How it shouldn't Look, otherwise know as snagging. Notice the tape is sideways between the wheel and tire. Fix this fast, otherwise the tape can tear.

Don't forget the SSR Racing sticker.

Here they are, all the wheels are finally finished. It takes some time and effort to complete them, but the outcome sure pays off.

Well, that's all for right now. I hope you enjoyed the build process so far.
Joe
Well, lets get started:
Here's the complete package deal: The car, Futaba Radio System, all the paints, both Acrylics and Sprays, and a TEU-104 BK Speed Controller- Purchased from Tower Hobbies.
The first step of assembly is painting the wheels with Tamiya X-11 Chrome Silver Acrylic. I used two coats of it, to make sure I had full coverage.
Here's is the fine-tip type brush I used. With a brush like this painting along the ridge is fairly easy. A steady hand and patience helps too.
The Tires are finally ready for installation after that tedious painting! Double sided, clear tape, is used to secure the tires to the wheels.
Below are two pictures of what can happen when applying the tires, snagging, or the tape catching the tire, should be avoided.
How it should look. Notice how the tape is both smooth, and flat, between the wheel and tire.
How it shouldn't Look, otherwise know as snagging. Notice the tape is sideways between the wheel and tire. Fix this fast, otherwise the tape can tear.
Don't forget the SSR Racing sticker.
Here they are, all the wheels are finally finished. It takes some time and effort to complete them, but the outcome sure pays off.
Well, that's all for right now. I hope you enjoyed the build process so far.
Joe

 07-04-2012, 12:47 PM
#3
Senior Member

the group C is my favorite onroad now, the best upgrades to get it on a track are- F103 rims and f103 shimizu rubber tires, spur gear spacer and run 48p spur gear, install soft front springs, replace bushings for bearings.
thats about it, very fast, fun stable car.
I have one with a C11 painted body, but i will not run it in fear of damaging it, stead i run a F103 ABC hobby Gt-1 body and a F103 Peugeot 505 body
thats about it, very fast, fun stable car.
I have one with a C11 painted body, but i will not run it in fear of damaging it, stead i run a F103 ABC hobby Gt-1 body and a F103 Peugeot 505 body
07-04-2012, 01:07 PM
#4
Senior Member
Thread Starter
Join Date: Nov 2008
Location: Wayne, NJ
Posts: 409
Likes: 0
Received 0 Likes
on
0 Posts
Thanks for the responses. I would love to run mine at the track, but then again, I'd need a new body. The original is way to much work, and just too plain nice to run.
07-04-2012, 03:21 PM
#5
Senior Member
ORIGINAL: TornadoGuy
Thanks for the responses. I would love to run mine at the track, but then again, I'd need a new body. The original is way to much work, and just too plain nice to run.
Thanks for the responses. I would love to run mine at the track, but then again, I'd need a new body. The original is way to much work, and just too plain nice to run.
this is my 505, however i have since then trimmed the body and replaced the tires/rims with smaller F103 ones. i have to upload what i call my "shadow" body, it looks sweet.
also there is no need to run the rear pod wing (this one i cut from body than affixed to pod) using it makes the rear end grab too hard.
07-05-2012, 06:38 PM
#6
Senior Member
Thread Starter
Join Date: Nov 2008
Location: Wayne, NJ
Posts: 409
Likes: 0
Received 0 Likes
on
0 Posts
Here's just a few more:
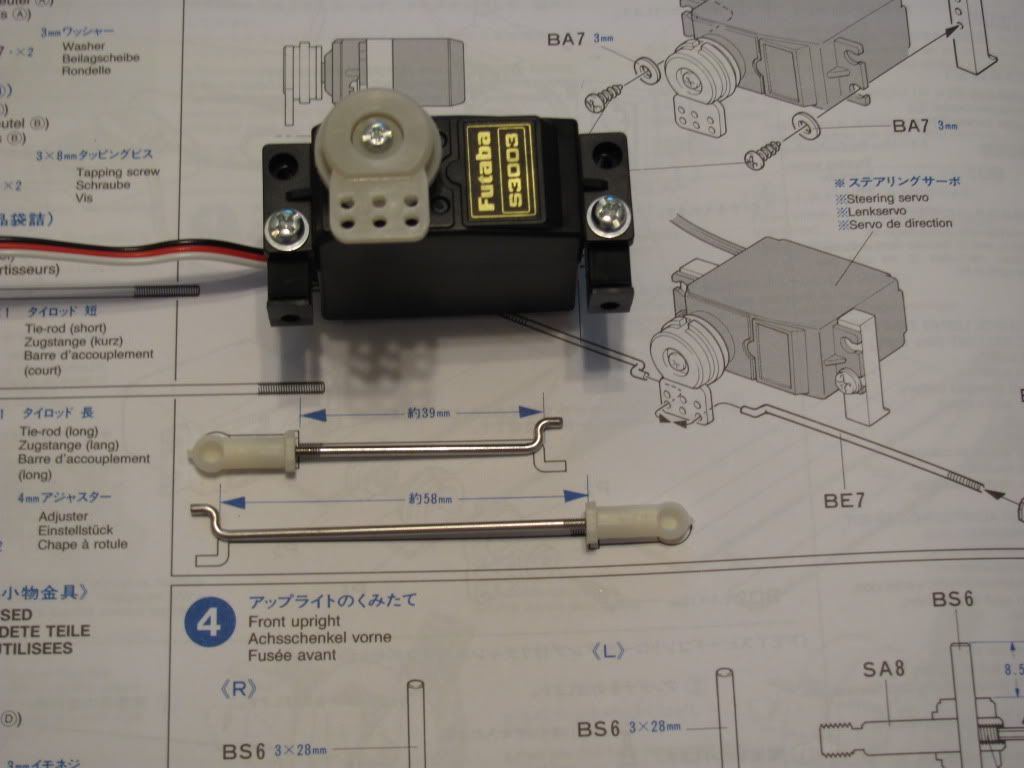
Steering Servo Arms with Futaba type Servo Saver attached.

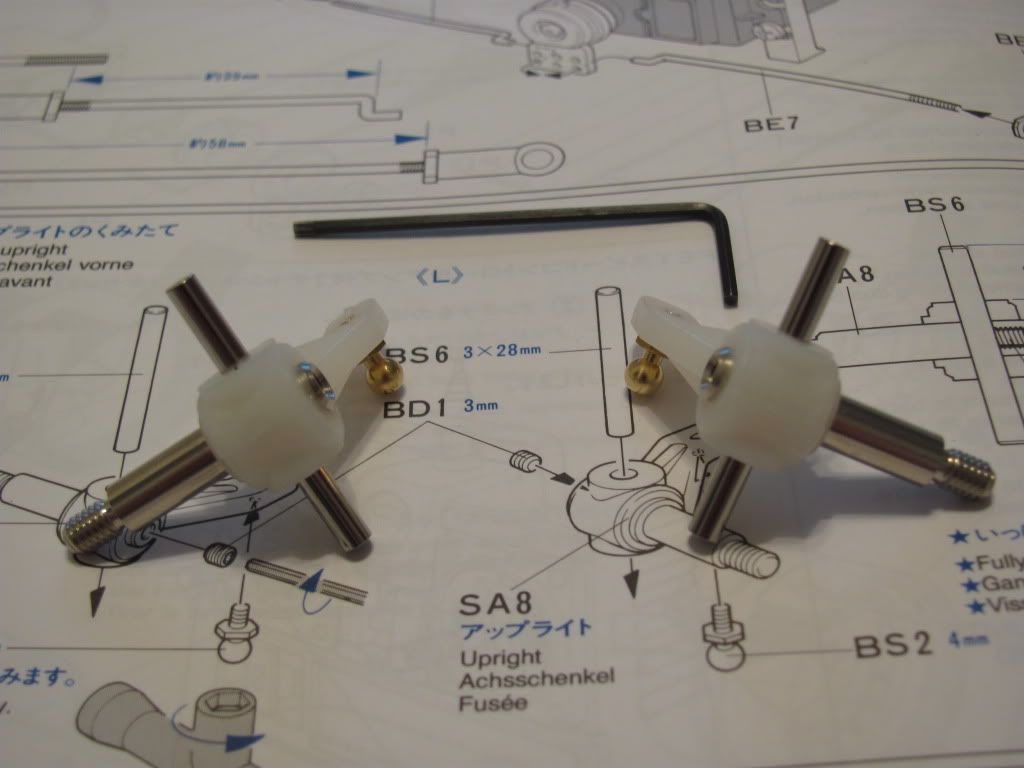
The steering uprights have a shaft that goes through it, which is secured by a grub screw. Make sure that screw is secured.
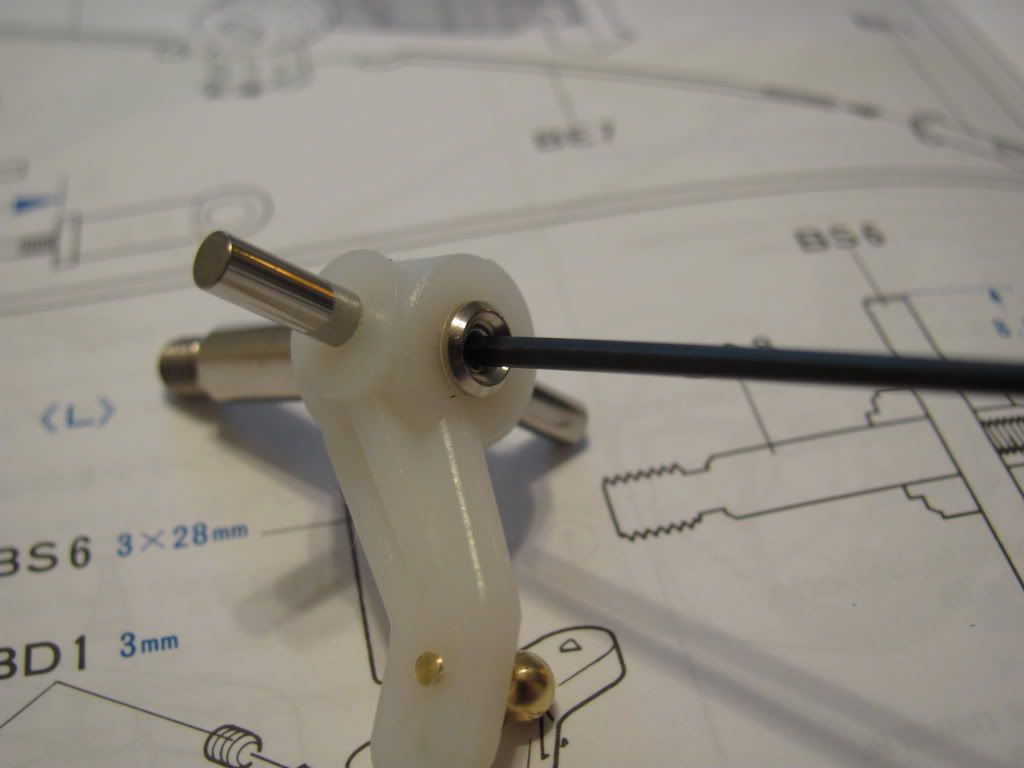
Both uprights completed.
That's it for now,
Joe
Steering Servo Arms with Futaba type Servo Saver attached.
The steering uprights have a shaft that goes through it, which is secured by a grub screw. Make sure that screw is secured.
Both uprights completed.
That's it for now,
Joe

