Revo XL builds
#2
Senior Member
Thread Starter
Join Date: Apr 2008
Location: Coulee Dam, WA
Posts: 812
Likes: 0
Received 0 Likes
on
0 Posts
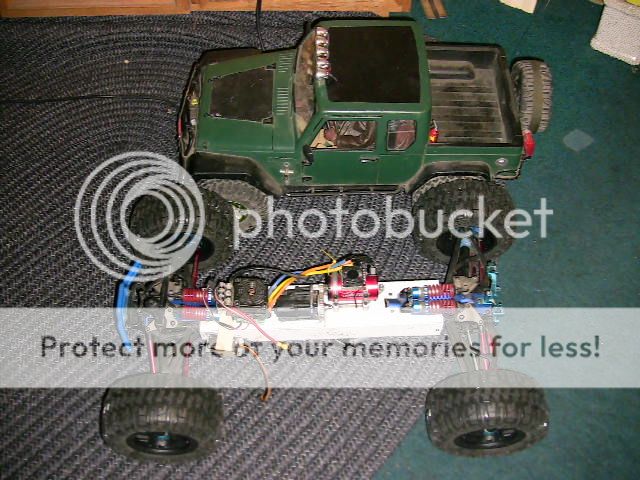
The longer of the two has a wheel base of 21" and will be using a HPI Vorza center diff. with a gear mounted above so that I acts as a gear reduction it my stand it might go, I'm going to try it before I cut it off or not. I will be using the Vorza motor mount on both builds. I will be using the Losi DBXL body and cage on the 21" wheel base and on the 18.75" wheel base I will be using a Yeti XL body and cage. I will be using both 24mm hex hubs and the 17mm hex hubs un these builds depending on how they will be run at the of use. The Losi DBXL will be done first because the body is available and the Yeti XL body isn't.


#3
Senior Member
Thread Starter
Join Date: Apr 2008
Location: Coulee Dam, WA
Posts: 812
Likes: 0
Received 0 Likes
on
0 Posts
I have had my Revo since they first came out. So I have had it for quite some time now. I have done the long chassis when it came out and then traxxas came out with there own and added a 3.3 motor and so years later the brushless revo came out and I converted it to brushless and then years later I made it into a 1/5 scale sc truck.
So that is where I'm at now. I will now make a scale buggy out of it and that is why you see it in the scale builds.
So what is planned? shorten the long frame you see here to a wheel base of 18.5. Why? because that is what the new Yeti XL is at.
I plan on adding the new Yeti XL body and wheels and tires to this build.

I will go over some of the parts that are already on the Revo as well as what will be added to make it balanced and out perform the Yeti XL.
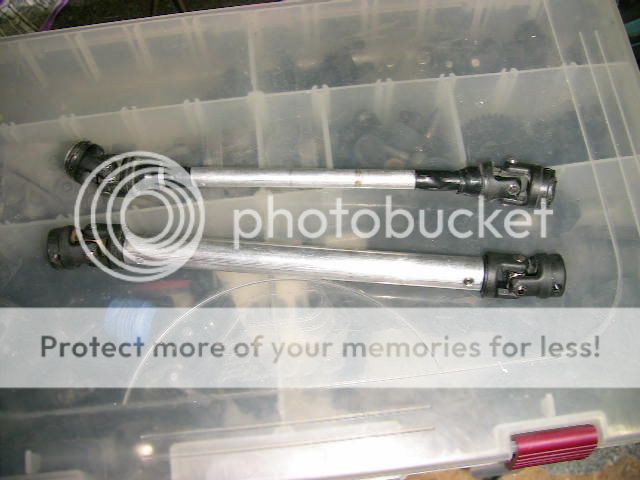
One thing you can spot right off is the low mounting of a Zero flex motor mount that is a HPI Vorza piece. The Robinson Racing slipper system is bomb proof also. I will also cover how to make the aluminum drive shafts that make this build
possible. It is simple and any one can do it.

So that is where I'm at now. I will now make a scale buggy out of it and that is why you see it in the scale builds.
So what is planned? shorten the long frame you see here to a wheel base of 18.5. Why? because that is what the new Yeti XL is at.
I plan on adding the new Yeti XL body and wheels and tires to this build.

I will go over some of the parts that are already on the Revo as well as what will be added to make it balanced and out perform the Yeti XL.
One thing you can spot right off is the low mounting of a Zero flex motor mount that is a HPI Vorza piece. The Robinson Racing slipper system is bomb proof also. I will also cover how to make the aluminum drive shafts that make this build
possible. It is simple and any one can do it.

#10
Senior Member
Thread Starter
Join Date: Apr 2008
Location: Coulee Dam, WA
Posts: 812
Likes: 0
Received 0 Likes
on
0 Posts
To show just how big the Yeti tires are here is a set of trenchers in 3.8 (bottom) and the 1/5 scale Trenchers on top. The top is a 7.55" tire which is very close to the Yeti XL tire size. What is really cool is if you want a narrow tire like what I have here get the front tires and for wide get the rear tires of a set of both wide on back and narrow on front.
Because of the design of the baja style of bead lock if your mostly rock crawling you will not need foam in side the tires.


So if you put on a set of 24mm adapters you can have true bead locks and tires that are very close in size.
HPI Racing 102530 Aluminum Wheel Hux Hub Set 24mm Gray 4 | eBay
So now you have your first up grade to a better wheel and more types to tire to choose from, including Sand paddles.
But for those of you that want to run the 17mm hub and run the 3.8 17mm hub look at the savage 17mm hubs. And you just might because the 3.8 have a softer compound. On the trenchers the lugs are deeper on the 1/5 scale so they feel almost as soft because of this.
Integy 17mm Hex Wheel Hub Savage INTC22926 | eBay
Because of the design of the baja style of bead lock if your mostly rock crawling you will not need foam in side the tires.


So if you put on a set of 24mm adapters you can have true bead locks and tires that are very close in size.
HPI Racing 102530 Aluminum Wheel Hux Hub Set 24mm Gray 4 | eBay
So now you have your first up grade to a better wheel and more types to tire to choose from, including Sand paddles.
But for those of you that want to run the 17mm hub and run the 3.8 17mm hub look at the savage 17mm hubs. And you just might because the 3.8 have a softer compound. On the trenchers the lugs are deeper on the 1/5 scale so they feel almost as soft because of this.
Integy 17mm Hex Wheel Hub Savage INTC22926 | eBay
#11
Senior Member
Thread Starter
Join Date: Apr 2008
Location: Coulee Dam, WA
Posts: 812
Likes: 0
Received 0 Likes
on
0 Posts
#15
Senior Member
Thread Starter
Join Date: Apr 2008
Location: Coulee Dam, WA
Posts: 812
Likes: 0
Received 0 Likes
on
0 Posts
I might have to use a wider stance with this body. If that is the case then I'll slapping down 160.00 and going to buy wheels and tires from RC4WD. Very Scale looking!!!!!

I like these wheels and tires. the wheels and plastic so ther light weight and tough. The Mickey Thompson 40 Series 3.8" Baja MTZ Scale Tires look like they would work well also.


I like these wheels and tires. the wheels and plastic so ther light weight and tough. The Mickey Thompson 40 Series 3.8" Baja MTZ Scale Tires look like they would work well also.

Last edited by twissted; 10-29-2014 at 09:26 AM.
#17
Senior Member
Thread Starter
Join Date: Apr 2008
Location: Coulee Dam, WA
Posts: 812
Likes: 0
Received 0 Likes
on
0 Posts
From the pictures above, you can see that the mount in the rear is to short and will need to be changed. Also It looks like when I get more money that I will need to buy the wheels and tires from RC4WD to get the stance that is needed. The frame under the body needs to be built so that the lipos mount and also the bottom part of the body. I'm glad I went this route. It is very good looking and light weight. And it didn't take very long to do.
#19
Senior Member
Thread Starter
Join Date: Apr 2008
Location: Coulee Dam, WA
Posts: 812
Likes: 0
Received 0 Likes
on
0 Posts
#20
Senior Member
Thread Starter
Join Date: Apr 2008
Location: Coulee Dam, WA
Posts: 812
Likes: 0
Received 0 Likes
on
0 Posts


