


MAXXLIGHTS
 11-30-2004, 10:04 PM
#1
Senior Member
Thread Starter
Join Date: Apr 2004
Location: Lauderhill, FL
Posts: 163
Likes: 0
Received 0 Likes
on
0 Posts
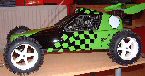
I passed up getting the FG decal sheet for my MT, way too expensive. I decided to put real LED lights in it instead. However, I had a real problem finding light kits that had enough wiring to fit in such a large body.
One company I've found makes custom light kits that allows you to put lights in whatever configuration you want for Cars, Truck, Boats, Planes and Helicopters! Besides that, these leds are super bright and can be seen for up to one mile! That's brighter than any other light kit I know. If you don't believe me check out Lumicorp at:
http://www.maxxlights.com/
You can also email Will at [email protected]. He's also giving out free items to ppl who order. I got a search light kit that is mounted on top of a hitec servo and turns in the same direction of the steering servo, among others. Anyone interested should check it out, you won't be dissappointed!
P.S. and it looks super cool too [8D] pics to come when I install them in my MT.
 12-01-2004, 07:53 AM
#2
Senior Member
Thread Starter
Join Date: Apr 2004
Location: Lauderhill, FL
Posts: 163
Likes: 0
Received 0 Likes
on
0 Posts
Oh yeah, it doesn't use 9V batteries like other kits. All the wires are connected to a Hitec universal male connector which can plug into any free slot on your reciever. That means you can use the 3rd channel to power it. Or you can get a Y harness if its not free. Current draw is unnoticable. Very cool.

 12-01-2004, 05:17 PM
#7
Senior Member
Thread Starter
Join Date: Apr 2004
Location: Lauderhill, FL
Posts: 163
Likes: 0
Received 0 Likes
on
0 Posts
I just ordered yesterday and I should have it in another week or so. I spent a total of $59.00 for the whole setup with free shipping.
Now you may say,"That's more expensive than the FG sticker sheet!!!!" But check out what I ordered:
4 Bright White Headlights (2 per side)
4 Brakelights with brake light sensor for realistic brakelight action
2 blue fog lights for the fog light spaces in the front of the MT
2 amber lights to go along side each headlight bucket (kinda like a yellow turn signal)
These lights all come with special mounts designed to fit any scale body, and a Hitec Male plug.
(This is just what I wanted, you can get as many lights as you want).
I'm sure it will look really cool and totally un-Chevy Chase Xmas Vacation House-like...cough...rfaster...cough... . I'll send some pics when I get it done.
I really started this thread so that anyone who is interested in lighting up their MT (or maybe MB) could get some custom lights. All you have to do is draw a diagram and send it in and Will will tell you how much it will cost (thats alot of wills in one sentence ). You can decide how much wire or lights you need in whatever configuration or color you want.
Besides, if you order from them you be getting a whole lotta free stuff. They are discontinuing some of their older product lines, and so they are giving them to customers who call in custom orders. I was told that they are not defective, but just discountinued because they were upgraded and replaced, but still very good and bright. Nothing wrong with some free stuff.
Call or email yourself if you want more info. If you call and speak to Will that would be the most useful in terms of questions/info.
Oh yeah one more thing....WORLDWIDE SHIPPING.
Now you may say,"That's more expensive than the FG sticker sheet!!!!" But check out what I ordered:
4 Bright White Headlights (2 per side)
4 Brakelights with brake light sensor for realistic brakelight action
2 blue fog lights for the fog light spaces in the front of the MT
2 amber lights to go along side each headlight bucket (kinda like a yellow turn signal)
These lights all come with special mounts designed to fit any scale body, and a Hitec Male plug.
(This is just what I wanted, you can get as many lights as you want).
I'm sure it will look really cool and totally un-Chevy Chase Xmas Vacation House-like...cough...rfaster...cough...
. I'll send some pics when I get it done. I really started this thread so that anyone who is interested in lighting up their MT (or maybe MB) could get some custom lights. All you have to do is draw a diagram and send it in and Will will tell you how much it will cost (thats alot of wills in one sentence
). You can decide how much wire or lights you need in whatever configuration or color you want.Besides, if you order from them you be getting a whole lotta free stuff. They are discontinuing some of their older product lines, and so they are giving them to customers who call in custom orders. I was told that they are not defective, but just discountinued because they were upgraded and replaced, but still very good and bright. Nothing wrong with some free stuff.
Call or email yourself if you want more info. If you call and speak to Will that would be the most useful in terms of questions/info.
Oh yeah one more thing....WORLDWIDE SHIPPING.
12-01-2004, 08:34 PM
#11
Senior Member
Join Date: Sep 2004
Location: , CA,
Posts: 168
Likes: 0
Received 0 Likes
on
0 Posts
The other option, of course, is just to do your own lights rather than buying a kit. 
If you're working with normal LEDs: (less than 50ma forward current)
Look up the spec sheet for the forward voltage and forward current. Not having one available, assume 1.5v for red, 2.5v for green, and 3.6v for blue/white, with 20ma for normal leds and 40ma for super-bright leds. ignore MCD ratings; they're completely useless. If your supply voltage is more than twice the forward voltage of the leds, use pairs in series. more than three times (for these cars, usually only red), use three in series. Find the difference between the supply voltage and the forward voltage of the leds, then find the resistor needed to get the proper forward current. R = (supply voltage - forward voltage of each led * number of leds in series) / forward current. You can use non-identical LEDs in series, as long as you want to run them at the same current, in which case the forward voltage would be the sum of the individual forward voltages. You can use _identical_ leds in parallel, in which case the forward voltage is the same and the forward current is multiplied by the number of LEDs.
If you're working with Luxeons:
HEAT SINKS! At full current, a luxeon puts out almost a full watt of heat, and a luxeon V 5 watts of heat. A 1-watt star may work at low current with ample air moving over the base, but a 5-watt one will burn out very quickly with no external heat sink. To use resistors to power these, be sure to compute the power dissipation across the resistor, as it will usually be several watts. You can also buy cheap, highly efficient power supplies for these off ebay.
And there's my 30-second guide to powering LEDs.
--Randy
Friends don't let friends vote for people that invade foreign countries, let religious nutcases dictate how intelligent people should run their lives, strip civil rights, keep people in love from getting married, say it's wrong to kill single-celled lifeforms but ok to kill non-americans, think the geneva convention is "quaint", .... oh wait, that wasn't a democrat, was it?
If you're working with normal LEDs: (less than 50ma forward current)
Look up the spec sheet for the forward voltage and forward current. Not having one available, assume 1.5v for red, 2.5v for green, and 3.6v for blue/white, with 20ma for normal leds and 40ma for super-bright leds. ignore MCD ratings; they're completely useless. If your supply voltage is more than twice the forward voltage of the leds, use pairs in series. more than three times (for these cars, usually only red), use three in series. Find the difference between the supply voltage and the forward voltage of the leds, then find the resistor needed to get the proper forward current. R = (supply voltage - forward voltage of each led * number of leds in series) / forward current. You can use non-identical LEDs in series, as long as you want to run them at the same current, in which case the forward voltage would be the sum of the individual forward voltages. You can use _identical_ leds in parallel, in which case the forward voltage is the same and the forward current is multiplied by the number of LEDs.
If you're working with Luxeons:
HEAT SINKS! At full current, a luxeon puts out almost a full watt of heat, and a luxeon V 5 watts of heat. A 1-watt star may work at low current with ample air moving over the base, but a 5-watt one will burn out very quickly with no external heat sink. To use resistors to power these, be sure to compute the power dissipation across the resistor, as it will usually be several watts. You can also buy cheap, highly efficient power supplies for these off ebay.
And there's my 30-second guide to powering LEDs.
--Randy
"FRIENDS DON'T LET FRIENDS VOTE DEMOCRAT"
 12-01-2004, 09:34 PM
#13
Senior Member
My Feedback: (1)

Join Date: Jan 2004
Location: Bath,
ME
Posts: 1,316
Likes: 0
Received 0 Likes
on
0 Posts
that is like looking at ancient hyroglifics to me, i don't have 1 idea as to what you just said Randy! Is there a LED for dummies book?
Jared1106, you got one of those don't you?
Is there a LED for dummies book? Jared1106, you got one of those don't you?
12-01-2004, 10:40 PM
#14
Senior Member
Thread Starter
Join Date: Apr 2004
Location: Lauderhill, FL
Posts: 163
Likes: 0
Received 0 Likes
on
0 Posts
Yeah man, thats all Greek to me (or should I say Hyroglphics). I barely have enough time to run my R/C's, not to mention build my own lights and stuff. If someone will make my light kit for me just the way I want it, then I'll pay the $$$ for it.
12-01-2004, 11:04 PM
#15
Senior Member
Join Date: Sep 2004
Location: , CA,
Posts: 168
Likes: 0
Received 0 Likes
on
0 Posts
Hmm, that wasn't an LEDs for dummies post?
Ok, more details...
Every LED (Light Emitting Diode) has two major specifications: Forward Voltage and Forward Current.
Forward Voltage is the voltage on the terminals of the LED during normal operation. For a red LED, this is typically about 1.5-1.8v. For a green LED, it's typically around 2.3-2.6v. For a blue LED, it's typically 3.4-3.7v. A white LED has the same specifications as a blue one, since a white one actually contains a blue led inside of it, with the output converted to white light.
Forward Current is the more important number for most applications, and gives how much power the LED needs. If you run too much current though an LED, you'll have a DED (Dark Emitting Diode) in very short order. For a small led, 20ma is a typical value. For a super-bright led, jumbo led, etc, 50ma might be the maximum current. For a Luxeon I, 350ma is needed for full brightness. For a Luxeon V, 700ma. An ma is a milliamp, or 1/000th of an amp.
Unlike light bulbs, if you connect an LED to a voltage source higher than its forward voltage (or, in many cases, even one slightly below the rated forward voltage), the LED will draw huge amounts of current (essentially a short circuit, the same as connecting the wires right together), and burn out instantly. To prevent this, you have to limit the current to a safe value. The standard way of doing this is with a resistor in series with the LED.
A resistor, as its name implies, resists the flow of electricity, preventing too much current from flowing. The two main specifications of a resistor are its resistance (how much it blocks the flow of electricity) and its power handling capability (how much power it can dissipate without it melting).
The relationship between these two quantities is given by Ohm's Law: V=I*R. This states that the voltage (V) across the resistor is the product of the current through the resistor (I) multiplied by the resistance of the resistor (R). For example, if you have a current of 5 amps through a 10 ohm resistor, there will be 5*10 = 50 volts across the resistor. Like most other equations, this one can (and very frequently is) re-aranged to solve for a different variable. Let's say that we know the voltage across the resistor and the current through the resistor, and want to find what the resistance of the resistor must be. We can re-arange it as R = V / I to put it in the correct form for this question (simply dividing both sides by I). Using the numbers from the previous example, if we have 50 volts across the resistor, and 5 amps flowing through the resistor, the resistance must be 50 / 5 = 10 ohms.
To pick the right resistor to prevent an LED from burning out, it is the re-aranged version of Ohm's Law that will be most useful to us. But first, we need to find a few quantities.
To find the voltage across the resistor, we need to know a bit about the voltages along a circuit. If we want our LED to run at its correct forward voltage, and that voltage is less than the battery voltage, some other part of the circuit must have that difference in voltage across it. This is where a set of rules called Kirchoff's laws come into play. In their most basic form, they state that the sum of the voltages across all parts of a circuit must equal the supply voltage. (Actually, they have to do with loops and a zero-sum, but the simplified version is adaquate for this case). Another important law is that the current through all parts in series must be the same; current is neither gained nor lost at any point. If we connect 20 random parts in series, all the parts will have the same current through them.
If our LED has a 3.6v forward voltage, and we want to run it off a 6v (5 nimh cell) battery pack, some other part of the circuit must have the missing 2.4v across it. This part is our resistor. We can verify this works, since 3.6v + 2.4v = 6v; the resistor is lowing the voltage to the correct voltage for our LED.
Now that we know how much voltage the resistor has to drop to lower the battery voltage to the LED voltage, we need to know what current our LED should run at. This is the Forward Current number off the data sheet, which I'll assume is 20ma for this example.
We now know the voltage drop across the resistor (found above as the difference between the supply voltage and the LED's forward voltage), and the current we want to run the LED at (assuming we want to run the LED at full brightness, this is the forward current off the data sheet), giving us both V and I in Ohm's Law. To find what value resistor we need, we can plug this numbers into Ohm's Law, written as R = V / I. In this case, we have V = 2.4v and I = 20ma = 0.02A. We then just divide 2.4 volts / 0.02 amps = 120 ohms. Thus, to run a 3.6v LED (white or blue) off a 6v receiver battery pack, a 120 ohm resistor will allow 20ma to run through the LED.
For another example, let's say we want to run a superbright red LED off a 7.2v pack on an electric. The LED has a forward voltage of 1.6v and a forward current of 35ma. First, we need to find what the voltage drop across the LED needs to be to keep the LED at its proper voltage. 7.2v - 1.6v = 5.6v. Thus, our resistor needs to lower the voltage by 5.6v at 35ma to run this LED. Plugging in to R=V/I, we have 5.6v / 0.035A = 160 ohms. This, for this LED, a 160 ohm resistor is needed.
Before going on to the next section, one more example. We found the red LED in the last example to be too dim, and went and bought a red Luxeon to replace it. All the numbers are the same, except the forward current is now 350ma instead of 35ma. Plugging back into the equation, we get 5.6v / 0.35A = 16 ohms. Thus, a 16 ohm resistor will run our Luxeon at the proper current.
But, now we need to consider the power dissipation of the resistor. When it drops the voltage, that energy has to go somewhere: in this case as heat, causing the resistor to get hot. The equation for power is given by P = I*V, which means that the power (in this case, heat) is given as the product of the current and the voltage. As would be expected, increasing either the voltage or the current increases the power. For our luxeon in the last example, the resistor has 5.6 volts across it, and a current of 0.35 amps. 5.6v * 0.35a = 1.96 watts. Thus, we must select a resistor rated for at least two watts to keep it from melting. For a smaller LED, usually 1/2 watt resistors (the most commonly available size) will be adaquate, but for Luxeons, higher power resistors must be used.
And since our goal is to make light, making heat is wasted power! If we lower the power lost in the resistor, we can increase the efficiency of the system -- and get more light for the same amount of battery power.
The simplest way to do this is to connect the LEDs in series. By Kirchoff's law, we know that the sum of the voltages must equal the battery voltage. If we put two luxeons in series, their voltages will be summed together, meaning the resistor will need to drop less voltage to make the LEDs get their proper current. Let's say we buy a second red luxeon, with the same specs as the first one. When summed together, they now have 1.6 + 1.6 = 3.2 volts across the pair. Thus, our resistor only needs to drop 7.2v - 3.2v = 4v. The current through both LEDs is the same since they're in series, and is still 350ma. Plugging into our equation, we have 4v / 0.35a = 11.5 ohms. And plugging into the power equation, the resistor now is only dissipating 4v * 0.35a = 1.4 watts.
This means that the resistor is putting out less heat, and thus wasting less of our battery power. In fact, since the current draw from our battery pack is still 350ma, and hasn't increased, adding that second LED was completely free! We added another LED, but didn't add any more drain on the battery pack. We can do this with even more LEDs in series, as long as they all should run at the same current, and we don't go over the battery voltage. Let's say we used 2 red luxeons and one yellow luxeon, for a total voltage drop of 1.6 + 1.6 + 2.4 = 5.6 volts. Then our resistor only needs to drop 7.2 - 5.6 = 1.6 volts. Finding the resistor value gives us 1.6 / 0.35 = 4.5 ohms, and a power disipation of only 1.6 * 0.35 = 0.56 watts. This means that very little of our battery power is being wasted, and we're still only using the same amount of battery power as we did with one LED!
While it seems very tempting to try to organize the LEDs so each set of them in series has as close to the battery voltage as possible, this brings up a problem: The battery voltage isn't constant. In particular, it's a lot higher right off the charger.
Let's say we have 2 red luxeons and one white luxeon, having a total of 1.6+1.6+3.6 = 6.8v. This is very close to our 7.2v battery pack. We run the numbers, and pick a 0.4v / 0.35a = 1.1 ohm resistor. Given that our battery pack is exactly 7.2v, all is well. But then we recharge our pack... and it now has 8.4v on it (normal for a fully charged 7.2v pack). Time to re-arange ohm's law again! We know our LEDs have 6.8v across them (since their voltage is constant), and we know our battery pack has 8.4v on it, so we know the resistor must have 1.6 volts across is. We also know that we have a 1.1 ohm resistor. Re-aranging Ohm's law again, we have I = V / R. Put in the numbers, and we have I = 1.6 volts / 1.1 ohms = 1.45 amps. D'oh!
At 1.45 amps, our LEDs, only rated for 0.35 amps, will glow very, very brightly... for a very, very short time.
What happened here? All a resistor does is resist the flow of current. If you raise the voltage across it, it will still try to resist it, but more current will be forced through. This additional current may be very unhealthy for our expensive LEDs.
Now, let's saw we stuck with just the two red LEDs, as in a previous example. We picked an 11.5 ohm resistor, to drop 7.2v to 3.2v at 350ma. We plug in our fully charged pack, and now have 8.4 - 3.2v = 5.2v. Again, I = V / R = 5.2v / 11.5 ohms = 0.45 amps. While this is still over the rated current of the LEDs, the difference is much less, and the LED will likely be perfectly safe until the battery voltage drops back to the nominal cell voltage.
So, putting more LEDs in series and using smaller resistors comes at a price... that of the safety of the LEDs. When the resistor is dropping a large voltage, a small change in input voltage will only cause a small change in the output. But when the voltage across the resistor is small, that small input voltage change is relatively large, and can cause large changes in the current.
Is there a solution to this? Yep. In fact, there's two main ones: Linear regulators and switching regulators.
Linear regulators act like a resistor with a value that changes to maintain a given output voltage or current. In acting like a resistor, however, they put out heat, and can often need heat sinks to keep them from being destroyed. The most useful ones for this application would likely be the 78xx series, such as the 7805, which will give you a perfectly constant 5 volts regardless of the input voltage. The use of these devices is beyond an LEDs For Dummies tutorial, however a google for the data sheet will likely give example schematics.
Switching regulators are the best solution, but they're complicated and expensive. They can provide a perfectly regulated voltage or current, while producing only a miniscule amount of heat. Since little heat is produced, it means they're very efficient, and maximize the runtime of the battery pack. For running Luxeons, pre-built regulators are available, where all you need to do is hook the LED(s) to the output and the battery to the input, with no resistors at all. The actual design of one of these from discrete components is very complicated (mine took about 4x4 inches of breadboard to build), so you'll want to buy modules to do it.
The (almost) last part of this post is merely a way of simplifying wiring. As long as the LEDs are _identical_ (same brand, same LED, same lot...), you can put them in parallel, and run more than one off the same resistor. If the LEDs are identical, and you put them in parallel, the current will split evenly through each of them. So if you put ten 20ma LEDs in parallel, and run 200ma through them, each will run at its proper current. With series LEDs we kept the current the same and summed the voltages; with parallel LEDs we keep the voltage the same and sum the currents. Since the LEDs must be identical, the total current is the rated current of each LED times the number of LEDs. This new current can then be used in Ohm's law to get the proper resistor to run all of them at once.
Continuting the example of ten 20ma leds, let's assume they're all yellow LEDs, with a 2.4v forward voltage. Our array of LEDs in parallel now has a forward voltage of 2.4v, but a forward current of 200ma. If we run these off a 6v pack, the resistor needs to drop 6 - 2.4 = 3.6v. R = 3.6v / 0.2a = 18 ohms. Thus, to run these LEDs, we need a single 18 ohm resistor. Since we're running a lot of current through this resistor (you wouldn't want to do this with luxeons!), we need to check the power dissipation. 3.6v * 0.2a = 0.72 watts. Thus, a 1 watt resistor is needed to dissipate that much heat without being damaged.
Since I've mentioned Luxeons, I need to mention cooling them. While some percentage of the power to a luxeon is converted to light, most of it is converted to heat. With a little LED, this small amount of heat is safely dissipated in the plastic casing and the metal leads. But the heat produced by a luxeon (almost 5 watts for the Vs!) is far more than can be dissipated in the packaging. To allow you to remove all this heat from the LED, the base of a luxeon is a solid metal slug, which must be mounted on a heat sink. The standard configuration for Luxeons is the Star, which is a Luxeon emitter mounted on an aluminum-core PCB. For the 1 watt luxeons, this little bit of aluminum can provide enough cooling, but for the 5 watt ones, or the 1 watt ones if any part of the board is covered of if there's not much air movement, an external heat sink must be provided. The easiest way to do this is just to screw the Star board to the unside of a heat sink, with a layer of thermal paste to ensure good thermal conductivity. If you notice the LED dims a few seconds after you turn it on, either your batteries are dead, or it's overheating! similary, if you find the led hot to the touch, you're not providing enough heat sinking.
The last thing to consider is Luxeon IIIs and Vs, which have a 7.2v forward voltage. If you have a 6v battery pack, you'll find you need a negative resistance resistor... an invention scientists would love to have! To run one, you'll either need to add an auxillary battery pack for the LEDs (say a pack of 8 nimh AAs, for 9.6v), or use a dc-dc converter. A dc-dc converter is a very nifty device that is capable of raising a lower voltage to a higher voltage, at the cost of increased current draw and a loss of efficiency. Like switching regulators, these are best purchased as modules, as attempting to design one is a very complicated task.
And as a very last note... What do you do if you ask for an 11.5 ohm resistor, and the guy at the electronics store looks at you like you're nuts? Resistors are available in a fixed set of standard values, and anything other than those values will be very difficult to obtain. Typically you can either use the next lower resistance, which will give you brighter (and hotter, shorter-lived) LEDs, or the next higher resistance, giving you dimmer LEDs. For cases where neither of these works, you can use resistors in series or parallel, to form a circuit with the correct equivelent resistance. However, this is beyond the scope of this document, with the exception of stating two rules: Putting two resistors in series gives a resistance which is the SUM of the two resistances. For example, a 2.2 ohm and a 3.3 ohm resistor can be put in series to make a 5.5 ohm resistance. When putting two resistors in parallel, the resistance is the reciprocal of the sum of the reciprocals of the resistances. ouch! This can be written as R = 1 / ((1 / R1) + (1 / R2)). A simple example of this is for resistors of the same value, in which case the equivelent resistance is half the resistance of each resistor. For example, putting two 22 ohm resistors in parallel will give you an 11 ohm resistance. This makes intuitive sense: If a resistor resists the flow of current, two of them will allow twice as much current to flow, which is the same thing a resistor of half the value would do.
And that, ladies and gentlemen, is my new "LEDs for Dummies" guide.
--Randy
(Damn that took a lot of work to type! and forgive any typos... after all that typing, I'm not in the mood to proofread it.
 12-02-2004, 07:45 AM
#19
Senior Member
My Feedback: (1)
Join Date: Jan 2004
Location: Bath,
ME
Posts: 1,316
Likes: 0
Received 0 Likes
on
0 Posts
rofl, holy crap man, that is great, when i go on my lunch break i will be able to read HALF of that!!!! Thanks for that info, seriously, its great to learn about these LEDz, as they are the wave of the future.

 12-02-2004, 05:54 PM
#22
Senior Member

Join Date: Aug 2004
Location: highlands ranch,
CO
Posts: 241
Likes: 0
Received 0 Likes
on
0 Posts
ORIGINAL: FROGMAN524
Are alternators available?
Are alternators available?
12-02-2004, 06:04 PM
#23
Senior Member
Join Date: Sep 2004
Location: , CA,
Posts: 168
Likes: 0
Received 0 Likes
on
0 Posts
ORIGINAL: dubby
Ive got a headache
Ive got a headache
--Randy
12-02-2004, 06:13 PM
#24
Senior Member
My Feedback: (1)
Join Date: Jan 2004
Location: Bath,
ME
Posts: 1,316
Likes: 0
Received 0 Likes
on
0 Posts
ORIGINAL: skulldoctor
i have a mini alternator im gonna be putting on my monster beetle.while your driving it charges the onboard battery and supplies power to run the servos at the same time. if i hook up a light kit it will power that also. i shouldnt hav to charge my battery pack at all,it will always be charged.
ORIGINAL: FROGMAN524
Are alternators available?
Are alternators available?
ah, ok, lets see it, how does it work?