


70" SZD 9 Bocian Build
 11-07-2010, 10:27 PM
#1
Member
Thread Starter
Join Date: Oct 2010
Location: the colony, TX
Posts: 35
Likes: 0
Received 0 Likes
on
0 Posts
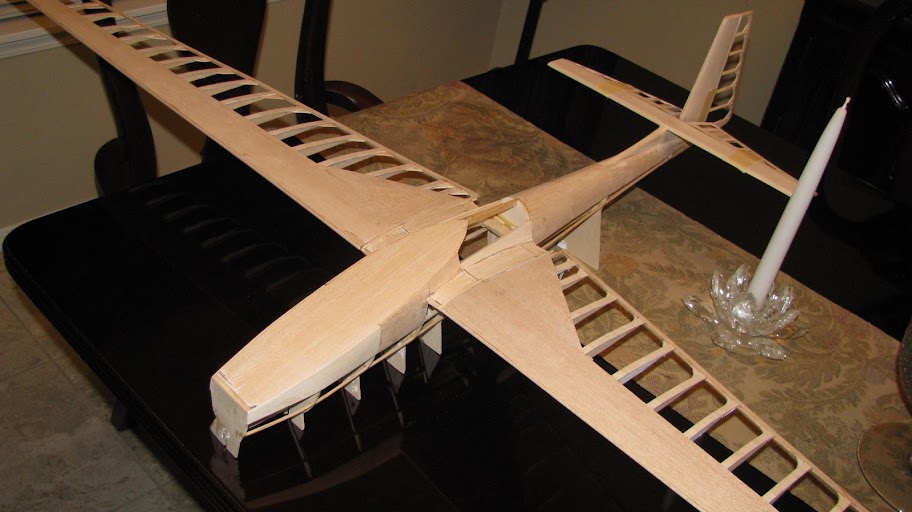
I found these free plans on vintage sailplaner for free.
It is for an 11' or so model. I printed it down to 70" WS.
Two things scare me to death.
1) I have never built plug in wings. So I dont know how that is going to come out.
2) I am not good at sheeting a fuse but will try on this one.
Well here we go.
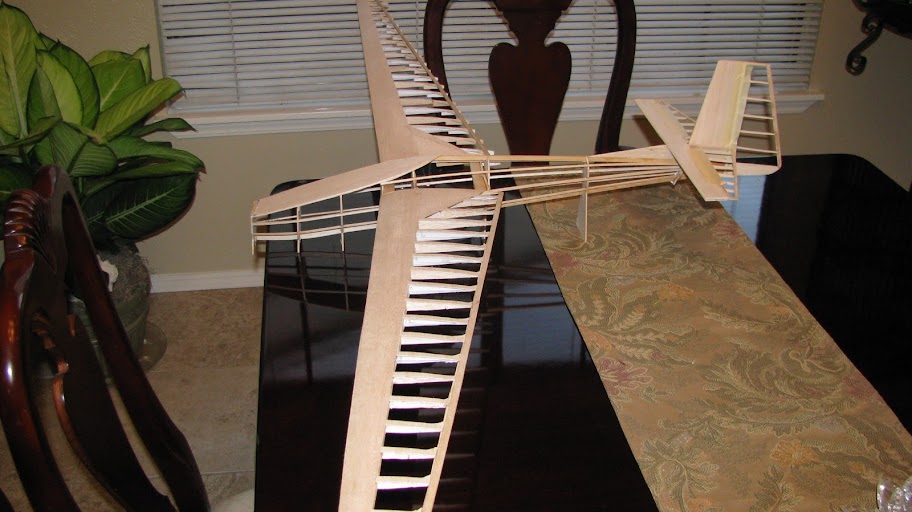
I have never built like this before but have seen others doing it so I gave it a try. (fuse above board instead of left half/right half.)
I must say I like it. It really helps in lining up the H&V stab.

It is for an 11' or so model. I printed it down to 70" WS.
Two things scare me to death.
1) I have never built plug in wings. So I dont know how that is going to come out.
2) I am not good at sheeting a fuse but will try on this one.
Well here we go.
I have never built like this before but have seen others doing it so I gave it a try. (fuse above board instead of left half/right half.)
I must say I like it. It really helps in lining up the H&V stab.
 11-11-2010, 01:25 AM
#2
Member
Thread Starter
Join Date: Oct 2010
Location: the colony, TX
Posts: 35
Likes: 0
Received 0 Likes
on
0 Posts
I got 1/2 a wing done. I still have no idea how to make it a plug in... I guess I will cross that bridge when I get there.

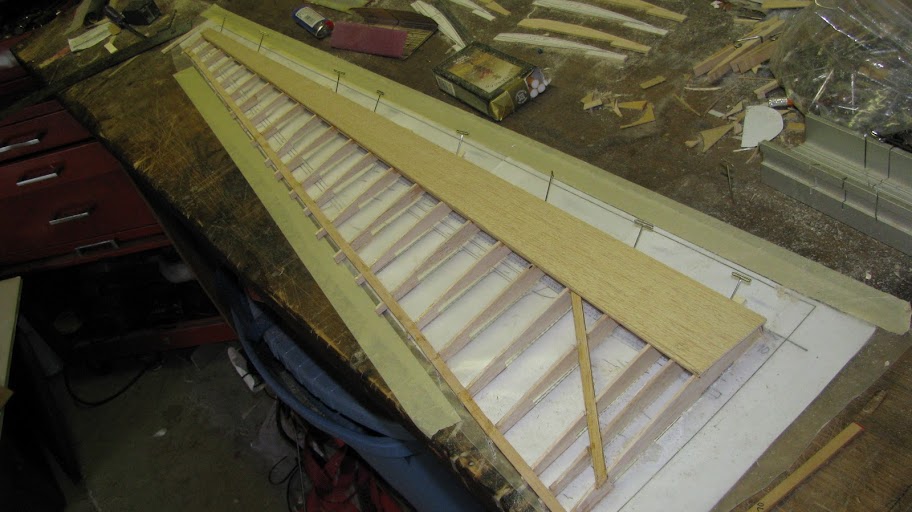
All of you guys do such GREAT work, am I the only one that does this???(break stuff while building)

All of you guys do such GREAT work, am I the only one that does this???(break stuff while building)
11-11-2010, 05:32 PM
#3
Junior Member
Join Date: Jun 2010
Location: Bel Air, MD
Posts: 4
Likes: 0
Received 0 Likes
on
0 Posts
Heck no. I'm a bull in a china shop and usually break something once a day. Especially a delicate piece on a delicate model.
Nice build. keep the pics coming
Kev
Nice build. keep the pics coming
Kev
 11-16-2010, 07:56 PM
#5
Member
Thread Starter
Join Date: Oct 2010
Location: the colony, TX
Posts: 35
Likes: 0
Received 0 Likes
on
0 Posts
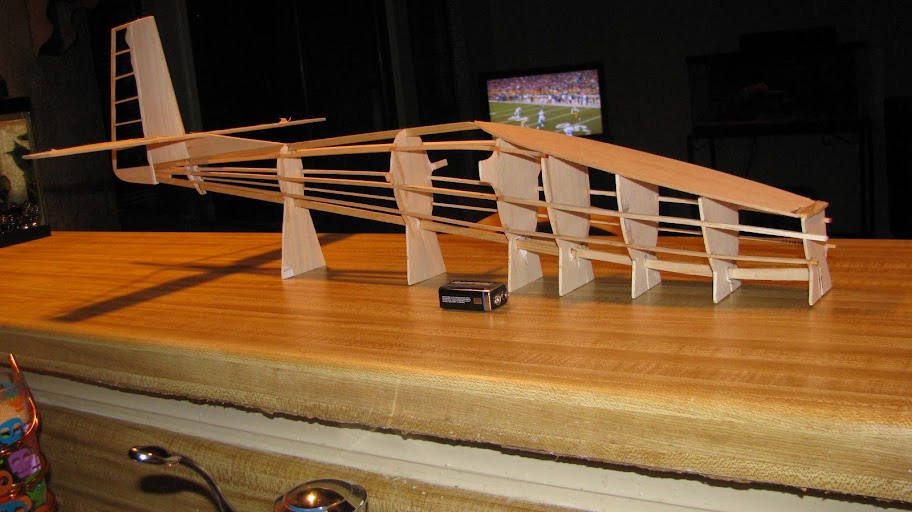
I knew I was not going to like sheeting the fuse!!!
It is coming out OK, but is taking forever. I have soaking 1/16 and wrapping it around some pint cans. Then I take some paper and masking tape and make a template for an area and then cut some balsa a little oversize.
Then Trim, fit, trim, fit, trim, fit.....
I know there must be some secret so share with me please?
11-17-2010, 01:14 PM
#6

Actually, what you are doing regarding sheeting is as good a technique as any!
Question: How many channels will you use. It looks to me like it needs ailerons, but I can't really tell the diehedral.
John C
Question: How many channels will you use. It looks to me like it needs ailerons, but I can't really tell the diehedral.
John C
11-17-2010, 03:06 PM
#7
Member
Thread Starter
Join Date: Oct 2010
Location: the colony, TX
Posts: 35
Likes: 0
Received 0 Likes
on
0 Posts
Hi John,
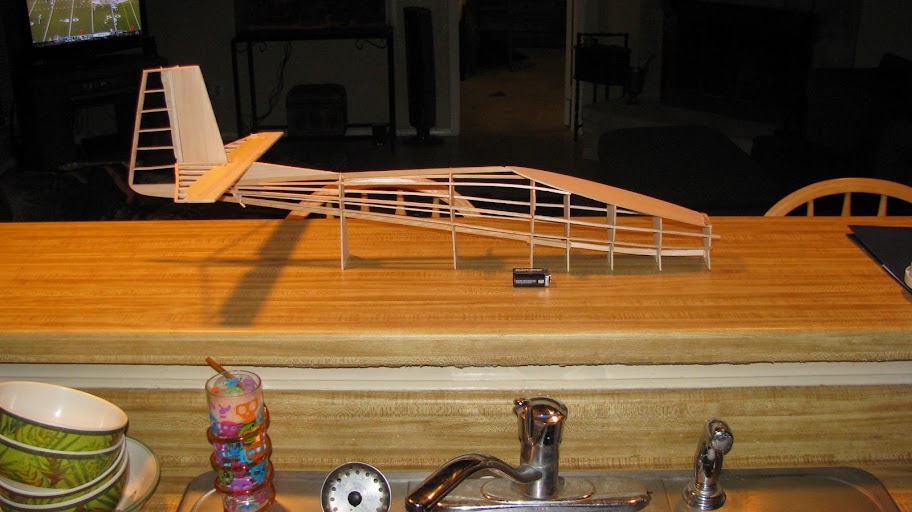
I added the ailerons today. I built them in after wards, I don't know why, I just did. So three channels.
Looking at the three views of the scale plane, I am going to go with about 3 degrees on the dihedral.
The sheeting has gone easier the more I do. I will stick with this technique. I am leaving the bottom open till I get the radio and push-rods in.
I'm headed to the LHS now to ask them how to build the plug-in wings and get supplies I should be able to test hop it this weekend.
Here are the ailerons and sheeting of about 2/3 rd's of the fuse.
11-19-2010, 11:30 AM
#8
Member
Thread Starter
Join Date: Oct 2010
Location: the colony, TX
Posts: 35
Likes: 0
Received 0 Likes
on
0 Posts
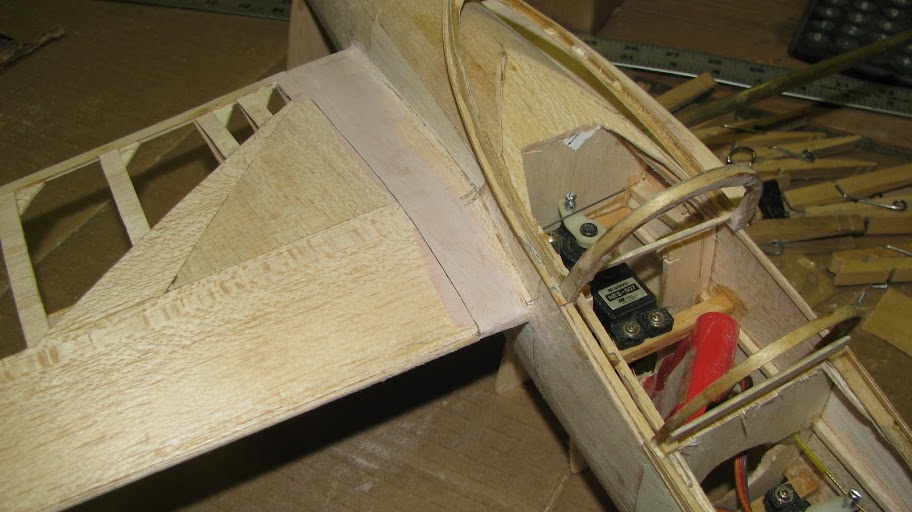
Well, I just started gluing stuff to make the plug-in wings. (my first plug-in).
Perhaps I did it backwards, with the main spar coming out of the fuse. I dont know, just seemed in my mind, the easiest.
I got some brass tube and carbon tube. For the male part I slathered epoxy on the carbon tube and inserted it into the tube seeing as the carbon is metric and the brass is standard, to beef it up.
I will cut the wing rib holes OVERSIZE, insert the female brass tube and put a bit of 15 min epoxy on it so I can fiddle, jiggle and adjust the wings to get the right dihedral, incidence and such. Once set I will just beef it up with ply, spruce and epoxy or whatever I have around.
The RG15 turned out to be really thin, I couldn't even fit "one more thin wafer mint". So I went with a bellcrank and the main aileron servo will be in the fuse. I'll have to hook 'em up every time I fly but so be it.
The canopy frame got started using 1/32 ply. All of the fiddly bits are balsa supports and keys while I sand away. I usually take masking tape to the fuse and then sand the frame to it. Looks ugly but works for me, I will sand all the other bits off after it is fit.
Regards,
Nels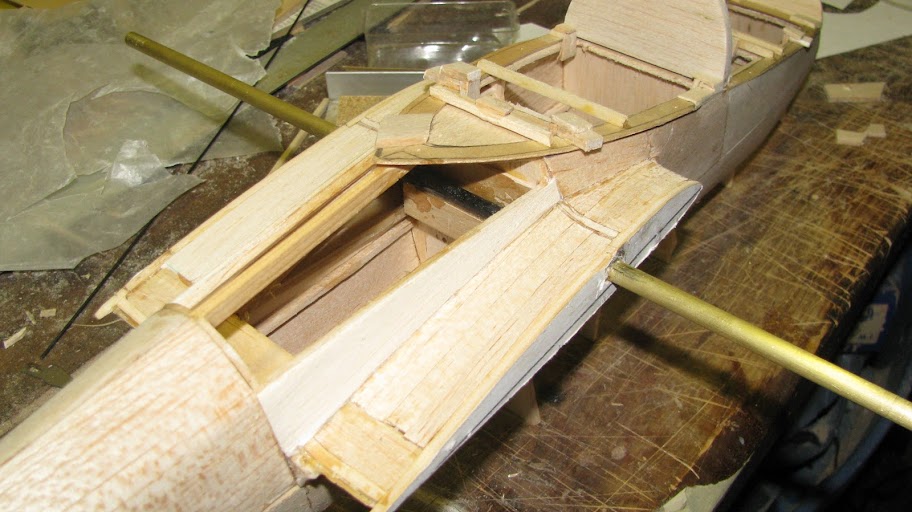
11-23-2010, 02:51 AM
#9
Member
Thread Starter
Join Date: Oct 2010
Location: the colony, TX
Posts: 35
Likes: 0
Received 0 Likes
on
0 Posts
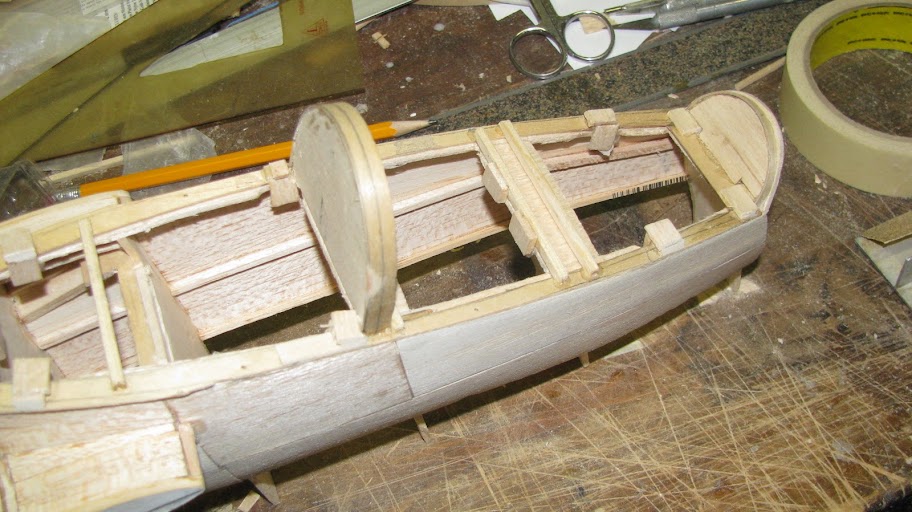
This weekend I set it up on the garage floor and jigged it all up. I was then able to set and epoxy the tubes in the wings.
I have one wing faired in and built a canopy slide for the right side rear canopy. I still have to make one for the left. There is a small notch cut out about half way which allows me to take the rear canopy off, otherwise it slides back to the stop.

I have one wing faired in and built a canopy slide for the right side rear canopy. I still have to make one for the left. There is a small notch cut out about half way which allows me to take the rear canopy off, otherwise it slides back to the stop.
11-23-2010, 10:49 PM
#10
Member
Thread Starter
Join Date: Oct 2010
Location: the colony, TX
Posts: 35
Likes: 0
Received 0 Likes
on
0 Posts
Let the doping begin! I had some old tissue paper, maybe 40 or 50 years old from a Thermic kit. It's still good. It is yellowed and stained but I am going to paint over it so no big deal.
For the fuse I am going to hit it with some dope then sanding sealer and primer and paint it.
Rear canopy slide is done. About half-way up the track there is a notch where I can remove it to hook up the ailerons.

 11-28-2010, 09:34 PM
#12
Member
Thread Starter
Join Date: Oct 2010
Location: the colony, TX
Posts: 35
Likes: 0
Received 0 Likes
on
0 Posts
I made some landing gear out of balsa, ply, brass tube and wire.

Added a coat of primer.

And shot some Dover white.

Now I just have to wait for the paint to gas off before handling it and doing details.
Added a coat of primer.
And shot some Dover white.
Now I just have to wait for the paint to gas off before handling it and doing details.
11-28-2010, 11:10 PM
#13


Join Date: Oct 2002
Location: Chilliwack, BC, CANADA
Posts: 12,425
Likes: 0
Received 22 Likes
on
19 Posts
She's coming along superbly.
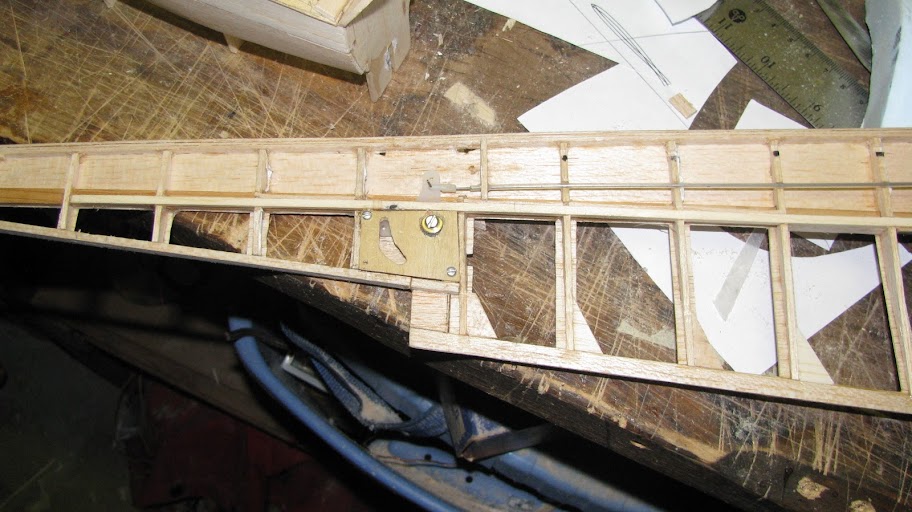
My one concern is how well the joiner rod connects the loads with the spars. I saw that the outer end was close to but not between the spar caps. I trust you used some ply or other method of ensuring that the spar loads are adequitely passed into the joiner and not just into the wing ribs? Otherwise winch loads will need to be watched. No "pedal to the metal" for this model.
But aside from that one concern for the model's well being I'd say you did a superb job of handling the issues. She looks fantastic!
11-28-2010, 11:52 PM
#14
Member
Thread Starter
Join Date: Oct 2010
Location: the colony, TX
Posts: 35
Likes: 0
Received 0 Likes
on
0 Posts
Thanx B,
Yes the wing rod passes from just in-between the top and bottom spruce spars and angles slightly backwards to the rear edge of the spars. (to give the forward sweep)
Then I built a "balsa" dam around it and filled it with epoxy. So the rod, spars and balsa all make a box filled with epoxy.
Other than that I have fought some paint issues but she will be ok.
Regards,
Nels
11-29-2010, 12:13 AM
#15
Member
Thread Starter
Join Date: Oct 2010
Location: the colony, TX
Posts: 35
Likes: 0
Received 0 Likes
on
0 Posts
Stork that is going on the nose. I have some old decal paper for a laser printer. I will paint the rest of the glider but I couldn't see pulling this off.
Yes, Red and White AGAIN. Why???? 'Cause thats the colors I have, lol.

Yes, Red and White AGAIN. Why???? 'Cause thats the colors I have, lol.
12-12-2010, 07:17 PM
#16
Member
Thread Starter
Join Date: Oct 2010
Location: the colony, TX
Posts: 35
Likes: 0
Received 0 Likes
on
0 Posts
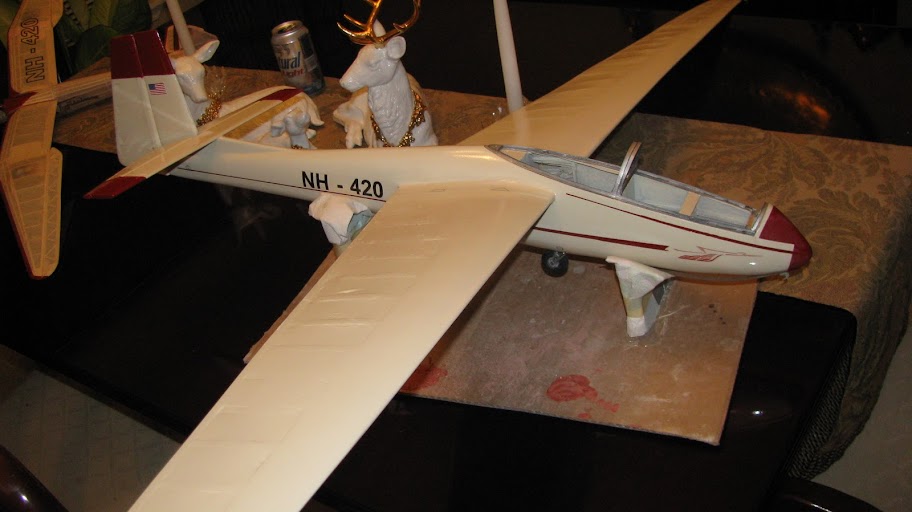
Added a little color this weekend. I still have to do stripes and such, but is a pain waiting so long for the paint to dry enough in the cold weather.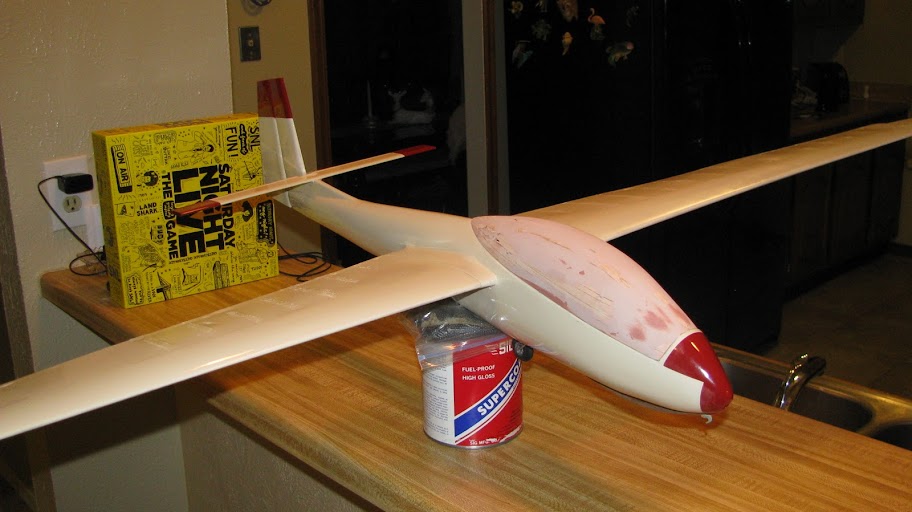


Also changed my mind from the white to a more cream color.
Worked on the landing skid and made a tow hook out of wire a wood screw and epoxy to hold it on. It slots in in the back.
Some covering is a little loose but, dang it, I am going forward at this point.
Spent most of the weekend planking a canopy plug and may cover it with 1/2 ounce FG cloth and epoxy before I try to pull a plug.
I hinged the rudder and elevator but still have to do the ailerons, I hate hinging...
 12-19-2010, 04:49 PM
#18
Member
Thread Starter
Join Date: Oct 2010
Location: the colony, TX
Posts: 35
Likes: 0
Received 0 Likes
on
0 Posts
Thank you Road,
II got the stripes on today and the bocian nose logo.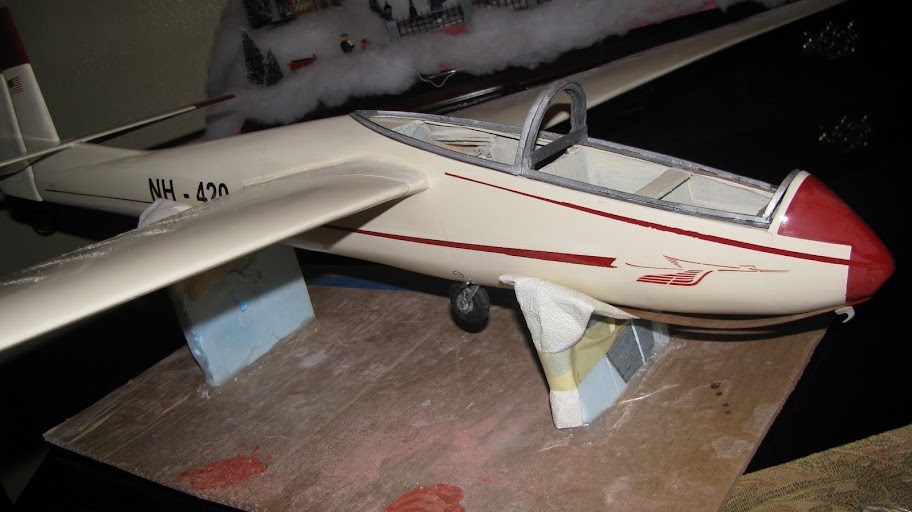
II got the stripes on today and the bocian nose logo.
The paint pulled off a bit , I suppose it is the weather.
, I suppose it is the weather.I'm moving forward anyway.
The numbers are my initials and birthday, no year, y'all will have to guess.
Bocian logo, reg. numbers, flag and access hatches are laser printed water slide declas.
I found some guys here that fly a lot so hopefully after the holiday we will do a flight. Right now with out radio it is at 1 pound.

12-19-2010, 06:31 PM
#19
Junior Member
Join Date: Feb 2006
Location: PeterboroughCambridgeshire, UNITED KINGDOM
Posts: 12
Likes: 0
Received 0 Likes
on
0 Posts
Good work! I guess I have a bit of a vested interest in Bocians, having spent almost all of this year getting one back in the air...
It may be too late for me to make this offer, but mine is sitting in a hangar having just been passed fit to fly. If you needed any pictures taking for detail, let me know and I'll either email them to you or post them here?
I'm not at my desktop right now, but here is a link to my blog post after her first flight back after seven years :-)
http://jackofallhobbies.blogspot.com...ly-flying.html
Let me know if I can help, and good luck with the finishing touches!
12-19-2010, 06:42 PM
#20
Member
Thread Starter
Join Date: Oct 2010
Location: the colony, TX
Posts: 35
Likes: 0
Received 0 Likes
on
0 Posts
Oh Man, TC,
That is too Awesome! I think that is so cool that you made the offer. I would love to see you flying your Bocian.
I'm really liking the looks of it so I may go ahead and build the bigger one.
Lets keep in touch and please share your flying stories, pics and vids with us.
Oh and do me a favor, put your canopy in the oven and shrink it down for me. I'm having fits making my own!
Regards,
Nels
12-21-2010, 12:41 PM
#21
Junior Member
Join Date: Feb 2006
Location: PeterboroughCambridgeshire, UNITED KINGDOM
Posts: 12
Likes: 0
Received 0 Likes
on
0 Posts
Here a few links to pictures, feel free to look through the rest in the album if you like 
http://lh4.ggpht.com/_HfCu6JJ2gdc/TR...2/IMG_0575.JPG
http://lh5.ggpht.com/_HfCu6JJ2gdc/TR...2/IMG_0579.JPG
http://lh5.ggpht.com/_HfCu6JJ2gdc/TR...2/IMG_0583.JPG
http://lh4.ggpht.com/_HfCu6JJ2gdc/TR...2/IMG_0751.JPG
http://lh5.ggpht.com/_HfCu6JJ2gdc/TR...2/IMG_0861.JPG
http://lh6.ggpht.com/_HfCu6JJ2gdc/TR...2/IMG_1823.JPG
http://lh6.ggpht.com/_HfCu6JJ2gdc/TR...2/IMG_2003.JPG
http://lh5.ggpht.com/_HfCu6JJ2gdc/TR...4/DSC00901.JPG
http://lh5.ggpht.com/_HfCu6JJ2gdc/TR...2/DSCN0302.JPG
http://lh4.ggpht.com/_HfCu6JJ2gdc/TR...2/DSCN0317.JPG
I was going to imbed the pictures, but they looked like they would swallow up the whole thread lol
Below should be a link to the rest of the album, if I've done it right!
http://picasaweb.google.com/tonyspironi/Bocian1E
12-28-2010, 04:21 PM
#22
Member
Thread Starter
Join Date: Oct 2010
Location: the colony, TX
Posts: 35
Likes: 0
Received 0 Likes
on
0 Posts
Coke bottle canopy.
Next time I will use a generic bottle as the coke bottle has too many ridges.
1) cut opening in bottle.
2) place canopy inside.
3)stuff with t-shirts to take up space in bottle.
4) turn broiler in oven on and get an oven mitt.
5)carefully wave the bottle under the broiler elements until it shrinks.
This was a two part canopy which was good 'cause the whole canopy was longer than the coke bottle.
Not the best job and also the shrinking caused my canopy form to buckle and crack.
But I want to fly this thing and now I just need to hinge the canopy on and head out to the school yard and give it some test chucks to see what happens.
12-31-2010, 04:28 AM
#23
Junior Member
Join Date: Feb 2006
Location: PeterboroughCambridgeshire, UNITED KINGDOM
Posts: 12
Likes: 0
Received 0 Likes
on
0 Posts
The canopy looks fantastic! I wish we could make one full size in the same way... There are so few left, if anything ever happens to ours we'll eighter have to scrap the glider or pay around £3,000 for a custom made one...
Sometimes I miss models... They were a lot cheaper! Lol
Sometimes I miss models... They were a lot cheaper! Lol
