My Starfire II build
 04-06-2011, 08:02 AM
#1

Thread Starter
My Feedback: (15)
Join Date: Jun 2002
Location: TX
Posts: 369
Likes: 0
Received 0 Likes
on
0 Posts
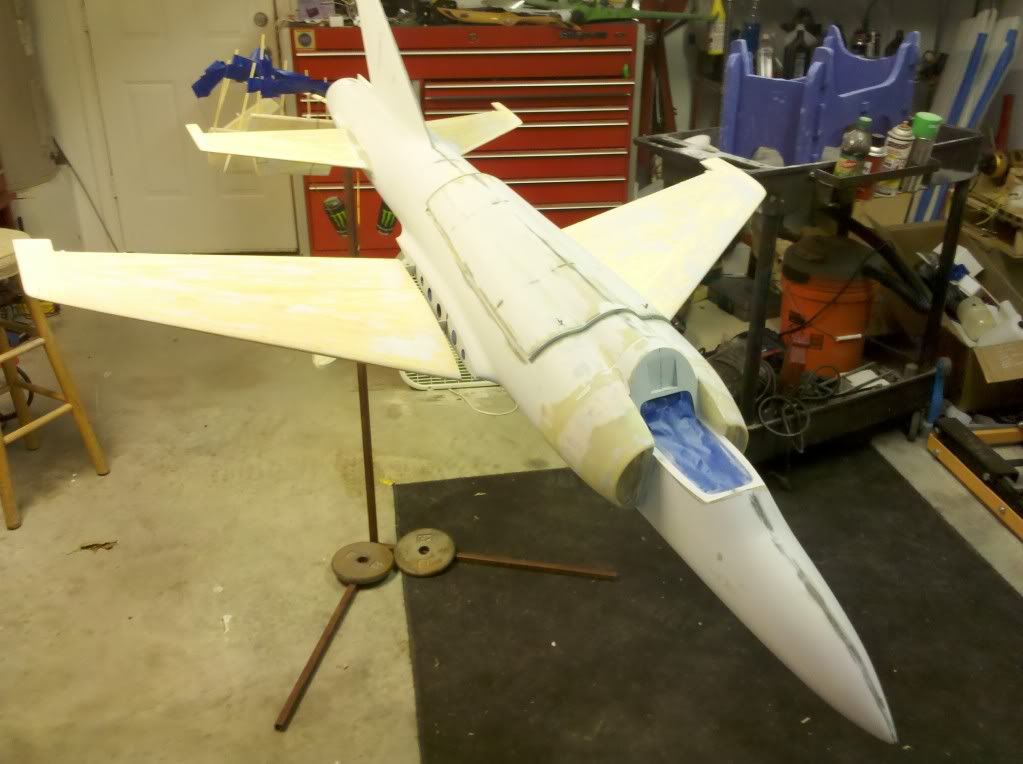
I was asked to post pics of my build by several people, so here's an overview of my starfire build starfire build. This is actually my first turbine, so I've had a lot of great advice, and apreciate all of it. Here we go. Setup is K80F with JR 12X, JR high voltage servo's, spektrum 12 Channel DSMX powersafe reciever, Eagle tree system, funkey retracts,robostruts, Tam intake, prolite wheels and brakes, Modified wings.
Progress at work that day was even slower than usual. Ha Ha
Ailerons cut out. Notice I added 1" to the wingtips inbetween the foam core, and the stock tip. I wanted to help with the extra weight of the turbine, possible extra fuel I will carry (up to 100 oz. depending on how it fly's at the stock 68 oz. setup) and to give the apearance of a slightly larger plane. At that point it adds 14Sq inches of wing area. You can see some carbon rods used for support.
Here is the extinsion pieces being glued.
Wing pics
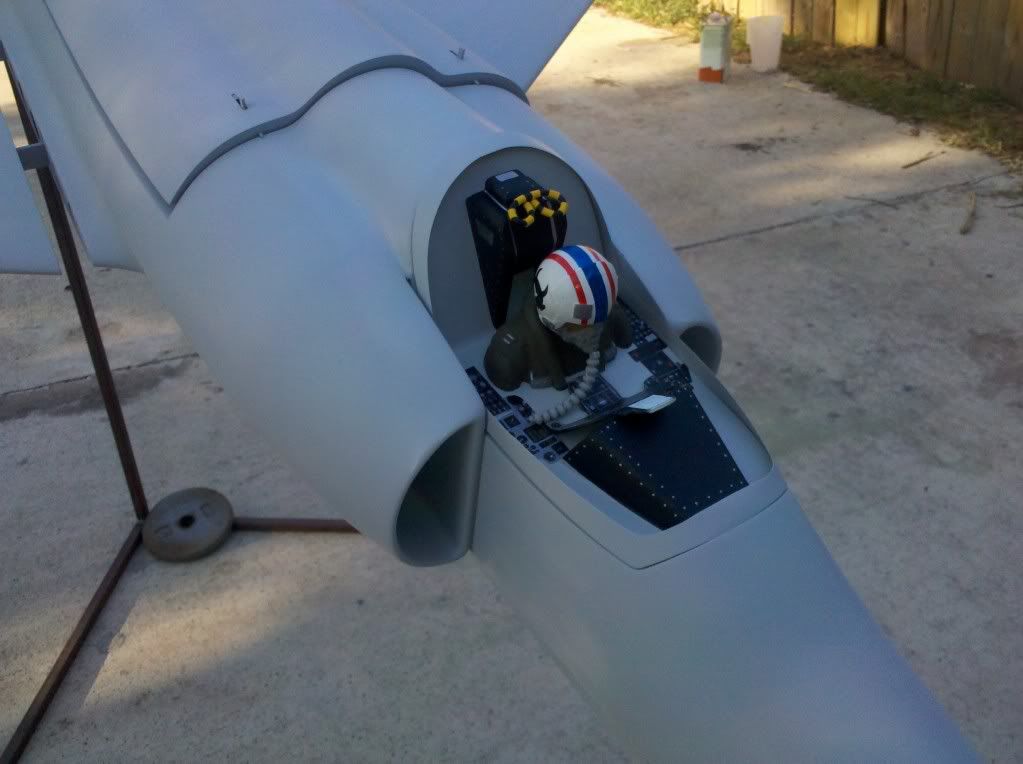
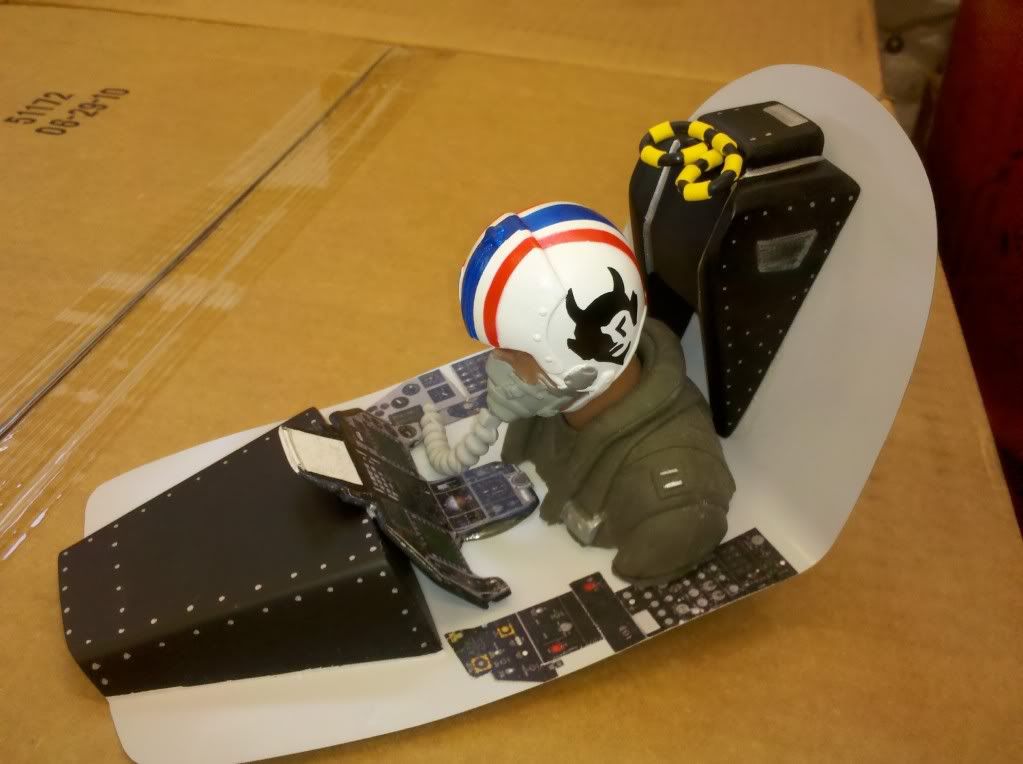
Started scratching a semiscale cockpit. BVM pilot cut down. Printed instrument pannels and glued them to a piece of light ply I cut and bent to give more shape. I have since done more, but don't have pics yet. I will also scratch a seat for it.
A quick mockup, with tams intakes. I realized here the tanks would need to be mounted upside down.
Thats better
Quick comparison of toms intake on left, and tams on the right.
Retract wells linned
Servo covers installed, with the wheel recesses cutout to accomidate the robostruts.
I opted to cut the inside canopy frame to go with the sport theme as oposed to a military style.

Testing the funkey retracts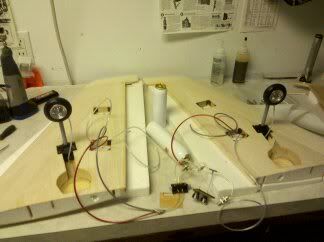
OOh yeah we all know this was a good day. And yes this would be a F model !!!!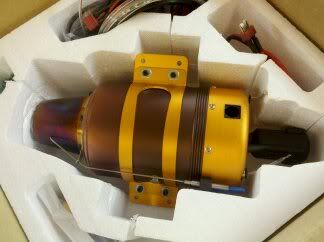
Stab spars glued in, and rudder cutout.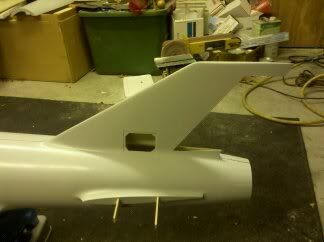
Started to fill tams intakes to fuse for a nice smoothe factory look.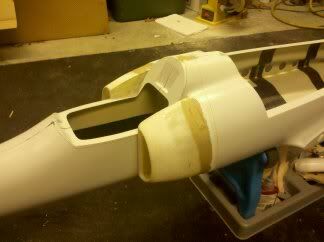
Stabs gluing on.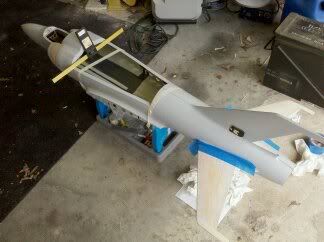
Front retract mount glued.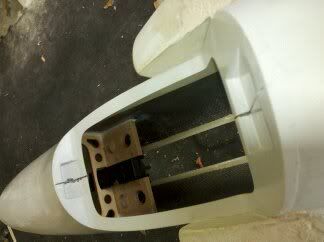
He He time to burn some jetA.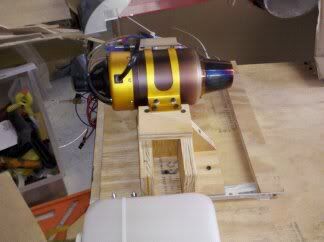
Wings getting close.

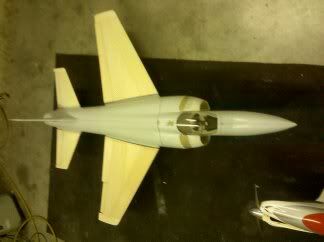
Gotta mock it up.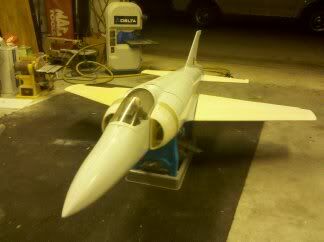
Fuse formers going in.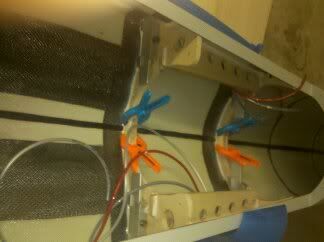
Gluing wingspars in.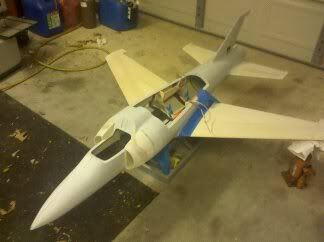
Rudder servo mount.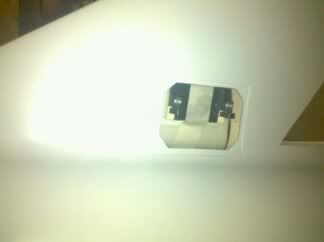
Test fitting tailpipe.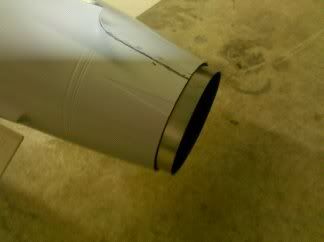
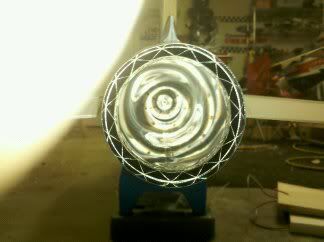
I will need to cut the center web of the intakes to fit the starter. The tailpipe will need to be setback alittle as well. Also the motor mount plates will be widened to accomidate the compact K80, but will keep the stock plates in there for a motor change planned for later that will use a wider mount.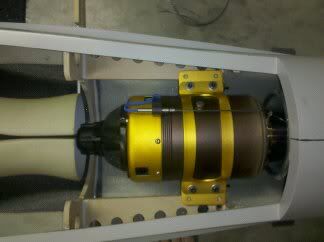
Catch yall next time.
Progress at work that day was even slower than usual. Ha Ha
Ailerons cut out. Notice I added 1" to the wingtips inbetween the foam core, and the stock tip. I wanted to help with the extra weight of the turbine, possible extra fuel I will carry (up to 100 oz. depending on how it fly's at the stock 68 oz. setup) and to give the apearance of a slightly larger plane. At that point it adds 14Sq inches of wing area. You can see some carbon rods used for support.
Here is the extinsion pieces being glued.
Wing pics
Started scratching a semiscale cockpit. BVM pilot cut down. Printed instrument pannels and glued them to a piece of light ply I cut and bent to give more shape. I have since done more, but don't have pics yet. I will also scratch a seat for it.
A quick mockup, with tams intakes. I realized here the tanks would need to be mounted upside down.
Thats better
Quick comparison of toms intake on left, and tams on the right.
Retract wells linned
Servo covers installed, with the wheel recesses cutout to accomidate the robostruts.
I opted to cut the inside canopy frame to go with the sport theme as oposed to a military style.
Testing the funkey retracts
OOh yeah we all know this was a good day. And yes this would be a F model !!!!
Stab spars glued in, and rudder cutout.
Started to fill tams intakes to fuse for a nice smoothe factory look.
Stabs gluing on.
Front retract mount glued.
He He time to burn some jetA.
Wings getting close.
Gotta mock it up.
Fuse formers going in.
Gluing wingspars in.
Rudder servo mount.
Test fitting tailpipe.
I will need to cut the center web of the intakes to fit the starter. The tailpipe will need to be setback alittle as well. Also the motor mount plates will be widened to accomidate the compact K80, but will keep the stock plates in there for a motor change planned for later that will use a wider mount.
Catch yall next time.
 04-06-2011, 08:43 AM
#2

Hi,
It looks to me like the mounts are ok with that engine. Also, do you mean that you intend to install the pipe such that it's inside the tail-cone? If not, I would strongly urge you to do that.
Other than the 'red rocket', pretty nice build !
!
It looks to me like the mounts are ok with that engine. Also, do you mean that you intend to install the pipe such that it's inside the tail-cone? If not, I would strongly urge you to do that.
Other than the 'red rocket', pretty nice build
!
04-06-2011, 08:54 AM
#3
Thread Starter
My Feedback: (15)
Join Date: Jun 2002
Location: TX
Posts: 369
Likes: 0
Received 0 Likes
on
0 Posts
As far as the tailpipe I think I need to push it back to the rear of the fuse further than was intended to get my 1/2 to 3/4" gap even after relieving the intake webbing. The motor will actually be mounted about an inch and a half further than it is in the pic, so when its moved the mounts get wider, and the bolts barely go through the wood. Do you mean you actually want the tailcone inside the tailpipe ? If so can you explain why?
04-06-2011, 09:47 AM
#4
Thread Starter
My Feedback: (15)
Join Date: Jun 2002
Location: TX
Posts: 369
Likes: 0
Received 0 Likes
on
0 Posts
AAh I see, you mean the tailpipe sticking out of the tailcone of the fuse. It will have to I think to fit everything in. I will know for sure when the intake gets mounted, and webbing modified.
04-12-2011, 08:06 AM
#7
Thread Starter
My Feedback: (15)
Join Date: Jun 2002
Location: TX
Posts: 369
Likes: 0
Received 0 Likes
on
0 Posts
Front tailpipe mount made, and installed. It will have lightnening holes bored later, but wanted to use it as pushrod suport, so I need to see where the passthrough holes will end up first. Motor mount mod done except for sanding, front former top brace bolted in place. You can see the BVM ceramic paint that I pre painted the inside of the wing filits with before gluing the unseen elevatror servo mounts in. The rest will be painted later. 
Rear tailpipe mounting ring I made glued in place. You can also see the sloppy rear stab former glue fillit. It gets tight in there when you get up to your forearm muscle, plus your working by brail.
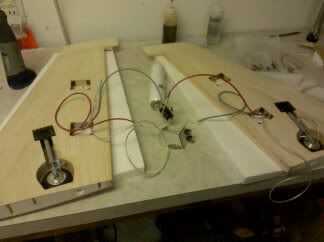
Here's the servo retract and valve plate rails.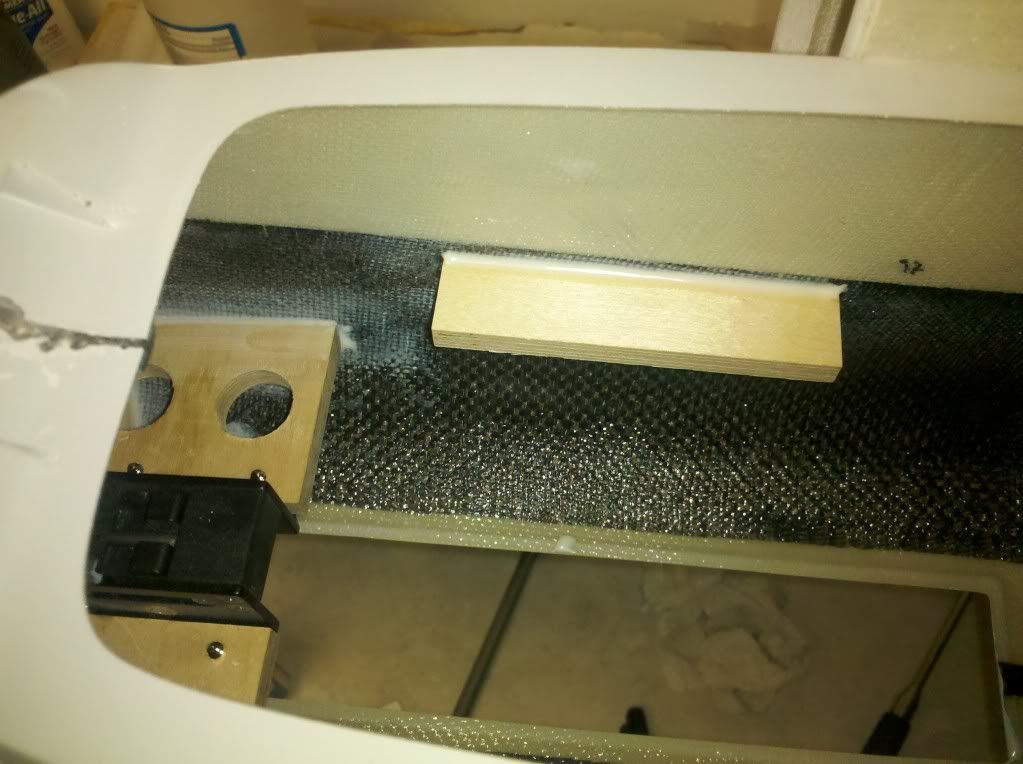
Pic of the center tank and UAT mount I made. The center tank will be mounted using velcro on the bottom and a velcro strap arround it. The small tangs give the tank horizontal support, and will be supported bt the intakes when installed.The UAT is held using rubber bands. The trinagle cutout is just a lightening hole. the big tank brings fuel to 106 oz of fuel with UAT.


Front view.
One thing I found on this kit is I read somewhere to use 3 straight robostruts, but the front has to be a left or right offset strut, or the wheel will not clear the nose door opening.
Rear tailpipe mounting ring I made glued in place. You can also see the sloppy rear stab former glue fillit. It gets tight in there when you get up to your forearm muscle, plus your working by brail.
Here's the servo retract and valve plate rails.
Pic of the center tank and UAT mount I made. The center tank will be mounted using velcro on the bottom and a velcro strap arround it. The small tangs give the tank horizontal support, and will be supported bt the intakes when installed.The UAT is held using rubber bands. The trinagle cutout is just a lightening hole. the big tank brings fuel to 106 oz of fuel with UAT.
Front view.
One thing I found on this kit is I read somewhere to use 3 straight robostruts, but the front has to be a left or right offset strut, or the wheel will not clear the nose door opening.
05-03-2011, 06:57 PM
#8
Thread Starter
My Feedback: (15)
Join Date: Jun 2002
Location: TX
Posts: 369
Likes: 0
Received 0 Likes
on
0 Posts
been a while since i gave an update. prime coat on intakes for pinhole filling, since has been sanded back down.
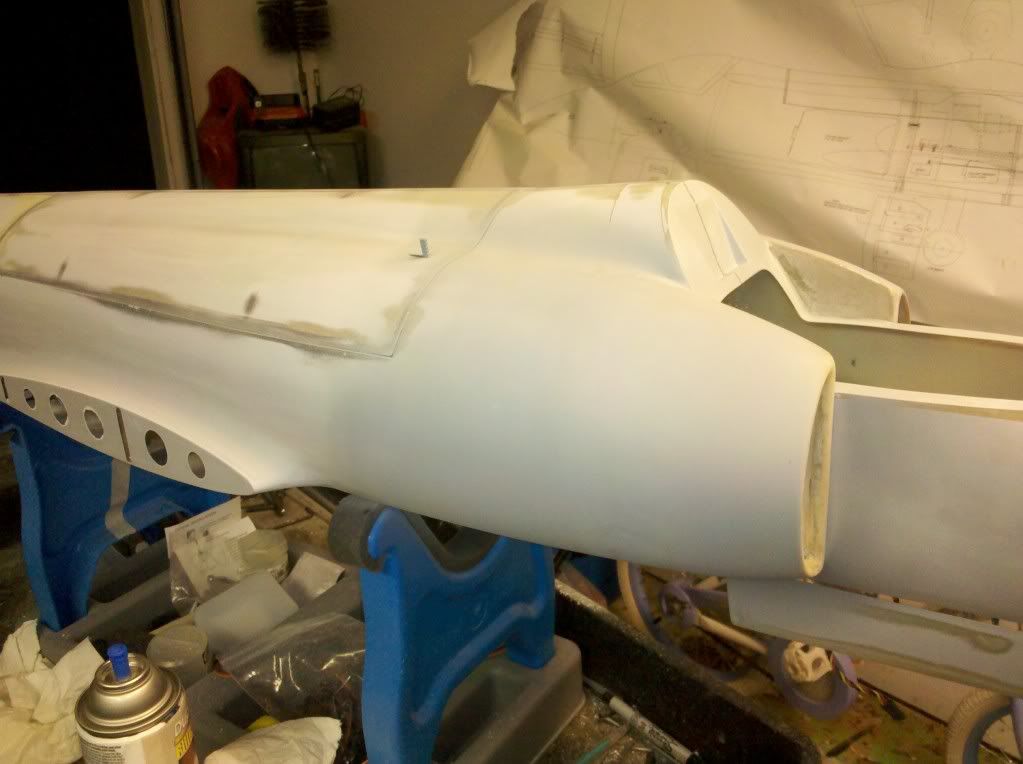
pic of intakes before being installed


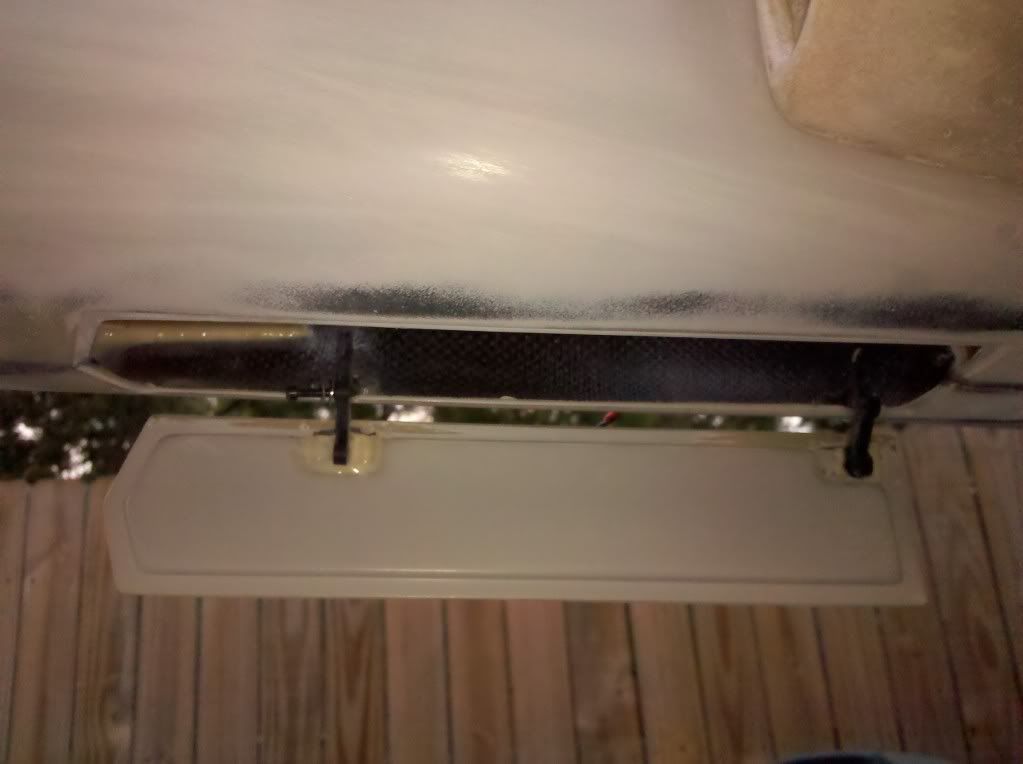
gear door

started the seat which will be the hardpoint for retaining the cockpit for removal

had to cut the intakes for tailpipe removal, but will build a hatch to cover it.

intake pics


Mock up


ready for primer tomorrow night


pic of intakes before being installed
gear door
started the seat which will be the hardpoint for retaining the cockpit for removal
had to cut the intakes for tailpipe removal, but will build a hatch to cover it.
intake pics
Mock up
ready for primer tomorrow night
05-04-2011, 04:22 AM
#10
Thread Starter
My Feedback: (15)
Join Date: Jun 2002
Location: TX
Posts: 369
Likes: 0
Received 0 Likes
on
0 Posts
I probably should have mounted the turbine a little farther up, but I set it based on the intakes, so after I modified the mounts is when I set the tailpipe, and realized it was a little far back. Its not a scale plane, and I am doing an aluminum tailcone so it will look good when done (i think). I guess its just a rookie mistake. Can't wait to start painting !
 05-04-2011, 08:29 AM
#13
Hi,
It looks fine, I was more thinking about the cooling of the airframe. Having that pipe inset will help vacuum out the hot air from the inside of the fuse. It makes a difference. Anyway, I can't wait for the start of your Hornet build because you're obviously a good builder!
It looks fine, I was more thinking about the cooling of the airframe. Having that pipe inset will help vacuum out the hot air from the inside of the fuse. It makes a difference. Anyway, I can't wait for the start of your Hornet build because you're obviously a good builder!
05-04-2011, 09:37 AM
#14
Thread Starter
My Feedback: (15)
Join Date: Jun 2002
Location: TX
Posts: 369
Likes: 0
Received 0 Likes
on
0 Posts
Thanks,
I've literally built hundreds of planes over the last 23 years, but this is my first jet. Interesting about the tailpipe. I love learning new stuff, but this pipe is literally the same size as the tailcone, so I won't get much flow, although i could vent the fiberglass and leave a gap with the aluminum that would be totaly hidden and still flow. Yeah I got big ambitions for the 18. Can't wait either. I'll post up pics of the painting process this weekend.
I've literally built hundreds of planes over the last 23 years, but this is my first jet. Interesting about the tailpipe. I love learning new stuff, but this pipe is literally the same size as the tailcone, so I won't get much flow, although i could vent the fiberglass and leave a gap with the aluminum that would be totaly hidden and still flow. Yeah I got big ambitions for the 18. Can't wait either. I'll post up pics of the painting process this weekend.
05-04-2011, 02:13 PM
#15
Hi,
Yeah, your experience shows. I'd still inset the pipe by about 1/2". Coat it with some BVM heat-shield and it'll be fine. Your fuse will stay much cooler.
Yeah, your experience shows. I'd still inset the pipe by about 1/2". Coat it with some BVM heat-shield and it'll be fine. Your fuse will stay much cooler.


 05-04-2011, 05:59 PM
#18
Thread Starter
My Feedback: (15)
Join Date: Jun 2002
Location: TX
Posts: 369
Likes: 0
Received 0 Likes
on
0 Posts
Cool thanks for the tips. Are the BVM outlets in the carbon section ? Can you post a link. I will have to redo my motor mount to fix the tailpipe, but if its gonna be a problem I will change it. I may have experience, but patients is hard for me to come by, and I got plenty to learn.
05-04-2011, 06:11 PM
#19
ORIGINAL: edgeflyer
Cool thanks for the tips. Are the BVM outlets in the carbon section ? Can you post a link. I will have to redo my motor mount to fix the tailpipe, but if its gonna be a problem I will change it. I may have experience, but patients is hard for me to come by, and I got plenty to learn.
Cool thanks for the tips. Are the BVM outlets in the carbon section ? Can you post a link. I will have to redo my motor mount to fix the tailpipe, but if its gonna be a problem I will change it. I may have experience, but patients is hard for me to come by, and I got plenty to learn.
05-04-2011, 06:17 PM
#20
Thread Starter
My Feedback: (15)
Join Date: Jun 2002
Location: TX
Posts: 369
Likes: 0
Received 0 Likes
on
0 Posts
http://shopbvmjets.com/zencart/index...roducts_id=124
Yep just found them, I never look in the "NON TURBINE" section Ha Ha. I'll order them. for shure. The fuse is pretty well sealed though. If i set the pipe in I could see the natural air leaks being able to vent air around the rear of the pipe, but would I need to add fresh air inlets just ahead of the turbine maybe on the sides to take advantage of the extra ventilaion with the inlets placed at the rear ?
Yep just found them, I never look in the "NON TURBINE" section Ha Ha. I'll order them. for shure. The fuse is pretty well sealed though. If i set the pipe in I could see the natural air leaks being able to vent air around the rear of the pipe, but would I need to add fresh air inlets just ahead of the turbine maybe on the sides to take advantage of the extra ventilaion with the inlets placed at the rear ?
05-04-2011, 07:33 PM
#21
Hi,
In my experience with the Starfire (I think I've had nine at this point), I'd say that if you're going with an open install, and the pipe is inset a bit, you won't need any extra ducting or inlets to keep the fuse cool. There's plenty of air.
In my experience with the Starfire (I think I've had nine at this point), I'd say that if you're going with an open install, and the pipe is inset a bit, you won't need any extra ducting or inlets to keep the fuse cool. There's plenty of air.