


Large futura prep and painting
 01-22-2012, 07:51 AM
#1

Thread Starter

Join Date: Feb 2004
Location: herts, UNITED KINGDOM
Posts: 589
Likes: 0
Received 0 Likes
on
0 Posts
Hi,
Over the next few weeks I will be painting a large futura in a scheme that I think will suit this aircraft 100%. I am not going to let out what scheme it is but during the design of the scheme on the PC you all will guess what it will be.
So to start with this model has been build beautifully by Bishop Aviation to a very high standard and it was handed over to me a couple of weeks ago to paint. As you will see on the forum you will see the project I have just finished which has now made clear the paint shop ready for this large model.
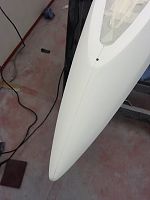
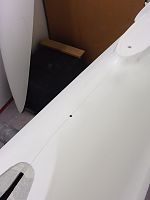
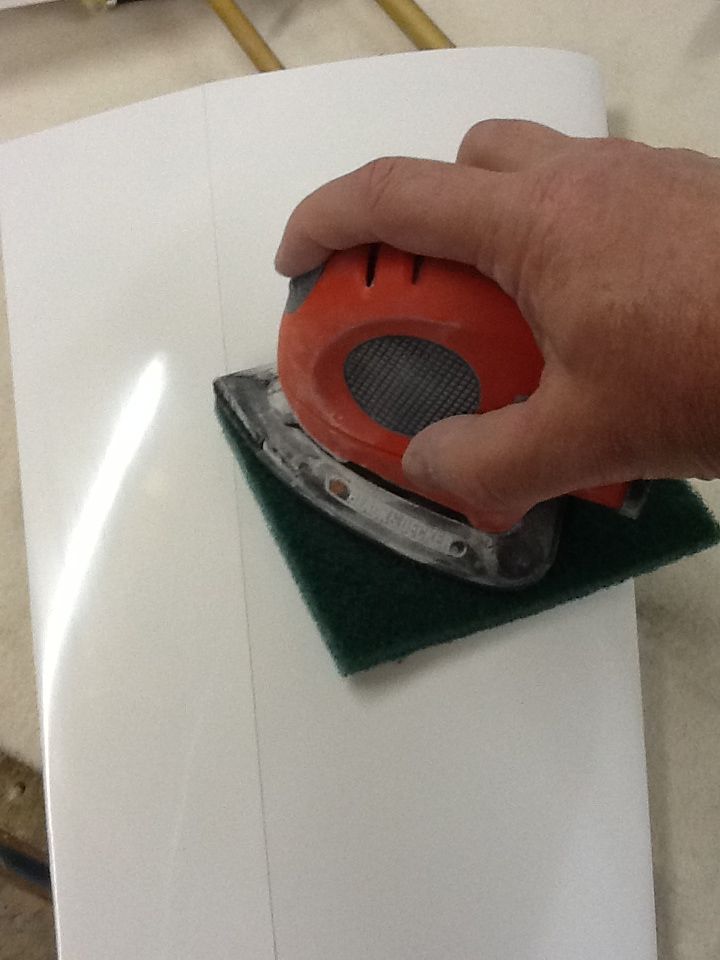
The first thing I had to do was to mask up all the areas that I didn't want to paint, then rub it down, I used a Black and Decker mouse with green fine scotchbrite.
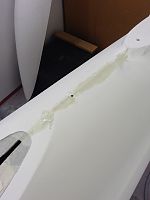
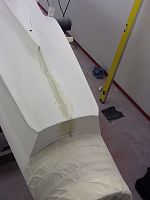
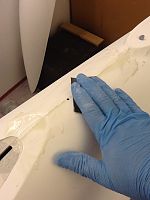
After flating the model the next thing the work on is the seams, I use a dremal with a sanding drum and sand out the lip making sure only to lightly sand out the lip.
Next is to fill the seams, I use a very fine finishing filler called Doulphin glaze, you can get this from any Paint Factors suppliers.
I then use 1200 wet'n'dry wet with and without a sanding block, when this is completed its ready for a wipe down with anti static panel wipe and then a track cloth, then a coat of primer.
Enjoy the photos.


Over the next few weeks I will be painting a large futura in a scheme that I think will suit this aircraft 100%. I am not going to let out what scheme it is but during the design of the scheme on the PC you all will guess what it will be.
So to start with this model has been build beautifully by Bishop Aviation to a very high standard and it was handed over to me a couple of weeks ago to paint. As you will see on the forum you will see the project I have just finished which has now made clear the paint shop ready for this large model.
The first thing I had to do was to mask up all the areas that I didn't want to paint, then rub it down, I used a Black and Decker mouse with green fine scotchbrite.
After flating the model the next thing the work on is the seams, I use a dremal with a sanding drum and sand out the lip making sure only to lightly sand out the lip.
Next is to fill the seams, I use a very fine finishing filler called Doulphin glaze, you can get this from any Paint Factors suppliers.
I then use 1200 wet'n'dry wet with and without a sanding block, when this is completed its ready for a wipe down with anti static panel wipe and then a track cloth, then a coat of primer.
Enjoy the photos.
 01-22-2012, 08:20 AM
#2

Join Date: Dec 2006
Location: harwich, UNITED KINGDOM
Posts: 709
Likes: 0
Received 0 Likes
on
0 Posts
i would like to be able to repaint my own jets but what paint are you going to use? never been sure what to get and what is the best spray gun for jet size paint jobs?
01-22-2012, 10:21 AM
#3
Thread Starter
Join Date: Feb 2004
Location: herts, UNITED KINGDOM
Posts: 589
Likes: 0
Received 0 Likes
on
0 Posts
Hi scooby,
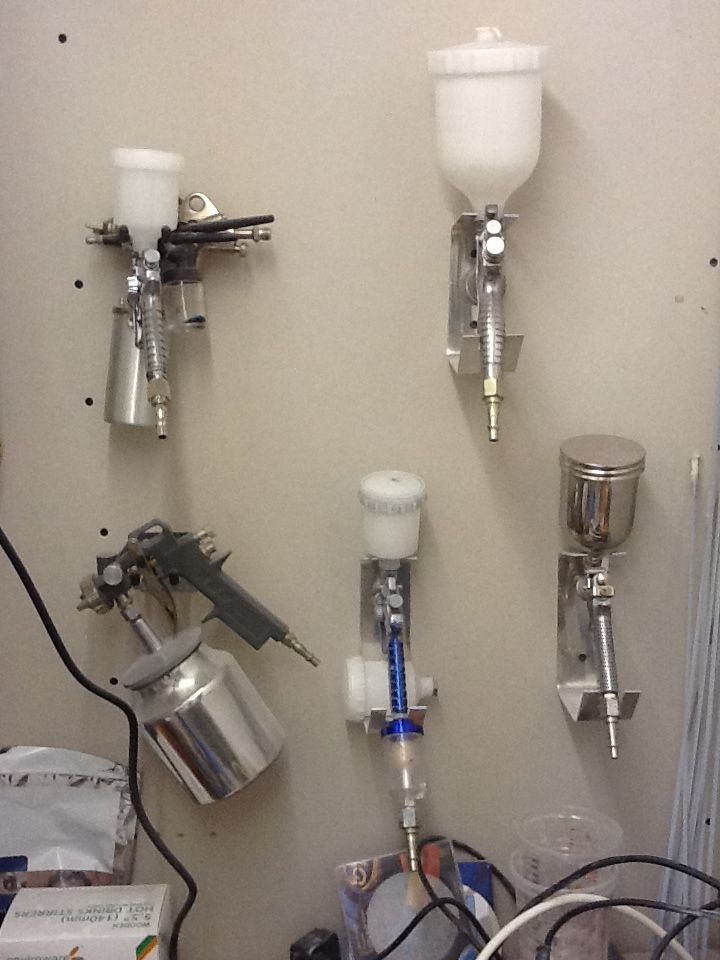
It's not easy to recommend the type of spray gun to use as you use all different types of guns for different type of jobs, you can get away with just a normal badger spray gun to do most jobs on most sizes of models. For me I use a number of guns from small touch up guns to spray camo up to my largest spray gun which I use to spray my gloss and matt clear coats.
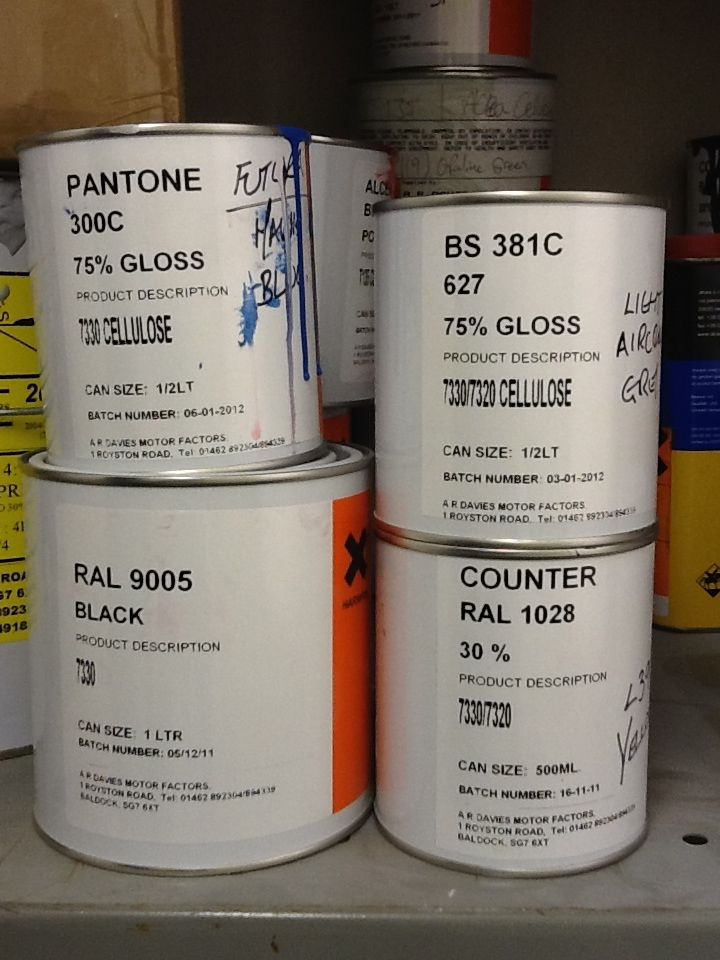
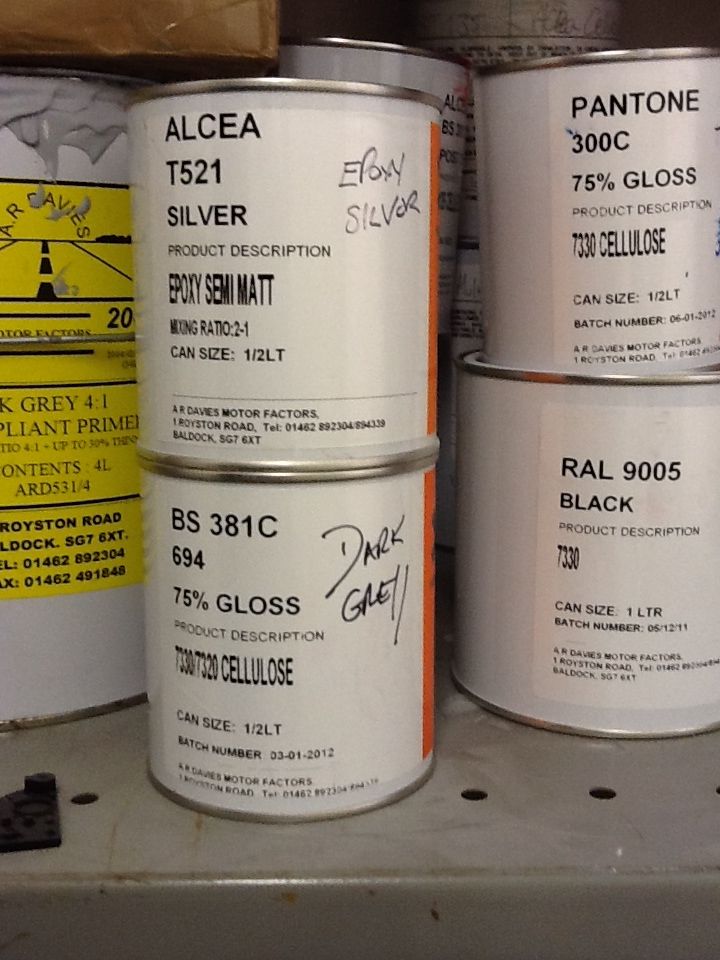
The paints agin can vary, humbrol enamels are good to use for most camo jobs or I use cellalous, acrylics, 2k and epoxy paints for all different jobs.
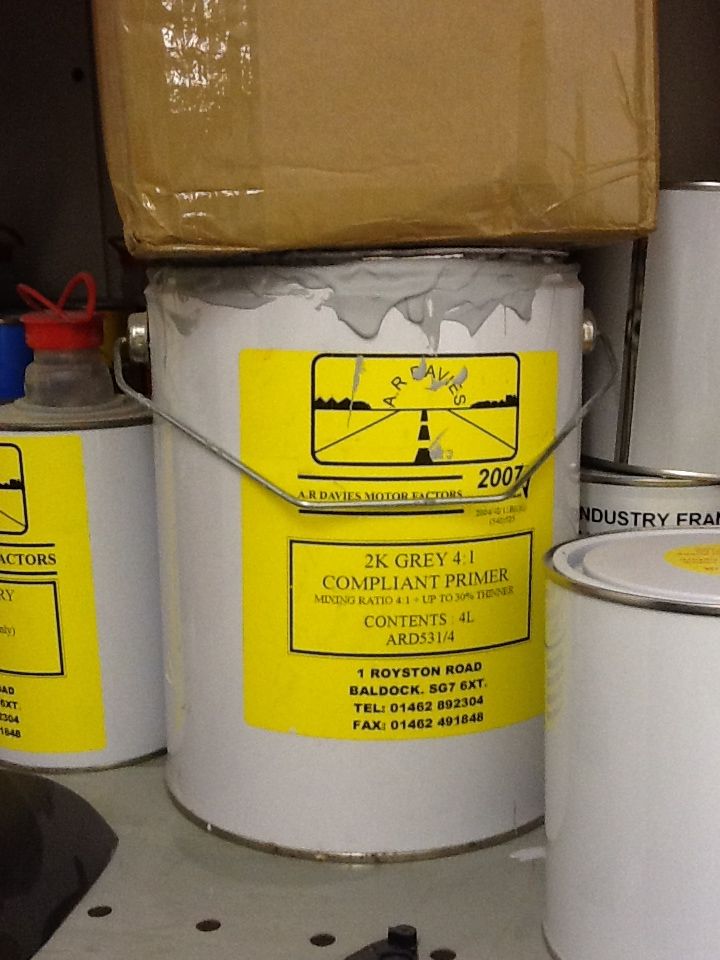
I use a 2k primer, this does two jobs firstly it seals in any unwanted contaminates that may affect the colours and the second is it gives you a good solid hard surface to work from.
I use epoxy silver as I find some silvers do not like some maskings.
I hope this is all helpful
Phil
It's not easy to recommend the type of spray gun to use as you use all different types of guns for different type of jobs, you can get away with just a normal badger spray gun to do most jobs on most sizes of models. For me I use a number of guns from small touch up guns to spray camo up to my largest spray gun which I use to spray my gloss and matt clear coats.
The paints agin can vary, humbrol enamels are good to use for most camo jobs or I use cellalous, acrylics, 2k and epoxy paints for all different jobs.
I use a 2k primer, this does two jobs firstly it seals in any unwanted contaminates that may affect the colours and the second is it gives you a good solid hard surface to work from.
I use epoxy silver as I find some silvers do not like some maskings.
I hope this is all helpful
Phil


 01-22-2012, 12:46 PM
#6
Banned
Join Date: Jul 2004
Location: England, , UNITED KINGDOM
Posts: 2,725
Likes: 0
Received 1 Like
on
1 Post
Jay
I think Philip is some what of a pro when it comes to painting. I am afraid I also will have to stick to prepainted stuff cos I am never going to be that good. Also I dont think Catherine would like me spraying in the bedroom when I do a lot of my building
Nice job Philip
Deno
I think Philip is some what of a pro when it comes to painting. I am afraid I also will have to stick to prepainted stuff cos I am never going to be that good. Also I dont think Catherine would like me spraying in the bedroom when I do a lot of my building
Nice job Philip
Deno
01-22-2012, 12:54 PM
#7
Philip,
Great thread .. thank you! Do you have someone at the shop who could video the actual spray operation? That would be really interesting too see for those of us who are working on our painting skills but don't do it as much as we should...
thanks!
Dave McQueeney
Great thread .. thank you! Do you have someone at the shop who could video the actual spray operation? That would be really interesting too see for those of us who are working on our painting skills but don't do it as much as we should...
thanks!
Dave McQueeney
01-22-2012, 01:09 PM
#8
Thread Starter
Join Date: Feb 2004
Location: herts, UNITED KINGDOM
Posts: 589
Likes: 0
Received 0 Likes
on
0 Posts
Hi deno and dave thank you for your kind words, anybody can paint its a lot to do with confidence. One of my latest guns I got off of eBay at less than £10, it's ideal for camo on models.
This is the eBay reference number 290638022084. You would need a compressor with a tank to prevent pulsing whilst spraying.
One that would be good you can get off of the Internet, axminster tools is a good place to look at £80.00
http://www.axminster.co.uk/axminster...or-prod868639/
Phil
This is the eBay reference number 290638022084. You would need a compressor with a tank to prevent pulsing whilst spraying.
One that would be good you can get off of the Internet, axminster tools is a good place to look at £80.00
http://www.axminster.co.uk/axminster...or-prod868639/
Phil
 01-23-2012, 04:41 AM
#10
Thread Starter
Join Date: Feb 2004
Location: herts, UNITED KINGDOM
Posts: 589
Likes: 0
Received 0 Likes
on
0 Posts
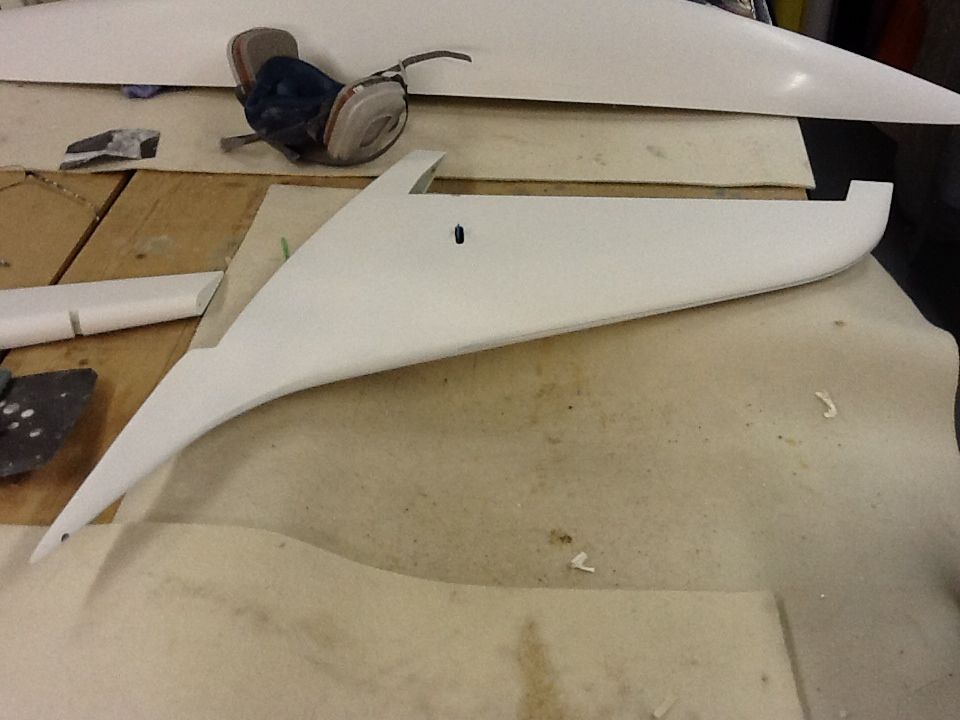
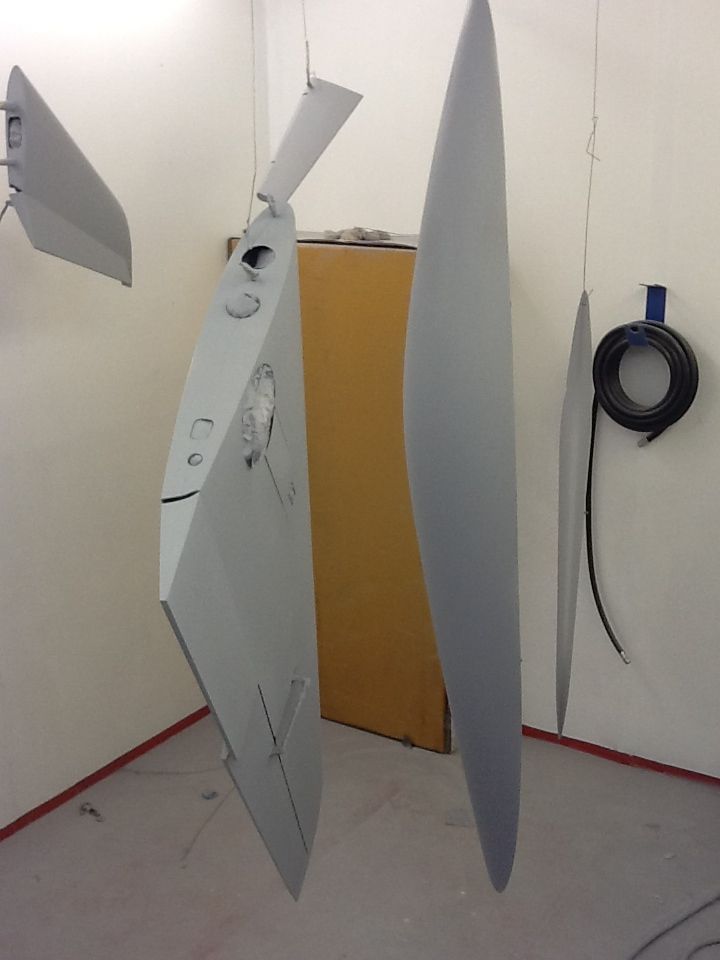
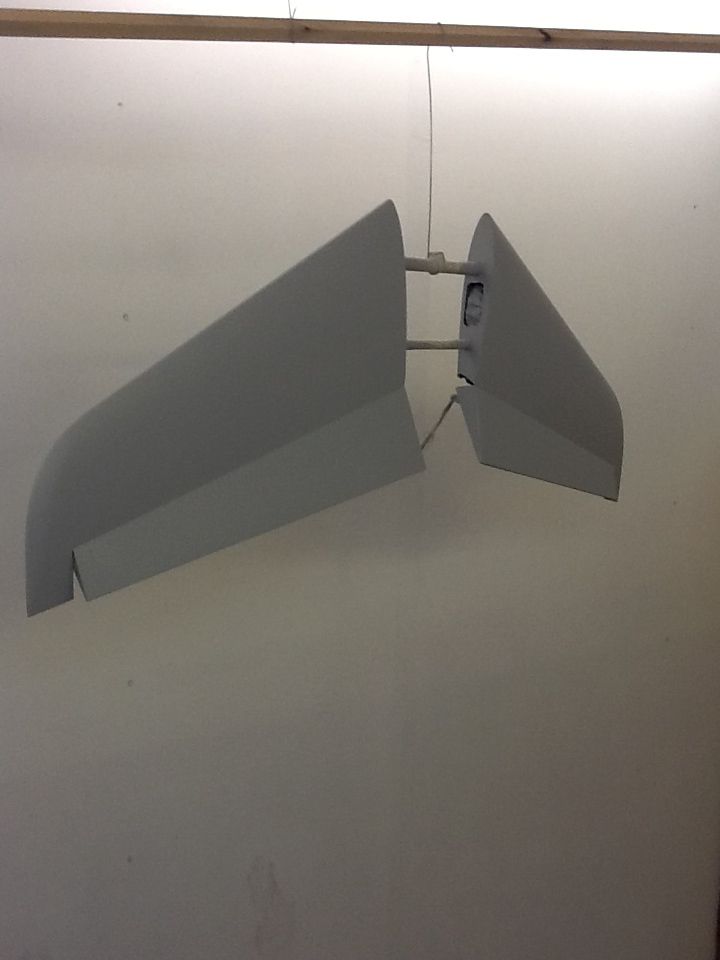
Ran out of primer on the fuse last night so i will be making a visit this week to my paint factors. i have the owner of the jet visiting me tonight so not much will be done, i may be able to sand down the wings and tailplane (Horizontal stabilizer for you guys in the US LOL).
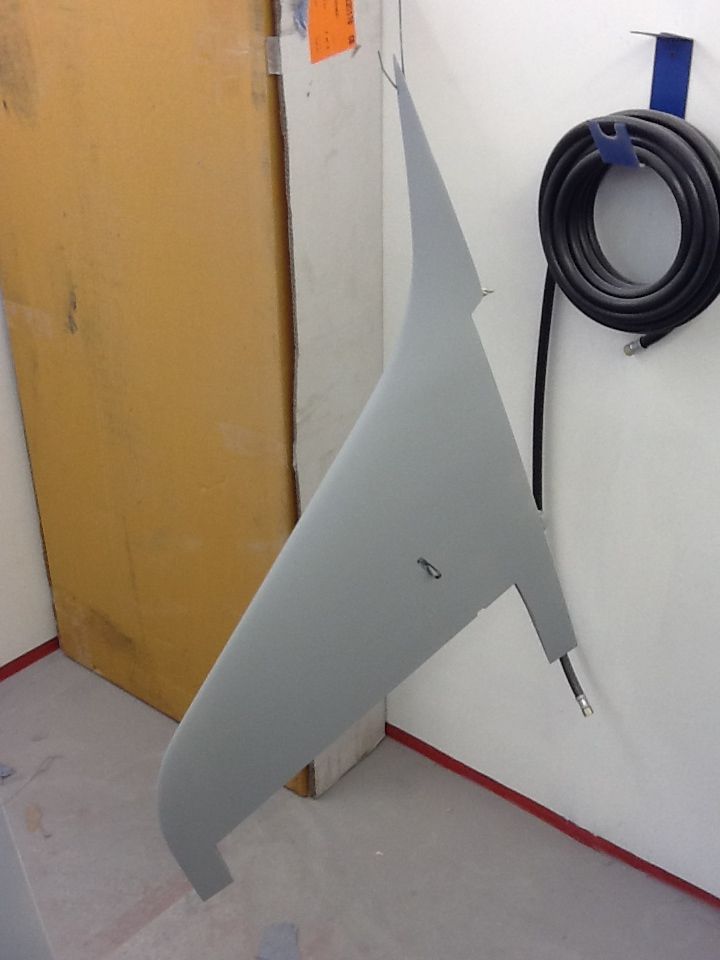
I sanded down the Fin (Vertical stab) while i was sanding down the fuse.
The following are a couple of previous models i have painted.
I sanded down the Fin (Vertical stab) while i was sanding down the fuse.
The following are a couple of previous models i have painted.
01-23-2012, 04:52 AM
#11
Thread Starter
Join Date: Feb 2004
Location: herts, UNITED KINGDOM
Posts: 589
Likes: 0
Received 0 Likes
on
0 Posts
some more.
The models are Fei Bao L39
Two YT Spitfires (Mk XIV)
Boomerang Torus.
You will see a Boomerang Torus, i worked closely with Alan Cardash with the development of this model and came up with this blue Aggressor scheme so its my fault for that scheme.
The models are Fei Bao L39
Two YT Spitfires (Mk XIV)
Boomerang Torus.
You will see a Boomerang Torus, i worked closely with Alan Cardash with the development of this model and came up with this blue Aggressor scheme so its my fault for that scheme.
01-23-2012, 05:36 AM
#12
Join Date: Jan 2007
Location: farnborough, , UNITED KINGDOM
Posts: 3,294
Likes: 0
Received 1 Like
on
1 Post
Whilst I do not dabble in the 'spraying' side of jet building I have had a few years at this element in spraying classic cars. For those looking to spray kits as Noel says its all about believing you can, and using some basic rules and tools.
You don't have to spend a fortune on air guns, a good 'finishing' gun with around a 1mm needle should cover most standard requirements. A small compressor with some sort of reservoir to help remove the pump pulse and a water trap is also a good idea.
The key to painting (other than getting the surface nice and smooth and well keyed) is the spray area - battling around other kits, furniture and all the stuff that lurks in garages etc is not a good base to work from, dust will kick up from everywhere. Try to cordon off an area, sheet it with plastic, stapled over a basic wooden frame will help it stay put and not get sucked in on you (like shower curtains tend to!). You can keep the dust down in this area by misting the place with water prior to setting up to spray. If you have a DIY booth, or dedicated area things get much easier.
Always wear a mask, and if dirt gets in paint leave until well dry as polishing will normally remove most of the imperfections, digging around while paint is wet is not a good idea even if the eyes are trying to deceive the brain
Keep up the good work Noel, looking forward to the 'scheme' and some video of the guru in action.....
marcs
01-24-2012, 10:13 AM
#13
Thread Starter
Join Date: Feb 2004
Location: herts, UNITED KINGDOM
Posts: 589
Likes: 0
Received 0 Likes
on
0 Posts
Going back a little as i missed out the rubbing down with the fuse it's only fair show you the rubbing down of the wings and horizontal stabs. After washing the fibre glass the next stage is the really boring one, but it needs to be done. If the surface is not prepare correctly if will only kick you in the backside later. I use a black and decker mouse with medium fine green scotchbrite, I get mine by the box and they come in 6"x 9" sheets which I cut in half and stick to the bottom. If you can over light your workshop as you will need to see or in this case not see any light reflection, a bit difficult to show in photo but I hope you can see how flat the surface is. With the surface now nice a flat you can now work on the leading and trailing edges. I use a file on the wings and stabs unlike the dremal on the fuse. Once it is filed down I use 1000 wet'n'dry dry this time. Try not to get mousture in the weave of the skin laminates, after a few years and flying in hot and cold weathers delamination may happen, unlikely but it might, prevention is always better then correction. (sorry about that, that is what you get working in the aircraft industry for over 30 years).
Anyway enjoy the photo. If you have any question just ask.
Phil
Anyway enjoy the photo. If you have any question just ask.
Phil


 01-24-2012, 10:17 AM
#14
Thread Starter
Join Date: Feb 2004
Location: herts, UNITED KINGDOM
Posts: 589
Likes: 0
Received 0 Likes
on
0 Posts
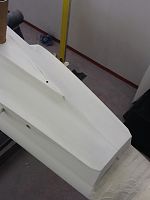
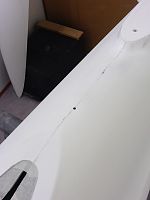
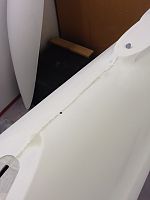
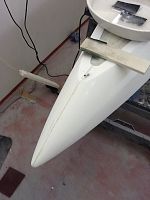
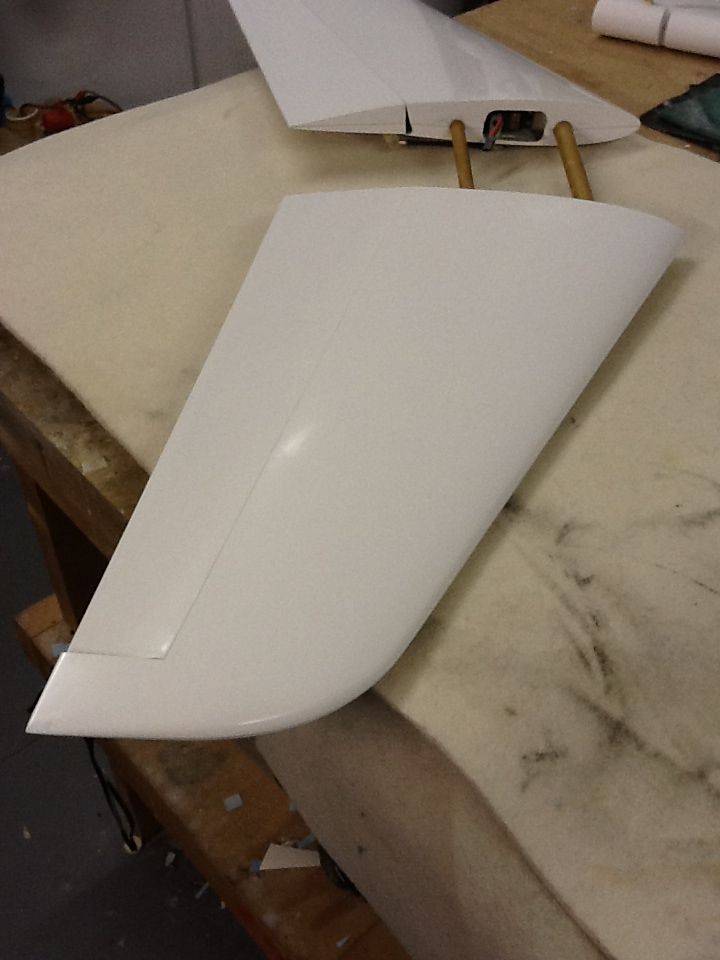
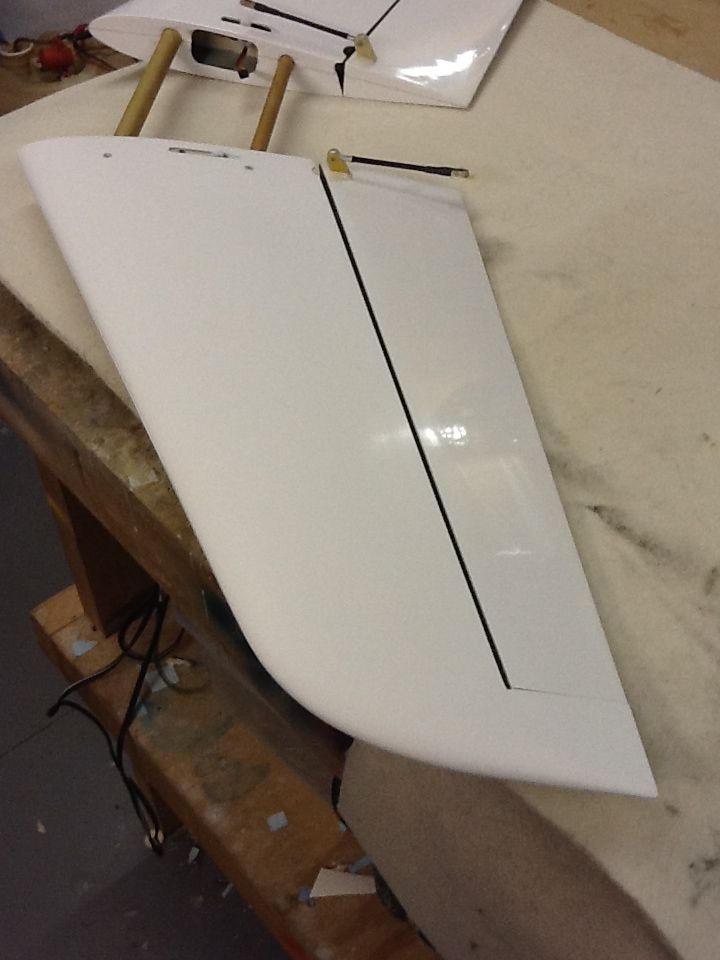
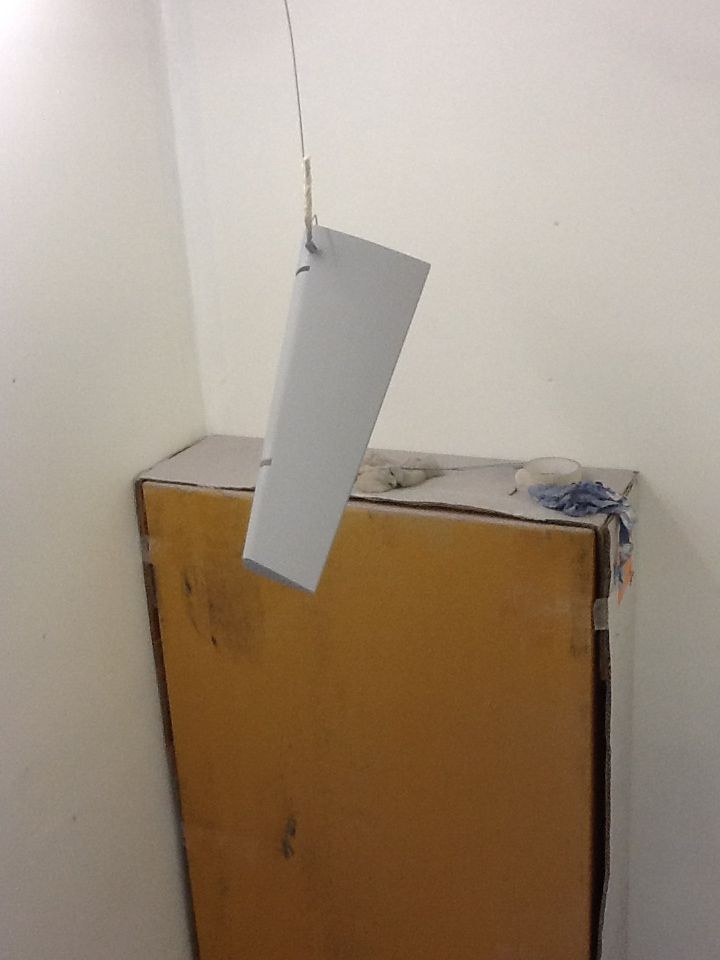
This is the large futura but the smaller one, as you can see from this photo the high gloss, out the mould finish they arrive like.
compare it with the large futura canopy that has been rubbed down, you can't see no reflection.
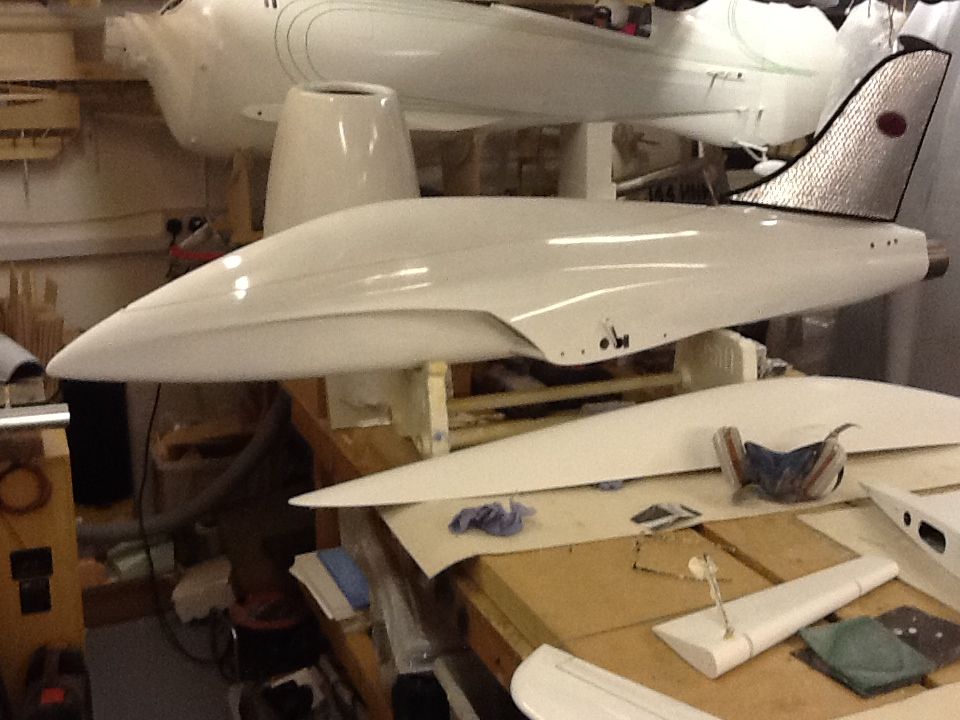
compare it with the large futura canopy that has been rubbed down, you can't see no reflection.

 01-25-2012, 12:14 AM
#20
Thread Starter
Join Date: Feb 2004
Location: herts, UNITED KINGDOM
Posts: 589
Likes: 0
Received 0 Likes
on
0 Posts
Hi jester,
I mainly use cellulose, epoxy and polyurethane 2K paints but have used acrylics in the past, there is no problem with them, i just prefer cellulose and the others.
I mainly use cellulose, epoxy and polyurethane 2K paints but have used acrylics in the past, there is no problem with them, i just prefer cellulose and the others.
01-28-2012, 08:03 AM
#21
Thread Starter
Join Date: Feb 2004
Location: herts, UNITED KINGDOM
Posts: 589
Likes: 0
Received 0 Likes
on
0 Posts
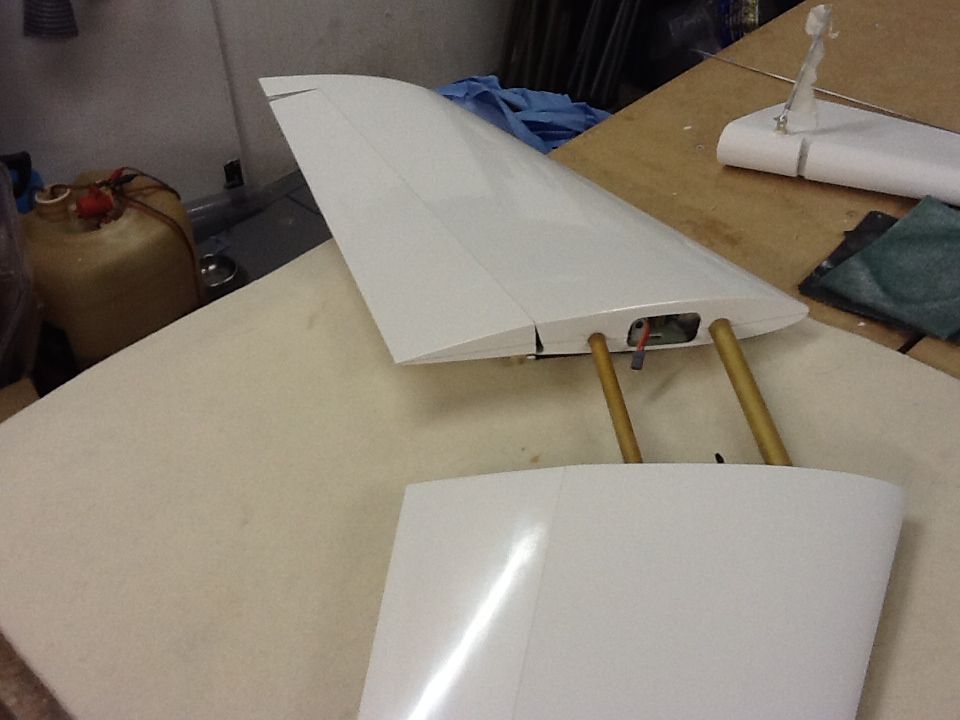
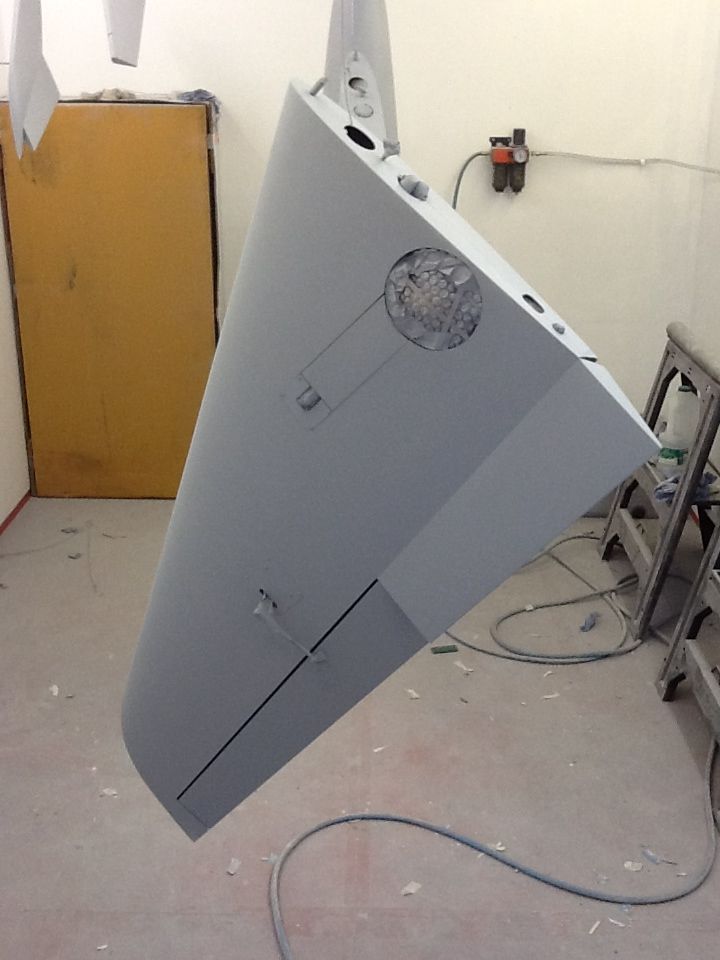
i finally sanded down the wings, vertical and horizontal stabs and worked on all the seems, so today I finished priming all the parts. Next a rub down with some 1200 wet'n'dry wet to remove any blemishes, it's also good now as the grey primer now shows up any faults or dents that need filling.


 01-28-2012, 08:31 AM
#22
Senior Member
nice job, but in my oppinion it is not ok to paint the parts with mounted linkage and gear... that´s not the perfect solution..
just my 2 cents
Joerg
just my 2 cents
Joerg
01-28-2012, 08:38 AM
#23
Thread Starter
Join Date: Feb 2004
Location: herts, UNITED KINGDOM
Posts: 589
Likes: 0
Received 0 Likes
on
0 Posts
This is true, if I build the aircraft I usually primer the model before I fit out the model, then remove everything prior to final paint. This model was built by Bishop Aviation and this thread is showing how to paint an assembled model. The next thread I will show how to paint a kit.
01-28-2012, 09:15 AM
#24

Airworld GeeBee R3 in the background of one of your photos Philip? Like the Futura its one of those like them or loathe them models. I'm in the "like them" camp. You going with the big Moki radial with that?
01-28-2012, 09:24 AM
#25
Thread Starter
Join Date: Feb 2004
Location: herts, UNITED KINGDOM
Posts: 589
Likes: 0
Received 0 Likes
on
0 Posts
Hi DominicM,
Yes the R3 will have a radial, we are current looking in to fitting something different than the standard Moki.
Yes the R3 will have a radial, we are current looking in to fitting something different than the standard Moki.