


Galeb G2 - new jet made in Serbia

 12-20-2015, 02:15 AM
#302

Thread Starter
Same like product I use...
Second filler, gray color, is primer.
I use Body 360 from canister, but you can use same primer in paint gun. In that case, two components (filler and harder) must mix together.
For me, canister is better option, because I can apply primer and leave canister. No washing paint gun.
Gray surface show exactly where you need to fix surface and after that surface are stronger.
Most important work in "filler - primer" process is sanding. For first rough sand - 100 grid sand paper and next is 240.
Only before adding rivets I use smoother sand paper.
Best regards
Mirce


 12-21-2015, 02:43 AM
#305
Thread Starter
Thank you for kind words...
For me editing here and on my web site is motivation and nice comments just push me to give my best...
Thanks for support...
Regards
Mirce
For me editing here and on my web site is motivation and nice comments just push me to give my best...
Thanks for support...
Regards
Mirce
 12-21-2015, 02:10 PM
#309
Very nice thread Mirce
Keep up the good job. Good to know that in 2015 (almost 2016), there are true modelers
When I retire, if I get there.... I maybe embrace such a project
Merry Christmas to all
Keep up the good job. Good to know that in 2015 (almost 2016), there are true modelers
When I retire, if I get there.... I maybe embrace such a project
Merry Christmas to all
12-28-2015, 03:12 PM
#311
Thread Starter
Thank you my friends around the world for nice and kind words about my G2 project.
Here are activity from last two weeks...
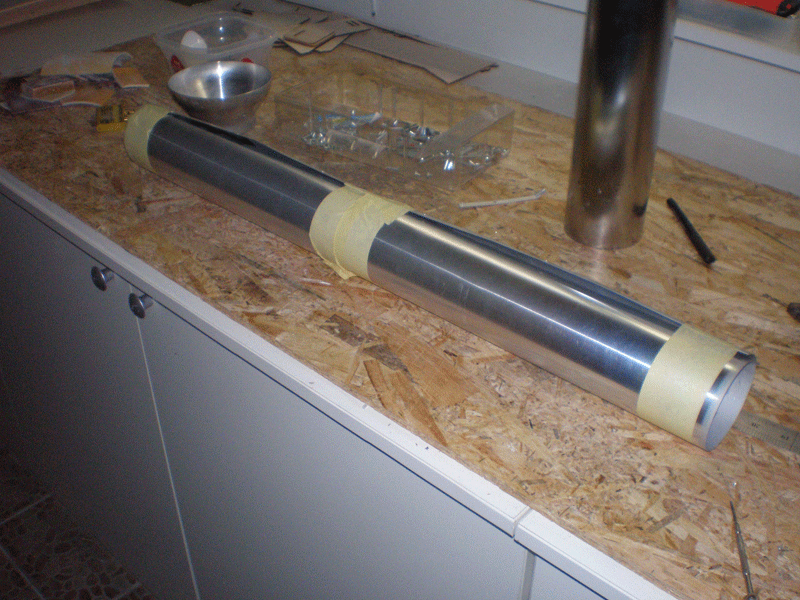
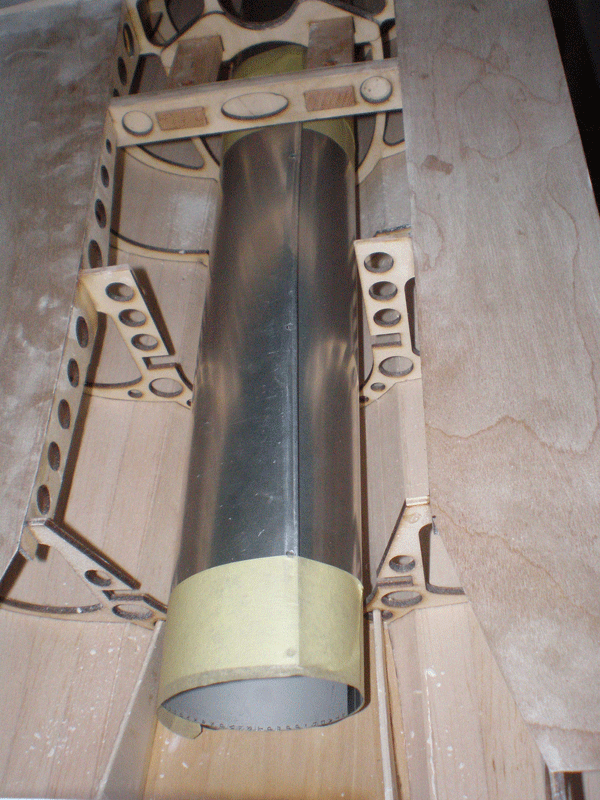
From IQ Hammer I got new thrust tube. This time it can fit in fuselage, but now question is, will this tube be good size for 90 turbine.
Diameter of inner tube is 68 mm.
This tube is for turbines from 40 - 80N, my will be 90, so I hope this will be OK...
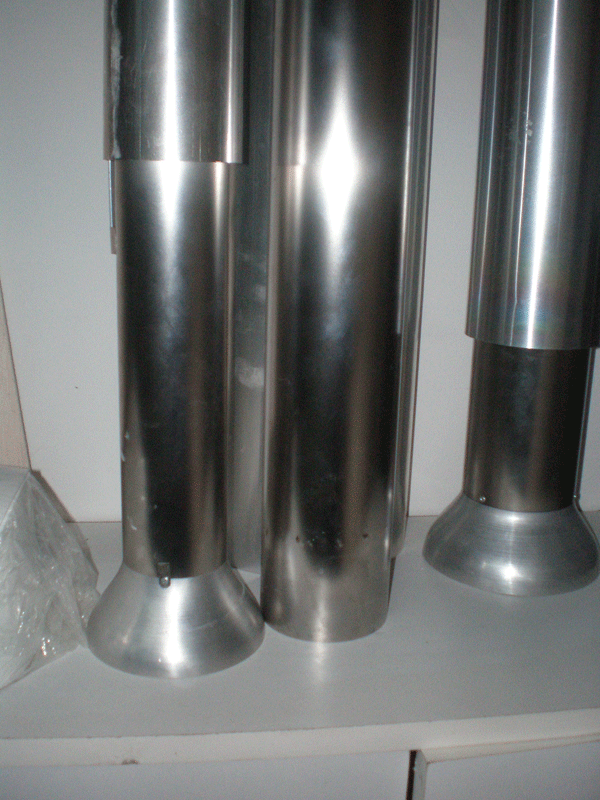
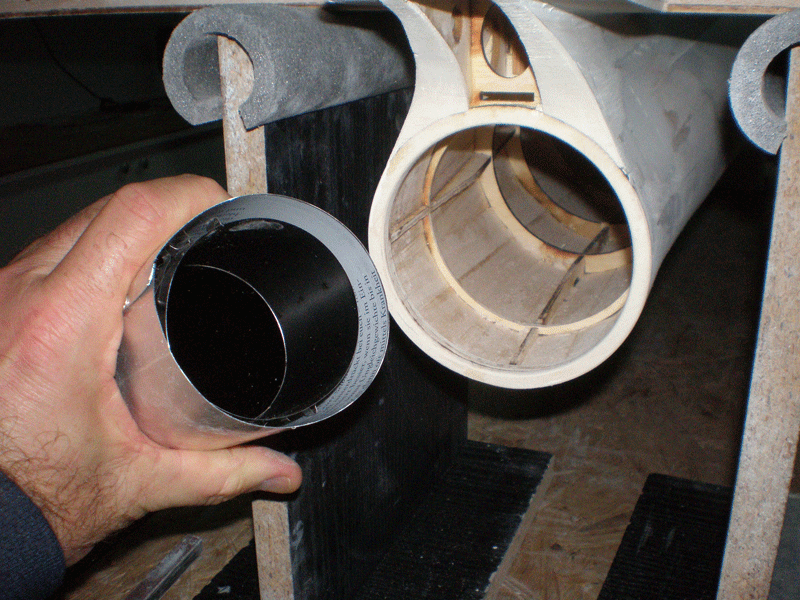
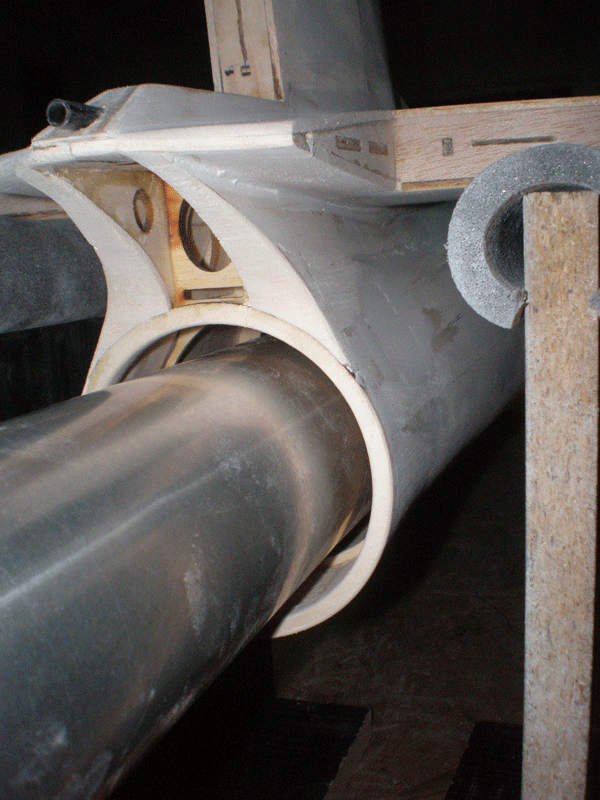
Back up plan is to install first tube I got, but in that case I must separates it in parts. That is no problem, anyhow I must remove bell mouth to install it in fuselage.
Few days ago I made that, thrust tube is separated...
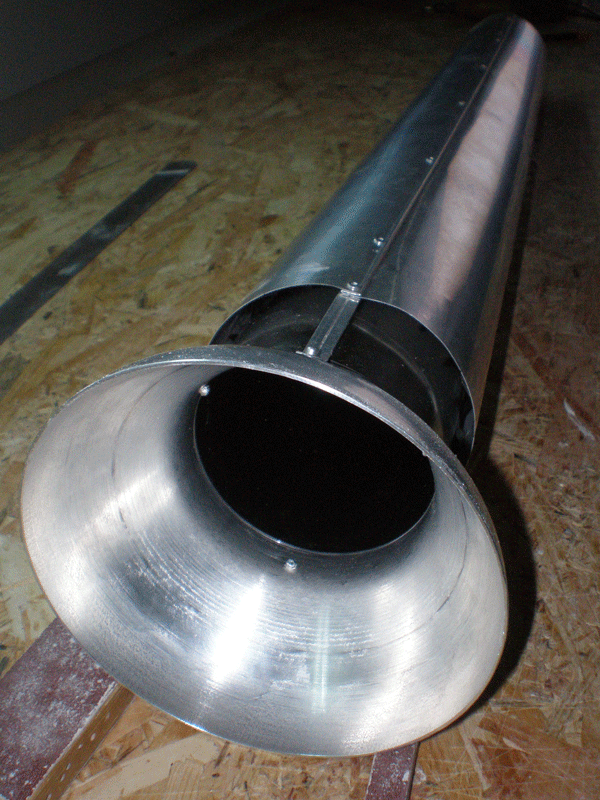
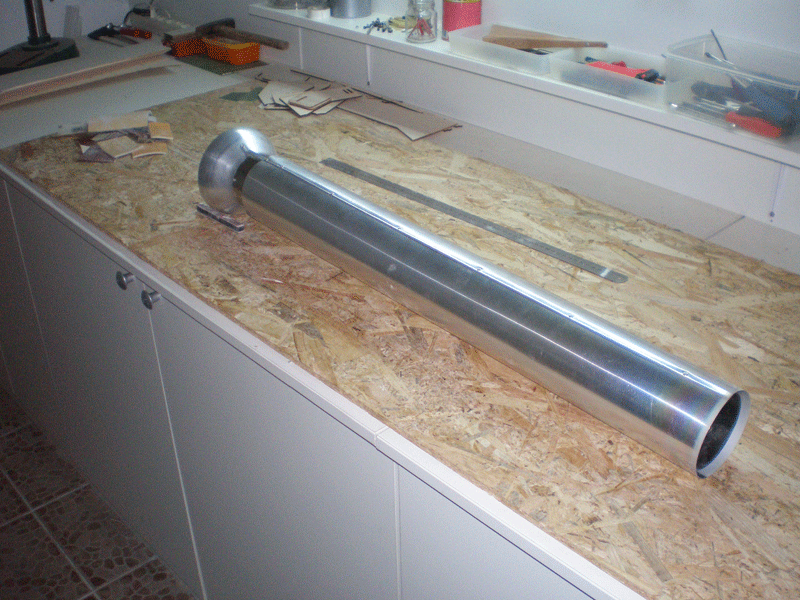
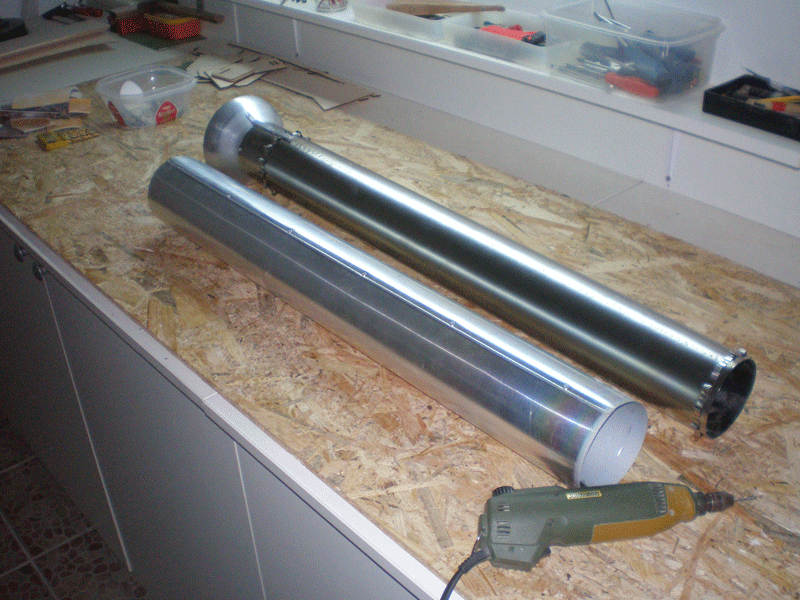
Only problem is in outer tube, which diameter is bigger on front side. When I separated thrust tubes, first I can install outer tube, than inner, and at the end bell mouth.
I try this, it work, so now will see what is better option, to install smaller (new) thrust tube, or to put this from few parts...
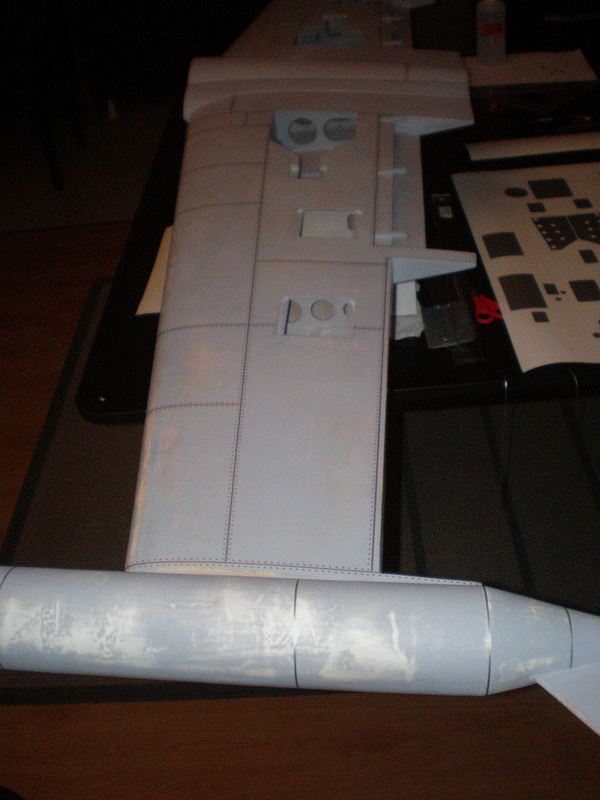
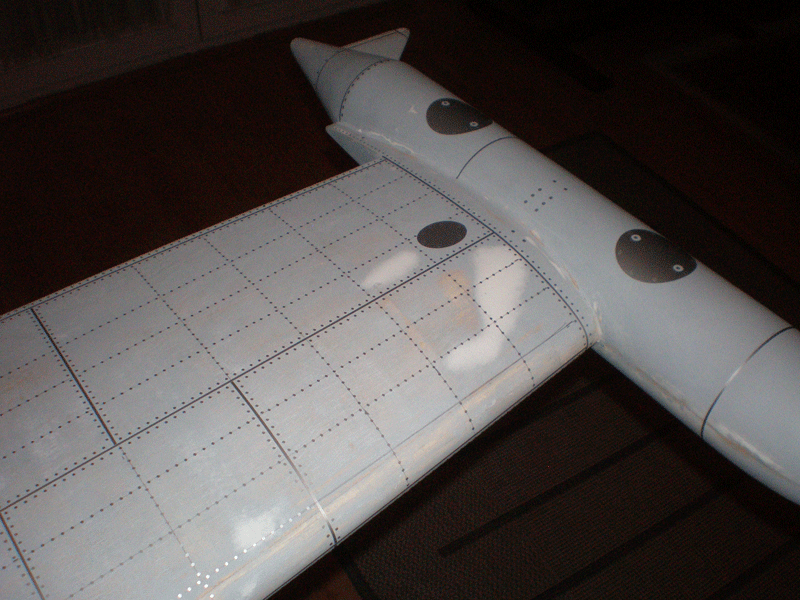
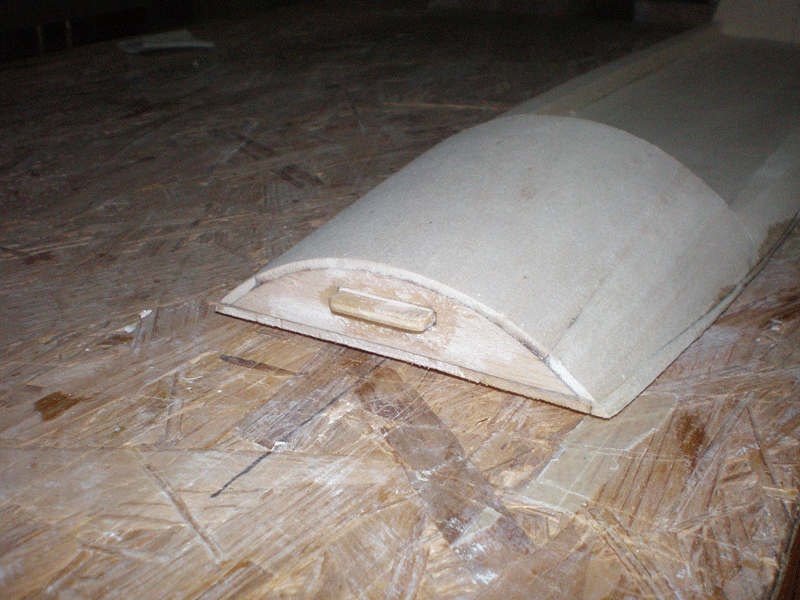
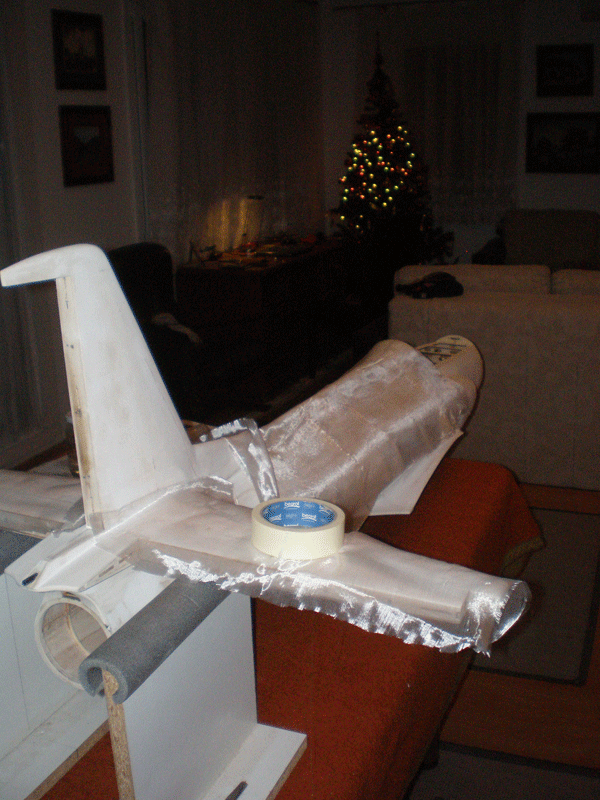
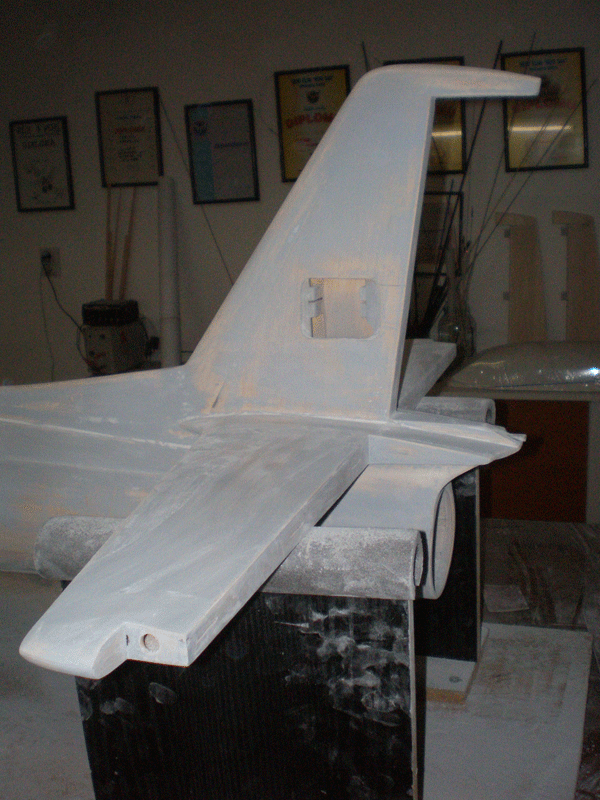
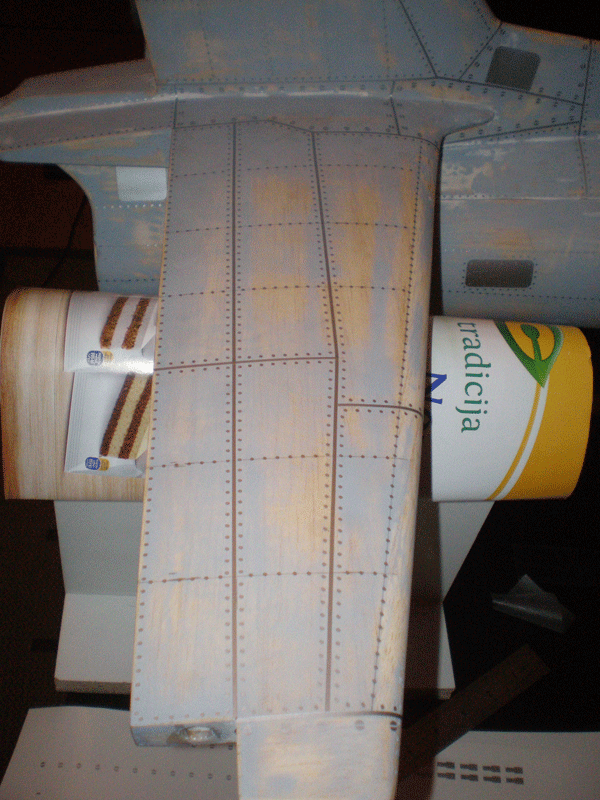
Wings, ailerons and flaps are ready for paint.
I work on panel lines, rivets and details.
Unlike the first G2 model now I'll leave panel lines on surface.
On first Galeb when panel lines was applyed I add few layer of primer. That multi layers give thickness for "channels" - panel lines.
Bed side of that process are more primer, more work, more sanding and most important - more weight behind CG.
OK, my G2 is not for Top Gun or F4C championship, so this new approach for apply panel lines can be good.
Also, I want to show modelers this system for finish, because it is easier method for doing this job.
Panel lines are apply as usually...
Than, next step is to add rivets. First near panel lines...
Here are activity from last two weeks...
From IQ Hammer I got new thrust tube. This time it can fit in fuselage, but now question is, will this tube be good size for 90 turbine.
Diameter of inner tube is 68 mm.
This tube is for turbines from 40 - 80N, my will be 90, so I hope this will be OK...


Back up plan is to install first tube I got, but in that case I must separates it in parts. That is no problem, anyhow I must remove bell mouth to install it in fuselage.
Few days ago I made that, thrust tube is separated...


Only problem is in outer tube, which diameter is bigger on front side. When I separated thrust tubes, first I can install outer tube, than inner, and at the end bell mouth.
I try this, it work, so now will see what is better option, to install smaller (new) thrust tube, or to put this from few parts...


Wings, ailerons and flaps are ready for paint.
I work on panel lines, rivets and details.
Unlike the first G2 model now I'll leave panel lines on surface.
On first Galeb when panel lines was applyed I add few layer of primer. That multi layers give thickness for "channels" - panel lines.
Bed side of that process are more primer, more work, more sanding and most important - more weight behind CG.
OK, my G2 is not for Top Gun or F4C championship, so this new approach for apply panel lines can be good.
Also, I want to show modelers this system for finish, because it is easier method for doing this job.
Panel lines are apply as usually...


Than, next step is to add rivets. First near panel lines...


Last edited by mirce; 12-28-2015 at 03:48 PM.
12-28-2015, 03:23 PM
#312
Thread Starter
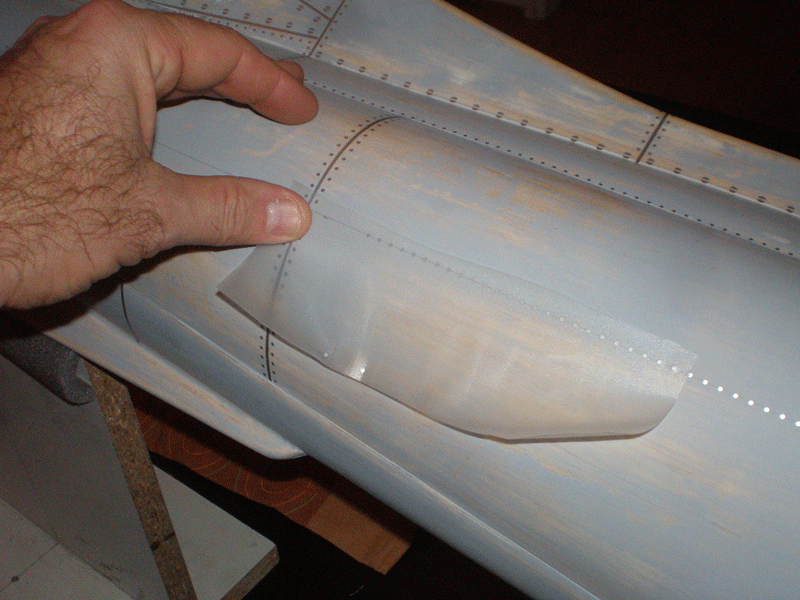
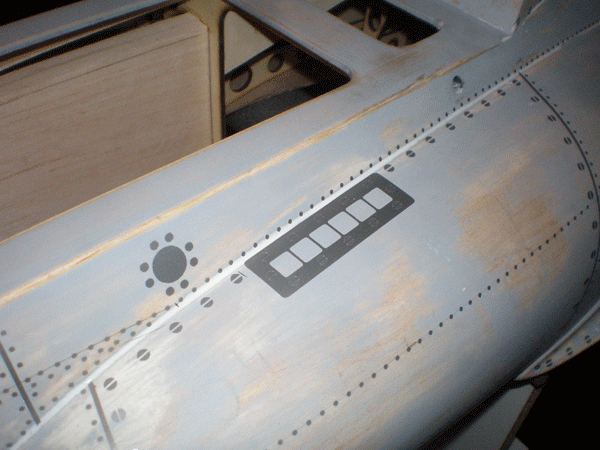
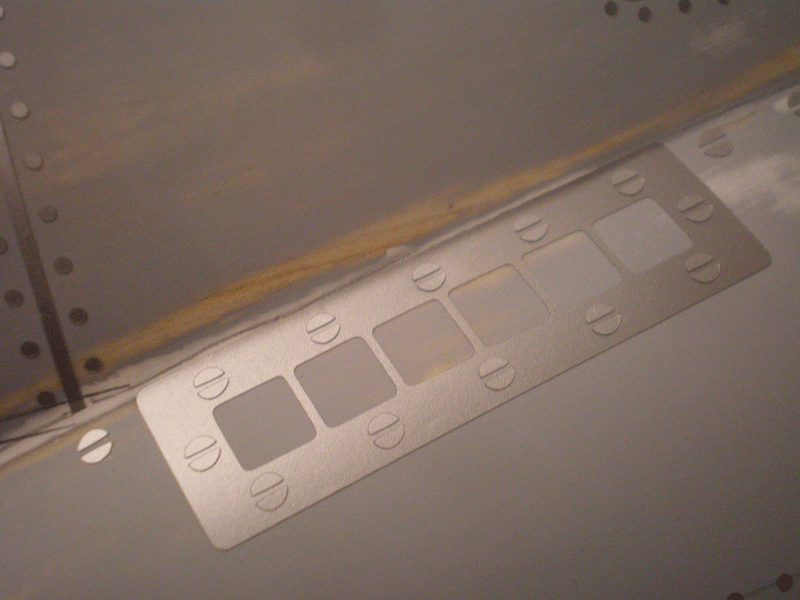
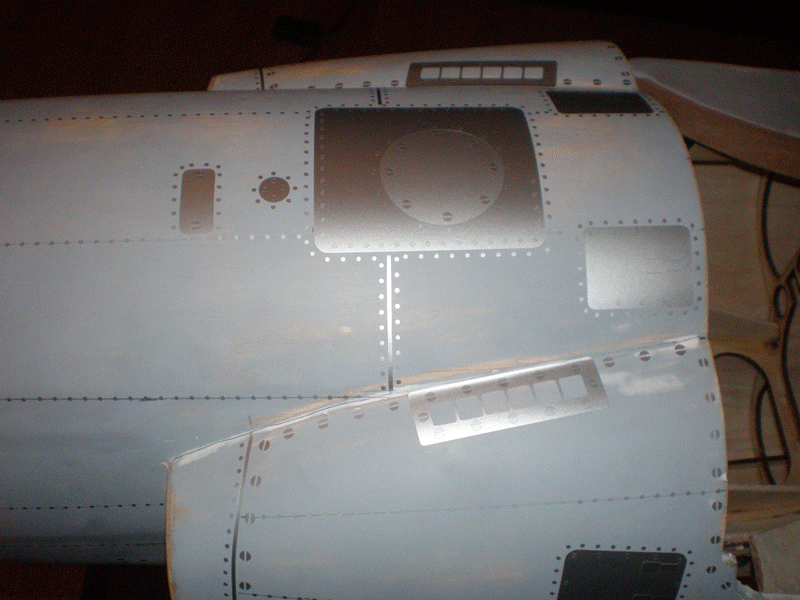
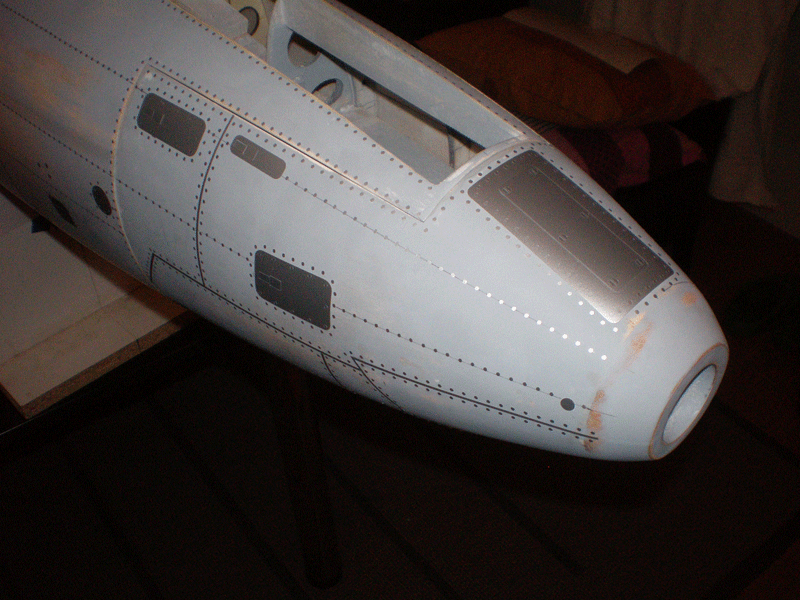
Than I prepare and apply details for wing surfaces...

Finally, I add all other panel lines. For this wing it need about 15K rivets...
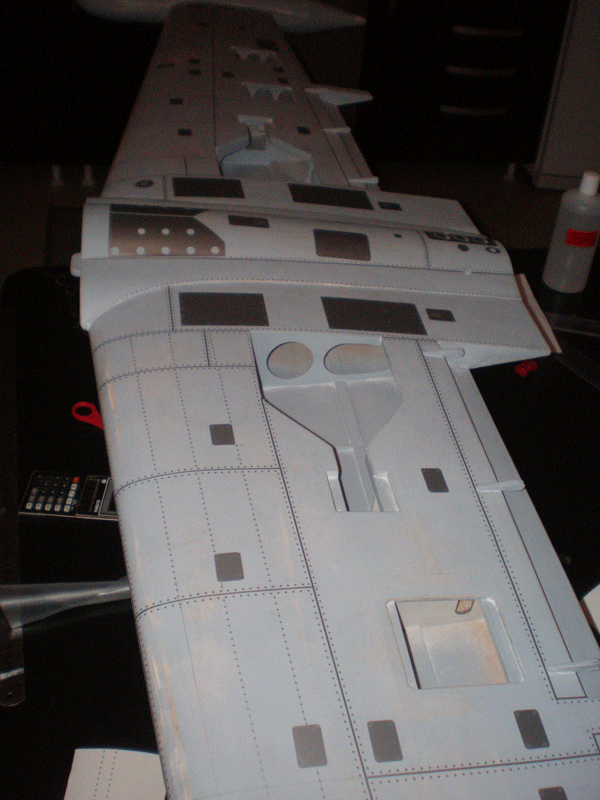

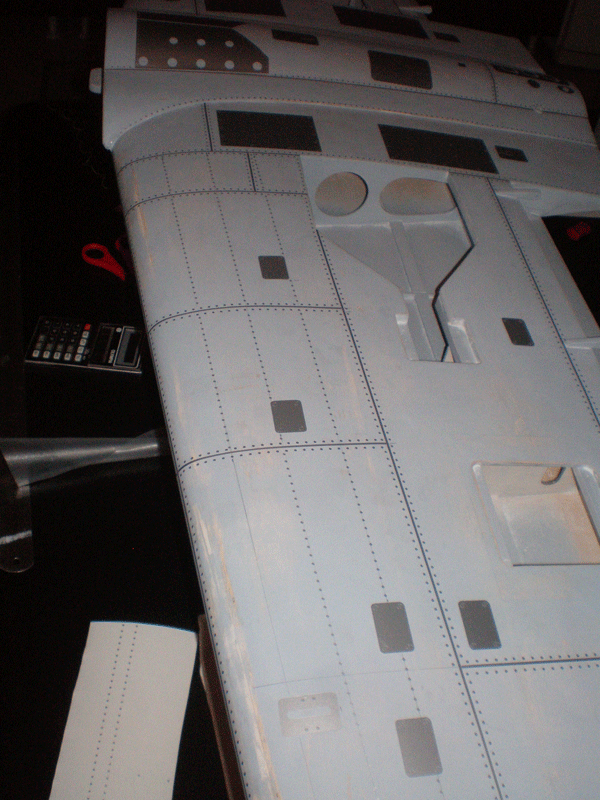
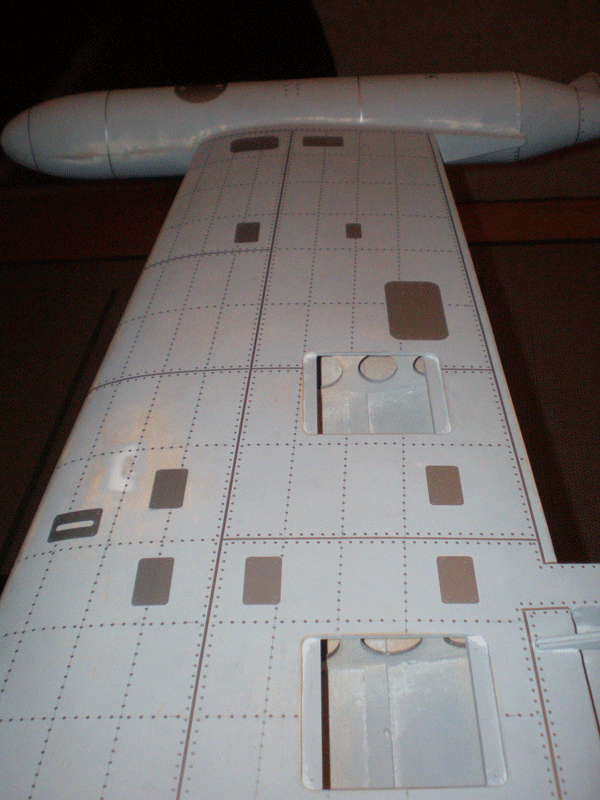
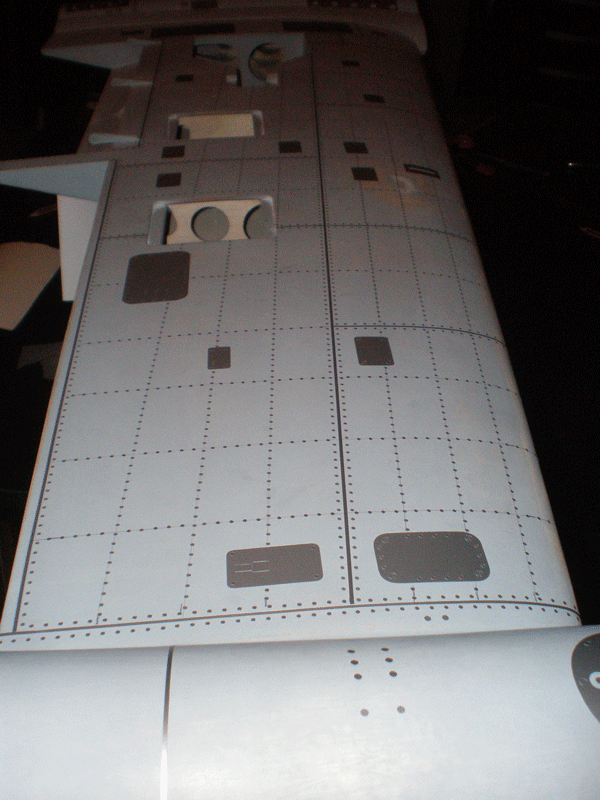
Wing is now ready for painting...
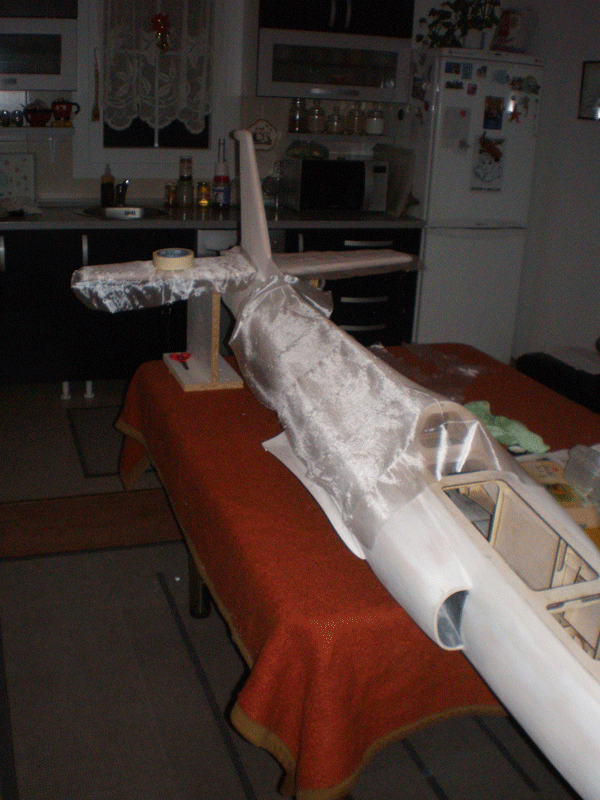
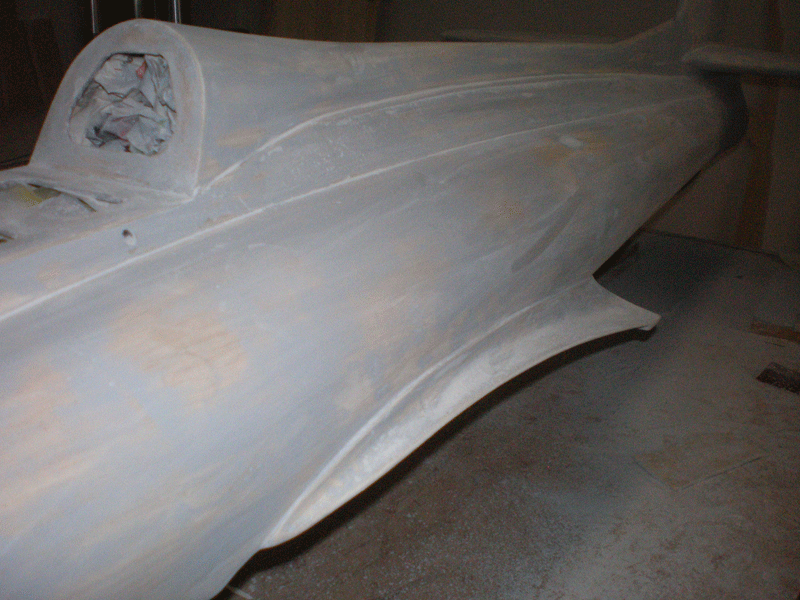
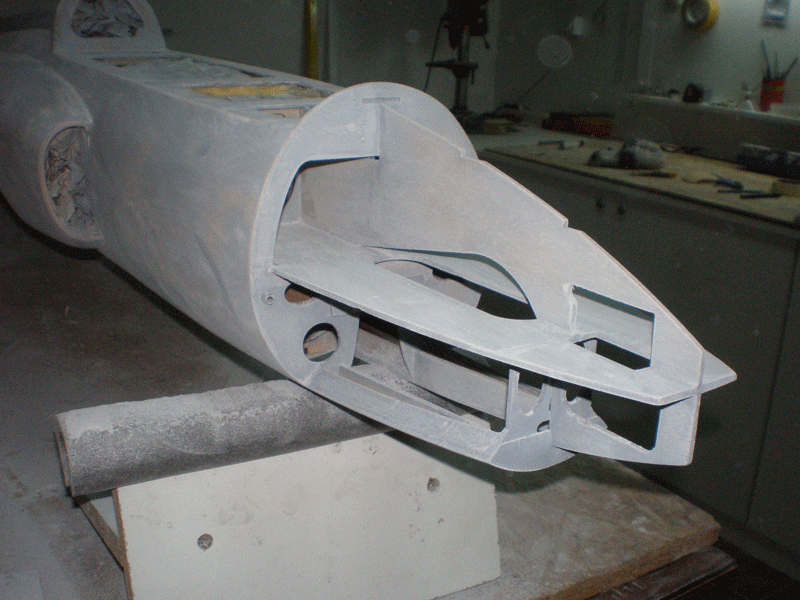
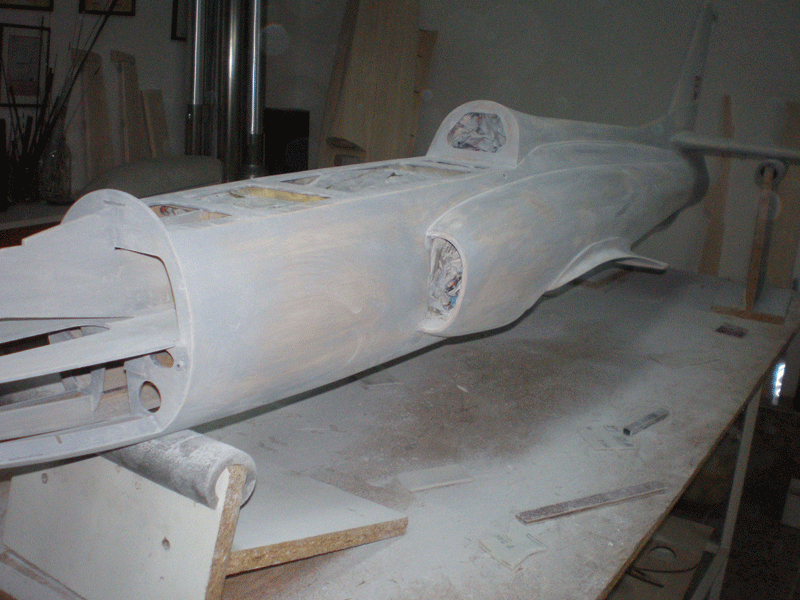
Next job was to prepare fuselage, cabin and front fuselage part for glassing.
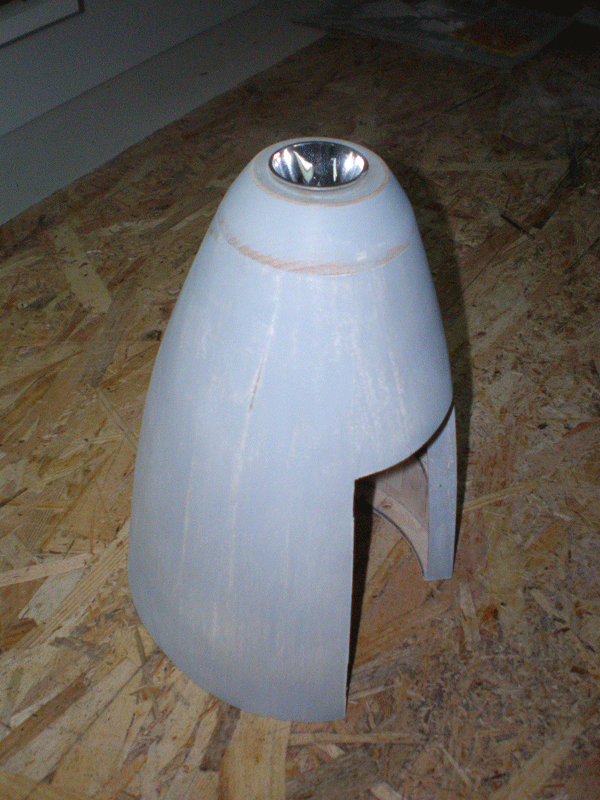
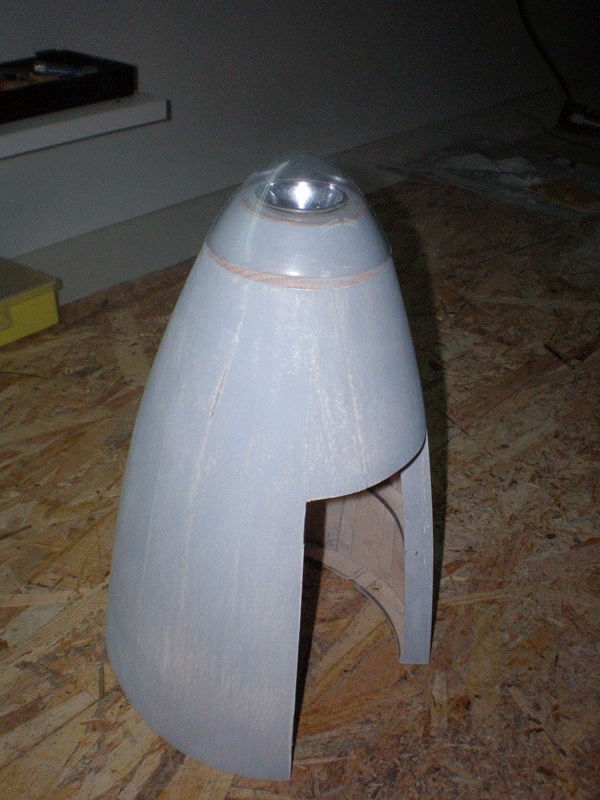
On front fuselage part I install head lamp. Chinese battery lamp was "donator" for parts...
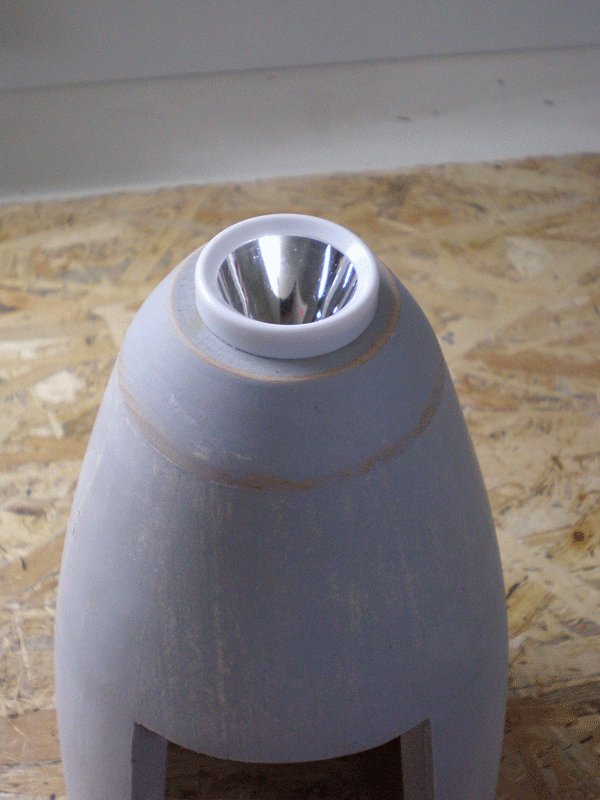
Clear plastic was made on vacuum machine...
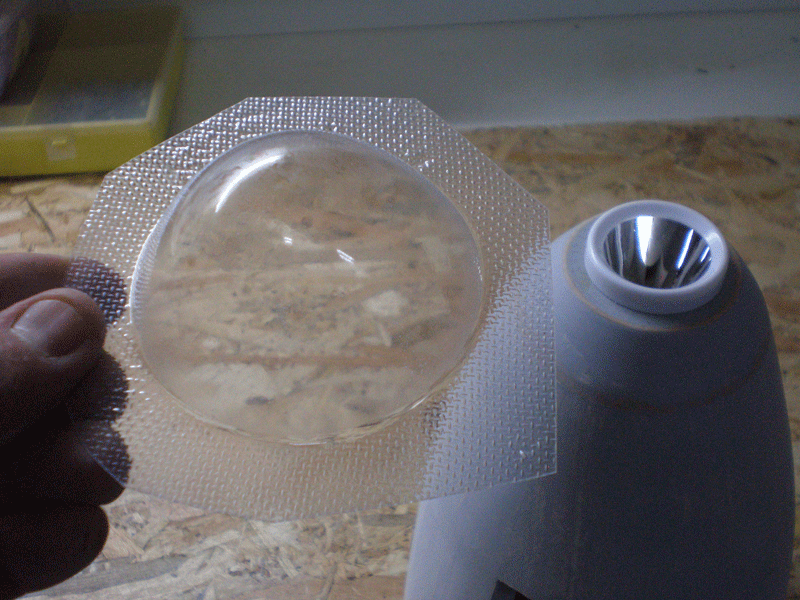
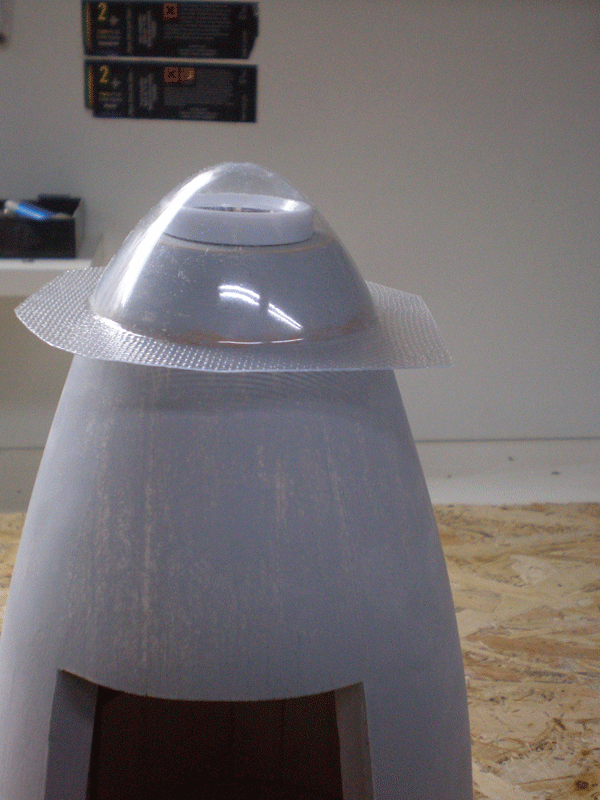
Head lamp can be without "ring"...


Finally, I add all other panel lines. For this wing it need about 15K rivets...


Wing is now ready for painting...
Next job was to prepare fuselage, cabin and front fuselage part for glassing.
On front fuselage part I install head lamp. Chinese battery lamp was "donator" for parts...


Clear plastic was made on vacuum machine...


Head lamp can be without "ring"...


Last edited by mirce; 12-28-2015 at 03:50 PM.
12-28-2015, 03:43 PM
#313
Thread Starter
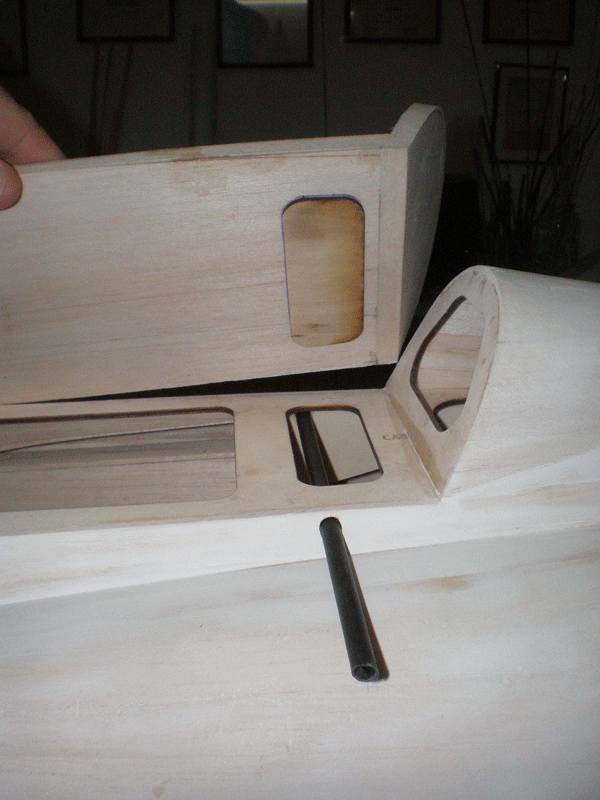
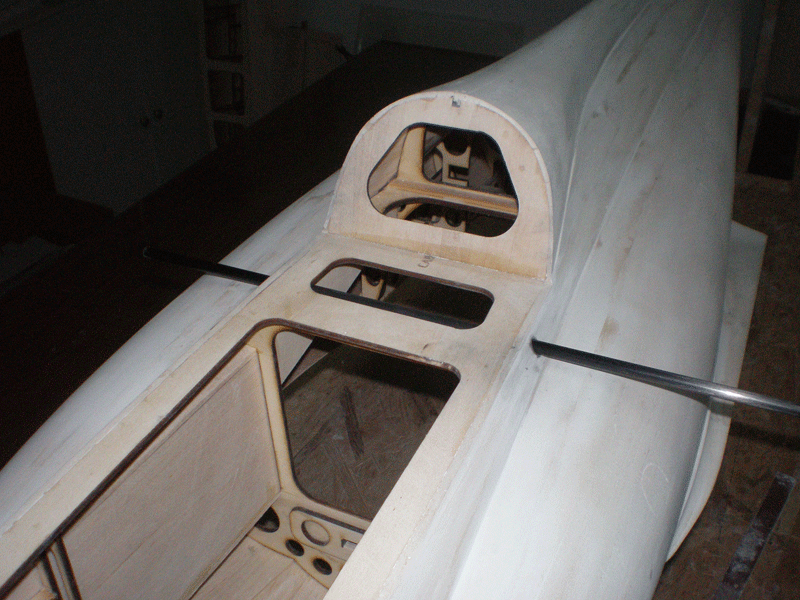
For cabin I must devise system for fixing. I don't want to do that with small screws, for magnets it's too big...
Because all field "action" (fuel, air, switchers, etc...) will be under cabin, it must be some simple but robust system.
Here is solution...
On the front side is peg...
On the rear side I first on the bottom of the cabin add ply part from fuselage frame.
Than I find two carbon tubes which fit perfectly one in other. Wider I glued in fuselage right under cabin floor...
Inside fuselage view of the carbon tube...
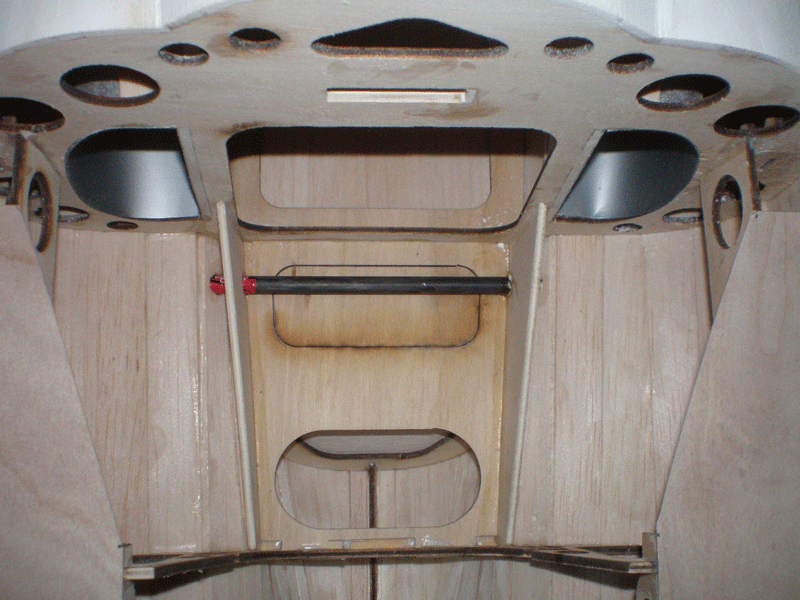
Than...
Bigger tube is cut on three pieces, middle was glued on cabin. All was made and glued together, so installation is simple...
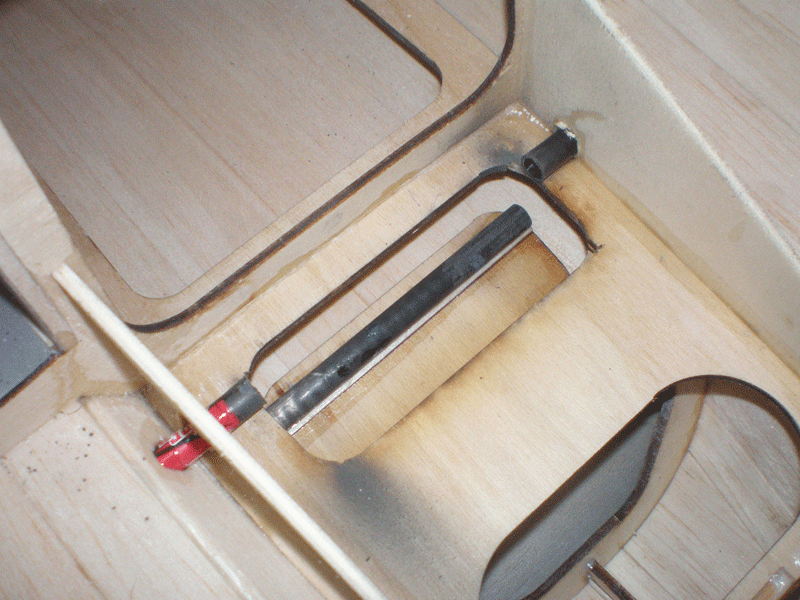

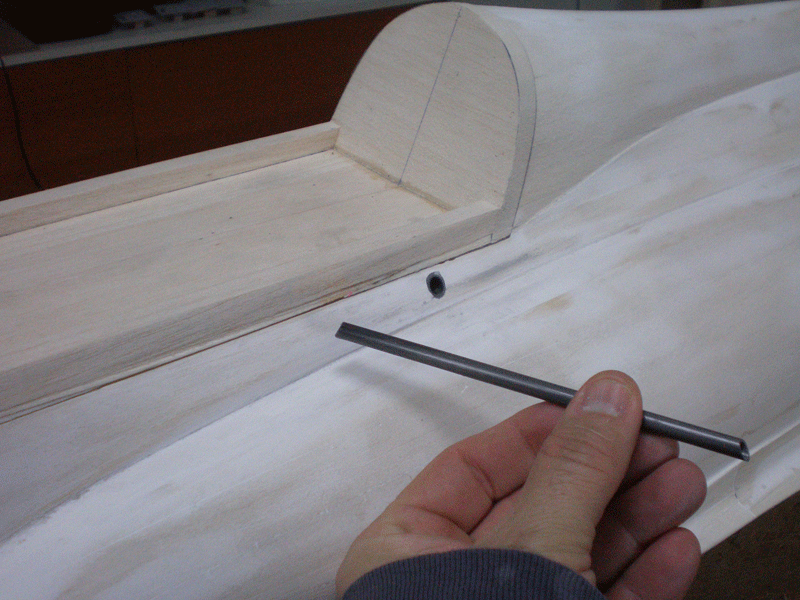
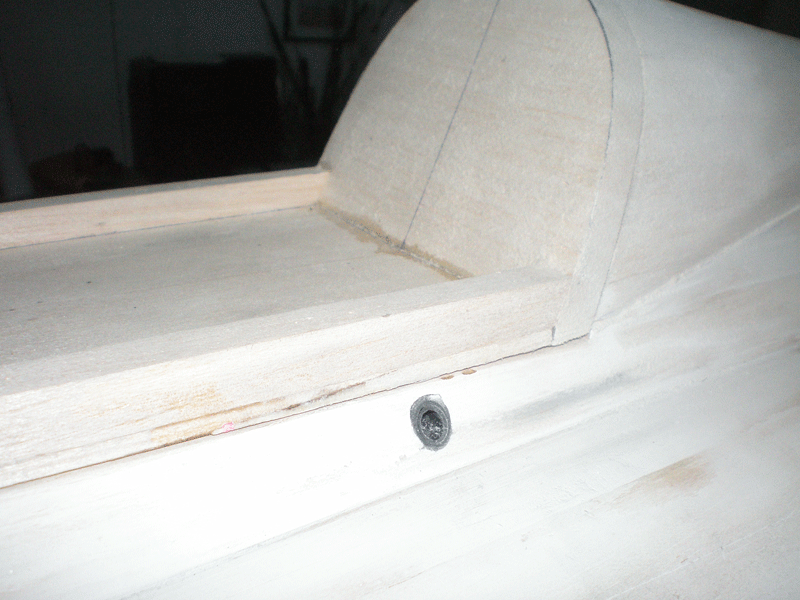
Hole of the inner tube will be filled, so from fuselage side, at the end, it will be almost invisible. I'll made system to prevent inner carbon tube to come out during flight.
And that's it...
When you want to open cabin just push inner tube from fuselage and take it out. Cabin is open...
For close, set cabin in place and push tube in fuselage...
Few days ago I bought turbine. As I told earlier, it is IQ Hammer 90+ .
Hope that during January post man will bring parcel...
Happy New Year and all the best in 2016. from Senta, Serbia wish
Mirce
Because all field "action" (fuel, air, switchers, etc...) will be under cabin, it must be some simple but robust system.
Here is solution...
On the front side is peg...

On the rear side I first on the bottom of the cabin add ply part from fuselage frame.
Than I find two carbon tubes which fit perfectly one in other. Wider I glued in fuselage right under cabin floor...

Inside fuselage view of the carbon tube...

Than...

Bigger tube is cut on three pieces, middle was glued on cabin. All was made and glued together, so installation is simple...


Hole of the inner tube will be filled, so from fuselage side, at the end, it will be almost invisible. I'll made system to prevent inner carbon tube to come out during flight.
And that's it...
When you want to open cabin just push inner tube from fuselage and take it out. Cabin is open...
For close, set cabin in place and push tube in fuselage...
Few days ago I bought turbine. As I told earlier, it is IQ Hammer 90+ .
Hope that during January post man will bring parcel...
Happy New Year and all the best in 2016. from Senta, Serbia wish
Mirce
Last edited by mirce; 12-28-2015 at 03:55 PM.
01-17-2016, 03:17 PM
#314
Thread Starter
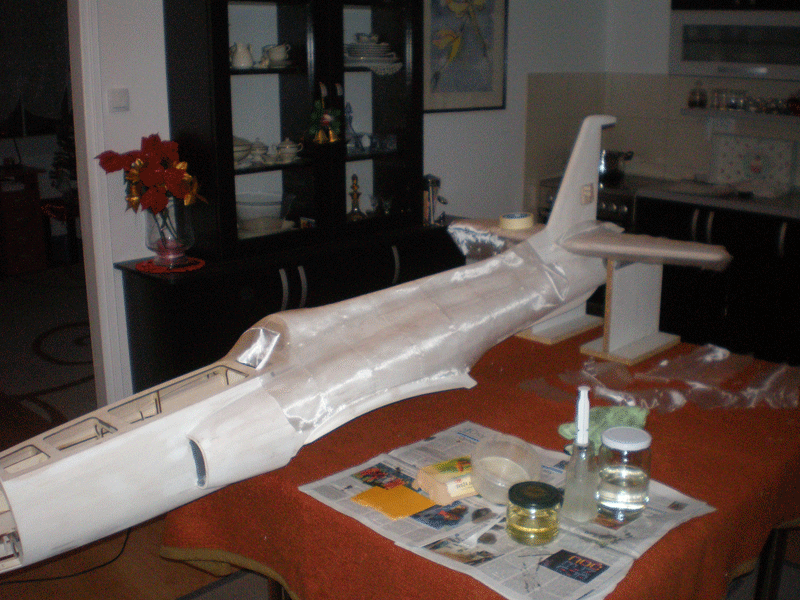
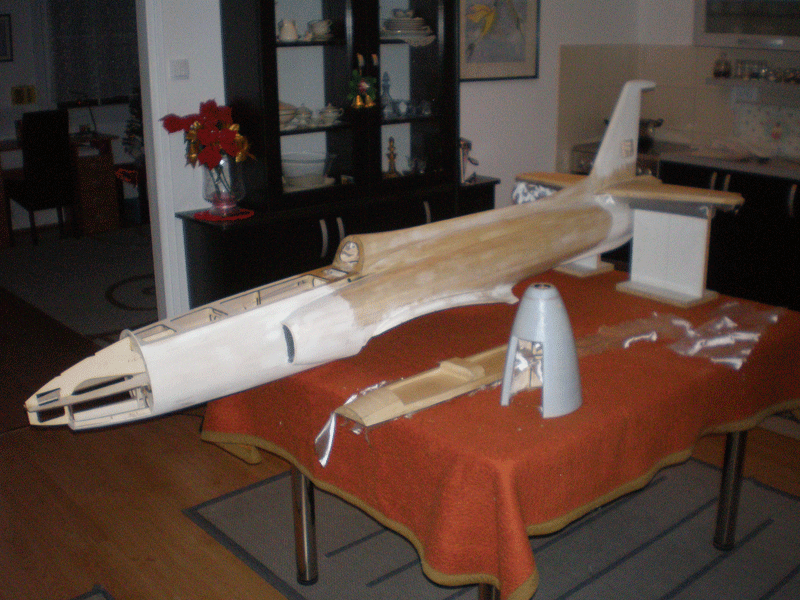
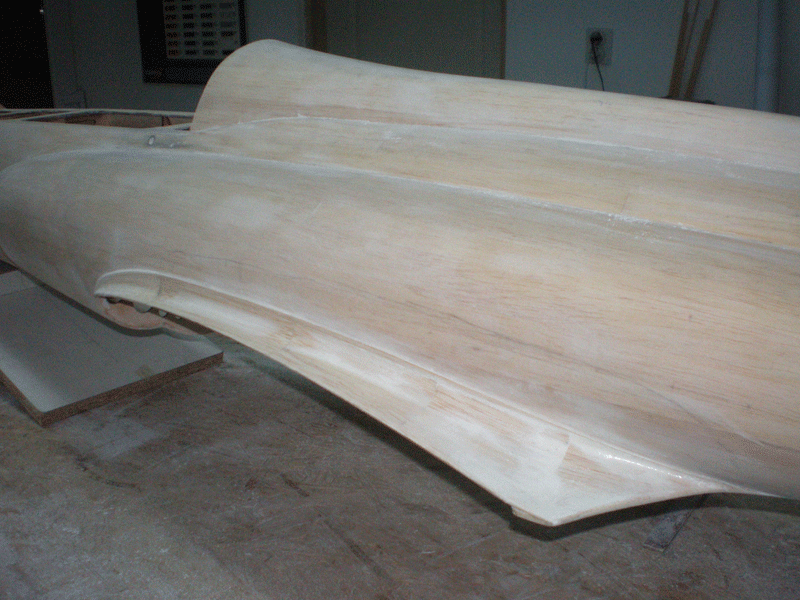
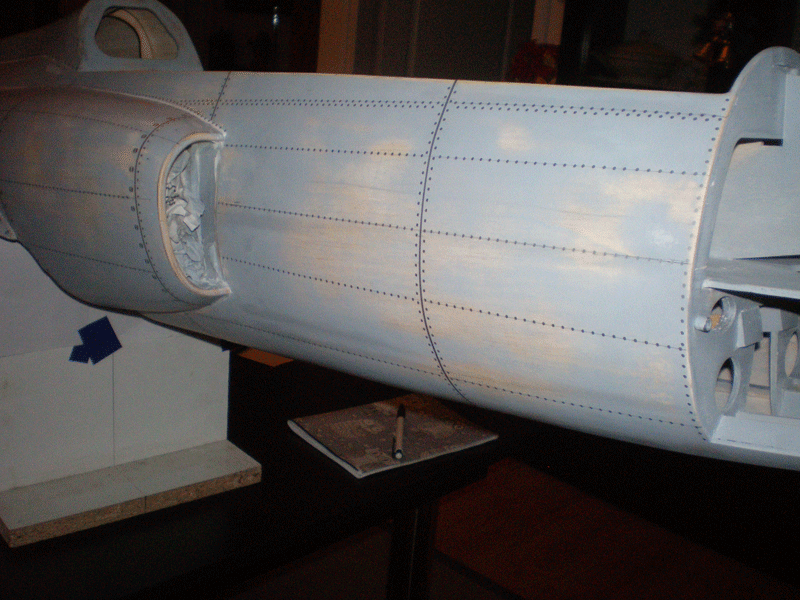
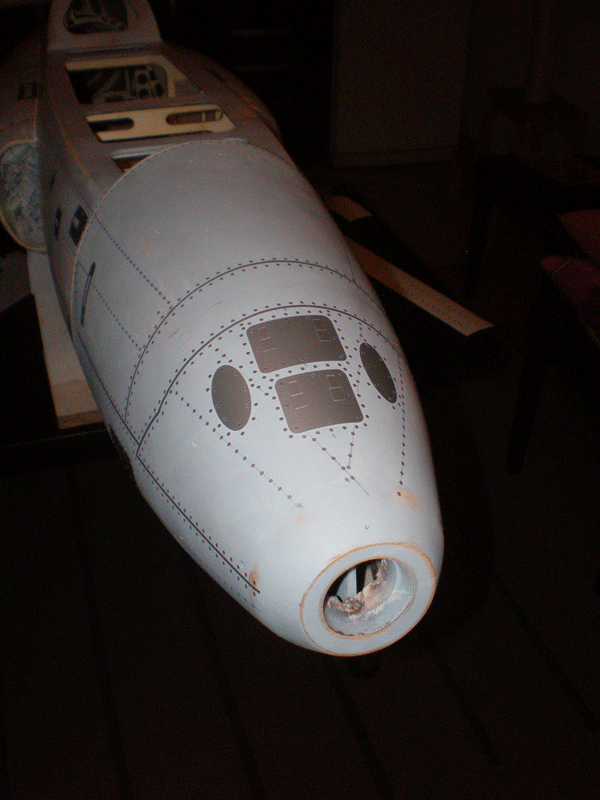
In last few weeks I was working on fuselage...
Fuselage was moving in house and first step was glassing. Process was same like I work on the wing...
First I prepare glass cloth for parts I want to work on. Upper side...
Bottom side...
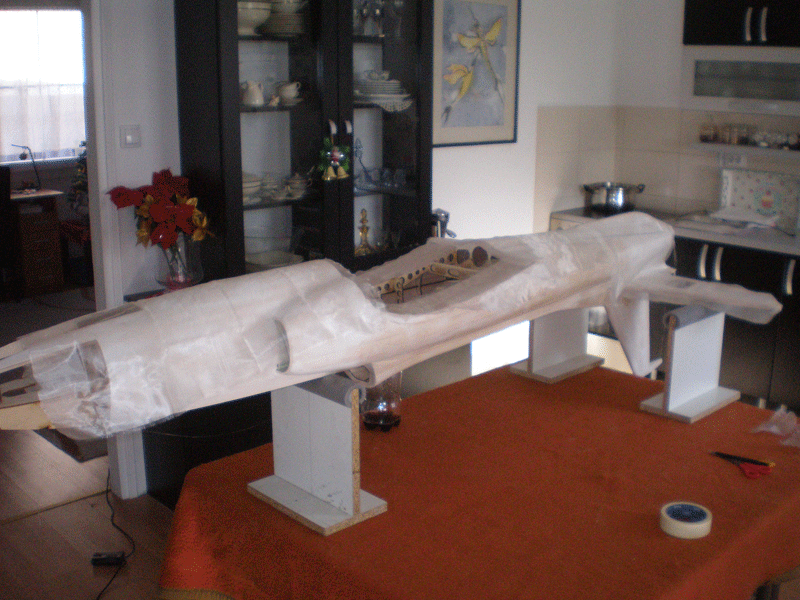
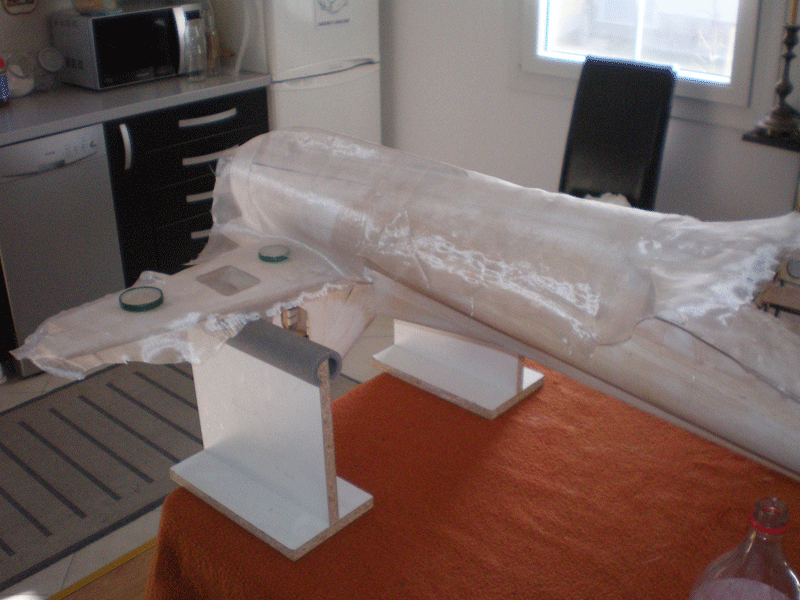
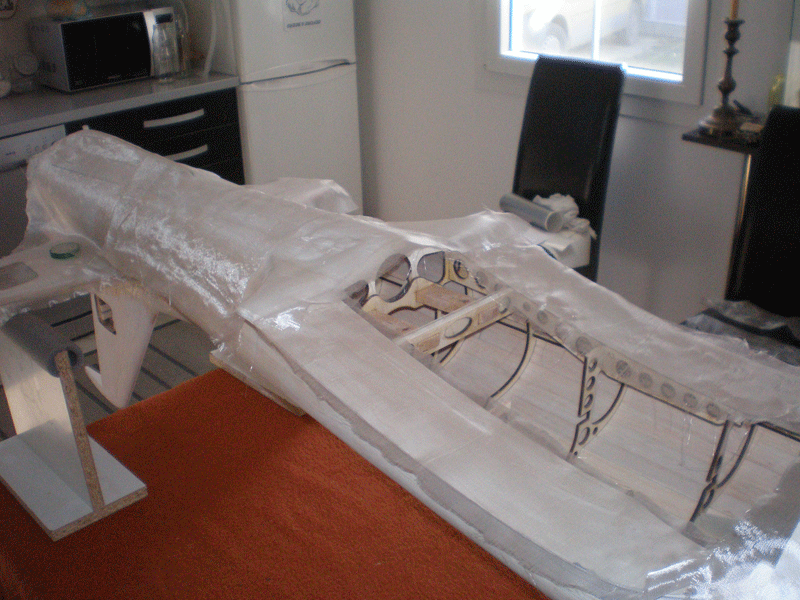
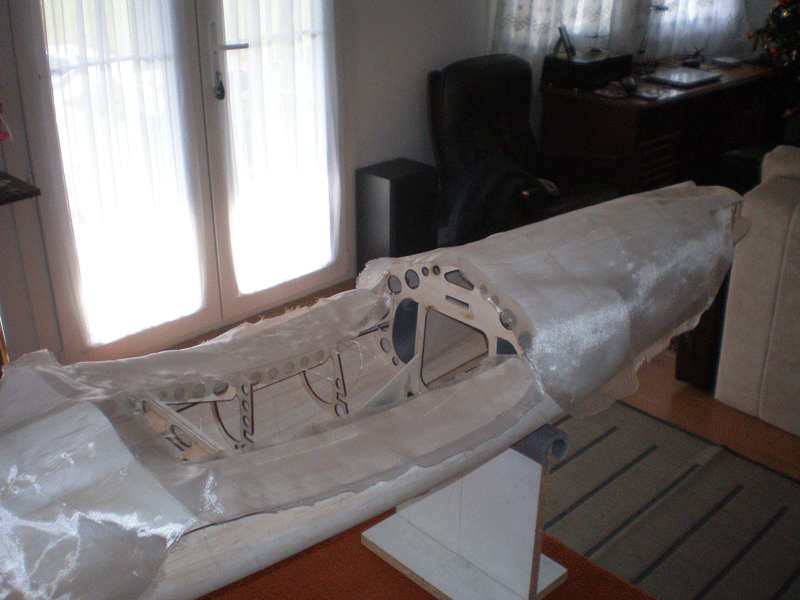
Little by little fuselage was cover with glass cloth. Before second layer of epoxy resin I sand complete fuselage.

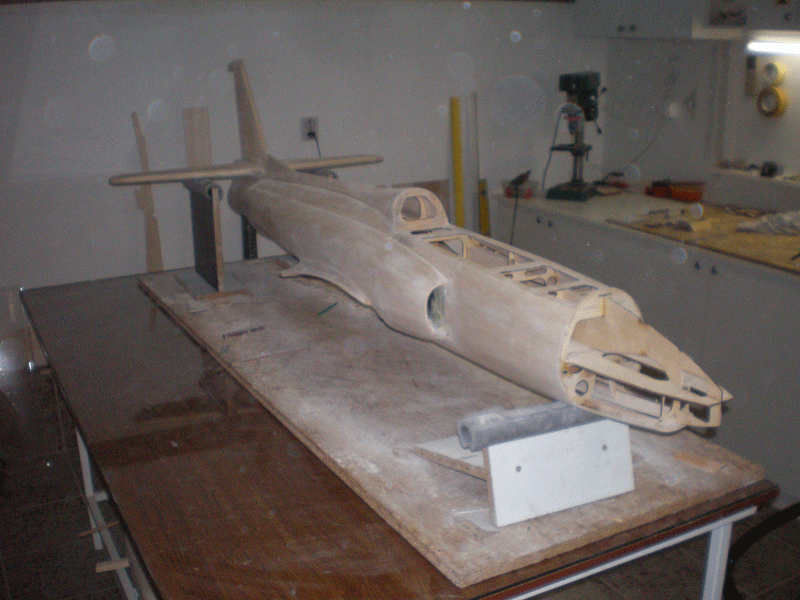

Primer was next, and after primer I repair all small bad spots I could discern... Than, sanding again...
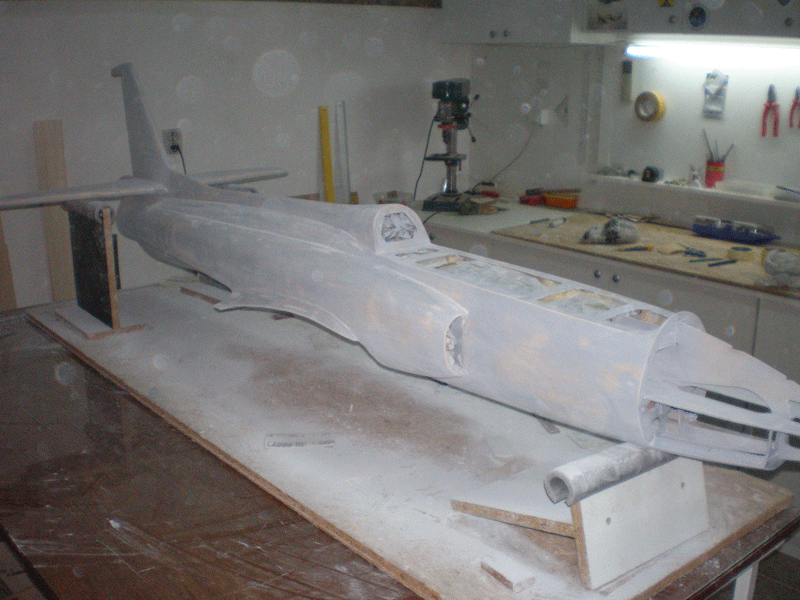
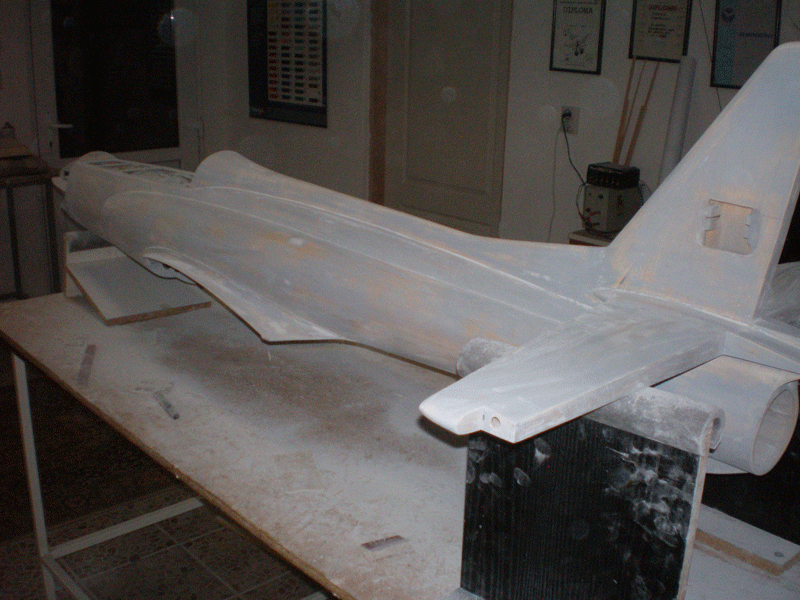

For sanding after glassing I use more than 20 work hours!!!
Fuselage was moving in house and first step was glassing. Process was same like I work on the wing...
First I prepare glass cloth for parts I want to work on. Upper side...


Bottom side...


Little by little fuselage was cover with glass cloth. Before second layer of epoxy resin I sand complete fuselage.


Primer was next, and after primer I repair all small bad spots I could discern... Than, sanding again...


For sanding after glassing I use more than 20 work hours!!!
Last edited by mirce; 01-17-2016 at 03:24 PM.
01-17-2016, 03:28 PM
#315
Thread Starter
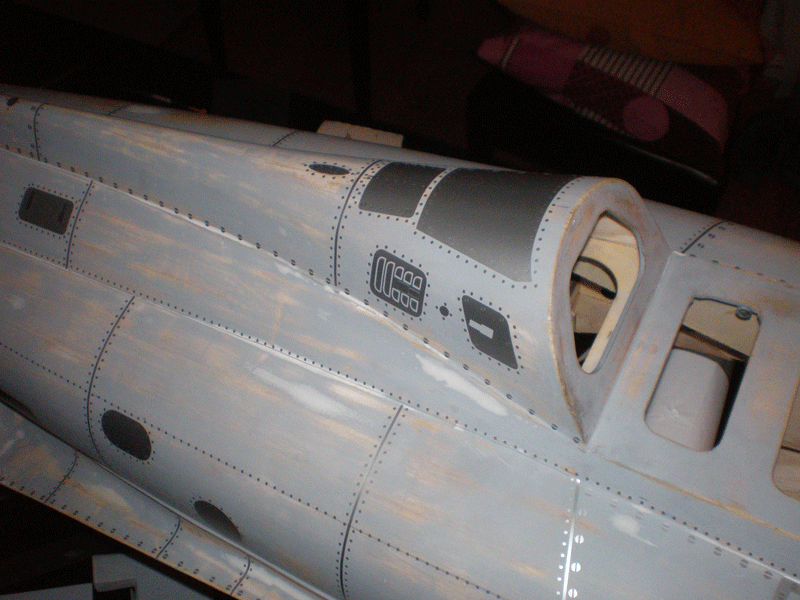
After cleaning dust, surface is smooth like "baby ass"...
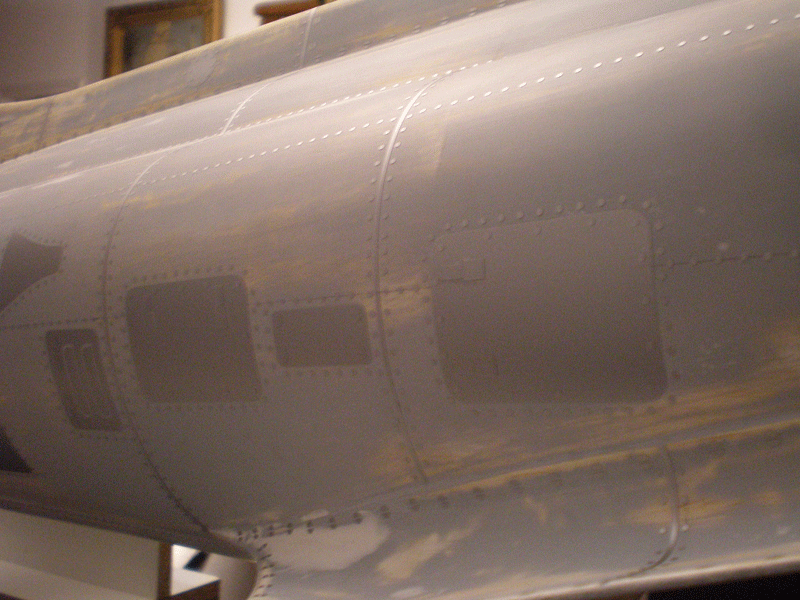
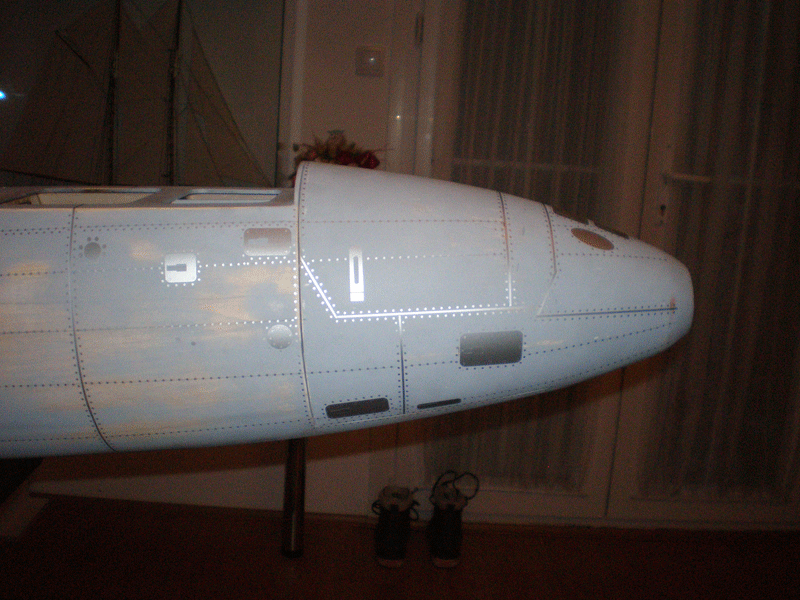
Fuselage was moved in house again and I start work on panel lines, rivets and all other details...
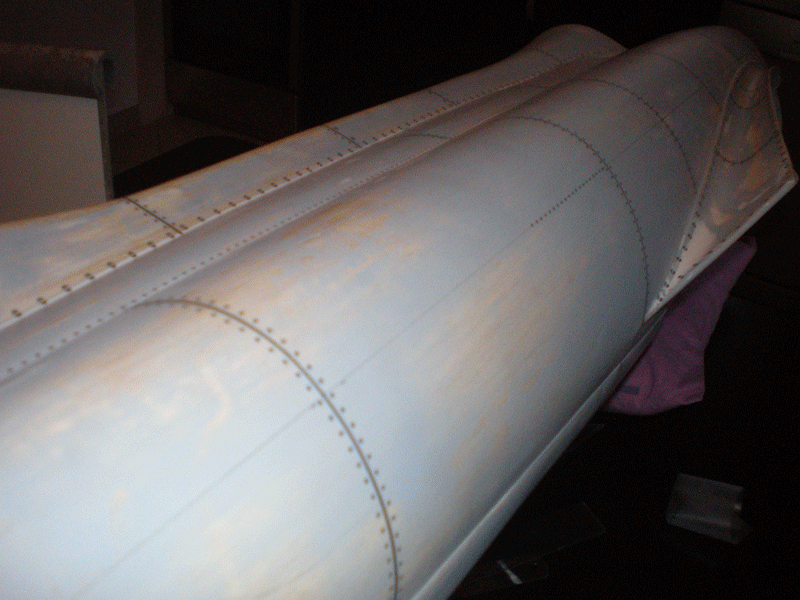
Applying is simple, just need patience...


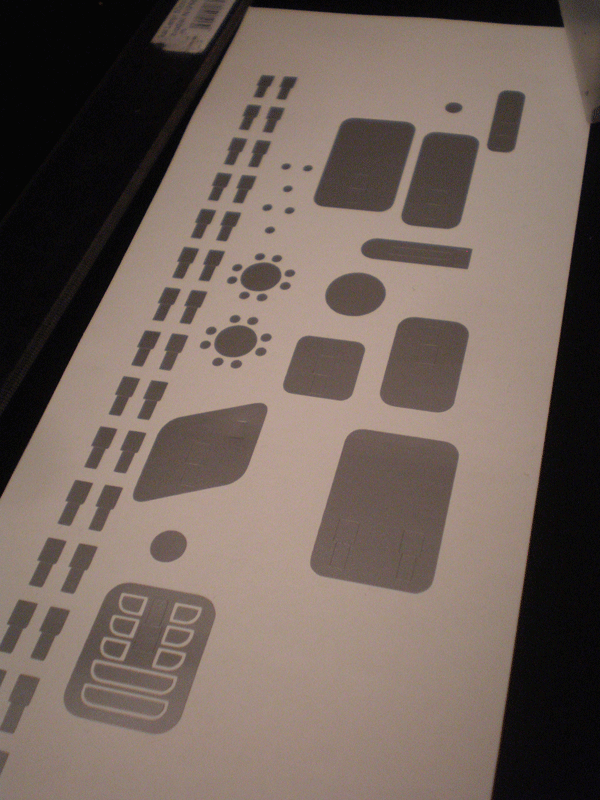
Like for all models I made, for G2 Detail set will be available...
Regards
Fuselage was moved in house again and I start work on panel lines, rivets and all other details...

Applying is simple, just need patience...


Like for all models I made, for G2 Detail set will be available...

Regards
Last edited by mirce; 01-17-2016 at 03:33 PM.


 01-20-2016, 11:44 AM
#318
Thread Starter
Thanks everyone on nice words.
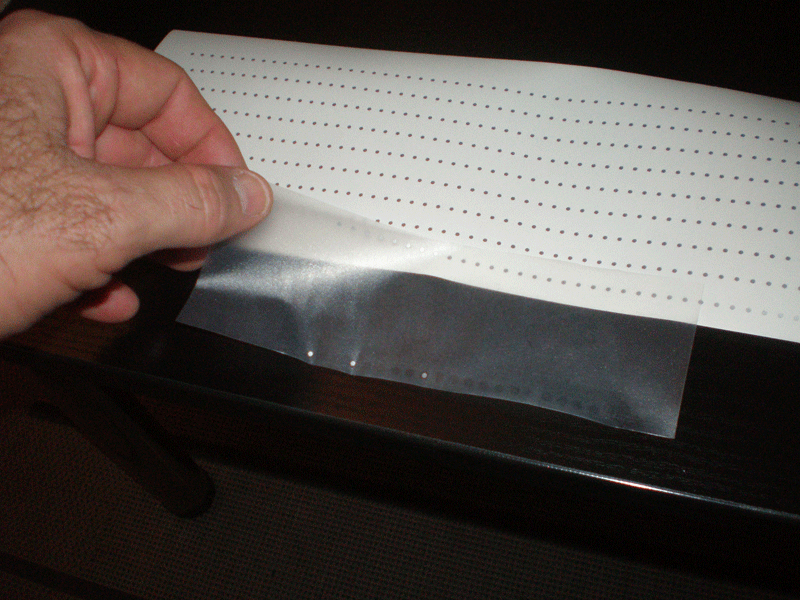
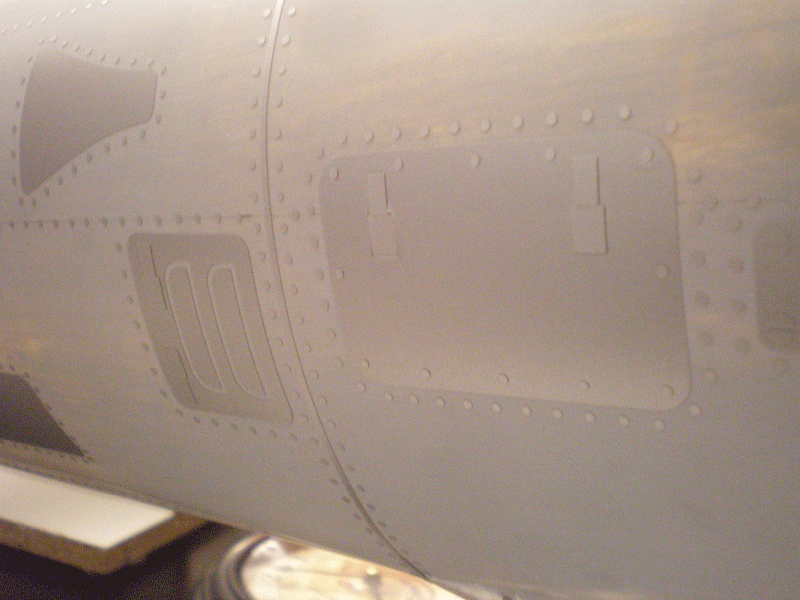
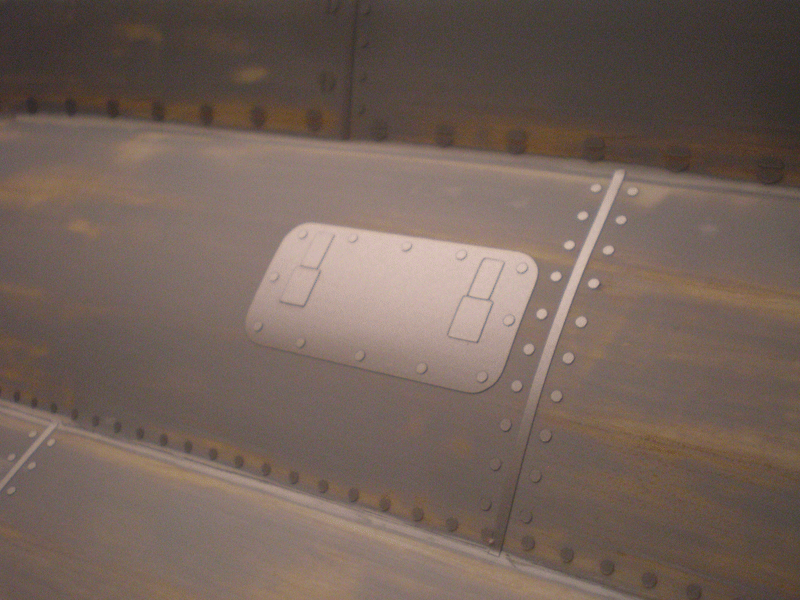
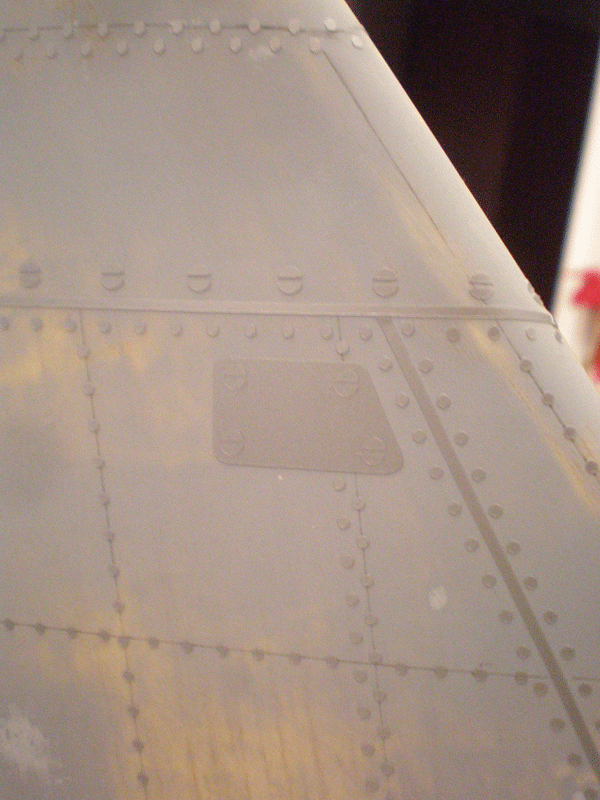
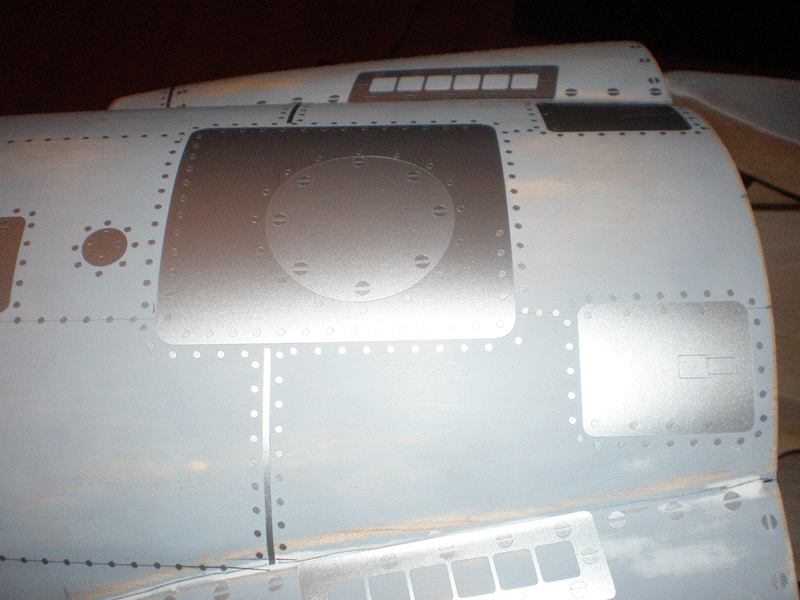
Applying panel lines, rivets, details is boring work, but at the end it worth every minute.
Those details separate good from great models.
Technique I show here is easier method, because I just apply panel lines without applying primer later.
Also, rivets which you made with soldering iron or small drilling machine are more realistic, but every mistake is visible and hard to fix.
System I offer here is much simpler and without any fear to use it.
Only what you need is patient...
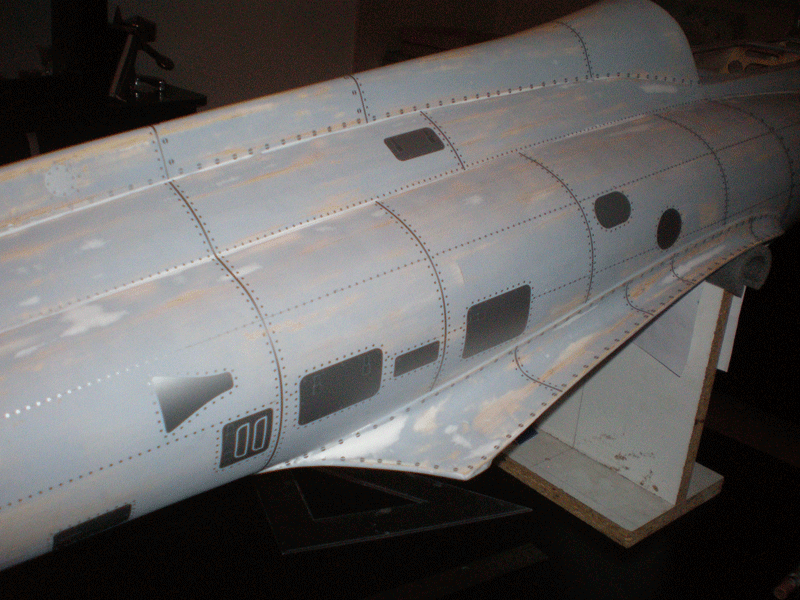
Finally here are pictures before painting...
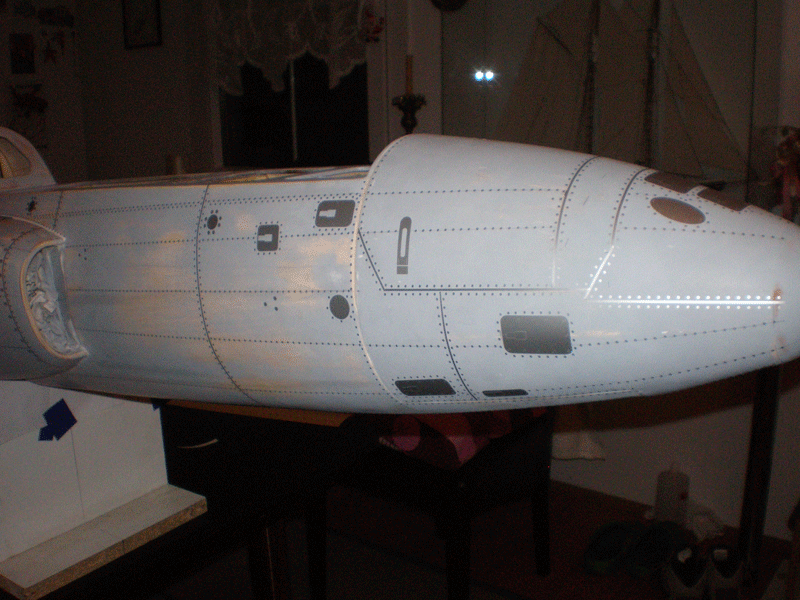
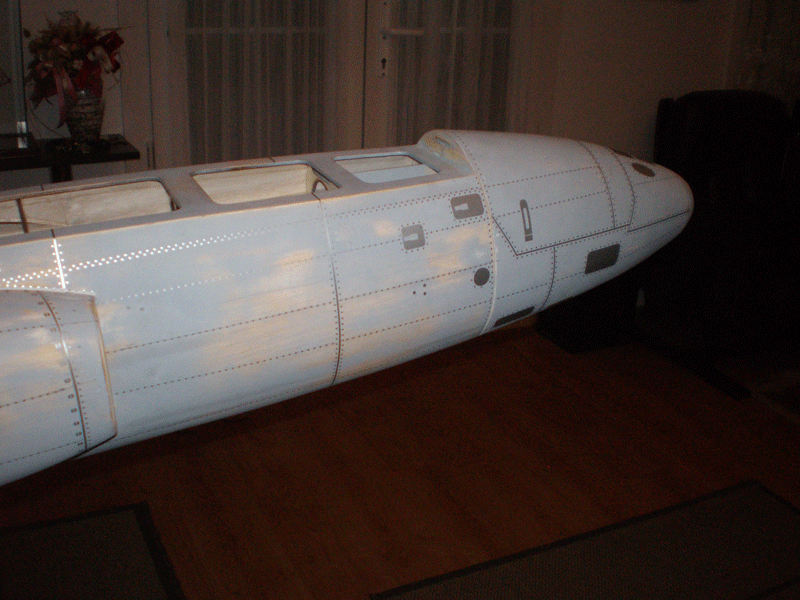
Bottom side...


Applying panel lines, rivets, details is boring work, but at the end it worth every minute.
Those details separate good from great models.
Technique I show here is easier method, because I just apply panel lines without applying primer later.
Also, rivets which you made with soldering iron or small drilling machine are more realistic, but every mistake is visible and hard to fix.
System I offer here is much simpler and without any fear to use it.
Only what you need is patient...
Finally here are pictures before painting...


Bottom side...


Last edited by mirce; 01-20-2016 at 12:06 PM.
01-20-2016, 12:02 PM
#320
Thread Starter
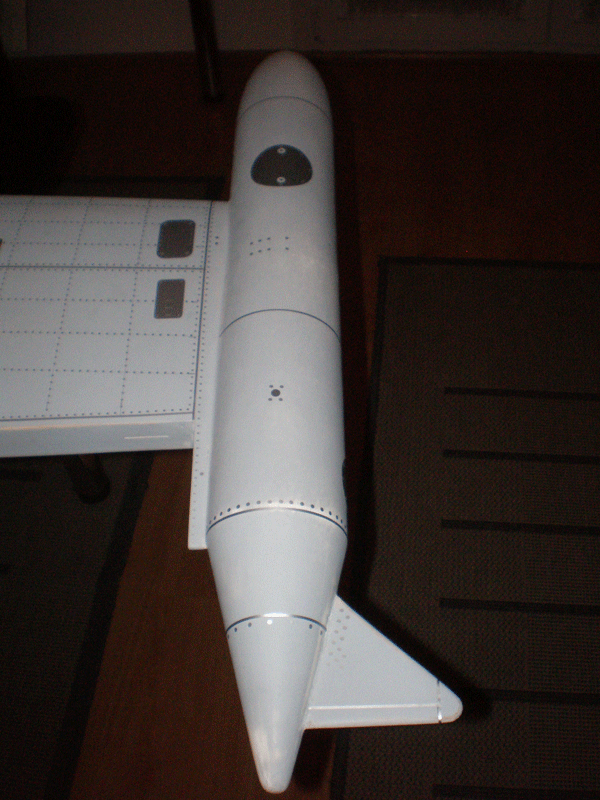
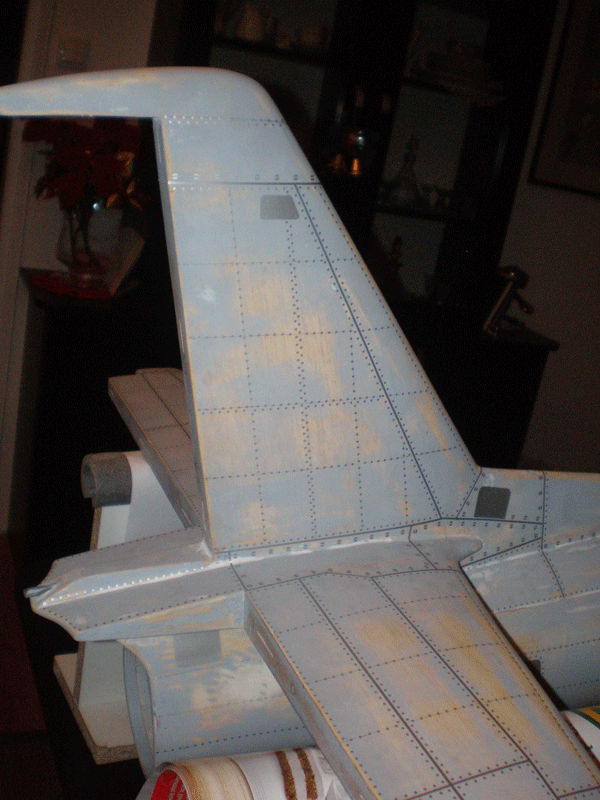
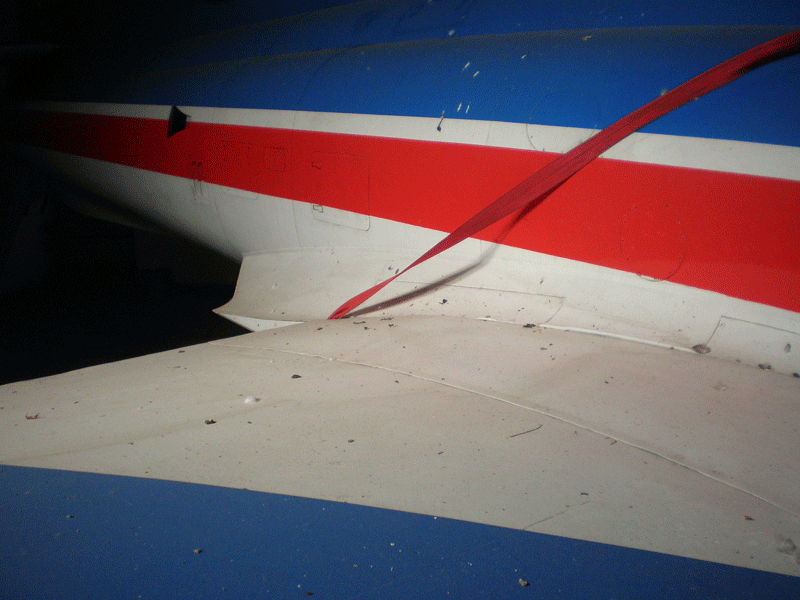
Tail with moving parts...
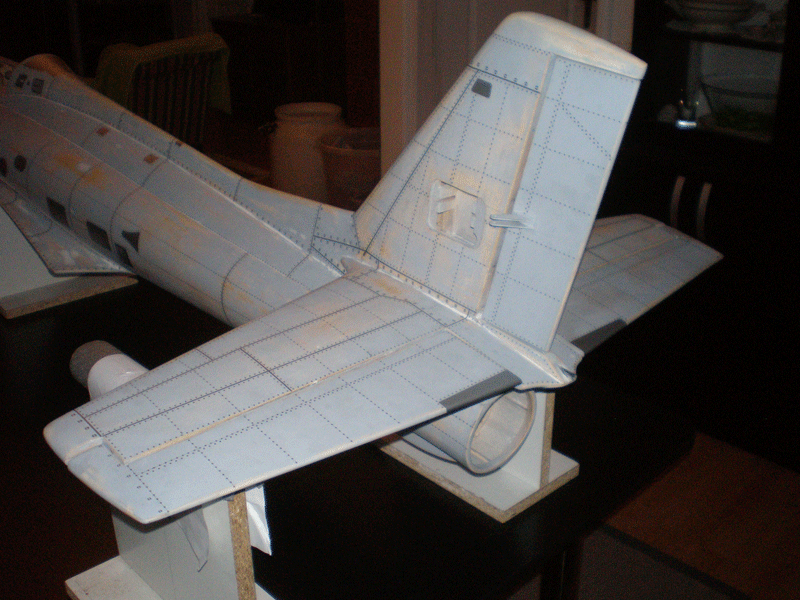
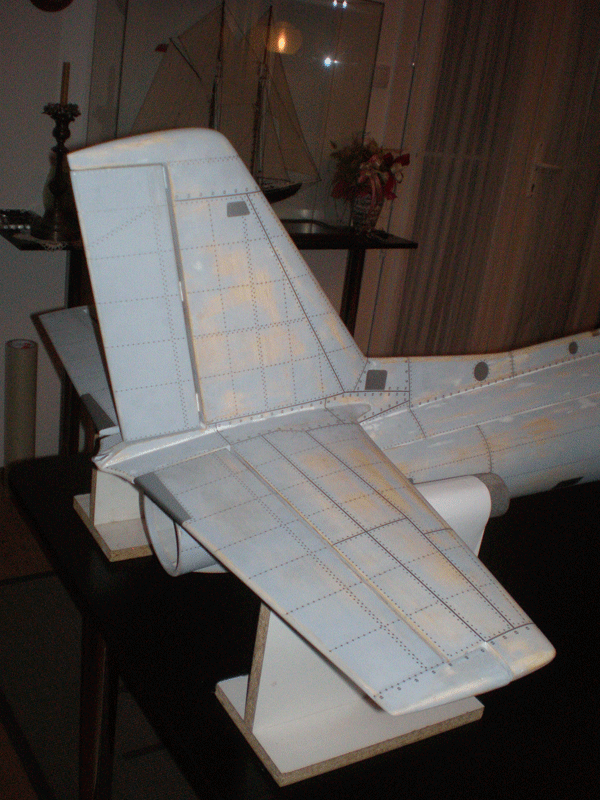
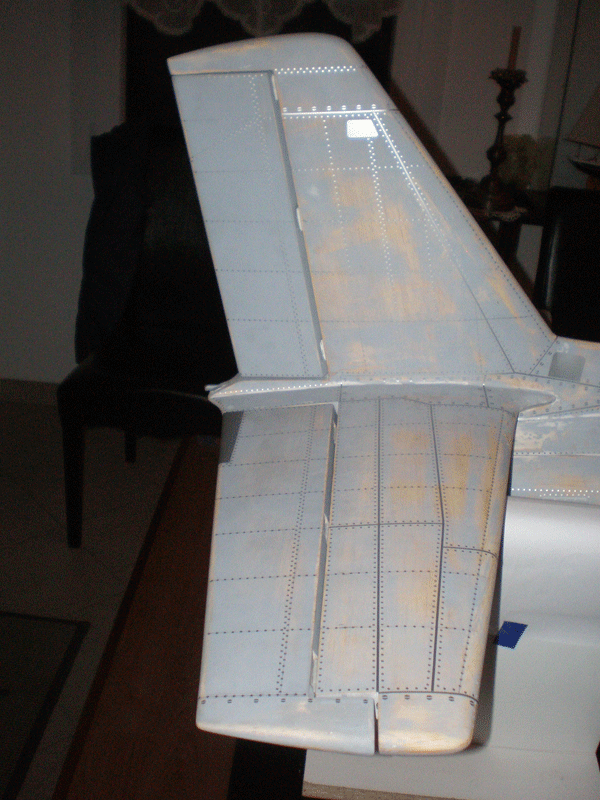
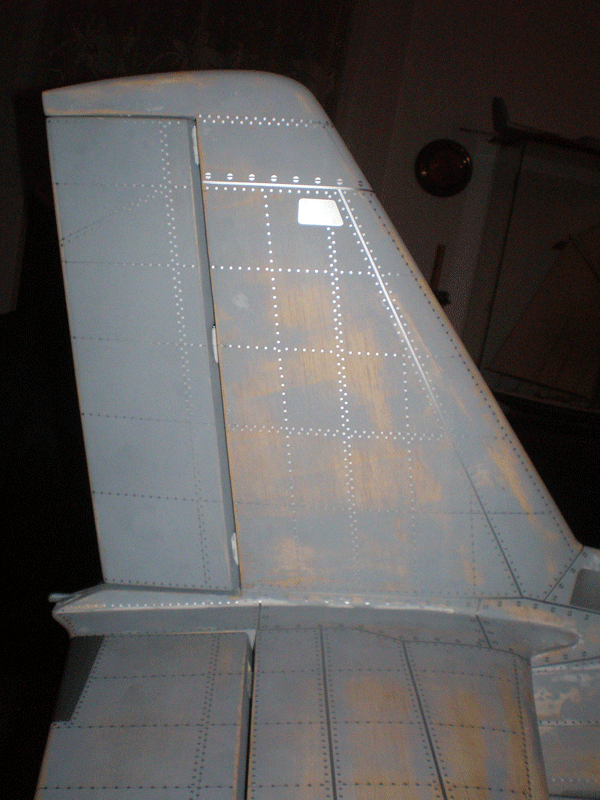
I have few minor things still to do and soon model will be take to Novi Sad, in my friend's Golub paint shop, who will paint it.
After painting all surface details will be more realistic...


I have few minor things still to do and soon model will be take to Novi Sad, in my friend's Golub paint shop, who will paint it.
After painting all surface details will be more realistic...
 01-20-2016, 01:24 PM
#323
Thread Starter
Steve, I'll try to explain in few steps...
First I cut and prepare all glass cloth I'll use that day.
I mix epoxy resin little by little. That mean I mix small quantity of resin and when I spend it I mix new quantity again.
In this case resin can not begin curing.
On surface I want to work on, for example wing, I put glass cloth and than in the middle I pour resin.
As I told, quantity is small and resin will not seeping down the wing. That first "line" of the resin will fix glass cloth...
With plastic credit card or plastic plate, gently stretch resin from middle of the wing to front and rear edges.
Excess resin you will, on the edges, take down from surface.
For edges, corners, leading edge or other "complicated" form, I use sponge which put in resin.
Again, after applying resin with sponge I'll try to remove as much resin as I can. Toilet paper is good for that job too.
That is all for that first day. Glass cloth is on the surface and resin is remove from cloth as much as you can do that...
Most important is to glass cloth lei perfect on surface, without bubbles & folds...
Day two, because surplus of the glass cloth hanging from the lip, with sand paper I remove it. Edges of that glass cloth must be sanded to be almost invisible. This is important because when you add next glass cloth, if edges are not smooth, new cloth will not lei nice on surface.
Process on other wing side is same like first day, copy - paste...
Day three, complete wing sand smooth with 120 grid sand pape. All small bubbles remove now, sand excess resin, if somewhere dripped, etc...
Take care to not push to much to not puncture glass cloth.
For first wing side again made epoxy resin and apply it on surface. JUST RESIN...
With credit card remove surplus and try to surface be as smooth as possible.
Day four, same procedure on other side...
OK that is end of phase one...
Next is to sand wing to be as smooth as possible. I use again 120 grid sand paper and after that 240 grid paper.
You will be surprised how much epoxy will take down.
Than I wipe all surface and apply primer. Primer will show you where you need to fix small scratches, holes, etc...
On that bad spots, I use acrylic filler for that minor repair...
Than sanding, sanding, sanding... Now I use just 240 grid sand paper. No 120 because it is to rough...
For Galeb fuselage I use more than 20 hours in this sanding!!!!
On spots where you apply filler you can add primer again, just to check your repair work. New primer layer will show you how good was your repair...
Try to sand as much primer and filler as possible, because it is "dead weight". Of course, smooth surface is on first place, but sanding is also very important...
After final cleaning, surface wipe with alcohol and it is ready for panel lines, rivets and details. Just to remind, alcohol clean surface from dust and more important from greasiness of the fingers...
Hope this help, if you understand my "great" English...
Regards
Mirce
Last edited by mirce; 01-20-2016 at 01:45 PM.
01-20-2016, 01:26 PM
#324
Thread Starter
Forgot to mention, fuselage need more time, because it is not just upper and lower side. On surface you have more work with glass cloth and for that you need more time (days)...