


F104g 1:4 scale
 03-03-2017, 11:31 AM
#101


Join Date: Jan 2005
Location: CaloundraQueensland , AUSTRALIA
Posts: 493
Likes: 0
Received 2 Likes
on
2 Posts
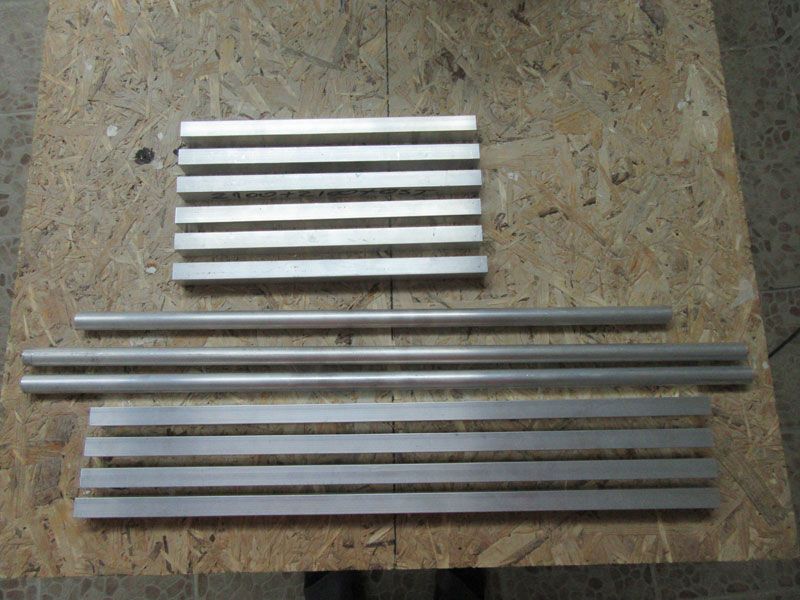
That's right you are not going to notice that few extra grams in this size aircraft... Were did you get those building pins from I've been looking can't find any
Damo

 03-04-2017, 05:56 AM
#103
I did my wings a little different from Mirce, I capped my leading edge with balsa and shaped it first, then added the sheeting.

Also the hinge holes are pre drilled into the control surfaces and trailing edge of the wing, I will be using large Robart hinge points, just remember to add the balsa blocks before sheeting.

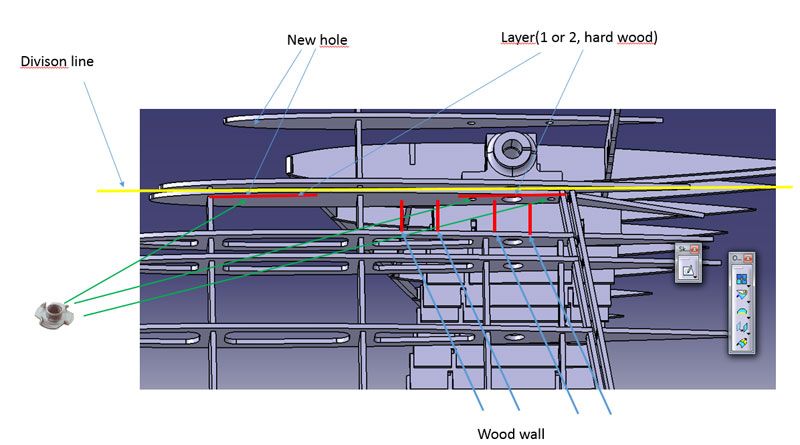
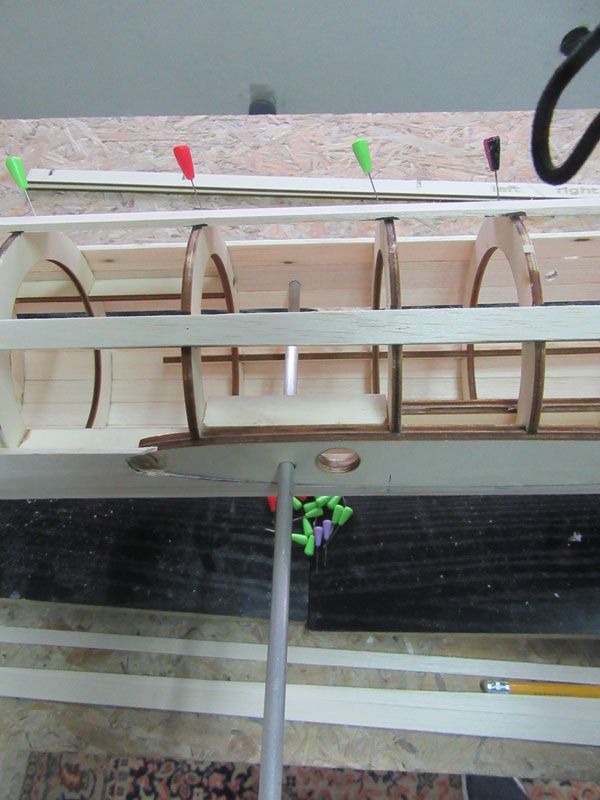
I do not have the machined stab support yet, but I'm thinking of ways to reenforce the vertical. So I made a 3mm carbon rib tied to a carbon tube. I also added 3 layers of ply for the blind nut support. I will
Hysol this together, but I have to wait for the stab support, don't want to glue anything until I have the stab built and ready to install.

This is how it looks installed without glue, if anyone has any ideas or input please feel free to comment. I will also be laminating thin carbon cloth to the stab sheeting on both sides.
Also the hinge holes are pre drilled into the control surfaces and trailing edge of the wing, I will be using large Robart hinge points, just remember to add the balsa blocks before sheeting.
I do not have the machined stab support yet, but I'm thinking of ways to reenforce the vertical. So I made a 3mm carbon rib tied to a carbon tube. I also added 3 layers of ply for the blind nut support. I will
Hysol this together, but I have to wait for the stab support, don't want to glue anything until I have the stab built and ready to install.
This is how it looks installed without glue, if anyone has any ideas or input please feel free to comment. I will also be laminating thin carbon cloth to the stab sheeting on both sides.
03-04-2017, 08:25 AM
#104
Join Date: Mar 2013
Location: reading berkshire, UNITED KINGDOM
Posts: 22
Likes: 0
Received 0 Likes
on
0 Posts
Hi dionysusbacchus your build looks great, I am waiting for the canopy and elevator/rudder control to come in befor I order a kit, but looking at the build so far I have some concern about the strength of the elevator mounting, there is a lot of load in flight in this area and I think your mod is the way to go but maybe make a carbon tube longer and secure it at the base of the fin. what do you think ?
03-04-2017, 11:37 AM
#105
Join Date: Jan 2005
Location: CaloundraQueensland , AUSTRALIA
Posts: 493
Likes: 0
Received 2 Likes
on
2 Posts
Luke very nice I've been looking at that and what I'm thinking is not having a removable fin I'm going to it like the Airworld F104 is there going to be a lot of load and stress in that area. But when mine gets here I'll have a better look and I'll have a talk to a friend who builds and designs pylon planes and see what he thinks
Damo
Damo
03-07-2017, 05:48 AM
#106
Thanks for the input guys, I will add more tube, it's just what I had left in stock. I am making a new order of carbon and will add full length tube one tube under the aluminum stab mounting point and one near the leading edge. It is very light stuff, better to be safe in this area and over build it a bit.
Here is a template of the tank fins in case people don't want to measure there own, I just cut two slots in the tank after sheeting and slide the fins in, they are 1/16" ply.
I will sheet them with 1/8" balsa and sand a small airfoil shape to them.


Using Robart hinges it is very easy to hinge the flaps and ailerons. I will close the gap with thin ply.

I added balsa blocks for the hinge points and to have material for rounding the edge.

Not final sanded but you get the idea. The hinge points are recessed and the leading edge rounded . Very nice having ply as the leading edge, never thought of doing that, but it makes for a clean hinge opening.

Now when deflected they stay nice and tight, also with the hinge gap ply in place it will look scale and very clean.
I just need to get the control throws from Mirce now so I can make sure I have enough deflection, especially with
the flaps.

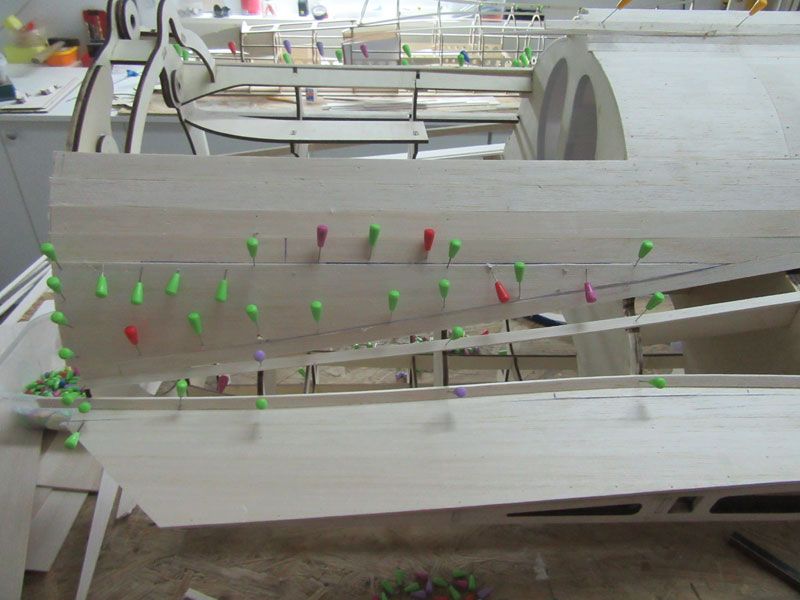
Flaps are hinged on the bottom. I have a question to throw out there for you guys. A push set up has less stress on the push-rod over a pull set up sticking out of the bottom of the wing. Question is, with the size of the flap would it be enough space between the hinge line and clevis attachment to do a push setup? The mechanical advantage to a push setup is obvious, but man these flaps are huge! I could just be overthinking it, I will mock it up so you all can see what I mean.
Here is a template of the tank fins in case people don't want to measure there own, I just cut two slots in the tank after sheeting and slide the fins in, they are 1/16" ply.
I will sheet them with 1/8" balsa and sand a small airfoil shape to them.
Using Robart hinges it is very easy to hinge the flaps and ailerons. I will close the gap with thin ply.
I added balsa blocks for the hinge points and to have material for rounding the edge.
Not final sanded but you get the idea. The hinge points are recessed and the leading edge rounded . Very nice having ply as the leading edge, never thought of doing that, but it makes for a clean hinge opening.
Now when deflected they stay nice and tight, also with the hinge gap ply in place it will look scale and very clean.
I just need to get the control throws from Mirce now so I can make sure I have enough deflection, especially with
the flaps.
Flaps are hinged on the bottom. I have a question to throw out there for you guys. A push set up has less stress on the push-rod over a pull set up sticking out of the bottom of the wing. Question is, with the size of the flap would it be enough space between the hinge line and clevis attachment to do a push setup? The mechanical advantage to a push setup is obvious, but man these flaps are huge! I could just be overthinking it, I will mock it up so you all can see what I mean.
Last edited by dionysusbacchus; 03-07-2017 at 05:50 AM.
03-07-2017, 05:45 PM
#107

Since you mention me, here are a few answers and thoughts ...
First, thanks Luke for sharing this pictures with us, you are far away from me in building, so I'll use many yours ideas.
Today I was thinking about fins measure on tip tanks. Your drawings will help a lot.
I glued round aluminum tubes in my wings, let them to go out just for tip tanks guide. Tube weight is just 76 grams, it's not heavy but will give better structural strength.
Rudder and elevator are most critical part on this model.
I ask Damiano to explain me what he was work on his model. His Starfighter flew more than 120 times, so I think his construction has proven.
Damiano told me that he apply carbon and glass cloth on rudder sheeting and inside rudder this is draw I got from him:
To be frank, right now I'm not in rudder - elevator "stage" but I think that I'll add tube in rudder from elevator down to rudder root. Damiano told me that he wasn't use tube in rudder...
As Luke said, all proposal will be welcome...
I was thinking about small piano wire for flaps hinges and classic hinges with shaft for ailerons.
Robart hinges are good option too, especially on wing trailing edge and control surface leading edges are holes for hinges.
Ailerons and flaps are not wide, but they are long...
In meantime I add numbers on center fuselage section ribs, but this pictures will help a lot...
Hope next week will have here canopies and aluminum elevator - rudder connection part...
Regards
Mirce
First, thanks Luke for sharing this pictures with us, you are far away from me in building, so I'll use many yours ideas.
Today I was thinking about fins measure on tip tanks. Your drawings will help a lot.
I glued round aluminum tubes in my wings, let them to go out just for tip tanks guide. Tube weight is just 76 grams, it's not heavy but will give better structural strength.
Rudder and elevator are most critical part on this model.
I ask Damiano to explain me what he was work on his model. His Starfighter flew more than 120 times, so I think his construction has proven.
Damiano told me that he apply carbon and glass cloth on rudder sheeting and inside rudder this is draw I got from him:


To be frank, right now I'm not in rudder - elevator "stage" but I think that I'll add tube in rudder from elevator down to rudder root. Damiano told me that he wasn't use tube in rudder...
As Luke said, all proposal will be welcome...
I was thinking about small piano wire for flaps hinges and classic hinges with shaft for ailerons.
Robart hinges are good option too, especially on wing trailing edge and control surface leading edges are holes for hinges.
Ailerons and flaps are not wide, but they are long...
In meantime I add numbers on center fuselage section ribs, but this pictures will help a lot...
Hope next week will have here canopies and aluminum elevator - rudder connection part...
Regards
Mirce
Last edited by mirce; 03-08-2017 at 07:51 AM.
03-09-2017, 02:57 PM
#108
Some parts are arrived today, but canopy will not be here for sure in next ten days...
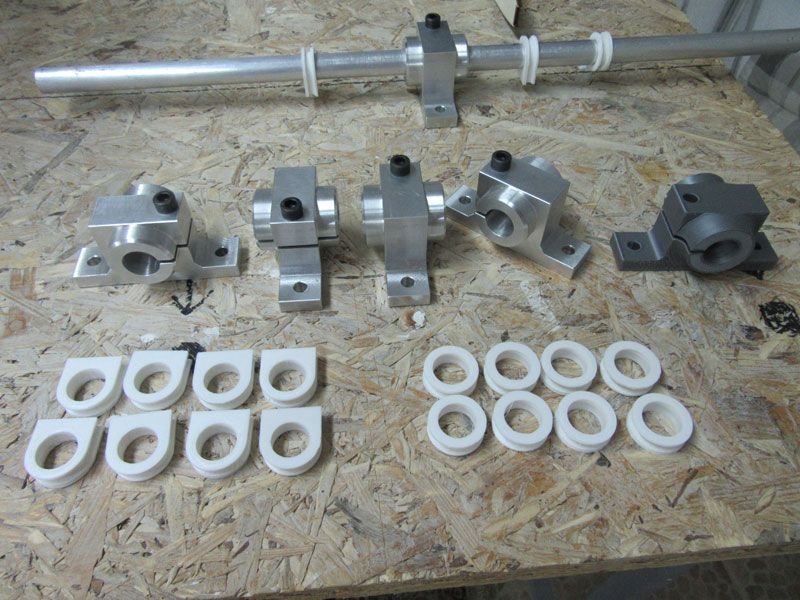
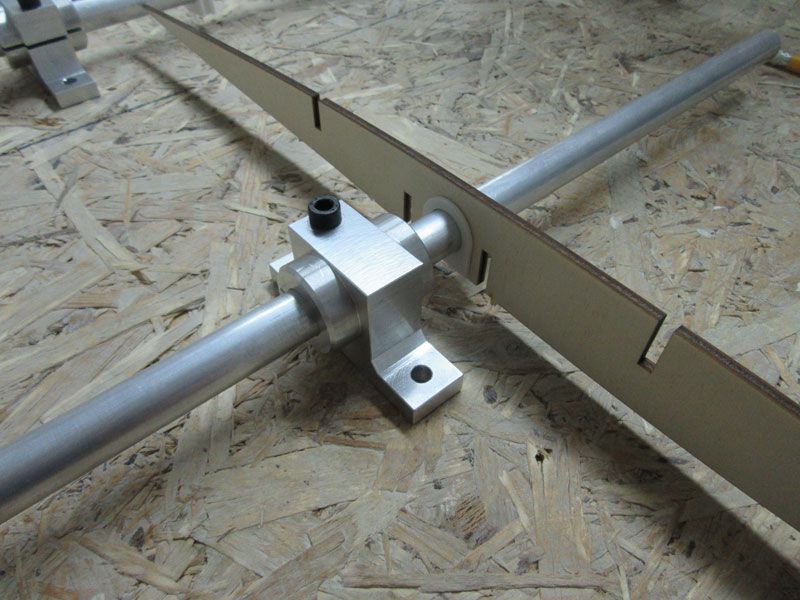
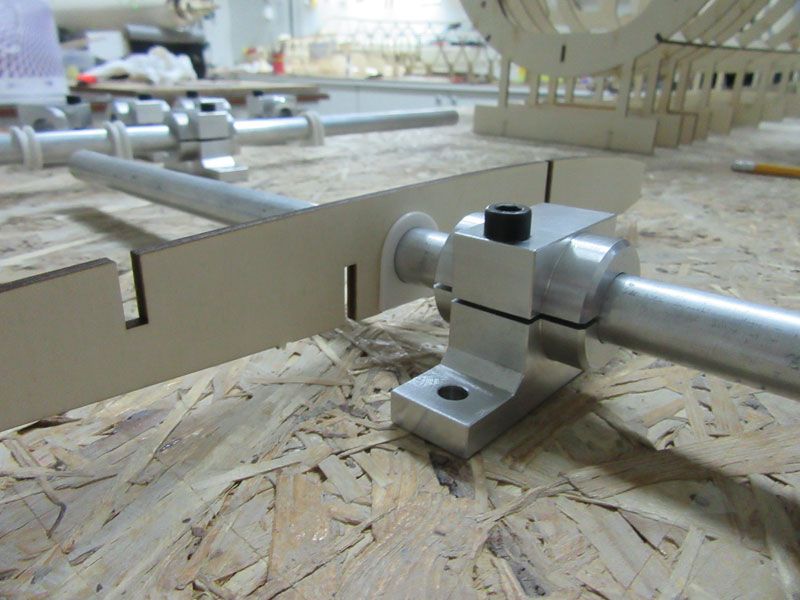
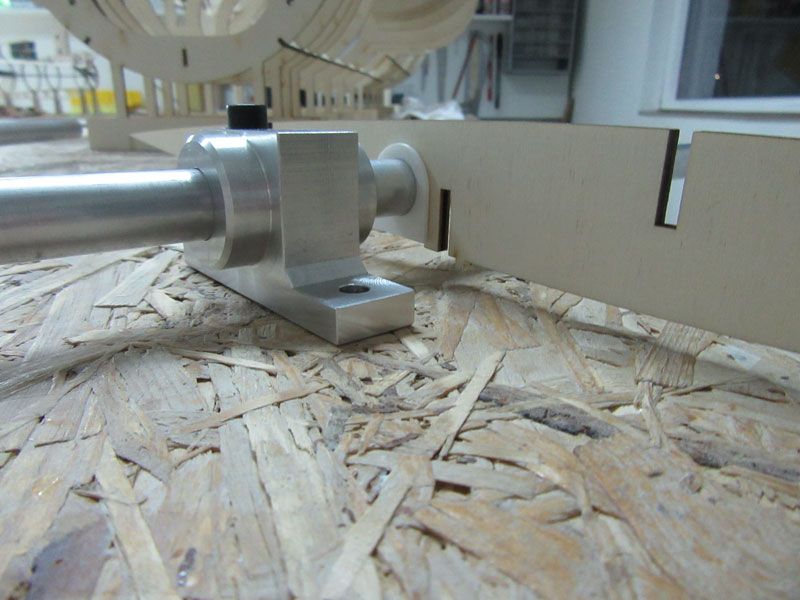
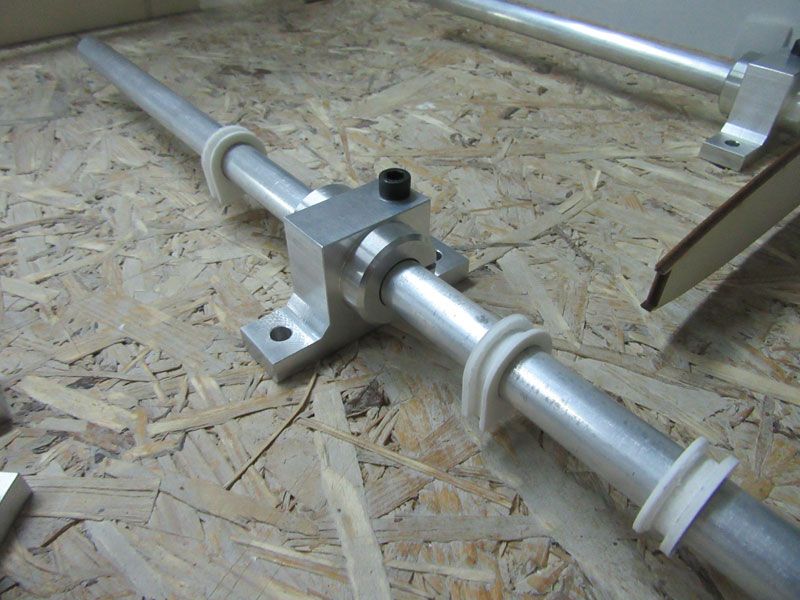
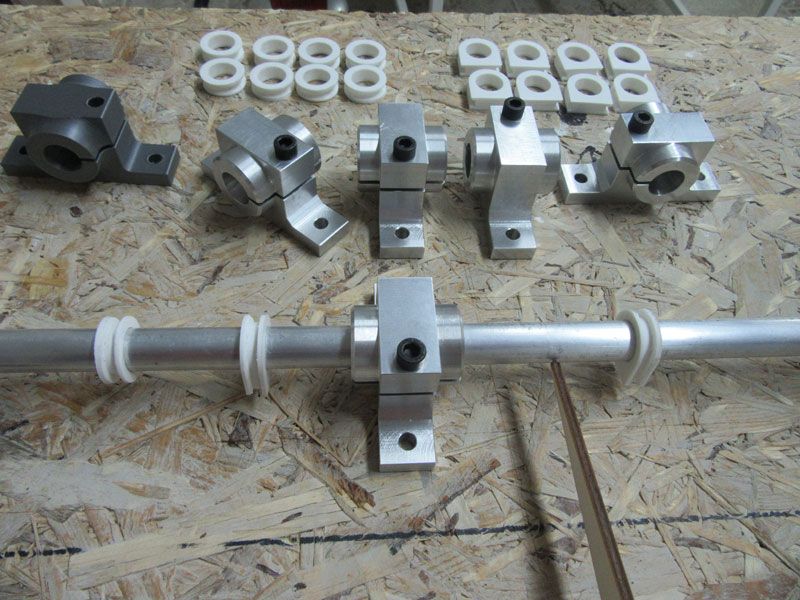
On pictures you can see plastic rings for elevator. Rings are printed on 3D printer (PLA plastic).
For Starfighter elevator you need 10 rings. In set I have 20 (10 in two shape) so modeler can choose which will use. Longer fit in higher ribs closer elevator center.
Aluminum tubes set are ready also...

Hope canopies will come in next 10 days...
More information and price about this parts on: http://www.nsmodelers.rs/damiano-f-104
Best regards
Mirce


On pictures you can see plastic rings for elevator. Rings are printed on 3D printer (PLA plastic).
For Starfighter elevator you need 10 rings. In set I have 20 (10 in two shape) so modeler can choose which will use. Longer fit in higher ribs closer elevator center.
Aluminum tubes set are ready also...


Hope canopies will come in next 10 days...
More information and price about this parts on: http://www.nsmodelers.rs/damiano-f-104
Best regards
Mirce
03-09-2017, 06:13 PM
#109
My Feedback: (2)
Join Date: Nov 2003
Location: Sugargrove ,
IL
Posts: 5
Likes: 0
Received 0 Likes
on
0 Posts
Mince,
the rings and fitting for the horizontal stabilizer look great. I'm in for them along with the canopy. Enjoying the build that you and Luke have posted. Hope to make some real progress this weekend,will be in touch.
the rings and fitting for the horizontal stabilizer look great. I'm in for them along with the canopy. Enjoying the build that you and Luke have posted. Hope to make some real progress this weekend,will be in touch.
03-10-2017, 02:12 PM
#112
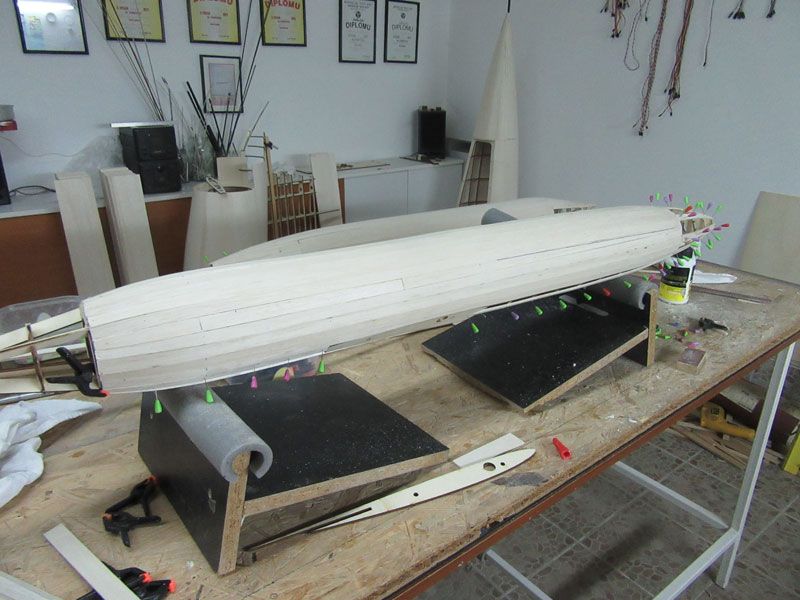
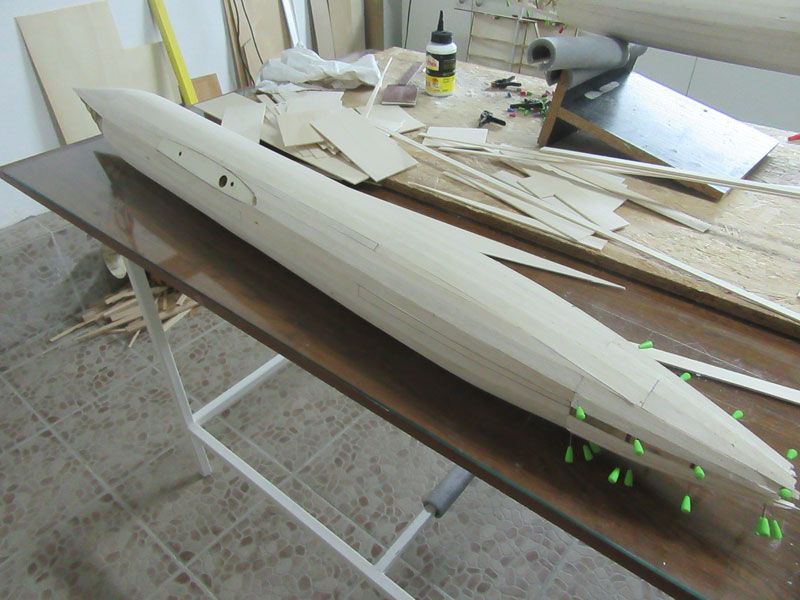
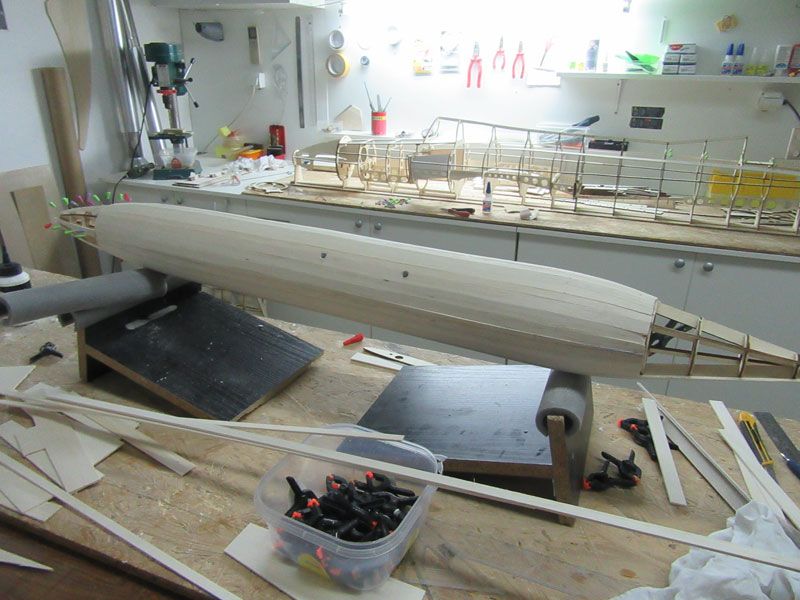
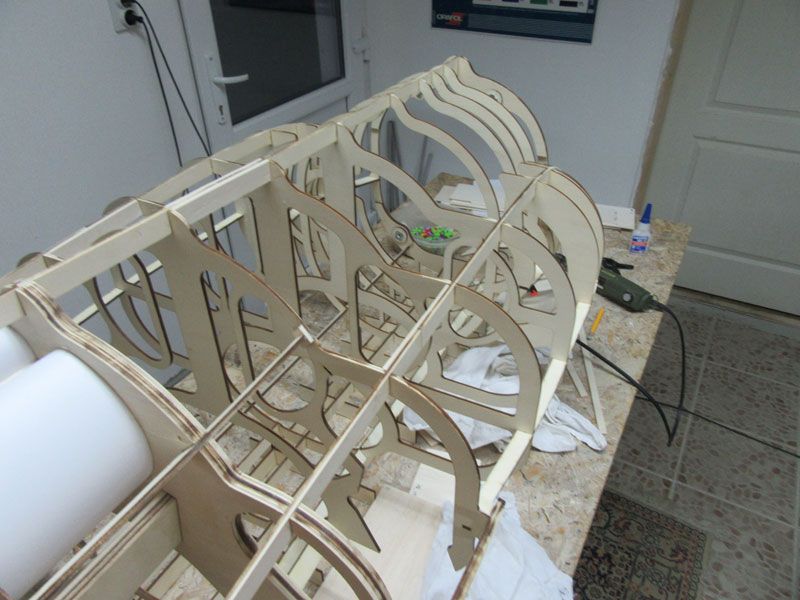
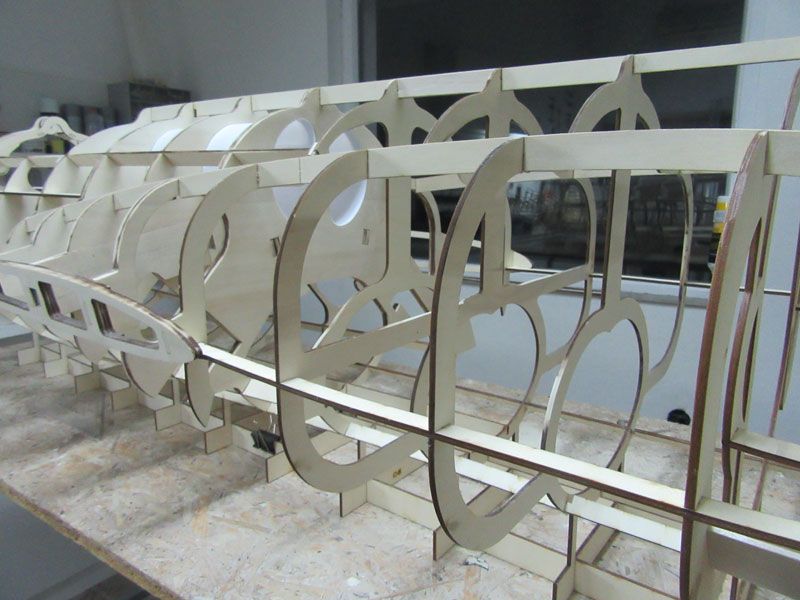
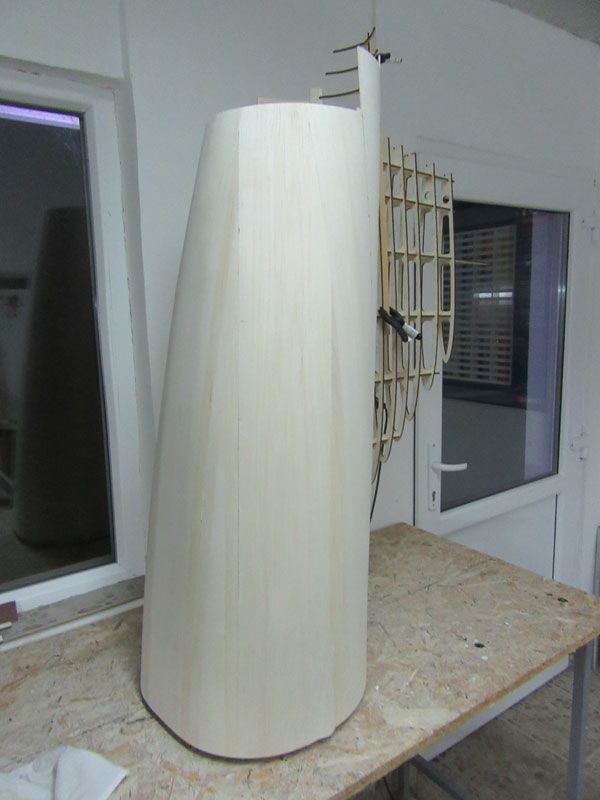
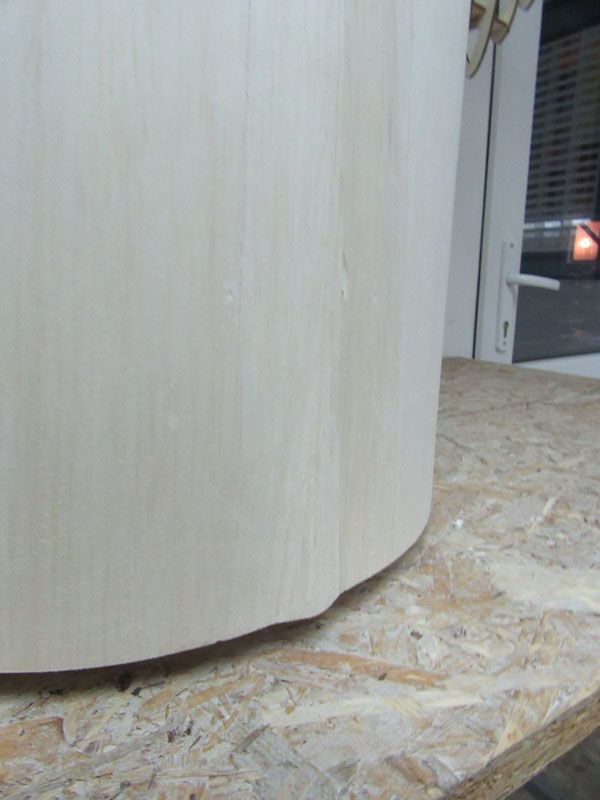
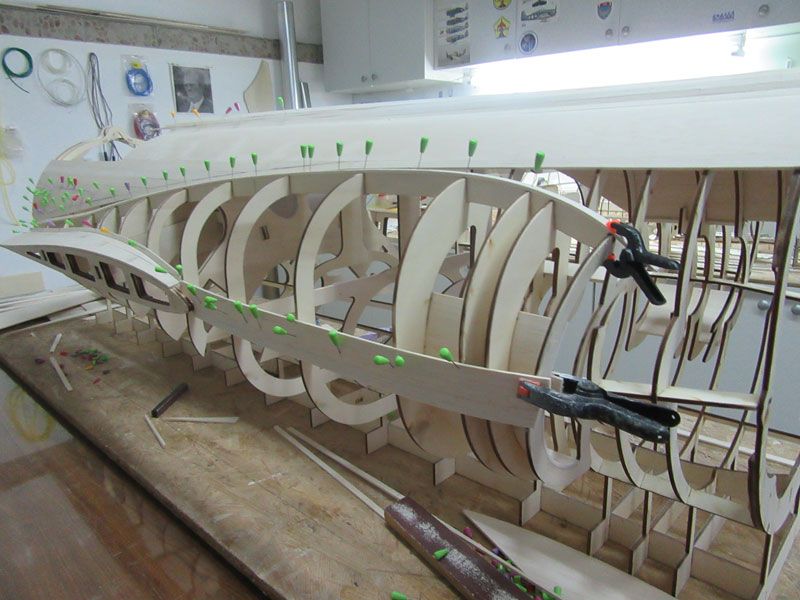
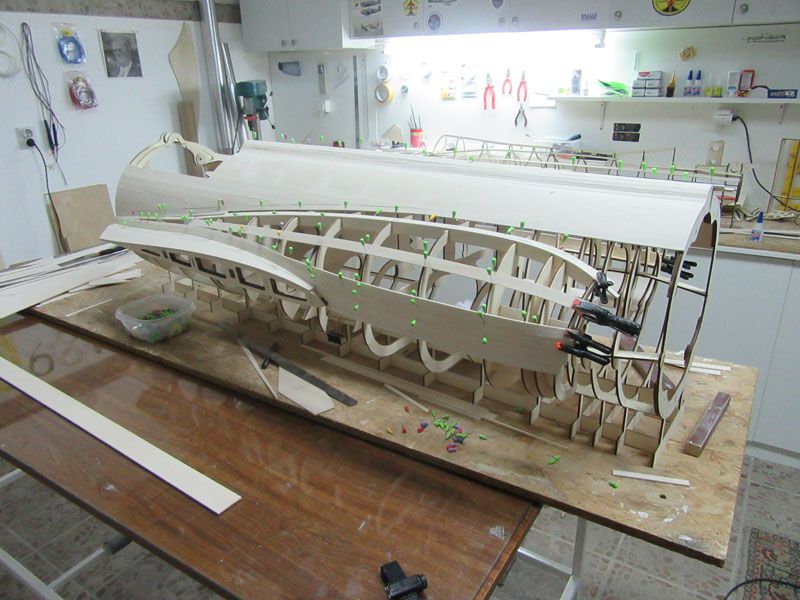
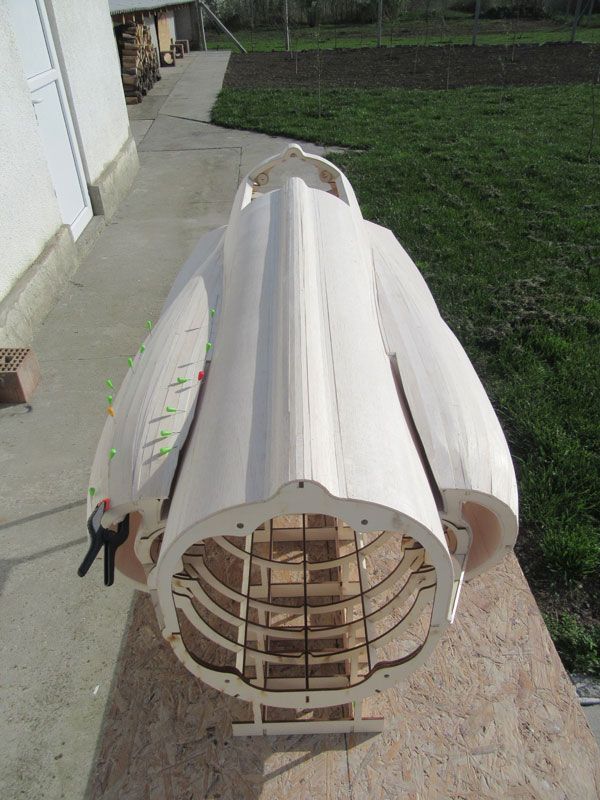
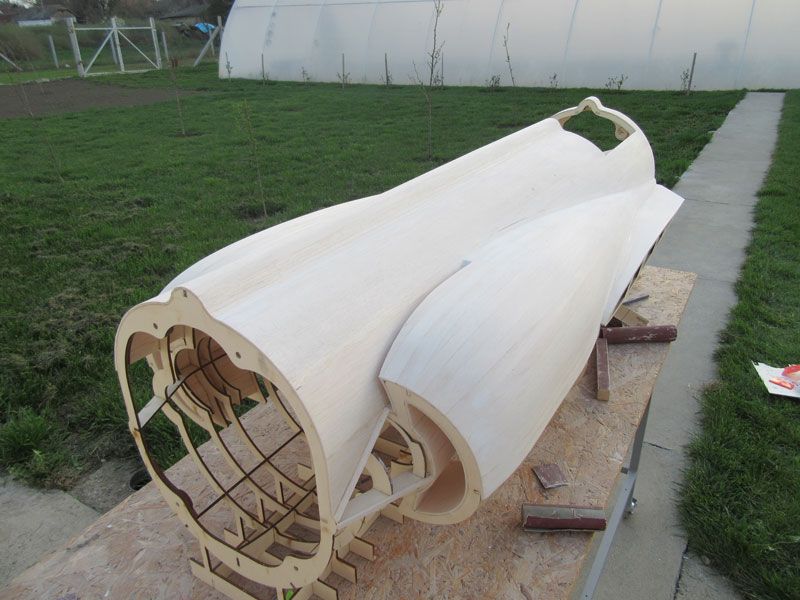
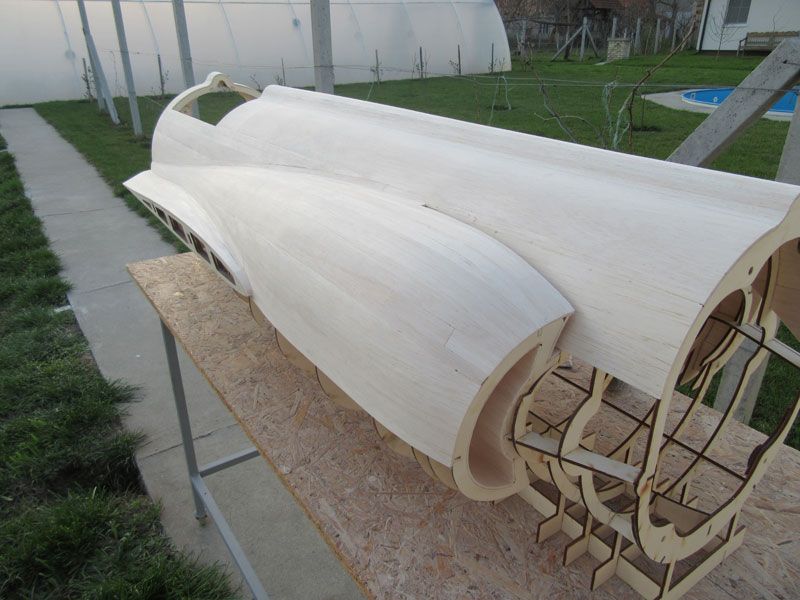
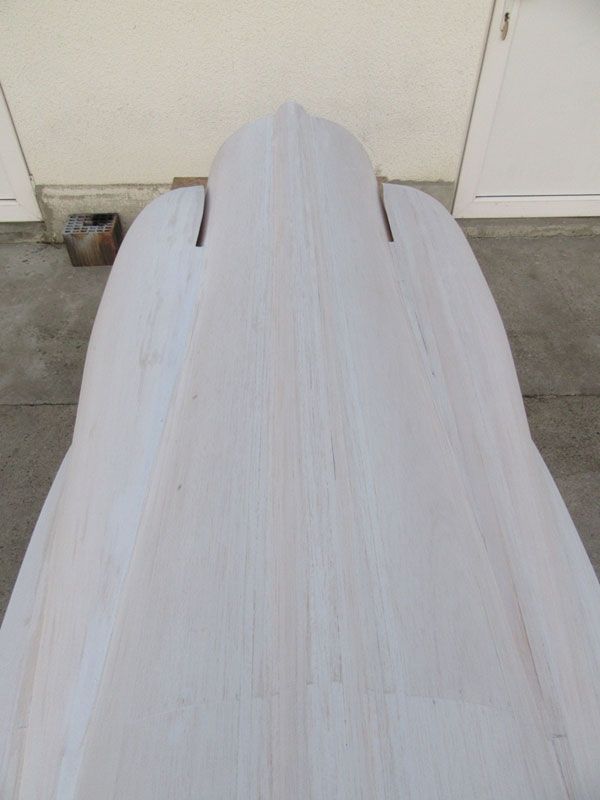
Have some inspirational shots and a little more work done. Not so much is noticeable because it's finally becoming an airplane, just waiting on my stab parts and then real progress will be made to finally finish the top of the fuselage at least.
Not perfect, but I'm hoping it does not need much trim to fly straight! This is another view where the rounded intakes really shine.


Working on the transition from the flap to the fuselage.

Not perfect, but I'm hoping it does not need much trim to fly straight! This is another view where the rounded intakes really shine.
Working on the transition from the flap to the fuselage.
03-11-2017, 12:38 AM
#113
Join Date: Jan 2005
Location: CaloundraQueensland , AUSTRALIA
Posts: 493
Likes: 0
Received 2 Likes
on
2 Posts
For sure Mirce I'll post my build nice work Luke I just got a few good books on the F -104 I'll try and scan some and upload them
Damo
Damo
Last edited by Damo260; 03-11-2017 at 01:11 AM.
03-11-2017, 04:55 PM
#115
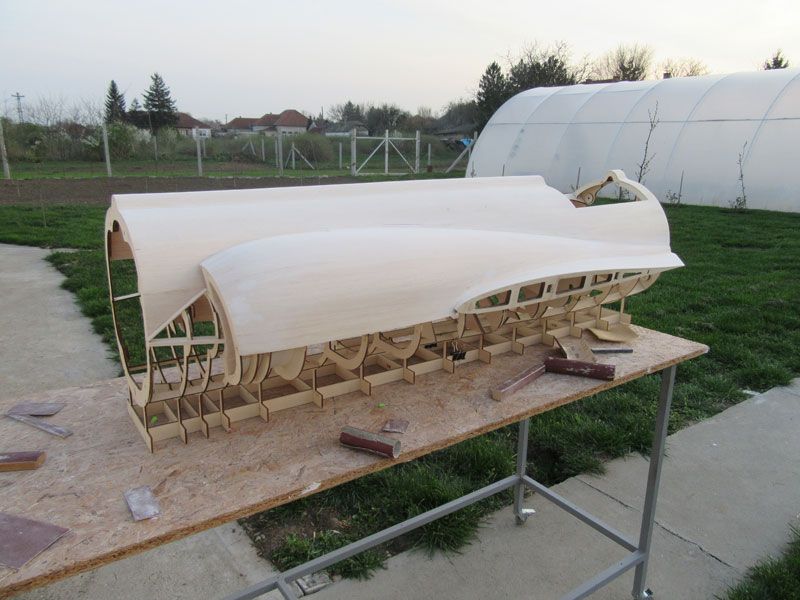
Since the last writing not much has been done, a lot of the time I spent in laser cut workshop.
Thanks God that we have here Luke who show us how fast this model can be made...
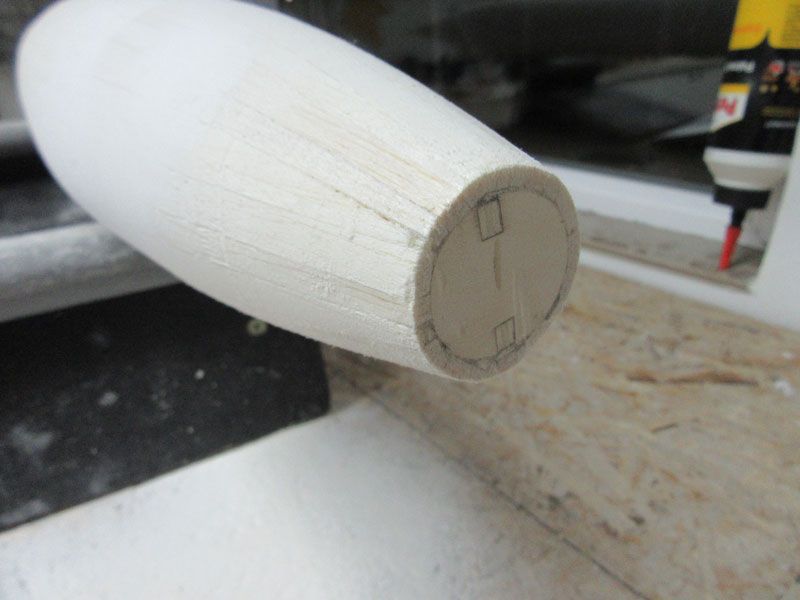
In tip tanks are built tubes for screws guide. I cut ring for tube base. Inner ring diameter is same like tube outer...

I used aluminum tube to have right direction for tube...
Tubes are printed on 3D printer...

Tip tanks are almost cover with balsa stripes, but wasn't made fins yet. Hope in next few days that will done too and after that sanding...
Here was small discussion to glue or not to glue round aluminum wing tube.
Damiano told me that it not need to be install, but weight is only 76 gr, so I decide to glue that tube.
Weight is small on so huge model and for sure that tube will give some strength.
Part which come out on wing end is guide for tip tank...
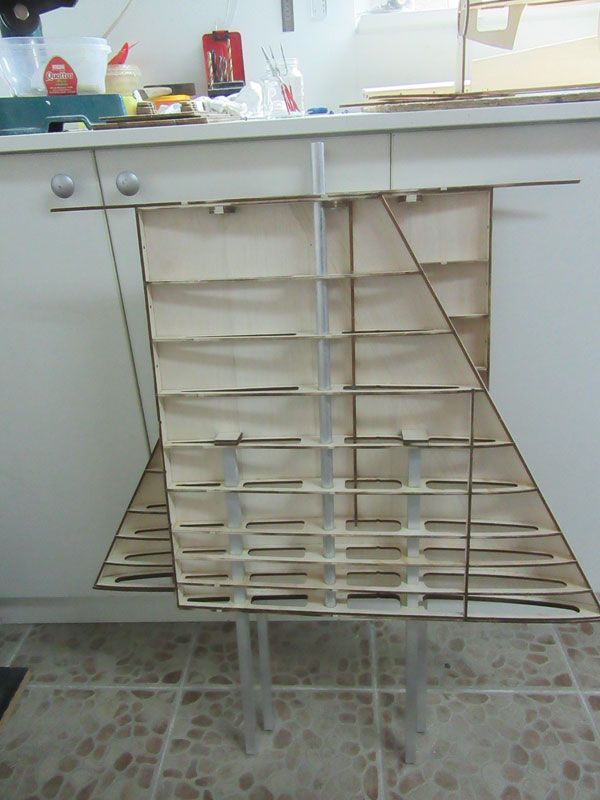
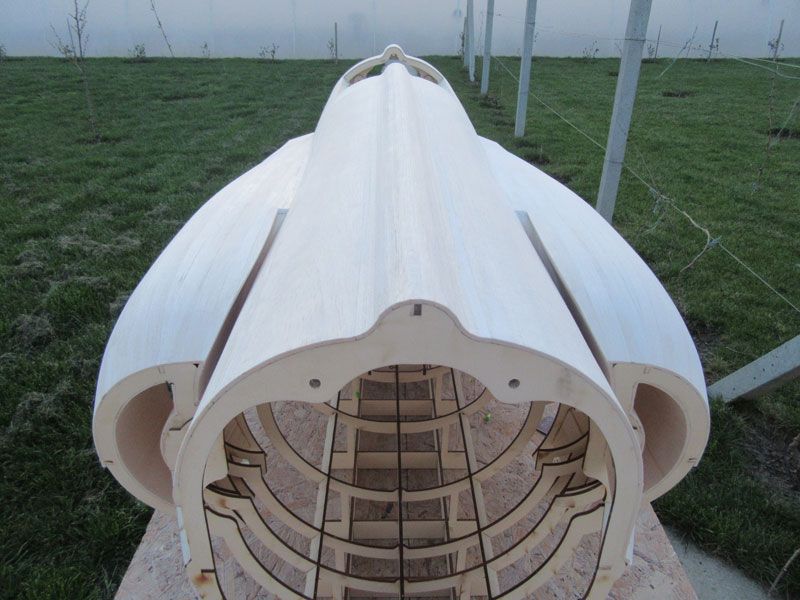
Other dilemma was to made or not intake turbine channel.
After talk with Luke and Damiano decision was made - no channels in middle fuselage section.
Fuselage is huge, on lower part is big "tunnel" and on upper part I made plastic channels.
Turbine sucks air and in so big fuselage there will be more than enough air for jet engine.
So, I cut off some parts on ribs, to get "smoother look" inside fuselage.
Before...
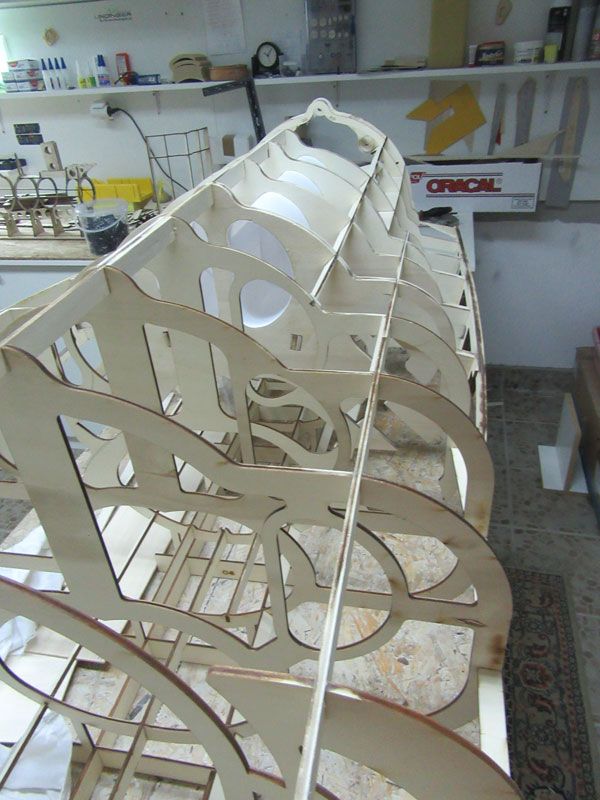
After...
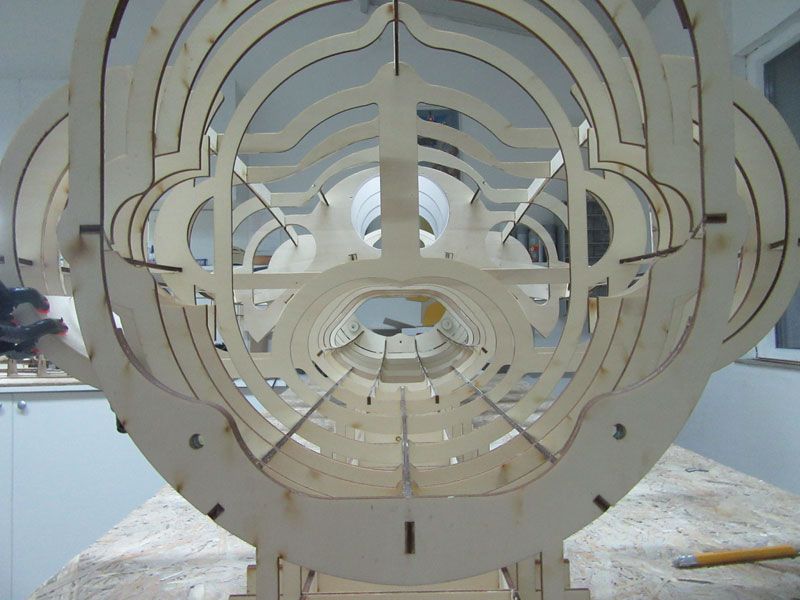

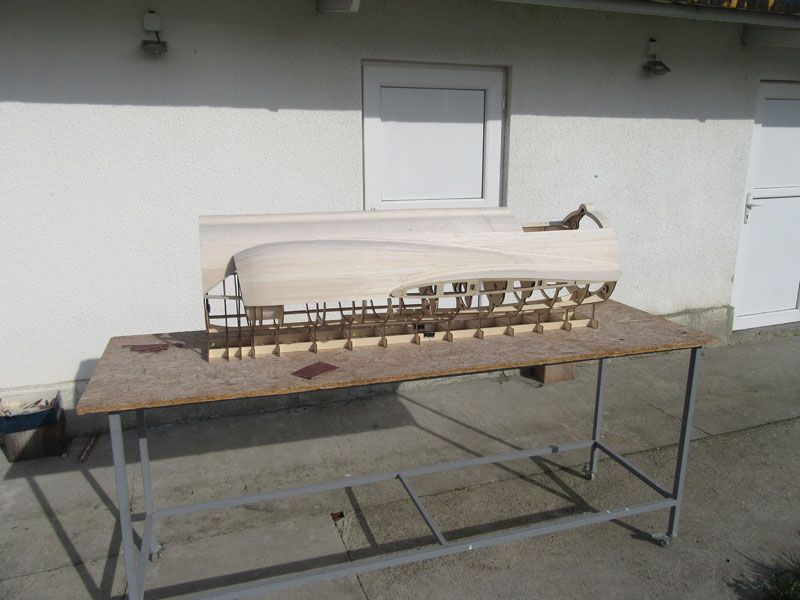
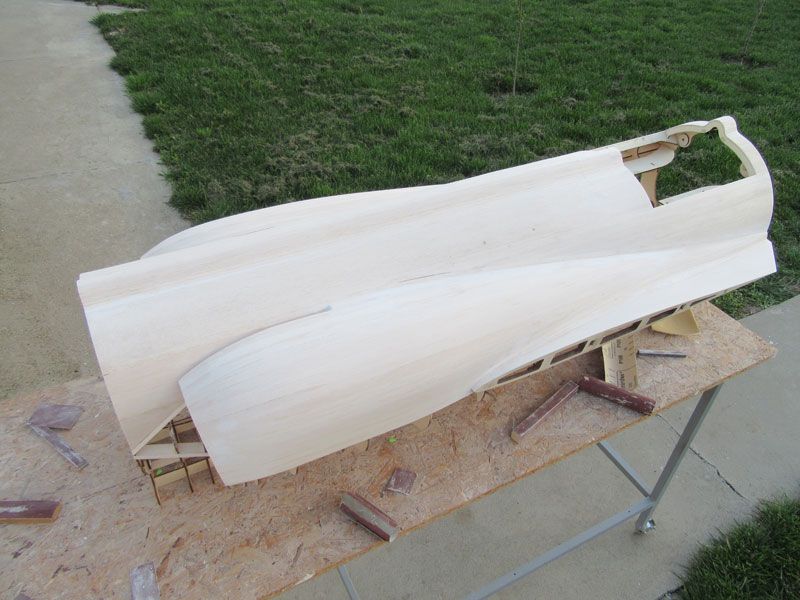
After this "operation" I start with covering with balsa sheets...
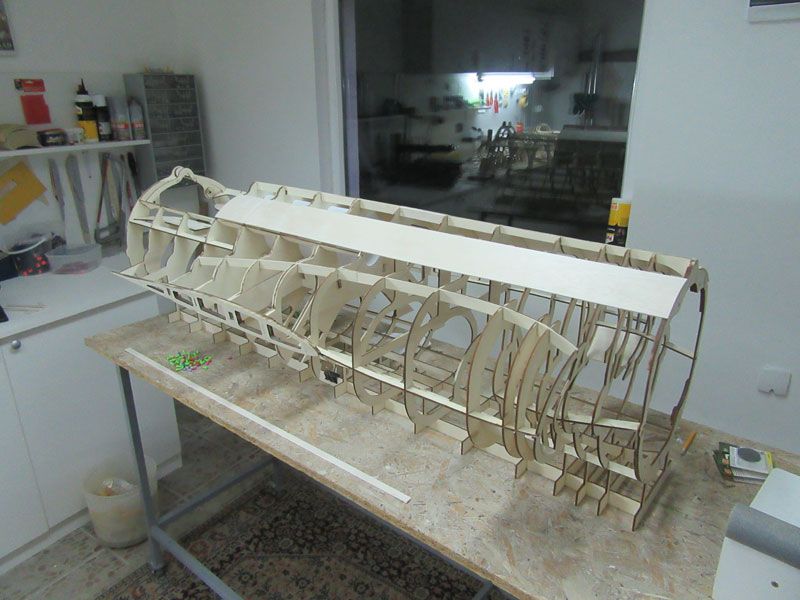
Rear fuselage section is finish in lower part, now I need to work on rudder...
Mirce
Thanks God that we have here Luke who show us how fast this model can be made...
In tip tanks are built tubes for screws guide. I cut ring for tube base. Inner ring diameter is same like tube outer...

I used aluminum tube to have right direction for tube...

Tubes are printed on 3D printer...

Tip tanks are almost cover with balsa stripes, but wasn't made fins yet. Hope in next few days that will done too and after that sanding...


Here was small discussion to glue or not to glue round aluminum wing tube.
Damiano told me that it not need to be install, but weight is only 76 gr, so I decide to glue that tube.
Weight is small on so huge model and for sure that tube will give some strength.
Part which come out on wing end is guide for tip tank...

Other dilemma was to made or not intake turbine channel.
After talk with Luke and Damiano decision was made - no channels in middle fuselage section.
Fuselage is huge, on lower part is big "tunnel" and on upper part I made plastic channels.
Turbine sucks air and in so big fuselage there will be more than enough air for jet engine.
So, I cut off some parts on ribs, to get "smoother look" inside fuselage.
Before...


After...


After this "operation" I start with covering with balsa sheets...

Rear fuselage section is finish in lower part, now I need to work on rudder...


Mirce
Last edited by mirce; 03-11-2017 at 05:02 PM.
03-12-2017, 04:43 PM
#116
For scale builders a lot of pictures of real F 104 Starfighter:
http://www.sbap.be/aircraft/f104g/f104g.htm
http://www.b-domke.de/AviationImages...html#F-104G_Lw
http://www.sbap.be/aircraft/f104g/f104g.htm
http://www.b-domke.de/AviationImages...html#F-104G_Lw
03-16-2017, 01:39 AM
#117
Join Date: Jan 2005
Location: CaloundraQueensland , AUSTRALIA
Posts: 493
Likes: 0
Received 2 Likes
on
2 Posts
Well I received my F104 today thank you Mirce for a awesome kit with in 4 hours I had the front and back half of the fuselage built I'll post some pictures soon
Damo
Damo
03-19-2017, 11:44 AM
#118
Join Date: Jan 2005
Location: CaloundraQueensland , AUSTRALIA
Posts: 493
Likes: 0
Received 2 Likes
on
2 Posts
Well I've been a busy boy for the 3 1/2 days got the fuselage all framed up it go's together very well now I have the fuselage ready for sheeting I'll start the wings today.
Damo


Damo
03-19-2017, 03:01 PM
#119
Join Date: Jan 2005
Location: CaloundraQueensland , AUSTRALIA
Posts: 493
Likes: 0
Received 2 Likes
on
2 Posts
Luke, Mirce I'm thinking of using this for sheeting what do you think??
http://www.fliteskin.com/Sheeting.htm
Damo
http://www.fliteskin.com/Sheeting.htm
Damo
03-19-2017, 04:39 PM
#120
I think that material is good on flat surfaces with a slight radius. Starfighter fuselage in very curved, so I don't know how you can to shape the material in two curve directions.
You can maybe use it on wings.
Other moment is weight, Fliteskin vs balsa...
My opinion is to use our classic proven material - balsa...
From other side, something new will be interesting to be seen.
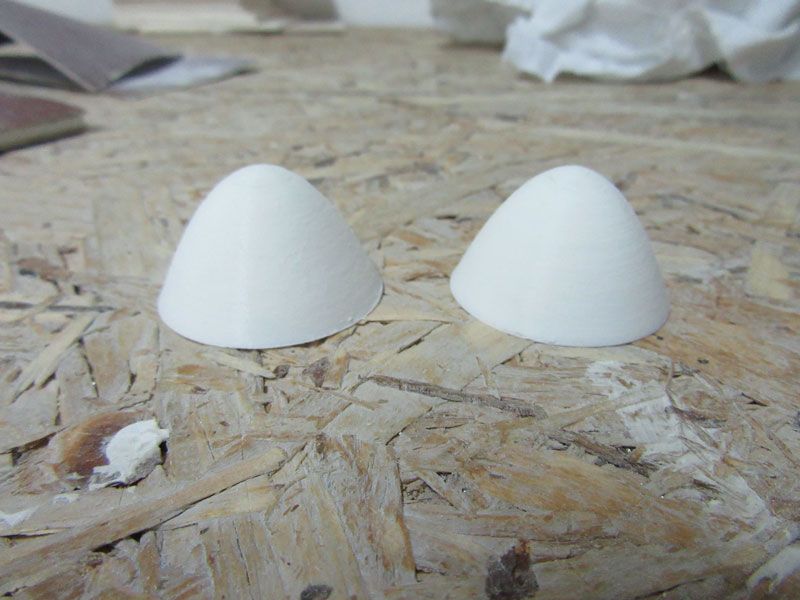
Btw, I have new parts, tip tank top, printed on 3D printer...
More info on: http://www.nsmodelers.rs/damiano-f-104
Best regards
Mirce
You can maybe use it on wings.
Other moment is weight, Fliteskin vs balsa...
My opinion is to use our classic proven material - balsa...
From other side, something new will be interesting to be seen.
Btw, I have new parts, tip tank top, printed on 3D printer...


More info on: http://www.nsmodelers.rs/damiano-f-104
Best regards
Mirce
03-20-2017, 06:08 AM
#122
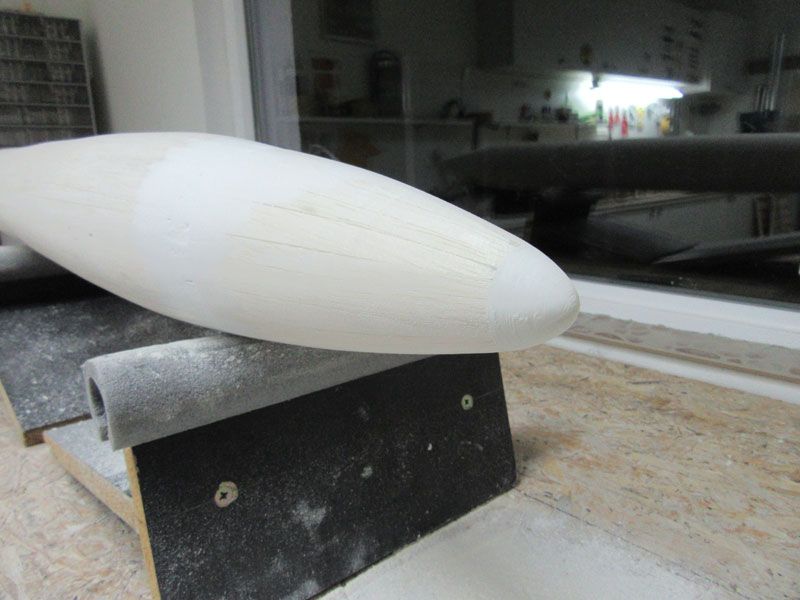
Hi guys! Progress has slowed because I'm waiting on the stab mechanism and associated parts.
I've worked out my flap linkage and am almost done with my plug for a canopy mold. I've seen the available canopies and although they look OK and do the job my requirements would take it just a bit further. I will make a fiberglass mold and then cut the frame out, finally adding a vacuum formed clear part.


Still some sanding to do, but I'm pleased with the overall look, this plane is sport scale after all.


Here is what I came up with for the flap. Flaps are not a big concern for this project, it lands so slow as it is, will probably use a few degrees for takeoff though.
Damo, I would not use flight skin to sheet this project. This plane was designed for 1/8" sheeting, you would then have thinner sheeting on the wings and thicker sheeting on the fuselage. It's great stuff for other details, I use it all the time, but never for sheeting.
I've worked out my flap linkage and am almost done with my plug for a canopy mold. I've seen the available canopies and although they look OK and do the job my requirements would take it just a bit further. I will make a fiberglass mold and then cut the frame out, finally adding a vacuum formed clear part.
Still some sanding to do, but I'm pleased with the overall look, this plane is sport scale after all.
Here is what I came up with for the flap. Flaps are not a big concern for this project, it lands so slow as it is, will probably use a few degrees for takeoff though.
Damo, I would not use flight skin to sheet this project. This plane was designed for 1/8" sheeting, you would then have thinner sheeting on the wings and thicker sheeting on the fuselage. It's great stuff for other details, I use it all the time, but never for sheeting.
03-20-2017, 11:03 AM
#123
Join Date: Jan 2005
Location: CaloundraQueensland , AUSTRALIA
Posts: 493
Likes: 0
Received 2 Likes
on
2 Posts
That's looking awesome Luke well done I'm starting to sheet mine today I like your setup for the flaps and thanks for the feedback on the fliteskin.
Damo
Damo
Last edited by Damo260; 03-20-2017 at 11:14 AM.
03-20-2017, 12:33 PM
#124
Nice work Luke as always...
This morning I finally speak with guy who made canopies.
When I pay them I got promise that canopies will be finish in ten days - two weeks, and now is ten days after that two weeks.
Today he told me that this week parts will be send and hope next week I'll get them here...
On this year Top Gun, "Mirce model" will have stand and offer wooden kits, parts, detail & finish sets.
This will be our first appearance on so huge modeler meeting and I want to thank Frank for the opportunity to appear.
You can from March 21. - April 21. order our wooden kits and finish & detail sets with 10% discount price and get them on Top Gun.
This offer is just for Top Gun order.
I want to ask you guys who made F 104 to put pictures how you will strength rudder and made removable elevator.
That is in my opinion the most critical part on this model and all help, ideas and information will be great.
Best regards
Mirce
Last edited by mirce; 03-20-2017 at 01:20 PM.
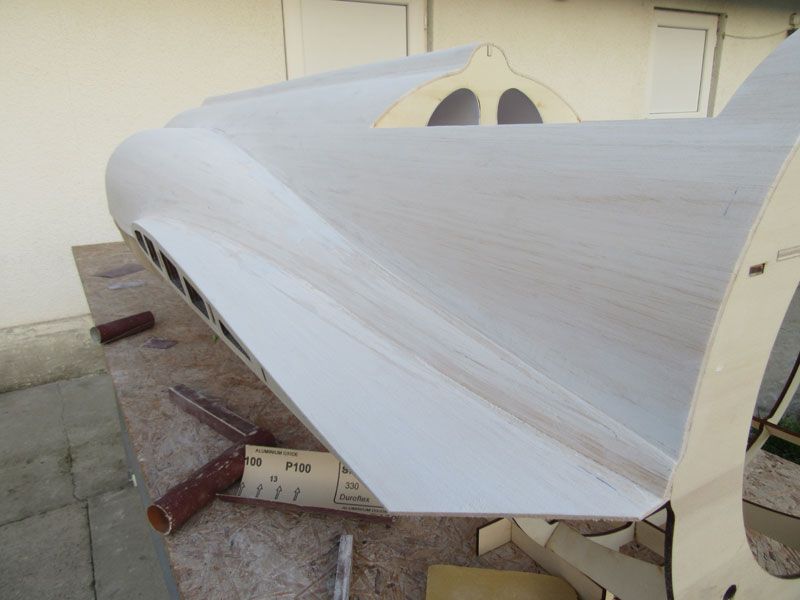
03-25-2017, 03:11 AM
#125
A few pictures from the last time I wrote here some works were done ...
Upper side of fuselage center section is covered with 3 mm balsa.


Yesterday weather was very nice, sunny and hot, so I use it for sanding.
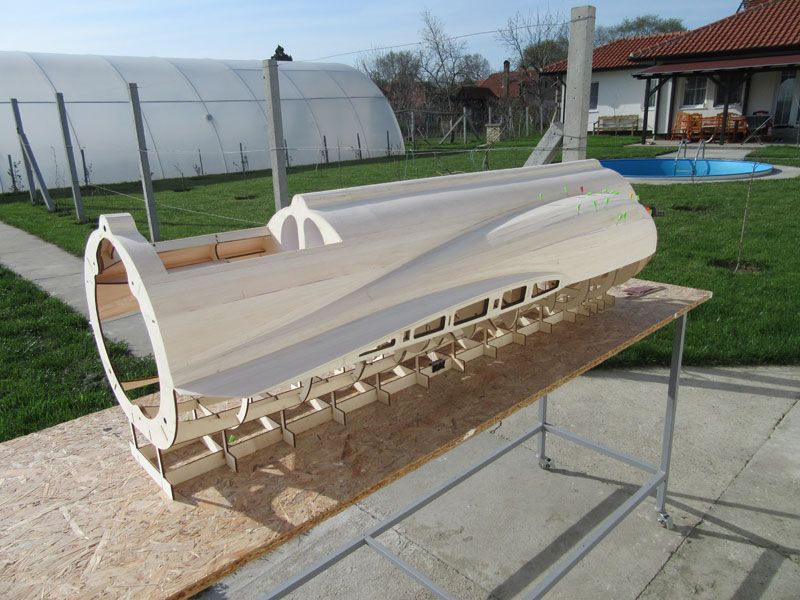
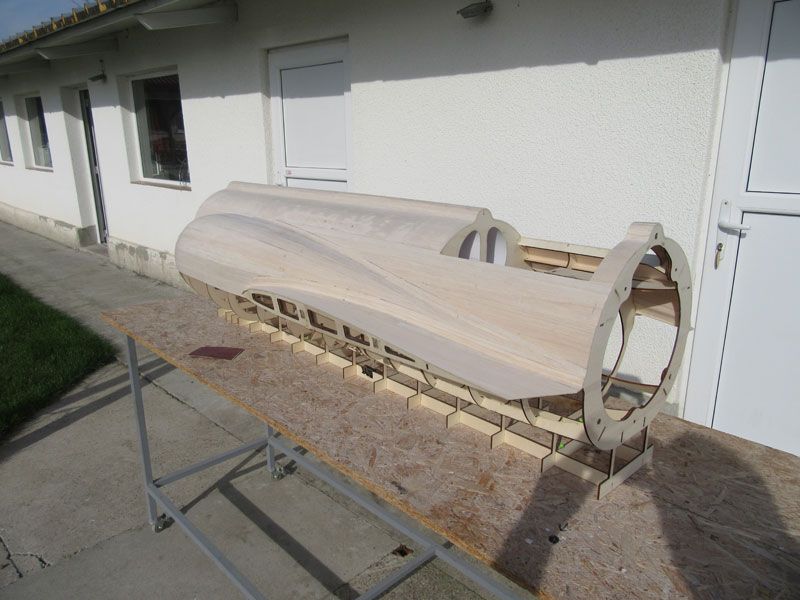
After few hours...
Upper side of fuselage center section is covered with 3 mm balsa.


Yesterday weather was very nice, sunny and hot, so I use it for sanding.


After few hours...


