


F104g 1:4 scale
 03-25-2017, 03:17 AM
#126

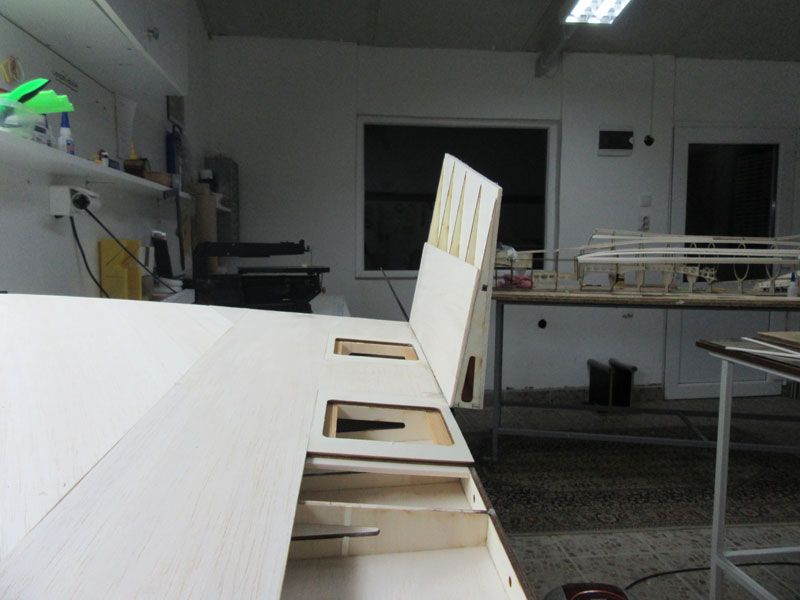
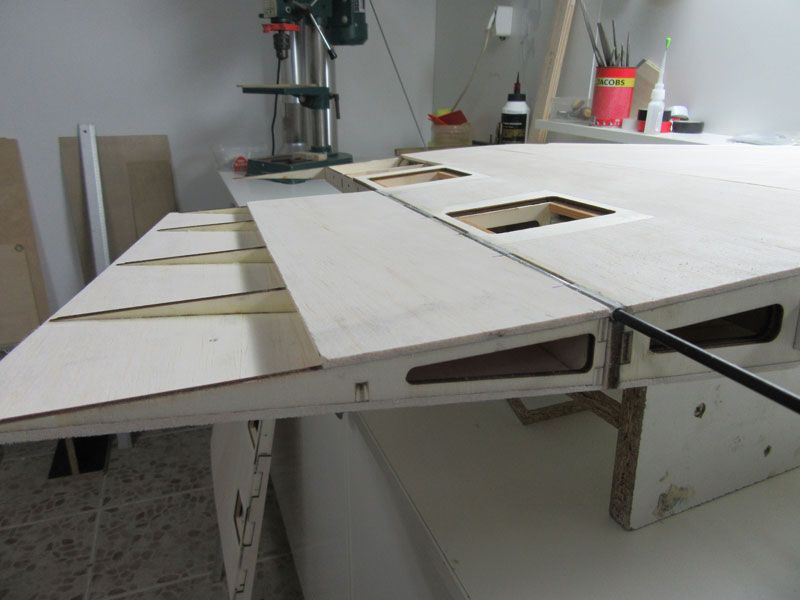
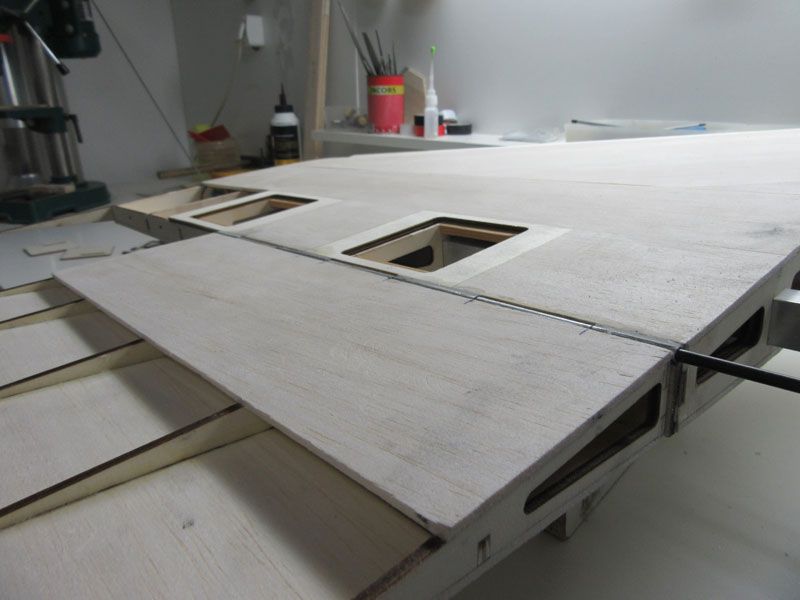
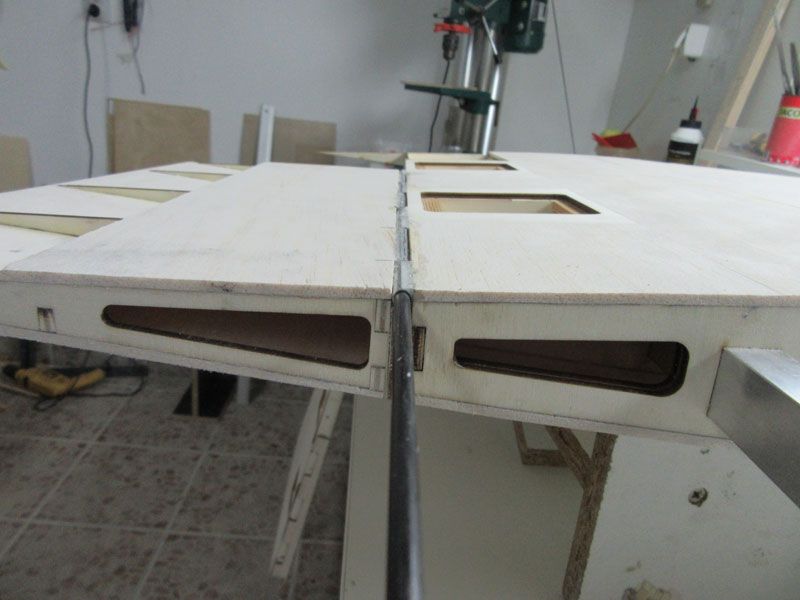
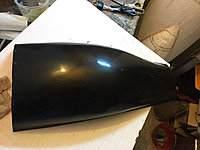
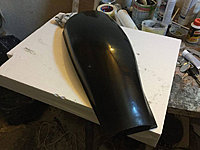
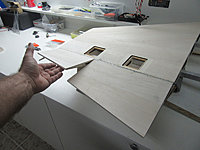
Intake channels are short, just for scale shape, but in fuselage no any guide channels for air...
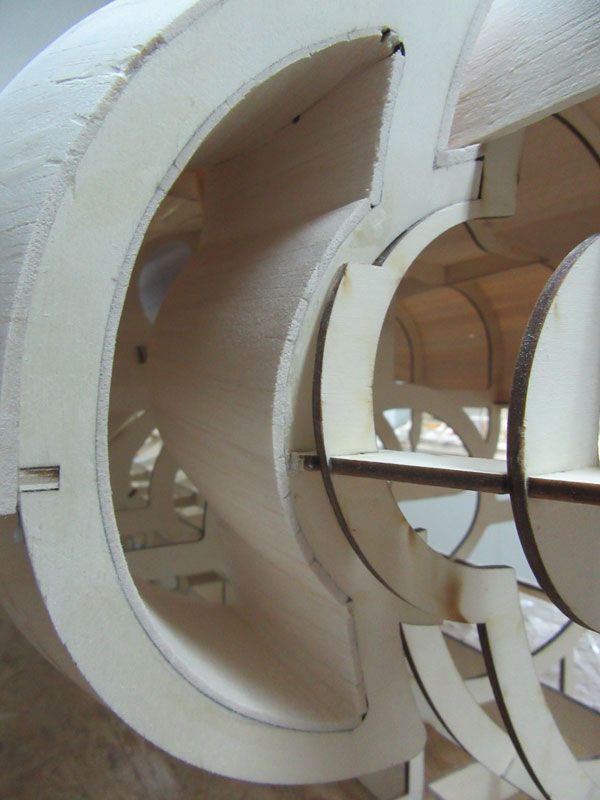
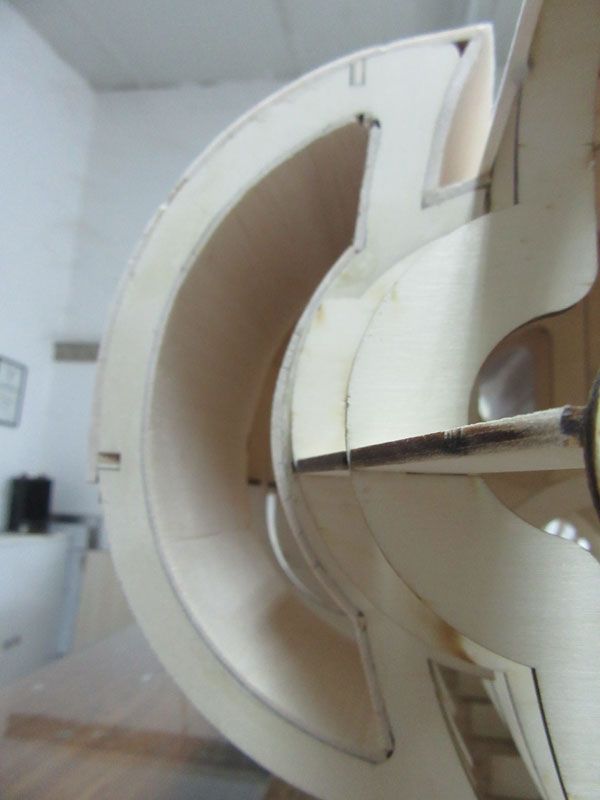
All together...


Canopy will arrival in next few days, so if you need it, please let me know, same like all other optional parts you need for this project.
To be continued...


All together...


Canopy will arrival in next few days, so if you need it, please let me know, same like all other optional parts you need for this project.
To be continued...
 03-25-2017, 12:15 PM
#127


Join Date: Jan 2005
Location: CaloundraQueensland , AUSTRALIA
Posts: 493
Likes: 0
Received 2 Likes
on
2 Posts
Hi Mirce
Very nice it's coming along very well can't wait to get mine at this stage.... As you know I need a F-104 and F-86 canopy.... Also what are you making the pilot tube from
Damo
Very nice it's coming along very well can't wait to get mine at this stage.... As you know I need a F-104 and F-86 canopy.... Also what are you making the pilot tube from
Damo
03-25-2017, 12:50 PM
#128
How quickly are you doing, you have arrived at this stage in next few days. That's good for "Mirce model" F 104 marketing, because when someone work as you work, that show how fast this kit can be made.
Other thing is, this is huuuuuuge model 4,15 meter long fuselage with a lot of curves. I made kits from some famous firm before, but never have kit which is build so easy and fast.
I told earlier, it can be seen that the model drawing engineer and modeler.
About canopies, yesterday they are sent from Germany. I hope during next week I'll have it here.
Canopies are most complicate part for me to order and have and must be done well.
Same as model, they are big and to get perfect canopy is not easy to made.
So, I also cant wait to get them and see live.
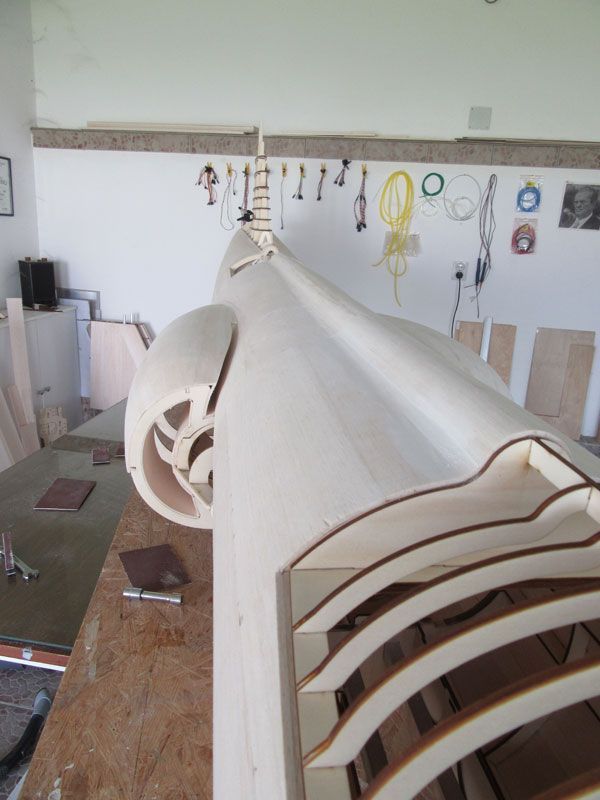
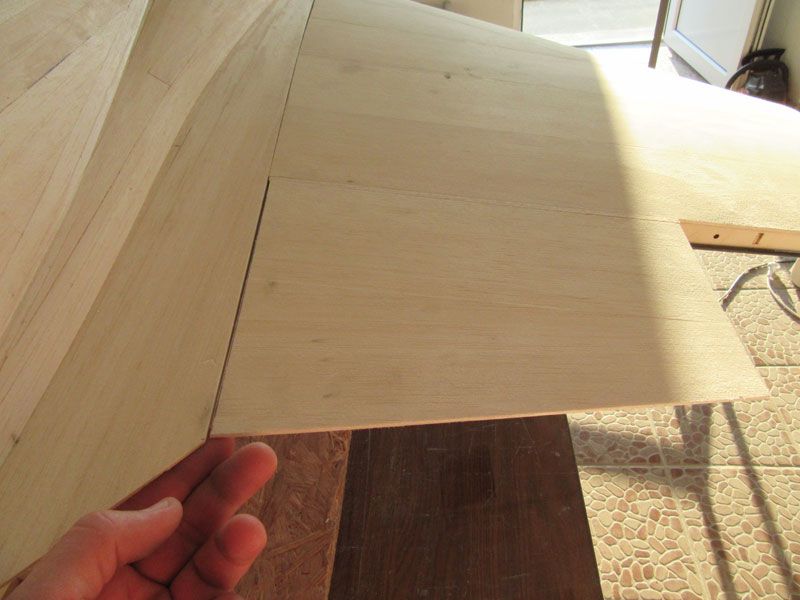
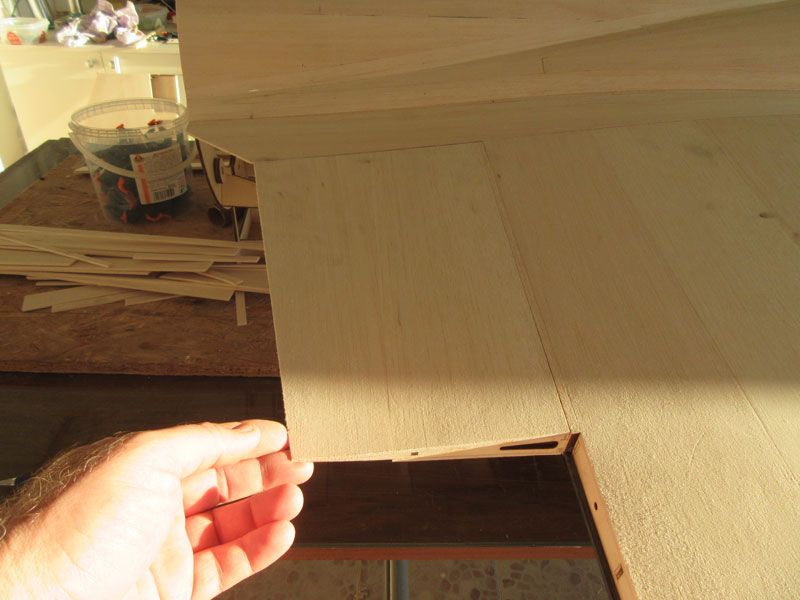
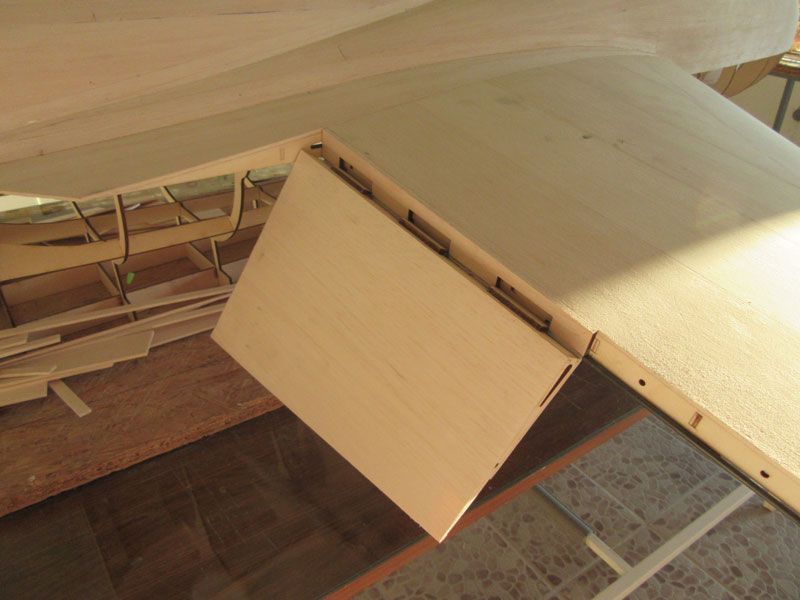
You can see on pictures that I start to made frame for canopy, idea is to made my mold. But mold must be perfect and must be strong because for so big canopy you need strong vacuum machine.
Maybe I'll made my mold, for few reasons, first canopy will be cheaper, second in that case I do not depend on other suppliers, third, I can have canopies in few days, not weeks like in this order...
But as I told now, first I want to see quality of this canopies.
Pilot tube is 10 mm tube. I have carbon one and use it, but it can be made from aluminum also, even steel if model need weight for CG.
I will print top of tube and transition part from fuselage to tube on my 3D printer. But haven't time right now...
Sorry for my English, little lore, little google translator, I know that can be better, but... Do not mind...
Best regards
Mirce
Other thing is, this is huuuuuuge model 4,15 meter long fuselage with a lot of curves. I made kits from some famous firm before, but never have kit which is build so easy and fast.
I told earlier, it can be seen that the model drawing engineer and modeler.
About canopies, yesterday they are sent from Germany. I hope during next week I'll have it here.
Canopies are most complicate part for me to order and have and must be done well.
Same as model, they are big and to get perfect canopy is not easy to made.
So, I also cant wait to get them and see live.
You can see on pictures that I start to made frame for canopy, idea is to made my mold. But mold must be perfect and must be strong because for so big canopy you need strong vacuum machine.
Maybe I'll made my mold, for few reasons, first canopy will be cheaper, second in that case I do not depend on other suppliers, third, I can have canopies in few days, not weeks like in this order...
But as I told now, first I want to see quality of this canopies.
Pilot tube is 10 mm tube. I have carbon one and use it, but it can be made from aluminum also, even steel if model need weight for CG.
I will print top of tube and transition part from fuselage to tube on my 3D printer. But haven't time right now...
Sorry for my English, little lore, little google translator, I know that can be better, but... Do not mind...
Best regards
Mirce


 03-26-2017, 11:42 AM
#130
Join Date: Jan 2005
Location: CaloundraQueensland , AUSTRALIA
Posts: 493
Likes: 0
Received 2 Likes
on
2 Posts
Very nice mate and thank you for the kind words it helps when you have a week off work due to the weather.... It helps when kit go's together perfectly make life a lot easier and like I said before I haven't done anything like this since I was a young boy with my Dad.... But just over a week I have everything framed up tail and nose sheeted....
Can't wait for the F-86 Sabre to arrive....
Damo


Can't wait for the F-86 Sabre to arrive....
Damo
Last edited by Damo260; 03-26-2017 at 11:51 AM.
03-26-2017, 05:13 PM
#131
Join Date: Apr 2006
Location: Carrollton
Posts: 1,698
Likes: 0
Received 0 Likes
on
0 Posts
Hello Mirce,
I hope you are doing well. It is interesting how things change over time, isn't it? I remember watching you build your Meister Jug and Zero. Then you design, build and fly your fantastic Galeb G2 jet and now you are building a 1/4 scale F-104 Starfighter. The best part is that you offer kits for all of these awesome jets to people who could only dream of having one in the past. You have worked very hard to get where you are now and you should be very proud. Just think, when did you ever dream you would be selling your fantastic kits at an event like Top Gun? I know you will have a great time seeing old friends and hopefully you will sell a few kits while you are there.
I will check in from time to time and follow along as you finish your HUGE F-104.
I wish you continued success with your jets and finish sets. Take care, my friend'
David
04-01-2017, 05:02 AM
#133
First I want to thanks David on kind words.
I love this hobby and this is no job for me, this is love, passion, I enjoy making models and sharing information with modelers around the world. Even when you get praise, there is no greater reward...
From other side I must find myself new challenges and that is reason for new projects and bigger model.
Of course, for me many things will be impossible without my many friends around the world, which always want to help me.
Can't wait to come on Top Gun, for me that is like way to heaven. This year I raises the bar on next "level", first time I'll sell some of my products. We will see how it will be...
OK, back to F 104...
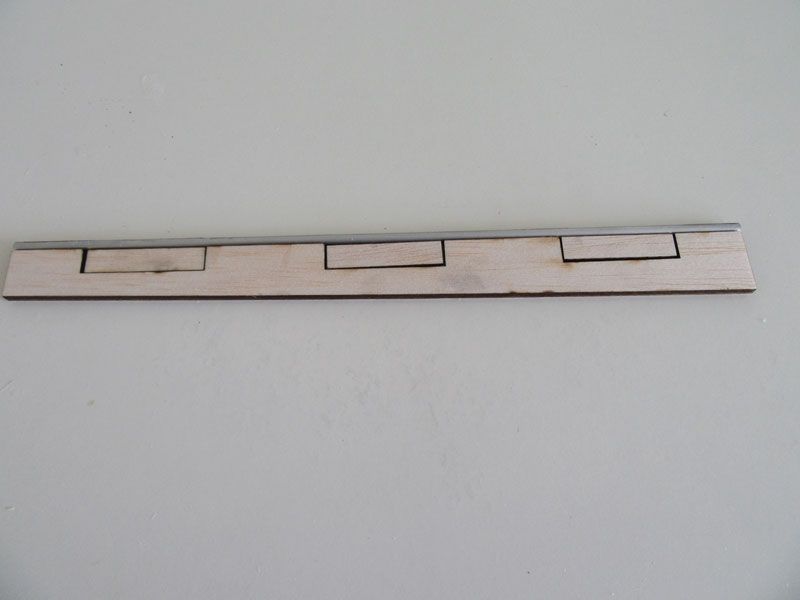
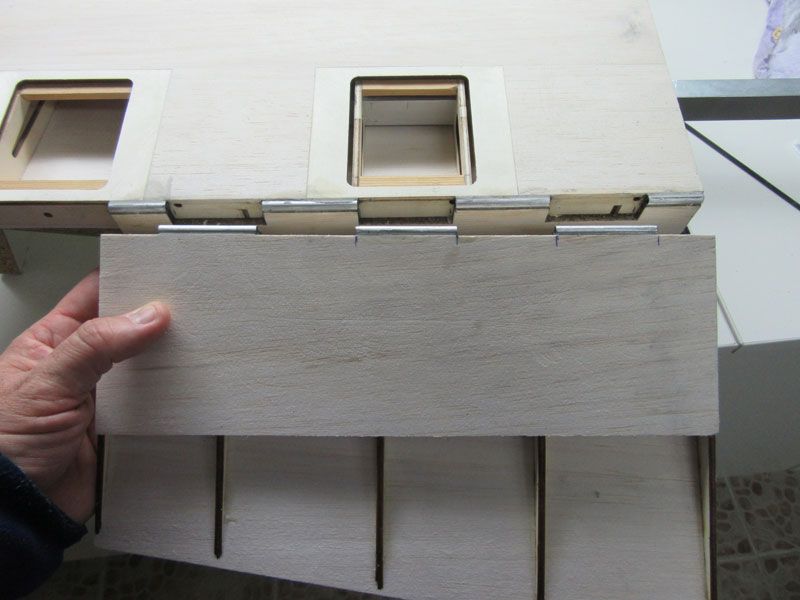
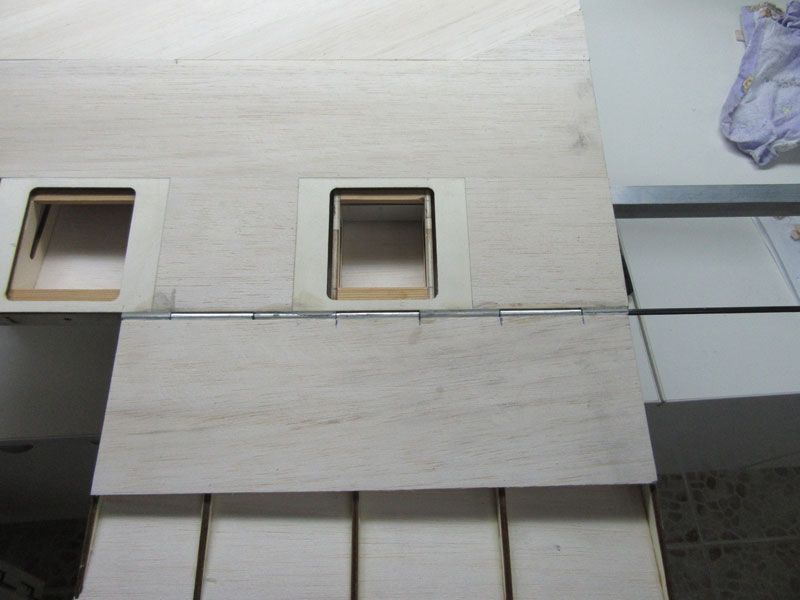
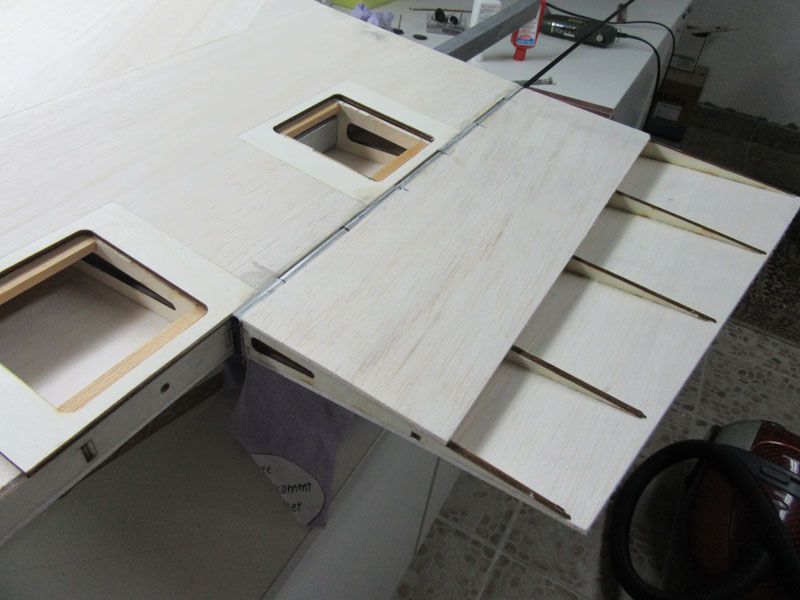
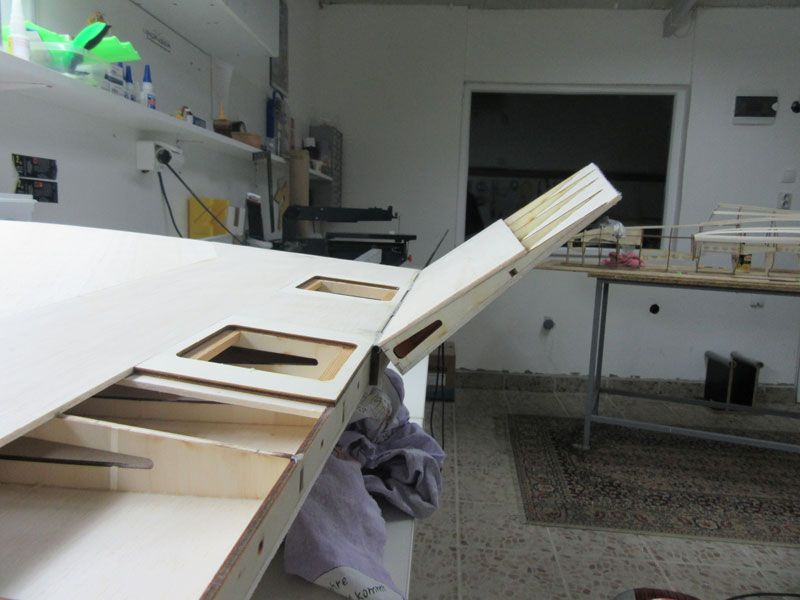
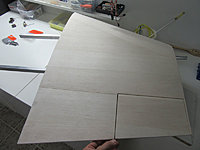
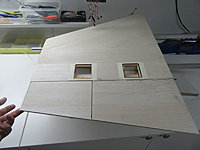
I was thinking how to made flap hinge, so here is my solution.
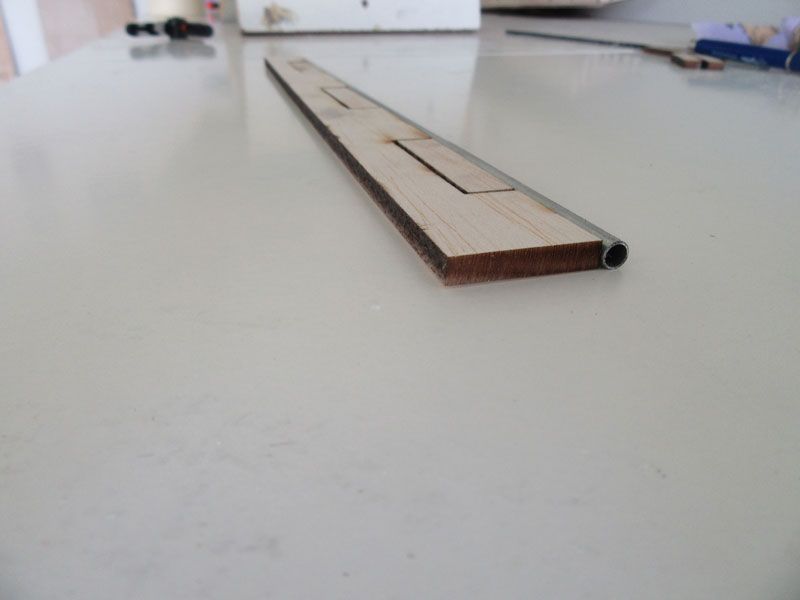
For construction I use 5/4 mm dural aluminum tube for out side and carbon 4/3 mm tube for "shaft".
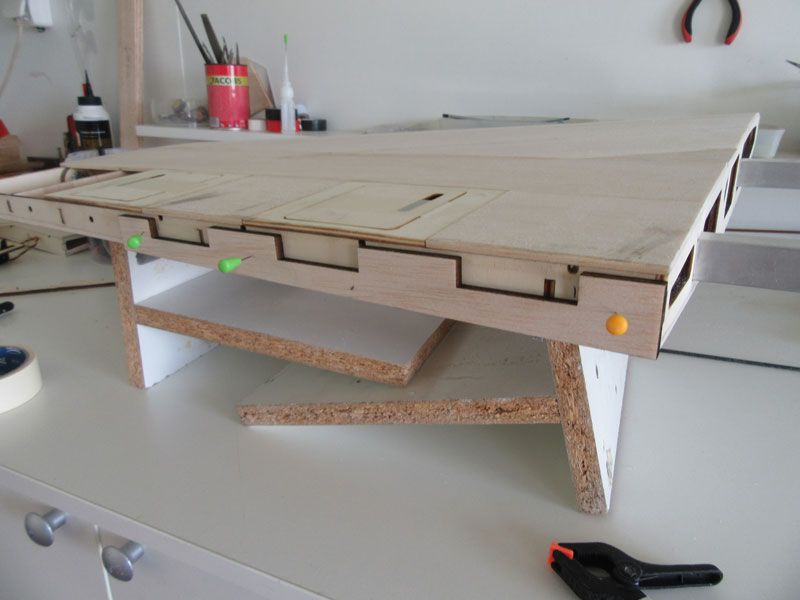
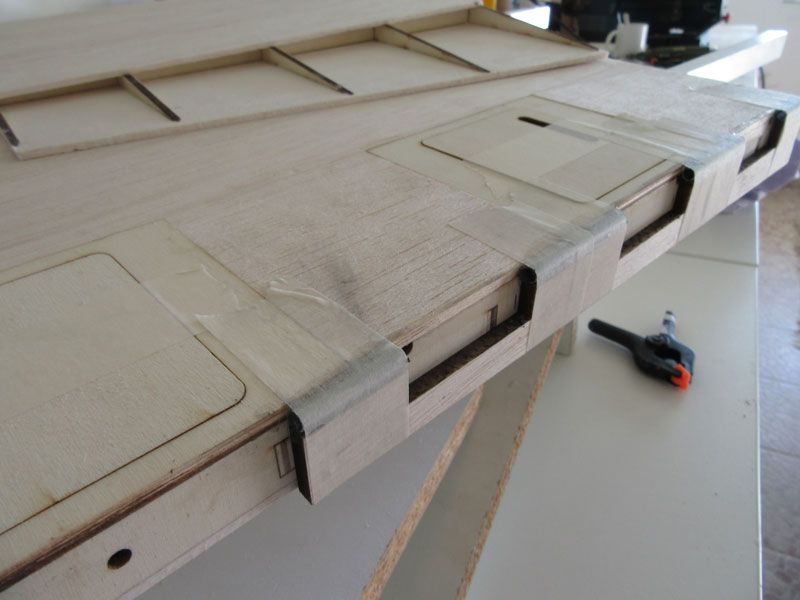
Because everything must be "in line" I draw and laser cut support construction from 5 mm balsa (same like tube).
Pictures tell 1000 word...
Aluminum tubes will be wrapped with glass cloth & epoxy resin, when complete wing get glass cloth...

Best regards
Mirce
I love this hobby and this is no job for me, this is love, passion, I enjoy making models and sharing information with modelers around the world. Even when you get praise, there is no greater reward...
From other side I must find myself new challenges and that is reason for new projects and bigger model.
Of course, for me many things will be impossible without my many friends around the world, which always want to help me.
Can't wait to come on Top Gun, for me that is like way to heaven. This year I raises the bar on next "level", first time I'll sell some of my products. We will see how it will be...
OK, back to F 104...
I was thinking how to made flap hinge, so here is my solution.
For construction I use 5/4 mm dural aluminum tube for out side and carbon 4/3 mm tube for "shaft".
Because everything must be "in line" I draw and laser cut support construction from 5 mm balsa (same like tube).
Pictures tell 1000 word...
Aluminum tubes will be wrapped with glass cloth & epoxy resin, when complete wing get glass cloth...


Best regards
Mirce
04-01-2017, 10:24 PM
#134
Join Date: Jan 2005
Location: CaloundraQueensland , AUSTRALIA
Posts: 493
Likes: 0
Received 2 Likes
on
2 Posts
Nice work mate I'm almost finished the nose cone been doing family things.... I'm about to start finish the fin off waiting for my carbon fibre tube to come and working out how I'm going to the elevator linkage....
Damo
Damo
04-17-2017, 11:05 AM
#135

Well guys, I've been away for a while, not all voluntary. I've had major internet issues with a new provider that took over Time Warner, internet has been down more than a week just this month. I have had problems getting logged onto RCU, and well you get the idea!
It took almost a month to get my aluminum elevator part, it has nothing to do with Mirce, it's just the way the mail works. I am extremely pleased with the part and it works great.

First a picture of my helper Posh, you can see she works hard! But she is always right there if I need her input!

I used aluminum tube provided by Mirce, you can see my ply parts to hold it in place.

I added ply below my blind nuts to fill the void below the stab. This ties in to the vertical ply former's already in the vertical stab.

When I tightened the bolts on the aluminum stab part, the plywood below it became dented and was beginning to crush. This is not good and I needed it to be stronger, so I cut that rib in half and added carbon sheet of the same thickness. Also notice the pin to hold the aluminum tube, I then glued it all in with Hysol.

This shows the carbon sheet, no denting there! One thing you will need to do is cut the sides of the stab almost all the way back to the pivot point. You will see why when you attach it with the sheeting! I will be using balsa blocks and PC board material in this area for support and my push rod attachment points.


You will not be able to use the 3d printed bearing pieces on the end next to the aluminum stab part, so I drilled a hole in a piece of ply and glued it in there for extra support on the inner rib. Also notice the ply cap over the 3rd bearing and the end cap. The end cap keeps the tube aligned in the stab and adds extra support that does not rely on the plastic bearings. It is a ply piece with a hole and an end cap.
I experimented with lubricant, and found Plumbers pure silicone grease to be the best.

If you remember I cut down the raised spine near the vertical, this is a little more scale and allowed me to transition the stab into the fuse so it looked more scale. I'm sanding the vertical to a sharper edge for a thinner look, don't round it! I used harder balsa on the sides and strip planked the leading edge.


It took almost a month to get my aluminum elevator part, it has nothing to do with Mirce, it's just the way the mail works. I am extremely pleased with the part and it works great.
First a picture of my helper Posh, you can see she works hard! But she is always right there if I need her input!
I used aluminum tube provided by Mirce, you can see my ply parts to hold it in place.
I added ply below my blind nuts to fill the void below the stab. This ties in to the vertical ply former's already in the vertical stab.
When I tightened the bolts on the aluminum stab part, the plywood below it became dented and was beginning to crush. This is not good and I needed it to be stronger, so I cut that rib in half and added carbon sheet of the same thickness. Also notice the pin to hold the aluminum tube, I then glued it all in with Hysol.
This shows the carbon sheet, no denting there! One thing you will need to do is cut the sides of the stab almost all the way back to the pivot point. You will see why when you attach it with the sheeting! I will be using balsa blocks and PC board material in this area for support and my push rod attachment points.
You will not be able to use the 3d printed bearing pieces on the end next to the aluminum stab part, so I drilled a hole in a piece of ply and glued it in there for extra support on the inner rib. Also notice the ply cap over the 3rd bearing and the end cap. The end cap keeps the tube aligned in the stab and adds extra support that does not rely on the plastic bearings. It is a ply piece with a hole and an end cap.
I experimented with lubricant, and found Plumbers pure silicone grease to be the best.
If you remember I cut down the raised spine near the vertical, this is a little more scale and allowed me to transition the stab into the fuse so it looked more scale. I'm sanding the vertical to a sharper edge for a thinner look, don't round it! I used harder balsa on the sides and strip planked the leading edge.
04-17-2017, 11:29 AM
#137
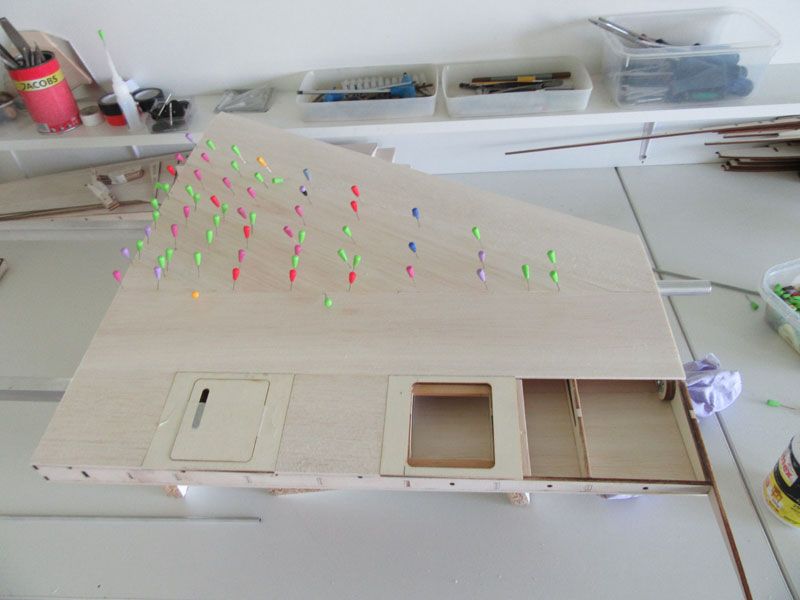
I want to show my servo installation plan for the stab. The stab must be easily removable, so they will be external. I like to paint my servo's and linkages so they blend in better, and that will help hide these.

There is an open area where I marked in the picture. I will mount two servo's there, one each side and one lower and the other higher, basically stacked.
I am going with the Savox servo's, you can't get JR servo's anymore. SA-1239SG Monster Torque Steel Gear Digital. Torque at 6 volts is 500.

This is how the servo will look on the right side, the left side servo will be higher up to clear the right side servo.
There is an open area where I marked in the picture. I will mount two servo's there, one each side and one lower and the other higher, basically stacked.
I am going with the Savox servo's, you can't get JR servo's anymore. SA-1239SG Monster Torque Steel Gear Digital. Torque at 6 volts is 500.
This is how the servo will look on the right side, the left side servo will be higher up to clear the right side servo.
04-17-2017, 12:51 PM
#138
Thanks F-86!
After looking at the servo location, I decided to move them closer to the stab and a bit further aft. I still have not received control throw maximums so I'm still guessing at the throw needed.
The closer the attachment point is to the stab leading edge the more servo throw is needed, this is a good reason to know control throws, I need to know how far aft I have to mount the servo to get the proper throw.

Anyway, I would like to use the placement shown here, the red triangle is the placement of the left side servo. This would shorten control rods and help to do a better job of making the servo's less noticeable. As soon as Mirce gets me the control throws for all control surfaces, I will start on servo installation. In this configuration, the servo's are on opposite sides of the rib, one on top and the other below it.
After looking at the servo location, I decided to move them closer to the stab and a bit further aft. I still have not received control throw maximums so I'm still guessing at the throw needed.
The closer the attachment point is to the stab leading edge the more servo throw is needed, this is a good reason to know control throws, I need to know how far aft I have to mount the servo to get the proper throw.
Anyway, I would like to use the placement shown here, the red triangle is the placement of the left side servo. This would shorten control rods and help to do a better job of making the servo's less noticeable. As soon as Mirce gets me the control throws for all control surfaces, I will start on servo installation. In this configuration, the servo's are on opposite sides of the rib, one on top and the other below it.
05-13-2017, 11:40 AM
#139
Join Date: Jan 2005
Location: CaloundraQueensland , AUSTRALIA
Posts: 493
Likes: 0
Received 2 Likes
on
2 Posts
Hi Luke
Very nice it's starting to come along nicely just seeing if got my pm haven't do much on mine due to work and family but I'll get stuck back in to this week
Damo
Very nice it's starting to come along nicely just seeing if got my pm haven't do much on mine due to work and family but I'll get stuck back in to this week
Damo
05-15-2017, 01:32 AM
#140
Few days ago I come back from Top Gun event, so back in the workshop...
I saw news on Luke and Damo F 104 build.
Yesterday I send Damiano message on Facebook, and I asked him to put how big are the movement control surfaces on model. Hope he will wright here soon.
On Top Gun I have opportunity to see prototype of landing gears made by Paul in Texas. They are for now made in wood, but hope in next few months it will be made in metal.


On my F 104 model I'll made landing gears same as Damiano do that, I'll buy setup in Behotec. That is "economic" option for modelers, not 100% scale, but work very well.
Mold for transparent canopy are finish, so this week I think I'll have first canopy.

Problem with guy from Germany, who promised me that will made canopies, are settled, Pay Pall returned money I pay him.
That is good for me, but bad side is I (and all my customers) lost three months in that situation.
In last few days I work on flaps and ailerons on F 104 wings. In USA, from Robart firm, I bring hinges for ailerons.


On Top Gun I have opportunity to saw Brian O'Meara F 104, OK, that model is from Airworld, but basically that is same model like this. In conversation we made I heard many interest details.

For sure Starfighter is model which give me the biggest impression. First, it's huge, in air is like real airplane, landing is very slow...
Brian use 220 size turbine, model is 25 kg and vertical maneuvers are unlimited...
I made many pictures of surface to have reference for details for my model...
Mirce
I saw news on Luke and Damo F 104 build.
Yesterday I send Damiano message on Facebook, and I asked him to put how big are the movement control surfaces on model. Hope he will wright here soon.
On Top Gun I have opportunity to see prototype of landing gears made by Paul in Texas. They are for now made in wood, but hope in next few months it will be made in metal.
On my F 104 model I'll made landing gears same as Damiano do that, I'll buy setup in Behotec. That is "economic" option for modelers, not 100% scale, but work very well.
Mold for transparent canopy are finish, so this week I think I'll have first canopy.
Problem with guy from Germany, who promised me that will made canopies, are settled, Pay Pall returned money I pay him.
That is good for me, but bad side is I (and all my customers) lost three months in that situation.
In last few days I work on flaps and ailerons on F 104 wings. In USA, from Robart firm, I bring hinges for ailerons.
On Top Gun I have opportunity to saw Brian O'Meara F 104, OK, that model is from Airworld, but basically that is same model like this. In conversation we made I heard many interest details.
For sure Starfighter is model which give me the biggest impression. First, it's huge, in air is like real airplane, landing is very slow...
Brian use 220 size turbine, model is 25 kg and vertical maneuvers are unlimited...
I made many pictures of surface to have reference for details for my model...
Mirce
Last edited by mirce; 05-15-2017 at 04:20 AM.
05-27-2017, 04:54 AM
#144
I have everything now to proceed full steam on the 104, all my fiberglass mold materials and the most expensive thing, the Airworld 104 undercarriage.
It was great working with Hans-Dieter and Christiane from Airworld Germany, I got great service and they are very helpful with advice about the gear set up. With the exchange rate, shipping (152.00 Euro's!) and customs fees it was just shy of $3,000.00, so you might want to consider that early on if you want to go that route. I look at it as saving $5,000.00 on an airframe if I was to get everything from Airworld.
Airworld provided a template for the Keel, but I could not get the gear to retract fully using that template, I had to move the air cylinder hole up and back slightly to get them to retract and extend fully. The gear have many places to adjust the angles, I had to build a test stand to figure it all out. Also the angle where the shocks are mounted is critical, and that was not included. I will make templates for all parts as I go and will provide them as a guide if anyone wants to use the Airworld gear. Interestingly, the wheels are 6" Du-Bro! I was a little worried about replacements from Germany, but they are easy to get here.
I've seen some installations using Hydraulic, but that is not needed, I will however have the main gear on there own air system. I will make a mold of the belly of my 104 and then cut that section out for gear installation, hope to get all that done in the next week or so.
Last edited by dionysusbacchus; 05-27-2017 at 04:57 AM.
05-27-2017, 11:11 AM
#145
Join Date: Jan 2005
Location: CaloundraQueensland , AUSTRALIA
Posts: 493
Likes: 0
Received 2 Likes
on
2 Posts
Hi Luke that's cool mate I've started back on my F104 last weekend playing around with the tail been thinking how I'm going to the elevator linkage I'll post some photos later on today on my progress.... Nice F4 mate what size on is it talk soon
Damo
Damo
06-02-2017, 09:28 AM
#146
Thanks Damo, I'm building two of the now smaller F-4's, one for me and one for a friend, nice size for every weekend flying.
Let me know what you come up with on the elevator linkage, I have an idea of what I'm doing but the landing gear are a priority now.
I worked all morning to make the parts, I wished at times I had six hands. First I made molds for the gear doors by first covering the area with Monokote.
Next I cut a HUGE hole in the fuselage to get those gear in there! I just kept saying to myself, man thats a big hole!
Next I made balsa templates for the mounting bulkheads, I was able to utilize the inner wing tube ply pieces on the main gear mounting point, other than that, the fuselage has NOTHING that is really usable when mounting these gear, no existing former's are in the right place to be of any use.
I did get them to fully retract, but remember my fuselage shape is altered on the bottom, if you did not alter the shape and blend the intakes into the bottom, the retracts would not fit all the way in.
Now that the main gear are figured out, I will glue them in with Hysol and then do the nose strut, that should be a piece of cake!
06-06-2017, 06:24 PM
#149
My plane is finally on the gear, will finish up on the construction and glass it finally.
Mirce, I hope you can have a F-104 detail set for me!
It was easy to install the Airworld nose gear retract, I used some 1/4" spruce square sticks as alignment pieces. Tacked those in and then Hysoled the nose gear mount right in, the sticks aligned it and gave it the right height, then I removed them when the glue was dry.
I added some 1/32" ply as gap seals on the flaps and ailerons, gives them a nice scale look.
It's not possible to convey the size in a picture, but this plane is impressive, REALLY looking forward to the finish work!
06-07-2017, 12:08 AM
#150
WOW, model look FANTASTIC!!!!!
Great work with landing gear. Front gear is also from Airworld?
I'll prepare Detail set in next few days, just to find good drawings (in big resolution) of top, bottom, left & right F 104 side. I work on that already...
Finally good news about F 104 canopies, after few up & down I got pictures of first transparent parts.


One more time, awesome work Luke...
Mirce
Great work with landing gear. Front gear is also from Airworld?
I'll prepare Detail set in next few days, just to find good drawings (in big resolution) of top, bottom, left & right F 104 side. I work on that already...
Finally good news about F 104 canopies, after few up & down I got pictures of first transparent parts.
One more time, awesome work Luke...
Mirce