


CARF Skygate Hawk in the house !

 06-20-2016, 01:20 PM
#1177

CAUTION !!
I test flew my SkyGate Hawk yesterday and landed after what I thought was a perfect test flight, but what was very nearly a disaster.
It was witnessed by about ten other guys who will confirm it was flown smoothly and without anything "hard and speed was kept quite low as recorded on the Weatronic GPS. . No rudder inputs were made in flight, aeros were loop, cuban eights and barrel rolls, with most of the flight at half throttle on the Olympus.
Pushing the jet back to the pits I noticed that the rudder trim tab was missing, and looking at the fin a huge crack was discovered running along the fin from front to back just at the top odf the mounting tibe. The other side of the fin was buckled. Any rudder inputs would certainly have led to fin loss !!!!
I have considerably strengthened the fin tube mount in the fuselage but the fin was standard (late) Skygate.
I will be fitting a new fin and probably repair and considerably stiffen this one. When flown I will fit a camera aimed at the fin/ rudder to record its behaviour.
Whether the fin flutter was started by flutter of the trim tab, which led to the rudder fluttering and then the fin will never be known.
My local CARF dealer will ask whether the new Hawks have any mods. to the fin for current kits.
More, and picture, later.
David Gladwin.
Good to know you landed safe, i too had rudder flutter with my olympus powered SG hawk, but that was mainly due to the rudder control horn that gave way.( It came fixed from SG as i opted for stage 3.) I too has strengthened the fin.
Changed the glass horns to carbon, with a hard wood block in-between the 2 horns, and all good so far.
Does your hawk have a functional trim tab, as mine is just a dummy.
Regards
Chatty.
06-21-2016, 12:02 AM
#1178

Join Date: Sep 2010
Location: AucklandAuckland, NEW ZEALAND
Posts: 184
Likes: 0
Received 1 Like
on
1 Post
Hi dave
Thats a close one. Good to hear you landed safely. Can you confirm that the fin in question is a comp-arf build of the skygate hawk or is it the original skygate manufactured. The reason I ask is that we had a hawk here a partial departure of the fin in flight at the point where the joiner finished. It was the original skygate build.
I fly the comp arf build skygate hawk, and your story concerns me. Not sure what if anything I can do to verify the fin's airworthiness.
Looking forward to your reply
Rgds
Mayur Topiwala
 06-21-2016, 02:24 AM
#1180

David G, that sounds both interesting and concerning. Just some questions please.
1. Are you running a GBR Jet bypass system, and if not then have you closed off your original intakes (they require a baffle that closes off the first 50%).
This will reduce the air intake significantly. As you know the original design was for a P-160 Turbine, very light, and very slow speeds (for JWM). The Olympus (and in my case P-200SX) are great power combinations but the down side is the extremely high internal fuselage pressure.
2. What generation/stage was your KIT. Stage 1,2 or 3
3. My vertical stabilizer Trim Tab is only cosmetic, was yours modified
4. Did you insert another grub screw set retainer on the lower part of the vertical stabilizer main spar tube
5. Have you limited your rudder travel for high speed flight (rudder limiter)
Otherwise I hope you are keeping well.
Kind regards, Darryl
06-21-2016, 08:53 AM
#1181
Hi guys, I am away from home at the moment so can't post the pictures. I have had time , walking here in Cornwall, to consider the failure.
My Hawk is an original SkyGate version with no prebuild, it was the basic kit.
It has GBR full ducting for the Olympus, so no fuselage pressurisation.
The fuselage fin tube mounting was VERY much strengthened and stiffened.
The main mounting tube was glued into the fin tube and secured into the fuselage tube with a hex bolt.
The fin itself was unmodufied, the rudder servo, Jr. 8911 with slop free ball links.
The dummy trim tab was cut away from the rudder to look exactly scale and mounted with polyply tabs, but glued to the top of the tab cutaway to lock in place.
My suggestion of the sequence of events is that the tab fluttered (judging by the damage to the trailing edge of the tab cutaway.
This flutter caused the rudder to flutter overloading the fin which then failed longitudinally just above the mounting tube.
I belive the tab separated, stopping the rudder flutter and saving the fin from total failure.
The Weatronics data logging confirms no rudder input in flight, no slow roll or 4 pointer as I often fly on my Airworld Hawks !!
Rudder travel is reduced with flaps UP. ( a bit like the speed related B 767 rudder ratio , Darryl)
I will repair and strengthen the damaged fin and order a complete new fin from CARF via DW at M&R which will allow me to do the new Red Arrows fin scheme, it's an ill wind !!
The repaired fin will now include a laminated 3 mm 5 ply and carbon plate fin running all the way to the top of the fin with carbon cloth to strengthen the skin internally.
I will examine the fuselage fin mounting structure when I get home, and post pictures and report further.
My experience may just save someone's else's model.
Best regards,
David.
06-21-2016, 09:54 AM
#1183
My Feedback: (6)
Dear David ,
Do you happen to have a proper walkaround on any of the Red Arrows 2014 (50 display seasons), although I'm not planning on competing with mine would love to have some proper docs like proper bird number with its accompanying crew ( pilot and chief technician ).. Please . My Hawk is built now awaiting decals and nomenclature .
Regards
peter
07-11-2016, 01:10 AM
#1186
On close examination the location and vertical extent of the fin tube is really just not good enough. To complete the repair:
Joined the cracks on all structure with thick CA to regain shape, then :
Added a new fin tailpost of 2mm carbon plate almost to the top.
The lower half of the new tailpost was doubled up with another 2mm carbon plate to increase strength where the hinge bracket goes through the sternpost, all secured with Hysol.
Internally the skin between the front spar and the rear spar has two layers of 90 gm carbon cloth with West System epoxy. This cloth wraps around the fin tube both securing it and effectively extending the tube upto the servo plate. Carbon clot also covers the lower half of the front spar (which was not damaged).
Carbon cloth restored, increased, the strength of the small spar (which failed) to which the phenolic tube was glued at manufacture.
A steel pin goes through the sternpost plate into the alloy tube which is glued into the fibre tube.
A new dummy trim tab was made and VERY securely aattched to the rudder.
The paintwork was painstakingly repaired !
On the next flight the fin and rudder will be filmed by my Mycro cam for monitoring of any flutter tendency.
A new fin is on order from CARF and it will be interesting to see the redesigned structure. (it will need modification as the tube on the CARF version is not the same as my original Skygate machine.
Sorry Lavi, I have no walkround of a Hawk in the 50 anniversary colours.
Regards,
David.
Last edited by David Gladwin; 07-11-2016 at 02:43 AM.
07-11-2016, 07:36 PM
#1187

You have a free aeroplane there David.. How on earth did that fin stay attached after suffering that kind of damage?
Another example of how devastating flutter can be ..
Another example of how devastating flutter can be ..
07-28-2016, 11:20 PM
#1190
My Hawk is a T1 of the Red Arrows.
It is XX310, a Hawk which I have flown. It was in service at 4 FTS at Valley, then when into storage and was resurrected as a replacement aircraft for the Reds, many of their aircraft having reached the end of their fatigue lives and a few write offs. It's amazing to think that the Hawk has been in service for over 30 years, but the latest RAF training Hawks, whilst having basically similar airframes to original Hawks, have vastly different electronics.
I have quite a few photos of Red Hawks with the latest fin design if that helps, I will use that on my replacement fin when it arrives.
David.
Last edited by David Gladwin; 07-28-2016 at 11:23 PM.
08-21-2016, 04:00 AM
#1192
Member
Join Date: Aug 2006
Location: bath, UNITED KINGDOM
Posts: 83
Likes: 0
Received 0 Likes
on
0 Posts
Hi guys
i have a question I've just finished my skygate original not carf , thing being springs on the mains are way too weak it's bottoming out with tank empty how do you get main springs out of legs and once out what strength springs do I need too replace them with so I don't have too keep stripping it down I'm guessing lots of people must have this problem, mine weighed in at 25kg dry as I made no attempt to save any weight so I can get a decent scale flight but now I'm thinking it may be too heavy even though I'll have plenty of power with Olympus thanks in advance
Regards and happy landings
08-21-2016, 04:11 AM
#1193
Hi Wayne, my original Skygate Hawk also weights 25 Kg's dry (25.16 to be exact). When you place the model on the ground it will feel as though the main gear oleo's have bottomed out however, there is still about 1/2" of suspension remaining. As long as the model sits level then you are fine and have nthing to worry about.
08-21-2016, 07:19 AM
#1194
Member
Join Date: Aug 2006
Location: bath, UNITED KINGDOM
Posts: 83
Likes: 0
Received 0 Likes
on
0 Posts
Hi
thanks very much for your advice, I'm useing mark scully 6.5 litre tank plus I'll also be useing around 2 litres of smoke fluid will this still be OK as I've got visions of retracts coming out the top of the wings �� Thanks in advance
Kind regards
thanks very much for your advice, I'm useing mark scully 6.5 litre tank plus I'll also be useing around 2 litres of smoke fluid will this still be OK as I've got visions of retracts coming out the top of the wings �� Thanks in advance
Kind regards
08-23-2016, 07:00 AM
#1198
Join Date: Jan 2007
Location: farnborough, , UNITED KINGDOM
Posts: 3,294
Likes: 0
Received 1 Like
on
1 Post
David, glad it made it home safe.
It's cool to see this thread still running and mention of the 'bypass kit' I made all those years ago while building Ali's Saudi Display SG Hawk, brings back memories, all that work outside the kit itself making the bypass, ducts, formers, tank, smoke tank and loads of other little bits to make the kit a little better - glad you seem to like them and more impressive is some still have the bypass kits!
While I remember back I want to mention a good friend who sadly passed away last year. Roger Moffat was a genius, he ran a small model making business called Sequoia Systems and without him, his help, his expertise and incredible attention to detail most of my wacky mods and accessories (which I still make today) would have never got off the ground. I'm happy however to know his legacy continues as his wife Lilly has taken over the reigns and has been working with Archie from Scale Model Composites who are kitting the incredible large scale Gnat (it will be at Jetpower) so continuing the amazing cnc work Roger was renowned for. If you get a chance check out the Sequoia Systems web site, he made what can only be described as THE most detailed kits on the market, there are no jets unfortunately, but the bi-plane is out there, most customers build the airframe, leave it uncovered and put it in a display case!
We were working on a jet but ran out of time, if you look at his kits you can imagine what it would have been like......
So back to the SGH fin, attached are a few pictures of the mods I did on this area, I reinforced the internal tube mounting former with a solid thin ply plate glued to the original former so loosing the lightening holes, added some triangular wood to the sides of the tube and binding with carbon tows (plus aeropoxy). The fin had a carbon plate fitted across the area in the form of a bridge, I would suggest this was done as a minimum to all SGH kits after seeing David's fin failure. I have attached a few pictures of this jet, some as I just like them and a few of the mods too


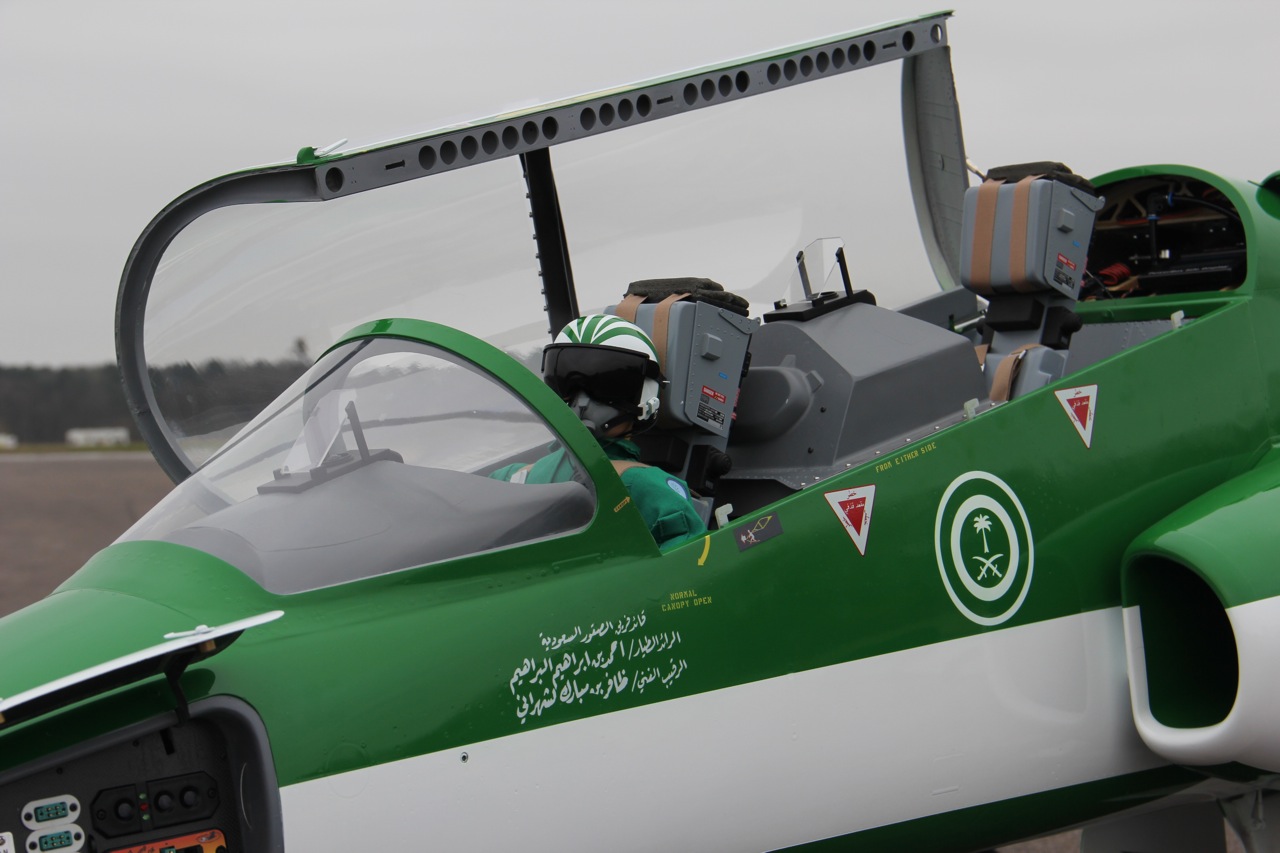


Hope this helps.
marcs
It's cool to see this thread still running and mention of the 'bypass kit' I made all those years ago while building Ali's Saudi Display SG Hawk, brings back memories, all that work outside the kit itself making the bypass, ducts, formers, tank, smoke tank and loads of other little bits to make the kit a little better - glad you seem to like them and more impressive is some still have the bypass kits!
While I remember back I want to mention a good friend who sadly passed away last year. Roger Moffat was a genius, he ran a small model making business called Sequoia Systems and without him, his help, his expertise and incredible attention to detail most of my wacky mods and accessories (which I still make today) would have never got off the ground. I'm happy however to know his legacy continues as his wife Lilly has taken over the reigns and has been working with Archie from Scale Model Composites who are kitting the incredible large scale Gnat (it will be at Jetpower) so continuing the amazing cnc work Roger was renowned for. If you get a chance check out the Sequoia Systems web site, he made what can only be described as THE most detailed kits on the market, there are no jets unfortunately, but the bi-plane is out there, most customers build the airframe, leave it uncovered and put it in a display case!
We were working on a jet but ran out of time, if you look at his kits you can imagine what it would have been like......
So back to the SGH fin, attached are a few pictures of the mods I did on this area, I reinforced the internal tube mounting former with a solid thin ply plate glued to the original former so loosing the lightening holes, added some triangular wood to the sides of the tube and binding with carbon tows (plus aeropoxy). The fin had a carbon plate fitted across the area in the form of a bridge, I would suggest this was done as a minimum to all SGH kits after seeing David's fin failure. I have attached a few pictures of this jet, some as I just like them and a few of the mods too
Hope this helps.
marcs