


Ripmax Xcalibur Sports jet
 08-22-2014, 12:55 PM
#876
Member
Join Date: Jan 2014
Posts: 39
Likes: 0
Received 0 Likes
on
0 Posts
I have been working close with Xoel from Electron Retracts in Spain to make a compatible set of retracts for the Xcalibur as I really wanted to go electric
we have finally finished and the struts are sized to match now
the machinery is superb
pictures attached
I have flown the model with the retracts and all I can say what a pleasure , the retracts work flawlessly ,and the nice part is I don't need to bring a compressor
using a 750mah pack, and after 4 flights and probably 6-8 retraction cycles only used 80mah
also worth noting is that the brakes is proportional as you can set the percentage of brake pressure via your tx, and I use a delay , so when I press brake switch , the brake pressure goes from very light pressure to full pressure as I set, with a delay , so that I cannot lock the brakes and no skidding
my hats of to Electron for a great product !!!!!!!!


thanks Electron and Xoel
we have finally finished and the struts are sized to match now
the machinery is superb
pictures attached
I have flown the model with the retracts and all I can say what a pleasure , the retracts work flawlessly ,and the nice part is I don't need to bring a compressor
using a 750mah pack, and after 4 flights and probably 6-8 retraction cycles only used 80mah
also worth noting is that the brakes is proportional as you can set the percentage of brake pressure via your tx, and I use a delay , so when I press brake switch , the brake pressure goes from very light pressure to full pressure as I set, with a delay , so that I cannot lock the brakes and no skidding
my hats of to Electron for a great product !!!!!!!!
thanks Electron and Xoel
I am very very very interested in this setup, id love to go electric. Can you provide maybe a estimate on price ? Any videos of them going up and down ?
 08-22-2014, 07:41 PM
#877
Senior Member
Join Date: May 2011
Location: brookfieldvictoria, AUSTRALIA
Posts: 154
Likes: 0
Received 0 Likes
on
0 Posts
hi all we have been selling electric retracts that fit the xcalibur for a while now and electric brakes with custom struts
they work great, xicoy controller or RCB controller. interested email [email protected]
regards
ken
they work great, xicoy controller or RCB controller. interested email [email protected]
regards
ken
08-22-2014, 08:28 PM
#878
Member
Join Date: Jan 2014
Posts: 39
Likes: 0
Received 0 Likes
on
0 Posts
hi all we have been selling electric retracts that fit the xcalibur for a while now and electric brakes with custom struts
they work great, xicoy controller or RCB controller. interested email [email protected]
regards
ken
they work great, xicoy controller or RCB controller. interested email [email protected]
regards
ken
How much are they ? Got a link ? or more information ?
08-22-2014, 09:51 PM
#879
 08-23-2014, 01:11 AM
#880
Senior Member
Join Date: May 2011
Location: brookfieldvictoria, AUSTRALIA
Posts: 154
Likes: 0
Received 0 Likes
on
0 Posts
hi the electric retracts that we sell in Australia are $380us xcalibur trailing link struts $210us electric brakes and custom wheels $220us
these retracts are near on bullet proof. Australian made high quality aluminium CNC machined parts. we will show pics and a video in
the morning
regards
ken
these retracts are near on bullet proof. Australian made high quality aluminium CNC machined parts. we will show pics and a video in
the morning
regards
ken
08-24-2014, 04:05 AM
#883

Join Date: Jun 2004
Location: Alice Springs, AUSTRALIA
Posts: 191
Likes: 0
Received 0 Likes
on
0 Posts
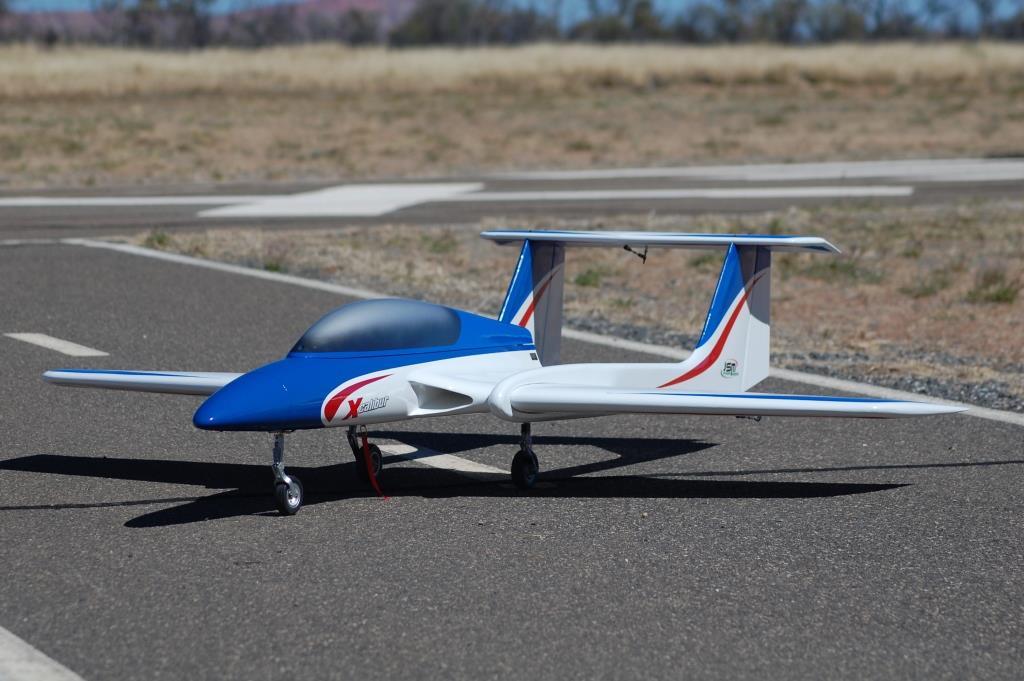
Finally got my act together and got the Xcalibur airborne. Firstly thanks to Dave, Dave and Ken for their ideas/help/experience and answering my PM's. Whilst I could only get one flight in before work it was enough to know how nice a low stress sports model it is. The K100 provided great power and final dry weight is 8.95kg with C of G at 165mm. Hope to get more flights in later in the week.


 08-24-2014, 07:05 AM
#884
Member
Join Date: Jan 2014
Posts: 39
Likes: 0
Received 0 Likes
on
0 Posts
Finally got my act together and got the Xcalibur airborne. Firstly thanks to Dave, Dave and Ken for their ideas/help/experience and answering my PM's. Whilst I could only get one flight in before work it was enough to know how nice a low stress sports model it is. The K100 provided great power and final dry weight is 8.95kg with C of G at 165mm. Hope to get more flights in later in the week.
Great work, looks awesome. Is this your first jet ? How did you find the first flight ? How was landing ?
08-24-2014, 01:12 PM
#885
Thread Starter
Finally got my act together and got the Xcalibur airborne. Firstly thanks to Dave, Dave and Ken for their ideas/help/experience and answering my PM's. Whilst I could only get one flight in before work it was enough to know how nice a low stress sports model it is. The K100 provided great power and final dry weight is 8.95kg with C of G at 165mm. Hope to get more flights in later in the week.
Looks good
Dave
08-24-2014, 04:50 PM
#886
Join Date: Jun 2004
Location: Alice Springs, AUSTRALIA
Posts: 191
Likes: 0
Received 0 Likes
on
0 Posts
G'day Lawndartz,
No this isn't my first jet but its been a long time between drinks as they say. I had a Falcon 120 for about 30 flights before I drove the retracts up through the wings doing something dumb. That was about 18 months ago and in the last months I have finally flown my new PST Reaction twice which has a K140G in it (its taken over a year to build). Combination of a crap roster at work which gives me a Sunday (our club day) off every 6 weeks and three young kids has seen a rapid demise in my flying time.
I like to get the model setup fairly well before the first flight as our airfield is very unforgiving. Whilst I have a nice 110m bitumen strip, the field is rough and will rip retracts out of models in a heart beat due to the tufts of Buffle Grass. Sort of like flying off a carrier at sea, miss the strip it's bad news. So any advice on setup and C of G people can offer is very welcomed as once your up your up. I'm also the only jet flier for 1000 miles in any direction and self taught so to me the jet forum and any good advice people can spare is invaluable.
The first flight was great. I forgot to put take off flap out but with the K100 after about 40m acceleration was rapid and up elevator was all that was needed. I flew for seven minutes and the airframe was very docile. I had my flight modes set at 80% travel of what the manual says for low and 100% for high and never used the high. I'm sure I will after a couple of flights but for the initial flight of a couple of rolls, a loop, inverted flight, stall test and flap test low rates were fine. At the 165mm inverted I needed a slight down elevator push to maintain level flight. It seems much nicer to fly on first impression than my Reaction but I think I've psyched myself a bit as the Reaction weighs 13kg dry so I'm a bit more cautious of it at slow speed. I really need a few flights of each to get comfortable to make a better comparison.
for landing I throttled back to idle on mid down wind and extended half flap. I fly curved approaches rather than square base legs so mid base I extended full flap and aligned with the strip. We had a gusty headwind between 10-20kts so I applied small amount of power which made the nose rise slightly. I will mix in a bit more down elevator as I like to fly nose down approaches like my warbirds. I'm not accustomed to high alpha approaches. Dave Wilshire is right about it being a low drag airframe and after I pushed the nose down I had a tiny bit more speed than I would have liked and I touched down in the first third of the runway but the wind and a possible slight bounce saw the model airborne again. A blip of throttle and let it settle saw me landing at the end of the strip and going bush. Thankfully no damage. I will try some crow next outing and possibly try to get more flap travel. I have about 80-85mm now but I think a bit more would be good.
Here is the landing sequence from touchdown. Not pretty but we lived to fly again.
Last edited by damagedgoodes; 08-24-2014 at 04:59 PM.
08-25-2014, 01:30 AM
#887
Senior Member
Join Date: May 2011
Location: brookfieldvictoria, AUSTRALIA
Posts: 154
Likes: 0
Received 0 Likes
on
0 Posts
hi all my previous post I put the price for the electric retracts and brakes and struts to suite the xcalibur in US dollars
this was an error it is in Australian dollars check out the conversion and you will be surprised. our dollar isn't worth as
much as the greenback or the euro. electric retracts $380.00 aud struts $210.00 electric brakes $220.00
regards
ken
this was an error it is in Australian dollars check out the conversion and you will be surprised. our dollar isn't worth as
much as the greenback or the euro. electric retracts $380.00 aud struts $210.00 electric brakes $220.00
regards
ken
08-28-2014, 03:16 AM
#888

Hi All,
Quick question - the manual states 40mm deflection for flaps on take off. I have a VT 80 power plant installed - do I need to use flaps for take off or not worry about it ? I'm flying off a grass strip.
Thanks,
Rick
Quick question - the manual states 40mm deflection for flaps on take off. I have a VT 80 power plant installed - do I need to use flaps for take off or not worry about it ? I'm flying off a grass strip.
Thanks,
Rick
08-29-2014, 11:40 AM
#889
Senior Member
Join Date: Aug 2002
Location: Colchester, Essex, UK,
Posts: 344
Likes: 0
Received 0 Likes
on
0 Posts
Hi,
Dumb question time......in the retract kit you get a valve that I assume is a fill valve. (see pic)

Now, I'm ready for some backlash on this, whatever I do I can't seem to get air to flow through it, tried both ends assuming there is a one way valve inside, nothing, no flow at all.
Two valves in the kit, both the same.
Is there something I'm missing?
Cheers
Lee
Dumb question time......in the retract kit you get a valve that I assume is a fill valve. (see pic)
Now, I'm ready for some backlash on this, whatever I do I can't seem to get air to flow through it, tried both ends assuming there is a one way valve inside, nothing, no flow at all.
Two valves in the kit, both the same.
Is there something I'm missing?
Cheers
Lee
08-29-2014, 11:45 AM
#890
Thread Starter
Yes, flap for take off what ever the turbine surface, I use around 35mm for take off and 100mm for landing
Air in via the red connector (which stays on your pump line) Should open at 20-30psi
If it does not they are both faulty, but I've not had one yet.
Air in via the red connector (which stays on your pump line) Should open at 20-30psi
If it does not they are both faulty, but I've not had one yet.
08-29-2014, 11:23 PM
#893
After looking at mounting options for a centre light, I ended up putting it just forward of the nose leg, onto the bottom of the fuselage. I now have a total of 240 lumens of light for a total cost of $35. This compares very favorably with some commercial systems costing $150 plus. This jet is perfect for lights due to its design. The lights will draw approximately 300 milliamps off a 3S LiPo battery, and I can now remove the lead in the nose, replaced by the battery.


Sorry for the quick off topic
Aussie 1, I finally got my nose leg light mounted Aussie. It's really bright! Comes on when the gear is switched to down. Just used a 42% switch as HK were out and a 11.1v 1000mah pack Lipo.
08-29-2014, 11:25 PM
#894
 08-30-2014, 05:10 AM
#895
Thread Starter
Just working on some Xcalibur orders and noticed the inside of some of the bung holes are not cleaned up on the latest batch of tanks. 30sec with this dremmel fixes it. Ripmax are aware and again talking to the factory.
Worth checking before you assemble the tank (its pretty obvious in this case)
I also add Dubro tank barbs to any tanks I make up to ensure a good tube seal.
Dw


Worth checking before you assemble the tank (its pretty obvious in this case)
I also add Dubro tank barbs to any tanks I make up to ensure a good tube seal.
Dw
08-31-2014, 07:04 AM
#896
Member
Join Date: Oct 2013
Location: Worcestershire, UNITED KINGDOM.
Posts: 62
Likes: 0
Received 0 Likes
on
0 Posts
Hi Dave,
More dumb questions. Firstly, what size barbs are required for the fuel tank pipes? and secondly, if I only use a feed line to a bubble trap and a vent line out of the main tank, how do I block the third hole in the fuel tank bung or do I need a different bung?
Cheers,
Nev.
More dumb questions. Firstly, what size barbs are required for the fuel tank pipes? and secondly, if I only use a feed line to a bubble trap and a vent line out of the main tank, how do I block the third hole in the fuel tank bung or do I need a different bung?
Cheers,
Nev.
08-31-2014, 07:35 AM
#897
Thread Starter
5/32-4mm size
There are only two holes broken through, so the rubber is enough of a seal. All bungs only have two of the holes broken through for this purpose
Dave
There are only two holes broken through, so the rubber is enough of a seal. All bungs only have two of the holes broken through for this purpose
Dave
08-31-2014, 10:51 PM
#900

Well, I finally started to get my Xcalibur out of the box, the first thing I decided to do is Purdy her up to my taste, basically to make it look a slight different than the rest of the heard. Keep in mind that this Jet has been stored in my Hangar during this summer with temperatures over 110 Fahrenheit, so if you notice extra wrinkle in the covering, then the heat is mostly to blame for that. I sent Callie, at Callie Graphics a copy of the decal sheet and make some slight changes to make it look a little like the F-14 scheme.