


Ripmax Xcalibur Sports jet
 08-31-2014, 11:02 PM
#901

Since I can't Airbrush to save my life, I went to the local Swap Meet and had them airbrush a Sword for me in on the tail, Basically if you saw one of the Excalibur movies, the lady in the lake gives the sword to King Arthur, I know, in most, the sword is in stone, and he pulls it out, but, he breaks it in a battle and throws it in the water and she returns it to him fixed. Well anyway, here is the Sword and lady of the lake on the back of my Jet. Cost me a whole $25 to have it done LOL. I been reading the post about the lights and bought some of those 45 Lumens ones only to read a couple of updates on newer/better lights, I then went out and bought me some LED 220 Lumens lights for the plane.
 09-01-2014, 01:08 AM
#902

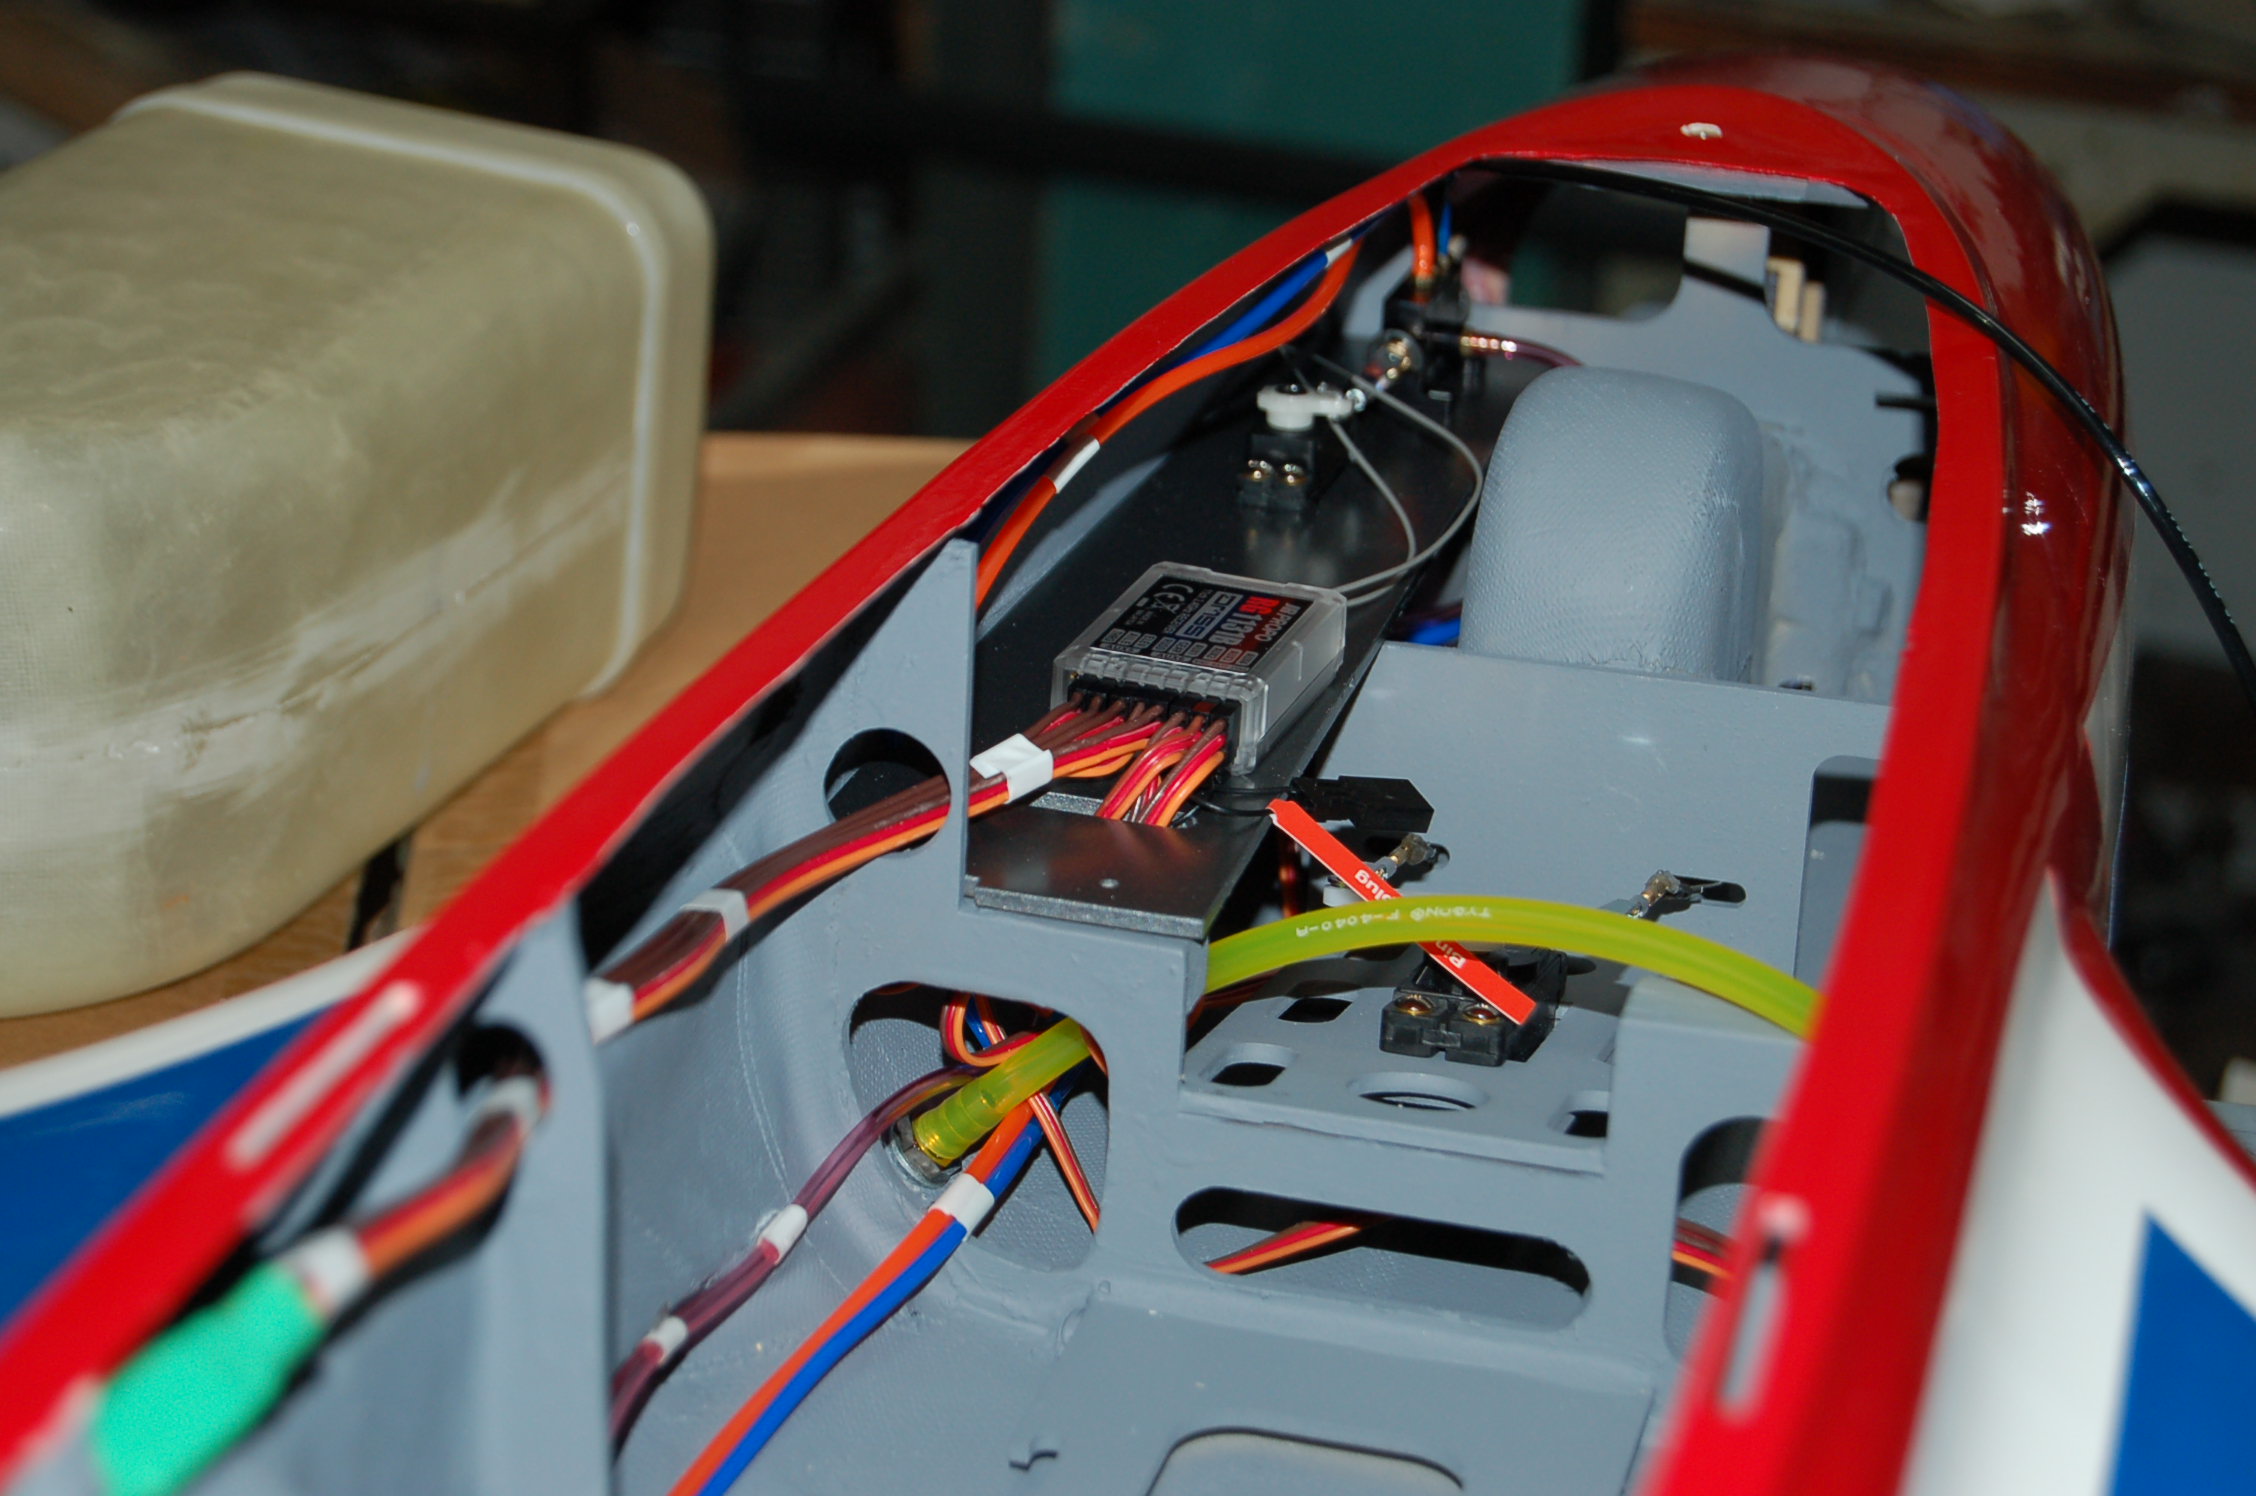
Test flew one of these for a friend yesterday, lovely flying model.
Didn't use the flaps for take off, just a smooth lift off with minimal elevator, full flap to control speed on landing.
Engine is a Jets Munt VT80.
Anyone else had trouble with the coloured trim blowing off? - John.
Didn't use the flaps for take off, just a smooth lift off with minimal elevator, full flap to control speed on landing.
Engine is a Jets Munt VT80.
Anyone else had trouble with the coloured trim blowing off? - John.
09-01-2014, 03:03 AM
#903
Last edited by Aussie1; 09-05-2014 at 02:39 PM.
09-01-2014, 05:26 AM
#904
Member
Join Date: Oct 2013
Location: Worcestershire, UNITED KINGDOM.
Posts: 62
Likes: 0
Received 0 Likes
on
0 Posts
I have just checked my bung and like Izzy's all three holes are open. Is the brown Dubro petrol bung a suitable replacement?
Last edited by Nev01; 09-01-2014 at 05:45 AM.
09-01-2014, 06:35 AM
#905
Thread Starter
Weird, I have built about 10 tanks and all have only two!
Yes, you could use the Dubro one. Are you coming to Long Marston this weekend?
Dave
Yes, you could use the Dubro one. Are you coming to Long Marston this weekend?
Dave
09-01-2014, 09:57 PM
#907
The first thing I have done on this bird was to make sure the tank would fit, I was not surprised that I had to sand/shave a little wood of the sides to make the tank to fit into the plane, it was a tight fit, but I didn't realize yet, that the tank was not fitting because it was also hitting the former in the front, I checked the entire thread and also looked around for solutions, since I didn't want to place the air tanks in top of the gas tank to begin with, I first thought of raising the gas tank by about half inch, maybe some anti vibration foam or anything else to raise the tank half an inch. Then I just decided to rip the front former off and cut the rear one and make a new one in front. If you look at my pictures, the left hand side of the former that holds the tank in the front was already starting to split/break from me trying to force the tank into its location. On the front former I made the cut-outs so that I can put in and remove the air tanks if they ever need servicing. I know everyone places their UAT in the front of the plane but in the rare chance that you drain all your fuel or have some kind of fuel problem, you could end up with a tail heavy airplane. I think I will just place the UAT in top of the Gas Tank to avoid that very little possibility.
09-01-2014, 11:24 PM
#908
Thread Starter
Interesting! Not had that one before, but i'm just fitting out an Xcalibur for a customer and I had never tried the tank fit! This one is snug, but fits OK. Will check a few others.
Dave

Dave
09-01-2014, 11:43 PM
#909
Thread Starter
Right, just had one of my crazy moments, we need an RAF scheme demo model, so with Long Marston this coming weekend I think I'm going to build another Xcalibur leading up to the event. My Sports Scheme model was built in the three days before our March LM event, with the customers build at fit out stage and everything instock for another I've grabbed a M&R servo/lead set, P-100Rx etc from stock and I'm going to build this one. It will be exactly the same as the Sports scheme on equipment, since that's been flawless.
First job is to run in and centre servos and we are off!
If I get some freedom I should have two Xcaliburs done by the weeks end.
Oh, tank fits easily on this one!

First job is to run in and centre servos and we are off!
If I get some freedom I should have two Xcaliburs done by the weeks end.
Oh, tank fits easily on this one!
09-02-2014, 05:55 AM
#912

I am so happy i bought one , this is just a great sport jet for the everyday flyer
i even managed to pack this into the baggage compartment of a ford focus station together with 20 litre kero bottle , tool box wife and 3 kids and a large suitecase when we went on vacation
last weekend flying shots


BTW fitted with Electron retracts , very happy with them , they worked flawlessly
i even managed to pack this into the baggage compartment of a ford focus station together with 20 litre kero bottle , tool box wife and 3 kids and a large suitecase when we went on vacation
last weekend flying shots
BTW fitted with Electron retracts , very happy with them , they worked flawlessly
Last edited by izzy; 09-02-2014 at 05:59 AM.
09-02-2014, 09:53 AM
#914
Thread Starter
OK, prep day, wood work is easy as I have a card pattern from the first one, so two coats of epoxy and a grey finish.
Undercarriage checked, brakes lightly greased and next job tonight hinging.
The other build is progressing, nose steering complete and silicon bullets added to dry, Flap servo in with Dubro allen screws. Tank built using GB high flow felt clunk as my original.


Undercarriage checked, brakes lightly greased and next job tonight hinging.
The other build is progressing, nose steering complete and silicon bullets added to dry, Flap servo in with Dubro allen screws. Tank built using GB high flow felt clunk as my original.
09-02-2014, 11:54 PM
#916
Thread Starter
Started fitting gear, this one has the nipples facing different directions, so route one on one of the airlines-through former!
I use a drill to spot the centre of each hole, then drill 3.2mm then tap M4.


I use a drill to spot the centre of each hole, then drill 3.2mm then tap M4.
09-03-2014, 02:20 AM
#917
Will keep you updated.
See you at jet power. Will you have any RAF scheme available for sale. Might buy another. I need the RAF scheme.
It really calls me....
09-03-2014, 04:05 PM
#919

Join Date: Mar 2002
Location: TWICKENHAM, UNITED KINGDOM
Posts: 401
Likes: 0
Received 1 Like
on
1 Post
Hi,
I bought one from David on Monday and flew it today. Its an easy build ( when you have seen inside the one DW built !) and flies off the board.
I reduced throws by 3mm all round for my style as I always find recomeded throws too much for me.
C.G.@ 170 jetcat 100 RX and all stock items, gear servos etc. I used an Evojet valve for the gear, another single Evojet valve for the brakes which work very well and with this unit are very progressive. Try putting some expo in the mix as well as the pulse mode. Needed the weight up front which is why these units were used from my stock drawer.
1 x 330 3s lipo for ECU and 2x 2700 2s for RX. No nose weight needed on top of this.
Had 3 flights and the sun went down and enjoyed much. This is an ideal second jet to take to a jet weekend as insurance to fly if problems occur or to simply load the car and have an easy day flying with no hassle.
Only comment I have is to sort out the nose fixing arrangement which I do not like much although it sort of worked today.
09-03-2014, 10:34 PM
#920
Thread Starter
David
Glad you had a good evenings flying. See you at LM, should be a fleet of Xcalibur models there!
i don't mind the fixing screw, though I have confidence in my power set up and only charge the Rx batteries every other flying session.
Dave
finished the hinging last night on the second one, gear and airlines all in. Servo leads and turbine and the second one will be done
09-04-2014, 07:48 AM
#921
Thread Starter
Struggling a bit here, trying to do two does not seem to save much! So concentrating on the one I need to fly Saturday, slow day as work keeps cropping up :-)
Gear and valve in, started the radio installation.
Dw

Gear and valve in, started the radio installation.
Dw
09-04-2014, 10:06 AM
#922
Thread Starter
Having been a slacker the last couple of nights, its a longer session in office tonight to get somewhere.
My prefered Behotec all-in-one valve. New P-100Rx turbine, both blocks used, you screw the mount to the blocks, pop that in, mount the turbine, drill through the blocks larger hole at end of canopy slot is for larger dril (I drill and tap the bearers M4)
Turbine in...I love Rx turbines one lead and tube!
09-04-2014, 10:42 AM
#923
Thread Starter
After having to do this on the first two, I was told this latest batch of kits finally had a smaller hole...nope!
1/8 ply spacer glued in and my prefered JR DS 3401 with JR Superservo arm.
Still only 20 minutes for one boom!


1/8 ply spacer glued in and my prefered JR DS 3401 with JR Superservo arm.
Still only 20 minutes for one boom!
09-04-2014, 02:37 PM
#925
Senior Member
Join Date: Aug 2002
Location: Colchester, Essex, UK,
Posts: 344
Likes: 0
Received 0 Likes
on
0 Posts
Just wanted to show my appreciation for the advice on this thread and individual help I've been given.
I'm new to Jets having been flying turbine and large scale helis and the information here was a godsend.
Wren 75, setup with a CofG at 180mm, Savox servos all round, two 5000 nicads in the nose.
Throws as per the manual, crow braking with full flap, 8mm ailerons and 2mm down elevator. Take off with half flap.
Few test taxis just to get a feel, then took off, one click of elevator and one click of aileron was all that was needed to trim and it was probably the most pleasant maiden I've ever had, flies like its on rails.
Come the landing, if I'm honest I was cacking it !!! Keep calm, throttle back crow braking on, little bit of down elevator to get the nose down and she sat there in the perfect position and I had possibly the smoothest landing I've ever had. Followed that with two more flights, so three in total this afternoon.
A very happy man !!
Kit went together well the main niggle I have is with the wing bolts. Mine were 25mm, and only the last 2-3mm of thread catches, with the tube in position the bolts aren't long enough to grab the captive nut. Swapped them with 30mm bolts and I'm much happier.
Quality wise, nose cone is a bit of a poor fit, some small gaps around the boom and wing mounting, one aileron is twisted slightly and the fill valve leaks a bit.
Extras
CA'd the main tyres on as a club member lost a tyre on take off.
Fully sealed all the covering on the wing panels and elevator (Thank my daughter for her clear nail varnish!)
Put my air tanks up front.
Thats about it.
Cracking aircraft !!!! Now its time to settle in, get some more air time and start to learn these jet manoeuvres )
)
Cheers
Lee
I'm new to Jets having been flying turbine and large scale helis and the information here was a godsend.
Wren 75, setup with a CofG at 180mm, Savox servos all round, two 5000 nicads in the nose.
Throws as per the manual, crow braking with full flap, 8mm ailerons and 2mm down elevator. Take off with half flap.
Few test taxis just to get a feel, then took off, one click of elevator and one click of aileron was all that was needed to trim and it was probably the most pleasant maiden I've ever had, flies like its on rails.
Come the landing, if I'm honest I was cacking it !!! Keep calm, throttle back crow braking on, little bit of down elevator to get the nose down and she sat there in the perfect position and I had possibly the smoothest landing I've ever had. Followed that with two more flights, so three in total this afternoon.
A very happy man !!
Kit went together well the main niggle I have is with the wing bolts. Mine were 25mm, and only the last 2-3mm of thread catches, with the tube in position the bolts aren't long enough to grab the captive nut. Swapped them with 30mm bolts and I'm much happier.
Quality wise, nose cone is a bit of a poor fit, some small gaps around the boom and wing mounting, one aileron is twisted slightly and the fill valve leaks a bit.
Extras
CA'd the main tyres on as a club member lost a tyre on take off.
Fully sealed all the covering on the wing panels and elevator (Thank my daughter for her clear nail varnish!)
Put my air tanks up front.
Thats about it.
Cracking aircraft !!!! Now its time to settle in, get some more air time and start to learn these jet manoeuvres
)Cheers
Lee