


Ripmax Xcalibur Sports jet
 12-11-2018, 10:36 AM
#2326

My Feedback: (4)
Join Date: Jul 2013
Location: Millville,
NJ
Posts: 143
Likes: 0
Received 0 Likes
on
0 Posts
OK, so starting to run my air lines, any secret to getting the coil memory out of these air lines, or just have to deal with it, tried heating them, still twang back to a coil shape?
 01-11-2019, 04:06 AM
#2328

Hi guys.
Just got my Xcalibur, and wanted to dry fit the parts.
Then I found out that I have a defective nut in the left front boom mounting.
The nut is glued in, but there are no threads in it.... So the screw just pushes throgh. There is no material in it to re-tap it. And there is no way to replace it, as the intake duct blocks it.
Whats the best way of fixing it?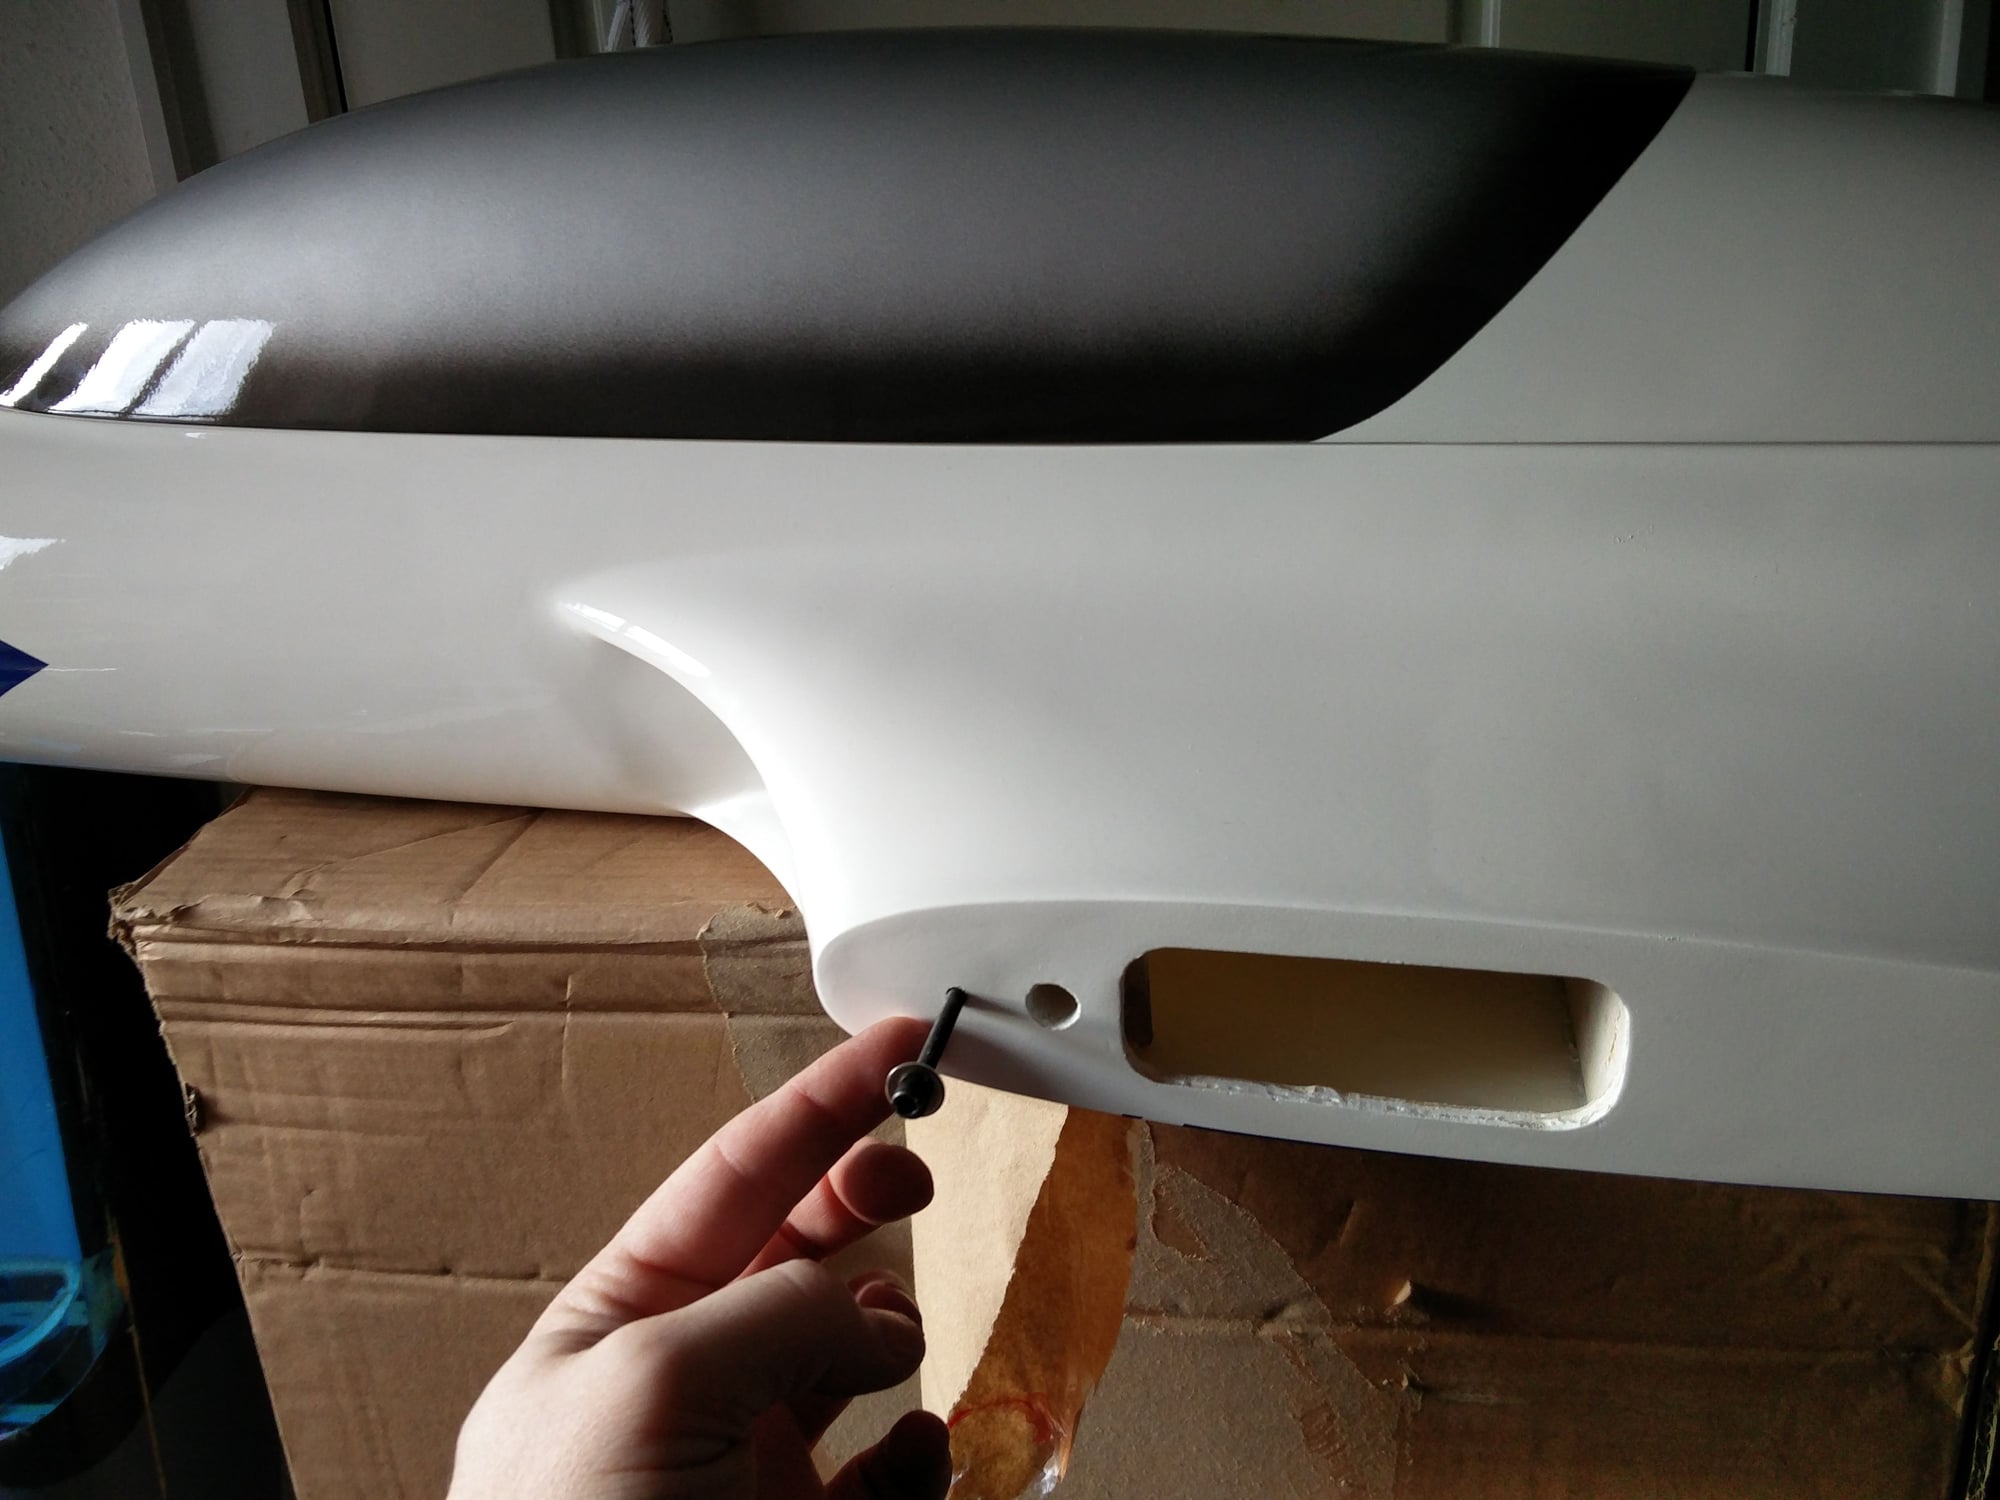
01-11-2019, 04:16 AM
#2329
Join Date: May 2014
Posts: 344
Likes: 0
Received 0 Likes
on
0 Posts
i would coat the bolt threads with wd40. then use hysol glue into the hole with enough say 4cc/4ml then insert bolt a bit more into the wing than it would normally be when boom is bolted on. then tilt the airfram on its side so the glue surrounds the bolt as it dries.. i might even be tempted to dril a second hole near bolt hole for a second round of glue to be added. then when dry i would use visegrip pliers to remove bolt and all should be fine from there..
this is just my opinion im sure others will have more
my first thought was a blind nut glued in from behind going through a slice inside the oval opening to get to it....not sure that isnt a viable choice also
this is just my opinion im sure others will have more
my first thought was a blind nut glued in from behind going through a slice inside the oval opening to get to it....not sure that isnt a viable choice also
 01-11-2019, 06:10 AM
#2331
Thread Starter
Order M4 threaded insert from Amazon or ebay, drill and screw that in. The M4 screws are mainly for transport, the pin and spar share the load
01-11-2019, 08:41 AM
#2332
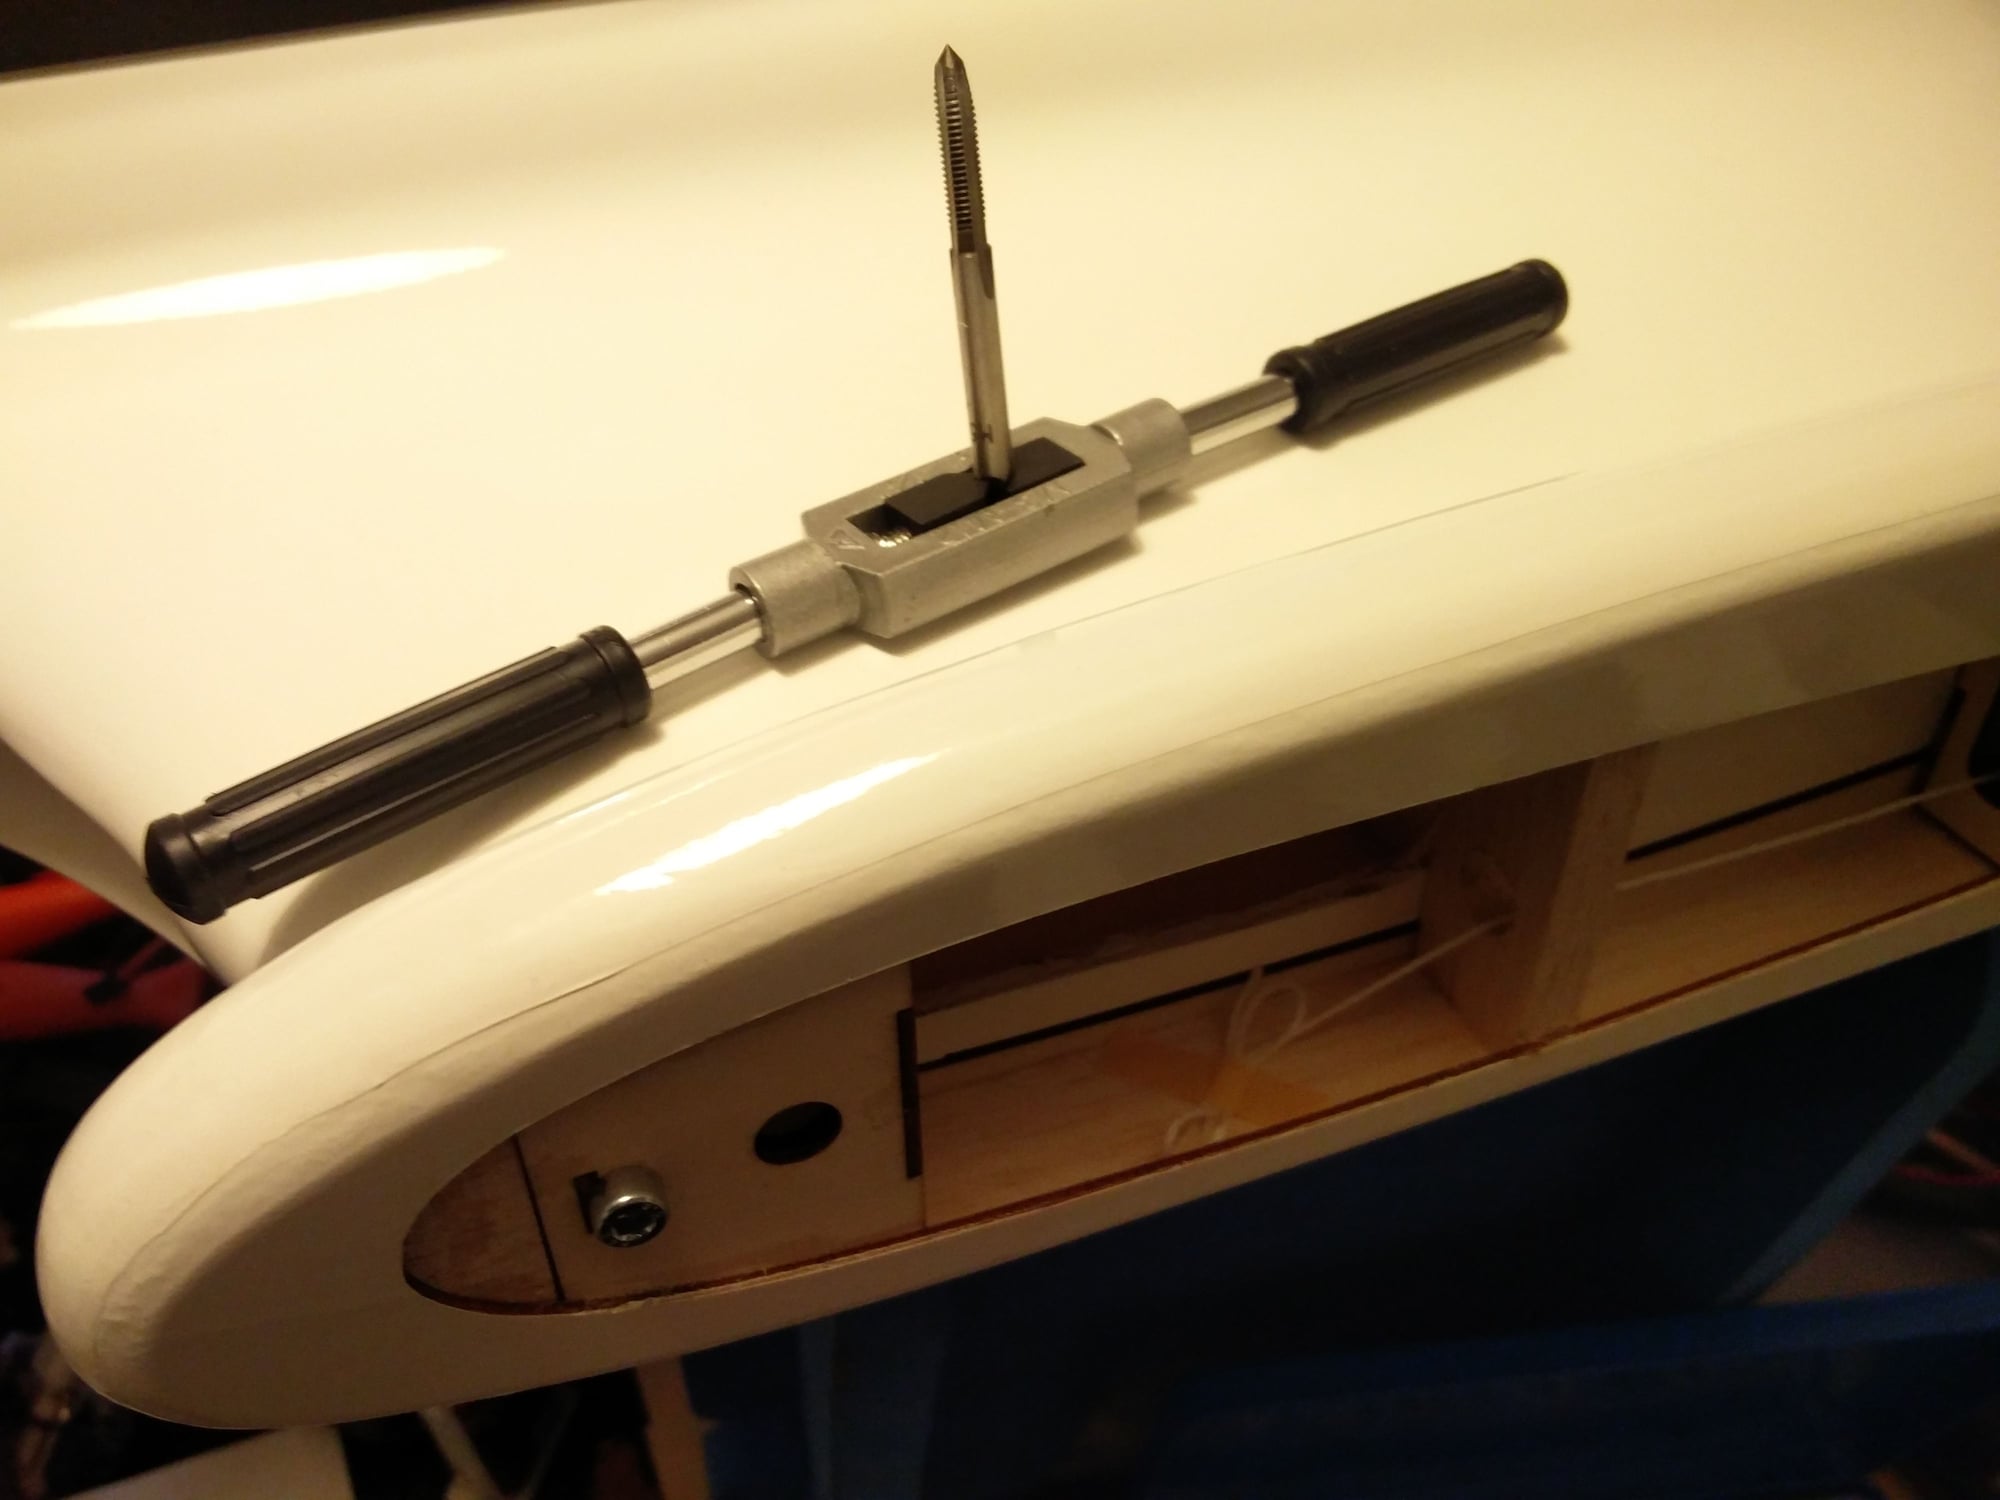
Thanks for the tips.
There was enough meat in the existing nutsert, that i could dril it up to 4.5mm, and tap it to a M5 bolt. This seems to work.
Now ill know why if it stalls to the left side because of the extra weight :-)
There was enough meat in the existing nutsert, that i could dril it up to 4.5mm, and tap it to a M5 bolt. This seems to work.
Now ill know why if it stalls to the left side because of the extra weight :-)
Last edited by SJN; 01-11-2019 at 08:45 AM.
01-21-2019, 09:36 PM
#2333
I am trying to figure out if my existing landing gear will fit the Xcalibur before I place an order. Is it possible for someone to measure the length of the landing gear axle to retract? Also, what size tires are used on the mains and nose?
Thanks,
Tone
Thanks,
Tone
01-21-2019, 10:54 PM
#2334
Mains - 120 mm extended, 17 mm trailing, Nose - 135 mm, 30 mm trailing. Nose wheel diameter 70 mm, mains 75 mm.
01-22-2019, 05:37 AM
#2335
Im also looking for some landing gear with 6mm joiner pins. So far I have only found jet-a1, but none are in stock, and the manufacturer website is broken, and I have not got an email repy from them...... So they are out.
Electron also make some, and I have sent them a mail. The 110mm with 19mm offset seem to fit great. 120mm are too long.
https://www.electron-retracts.com/pr...gs-offset=19mm
Also found these from the UK anyone tried these ?
http://kingfisher-aviation.com/produ...railing-links/
Electron also make some, and I have sent them a mail. The 110mm with 19mm offset seem to fit great. 120mm are too long.
https://www.electron-retracts.com/pr...gs-offset=19mm
Also found these from the UK anyone tried these ?
http://kingfisher-aviation.com/produ...railing-links/
Last edited by SJN; 01-22-2019 at 05:42 AM.
01-24-2019, 11:41 AM
#2337
01-25-2019, 08:00 AM
#2338
Join Date: Jan 2019
Posts: 3
Likes: 0
Received 0 Likes
on
0 Posts
Good afternoon gents: Standard size Xcalibur is my first jet and whilst I have made a start, (this a huge but rewarding thread to search), so please forgive if this has been covered earlier. I am installing Electron retracts with the nose wheel steering and I am looking for advice please regarding the closed loop wire system required. Specifically, where exactly and what size holes to drill for the wires to pass through the nose-wheel well to line up with the steering servo yoke.
Any pics or pointers will be much appreciated.
Any pics or pointers will be much appreciated.
01-25-2019, 08:19 AM
#2339
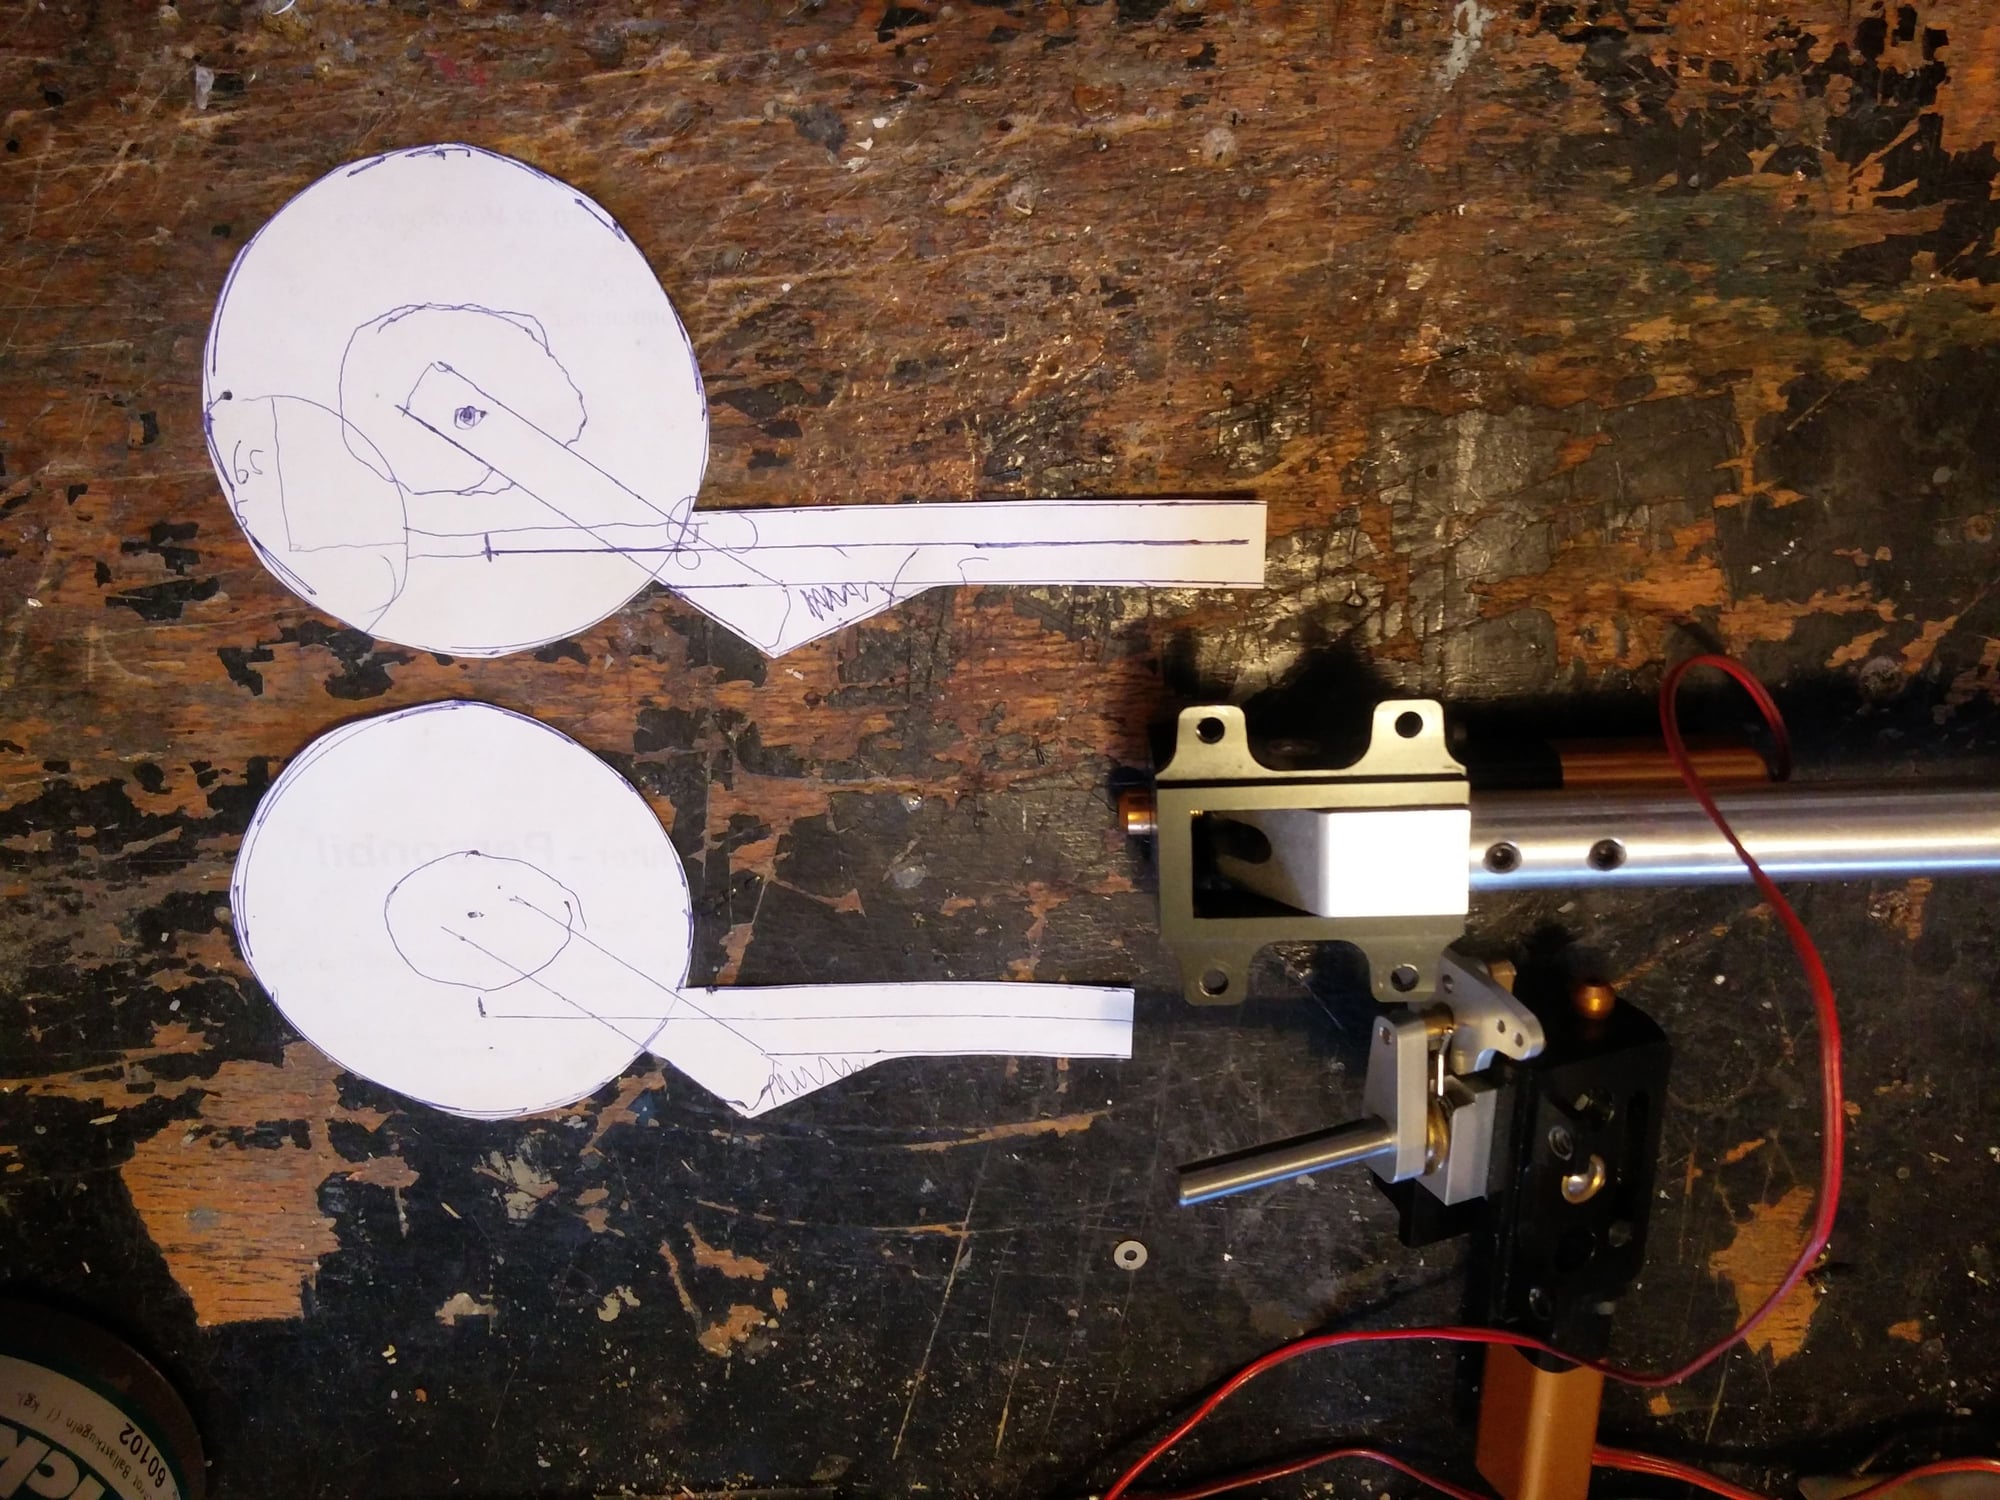
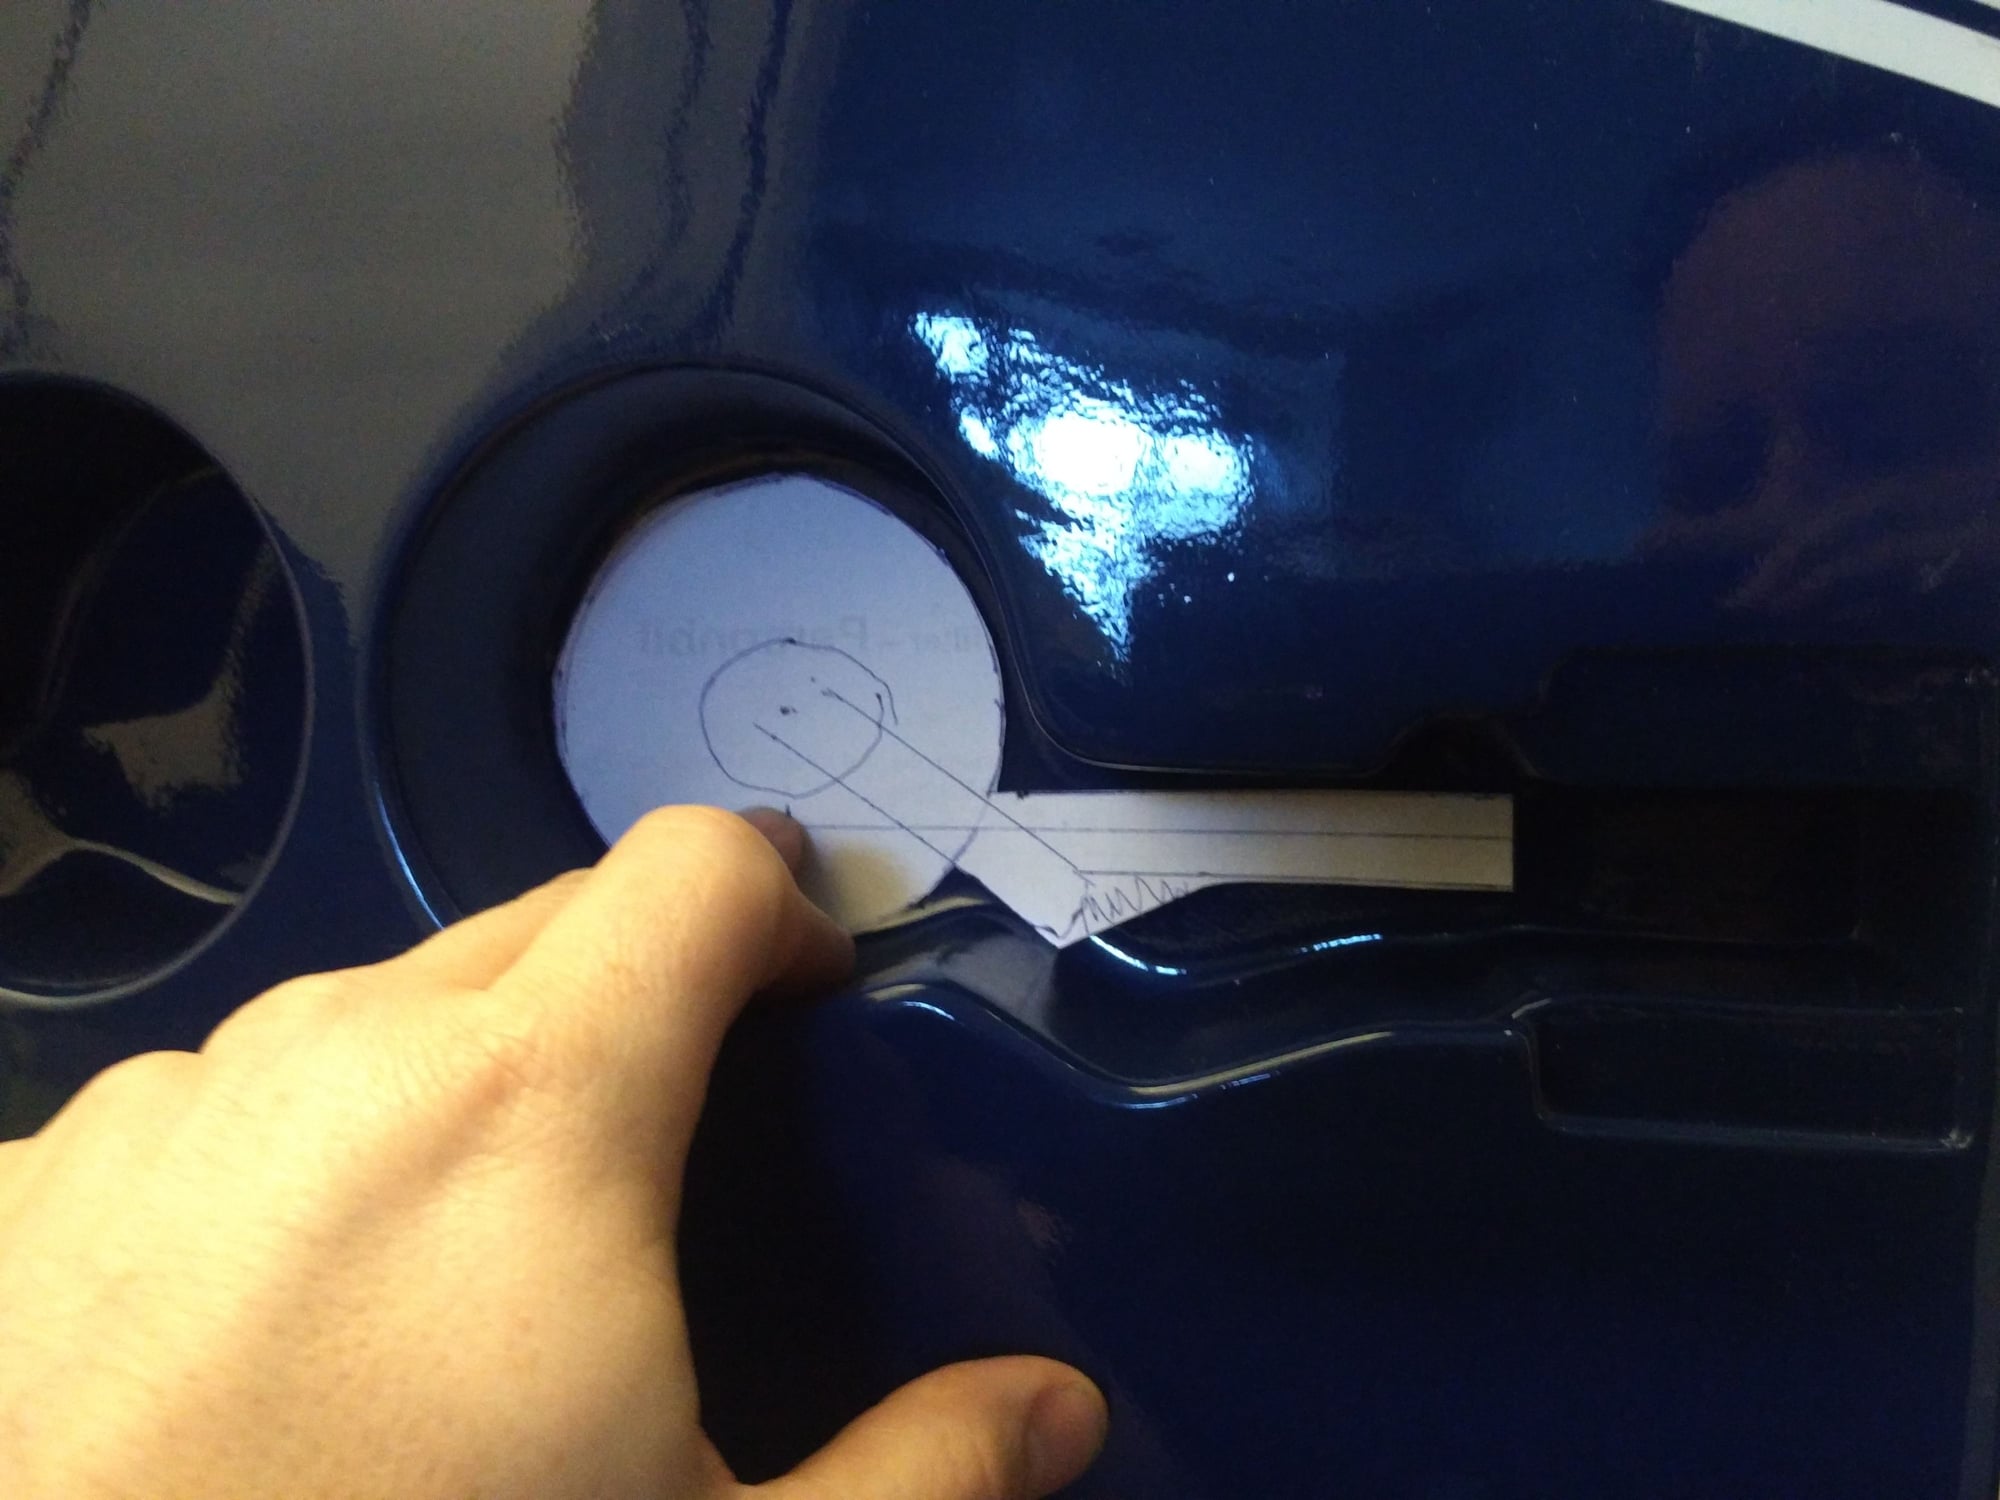
These are the pictures from the electron site, and you can see what has been done :-)
There are also 2 types of steering, as you can see there has been made a hole in the fuselage for the stock electron steering.
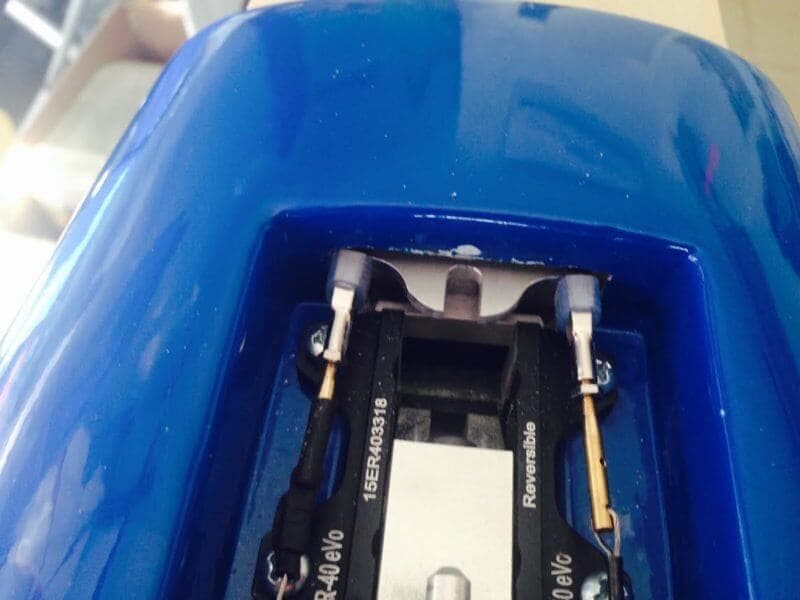
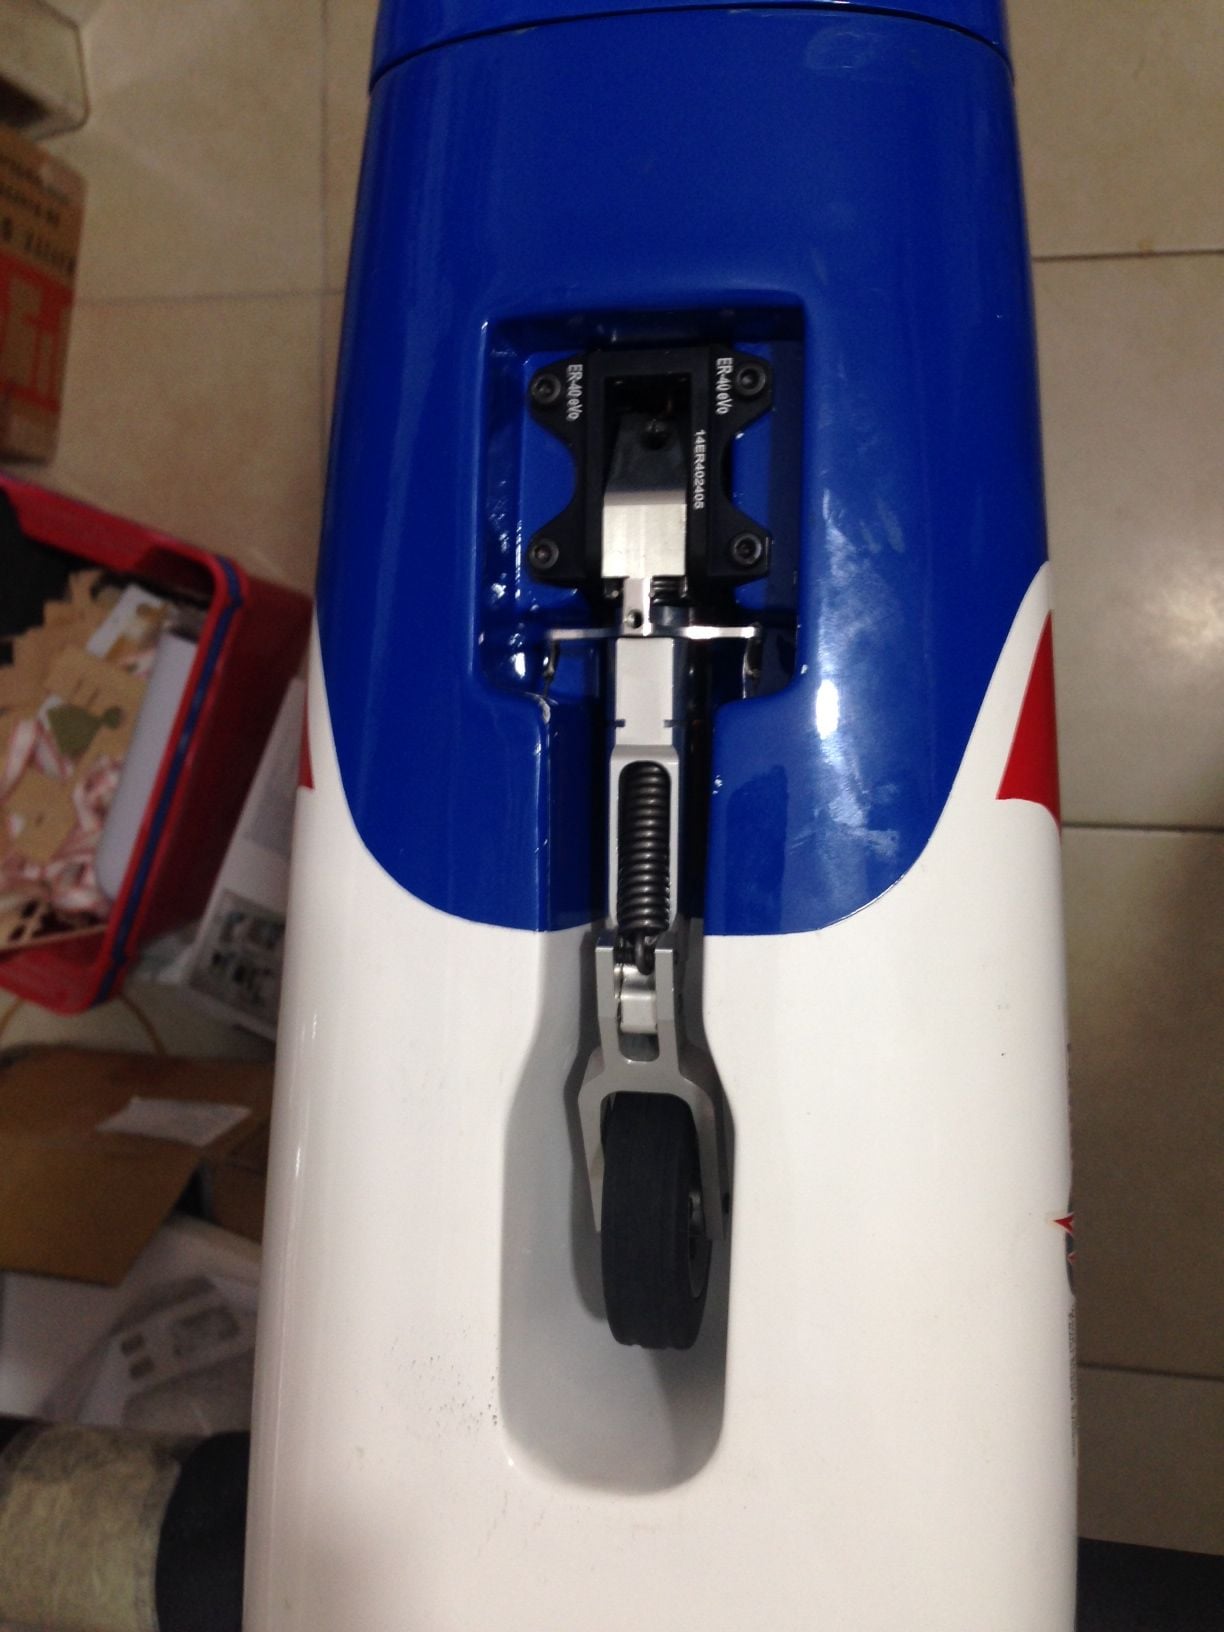
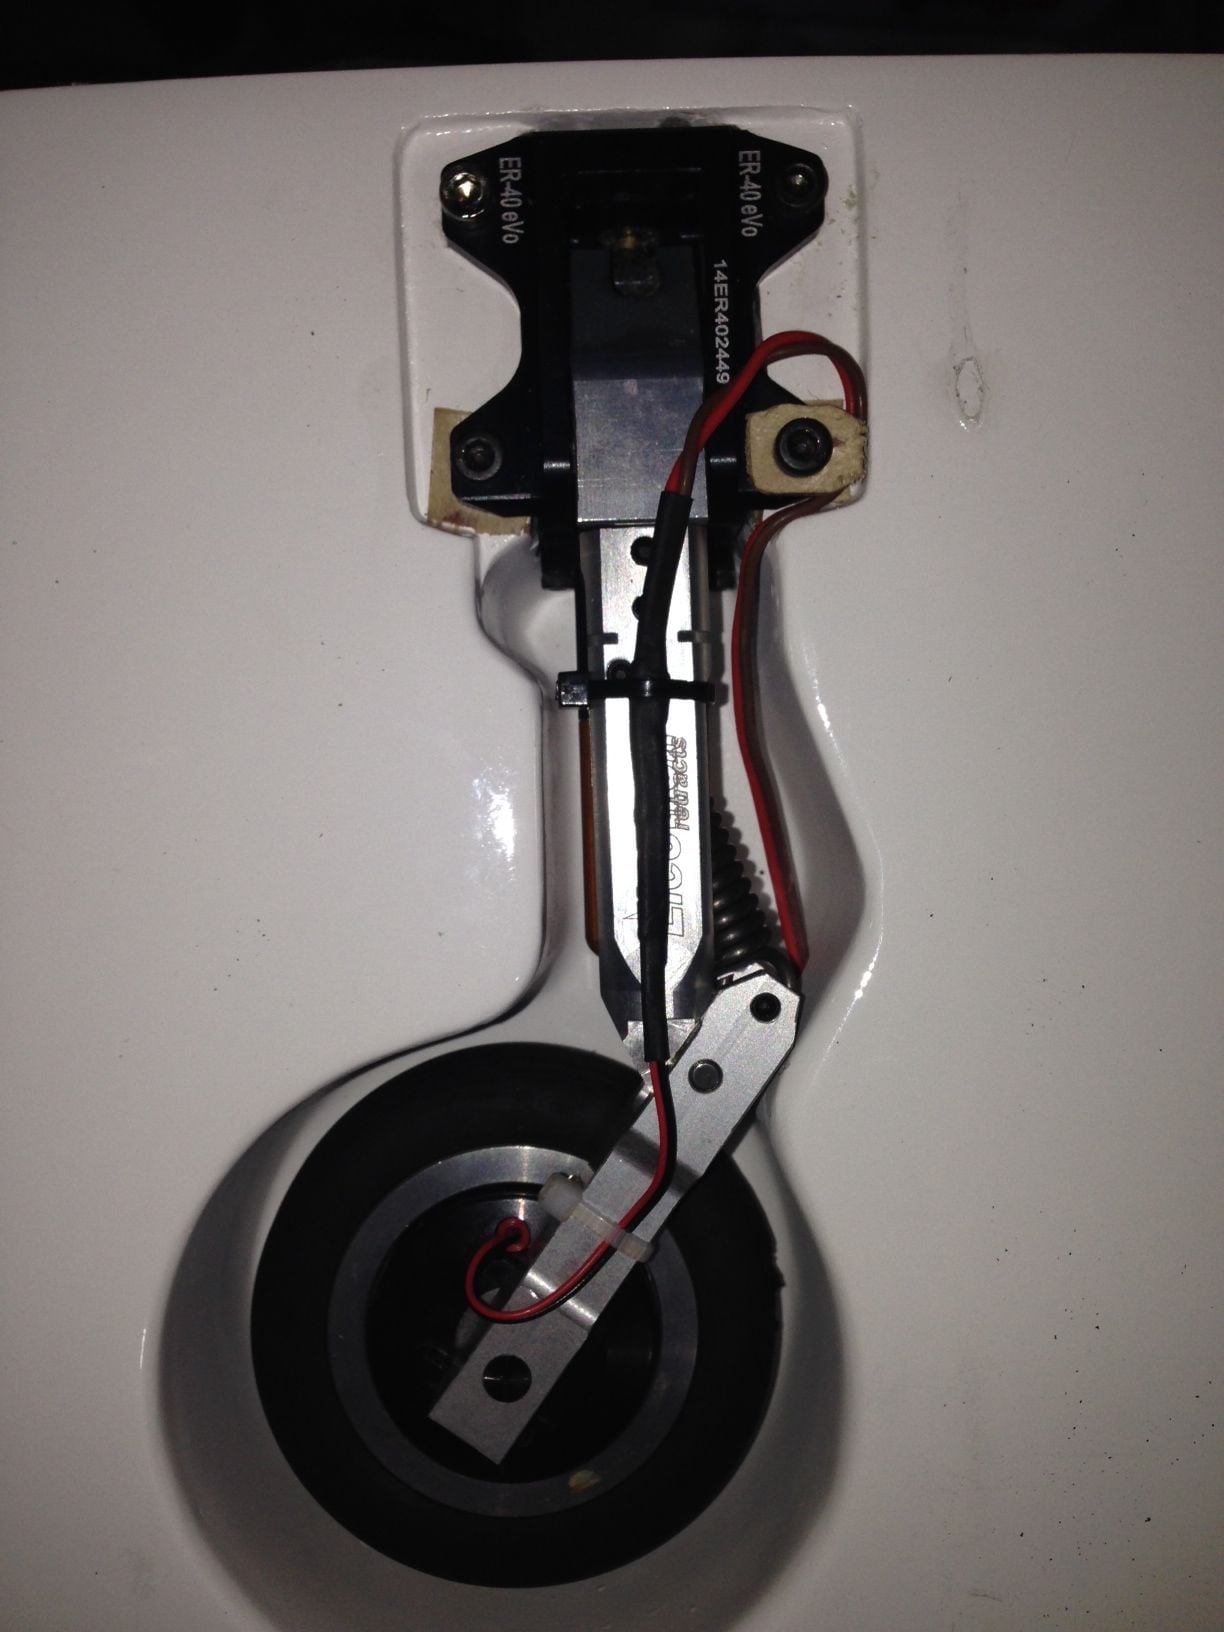
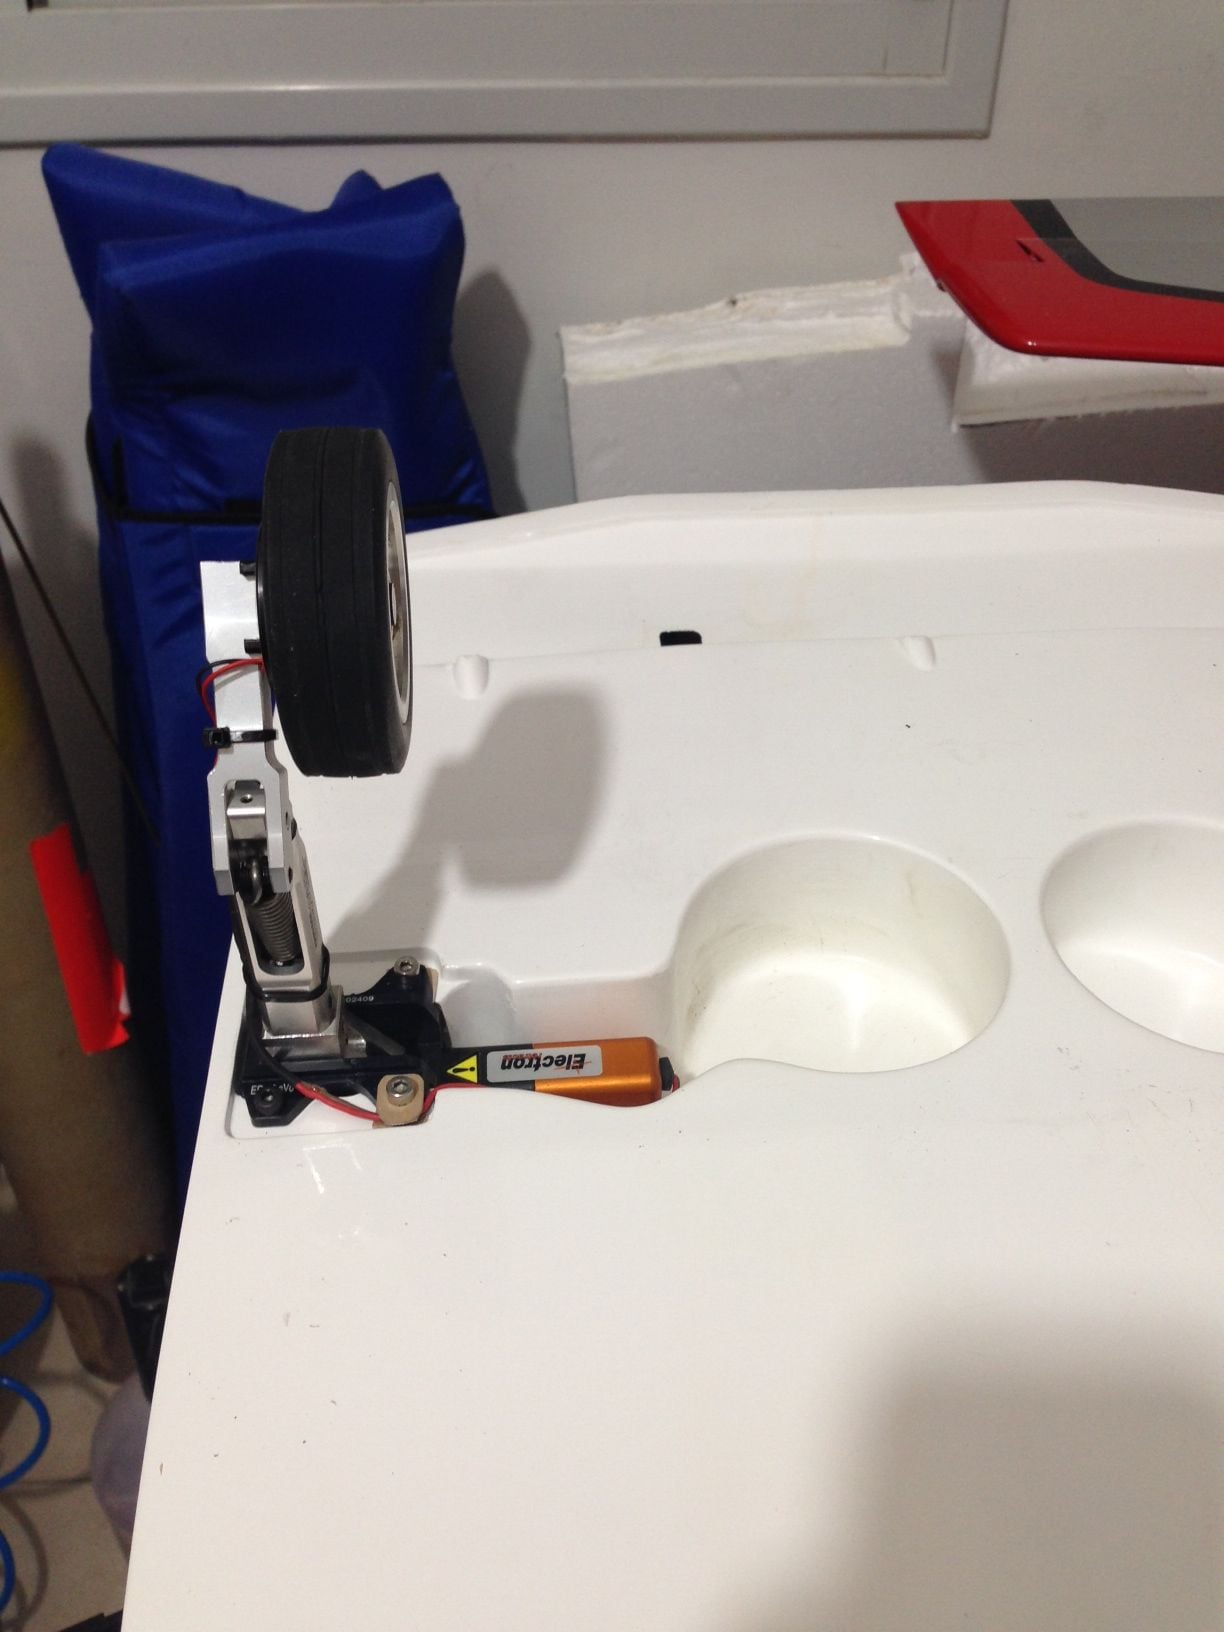
There are also 2 types of steering, as you can see there has been made a hole in the fuselage for the stock electron steering.
01-26-2019, 04:12 AM
#2340
Join Date: Jan 2019
Posts: 3
Likes: 0
Received 0 Likes
on
0 Posts
Thanks for reply and pics. The first one is the same as my set-up up with the Electron steering unit and I'm clear on the forward cut-out etc. thanks. The second pic shows the cable pass through hole with the non-electron steering unit. I was hoping to find a pic of where the cables should pass through the rear wall of the nose wheel bay without chaffing. I want to finish up with the smallest acceptable hole as possible and whilst I can roughly work out the angle I am hoping to get the hole cut spot-on first time.
Grateful for all input.
Grateful for all input.
01-28-2019, 09:38 AM
#2341
I noticed that most people are using the stock plastic control horns. Are you guys using plastic servo arms also? If not, what metal arms are being used that allow use of a clevis without significant slop?
thanks,
Tone
thanks,
Tone
01-28-2019, 10:29 AM
#2342
Thread Starter
All our JR servo models use the Super Servo arm which was a HD nylon arm. Savox HD arms are ok too, Futaba std arms are too brittle.
Clevis at each end
Clevis at each end
01-28-2019, 01:28 PM
#2343
02-09-2019, 11:06 PM
#2344
Junior Member
Join Date: Feb 2019
Posts: 9
Likes: 0
Received 0 Likes
on
0 Posts
Hi
I am building up an Excalibur with air retracts.
I have noticed in some pictures that some people have safety wire ties on the airlines at each junctions others dont.
I have noticed that the supplied tubing is very hard to pull off once on a barbed fitting.
question ... do they need a safety wire on each joint... ??
also on the main retract hinge point there is a hole that is tapped with a thread however there is no grub screw inside ??
Is there supposed to be one.. it looks like it would safety the main hinge pin..
thanks for any answers.
Ray
NZ
02-10-2019, 12:10 AM
#2345
Thread Starter
We almost never lock wire joints, but it’s much cooler here than some countries, if the tube gets warm it softens, so can on certain fitting design, slide off with pressure. The Xcalibur retract nipple has sharp barbs, so I would say even in hot conditions it’s fine without.
There should be an M3 x 6 set screw that locks the pin in place. They do miss it from time to time and even fitted they are often loose.
Dave
There should be an M3 x 6 set screw that locks the pin in place. They do miss it from time to time and even fitted they are often loose.
Dave
02-10-2019, 05:07 AM
#2346
I fly my Xcalibur with stock air retracts since more than 3 years and in summer we often have 35�C, never had 1 Festo tube off any nipple.
02-11-2019, 11:24 AM
#2347
Junior Member
Join Date: Feb 2019
Posts: 9
Likes: 0
Received 0 Likes
on
0 Posts
Thanks Dave and Denis, very much appreciated.
Ill get some grubscrews for the retract hinge pin.
I also found most of the small wheel screws were all very loose... removed and Loctite now.
once again Thanks guys.
Ray
NZ
Ill get some grubscrews for the retract hinge pin.
I also found most of the small wheel screws were all very loose... removed and Loctite now.
once again Thanks guys.
Ray
NZ
02-18-2019, 04:00 PM
#2350
I am building my Xcalibur that I purchased from Lindinger. I have only mounted the control horns on the rudder, however I have noticed that there is not retainer for the control horns that goes on the other side of the hinged surfaces. I was under the impression that hinges are supposed to be through bolted? Also, it seems to me that the rudder is hollow. Is this correct?
Thanks,
Tone