F104 Starfighter (NASA N820) Build
 09-21-2013, 09:44 AM
#26

Thread Starter

That's interesting thanks... Why have orange and white Nav lights on both sides? I'll have to do some further investigation... Thanks re the book link. The models owner has ordered a copy 

 09-26-2013, 03:58 AM
#28
Thread Starter
Slowly at the moment...  I'm just finalising all the bits for the Lens kits, the printed box's have a 2 week lead time and I'll be making a a load of kits early next week as all the materials came today.
I'll be starting properly soon so look out for updates
I'm just finalising all the bits for the Lens kits, the printed box's have a 2 week lead time and I'll be making a a load of kits early next week as all the materials came today.I'll be starting properly soon so look out for updates
10-27-2013, 04:07 AM
#29
Thread Starter
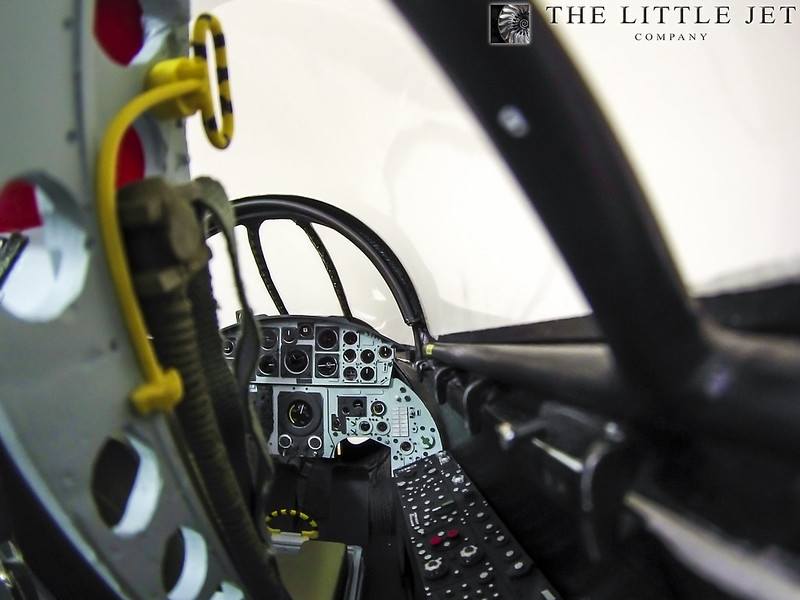
The cockpit is nearly finished, this shot was taken with a GoPro that will be mounted in this position in the jet. I have an animated OLED radar display and fibre optic lights to install.
10-27-2013, 02:03 PM
#30


Join Date: Jun 2006
Location: Gold Coast, Queensland, AUSTRALIA
Posts: 1,469
Received 26 Likes
on
24 Posts
Alex,
Is the cockpit, the one from SM or have you made a different one? Also, are you putting together an internal and external light kit for the F-104? As for the pilot - are you making it, or getting it from a supplier?
Cheers,
Jan
Is the cockpit, the one from SM or have you made a different one? Also, are you putting together an internal and external light kit for the F-104? As for the pilot - are you making it, or getting it from a supplier?
Cheers,
Jan
 10-27-2013, 11:26 PM
#34
Thread Starter
Thanks red
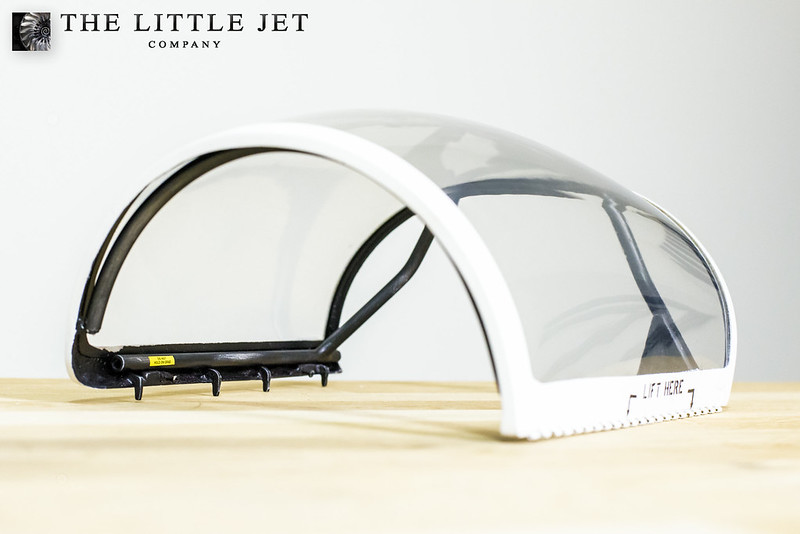
Hi Jan, its a Skymaster cockpit but Ive added some detail. The whole cockpit has been painted black and weathered accordingly. This is the canopy frame after a bit of detailing.
I hadn't planned on selling any of the cockpit lighting or OLED radar displays but if there;'s enough interest I can. I do plan on selling a lens kit which includes the lenses only (two orange, two clear, one large red, one large green), semi circular black vinyl blanks for the aft lights and scale like fastenings. These should be available in the first few weeks of November.
The full lighting kit will include the following and be available in the new year.
These will be made to order. They will be custom built so expect a 3 week wait before shipping. T
- 6 fuz lights and lenses
- 1 red beacon light (bottom of the fuz)
- 1 white strobe (top of the fuz)
- 2 large landing lights for the mains (inc brackets)
- 1 nose oleo landing light.
- 1 red light for the wing or tank
- 1 green light for the wing or tank
- 1 afterburner ring
- 1 Skyfire lighting control unit
All wiring and soldering will be completed and all looms will be supplied at the correct lengths. The Skyfire Lighting control unit will be pre programmed and tested before dispatch. Its completely plug and play with only the transmitter side of things to set up. A 2cell lipo will be required to run the system but will not be included due to shipping constraints
I hope this helps.
Cheers, Alex
10-27-2013, 11:29 PM
#35
Thread Starter
Also I know facebook isn't everyones cup of tea but I keep my page up to date with all my builds and product related news. I'm not so good with RCU these days but stuff from my page will eventually find its way on here.
https://www.facebook.com/TheLittleJetCompany
Cheers, Alex
https://www.facebook.com/TheLittleJetCompany
Cheers, Alex
10-28-2013, 12:54 PM
#36
Cheers
Red
Last edited by Lownverted; 10-28-2013 at 12:56 PM.
10-29-2013, 10:54 AM
#39
Thread Starter
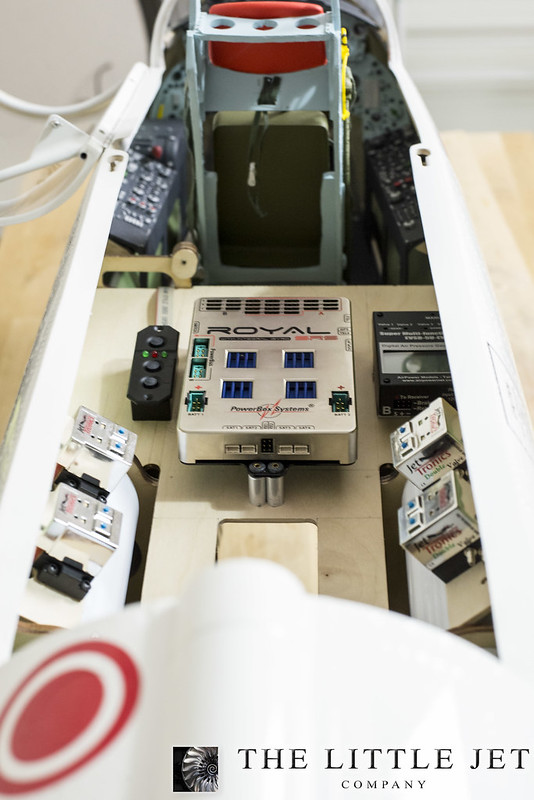
The start of the equipment installation. Custom trays which will be available from me along with the lighting kit in January. All the trays will be blanks so any choice of equipment can be installed.
 10-30-2013, 03:25 PM
#42
Thread Starter
Hello
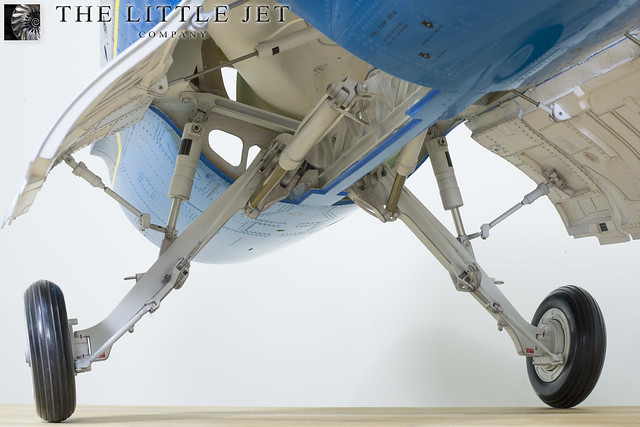
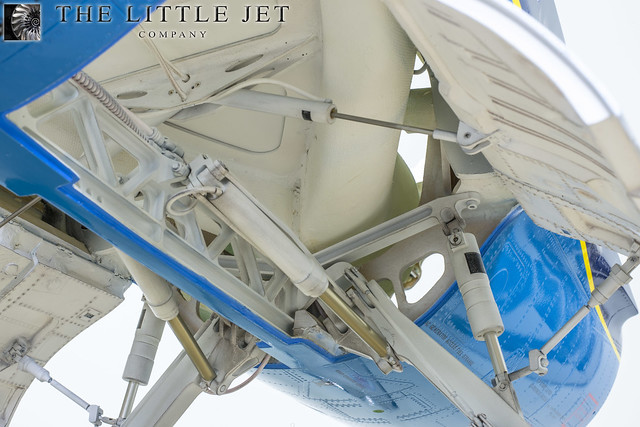
I'll take some video when the gear is up and running but in the mean time have a look at this which shows the sequence on my previous F104 build.
http://www.youtube.com/watch?v=969FGu92X6I
I'll take some video when the gear is up and running but in the mean time have a look at this which shows the sequence on my previous F104 build.
http://www.youtube.com/watch?v=969FGu92X6I
11-03-2013, 12:16 AM
#43
Thread Starter
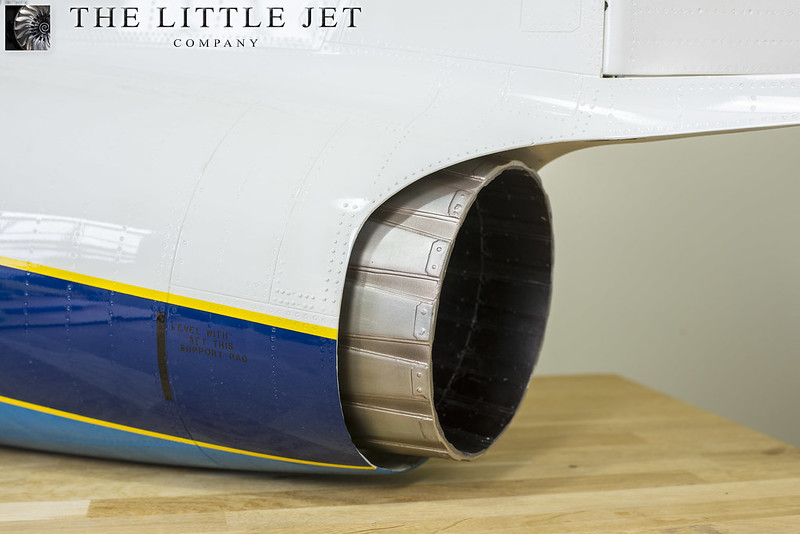
Each section of the Exhaust Nozzle has had a separate piece of flight metal applied then burnished. Five layers of colour from green to black were then layered to create this weathered effect. The effect isn't very photogenic but it does look better in the flesh.
11-03-2013, 11:59 AM
#45
Thread Starter
Hi Jason
The initial plan is to use two PowerBox 4000mAh Lipos in the nose but it won't be decided until I see how the CG is shaping up. The turbine has been changed to a Behotec 220 similar in size and weight to the JetCat 180RX it will be replacing.
A big thanks for the excellent service I've been receiving from Ali Mashinchy especially with the late change of turbine which he was perfectly happy to change even though the JetCat had been payed for and ordered, thanks Al.
The initial plan is to use two PowerBox 4000mAh Lipos in the nose but it won't be decided until I see how the CG is shaping up. The turbine has been changed to a Behotec 220
similar in size and weight to the JetCat 180RX it will be replacing.A big thanks for the excellent service I've been receiving from Ali Mashinchy especially with the late change of turbine which he was perfectly happy to change even though the JetCat had been payed for and ordered, thanks Al.
Last edited by Alex48; 11-03-2013 at 12:52 PM.
 11-04-2013, 10:47 AM
#47
Banned
Join Date: Jul 2013
Location: , UNITED KINGDOM
Posts: 454
Likes: 0
Received 0 Likes
on
0 Posts
I see quite a lot of people using the S bus system in their jets more and more with Powerbox this and Powerbox that and while I appreciate that the planes these systems are used in are generally larger than other planes I also often think that this is perhaps all just added bling and people would be better off going for the keep it simple principal. Anyone else feel the same ?