Go Back  RCU Forums > RC Airplanes > RC Jets
Reload this Page >

Boomerang Torus Merlin 140 Build

Community
Search
Notices
RC Jets Discuss RC jets in this forum plus rc turbines and ducted fan power systems

Boomerang Torus Merlin 140 Build

Thread Tools
 
Search this Thread
 
Old 05-13-2014, 01:45 AM
  #26  
duthie
 
Join Date: Sep 2004
Location: aberdeen, UNITED KINGDOM
Posts: 79
Likes: 0
Received 0 Likes on 0 Posts
Default

Macrs,
Fighteraces in the UK now sell the Ashlok connectors and crimping tools, pins and clables etc.
Old 05-13-2014, 04:53 AM
  #27  
siclick33
 
Join Date: Dec 2003
Location: York, UNITED KINGDOM
Posts: 3,743
Likes: 0
Received 1 Like on 1 Post
Default

You mention Ashlok connectors which I know are hard to find as the guy selling them decided to quit, they are made by Molex and sure if someone planned to they could source and sell them - just need a UK model company to do the leg work.......
I have the housings and various 'grades' of pins
Old 05-13-2014, 11:43 AM
  #28  
Colin_Mc
Thread Starter
 
Colin_Mc's Avatar
 
Join Date: Feb 2006
Location: Scotland
Posts: 203
Likes: 0
Received 1 Like on 1 Post
Default

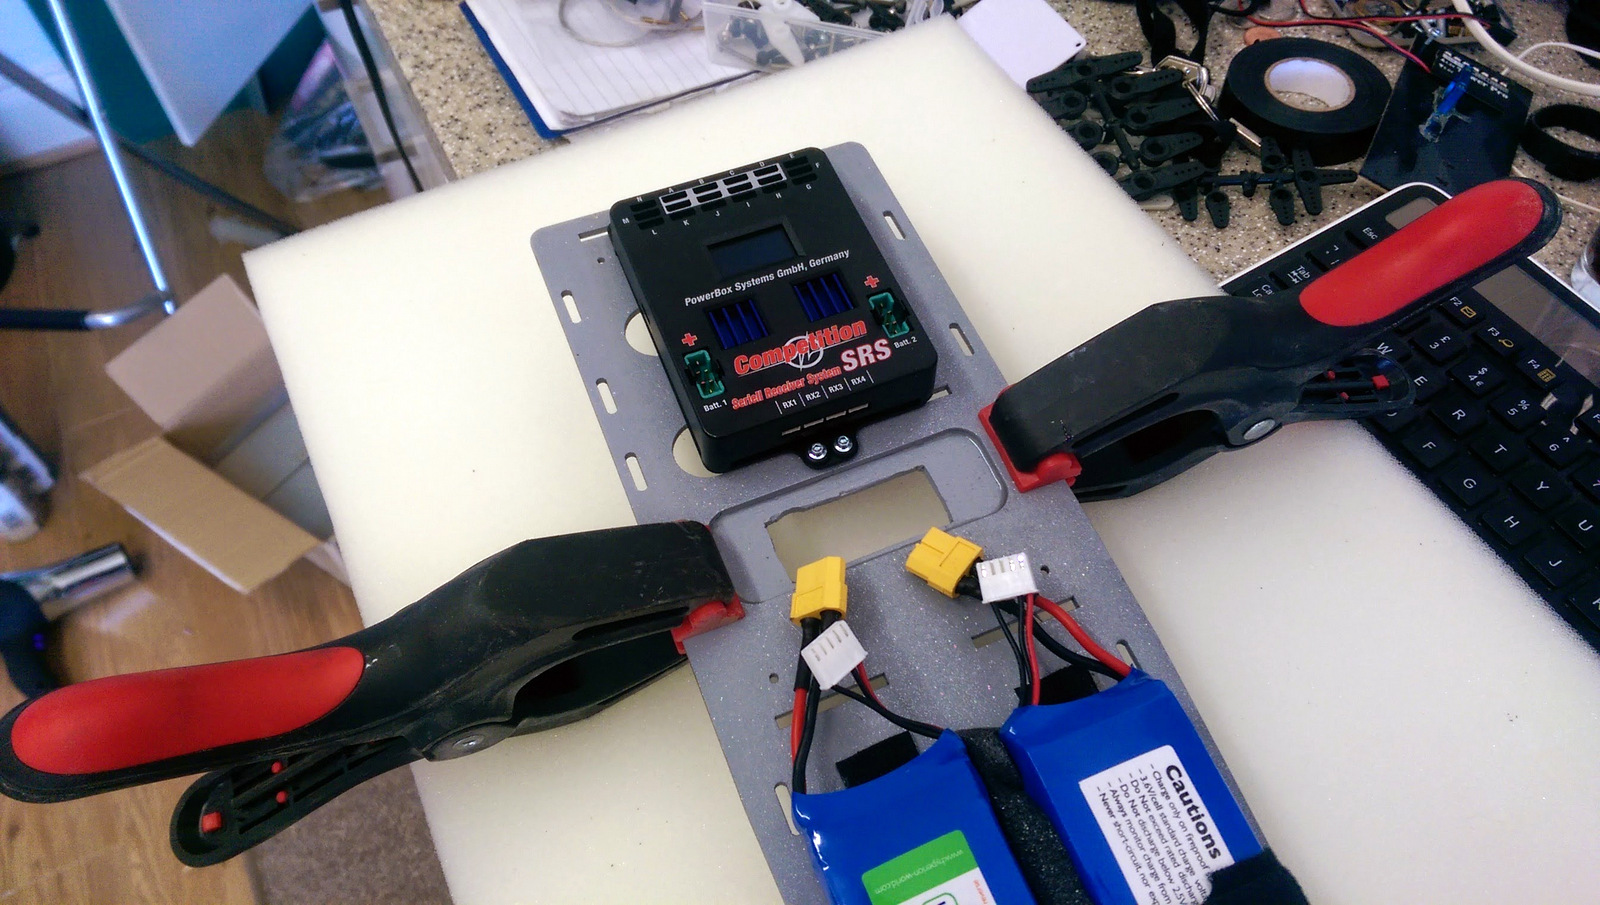
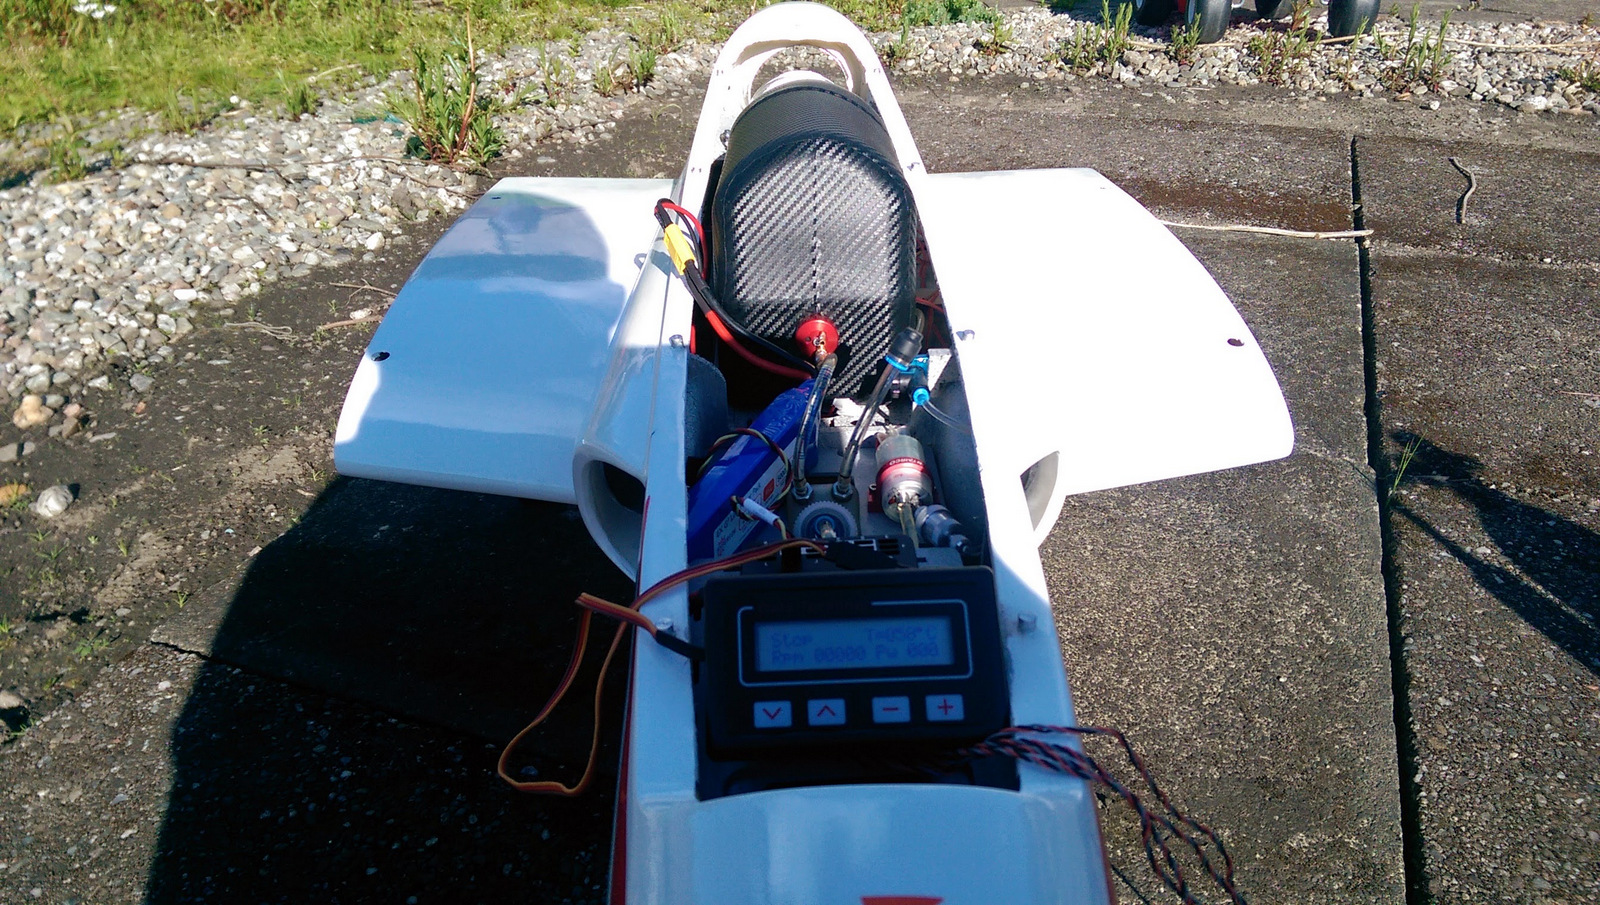
Done, just a few cables to tidy up a CAT to install when I receive it and the airframe to balance properly.


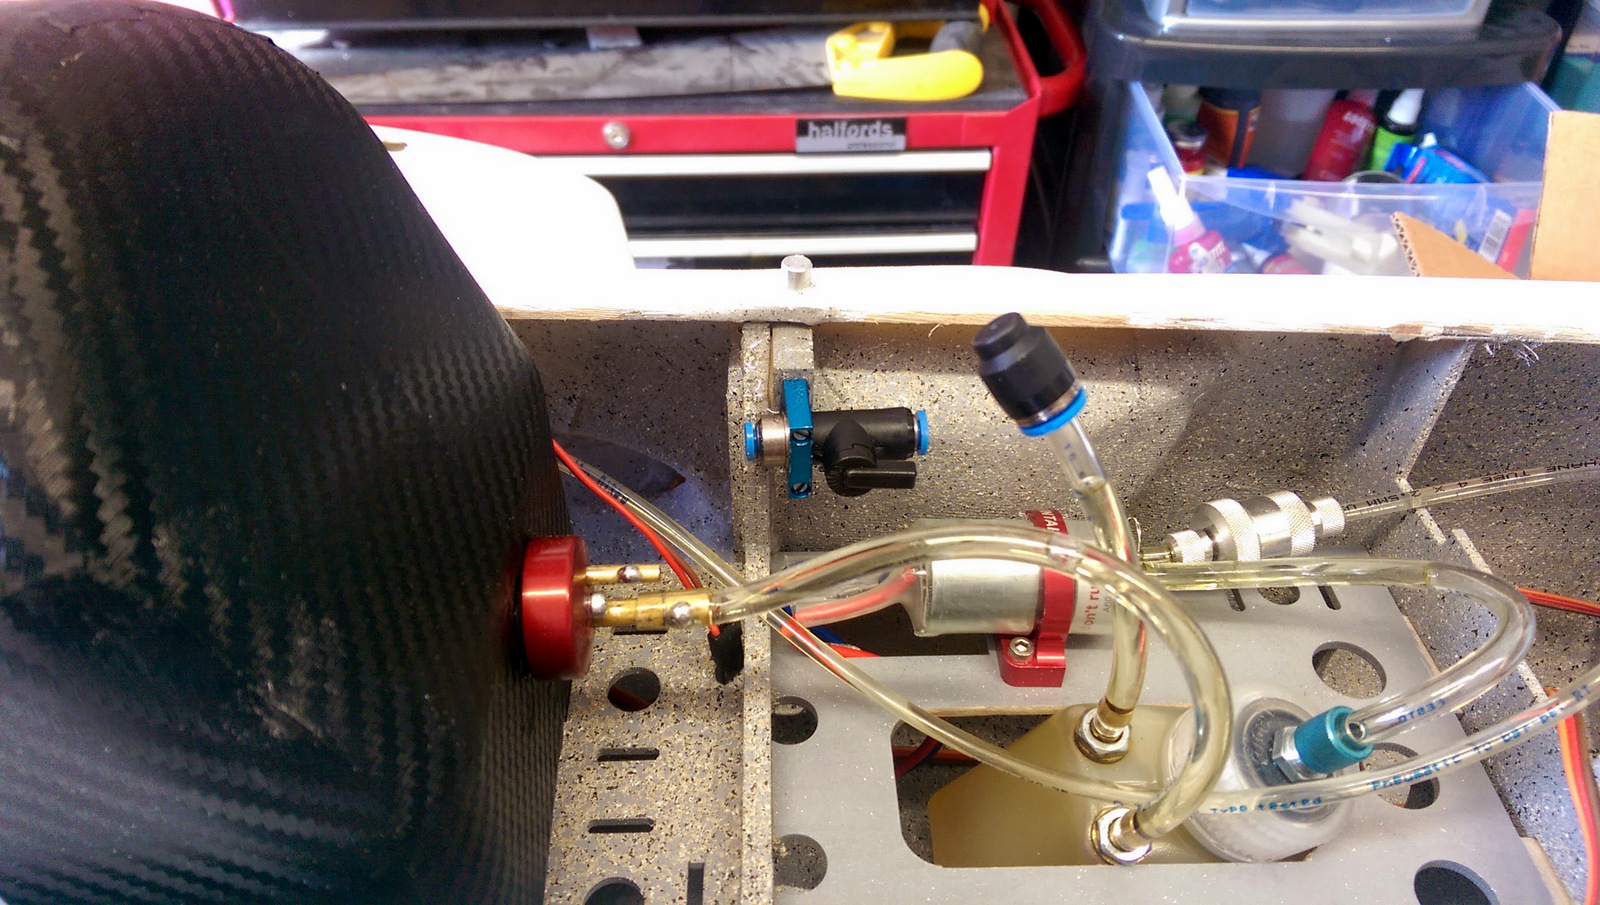
Turbine started first time but then again I'd be worried if it didn't


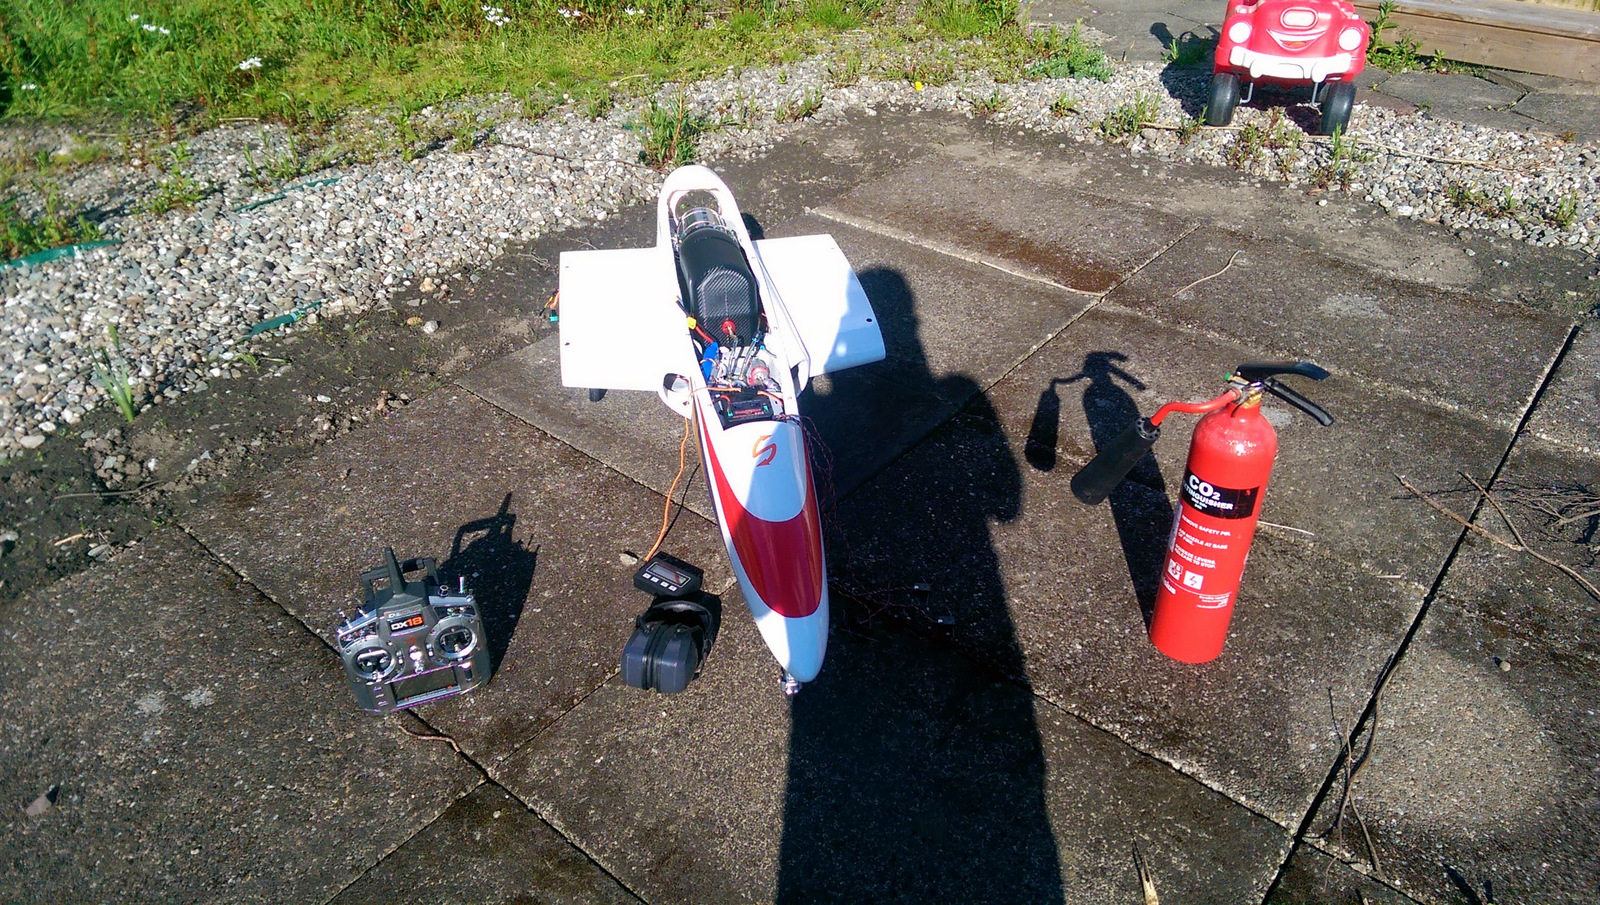
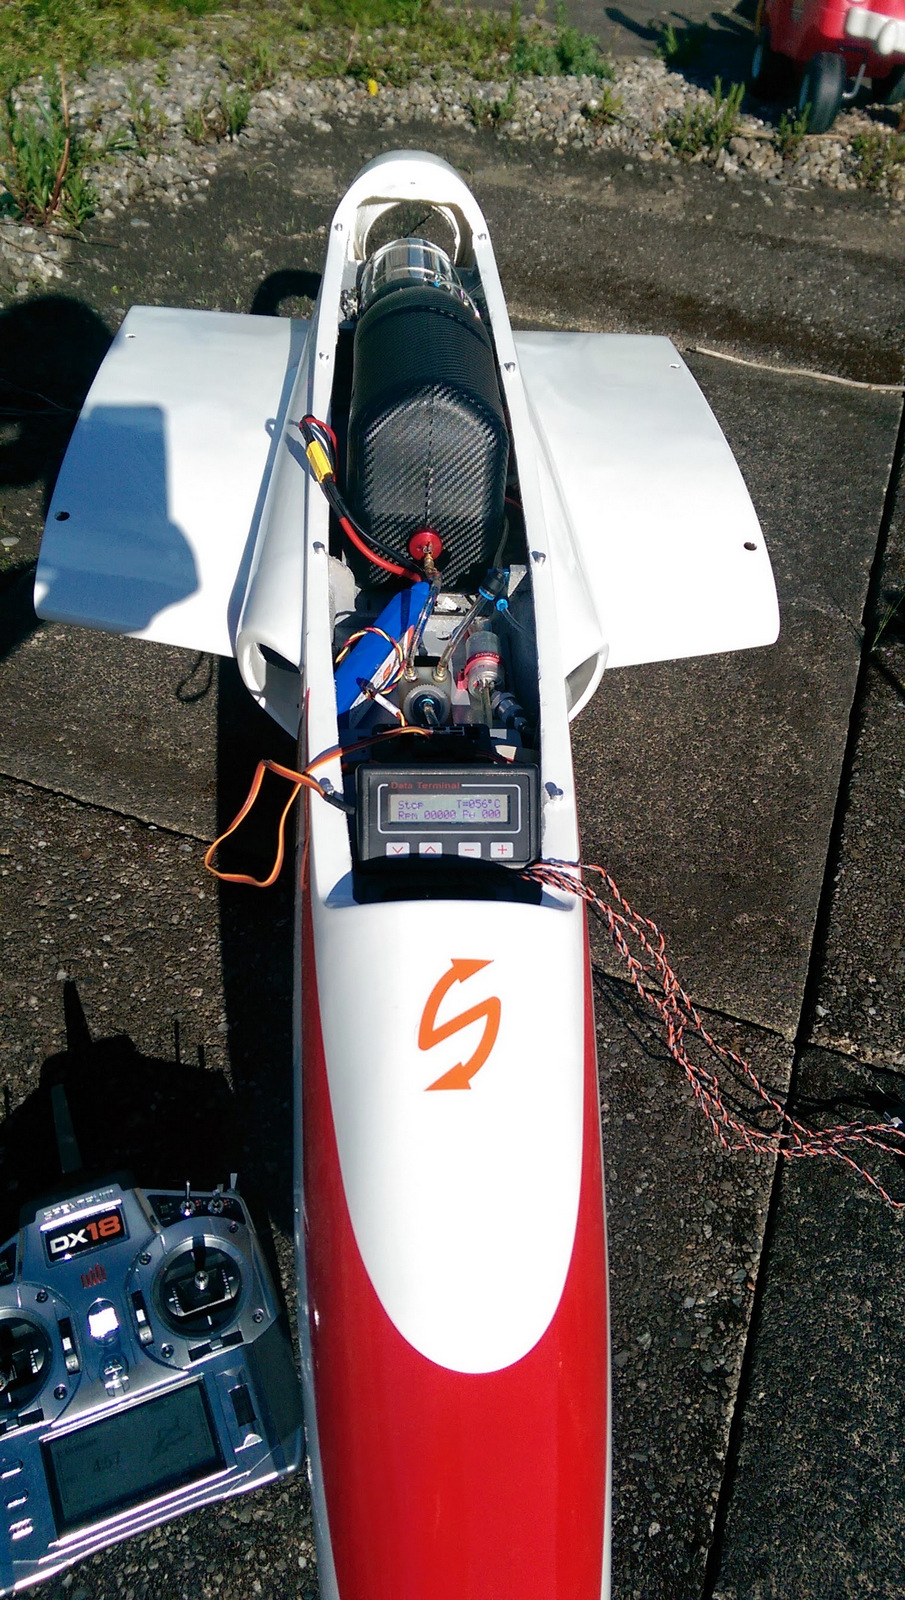
I'm guessing it'll be need 200-300 grams of lead needed sticking some of my daughters play dough on the nose

Not sure if I have enough?

Attached Thumbnails Click image for larger version

Name:	IMAG0356.jpg
Views:	172
Size:	485.3 KB
ID:	1995035   Click image for larger version

Name:	IMAG0357.jpg
Views:	180
Size:	581.6 KB
ID:	1995036   Click image for larger version

Name:	IMAG0360.jpg
Views:	176
Size:	941.2 KB
ID:	1995037   Click image for larger version

Name:	IMAG0362.jpg
Views:	158
Size:	725.8 KB
ID:	1995038   Click image for larger version

Name:	IMAG0363.jpg
Views:	174
Size:	688.7 KB
ID:	1995039   Click image for larger version

Name:	IMAG0364.jpg
Views:	186
Size:	499.8 KB
ID:	1995040   Click image for larger version

Name:	IMAG0368.jpg
Views:	159
Size:	952.4 KB
ID:	1995041   Click image for larger version

Name:	IMAG0370.jpg
Views:	166
Size:	841.9 KB
ID:	1995042  

Click image for larger version

Name:	IMAG0374.jpg
Views:	193
Size:	1.15 MB
ID:	1995043  
Old 05-13-2014, 12:11 PM
  #29  
RCISFUN
My Feedback: (44)
 
RCISFUN's Avatar
 
Join Date: Apr 2002
Location: Erie, PA
Posts: 6,860
Received 26 Likes on 23 Posts
Default

You may find you need more than that, I had to add 670 grams (1.48 lbs) of lead shot to the nose in mine; however, that being said I did glass & paint the horizontal stab and the wings which could have been a contributing factor to making it a bit tail heavy .

http://www.rcuniverse.com/forum/rc-j...thread-11.html


Attached is a layout for the balance fixture I made for mine, they slip in between the fuselage and the booms.
Attached Files
File Type: pdf
Torus balance fixture .pdf (6.4 KB, 50 views)

Last edited by RCISFUN; 05-13-2014 at 12:22 PM.
Old 05-13-2014, 12:25 PM
  #30  
Colin_Mc
Thread Starter
 
Colin_Mc's Avatar
 
Join Date: Feb 2006
Location: Scotland
Posts: 203
Likes: 0
Received 1 Like on 1 Post
Default

Are you balancing with the hatch and wings on, 1/4 inch behind front spar?
Old 05-13-2014, 06:13 PM
  #31  
RCISFUN
My Feedback: (44)
 
RCISFUN's Avatar
 
Join Date: Apr 2002
Location: Erie, PA
Posts: 6,860
Received 26 Likes on 23 Posts
Default

Yes it was all fitted up with booms, horz stab, wings, canopy and a full UAT.
Balance was on the center of spar, see post 268

http://www.rcuniverse.com/forum/rc-j...thread-11.html
Old 05-16-2014, 07:18 AM
  #32  
Colin_Mc
Thread Starter
 
Colin_Mc's Avatar
 
Join Date: Feb 2006
Location: Scotland
Posts: 203
Likes: 0
Received 1 Like on 1 Post
Default

Final equipment install pics - still to balance.

The UAT is going to be replaced with a CAT and a maglock vent from gbrjets installed when i receive them.

Attached Thumbnails Click image for larger version

Name:	IMAG0385.jpg
Views:	159
Size:	541.9 KB
ID:	1995738   Click image for larger version

Name:	IMAG0386.jpg
Views:	141
Size:	680.3 KB
ID:	1995739   Click image for larger version

Name:	IMAG0389.jpg
Views:	138
Size:	495.7 KB
ID:	1995740   Click image for larger version

Name:	IMAG0391.jpg
Views:	158
Size:	561.2 KB
ID:	1995741   Click image for larger version

Name:	IMAG0393.jpg
Views:	152
Size:	445.0 KB
ID:	1995742   Click image for larger version

Name:	IMAG0398.jpg
Views:	173
Size:	433.8 KB
ID:	1995743  
Old 05-16-2014, 11:10 AM
  #33  
Colin_Mc
Thread Starter
 
Colin_Mc's Avatar
 
Join Date: Feb 2006
Location: Scotland
Posts: 203
Likes: 0
Received 1 Like on 1 Post
Default

Originally Posted by RCISFUN
You may find you need more than that, I had to add 670 grams (1.48 lbs) of lead shot to the nose in mine; however, that being said I did glass & paint the horizontal stab and the wings which could have been a contributing factor to making it a bit tail heavy .

http://www.rcuniverse.com/forum/rc-j...thread-11.html


Attached is a layout for the balance fixture I made for mine, they slip in between the fuselage and the booms.
To balance i've had to add 400grams or 14ozs. I'll probably be removing some as its a bit conservative at the moment.

Attached Thumbnails Click image for larger version

Name:	IMAG0399.jpg
Views:	174
Size:	490.8 KB
ID:	1995781  
Old 05-16-2014, 12:35 PM
  #34  
Colin_Mc
Thread Starter
 
Colin_Mc's Avatar
 
Join Date: Feb 2006
Location: Scotland
Posts: 203
Likes: 0
Received 1 Like on 1 Post
Default

Maiden tomorrow, then onto a new project....

Attached Thumbnails Click image for larger version

Name:	IMAG0401.jpg
Views:	165
Size:	155.8 KB
ID:	1995785  
Old 05-16-2014, 12:51 PM
  #35  
Si_B
 
Si_B's Avatar
 
Join Date: Aug 2010
Location: , , UNITED KINGDOM
Posts: 305
Likes: 0
Received 0 Likes on 0 Posts
Default

What balancer are you using there?
Old 05-16-2014, 01:05 PM
  #36  
RCISFUN
My Feedback: (44)
 
RCISFUN's Avatar
 
Join Date: Apr 2002
Location: Erie, PA
Posts: 6,860
Received 26 Likes on 23 Posts
Default

Cool.... I see you have lead sitting behind your nose wheel, you could lessen it a bit if you stand it on its nose and pour lead shoot directly into the nose and secure with epoxy
Old 05-16-2014, 01:09 PM
  #37  
Colin_Mc
Thread Starter
 
Colin_Mc's Avatar
 
Join Date: Feb 2006
Location: Scotland
Posts: 203
Likes: 0
Received 1 Like on 1 Post
Default

Originally Posted by Si_B
What balancer are you using there?
EZ Balancer

http://www.ezbalancer.com/

Bought and imported via:

http://www.dreamworksrc.com/catalog/Ez-Balancer-Ii

My one is a few years old and is anodized - much better now that they are powder coated.
Old 05-16-2014, 01:12 PM
  #38  
Colin_Mc
Thread Starter
 
Colin_Mc's Avatar
 
Join Date: Feb 2006
Location: Scotland
Posts: 203
Likes: 0
Received 1 Like on 1 Post
Default

Originally Posted by RCISFUN
Cool.... I see you have lead sitting behind your nose wheel, you could lessen it a bit if you stand it on its nose and pour lead shoot directly into the nose and secure with epoxy
There is a hatch directly under the retract which is where it is now, once i have an idea the final CG I'll do your method, sounds much cooler.
Old 05-17-2014, 10:27 AM
  #39  
Knock
My Feedback: (2)
 
Knock's Avatar
 
Join Date: May 2004
Location: , ON, CANADA
Posts: 183
Likes: 0
Received 0 Likes on 0 Posts
Default

Hello , I got my Torus about two months ago . I just dry fitted the airplane together last night . I was suprised to find the main carbon spars of my Torus are alot thiner than the carbon spars for my Boomerang XL . The carbon spars of the Torus are about 1/16 of an inch ....a guestimate . The carbon spars for the Boomerang XL seem about twice to three times as thick....1/8 , 3/16 . Has anyone else found the same? I am thinking maybe I got the wrong parts .

Thanks for the help in advance
Old 05-17-2014, 10:35 AM
  #40  
Colin_Mc
Thread Starter
 
Colin_Mc's Avatar
 
Join Date: Feb 2006
Location: Scotland
Posts: 203
Likes: 0
Received 1 Like on 1 Post
Default

Nope they are thin just like my old intro but the difference being here is that there is two of them.
Old 05-17-2014, 11:29 AM
  #41  
Colin_Mc
Thread Starter
 
Colin_Mc's Avatar
 
Join Date: Feb 2006
Location: Scotland
Posts: 203
Likes: 0
Received 1 Like on 1 Post
Default

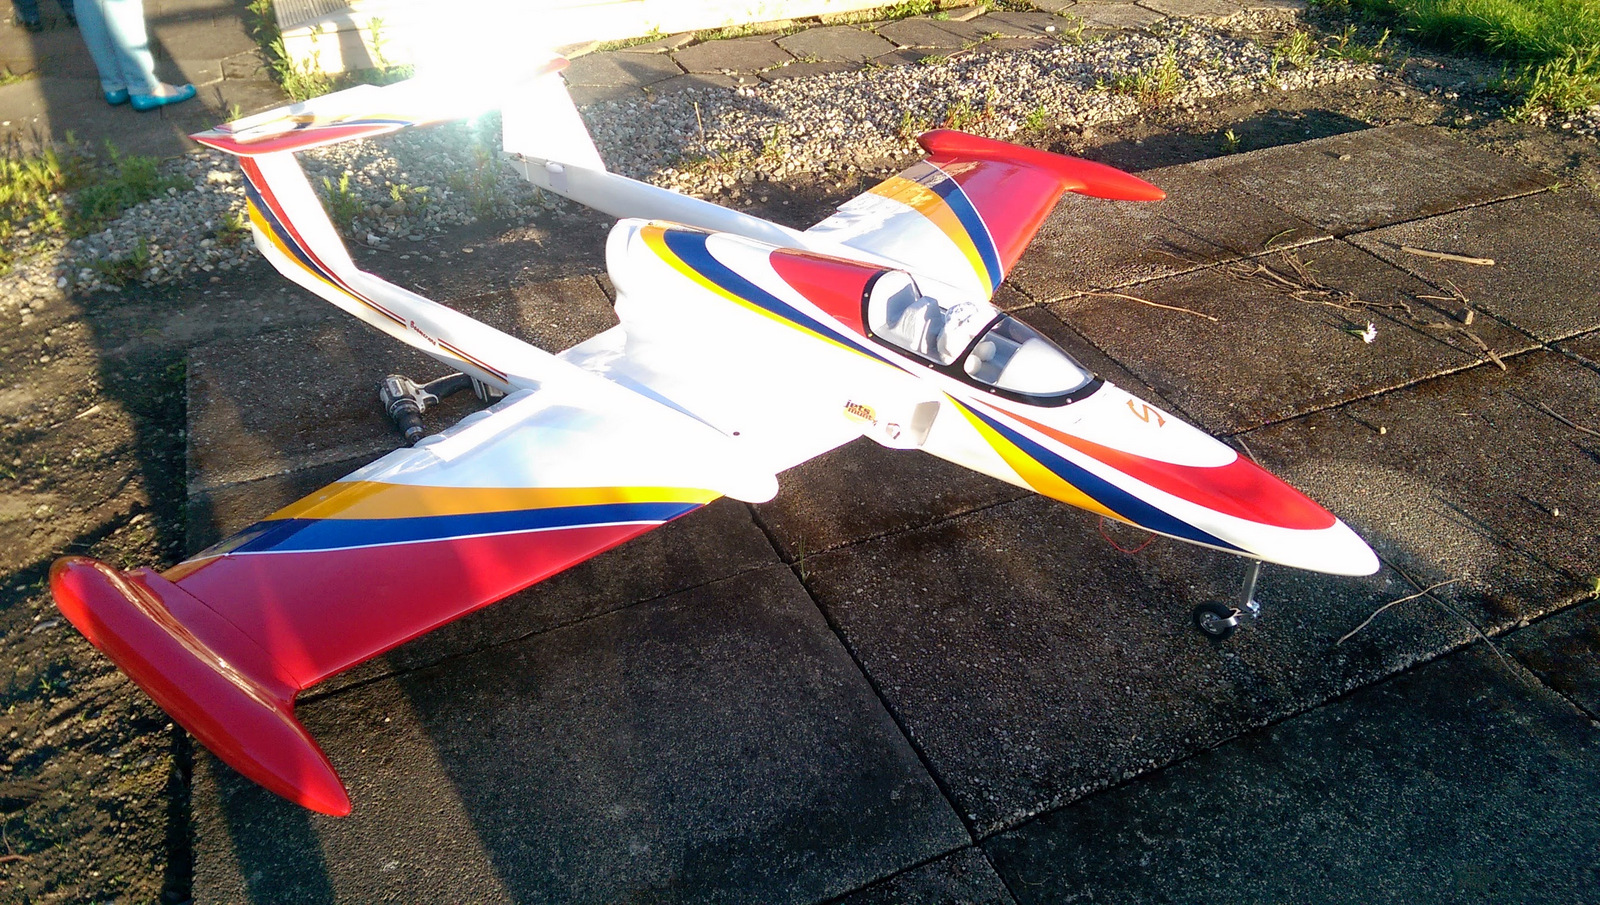
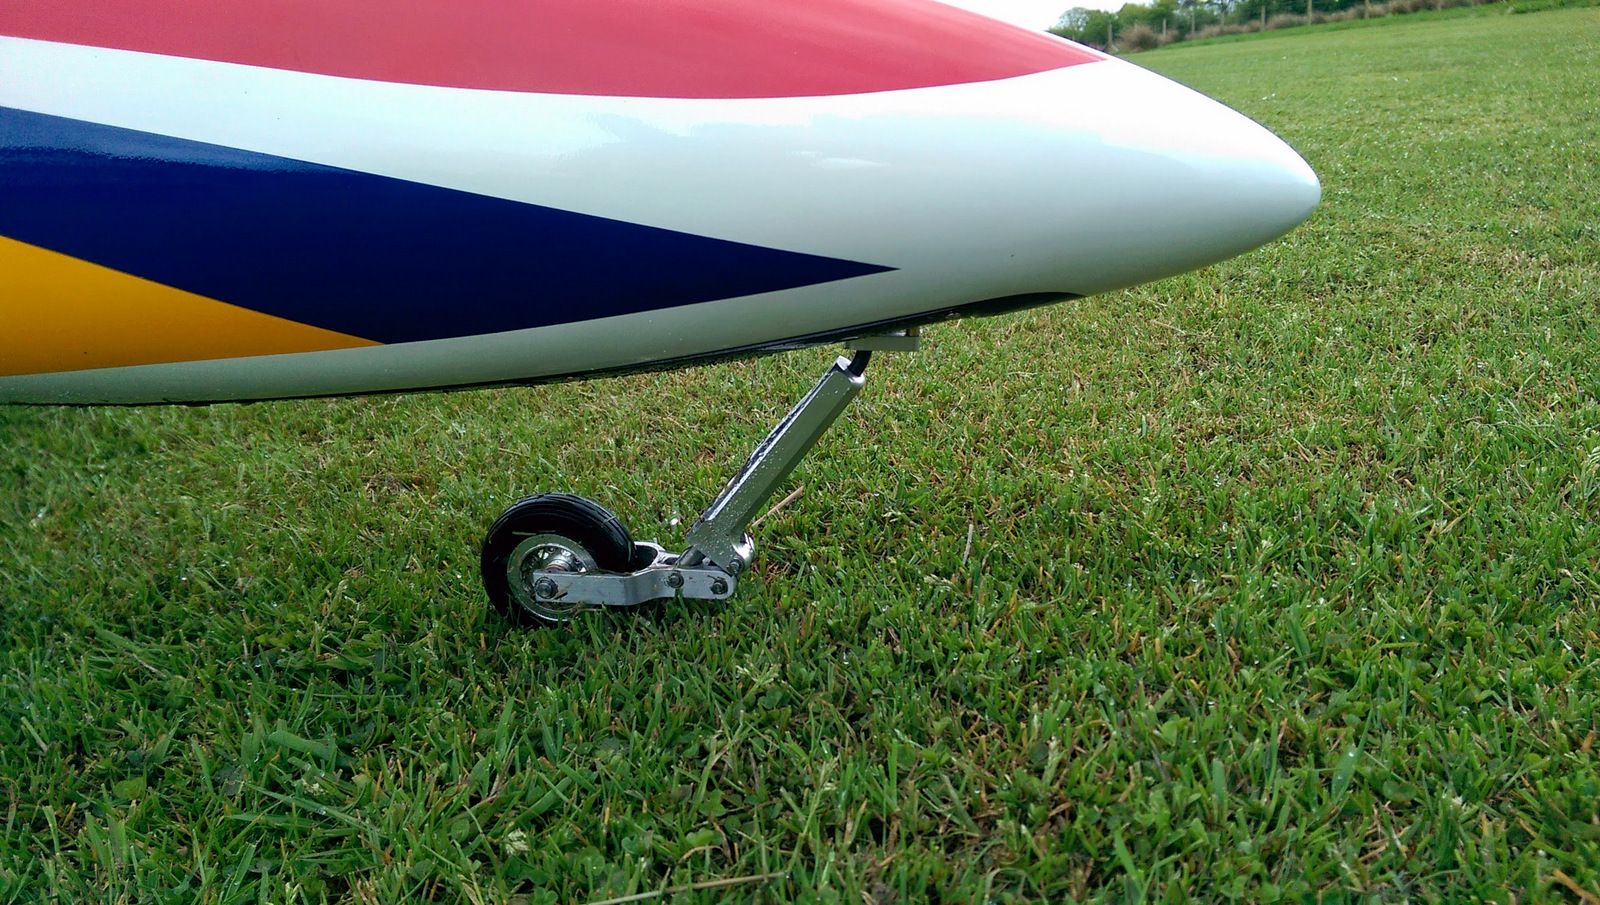
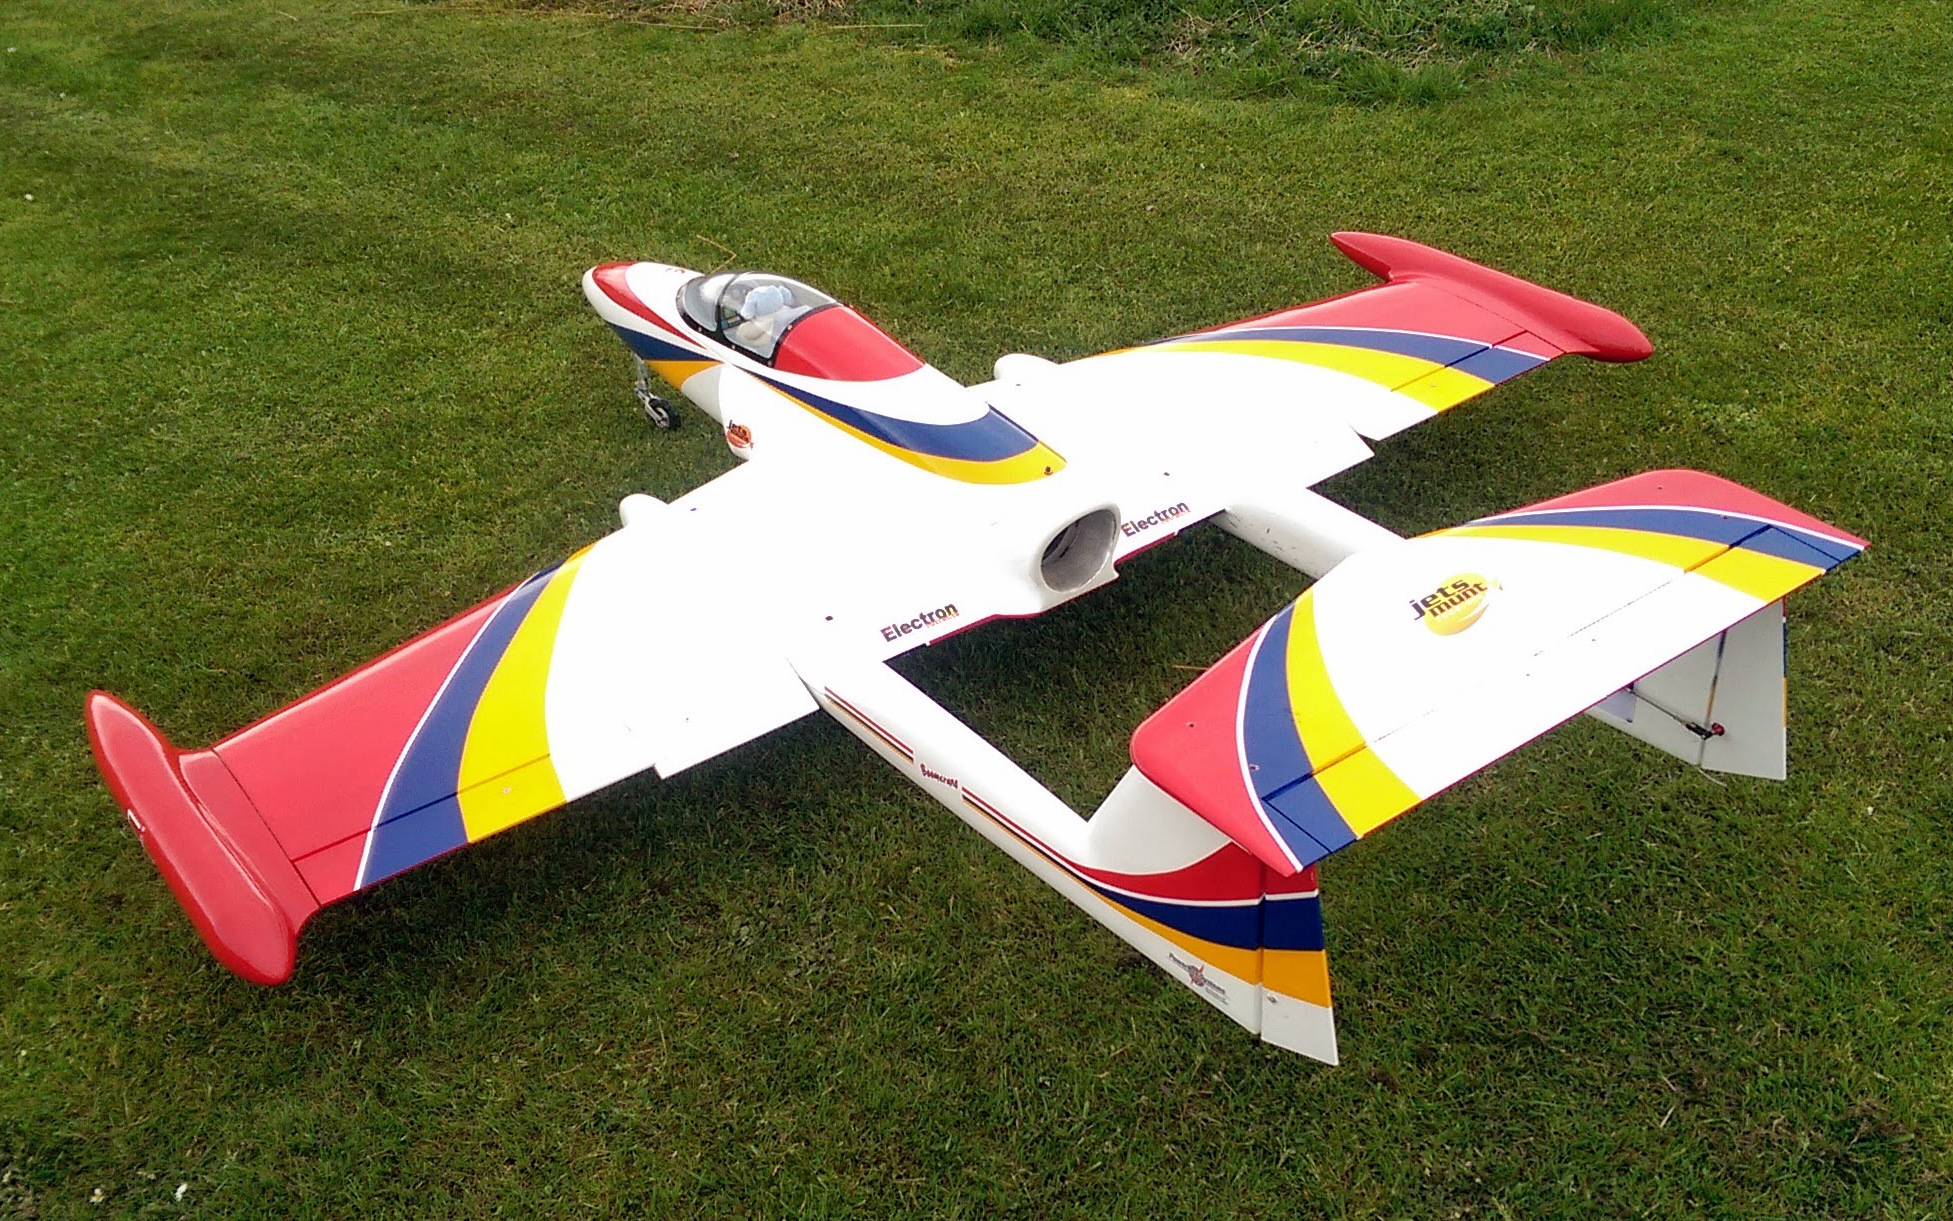
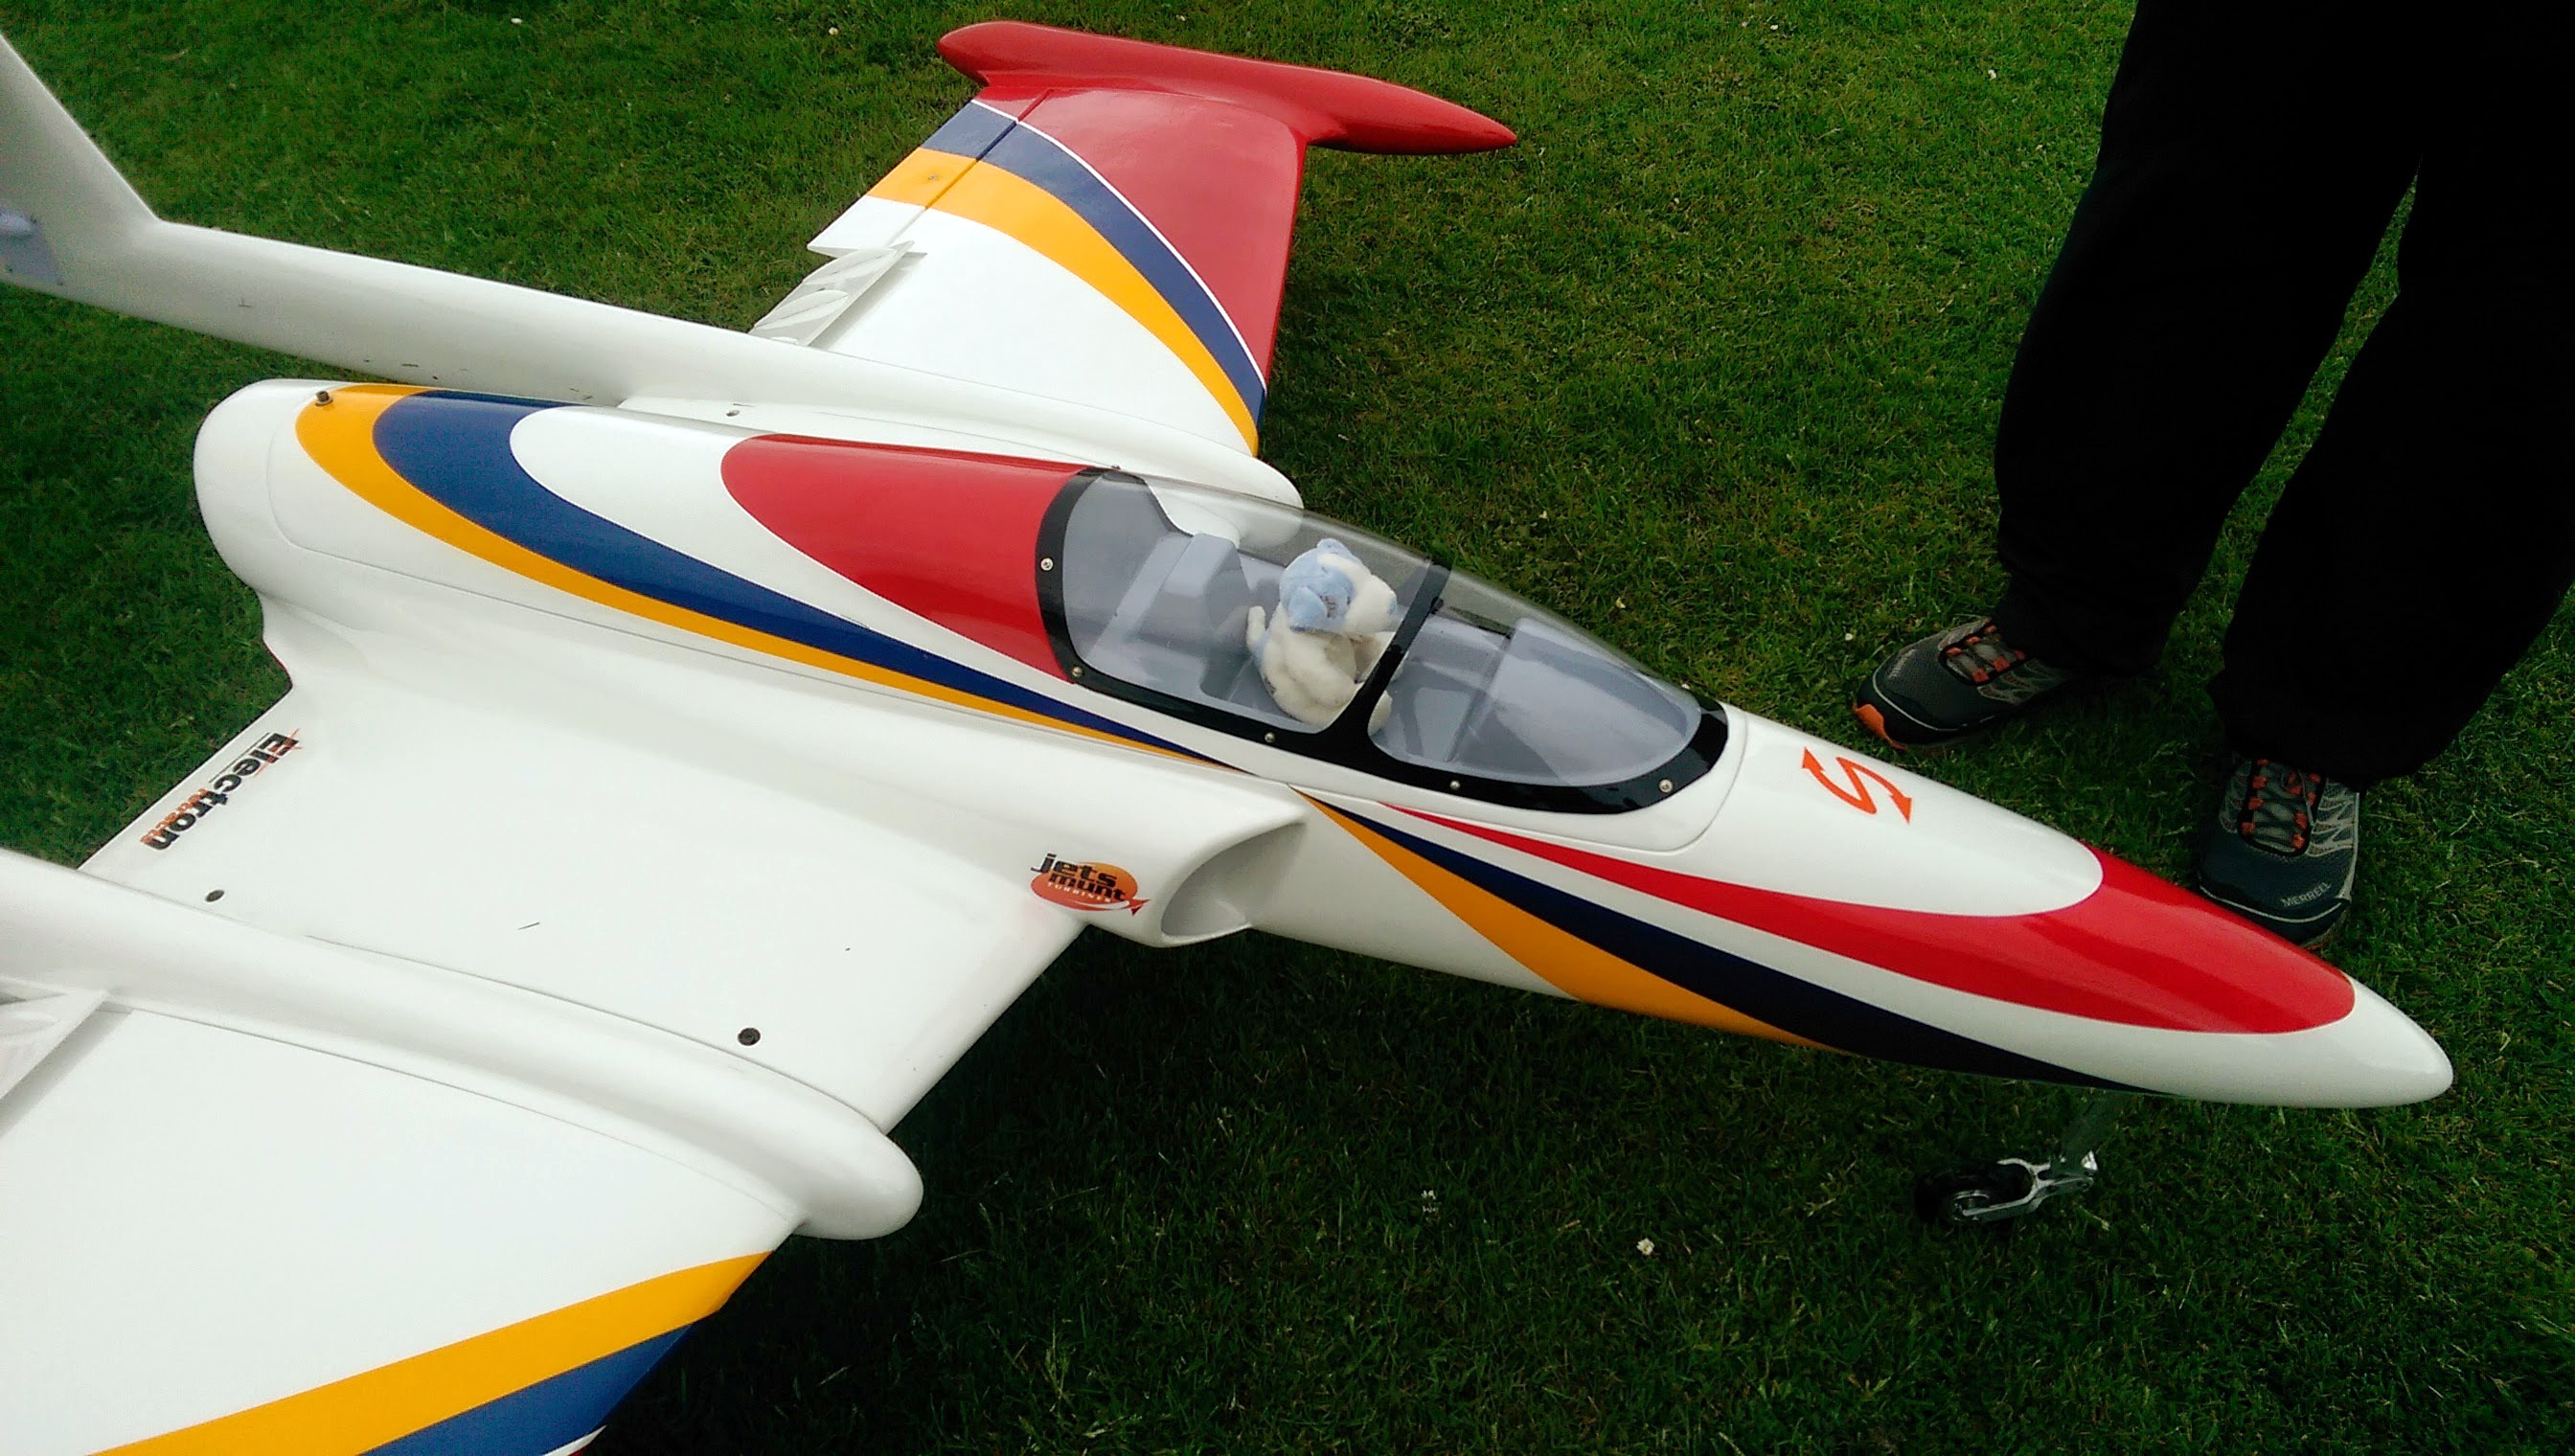
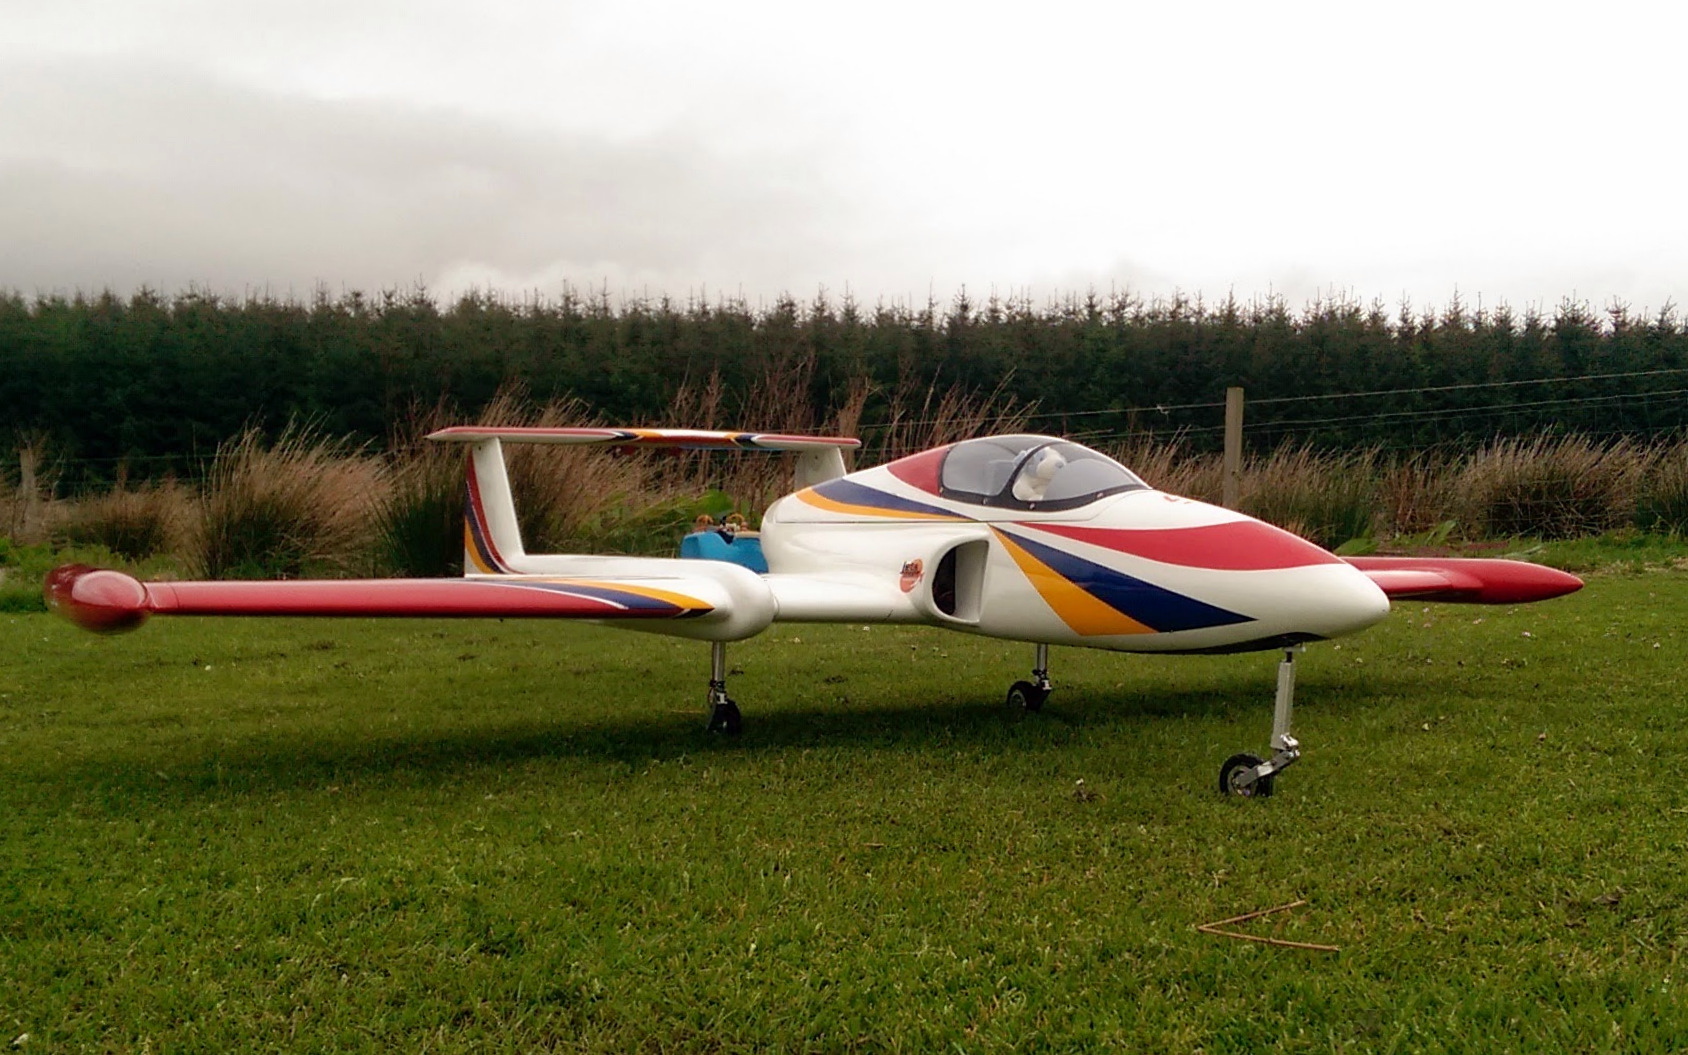
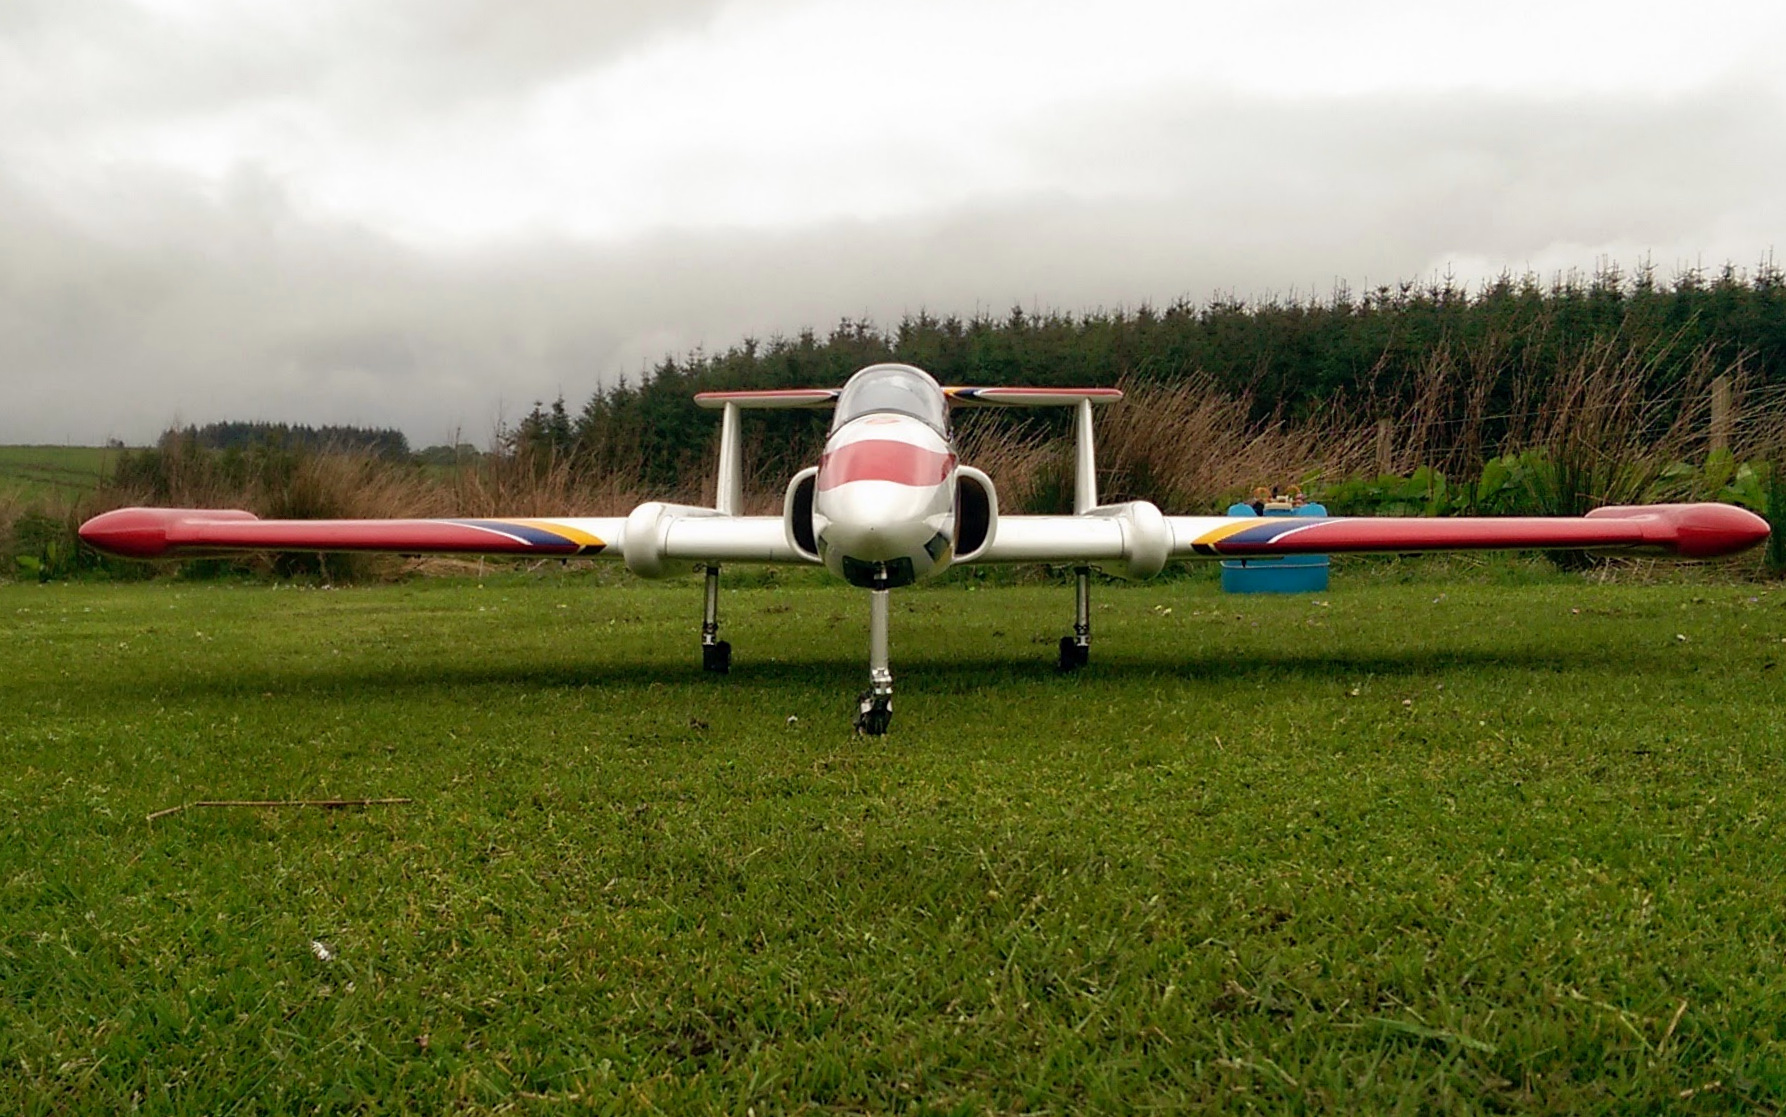
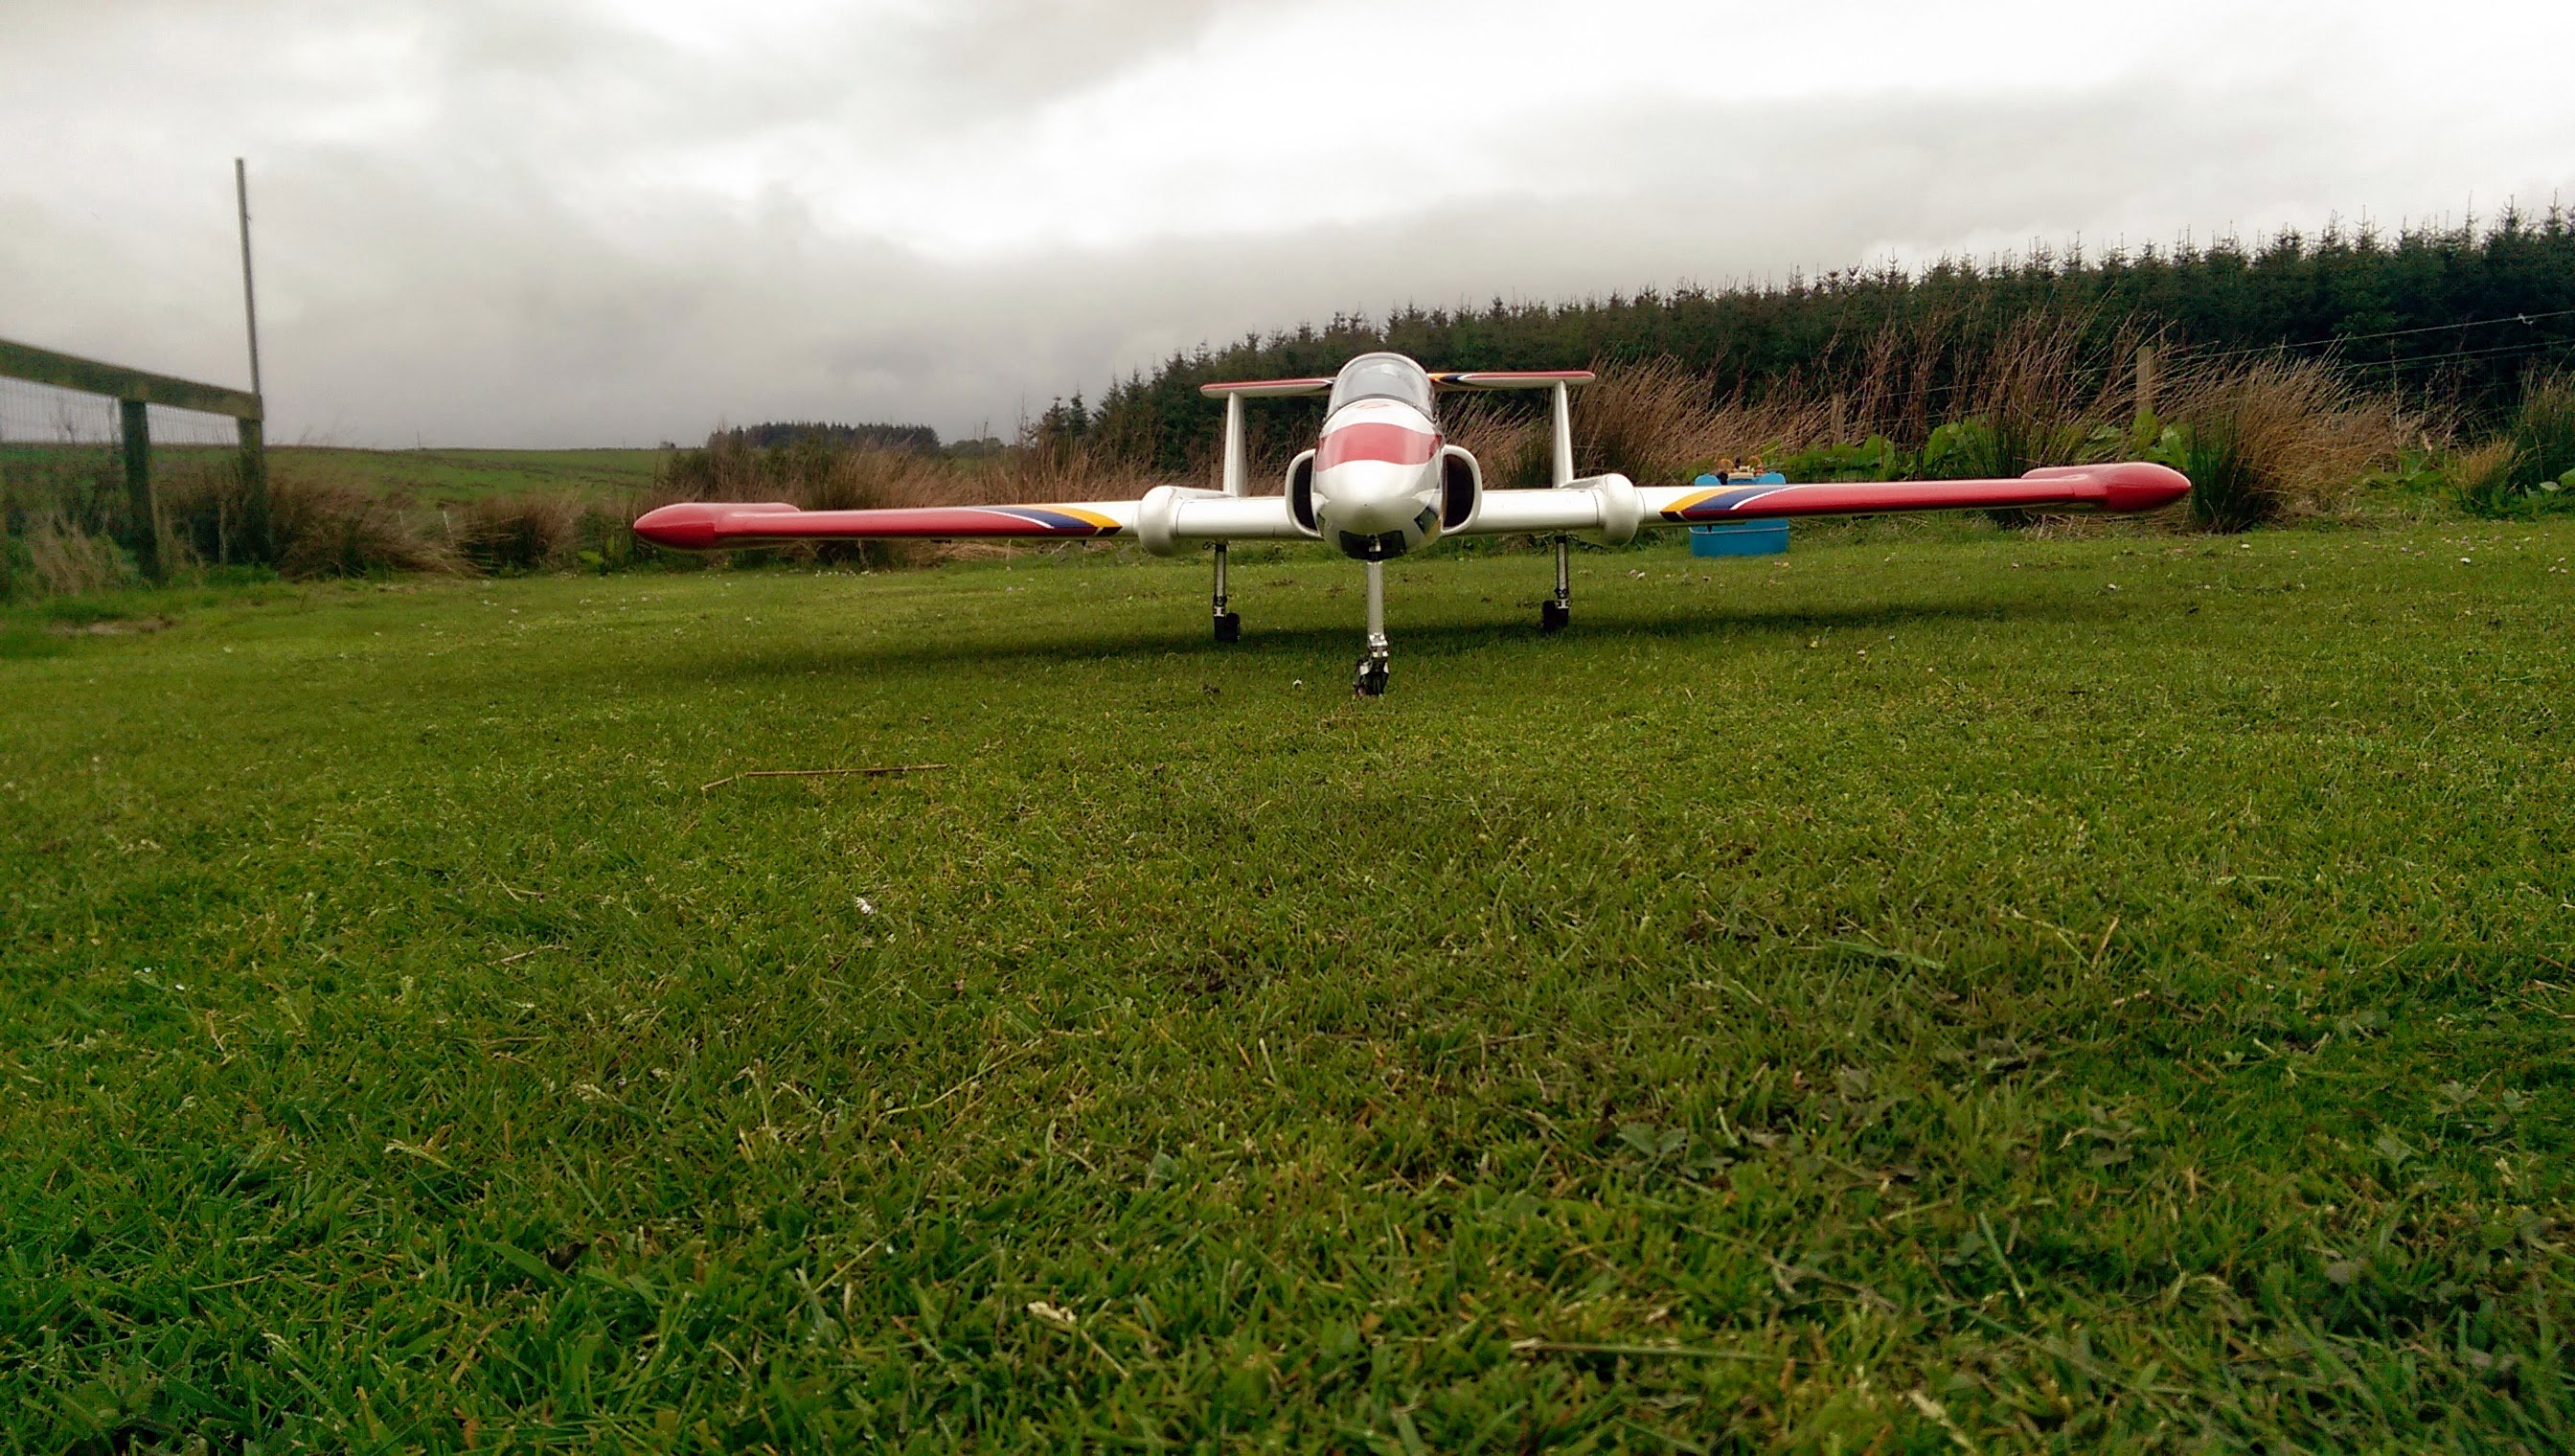
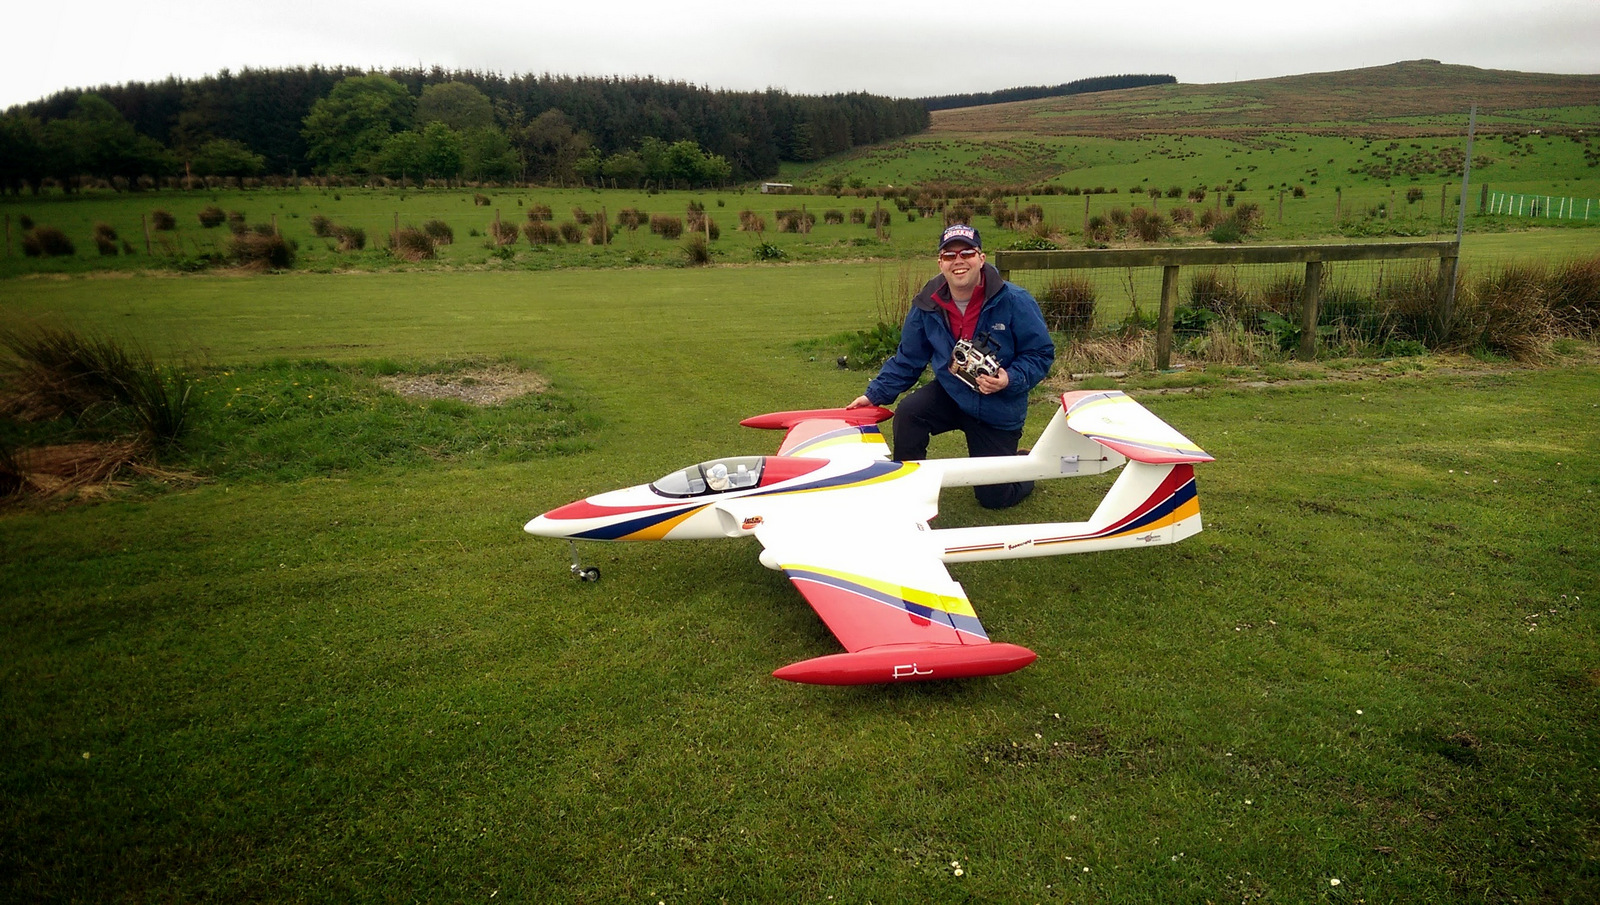
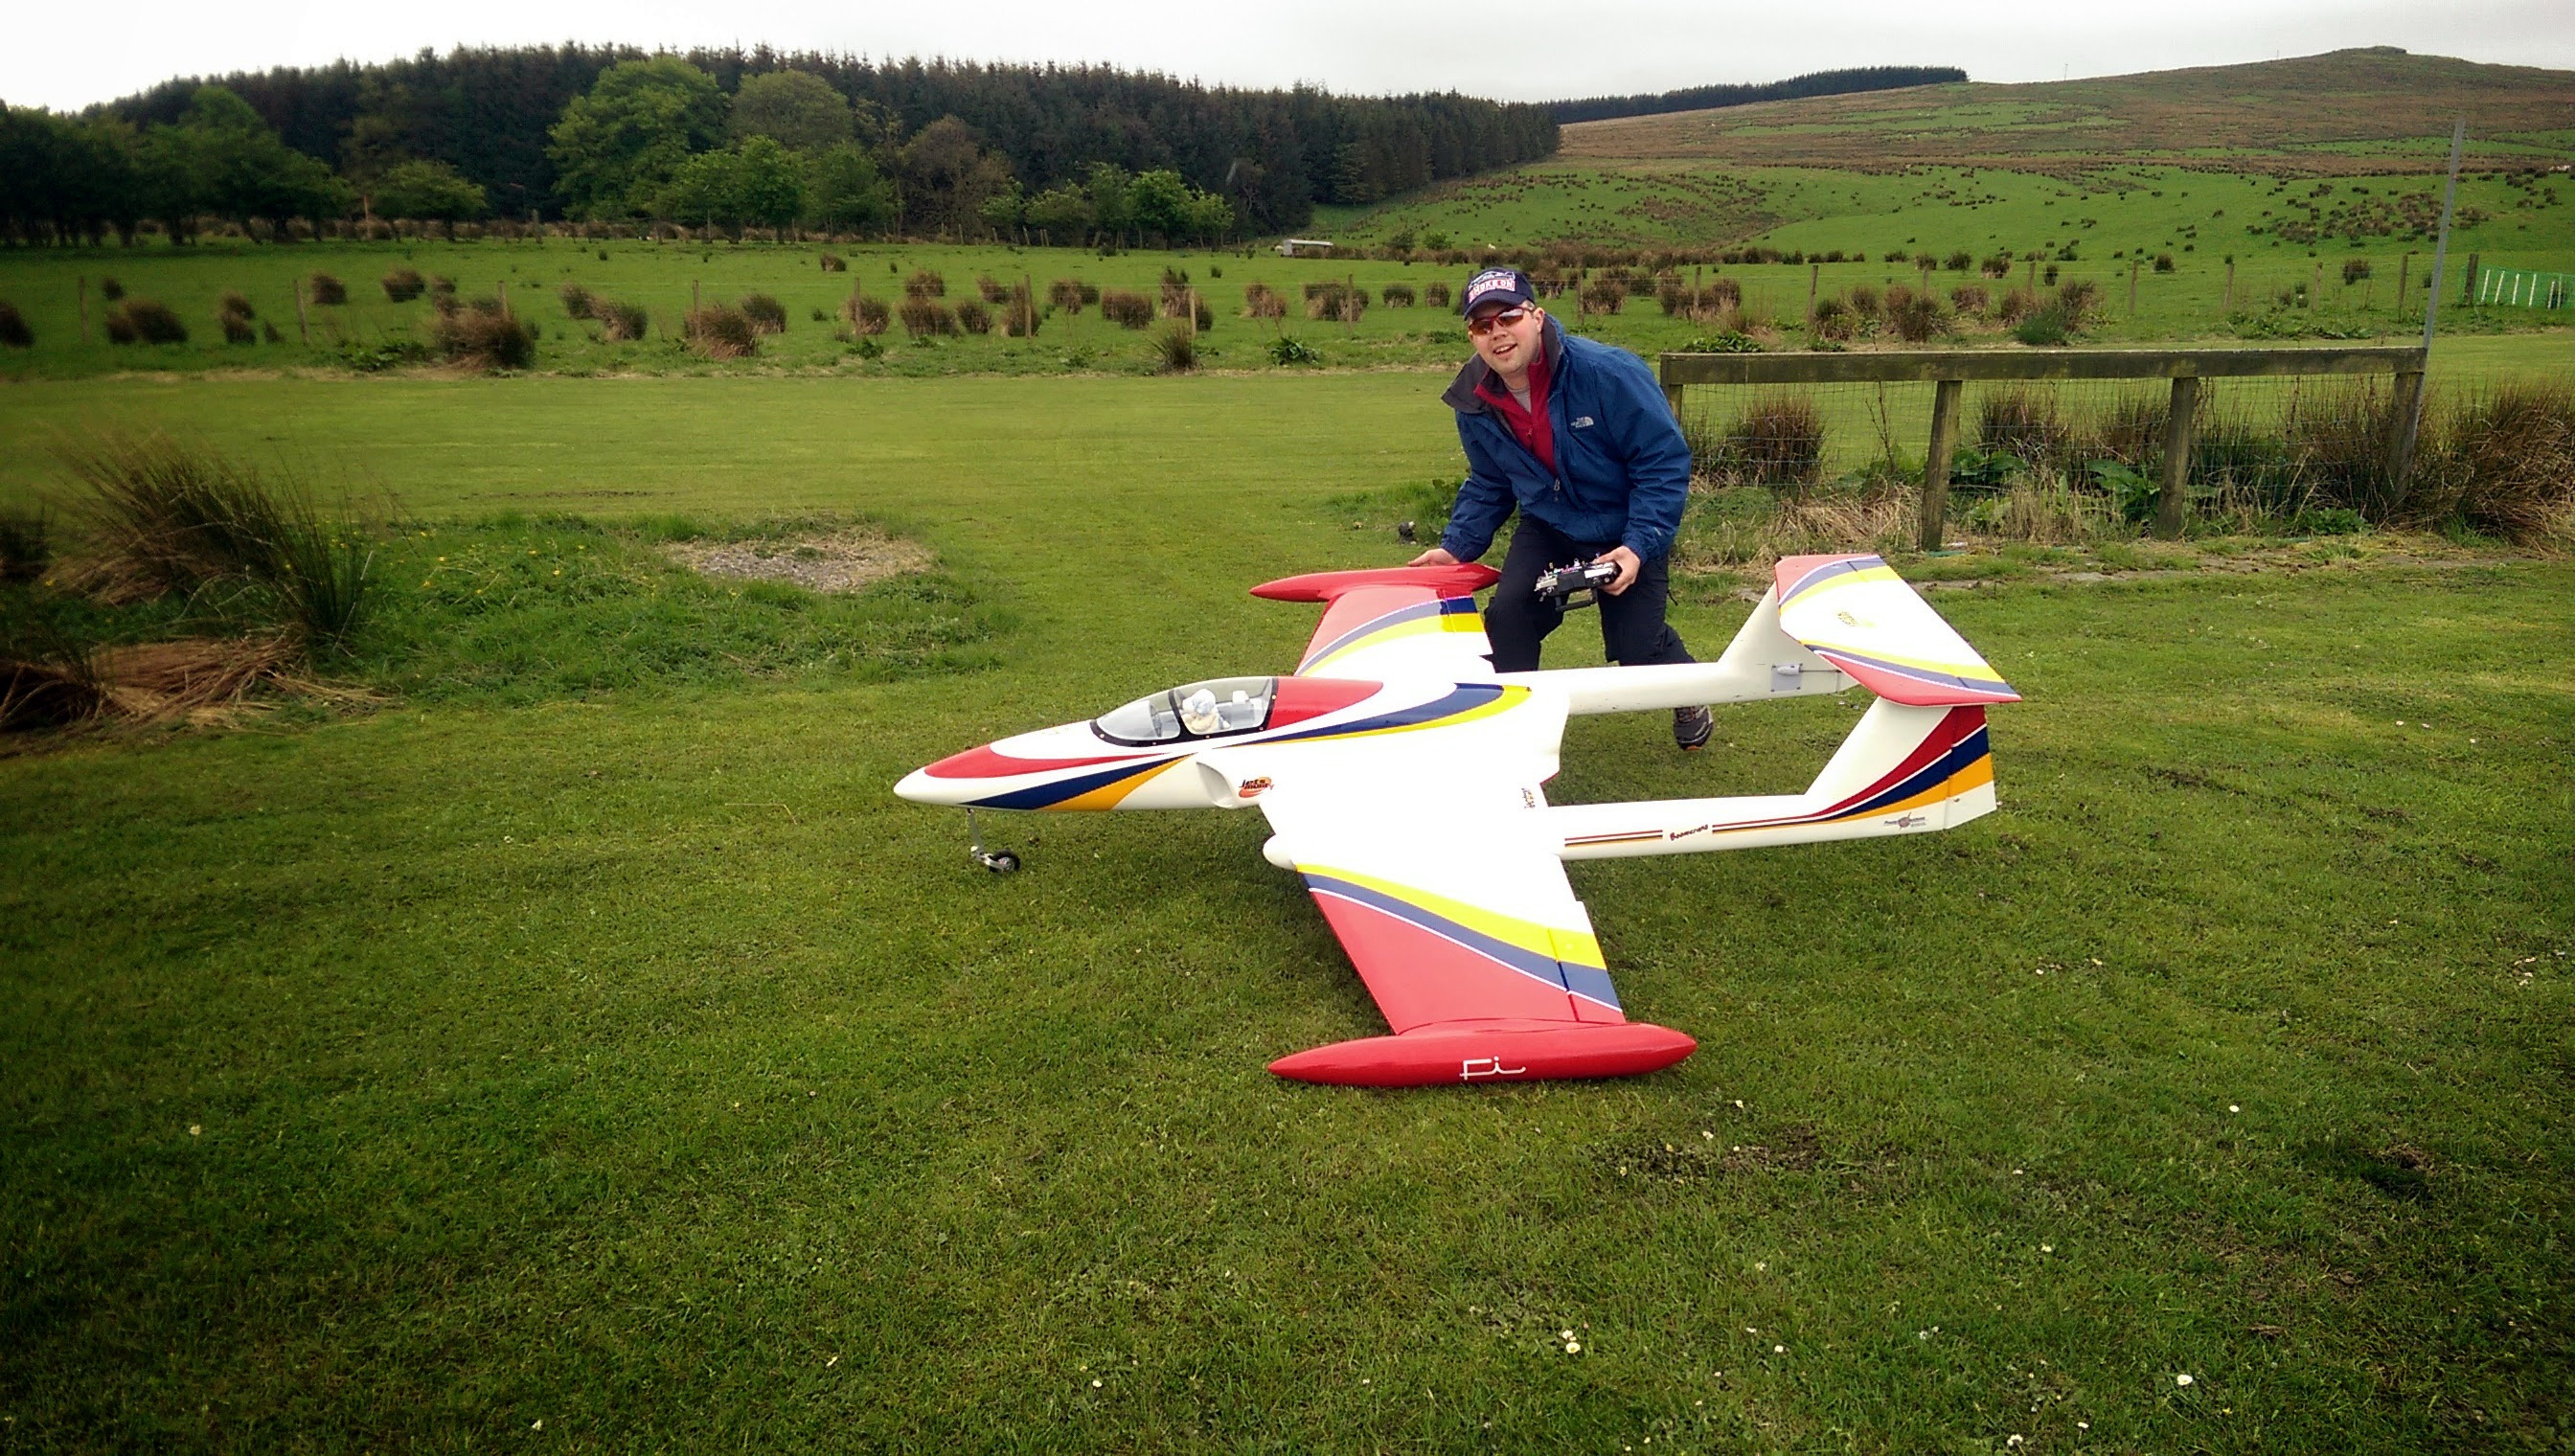
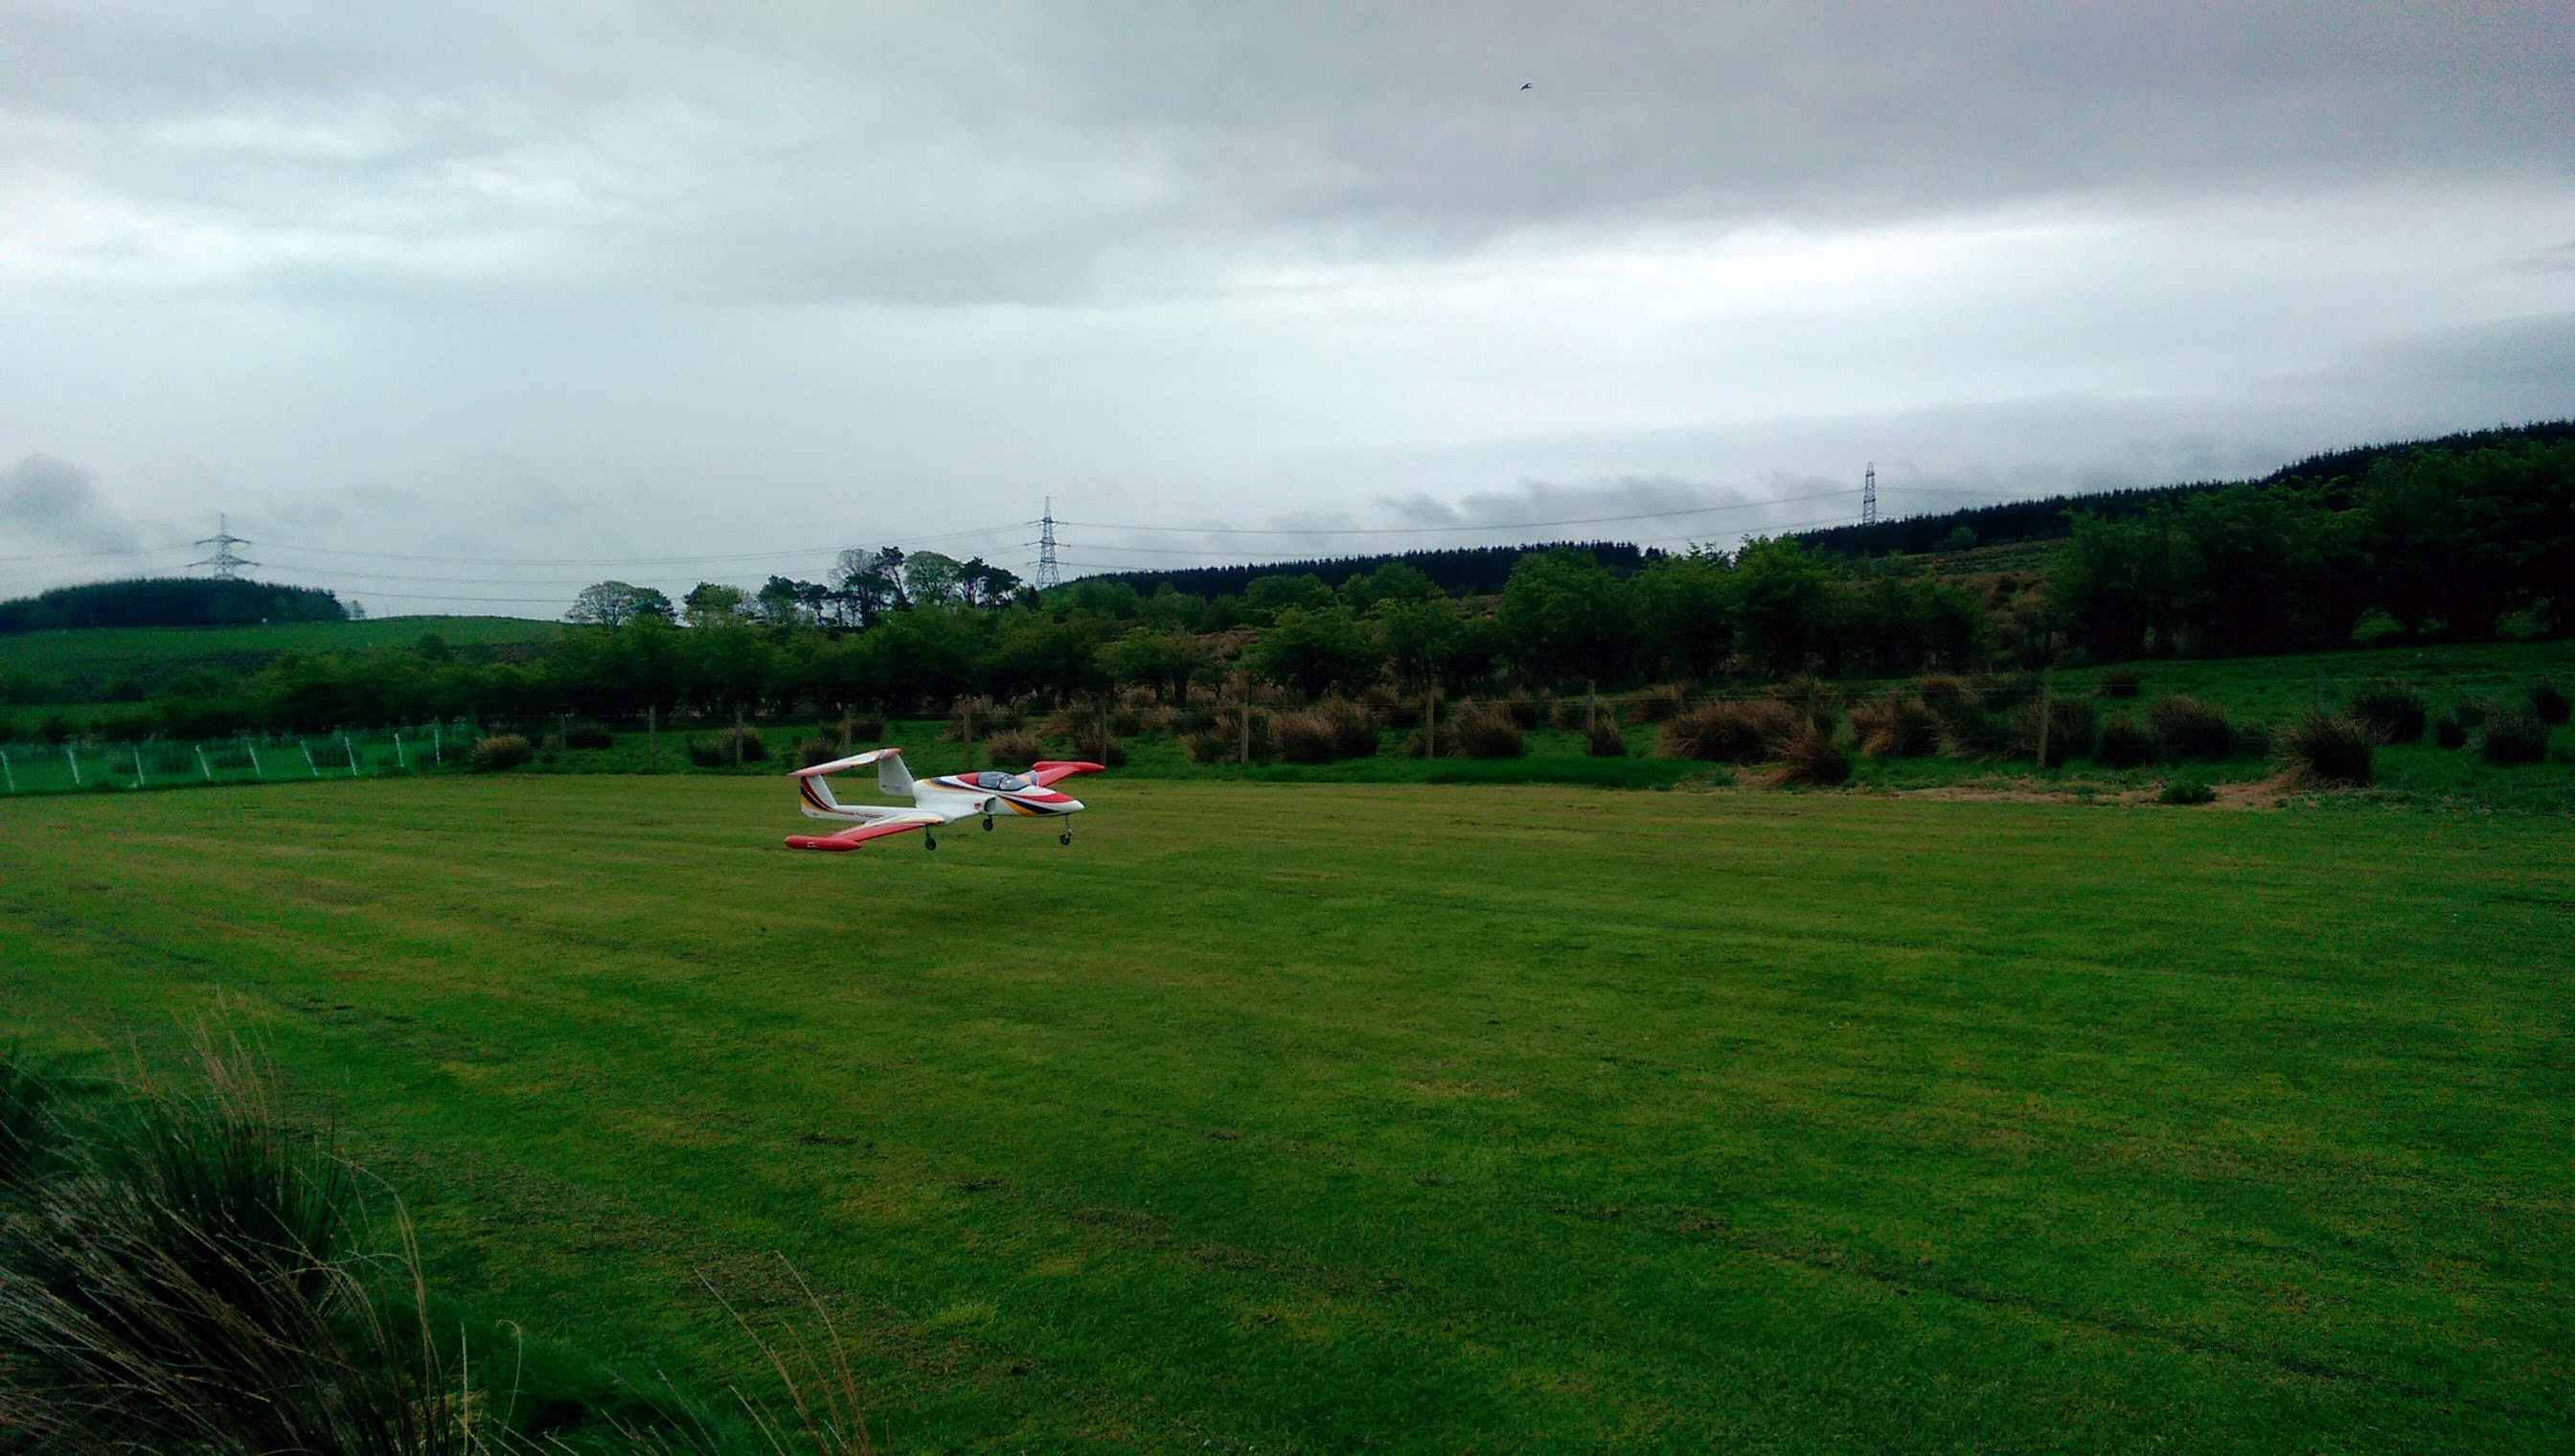
Happy day today, maidened the plane and only one minor problem with a soft nosewheel pin which bent under the initial landing.

Video to follow....


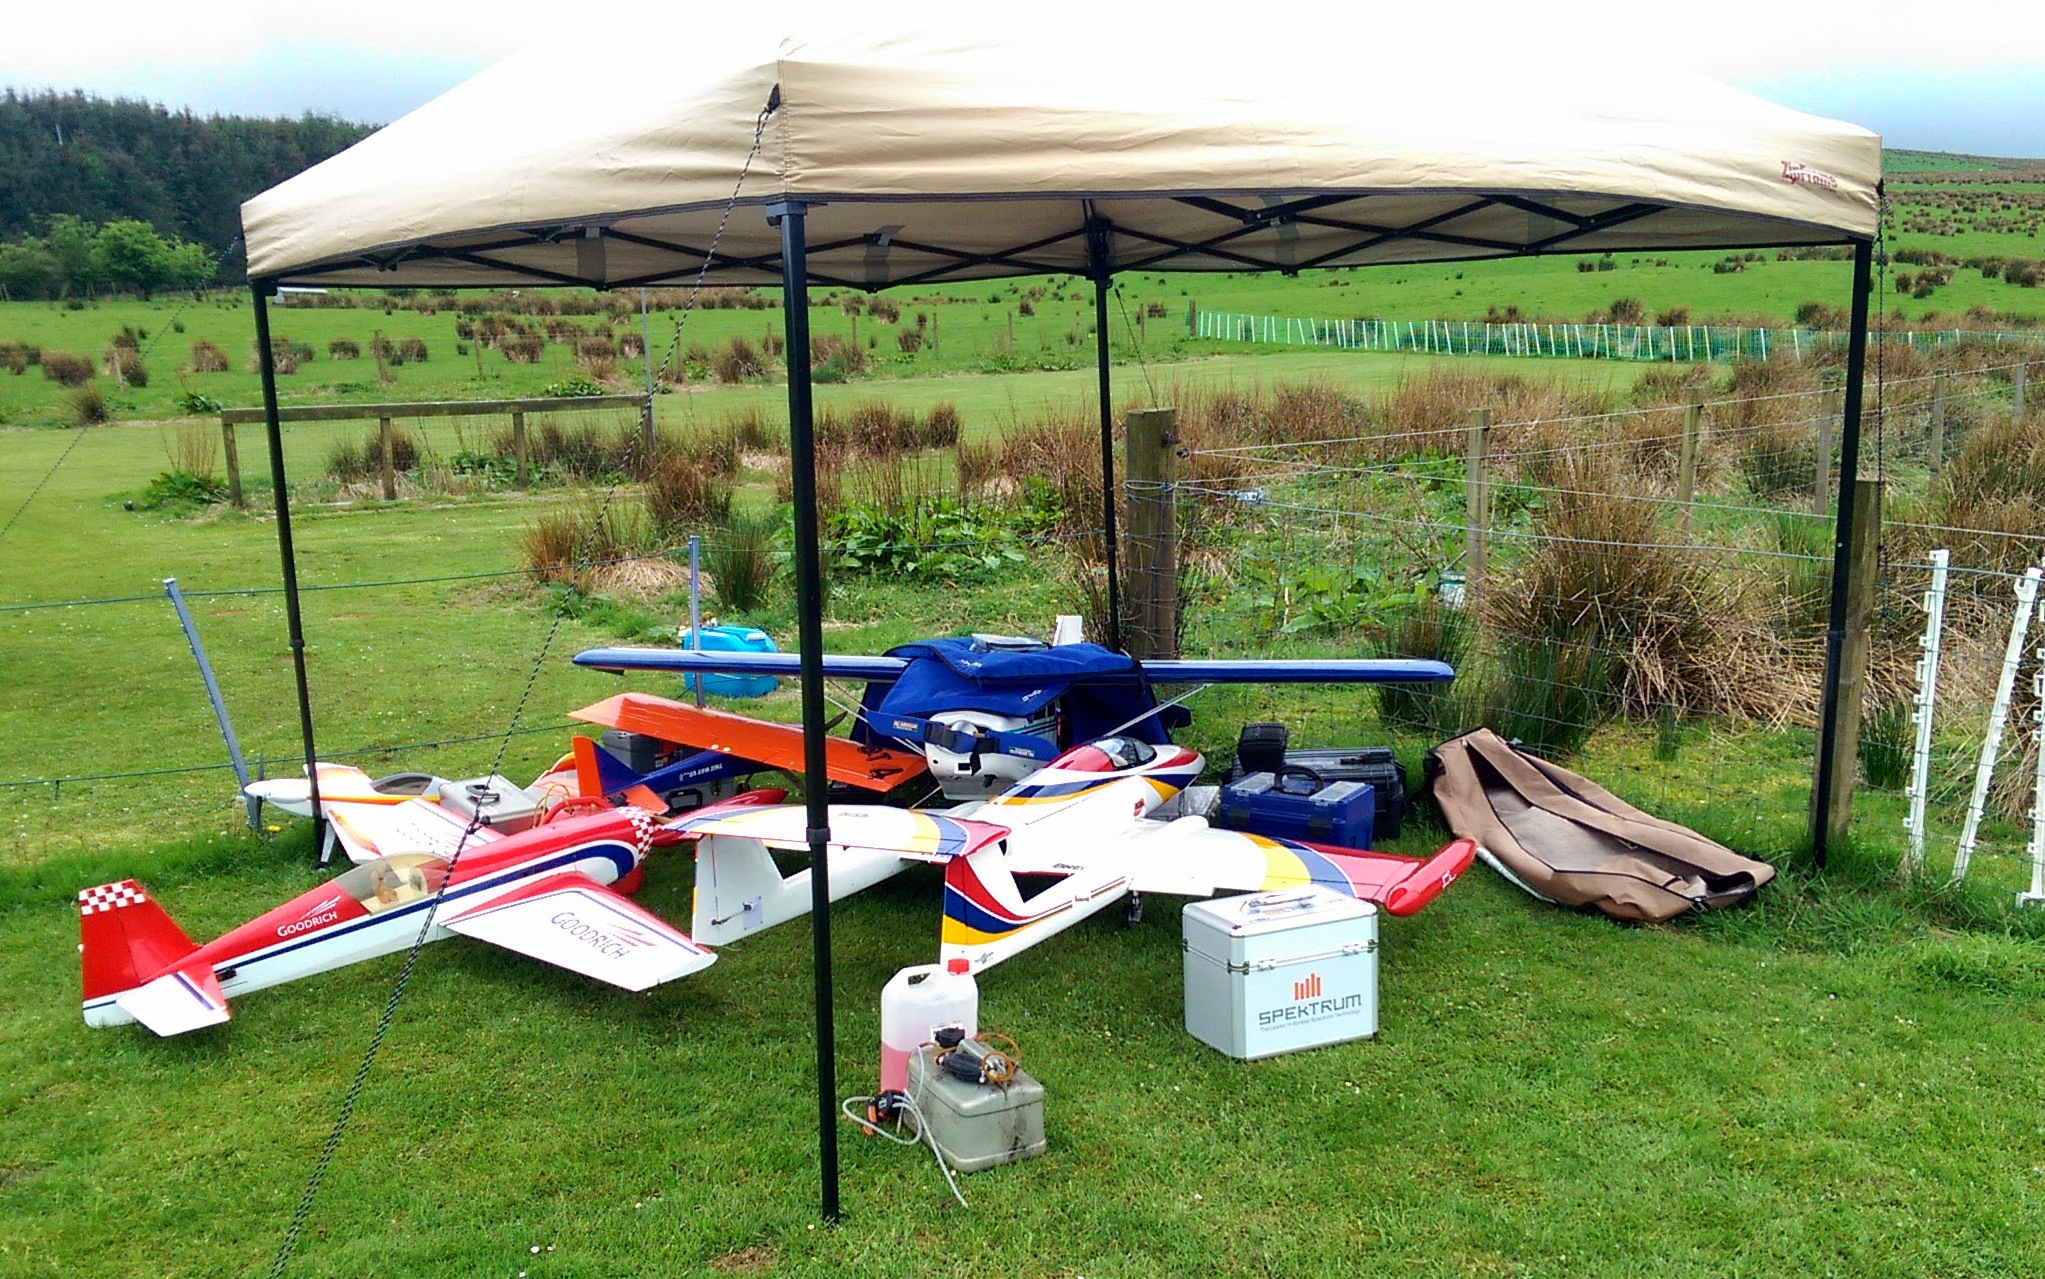
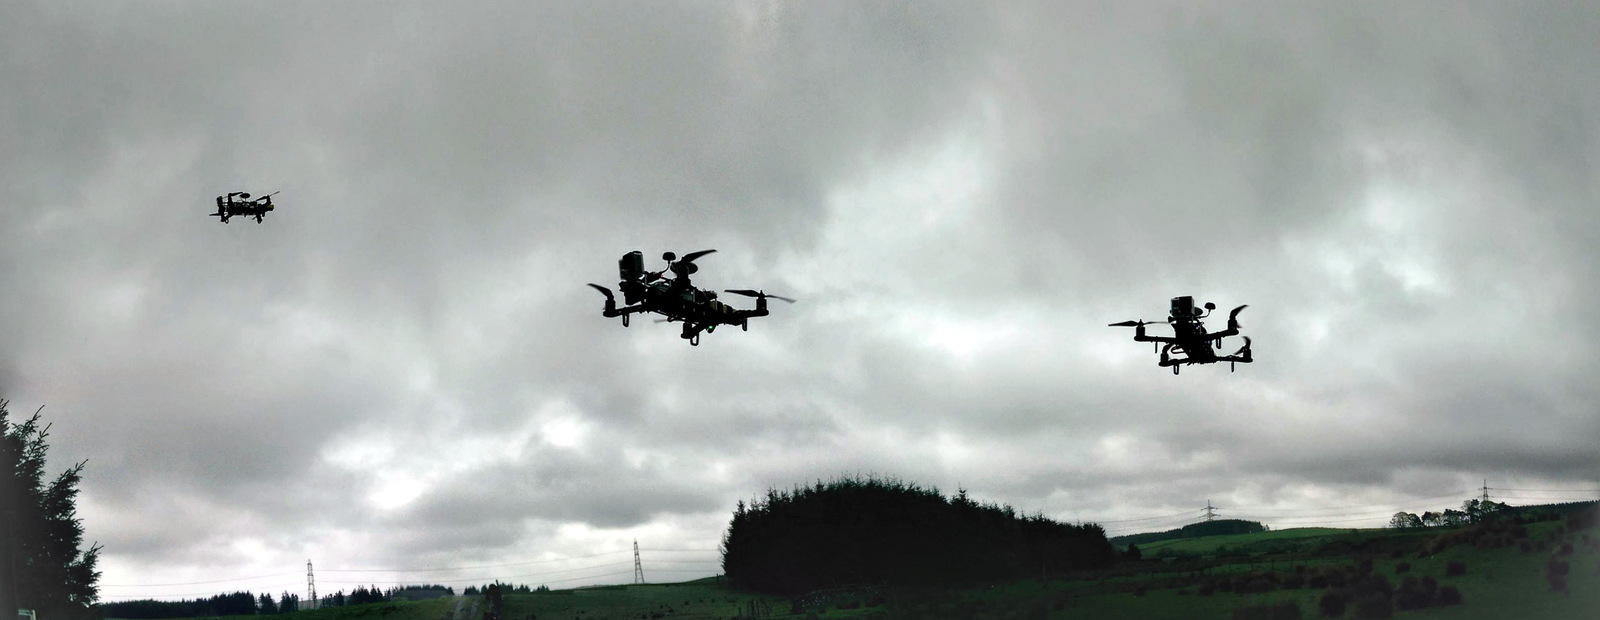
Fun with quadcopter too when it started chucking it down....
Attached Thumbnails Click image for larger version

Name:	IMAG0404.jpg
Views:	164
Size:	776.7 KB
ID:	1996088   Click image for larger version

Name:	IMAG0409_BURST020.jpg
Views:	124
Size:	377.4 KB
ID:	1996089   Click image for larger version

Name:	IMAG0410_BURST002.jpg
Views:	139
Size:	1.06 MB
ID:	1996090   Click image for larger version

Name:	IMAG0410_BURST005.jpg
Views:	133
Size:	1.12 MB
ID:	1996091   Click image for larger version

Name:	IMAG0413.jpg
Views:	140
Size:	1.78 MB
ID:	1996092   Click image for larger version

Name:	IMAG0415.jpg
Views:	130
Size:	710.3 KB
ID:	1996093   Click image for larger version

Name:	IMAG0418.jpg
Views:	124
Size:	1.58 MB
ID:	1996094   Click image for larger version

Name:	IMAG0419.jpg
Views:	145
Size:	677.3 KB
ID:	1996095  

Click image for larger version

Name:	IMAG0420.jpg
Views:	133
Size:	568.8 KB
ID:	1996096   Click image for larger version

Name:	IMAG0421.jpg
Views:	148
Size:	629.2 KB
ID:	1996097   Click image for larger version

Name:	IMAG0422.jpg
Views:	130
Size:	1.16 MB
ID:	1996098   Click image for larger version

Name:	IMAG0423.jpg
Views:	152
Size:	730.3 KB
ID:	1996099   Click image for larger version

Name:	IMAG0424.jpg
Views:	130
Size:	1.07 MB
ID:	1996100   Click image for larger version

Name:	IMAG0425.jpg
Views:	141
Size:	1.15 MB
ID:	1996101   Click image for larger version

Name:	IMAG0426.jpg
Views:	157
Size:	1.23 MB
ID:	1996102   Click image for larger version

Name:	IMAG0431-PANO.jpg
Views:	152
Size:	187.7 KB
ID:	1996103  

Click image for larger version

Name:	IMAG0439.jpg
Views:	137
Size:	1.62 MB
ID:	1996104  
Old 05-21-2014, 01:59 AM
  #42  
Colin_Mc
Thread Starter
 
Colin_Mc's Avatar
 
Join Date: Feb 2006
Location: Scotland
Posts: 203
Likes: 0
Received 1 Like on 1 Post
Default

GBRJet CAT & Maglok vent installed - both very,very well made.

Attached Thumbnails Click image for larger version

Name:	IMAG0487.jpg
Views:	139
Size:	435.9 KB
ID:	1997143   Click image for larger version

Name:	IMAG0488.jpg
Views:	132
Size:	440.4 KB
ID:	1997144   Click image for larger version

Name:	IMAG0490.jpg
Views:	152
Size:	292.8 KB
ID:	1997145  

Posting Rules
You may not post new threads
You may not post replies
You may not post attachments
You may not edit your posts

BB code is On
Smilies are On
[IMG] code is On
HTML code is Off


Contact Us - Archive - Advertising - Cookie Policy - Privacy Statement - Terms of Service -

Copyright © 2024 MH Sub I, LLC dba Internet Brands. All rights reserved. Use of this site indicates your consent to the Terms of Use.