


My SM F-14 Tomcat
 01-21-2015, 11:19 AM
#226

While Im waiting for better weather, I decided to take up some cosmetical items...
there are some errors in the markings on #146, as shown in these pictures....


some of these are easy to correct, others not......
Is started working in the nose gear doors. I opted to have the plane fitted with aluminium hinges on the doors, al I hate those plastics ones that break all the time... Onlu afterwards did I notice the hinges they use are custom fibreglass ones... oh well, added bonus of the alu hinges is that they can be taken apart by removing the M2 screw. takes some work to get it loose, as they used a lot of glue!!! I removed them to paint them black, and to install the 3D printed vents by The Little Jet Company that are on their way! also, with the alu hinges, the doors didn't open up quite right (90�). also a good opportunity to clean up the messy paintjob....removed the unused tabs on the hinges as well, and cleaned them up...


there are some errors in the markings on #146, as shown in these pictures....
some of these are easy to correct, others not......
Is started working in the nose gear doors. I opted to have the plane fitted with aluminium hinges on the doors, al I hate those plastics ones that break all the time... Onlu afterwards did I notice the hinges they use are custom fibreglass ones... oh well, added bonus of the alu hinges is that they can be taken apart by removing the M2 screw. takes some work to get it loose, as they used a lot of glue!!! I removed them to paint them black, and to install the 3D printed vents by The Little Jet Company that are on their way! also, with the alu hinges, the doors didn't open up quite right (90�). also a good opportunity to clean up the messy paintjob....removed the unused tabs on the hinges as well, and cleaned them up...
 01-21-2015, 11:23 AM
#227


Wim, how are you going to fix the lettering? I have the same scheme as you. I thought I could leave the "CDN" and just tell people it was the lone canadian in the Navy, but I would prefer to change it… ;-) I don't mind the rest of the nomenclature errors, but I know people will comment on the CDN.
01-21-2015, 11:28 AM
#228
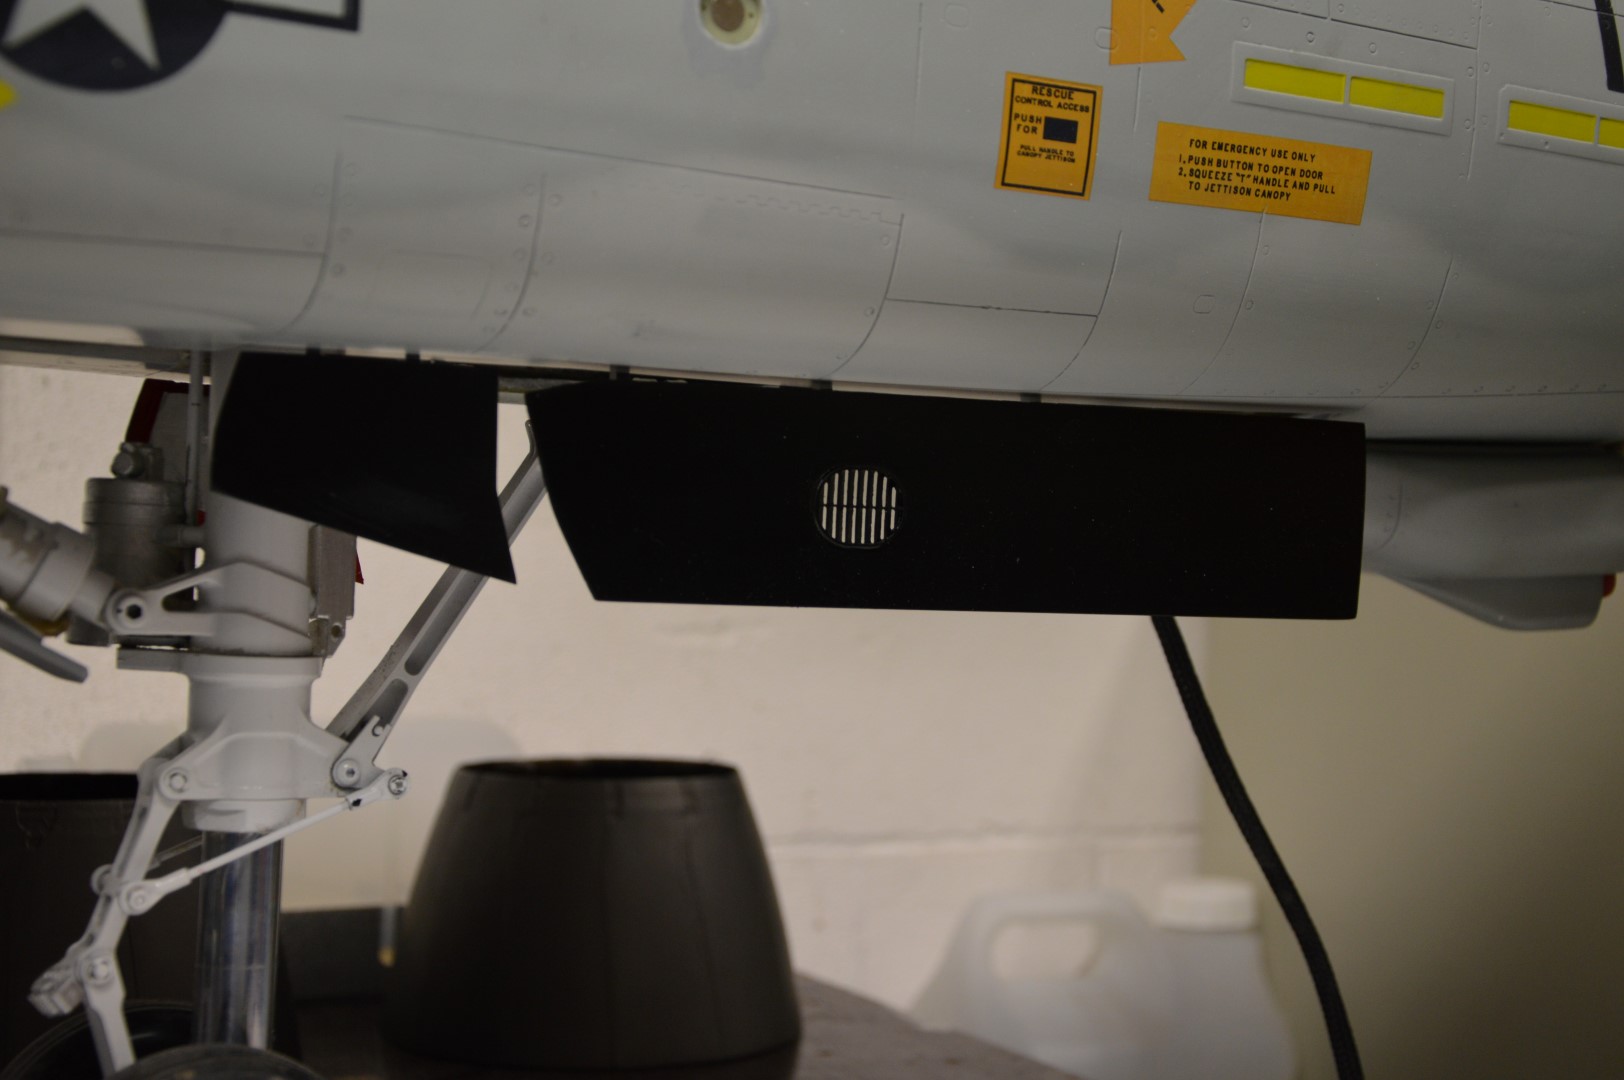
heres the doors installed temporarily....

Dr Scoles, on the lettering: apparently the Navy had a liking for the "Times New Roman" font..... a lot of these are in this font.... I decifered the marking on the doors from different pictures. A frind of mine will cut the paint masks, also those for the ventral fins, which should be black as well.
LEft door:
CMDCM (AW/SW)
R.W. BURINSKAS
Right door:
AFCM (AW) SIMMONS
MMCPO
01-21-2015, 11:35 AM
#230
I'll be changing other things as well, like the black external tanks, with the signature strip, the white base of the roundel and arrows on the fuse will be harder to fix.
als started to do some weathering. I prefer a very light approach to this, and I must admit, it's my first attemt at this...
here's some detail shots:


als started to do some weathering. I prefer a very light approach to this, and I must admit, it's my first attemt at this...
here's some detail shots:
01-21-2015, 11:48 AM
#232
also did some work on the panel lines... where the fuse is joined, a lot of the panel lines are sanded or filled. So I used a very fine file to cut the back in. a Little touch up paint, and presto!!
Top panel line on the windshield still needs to be done.

Top panel line on the windshield still needs to be done.
01-21-2015, 03:39 PM
#233

Yeah wim I guess this is just a common thing. I don't mind fixing stuff but I was unable to match the paints they used. Good work I started on mine and trying to get the turbines in. The rails are not level so I'm have to resolve this as well. I was wondering have your ever used model paint that was white like testors? If so does it get yellow over time?
01-25-2015, 01:28 AM
#235
you will notice I also worked on the "red" areas under the slat and spoilers. I bothered me that with devices retracted, the red was still visible... it makes them standout more than intended, so I painted the edges of the spoilers and airbrake on the fuse gray, and also on the first few mm's under the slat. makes an huge difference!!!!
01-25-2015, 08:43 AM
#238
Wim thats interesting I have one leading edge slat that is the same way and seeing the red when closed drives me nuts as well LOL I am also redoing my gear doors since the current state is not to standard. I was wondering about your main gear locking cylinder, do you have it tied into the gear up and down lines or is it on its own air valve?
01-25-2015, 10:02 AM
#239
Keith,
I simply tied it into the main gear cylinder, works perfectly like that. I did remove the restictors on the main gear, since the gear wouldn't retract properly. Seems it needs the momentum to make the wheel rotate.
for the paint, I bought some Revell paint, and mixed till I got it close enough...
Wim
01-25-2015, 10:31 AM
#240
Okay so you tied the the lock into the gear down air line and then the unlock into the gear up air line, Thanks, I figured this was what folks are doing just wanted to make sure it wasnt causing and binding. Cheers!
Keith,
I simply tied it into the main gear cylinder, works perfectly like that. I did remove the restictors on the main gear, since the gear wouldn't retract properly. Seems it needs the momentum to make the wheel rotate.
for the paint, I bought some Revell paint, and mixed till I got it close enough...
Wim
I simply tied it into the main gear cylinder, works perfectly like that. I did remove the restictors on the main gear, since the gear wouldn't retract properly. Seems it needs the momentum to make the wheel rotate.
for the paint, I bought some Revell paint, and mixed till I got it close enough...
Wim
01-25-2015, 11:41 AM
#243
No secret here, I did a paint-wash on it...
I used Revell paint (enamel used for plastic models) in matt/semi gloss. mixed up different tones of gray, made darker with black or lighter with white. point is to make it just a tad darker than the paint on the plane. I thinned this up with cellulose thinner, to a consistancy like water, and swiped this over the area to be weathered with a cloth. let this dry, and then wipe it back down with a paper towel and cellulose thinner. it takes some experimenting with wiping it down, too wet and all the paint is removed. in my experience, the towel needs to be almost dry to get the best effect.
How much you remove is up to your personal taste, but wipe it down in like the airstream would flow over the plane.
Do take care with thinner, as it is v�ry flammable, and do this in a well ventilated area!! Do small area's at a time....
I am under the impression that the thinner does soften the clearcoat on the plane somewhat, so do be carefull.. added benefit of this softening is that is brings a sort of deep semi gloss to the paint. and the paper towels seem to have a polishing action... I really like it this way!
Wim
 01-29-2015, 10:26 AM
#250
I continued work on the vents, they're all in now....
I did the gun vent last, and it was the hardest....given the curvature of the fuse in that area, and that the vent itself needs to be trimmed to fit right....also, cutting into the fuse is not for the faint hearted........but, they are well worth the effort!!!!

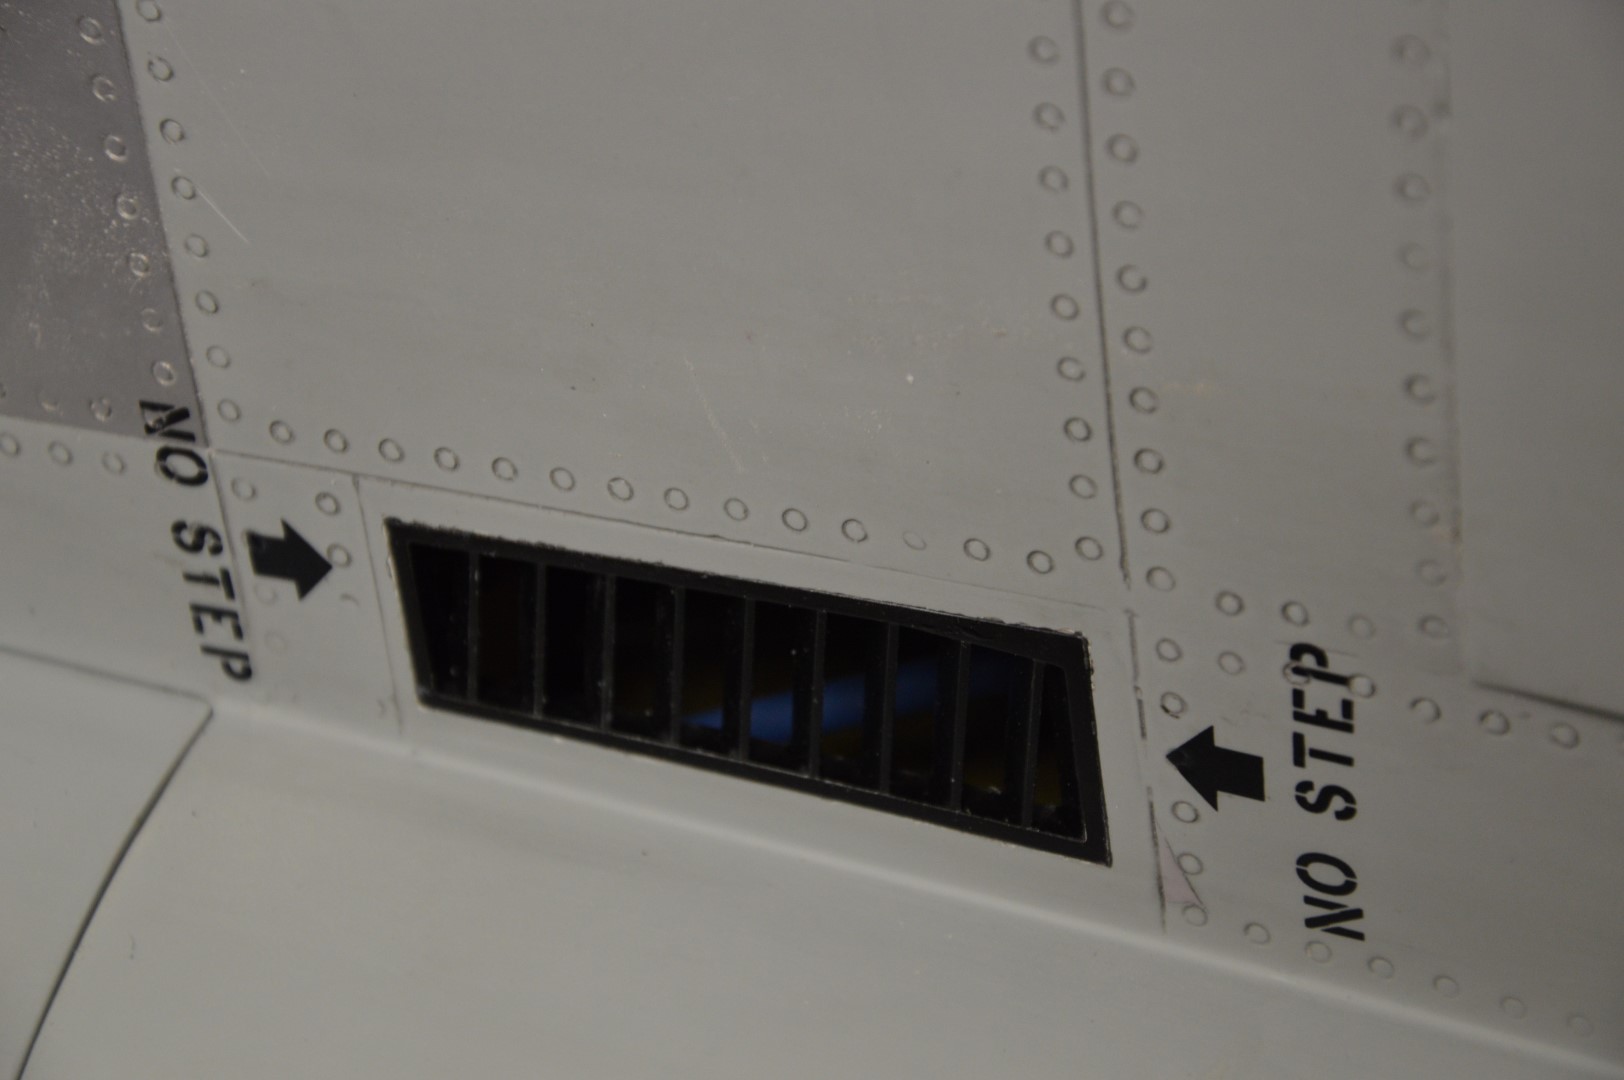


I did the gun vent last, and it was the hardest....given the curvature of the fuse in that area, and that the vent itself needs to be trimmed to fit right....also, cutting into the fuse is not for the faint hearted........but, they are well worth the effort!!!!
Last edited by WimB; 01-29-2015 at 10:41 AM.

