


Skymaster Avanti XXL Build Thread


 12-01-2014, 08:52 PM
#78

Thread Starter

Well, after a week off and way to much food I managed to get a little done tonight. I didn't get home till after 7pm so it was a late start. I pretty much just had time to glue the vent lines in the tanks, I had drilled them last night but wasn't in to building since I had such a long drive home yesterday. Tomorrow should be a better day and can get the tanks in. I haven't heard back from Todd at dreamworksrc on my sequencer so I am still waiting on that to finish up and test the air system. New videos are uploading the first was long winded and I had to start a 2nd video to finish it but I have some exciting news! If I look tired its because I am LOL


 instructor im doing a bunch of typical things you don't do during public speaking. lol Oh well im be rested tomorrow.
 12-02-2014, 08:50 PM
#83
Thread Starter
Well slow going this week, works keeping me busy and I had to help put up a tree tonight so another late start but I did get the tank mount glued in, I made a back mount to set the angle of the base board since it needed about 7 degrees to sit flush with the tank. I add some velcro and wow was impossible almost to get the tank back out lol I am going to add a flat ply bracket across the top that will mount to the bulk head to secure the bottom tank in. Im still brain storming on the top tank I may just velcro it to the top of the bottom tank. Im curious if im going to need two tanks, if I can get 8+ mins of flight I may just remove the top. Lots of tanks in this jet over two gallons in the mains and close to a gallon in the smoke tank Crazy weight im starting to 2nd guess the smoke system now so well see. I also plugged up the 2n hole on the fuel stoppers and installed them. I had one small leak on the main tank so I had to add a little more hysol to plug the pin hole. Im using a old receiver mount box as my UAT mount which I will put on top of the smoke tank if I run it , if I dont it will go in the same area just with a small mount.
A video is uploading showing the back support I made for the base board


A video is uploading showing the back support I made for the base board
12-03-2014, 08:56 PM
#84
Thread Starter
Well better late than never, had another late start tonight but im getting there! I decided not to install the smoke tank at the moment since I dont have a smoke pump yet anyway so I had to figure out a way to mount my UAT and still be able to move it and install the smoke tank. So after a bit of pondering and poking around the hobby room I had a great idea! I would like to introduce the new light, strong and completely customizable Bean UAT mount!!!
Yeah Yeah I know so simple it couldnt possibly work LOL I took some of the material I am going to make stand for the Avanti and just cut to fit where I wanted it and used some household goop to keep the UAT in place.
The video uploading shows this
I also made a light ply bracket to hold the main tank in place and laminated it with two layers of carbon fiber. It will be cured by tomorrow so I can install the top tank and hook up all the fuel lines. After that I will mount my bottom vents and then thats it till the turbine gets here....Slow going I know but with the work stuff this week its hard to get much done plus the cure tie on the carbon layup. This weekend is a bust as well since Im going to Atlanta for the big gane! Roll Tide!
https://www.youtube.com/playlist?lis...ChUhZBK1ZFKNfa
Last edited by FenderBean; 12-03-2014 at 09:03 PM.
12-04-2014, 04:20 PM
#85
Thread Starter
So got a few things done this evening so far, I also come up with another really fun thing to do with the foam stuff
 Been wanting to make a stand for this jet since I started the build but never had the right stuff till tonight. I simply cut to fit the bottom of the jet and hot glued the two support pieces. After that I took a nice soft cotton shirt and cut some strips and hot glued them to the area that touches the jet. The hard foam is softer than the white foam but its rough feeling so I wanted something soft to prevent any scratches. This will make assembly a breeze since I can put these on the ground and it allows for gear movement.
 For the build the ply bracket I laminated with carbon turned out great and very strong/light. I had to remove the velcro I was using to lower the tank some, the video im uploading now explains why. I hard mounted the big tank and if I ever need to remove it I can still get it out without tearing anything up. While the hysol is curing I went ahead and cut the two vent holes on the bottom and applied some carbon to reinforce the area. Pushing and pulling taxi tank lines on and off could over time flexing the area cause a weak spot so I beefed it up. I used 30 min epoxy with some denatured alcohol to thin it down like resign. I am using super large tygon for the vent lines so this system is deff high flow!!! After dinner and a little relaxation I will get back to it should have more stuff to post later tonight Cheers!
12-04-2014, 08:41 PM
#86
Thread Starter
Well a little more done before bed, its slow tonight having to wait on hysol to dry. I kinda changed focus and filled in about half of the six canopy hatch mount slots. I noticed the glued the "L" brackets on the top part of canopy to far back on a couple so they are not locking in the canopy whens it's on.  I cut the holes and glued in my rather larger vent lines, which I added my typical angle facing forward to help even more with pressures!
I have a another quick video uploading showing a few things and im hitting the sack, I should be done tomorrow with as much as I can till the Turbine is here.


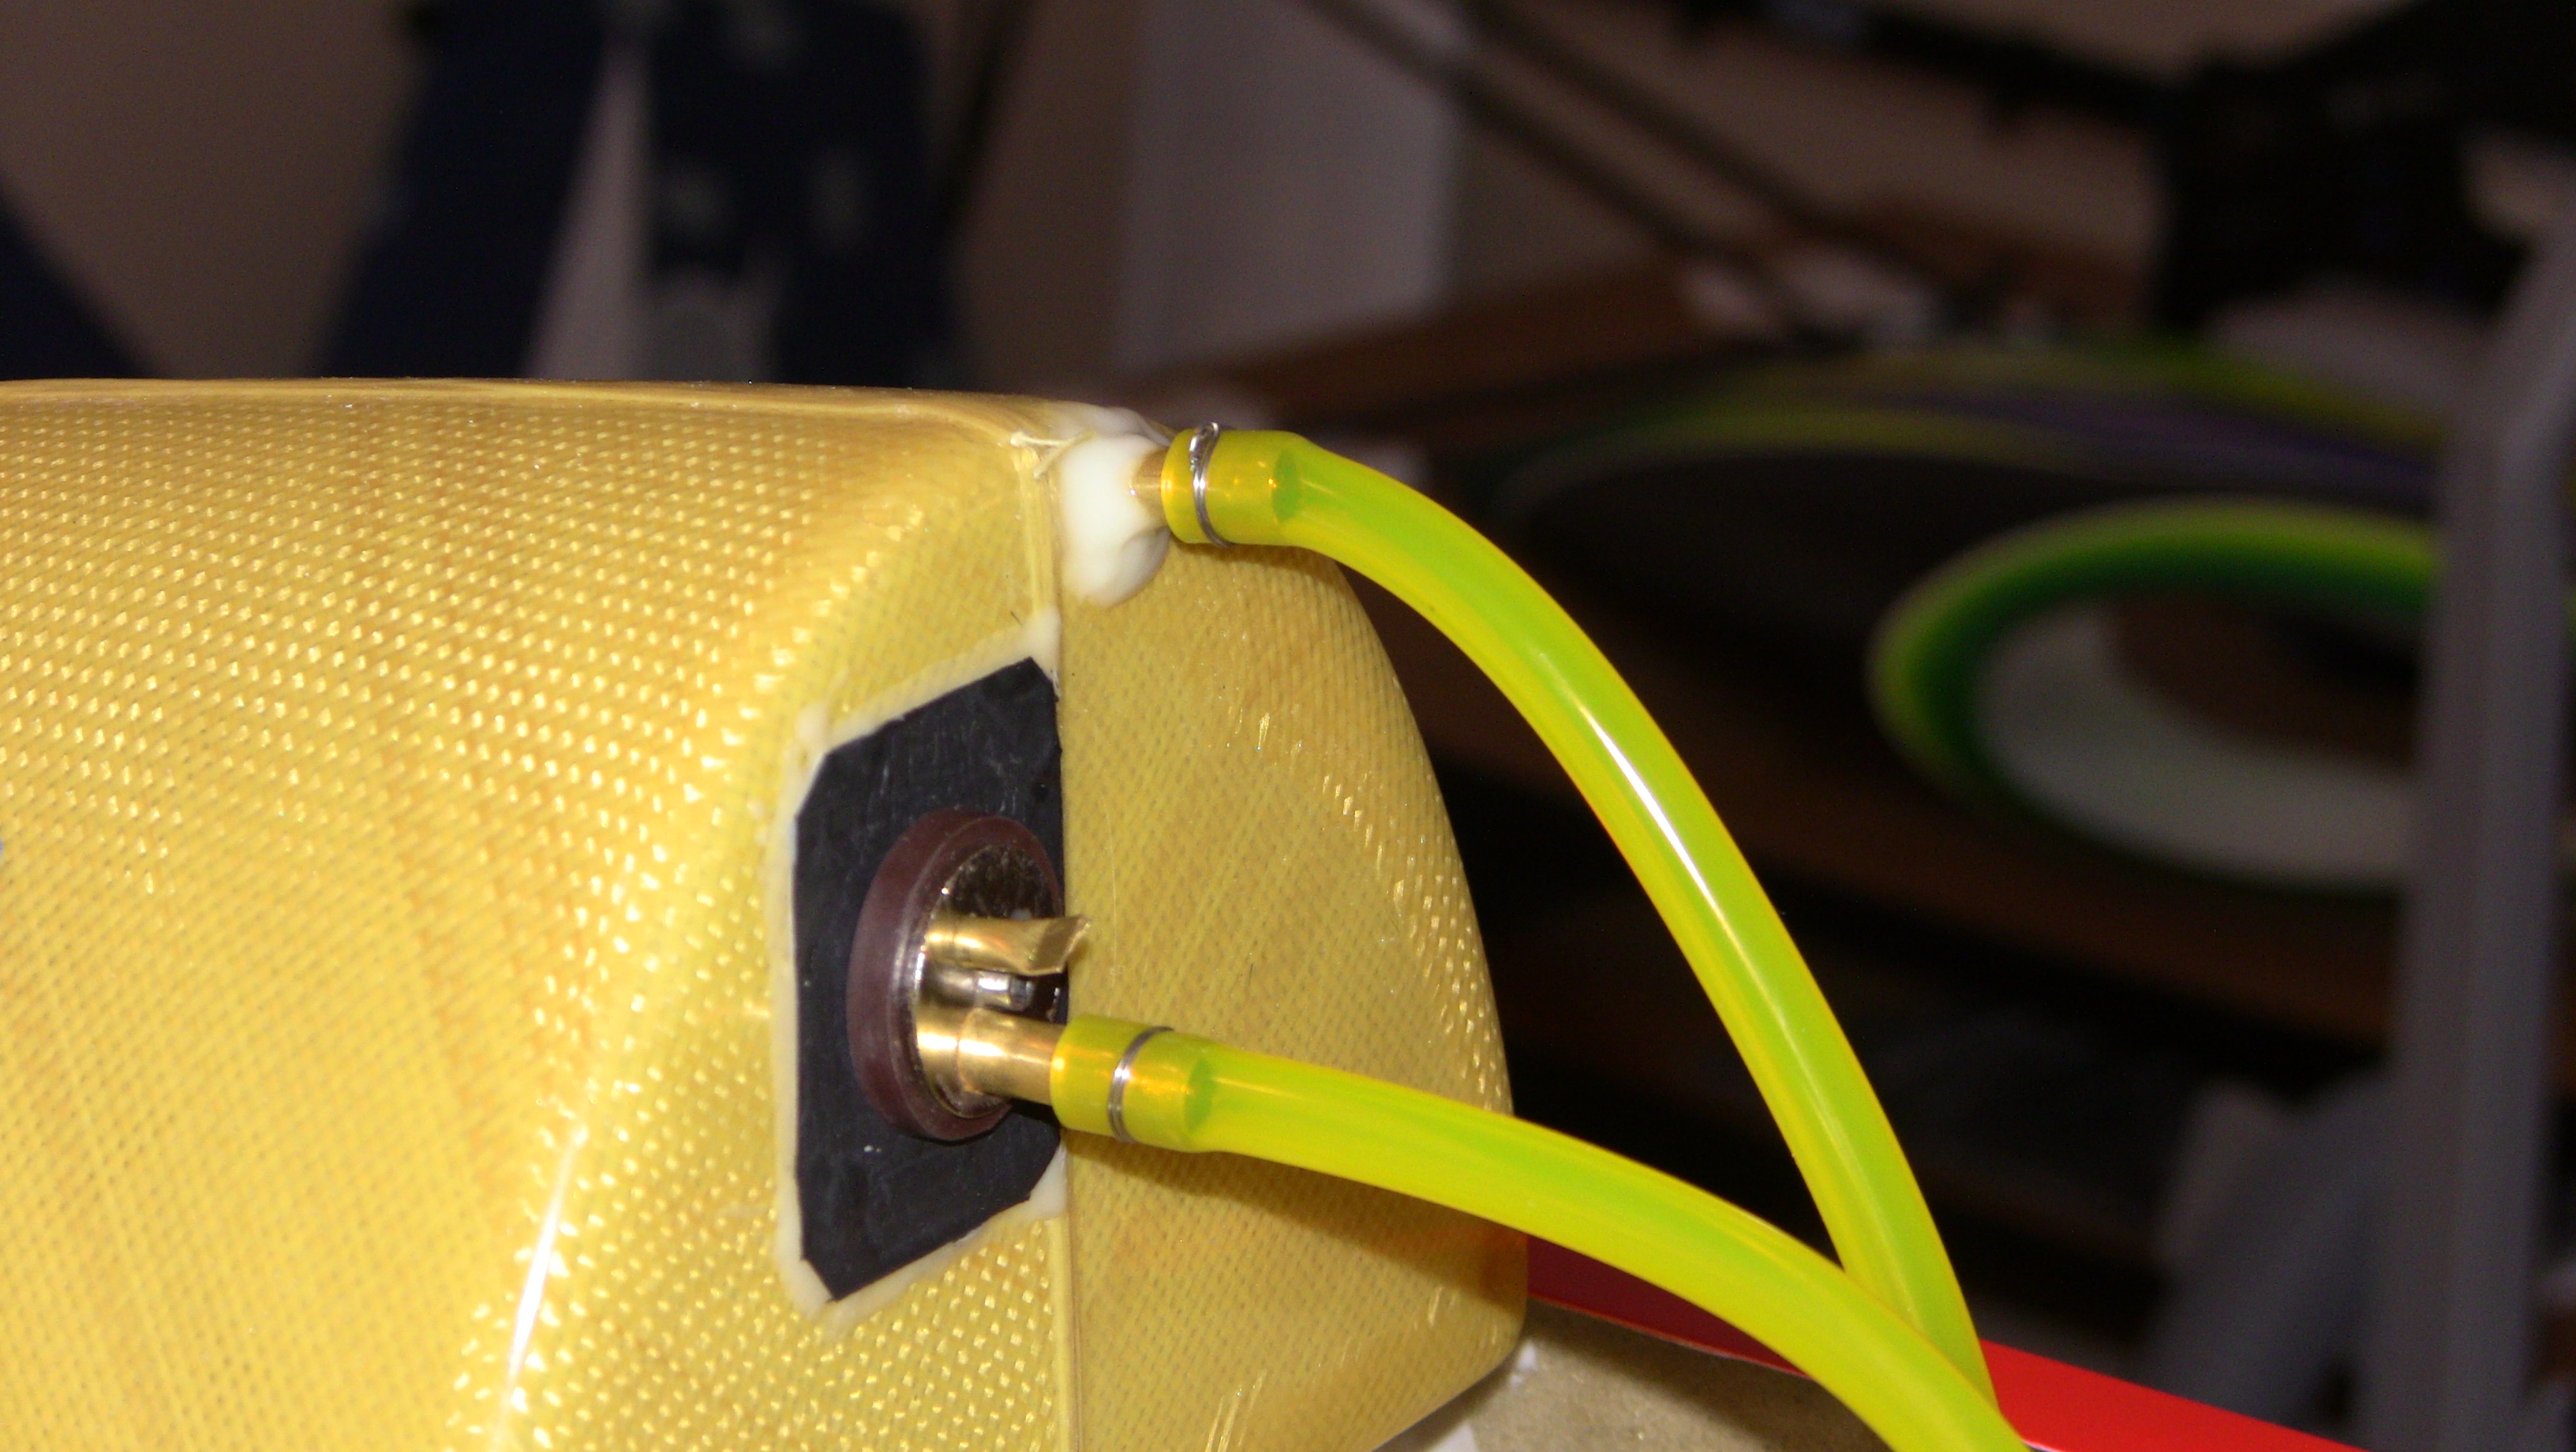


I cut the holes and glued in my rather larger vent lines, which I added my typical angle facing forward to help even more with pressures!I have a another quick video uploading showing a few things and im hitting the sack, I should be done tomorrow with as much as I can till the Turbine is here.
") 12-05-2014, 01:36 PM
12-05-2014, 01:36 PM
#88
Awesome build photos, your attention to detail is very impressive.....I have a question about your fuel system. Would it not be easier to vent the top tank to the bottom of the fuse instead of the bottom? Reason I ask is the way I see it all the fuel in the system will have to be moved from the bottom tank to the top before it flows into the uat. I ask because I don't know, I'm in no way an expert on this and have only built a few jets. 
12-05-2014, 02:32 PM
#89
Thread Starter
Due to the shape of the bottom tank its much harder for a clunk to move in all areas, the top tank is a normal tank shape. Plus the tanks are so close together I dont think pulling fuel vs down will change the pressure much. This setup will make fueling better since gravity will help keep the pressure down as well. No right answer here since the jet rolls inverted and everything changes 
12-05-2014, 02:55 PM
#91
Thread Starter
The only thing I didnt like about this was having the weight above the thrust line, as long as it doesnt make the jet wobble during rolls I will leave it
 12-07-2014, 02:29 PM
#94
Thread Starter
Okay well after almost 600 miles of driving im back home finishing up what I can. Was a good game and I had a lot fun crazy weekend for football with this new system.
So I finally come up with a way to hard mount the top tank and still be able to remove it if needed. I also made a back tank mount/equipment tray as well. I added some carbon to the side walls to help beef up the area for the front tanks supports which will be glued to the tank itself with hysol. Once everything is dry I will get back to work installing the tank and try and get the elevator support made as well.
Another video is uploading as well cheers and for those that missed it I started my next build thread on the GJC forum!
12-08-2014, 03:26 PM
#95
Thread Starter
Well all the layups are dry and I made the back support block that I glued to the aft part of the tank. I also glued the front supports on as well, I added two sided tape and a rubbery glue between the tanks to help prevent and wear from small movement. This will absorb any landing jolts that may occur. I took some of the left over hysol and glued on one end of the vector pipe push rods, not going to glue the other end until everything is in, I may need to trim the rods some.
New video is uploading


New video is uploading
12-08-2014, 07:42 PM
#96
Thread Starter
I made the top mount for the aft brace and glued it in, I think this system will do great for holding the tanks. Im really curious how other people have mounted their tanks. I am doing some beefing up on the turbine mount rails, they use some very soft ply, its two 1/8 ply glued together. I was able to pull the two pieces apart so I would check yours if you havent, I glued them back together with CA and decided to laminate both sides with carbon fiber for strength. Once they dry I will trim and glue them in, a 50+lb thrust turbine I think over time might tear the stock mounts up. I have two videos uploading showing this mod as well.


12-09-2014, 08:40 AM
#97
My Feedback: (1)
Join Date: Jul 2002
Location: SevenoaksKent, UNITED KINGDOM
Posts: 5,193
Likes: 0
Received 0 Likes
on
0 Posts
For anyone building one of these and using the supplied carbon horns, has anyone been able to set them in the proper position so the pivot sits over the hinge line? To my mind, what should actually be supplied are horns sized/shaped as in these pics from the SM website...

12-09-2014, 02:09 PM
#99
My Feedback: (1)
Join Date: Jul 2002
Location: SevenoaksKent, UNITED KINGDOM
Posts: 5,193
Likes: 0
Received 0 Likes
on
0 Posts
Fender, can you measure the distance you have from surface to your linkage pivot (ie the ball link bolt). I'm just wondering about chance of flutter if the distances become too small due to the undersized horns.
12-09-2014, 03:08 PM
#100
Thread Starter
Yeah I will measure them, I don't think you will have any flutter from them being small. The flutter would be more likely to come from the horns not holding.