


CARF Eurosport Options
 12-20-2014, 02:20 AM
#26

Join Date: Oct 2011
Location: , AUSTRALIA
Posts: 177
Likes: 0
Received 0 Likes
on
0 Posts
Just got mine today, she's quite impressive, and larger than I though. Glad I went with the K180!
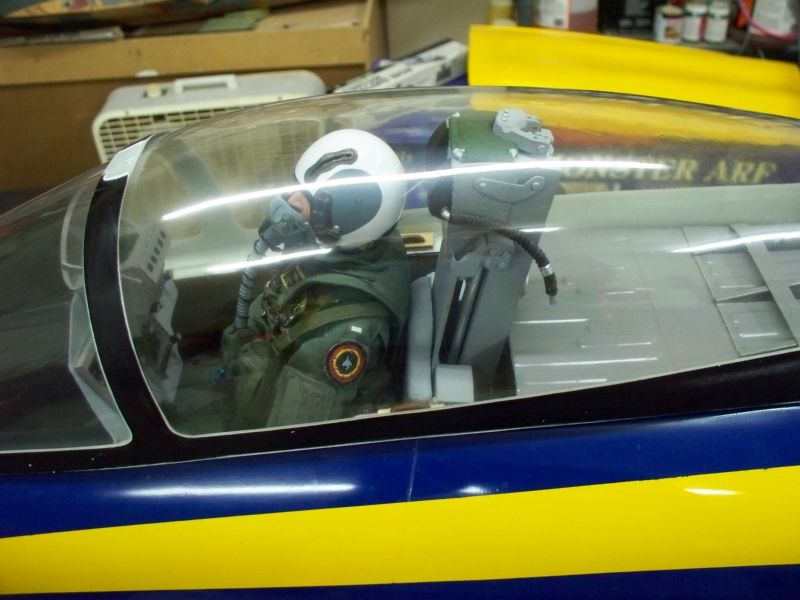
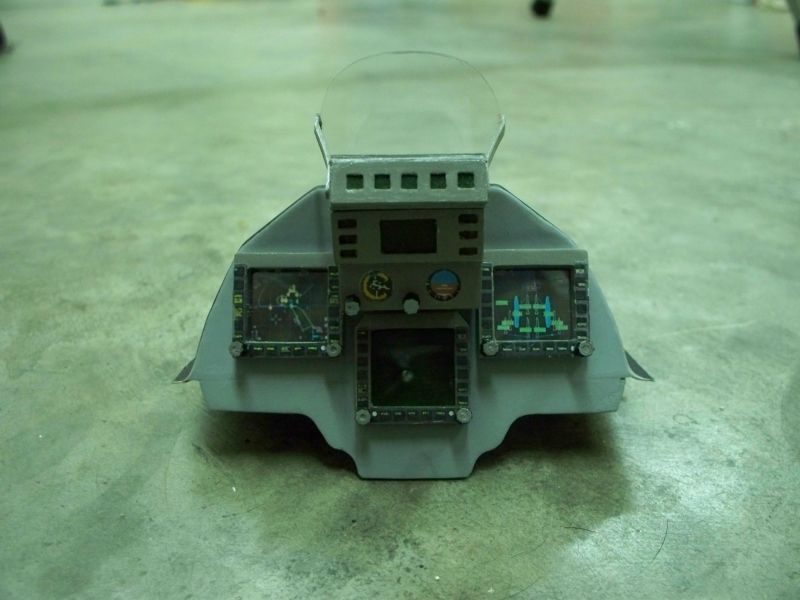
Looking fwd to putting it together, shouldn't be to much work. Using a mix of savox servos and spectrum, K 180 for motivation, Intairco/prolink gear brakes.A warbird pilots full pilot, may get his legs cut tho. Want to do a decent cockpit. Thinking I may try and get one of those operational HUD's. Using Xicoy afterburner rings ect.
Just sitting here admiring her, listeng to old school ACDC drinking wine. Life is good in FNQ .
Matt
 12-20-2014, 05:12 AM
#27
I think you have the right approach to life, Matt! Enjoy! I will soon go down to my workshop and put on Led Zeppelin II and begin to work. I have just finished the installation of the main gears and now I will continue with the horns on the ailerons. The wine will have to wait until I�m done but then I�ll have some as well. It�s a nice bird. Cheers!
 12-21-2014, 02:06 AM
#29

Join Date: Oct 2002
Location: Leeds, UNITED KINGDOM
Posts: 1,449
Likes: 0
Received 11 Likes
on
8 Posts
Hi Darren
If you only plan to fly from a tarmac runway then straight legs are fine. For a grass feild capability the trailing links are better, but get ones with an internal compression springs rather than an extenal extension spring. I was for ever stretching the springs, and this meant that the wheel would catch on the fuselage. I got mine from Dave Wiltshire and they have not needed any maintenance at all, and quite resonably priced too. I have only seen mine nodding during the taxi, I have not noticed it during the take off run. Perhaps that is because I set 5 degrees positive canard for take off.
When you have it finished, i will be happy to help you with throws etc.
John
12-21-2014, 02:11 AM
#30
Join Date: Oct 2002
Location: Leeds, UNITED KINGDOM
Posts: 1,449
Likes: 0
Received 11 Likes
on
8 Posts
Whilst on this topic, has anyone got any instrcutions for fuitting the CARF airbrake kit? Mine did not come with any and MArtin has searched their site and not found any. When I did my frst one this kit did not exist. This time I thought to take the lazy way out, but we were looking at all the bits yesterday and scratching our heads. There are some parts that have a obvious use ( although at the price, I would have expected them to fit rather better). Then there are other parts that we have no clue about. I.E. two carbon plates, curved at one edge and with white gel coat on one side. Answers on a postcard please...
TIA
John
TIA
John
12-21-2014, 04:42 AM
#32

Just got mine today, she's quite impressive, and larger than I though. Glad I went with the K180!
Looking fwd to putting it together, shouldn't be to much work. Using a mix of savox servos and spectrum, K 180 for motivation, Intairco/prolink gear brakes.A warbird pilots full pilot, may get his legs cut tho. Want to do a decent cockpit. Thinking I may try and get one of those operational HUD's. Using Xicoy afterburner rings ect.
Just sitting here admiring her, listeng to old school ACDC drinking wine. Life is good in FNQ .
Matt
 12-21-2014, 05:34 AM
#34
Whilst on this topic, has anyone got any instrcutions for fuitting the CARF airbrake kit? Mine did not come with any and MArtin has searched their site and not found any. When I did my frst one this kit did not exist. This time I thought to take the lazy way out, but we were looking at all the bits yesterday and scratching our heads. There are some parts that have a obvious use ( although at the price, I would have expected them to fit rather better). Then there are other parts that we have no clue about. I.E. two carbon plates, curved at one edge and with white gel coat on one side. Answers on a postcard please...
TIA
John
TIA
John
12-21-2014, 06:38 AM
#35

My Feedback: (34)
My only issues with my euro is even with the k140. I feel like its just to slow I find my self at almost full power 80% of the flight. I know with the k140 it flys great but I feel like I more motor. Even thow my set up has been gps at 175. I think it has a lot to do with its massive size
But I have been told a motor I upgraded would have hardly noticeable. I got a old 50pound thrust AMT I thought about transplanting into the euro. But I was told it would only go 20mph faster. What you guys think
12-21-2014, 06:38 AM
#36
My Feedback: (34)
My only issues with my euro is even with the k140. I feel like its just to slow I find my self at almost full power 80% of the flight. I know with the k140 it flys great but I feel like I more motor. Even thow my set up has been gps at 175. I think it has a lot to do with its massive size
But I have been told a motor I upgraded would have hardly noticeable. I got a old 50pound thrust AMT I thought about transplanting into the euro. But I was told it would only go 20mph faster. What you guys think
")
 12-22-2014, 03:39 AM
#39
Thread Starter
Ok, so I have decided on the gear.
I have gone with Intairco retracts, wheels and brakes with Pro-Link trailing link oleos on the mains and the Intairco straight strut on the nose. Hopefully that combination will be ok.
Intairco have been great to deal with so far, and they're currently having a Christmas sale which makes the prices very reasonable (even when factoring in shipping costs from Australia).
Now I just need to decide on the tanks. Are the standard CARF 4 litre tanks big enough for a Merlin 160/200?
12-22-2014, 04:58 AM
#40
Senior Member

Join Date: Nov 2008
Location: Coventry, UNITED KINGDOM
Posts: 1,015
Likes: 0
Received 0 Likes
on
0 Posts
I found this document which shows and describes all the nav and strobe lights.
http://www.utcaerospacesystems.com/c...0Equipment.pdf
http://www.utcaerospacesystems.com/c...0Equipment.pdf
12-22-2014, 05:12 AM
#41
Join Date: Oct 2002
Location: Leeds, UNITED KINGDOM
Posts: 1,449
Likes: 0
Received 11 Likes
on
8 Posts
Ok, so I have decided on the gear.
I have gone with Intairco retracts, wheels and brakes with Pro-Link trailing link oleos on the mains and the Intairco straight strut on the nose. Hopefully that combination will be ok.
Intairco have been great to deal with so far, and they're currently having a Christmas sale which makes the prices very reasonable (even when factoring in shipping costs from Australia).
Now I just need to decide on the tanks. Are the standard CARF 4 litre tanks big enough for a Merlin 160/200?
I have gone with Intairco retracts, wheels and brakes with Pro-Link trailing link oleos on the mains and the Intairco straight strut on the nose. Hopefully that combination will be ok.
Intairco have been great to deal with so far, and they're currently having a Christmas sale which makes the prices very reasonable (even when factoring in shipping costs from Australia).
Now I just need to decide on the tanks. Are the standard CARF 4 litre tanks big enough for a Merlin 160/200?
John
12-23-2014, 12:42 AM
#43
Join Date: Oct 2002
Location: Leeds, UNITED KINGDOM
Posts: 1,449
Likes: 0
Received 11 Likes
on
8 Posts
The speed brake area is very similar (but much neater) than my original. I will use a linaer actuator instead of an air cylinder on this one.Your servo tray area is interesting.
John
12-26-2014, 07:05 AM
#44
My new Eurosport Evelution kit comes with 4 very nice fairing’s that clearly are supposed to fit on the underside of the wings. On the original aircraft they probably cover the mechanisms for the trailing edge surfaces or whatever they are called nowadays.
Now I don’t really know how I am going to do with them on my model? They are of course not mentioned in the manual but their position is clearly marked on the wing skin. They seem to narrow to fit my linkage inside them but I guess it still can be done with some stubbornness if that is what is meant. But I think it seems better to put the linkage besides the fairing. And if I glue them in place, witch obviously is meant, they will cover the removable hatches for the aileron servos making them closed for ever and that don’t seems to be a very practical solution. Someone must have solved this problem before me. Does anyone have an idea?
Jannica In Sweden
Last edited by Jannica; 12-26-2014 at 09:45 AM.
12-26-2014, 06:10 PM
#46

Join Date: Apr 2007
Location: AUSTRALIA
Posts: 397
Likes: 0
Received 0 Likes
on
0 Posts
I have had two euro's neither time those covers fitted. I made some new ones for the first one from moulds that a good friend and had made and they then fitted. Lot of mucking around. Current Euro did not install them and they are in the shed somehwere. Didnt fit either. I suppose unless you are a scale modeller I would not take the time to put them on. Aesthetics only I believe. Keep it light its either a sports model or a scale model.