


Skymaster F-18F
 02-23-2015, 02:39 PM
#26

Join Date: Jan 2007
Location: Castle Rock,
CO
Posts: 267
Likes: 0
Received 0 Likes
on
0 Posts
 02-23-2015, 02:51 PM
#27

My Feedback: (3)

Join Date: Oct 2005
Location: san jose,
CA
Posts: 880
Likes: 0
Received 0 Likes
on
0 Posts
There was a recent thread on this and probably best for recent info(can find it in a search). For an F18 the ultra precision(up valves) work well IMO. IIRC an up2 + up3.
02-23-2015, 03:27 PM
#28

I'm using a 14 channel Futaba and a Powerbox Champion SRS: http://www.chiefaircraft.com/radio-c.../pbs-4520.html
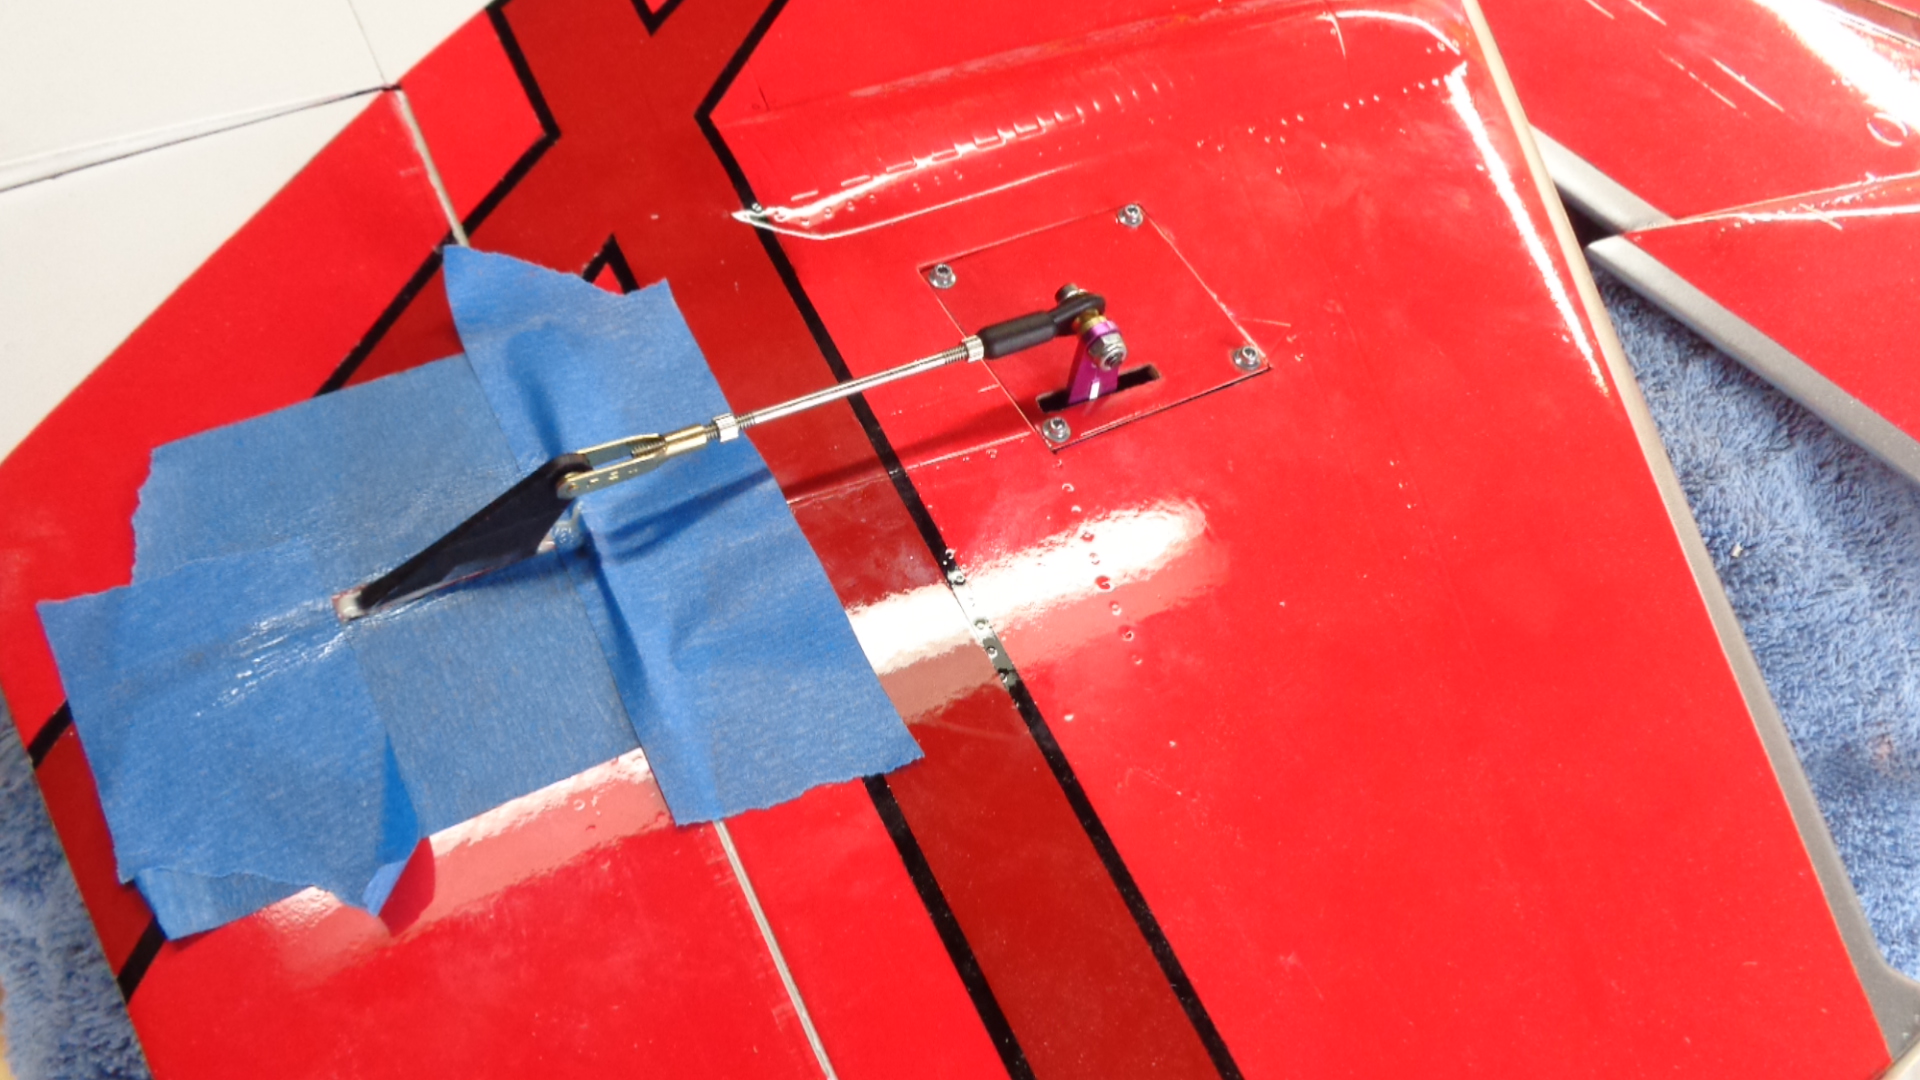
Right now I'm working on the flaps, there are a few reasons I want a concealed linkage system. For one I don't like surfaces that are hinged on the bottom to have the control horn on the bottom. My plane has white on the wings there and any linkage shows up a lot more. Concealing the linkage will keep all but 2 aileron servo's outside the fuselage.
Right now I'm working on the flaps, there are a few reasons I want a concealed linkage system. For one I don't like surfaces that are hinged on the bottom to have the control horn on the bottom. My plane has white on the wings there and any linkage shows up a lot more. Concealing the linkage will keep all but 2 aileron servo's outside the fuselage.
02-24-2015, 01:23 PM
#29
My Feedback: (24)

Join Date: Dec 2001
Location: New Braunfels,
TX
Posts: 288
Likes: 0
Received 0 Likes
on
0 Posts
Luke,
Looks like a lot of mods to a Ready To Fly Airplane. You're doing the right thing by strengthening the servo areas. Can't believe they put stuff like that out there as usable. Is the Panther and the F-18 still in the fleet? Any new videos lately?
Rob
Looks like a lot of mods to a Ready To Fly Airplane. You're doing the right thing by strengthening the servo areas. Can't believe they put stuff like that out there as usable. Is the Panther and the F-18 still in the fleet? Any new videos lately?
Rob
02-24-2015, 02:40 PM
#30
Hey Rob nice to see you chime in here! I don't do well in the cold so I have not done any glassing or painting although the Panther is ready for covering, I was hoping to have warmer weather by this time!
These "Almost Ready to Fly" planes can be a lot of work! lol!
These "Almost Ready to Fly" planes can be a lot of work! lol!
03-03-2015, 03:46 PM
#31
It has been one cold winter, my shop is not insulated and I don't have a heater, going to be 30 degrees Thursday. I can work all day in 100 degree heat, but I'm out and calling it quits in the cold!
I did manage to get some work done on the rudders, still waiting for my flap part from the machine shop. The servo covers are 1/16" ply with some I believe Jet Legend brackets. I mounted my servo low on the vertical because it looks better and the servo would not fit if it was higher.


I did manage to get some work done on the rudders, still waiting for my flap part from the machine shop. The servo covers are 1/16" ply with some I believe Jet Legend brackets. I mounted my servo low on the vertical because it looks better and the servo would not fit if it was higher.
03-21-2015, 07:18 PM
#32
She is finally here, very nice!
The turbine mounts are very brittle poorly glued sandwich of 1/8" ply, I broke it out with my thumb and index finger only.
I'm going with a high flow system, 8mm fittings and tubing with a reducer to 6mm just before the fuel pump inlet. The reducer is included in the high flow UAT from BVM. I also went with the high flow fittings from Jet Tech and the heavy clunks. You can see the new motor mounts I cut from good old Bud Nosen 1/4" ply. The clear 8mm high flow clunk line from BVM did not work, it is way to soft, I just went with yellow Tygon.
In order to get the servo wires past the turbine and saddle tanks I had to make a small hole below the tanks.
There is plenty of room for the turbine now. Also notice my test fitting of the new motor mounts.
In order for the cockpit to fit properly, I had to add about 2" of new material behind the rear seat, you can just see the line. If you don't the cockpit will not look right, the rear seat will be to far back and the dash will be off in front. Also don't forget to paint the inside of the canopy frame black.
Last edited by dionysusbacchus; 03-21-2015 at 07:20 PM.
03-25-2015, 09:09 AM
#35
When I installed the tank fittings I added some Hysol to areas of the tank that appeared to be potential leak areas. When I did the pressure check only one hole was found in one of the saddle tanks.
I made a fiberglass heat shield for the elevator servos.
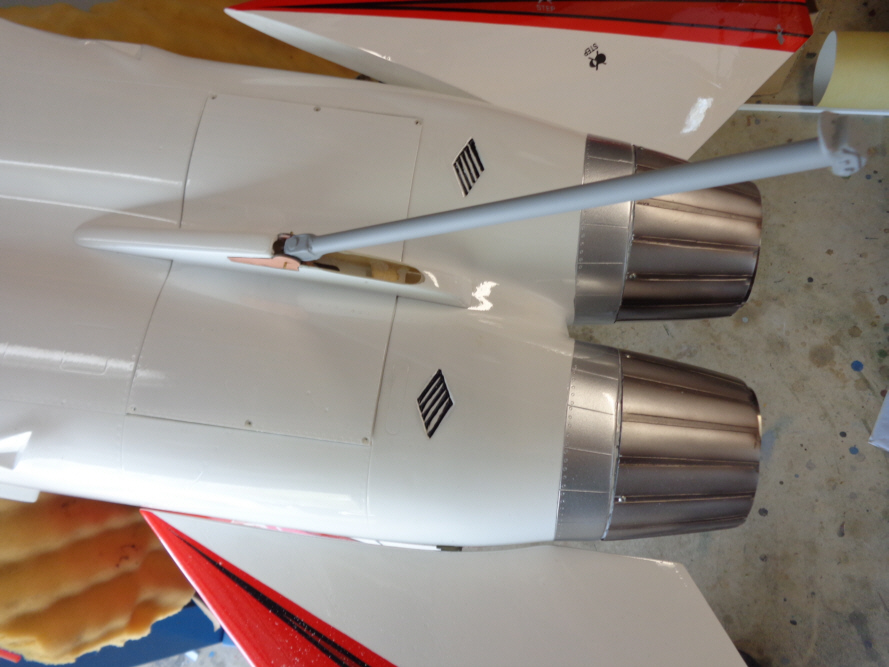
The tailpipe exits are closer together than the scale exits, this is really not a problem because you want the pipe to have as little of an angle in the split as possible. Only problem is the stock ply rings are way off and it's more work to fix that.
Tailpipe installed.
A look at the tailpipe exit, I set the turbine at 20mm from the pipe, you can go as much as 30mm and that would be nice. But the tailpipe would stick out to far at 30mm.
Going with a partial bypass.
Turbine installation, I also have a lot of the fuel plumbing done.
Unfortunately I will have to stop work on the CF-18F, Dreamworks had the air valves "In Stock" when I ordered them, a day later I got a notice they were on backorder, could be several weeks. I have another project to finish, so I will be back on this hopefully in a month or so.
03-25-2015, 10:36 AM
#37
My Feedback: (5)
I was wrong though about the mounting of the servo plate, it is keyed into both fuselage formers, with everything I've added the fuselage would have to be destroyed to move that plate at all, it is extremely rigid!
Waiting for the Hysol to dry on the ailerons.
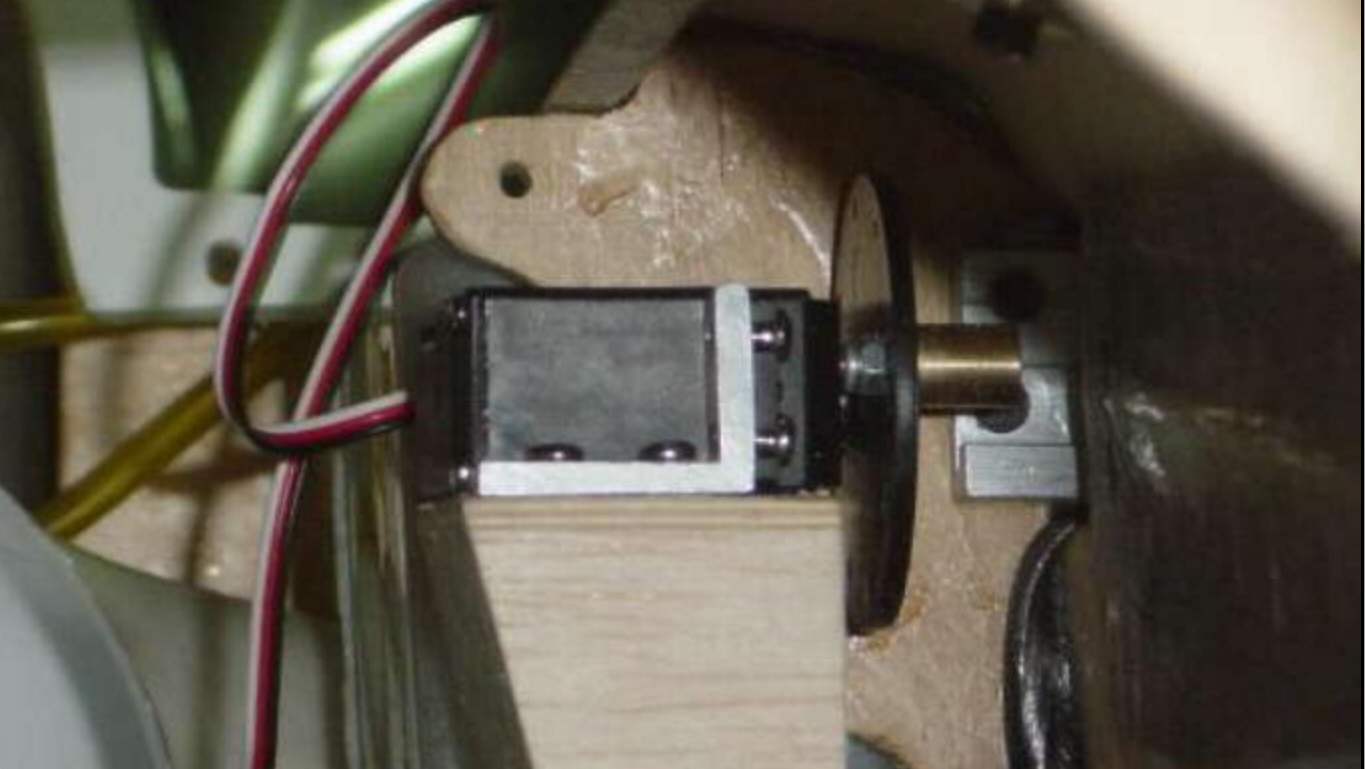
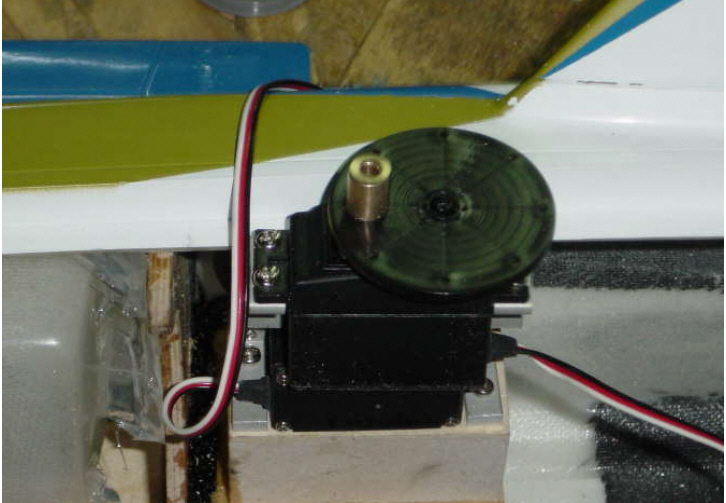
I'm debating the flap servo set up, Skymaster says you can hook up a linkage for installation of the flap servo inside the fuselage, but I have no idea where to get the part that goes on the servo arm, any ideas?
Waiting for the Hysol to dry on the ailerons.
I'm debating the flap servo set up, Skymaster says you can hook up a linkage for installation of the flap servo inside the fuselage, but I have no idea where to get the part that goes on the servo arm, any ideas?
Last edited by basimpsn; 03-25-2015 at 10:41 AM.
03-25-2015, 12:12 PM
#38
I had to redo the airlines, especially the old yellow ones, they were so hard they actually cracked in some tight turn areas and would spin on the T fittings! I tested the system it all holds air, although I am not taking any chances with all those air cylinders, the gear doors are going to be on a completely separate air system.
Thanks basimpsn, I really would like to do that, but I was looking for the brass part. Tried to get a machine shop to do it but I guess it just was not worth it to them. Since my valves are on backorder, I have some time to figure something out.
Mine came with aluminum rod sticking out from the flap into the fuselage and slid into the brass hole of the flap servo wheel.
 03-25-2015, 06:11 PM
#40
Thanks and your F-18 is looking great! I was planning on putting as much under the engine hatch as I could also, like how you got the UAT back there! Are you running a high flow 8mm fuel system? I hope these valves don't take as long as they say, I will continue to tinker with my F-18 with some minor things that need attention.
03-25-2015, 06:40 PM
#41
Thanks man!! They are the stock tanks, I'm going to see how they go but might upgrade to the jet techs. Mine is an older one that was a partial build so the tanks were included. Mine also has internal linkages for the rudders, my buddy is machining me some long control arms to give it an extreme mechanical advantage to prevent flutter. He also made me some larger elevator arms to again increase the mechanical advantage. I had Tam build a customs pipe and had it made with larger diameter nozzles and a shorter length than stock to account for the bigger 210. I also added some afterburner rings and upgraded the main wheels to a larger diameter as well.

Stab arms

Onboard GSU, the UP3 has been removed and will be using 2 Xicoy valves 1 for doors and one for gear with the DX18 built in sequencer
Stab arms
Onboard GSU, the UP3 has been removed and will be using 2 Xicoy valves 1 for doors and one for gear with the DX18 built in sequencer
03-25-2015, 07:18 PM
#42
Some great mods there, on those bigger main wheels, I looked into that but that will raise the a s s of that bird even more! What mods are you doing to the nose gear to get the nose higher? The lower nose attitude is one of the problems with this bird.
From what I've read, I will be setting the CG at 130mm and taking off with full flaps on the maiden. What are your thoughts?
From what I've read, I will be setting the CG at 130mm and taking off with full flaps on the maiden. What are your thoughts?
03-25-2015, 07:39 PM
#43
So I had already raised the nose almost 1/2" but couldn't stand the tiny mains so after going to a 1/2" bigger wheel I took the struts apart and cut down the springs a 1/4" and now the stance is perfect and the wheels look way better. With the better stance I plan on using an agressive take off flap setting (not full) and use 130-135 CG with the 210 if it pops on takeoff it will be no problem since I will be much better than 1:1 fully fueled...
Last edited by bri6672; 03-25-2015 at 07:43 PM.
03-26-2015, 04:23 AM
#46
bri6672, that looks really nice. That is something I can always change later, so I'll wait. Keep the pictures coming though, very good to see what others do on a project!
xhxfhh, I did a complete rework of the stab servo mount area, look back through the thread. The mount is tied to both formers and the way I have mine modded you would have to destroy the fuselage to move it.
I have a few little details I will be tinkering with while I wait for the last of my items to finish this bird, first up will be a functional tail hook! Well not totally functional but good enough for a dirty carrier pass! I have one on my 1/8 scale Royal Corsair, so this one should be easy!


Tail hook is a pretty noticeable feature of this plane, and to have it down will look cool!
xhxfhh, I did a complete rework of the stab servo mount area, look back through the thread. The mount is tied to both formers and the way I have mine modded you would have to destroy the fuselage to move it.
I have a few little details I will be tinkering with while I wait for the last of my items to finish this bird, first up will be a functional tail hook! Well not totally functional but good enough for a dirty carrier pass! I have one on my 1/8 scale Royal Corsair, so this one should be easy!
Tail hook is a pretty noticeable feature of this plane, and to have it down will look cool!
03-26-2015, 01:23 PM
#50
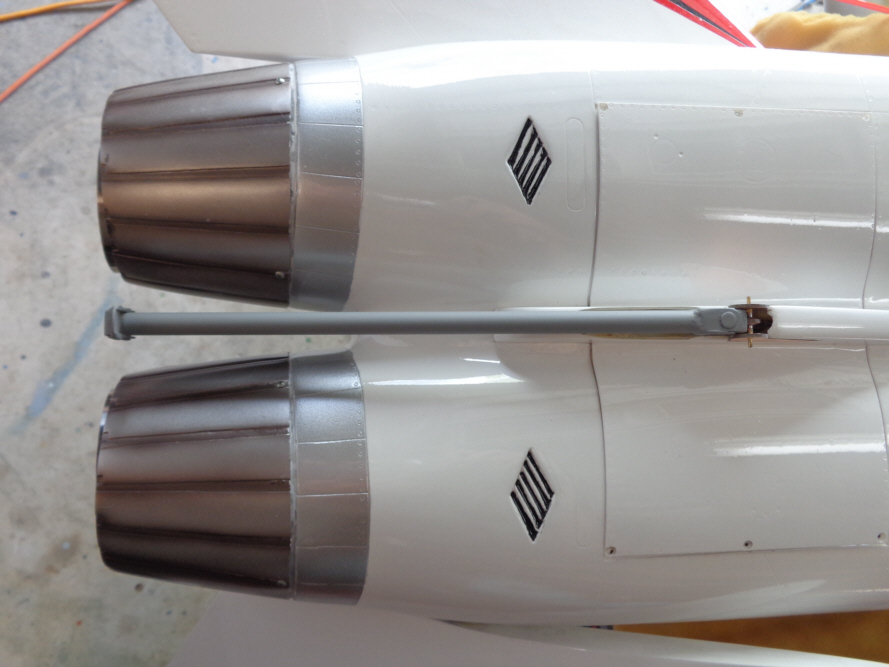
Yes she's got a hook!
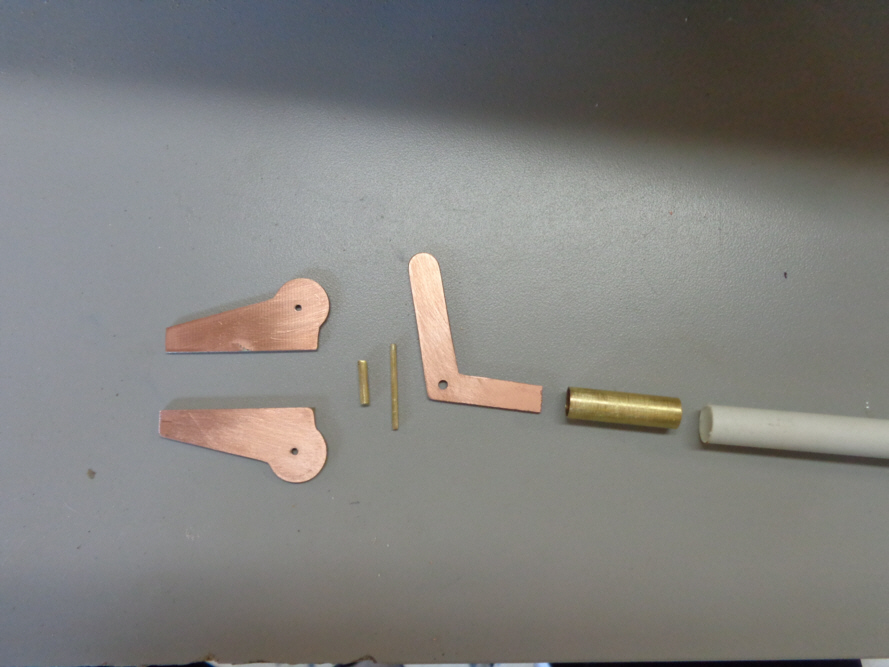
Started with a simple drawing and some double sided copper clad PC board, .040.
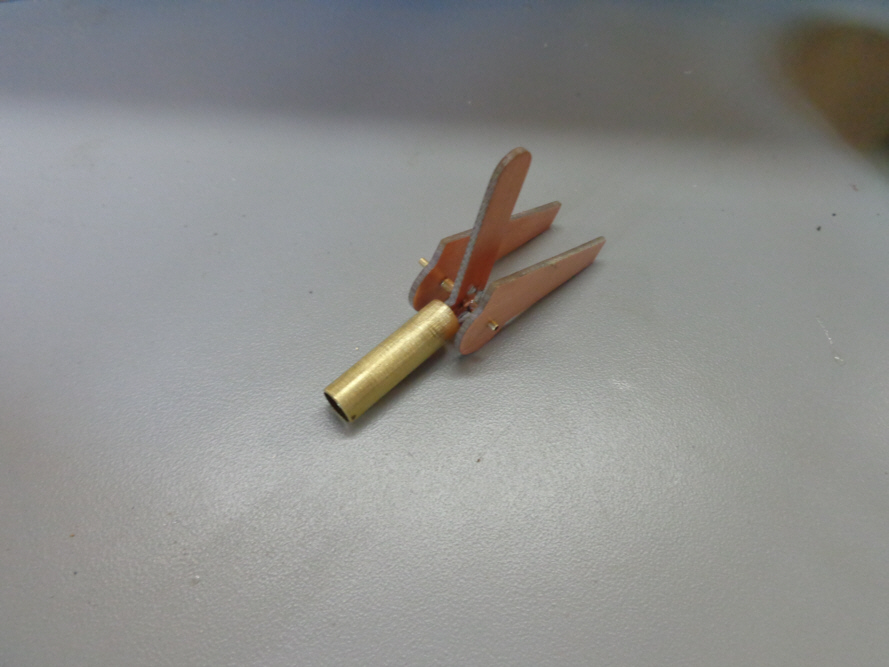
The larger brass tube is soldered to the servo lever, this keeps it centered. The tiny brass tube will be soldered to the PC board hook supports when the time comes.
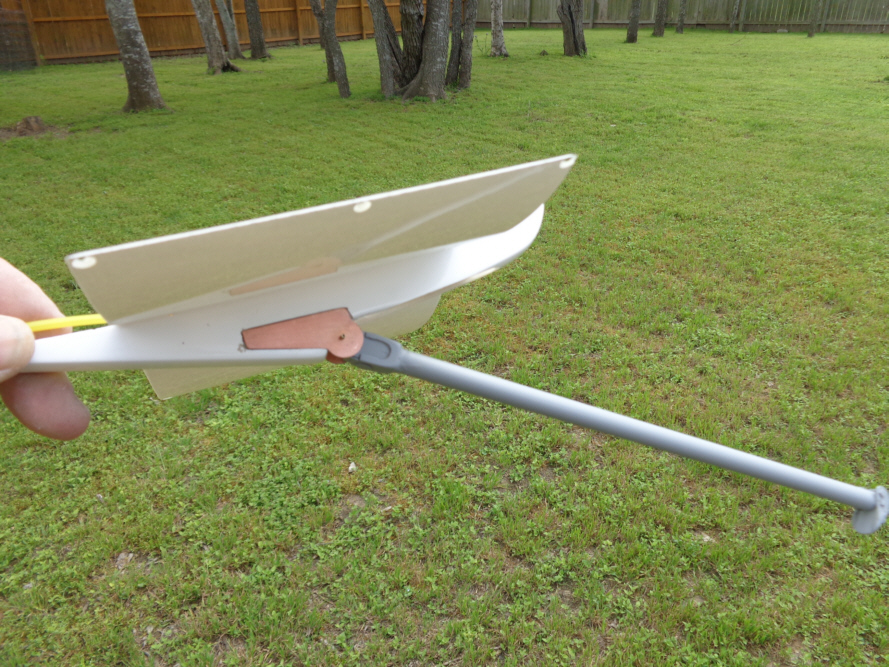
I used Hysol to glue in the hook supports.
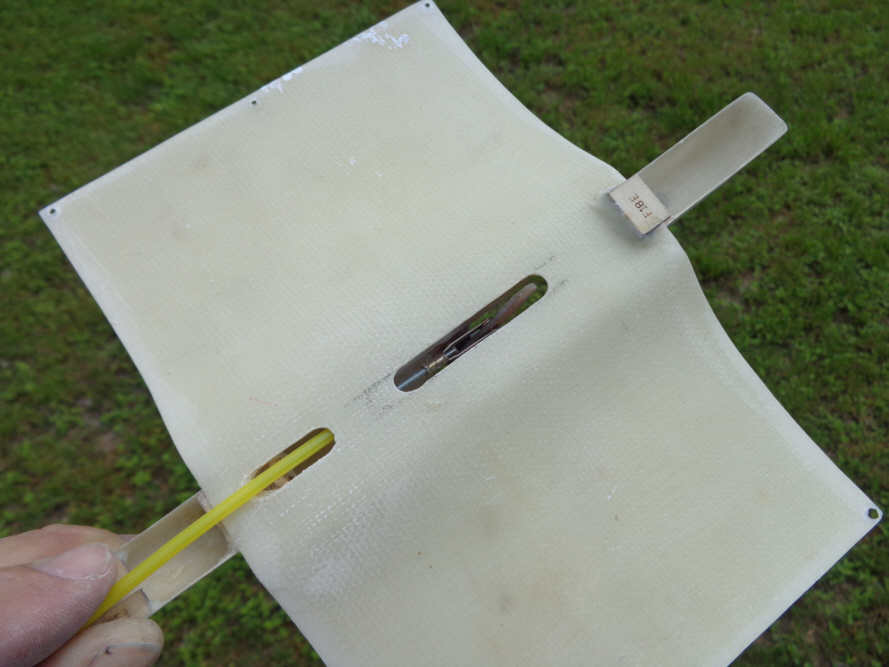
To remove the hatch the pushrod will be disconnected from the servo located in the front of the aircraft and the inner yellow pushrod pulled out of the plane.
Should look the part all painted up!
Started with a simple drawing and some double sided copper clad PC board, .040.
The larger brass tube is soldered to the servo lever, this keeps it centered. The tiny brass tube will be soldered to the PC board hook supports when the time comes.
I used Hysol to glue in the hook supports.
To remove the hatch the pushrod will be disconnected from the servo located in the front of the aircraft and the inner yellow pushrod pulled out of the plane.
Should look the part all painted up!
Last edited by dionysusbacchus; 03-26-2015 at 01:27 PM.