


Skymaster 1/5 Scale F16 Build Thread
 08-24-2016, 03:17 AM
#351
Thanks Gary. I haven't tried to purge the system yet as been focusing on other areas but I'll get to it. Thanks for sharing your methods/progress throughout the build.
Definatley is some benefit in running one air system as Andy suggested. I like to run three. Obviously with only one air circuit all it takes is a line to pull off the wheel brakes during retraction or a small door cylinder to fail and it takes the whole system with it.
Definatley is some benefit in running one air system as Andy suggested. I like to run three. Obviously with only one air circuit all it takes is a line to pull off the wheel brakes during retraction or a small door cylinder to fail and it takes the whole system with it.
 08-24-2016, 05:58 AM
#352

Running 3 air systems is the best way to do it IMO. I would hate to loose air-pressure in my main gear from something like a canopy cylinder leaking.
Gear is on its own system
Brakes on its own system
Non essential equipment is on the 3rd system. On my F15 its Airbrake-Canopy-bombdrop.
This is how I do my planes.
Looks great Gary. Nice build.
Gear is on its own system
Brakes on its own system
Non essential equipment is on the 3rd system. On my F15 its Airbrake-Canopy-bombdrop.
This is how I do my planes.
Looks great Gary. Nice build.
08-24-2016, 06:06 AM
#353

Running 3 air systems is the best way to do it IMO. I would hate to loose air-pressure in my main gear from something like a canopy cylinder leaking.
Gear is on its own system
Brakes on its own system
Non essential equipment is on the 3rd system. On my F15 its Airbrake-Canopy-bombdrop.
This is how I do my planes.
Looks great Gary. Nice build.
Gear is on its own system
Brakes on its own system
Non essential equipment is on the 3rd system. On my F15 its Airbrake-Canopy-bombdrop.
This is how I do my planes.
Looks great Gary. Nice build.
08-24-2016, 07:02 AM
#354
Thats what makes us all different. No wrong way I guess unless you have a gear up landing or a brake lock up due to to much air pressure and go off the runway.
08-24-2016, 07:37 AM
#355
I see, never had these problems... I actually just use one big tank and connect all to it.
Brakes don't leak and if the gear does not come down, being able to brake doesn't do me any good
I also think connecting non-critical utilities to a separate system is a smart idea though, since these can leak as much or more than the gear system, compromising its safety.
Brakes don't leak and if the gear does not come down, being able to brake doesn't do me any good
I also think connecting non-critical utilities to a separate system is a smart idea though, since these can leak as much or more than the gear system, compromising its safety.
08-24-2016, 06:03 PM
#356
My Feedback: (20)
Interesting ideas about one, two or three air systems. Funny it was about 5 min after I read Andy's post that I saw Jim McEwen's article in JPO Contrails about the same subject. I never thought much about it since "I've always done it that way" since I started jets.
Anyway for now, on this F-16, I'm too far past the "I'm tired of working on this one and don't care" to want to go change it now.
I still think I feel better with the 3 systems as described by gunradd. However there are still a lots of non-redundant systems here that we use every flight, one Tx, one Rx, single engine, and the most dangerous non redundant link, one shaky pilot (me). At least in the real one I had Aces II (thrust you can trust) to literally bail me out.
Most available shop time today was spent programming radio and flight controls. I think I got them all working pretty good on the table. Nose gear works well as far as I can tell with out taxi test.

Last project today was to program the Cortex. This is where I won the dummy of the day award again. Cortex programming worked good in pitch and yaw but roll was backwards. No matter what I did it was still backwards. Finally after much frustration I found the error. Two months ago I planned and laid out the electronics board for the forward mount in the nose. After the nose heavy CG was discovered I moved the board back under the pilots seat and turned it around for shorter servo leads and better antenna mounting. Bingo� I did not turn the Cortex around and it faced backwards. This would have made for an interesting take off and first flight. It's always something...
Got a call today from another 1/5 F-16 pilot. Lots of good info received. His rudder hinge wire was not long enough to go through the top rudder hinge. Mine checked OK. Also, LEF hinges, wing spar rods and tubes had some slop after a few flights. Mine are tight as of now. Lastly he has replaced all the gear door air cylinders because they would not stay closed especially at high speed. He is sending me the cylinder sizes he used.
I will fill fuel and smoke tanks tomorrow and check CG again. Then I will do first starts, static runs, and smoke system tests if all goes well.
Gary
Anyway for now, on this F-16, I'm too far past the "I'm tired of working on this one and don't care" to want to go change it now.
I still think I feel better with the 3 systems as described by gunradd. However there are still a lots of non-redundant systems here that we use every flight, one Tx, one Rx, single engine, and the most dangerous non redundant link, one shaky pilot (me). At least in the real one I had Aces II (thrust you can trust) to literally bail me out.
Most available shop time today was spent programming radio and flight controls. I think I got them all working pretty good on the table. Nose gear works well as far as I can tell with out taxi test.
Last project today was to program the Cortex. This is where I won the dummy of the day award again. Cortex programming worked good in pitch and yaw but roll was backwards. No matter what I did it was still backwards. Finally after much frustration I found the error. Two months ago I planned and laid out the electronics board for the forward mount in the nose. After the nose heavy CG was discovered I moved the board back under the pilots seat and turned it around for shorter servo leads and better antenna mounting. Bingo� I did not turn the Cortex around and it faced backwards. This would have made for an interesting take off and first flight. It's always something...
Got a call today from another 1/5 F-16 pilot. Lots of good info received. His rudder hinge wire was not long enough to go through the top rudder hinge. Mine checked OK. Also, LEF hinges, wing spar rods and tubes had some slop after a few flights. Mine are tight as of now. Lastly he has replaced all the gear door air cylinders because they would not stay closed especially at high speed. He is sending me the cylinder sizes he used.
I will fill fuel and smoke tanks tomorrow and check CG again. Then I will do first starts, static runs, and smoke system tests if all goes well.
Gary
 08-25-2016, 06:03 PM
#357
My Feedback: (20)
Did overnight air leak test. After 12 hrs all systems still had pressure. Canopy/Speedbrake was the lowest. All systems should be plenty good for a 30min flight period.

Did first starts and runs on the B300F today. I was a little nervous about it but I got perfect starts each time without any problems. It starts fast and with authority. At full power it was nearly pushing me across the floor. The thing is a monster. Smoke system works good. Next starts will be for fully assembled outside tethered runs for range checks and taxi test in yard.


Got an order from McMaster Carr for some fuel tubing and hardware. I also ordered two spare rod end ball joints for the landing gear. These are the ones that Craig said would fit. Looks like they may have to be shortened but otherwise they should work in case the factory ones break.


Did first starts and runs on the B300F today. I was a little nervous about it but I got perfect starts each time without any problems. It starts fast and with authority. At full power it was nearly pushing me across the floor. The thing is a monster. Smoke system works good. Next starts will be for fully assembled outside tethered runs for range checks and taxi test in yard.
Got an order from McMaster Carr for some fuel tubing and hardware. I also ordered two spare rod end ball joints for the landing gear. These are the ones that Craig said would fit. Looks like they may have to be shortened but otherwise they should work in case the factory ones break.
08-26-2016, 09:59 AM
#358

My Feedback: (86)
Awesome Gary!
Yes, those MC parts need to be shortened but be careful to keep enough thread on them!
My canopy air system has a very slow bleed off...about a day. The Gear, Speed Brakes and Brakes are rock solid and stay as full as when I put the plane away and bring it back out to fly again. Must be the cylinder on the canopy or the locks have a very slow bleed off.
08-26-2016, 06:52 PM
#359
My Feedback: (20)
Thanks Rex,
The leak rate for the canopy/speedbrake system is about 6 psi/hour. I'm not worried about it enough to trouble shoot it now. That is plenty good to fly it for now.
Working on last items on the "finish it up" punch list now. Applied clear coat today on the areas I had to sand and repaint for the incorrect canopy graphics and upside down flags. I'm also replacing the "1" on the side of the intake with the upside down "5" and "Lead Solo" on the canopy lettering. I will apply the new graphics next.
My last "mod" is to fabricate a pitot tube for the IAS system. I have enjoyed using a CB Elektronics IAS module on my Super Scorpion this last year. Its not really necessary but its nice to hear IAS trends as you fly the pattern and approach.
I installed the CB IAS module on the air valve board in the nose and connected it to the SBUS-2 port on the receiver. I plan on making a functional pitot tube in place of the backup AOA probe just behind the radome on the lower right side. You can see it in the photo just below and behind the primary AOA probe on the right side. When I was flying the full scale jet we always referred to it as the "donkey dick"


I scaled the size from the photo and the mounting plate molded into the fuse. The base is 30mm long and the tube is 57mm long. The pattern is in the photo. I will make it from a brass tube, plywood, and epoxy filler. Paint it all silver and mount it in place. If you did not know the full scale probe had a rounded nose with 5 pin holes on the front, it should look about the same.
The leak rate for the canopy/speedbrake system is about 6 psi/hour. I'm not worried about it enough to trouble shoot it now. That is plenty good to fly it for now.
Working on last items on the "finish it up" punch list now. Applied clear coat today on the areas I had to sand and repaint for the incorrect canopy graphics and upside down flags. I'm also replacing the "1" on the side of the intake with the upside down "5" and "Lead Solo" on the canopy lettering. I will apply the new graphics next.
My last "mod" is to fabricate a pitot tube for the IAS system. I have enjoyed using a CB Elektronics IAS module on my Super Scorpion this last year. Its not really necessary but its nice to hear IAS trends as you fly the pattern and approach.
I installed the CB IAS module on the air valve board in the nose and connected it to the SBUS-2 port on the receiver. I plan on making a functional pitot tube in place of the backup AOA probe just behind the radome on the lower right side. You can see it in the photo just below and behind the primary AOA probe on the right side. When I was flying the full scale jet we always referred to it as the "donkey dick"
I scaled the size from the photo and the mounting plate molded into the fuse. The base is 30mm long and the tube is 57mm long. The pattern is in the photo. I will make it from a brass tube, plywood, and epoxy filler. Paint it all silver and mount it in place. If you did not know the full scale probe had a rounded nose with 5 pin holes on the front, it should look about the same.
Last edited by Viper1GJ; 08-26-2016 at 06:56 PM.
08-27-2016, 05:16 PM
#360
My Feedback: (20)
Finished vinyl graphics.
I sanded off, repainted, clear coated and applied new vinyl where the factory mistakes were and replaced with my own graphics.
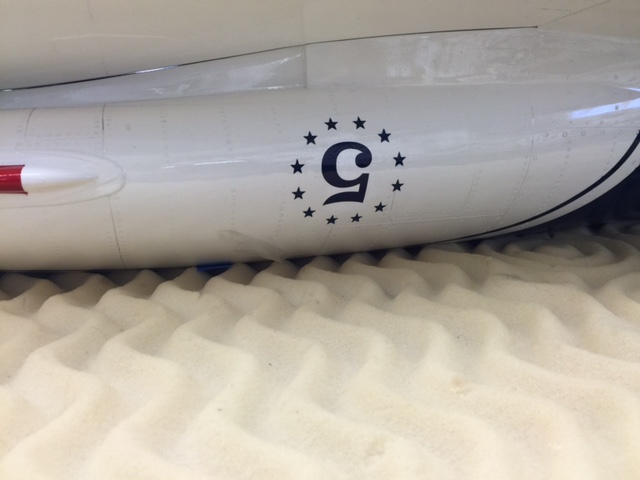
I also changed the aircraft number from "1" to "5" since my jet will normally fly solo and will never fly lead in the four ship Thunderbird formation
I also clear coated around the new flag decal that the factory applied upside down.
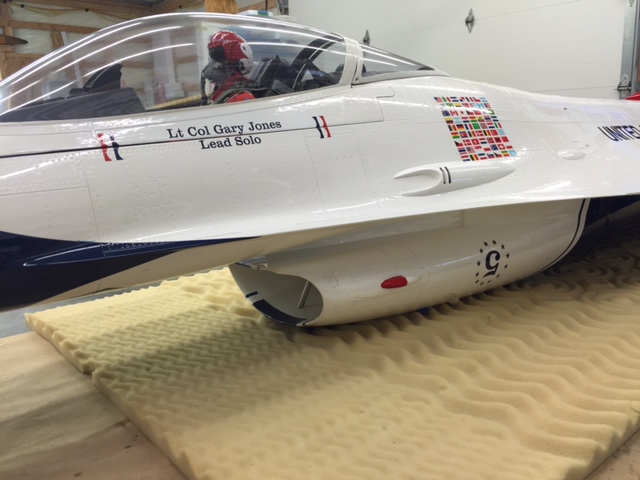


Changed the pilots helmet and flight suit number to "5". Tailored Pilots put my old tactical call sign "Too Tall" on the helmet prior to delivery.


Fabricated a functional pitot tube disguised as the back up AOA probe.


Used parts from the scrap box and brass tube. Slotted the plastic tubes with a Dremel wheel.
Glued up plywood frame, filled with epoxy filler, and finished with glazing putty all sanded smooth.

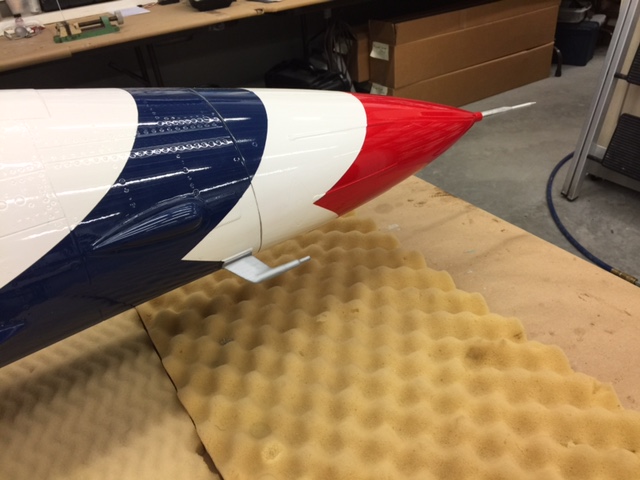
Pitot tube probe is painted and in position. It is connected to the CB module with silicon fuel tubing inside the fuse.
This finishes the build. Next steps are tethered run ups for range checks and taxi tests.
I sanded off, repainted, clear coated and applied new vinyl where the factory mistakes were and replaced with my own graphics.
I also changed the aircraft number from "1" to "5" since my jet will normally fly solo and will never fly lead in the four ship Thunderbird formation
I also clear coated around the new flag decal that the factory applied upside down.
Changed the pilots helmet and flight suit number to "5". Tailored Pilots put my old tactical call sign "Too Tall" on the helmet prior to delivery.
Fabricated a functional pitot tube disguised as the back up AOA probe.
Used parts from the scrap box and brass tube. Slotted the plastic tubes with a Dremel wheel.
Glued up plywood frame, filled with epoxy filler, and finished with glazing putty all sanded smooth.
Pitot tube probe is painted and in position. It is connected to the CB module with silicon fuel tubing inside the fuse.
This finishes the build. Next steps are tethered run ups for range checks and taxi tests.
 08-28-2016, 06:03 AM
#362
My Feedback: (20)
Hi Peter,
When I put my homemade probe on the jet it just did not look right. It was too big and not the correct shape. I wish I had had your CAD diagram before I made my probe. Since I am using it to disguise an actual IAS pitot tube it will not have the round front but it will be close enough for my stand way off sport scale. The CB Elektronics manual says the 4mm brass tube should extend 1cm from the mount. That is why I used the telescoping tubes
I am going to make another one using your CAD diagram and it will give me the correct shape and size. The base is 12mm x 27mm so I can use your diagram to get the proper scale and shape. Do you have a top plan view diagram of the AOA probe available. If not no problem. Thanks
I have been following your thread since the start. You are the master on this jet. I wish I could just sit and observe your work to learn how you do it. Great job. Cant wait to see yours flying.
Gary
08-30-2016, 05:22 PM
#363
My Feedback: (20)
I reshaped and resized my AOA probe/IAS pitot tube using Peters' CAD drawing shown in post #361. It looks more realistic now and hopefully will function OK with the CB Elektronics IAS module. The probe is connected to the IAS module with standard silicon fuel tubing shown inside the front fuse.


I did final weight and balance and the CG checks ok.
Hope to complete outside tethered engine run, smoke system test, range checks at idle to full power with smoke on and off, and then taxi tests soon weather permitting. After that it is time to fly. Test flights planned on weekend of 10-11 Sep. Stay tuned.
Gary
08-31-2016, 03:21 AM
#364
All the best for the maiden Gary. I'm sure you've got it covered after taming the full scale bird. Looking forward to hearing your results. Here's a pic of mine. Getting closer.
s.
s.
08-31-2016, 05:57 AM
#365

I'm sure most have seen the new BVM brake valve system. It's fantastic. NO air tanks needed at all. It's a little heavy but when weight isn't an issue this brake is awesome. It gives you true and complete proportional control. And did I say? NO TANKS!
http://shopbvmjets.com/zencart/index...roducts_id=811
http://shopbvmjets.com/zencart/index...roducts_id=811
08-31-2016, 08:24 AM
#366
My Feedback: (3)
Andy, are you using it on a 1/5 F-16?
I had one in a bandit and loved it. Best brake system I ever used.
But, I wonder how large of a jet/wheel hub that it can handle with its limited air volume? I thought about one in my 1/3.65 SM Hawk but went with a tank system due to these concerns. It would be great to have a data point on a large jet.
Thanks!
Jamie
I'm sure most have seen the new BVM brake valve system. It's fantastic. NO air tanks needed at all. It's a little heavy but when weight isn't an issue this brake is awesome. It gives you true and complete proportional control. And did I say? NO TANKS!
http://shopbvmjets.com/zencart/index...roducts_id=811
http://shopbvmjets.com/zencart/index...roducts_id=811
08-31-2016, 04:08 PM
#367
My Feedback: (20)
Levi, thanks for the kind words. Your jet looks good. Keep the photos and progress reports coming.
Accomplished tethered engine runups, smoke system tests, range checks, and taxi tests in yard today.


First time assembled on floor and looking down at it. Its huge!


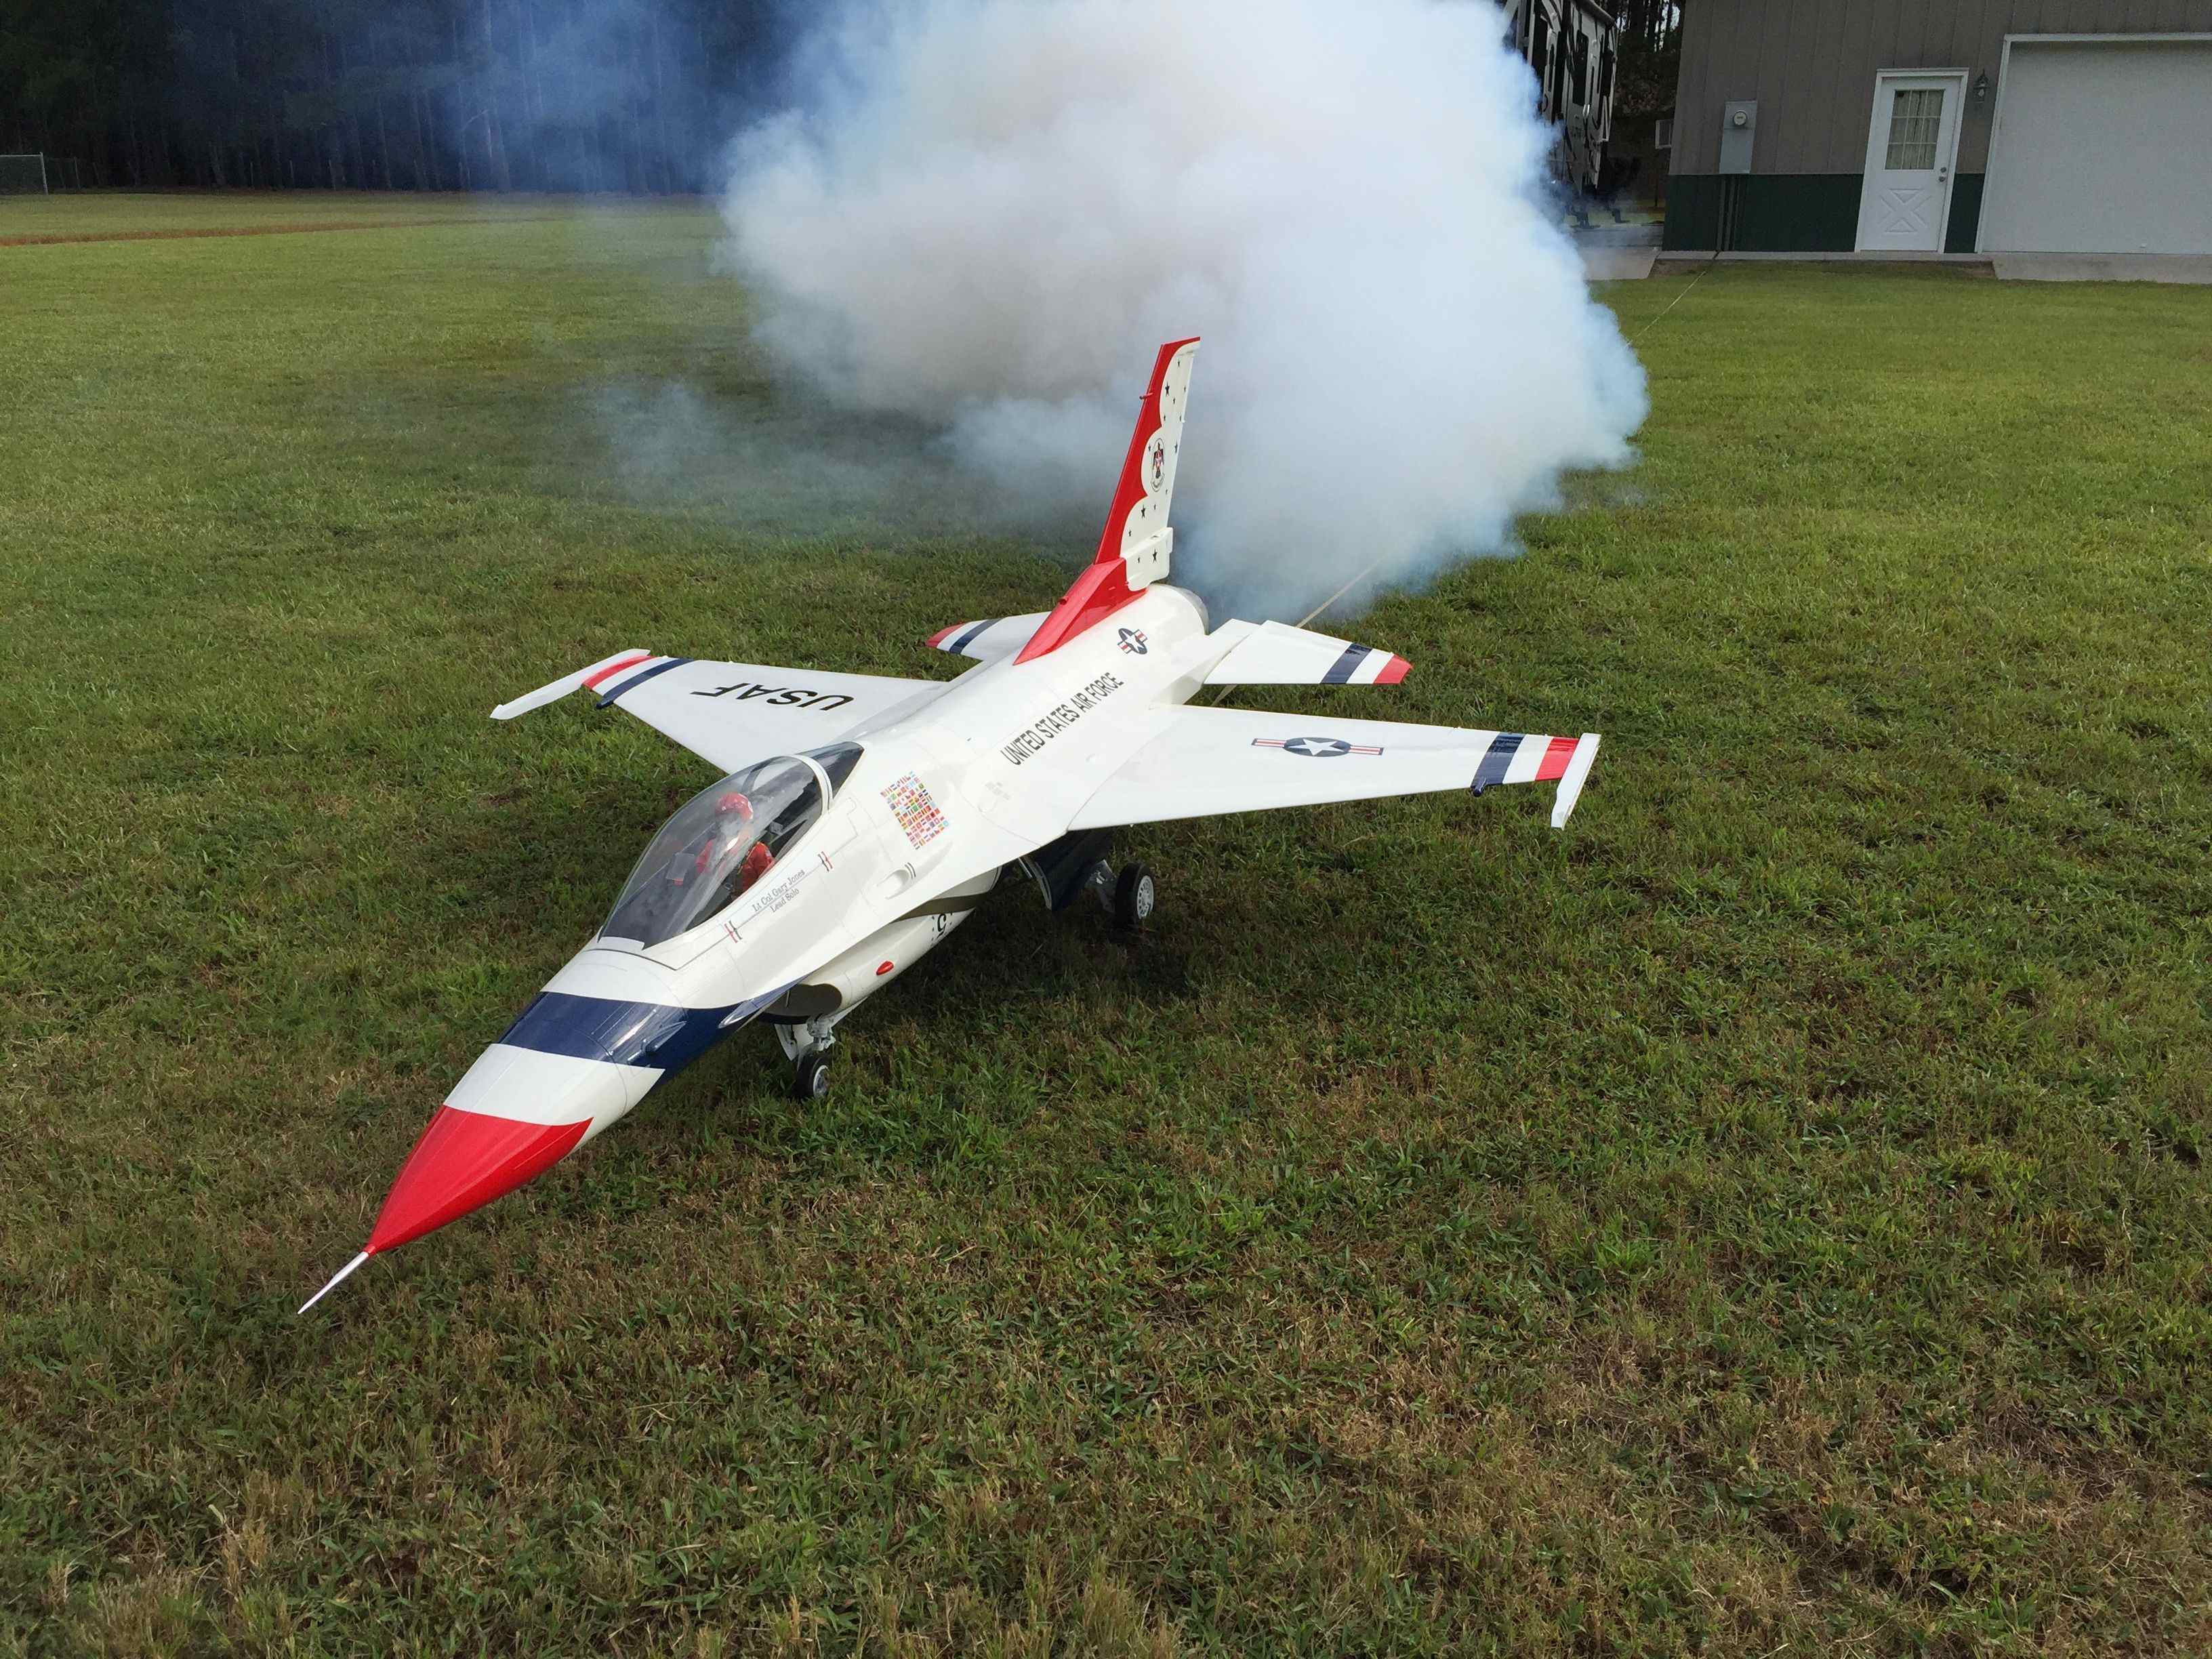

First outside happy snaps. Jet is tied to building in background. Tether allows run ups and range checks with out someone holding.
Smoke system tests good. Taxi tests in grass went well. Steering seemed solid and tracking was straight.


Acceleration in grass was really fast. The B300F makes lots of thrust. Fail safe shut down tested OK, cooling air applied after shutdown.
A final full power cold fuel system test accomplished to observe saddle tank feed out and venting. Both tanks emptied nearly the same time. All seems ready for test flights.
Gary
Accomplished tethered engine runups, smoke system tests, range checks, and taxi tests in yard today.
First time assembled on floor and looking down at it. Its huge!
First outside happy snaps. Jet is tied to building in background. Tether allows run ups and range checks with out someone holding.
Smoke system tests good. Taxi tests in grass went well. Steering seemed solid and tracking was straight.
Acceleration in grass was really fast. The B300F makes lots of thrust. Fail safe shut down tested OK, cooling air applied after shutdown.
A final full power cold fuel system test accomplished to observe saddle tank feed out and venting. Both tanks emptied nearly the same time. All seems ready for test flights.
Gary
Last edited by Viper1GJ; 08-31-2016 at 04:16 PM.
09-01-2016, 07:05 AM
#368
My Feedback: (20)
Has anyone flying this jet mass balanced the stabs at the pivot point.
I did a quick check and found it would take about 6oz of lead in each stab root leading edge to balance at the pivot point. That is about 3/4 lbs extra weight for both. I don't really want to add that if not necessary.
Gary
I did a quick check and found it would take about 6oz of lead in each stab root leading edge to balance at the pivot point. That is about 3/4 lbs extra weight for both. I don't really want to add that if not necessary.
Gary
09-01-2016, 07:12 AM
#369
Has anyone flying this jet mass balanced the stabs at the pivot point.I did a quick check and found it would take about 6oz of lead in each stab root leading edge to balance at the pivot point. That is about 3/4 lbs extra weight for both. I don't really want to add that if not necessary.Gary
09-01-2016, 06:36 PM
#371
09-02-2016, 05:37 AM
#372
My Feedback: (86)
Has anyone flying this jet mass balanced the stabs at the pivot point.
I did a quick check and found it would take about 6oz of lead in each stab root leading edge to balance at the pivot point. That is about 3/4 lbs extra weight for both. I don't really want to add that if not necessary.
Gary
I did a quick check and found it would take about 6oz of lead in each stab root leading edge to balance at the pivot point. That is about 3/4 lbs extra weight for both. I don't really want to add that if not necessary.
Gary
I would, before each day of flying, double check the metal inserts for any "potential looseness" in the stabs, the bearings run through for deflection.
best wishes on your maiden.
Rex
Last edited by rbxbear44; 09-02-2016 at 05:43 AM.
09-02-2016, 06:41 AM
#373
Gary, just IMO...I'd steer clear of balancing these stabs since there are two points: The pivot AND the Servo arm. It's a rock solid design and I imagine...unlike other manufacturers...SM thought through the "balance" issue/MAC in what they brought together on this stab/servo design.
I would, before each day of flying, double check the metal inserts for any "potential looseness" in the stabs, the bearings run through for deflection.
best wishes on your maiden.
Rex
I would, before each day of flying, double check the metal inserts for any "potential looseness" in the stabs, the bearings run through for deflection.
best wishes on your maiden.
Rex
09-02-2016, 08:45 AM
#374
My Feedback: (20)
Ok I will leave the stabs as they are from the factory. I have already assembled the bearing stack on the servo arm with red locktite. Thanks.
Out in shop waiting for Tropical Storm Hermine to pass over. Tested the CB Elektronics IAS module and my pitot tube assembly by carefully blowing air at it. Worked great. Got good readings all the way from 0 to 150 mph. Digital read out on Tx screen and verbal readout every 3 seconds when I flip the voice switch. Should be fun to see it work in the air.


Test flights scheduled for next weekend 9-11 SEP.
Gary
Out in shop waiting for Tropical Storm Hermine to pass over. Tested the CB Elektronics IAS module and my pitot tube assembly by carefully blowing air at it. Worked great. Got good readings all the way from 0 to 150 mph. Digital read out on Tx screen and verbal readout every 3 seconds when I flip the voice switch. Should be fun to see it work in the air.
Test flights scheduled for next weekend 9-11 SEP.
Gary
Last edited by Viper1GJ; 09-02-2016 at 08:58 AM.
09-02-2016, 04:04 PM
#375
She looks awesome Levi! I like the extra detail of the blade antennae infront of the canopy. Nice work mate!

