


US NAVY SeaDart F2Y (Flying boat) Build
 01-22-2016, 07:54 AM
#176

Thread Starter

Thanks for taking the time to comment  I'm glad your enjoying the build!
It's great fun having resources that I wouldn't ordinarily have so hopefully we can produce a incredible flying model that operates effortlessly from water. No pressure then!
Cheers, Alex
I'm glad your enjoying the build! It's great fun having resources that I wouldn't ordinarily have so hopefully we can produce a incredible flying model that operates effortlessly from water. No pressure then!
Cheers, Alex
 01-22-2016, 02:43 PM
#177

My Feedback: (6)
Your not the only one hoping this goes well, Like I said I did not work on the SEA Dart, but did get to see many of the problems the fellows that did work on it had. the old experimental shop was 4 big bays wide each with a different project in it, mine was #2 with the Pogo Stick, #3 was the model 8 that became the F102, and #4 was the Sea Dart. Bay 1 was our machine and part fab shop.
Cheers bob T
01-23-2016, 02:13 AM
#178
Thread Starter
I would have loved to of seen it!
We are starting our own Pogo project shortly. The model will stand around 5 feet tall with a large electric contra rotating power unit Thats probably for another forum though...
We are starting our own Pogo project shortly. The model will stand around 5 feet tall with a large electric contra rotating power unit
Thats probably for another forum though...
Last edited by Alex48; 01-23-2016 at 02:37 AM.
02-01-2016, 06:01 AM
#179
Thread Starter
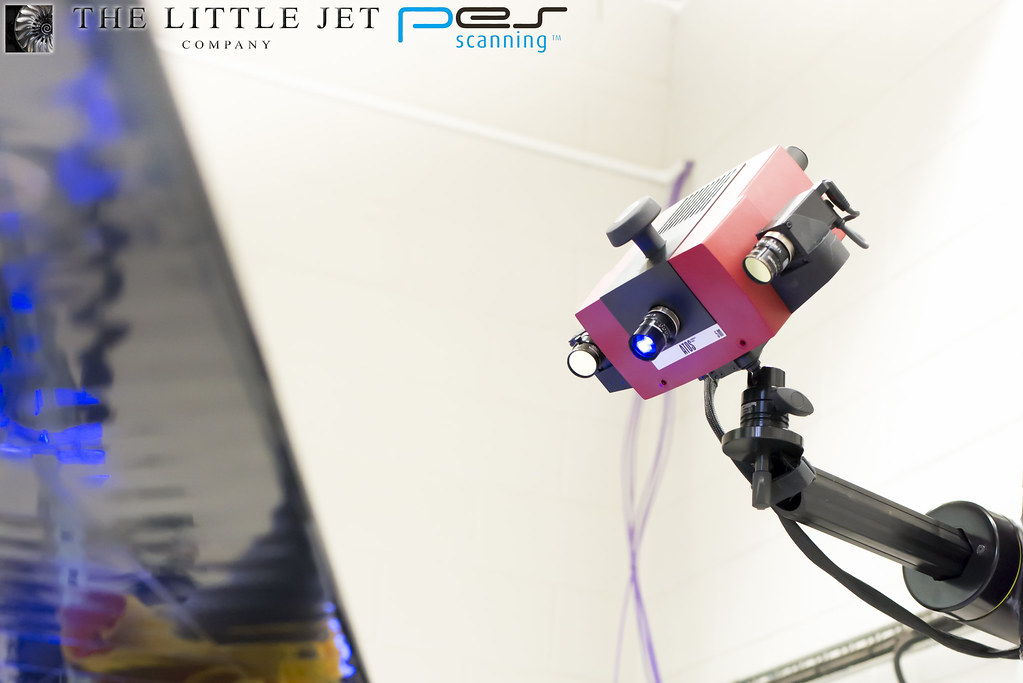
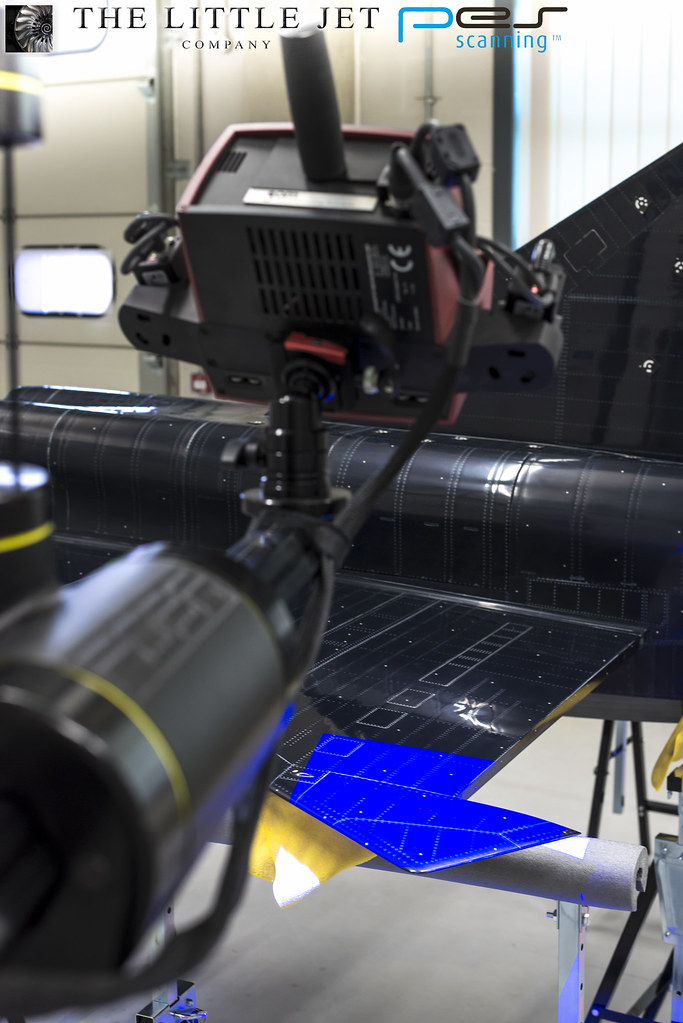
PES Scanning have now finished the SeaDart scan. I’m amazed at the level of detail they have captured and I’m excited to see all of the data later this week.
 <script async src="//embedr.flickr.com/assets/client-code.js" charset="utf-8"></script>
 <script async src="//embedr.flickr.com/assets/client-code.js" charset="utf-8"></script>
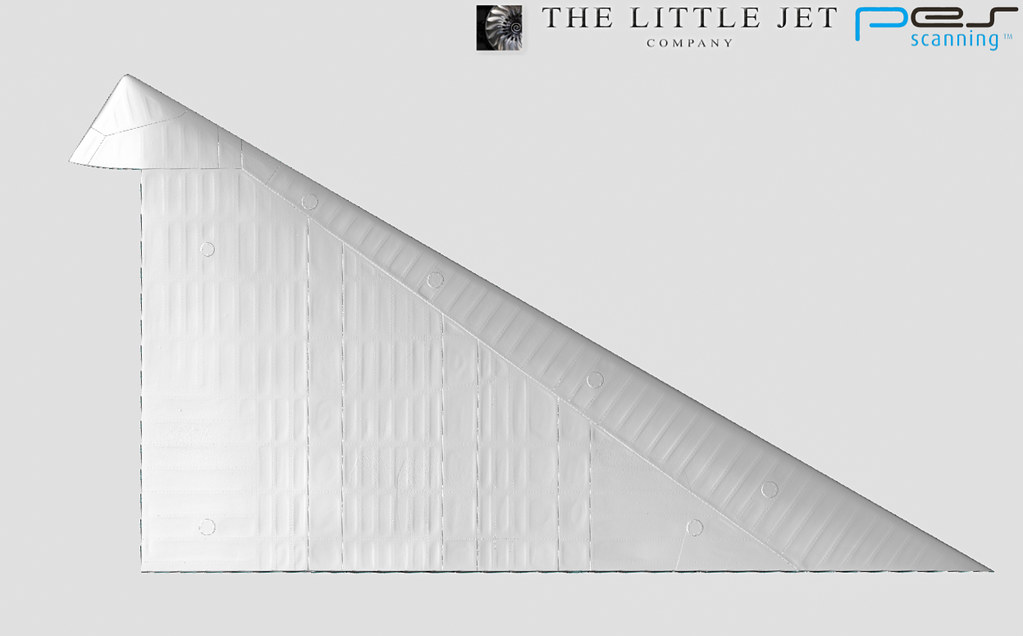
This is a low resolution screen grab but should give you an idea of the level of detail the guys at PES scanning have managed to capture. This shows the underside of the right wing. The wings on the full size took a massive battering and looking at our research photos from the 50's FighterAces have managed to emulate this very well indeed.
 <script async src="//embedr.flickr.com/assets/client-code.js" charset="utf-8"></script>
<script async src="//embedr.flickr.com/assets/client-code.js" charset="utf-8"></script><script async src="//embedr.flickr.com/assets/client-code.js" charset="utf-8"></script>This is a low resolution screen grab but should give you an idea of the level of detail the guys at PES scanning have managed to capture. This shows the underside of the right wing. The wings on the full size took a massive battering and looking at our research photos from the 50's FighterAces have managed to emulate this very well indeed.
<script async src="//embedr.flickr.com/assets/client-code.js" charset="utf-8"></script>
 02-10-2016, 05:58 AM
#181
Thread Starter
Thanks Mike, there is a lot of tech going into this model and many new processes that haven't been used in this application before.
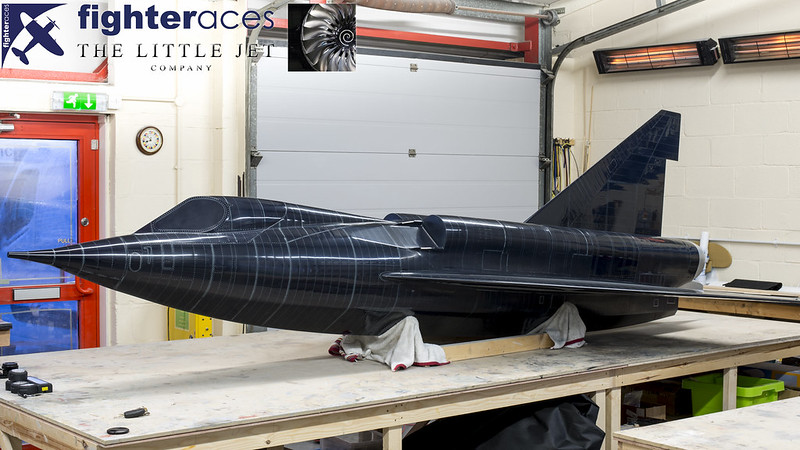
Take a walk around the SeaDart pattern at Fighteraces workshop. Navigate the workshop and look at the SeaDart and our other TLJC GeeBeeZ project that Fighteraces are building.
https://www.google.com/maps/place/Fi...28b16c!6m1!1e1
Take a walk around the SeaDart pattern at Fighteraces workshop. Navigate the workshop and look at the SeaDart and our other TLJC GeeBeeZ project that Fighteraces are building.
https://www.google.com/maps/place/Fi...28b16c!6m1!1e1
Last edited by Alex48; 02-10-2016 at 06:09 AM.
03-26-2016, 03:38 AM
#184
Thread Starter
I know I’ve been a little quiet with regard to this project but I’ve been working nearly full time since my last post on the aircrafts internal, tooling and layup designs along with manufacturing workflows etc…
We’ve been managing all the companies involved so we can all come together at the right time with the correct designs and parts allowing us to build the first prototype with as few issues as possible. I’ve lost count of the number of miles I have driven to various design meetings and touring possible manufacturers facilities.
We are now at a stage where I’m very happy with all the companies involved and think we can make something spectacular. The tooling and parts manufacturers are very enthusiastic about the project and to see that our design will be produced along side parts at the highest level of composite specification is very exciting. I would love to tell you what sort of things these guys are doing and for who but unfortunately almost all the work these companies do is based on non disclosure agreements but the level of detail and the quality of the composite parts we’ve seen being produced is staggering and far removed to what we are used to in our models.
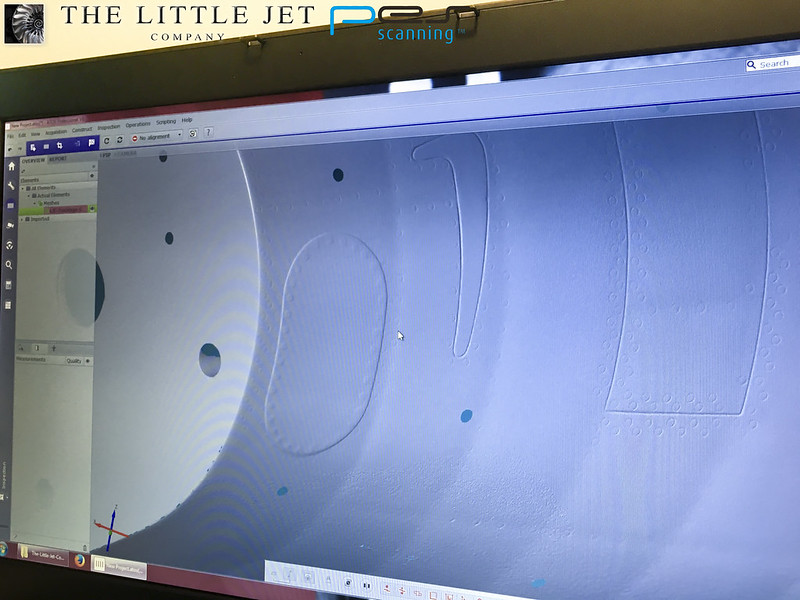
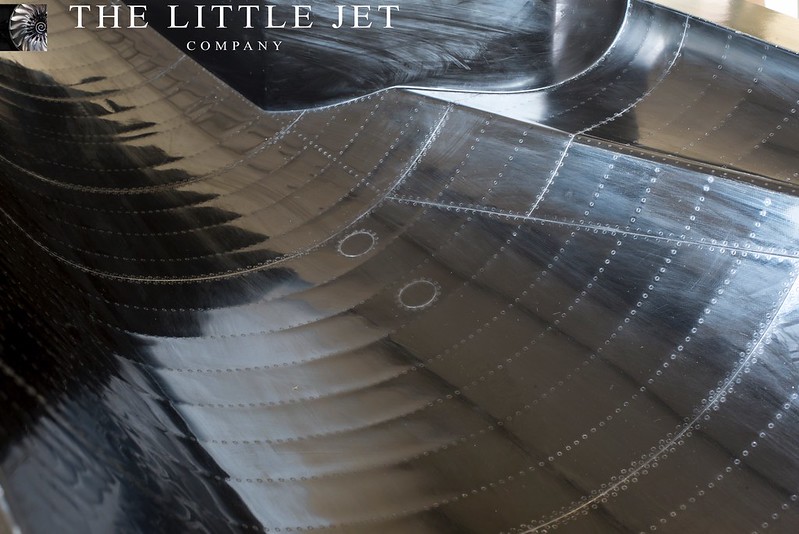
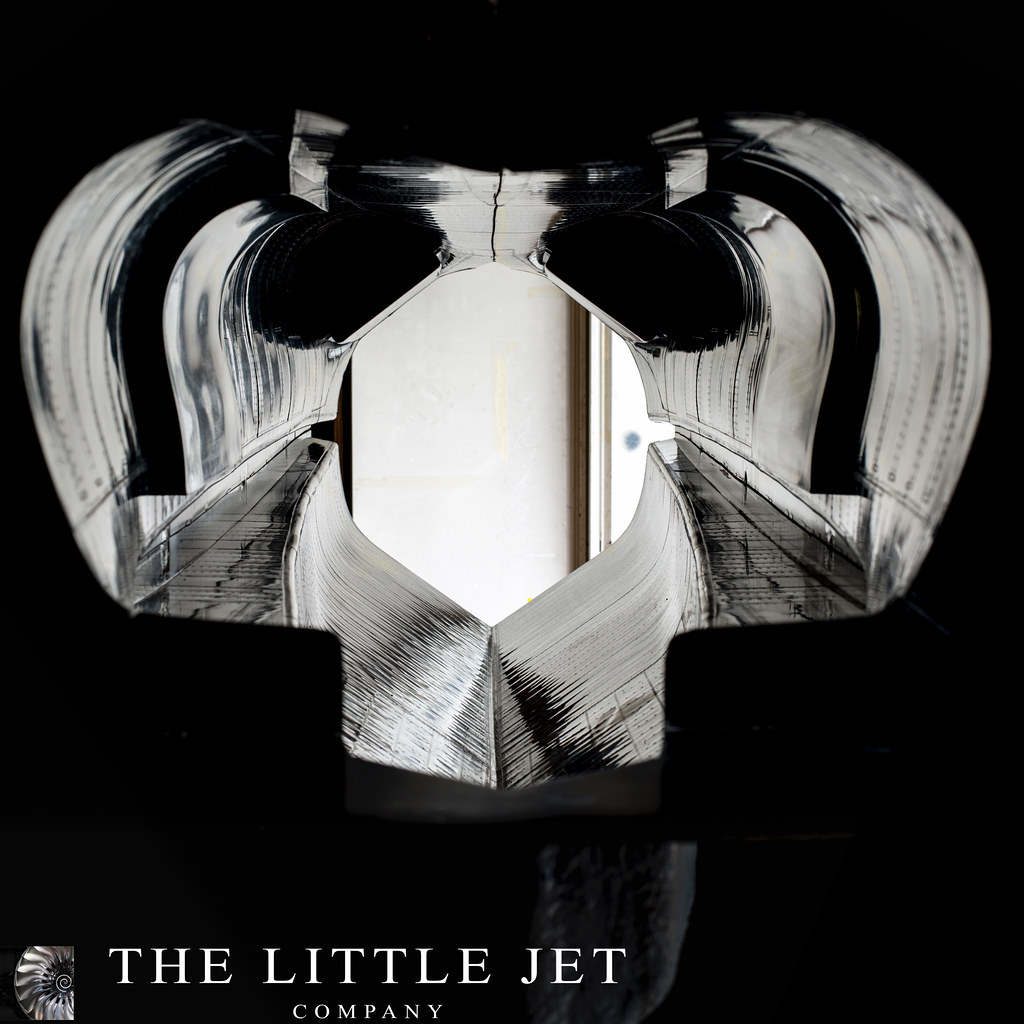
PES Scanning have done a great job with the scan at what was a very high resolution. We have captured every panel deformation and every rivet. The resolution was so high that the scanner picked up the titanium dioxide spray but the team also encountered some noise in the data which had to be removed by hand. This is mainly due to the pattern having the worst two properties possible for scanning which is dark and glossy. Even so the results are beyond what I had expected. The below picture shows the front portion of the fuselage in the process of being cleaned. The file contains over 170 million triangles and is in the region of 22GB in size.
 <script async src="//embedr.flickr.com/assets/client-code.js" charset="utf-8"></script>
We’ve been managing all the companies involved so we can all come together at the right time with the correct designs and parts allowing us to build the first prototype with as few issues as possible. I’ve lost count of the number of miles I have driven to various design meetings and touring possible manufacturers facilities.
We are now at a stage where I’m very happy with all the companies involved and think we can make something spectacular. The tooling and parts manufacturers are very enthusiastic about the project and to see that our design will be produced along side parts at the highest level of composite specification is very exciting. I would love to tell you what sort of things these guys are doing and for who but unfortunately almost all the work these companies do is based on non disclosure agreements but the level of detail and the quality of the composite parts we’ve seen being produced is staggering and far removed to what we are used to in our models.
PES Scanning have done a great job with the scan at what was a very high resolution. We have captured every panel deformation and every rivet. The resolution was so high that the scanner picked up the titanium dioxide spray but the team also encountered some noise in the data which had to be removed by hand. This is mainly due to the pattern having the worst two properties possible for scanning which is dark and glossy. Even so the results are beyond what I had expected. The below picture shows the front portion of the fuselage in the process of being cleaned. The file contains over 170 million triangles and is in the region of 22GB in size.
<script async src="//embedr.flickr.com/assets/client-code.js" charset="utf-8"></script>
03-28-2016, 04:17 AM
#186
Thread Starter
Thanks Bob
The Pattern was displayed at the Advanced Manufacturing Park home to parts of AMRC Boeing and Rolls Royce along with some really innovate engineering companies. We’ve been asked to display the finished model at the Manufacturing Park as the pattern created a lot of interest in the project. We will also be giving several talks on the models development later in the year...
Some large companies have become interested and are helping us with various parts of the model. Rolls Royce patented technology is being designed into areas of the project and some other sponsorship opportunities have arisen which if they pan out are very exciting!
While scanning the pattern there was some superficial damage caused. Having a flawless pattern before we start tooling is essential so I drove it back to FighterAces who made the repairs to their usual high standard and many thanks to the team for fitting the model back in to their busy schedule, it was much appreciated!
The pattern is now now back to looking its best.
 <script async src="//embedr.flickr.com/assets/client-code.js" charset="utf-8"></script>
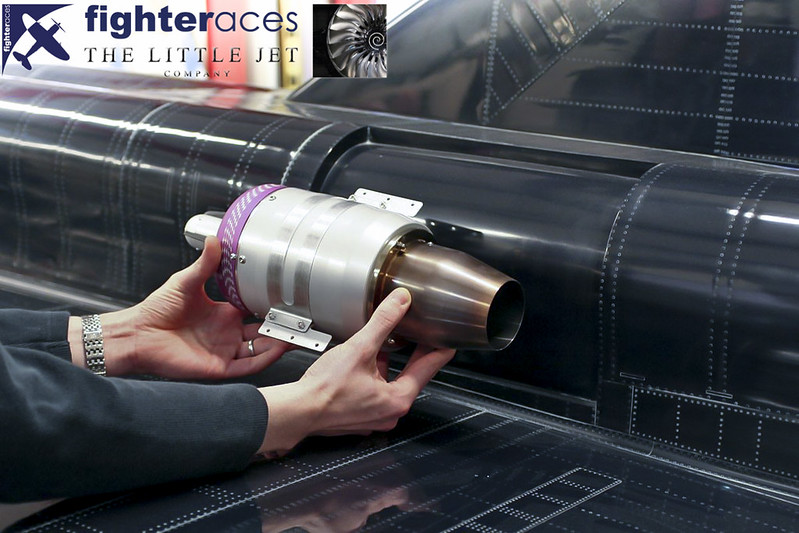
Dave Wilshere from Motors & Rotors here in the UK has been very helpful and managed to get us a P300RX(G) in short order. The service I received through Dave was second to none and I’m looking forward to having his experience cast over some of our other projects we have in the pipeline. This P300 is destined for another project but it did allow us to scan it as a space saver in CAD which will allow for a more accurate design.
The P300RXG held against the pattern.
 <script async src="//embedr.flickr.com/assets/client-code.js" charset="utf-8"></script>
The Pattern was displayed at the Advanced Manufacturing Park home to parts of AMRC Boeing and Rolls Royce along with some really innovate engineering companies. We’ve been asked to display the finished model at the Manufacturing Park as the pattern created a lot of interest in the project. We will also be giving several talks on the models development later in the year...
Some large companies have become interested and are helping us with various parts of the model. Rolls Royce patented technology is being designed into areas of the project and some other sponsorship opportunities have arisen which if they pan out are very exciting!
While scanning the pattern there was some superficial damage caused. Having a flawless pattern before we start tooling is essential so I drove it back to FighterAces who made the repairs to their usual high standard and many thanks to the team for fitting the model back in to their busy schedule, it was much appreciated!
The pattern is now now back to looking its best.
<script async src="//embedr.flickr.com/assets/client-code.js" charset="utf-8"></script>Dave Wilshere from Motors & Rotors here in the UK has been very helpful and managed to get us a P300RX(G) in short order. The service I received through Dave was second to none and I’m looking forward to having his experience cast over some of our other projects we have in the pipeline. This P300 is destined for another project but it did allow us to scan it as a space saver in CAD which will allow for a more accurate design.
The P300RXG held against the pattern.
<script async src="//embedr.flickr.com/assets/client-code.js" charset="utf-8"></script>Last edited by Alex48; 03-28-2016 at 04:28 AM.
 06-06-2016, 09:09 AM
#189
Thread Starter
Hi Guys,
Sorry I haven�t updated the thread for a while but we have been doing lots behind the scenes on the SeaDart and a few other projects.
Progress is going well but has been delayed a little. The tooling is looking really good but we spent some time with the company involved experimenting with release agents trying to find the right combination for our pattern and the resin system we are using. We now have a resin system with a very low endothermic reaction helping to maintain the dimensional stability of the pattern. The resin is a high temperature system allowing us to use the tooling in the autoclave which means we can make the parts using the latest in prepreg materials.
Another delay and after much thought mainly due to cost I decided we really needed cradles for the tooling process on the wings, fin and elevons. This was the only way I could guarantee there would be no movement in the wing during the process. With this decided we rapid surfaced the wings in CAD using the scan data and CNC�d the cradles using these surfaces. The result is impressive and I will of course upload photos of the tooling and cradles once it has all been made. Our next projects won't suffer from these issues as they will CNC'd patterns from the start using scan data captured from the full size.
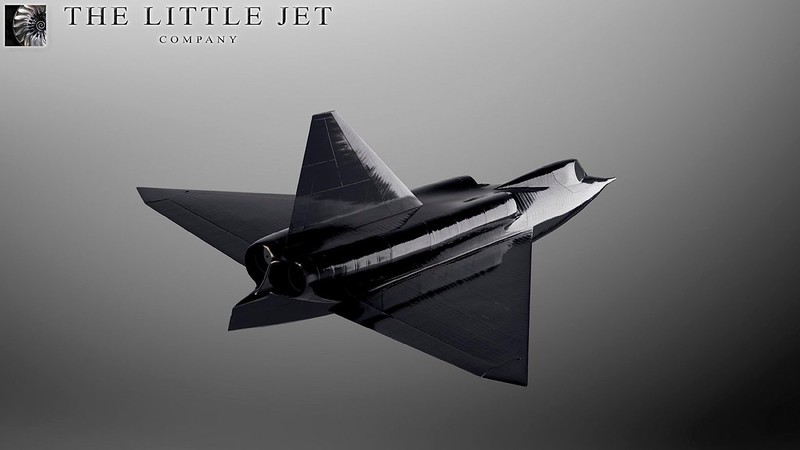
To round the scanning phase off I thought I�d attach an image which I made using the scan data. This is an STL file rendered in CAD, to put the detail captured into context this image is only 100Mbs of data. The raw data file size is 22GBS....
 <script async src="//embedr.flickr.com/assets/client-code.js" charset="utf-8"></script>
Sorry I haven�t updated the thread for a while but we have been doing lots behind the scenes on the SeaDart and a few other projects.
Progress is going well but has been delayed a little. The tooling is looking really good but we spent some time with the company involved experimenting with release agents trying to find the right combination for our pattern and the resin system we are using. We now have a resin system with a very low endothermic reaction helping to maintain the dimensional stability of the pattern. The resin is a high temperature system allowing us to use the tooling in the autoclave which means we can make the parts using the latest in prepreg materials.
Another delay and after much thought mainly due to cost I decided we really needed cradles for the tooling process on the wings, fin and elevons. This was the only way I could guarantee there would be no movement in the wing during the process. With this decided we rapid surfaced the wings in CAD using the scan data and CNC�d the cradles using these surfaces. The result is impressive and I will of course upload photos of the tooling and cradles once it has all been made. Our next projects won't suffer from these issues as they will CNC'd patterns from the start using scan data captured from the full size.
To round the scanning phase off I thought I�d attach an image which I made using the scan data. This is an STL file rendered in CAD, to put the detail captured into context this image is only 100Mbs of data. The raw data file size is 22GBS....
<script async src="//embedr.flickr.com/assets/client-code.js" charset="utf-8"></script>
Last edited by Alex48; 06-06-2016 at 09:12 AM.
07-17-2016, 12:36 AM
#191
Thread Starter
Hi Guys,
I don't know where the time goes... We have been mega busy on multiple projects but while these are in paint we can progress with the SeaDart.
The tooling is nearly complete and I'm very happy with the results. We're still working hard on all the internals but this is progressing well also. I'm hoping to start manufacturing parts next month.
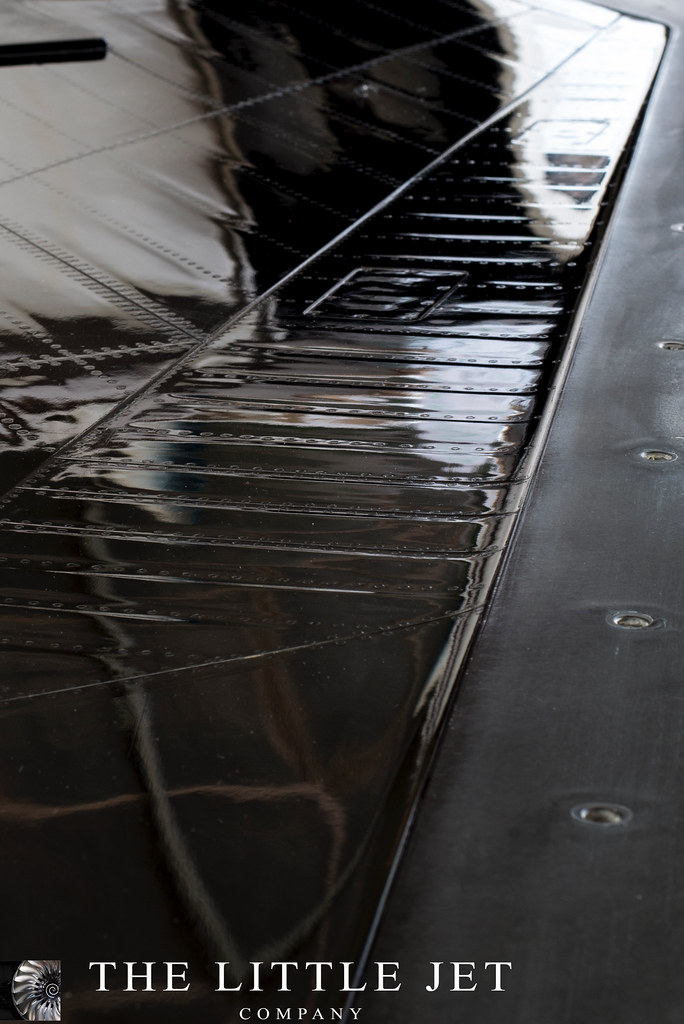
A shot of the forward fuselage tooling. This was fresh off the pattern so has yet to be cleaned... More photos will follow once all is complete.
 <script async src="//embedr.flickr.com/assets/client-code.js" charset="utf-8"></script>
Cheers, Alex
I don't know where the time goes... We have been mega busy on multiple projects but while these are in paint we can progress with the SeaDart.
The tooling is nearly complete and I'm very happy with the results. We're still working hard on all the internals but this is progressing well also. I'm hoping to start manufacturing parts next month.
A shot of the forward fuselage tooling. This was fresh off the pattern so has yet to be cleaned... More photos will follow once all is complete.
<script async src="//embedr.flickr.com/assets/client-code.js" charset="utf-8"></script>Cheers, Alex
Last edited by Alex48; 07-17-2016 at 05:34 AM.
07-30-2016, 08:40 AM
#193
Thread Starter
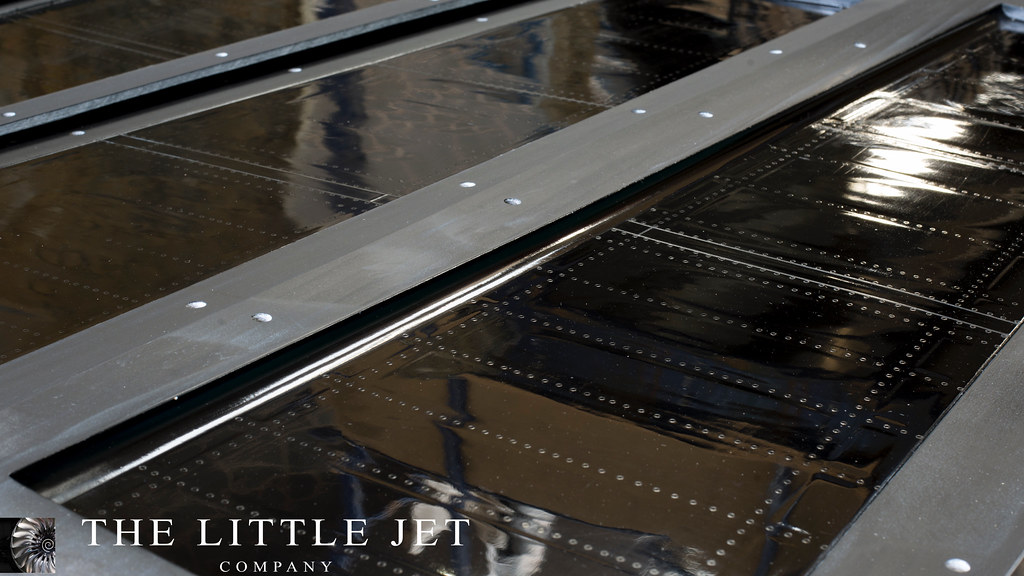
Great progress on our SeaDart tooling! To give you an idea of scale I could crawl into this rear fuselage section and lie down.
 <script async src="//embedr.flickr.com/assets/client-code.js" charset="utf-8"></script>
 <script async src="//embedr.flickr.com/assets/client-code.js" charset="utf-8"></script>
 <script async src="//embedr.flickr.com/assets/client-code.js" charset="utf-8"></script>
Although the pattern has sustained superfical damge all the tooling has turned out very well. We're pushing hard to get the CAD work finished so we can start manufacturing parts towards the end of August.
<script async src="//embedr.flickr.com/assets/client-code.js" charset="utf-8"></script><script async src="//embedr.flickr.com/assets/client-code.js" charset="utf-8"></script><script async src="//embedr.flickr.com/assets/client-code.js" charset="utf-8"></script>Although the pattern has sustained superfical damge all the tooling has turned out very well. We're pushing hard to get the CAD work finished so we can start manufacturing parts towards the end of August.
 08-05-2016, 11:28 PM
#195
Thread Starter
Thanks Alan,
We're currently running through the layup designs which are a mix of e-cloth, carbon and kevlar. The nice thing about the fuselage sections is we can make them seamless giving the finished parts more strength than the traditional joining of two halves. We will still have flashing to remove where the tools join but no seam.
Cheers
08-07-2016, 10:06 PM
#197
Thread Starter
Now the tooling is complete I’ll admit to being rather relieved as we only had one shot at getting the tooling right. This was due to the patterns construction and the fact we are using a very aggressive high temperature vinylester gelcoat meant that the patterns are now feeling a bit sorry for themselves. They served their purpose well though! I’m taking the them back to FighterAces this week so if your close to Phil’s do pop in and have a look so you can get a feel of the size and quality of the model.
We are now finishing all the CAD work for the internal structure, cockpit, ski and oleo designs.
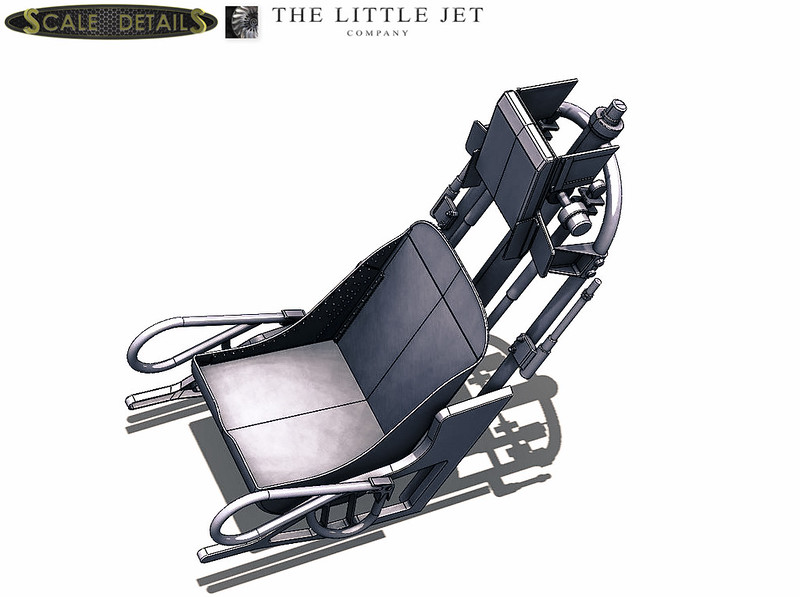
The cockpit specification from the client was to create a museum quality piece with a full animatronic pilot and working control stick, thrust levers, rudders and lights. For the cockpit design I’ve been working closely with ‘Scale Details’ based in Sweden and run by the very talented Anton Robertsson. I have to say that it’s a real pleasure working with Anton and the quality of his work is incredible. The animatronic pilot will work around eight axis creating a very realistic movement. This is being designed by a special effects company based in the US who are responsible for some incredible film work. Josh who is running that project for us worked for years under Stan Winston on some of the most iconic films in history.
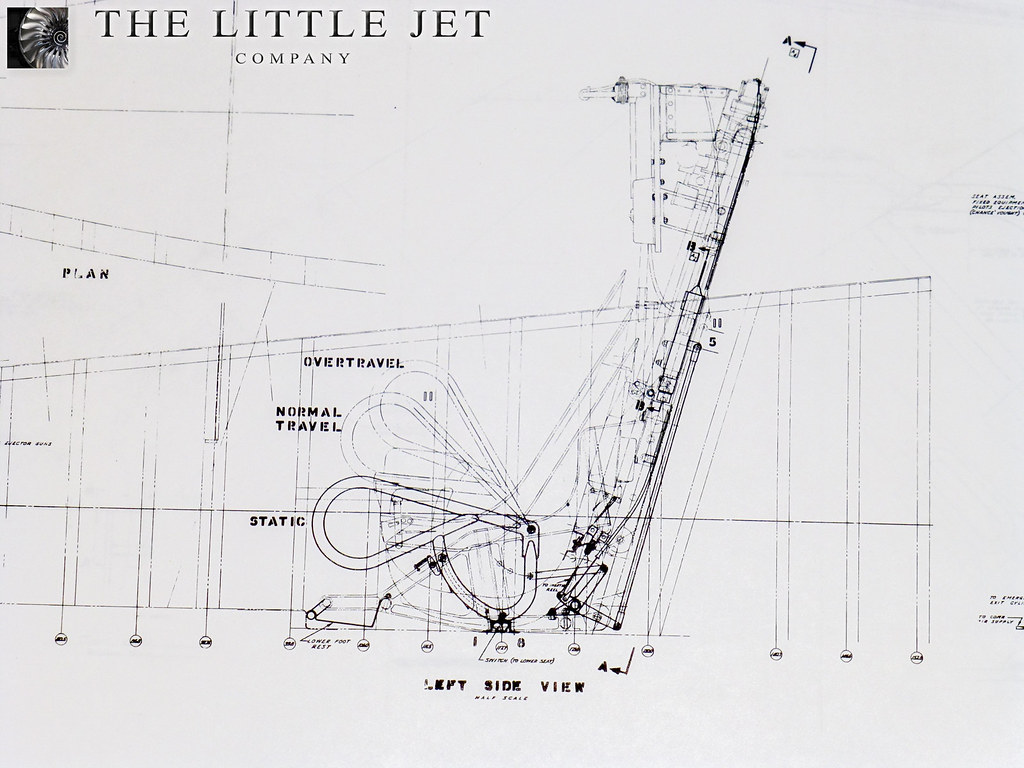
We have plenty of information on the cockpit including the original drawings for the ejection seat. This coupled with our scan data means we can accurately design the cockpit which will fit perfectly into our model.
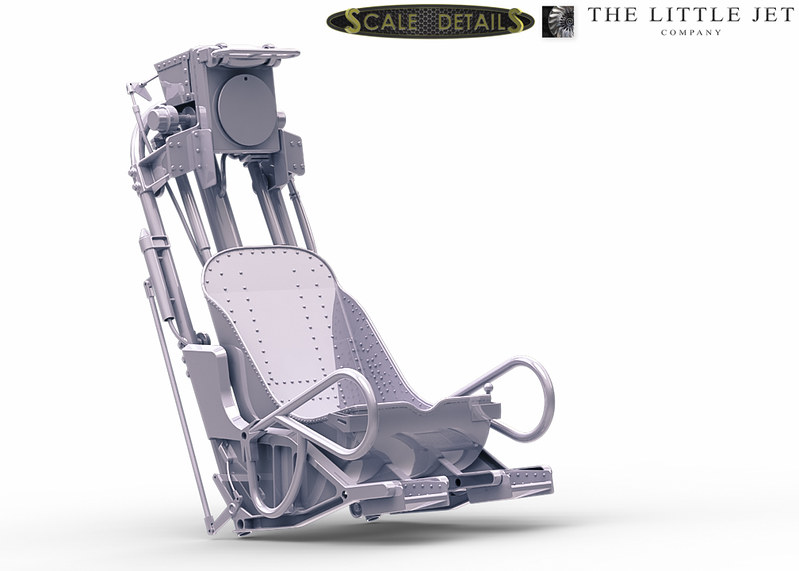
I’ll start by showing the design evolution of our ejection seat.
 <script async src="//embedr.flickr.com/assets/client-code.js" charset="utf-8"></script>
 <script async src="//embedr.flickr.com/assets/client-code.js" charset="utf-8"></script>
 <script async src="//embedr.flickr.com/assets/client-code.js" charset="utf-8"></script>
 <script async src="//embedr.flickr.com/assets/client-code.js" charset="utf-8"></script>
We are now finishing all the CAD work for the internal structure, cockpit, ski and oleo designs.
The cockpit specification from the client was to create a museum quality piece with a full animatronic pilot and working control stick, thrust levers, rudders and lights. For the cockpit design I’ve been working closely with ‘Scale Details’ based in Sweden and run by the very talented Anton Robertsson. I have to say that it’s a real pleasure working with Anton and the quality of his work is incredible. The animatronic pilot will work around eight axis creating a very realistic movement. This is being designed by a special effects company based in the US who are responsible for some incredible film work. Josh who is running that project for us worked for years under Stan Winston on some of the most iconic films in history.
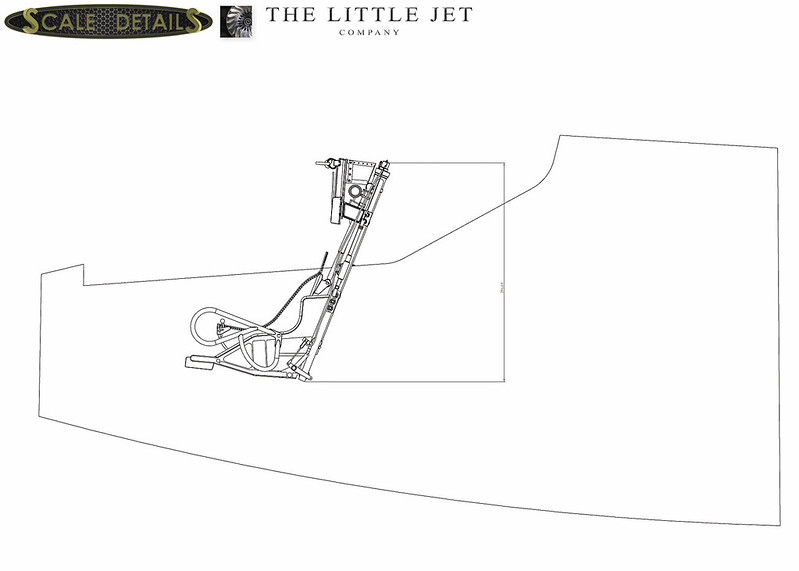
We have plenty of information on the cockpit including the original drawings for the ejection seat. This coupled with our scan data means we can accurately design the cockpit which will fit perfectly into our model.
I’ll start by showing the design evolution of our ejection seat.
<script async src="//embedr.flickr.com/assets/client-code.js" charset="utf-8"></script><script async src="//embedr.flickr.com/assets/client-code.js" charset="utf-8"></script><script async src="//embedr.flickr.com/assets/client-code.js" charset="utf-8"></script><script async src="//embedr.flickr.com/assets/client-code.js" charset="utf-8"></script>
08-09-2016, 01:28 AM
#198
Thread Starter
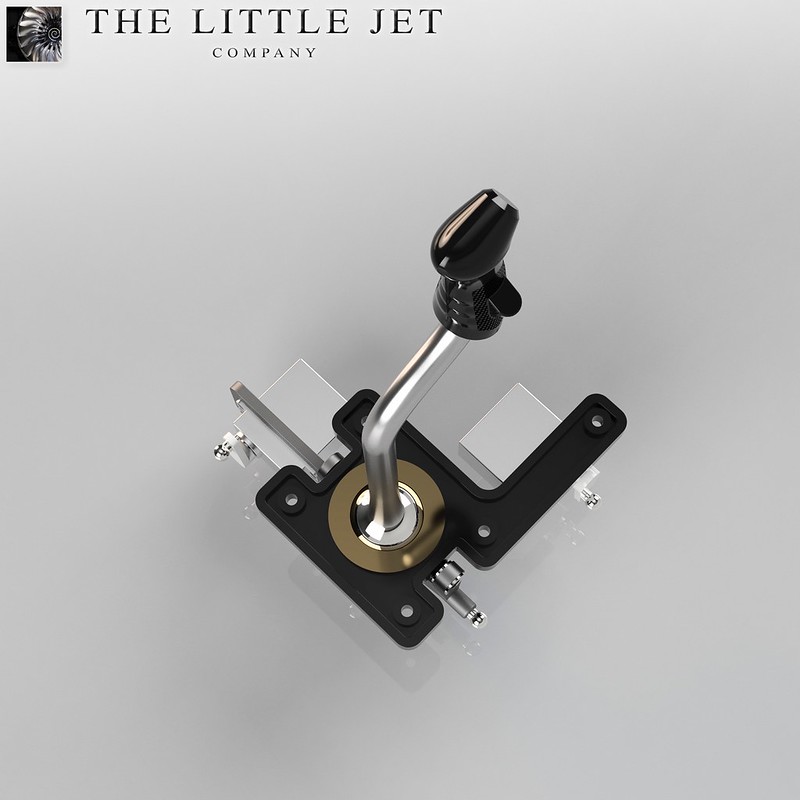
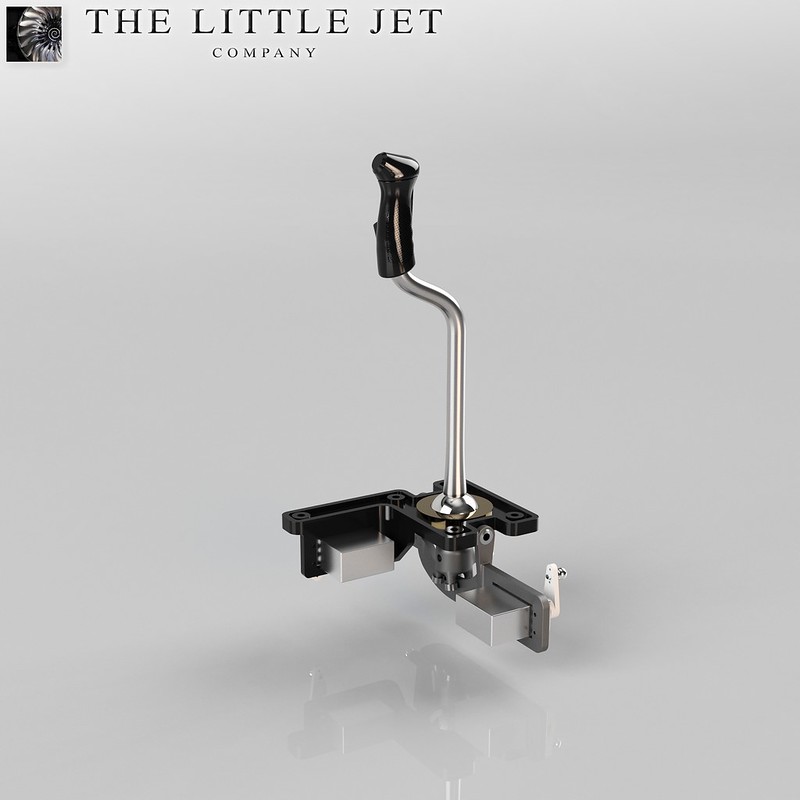
With the cockpit designs underway I set about designing a gimbal mechanism so the control stick could be driven, this in turn will move the pilots arm and be integrated into the main cockpit.
 <script async src="//embedr.flickr.com/assets/client-code.js" charset="utf-8"></script>
 <script async src="//embedr.flickr.com/assets/client-code.js" charset="utf-8"></script>
<script async src="//embedr.flickr.com/assets/client-code.js" charset="utf-8"></script><script async src="//embedr.flickr.com/assets/client-code.js" charset="utf-8"></script>
08-11-2016, 05:26 AM
#199
Thread Starter
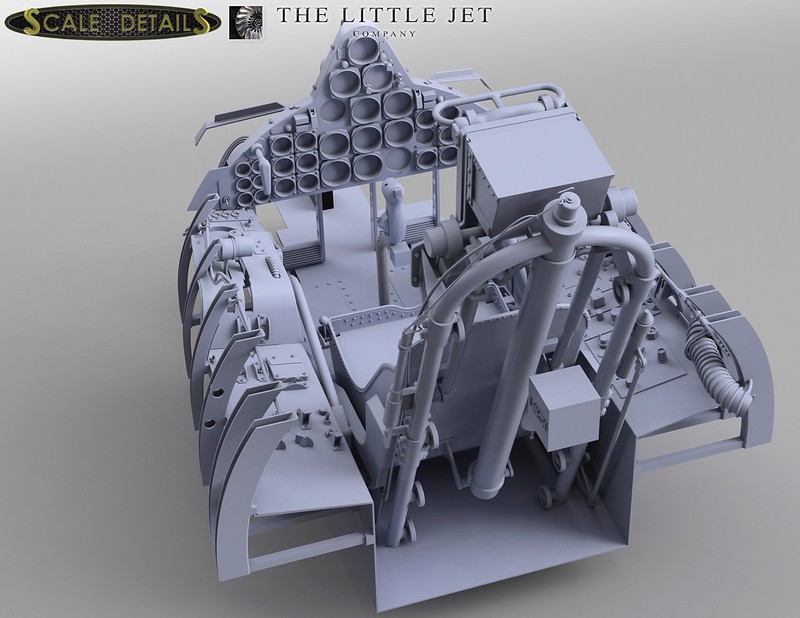
The SeaDart cockpit CAD work, More details to add and a few changes here and there but its look good,
Anton has been great to work with, do check out his website here: www.scaledetails.se
 <script async src="//embedr.flickr.com/assets/client-code.js" charset="utf-8"></script>
 <script async src="//embedr.flickr.com/assets/client-code.js" charset="utf-8"></script>
Anton has been great to work with, do check out his website here: www.scaledetails.se
<script async src="//embedr.flickr.com/assets/client-code.js" charset="utf-8"></script><script async src="//embedr.flickr.com/assets/client-code.js" charset="utf-8"></script>
