


Galactic Empire SHOCKWAVE


 11-27-2015, 12:16 AM
#30

That looks fantastic. I've been flying mine for a while now and love it - it is a really nice flying plane. When I bought mine, I think the scheme you have was in stock as well - you've made it look a lot better 
Was out on Monday with mine as the weather starts getting a bit colder here.
Was out on Monday with mine as the weather starts getting a bit colder here.
12-11-2015, 06:24 AM
#31
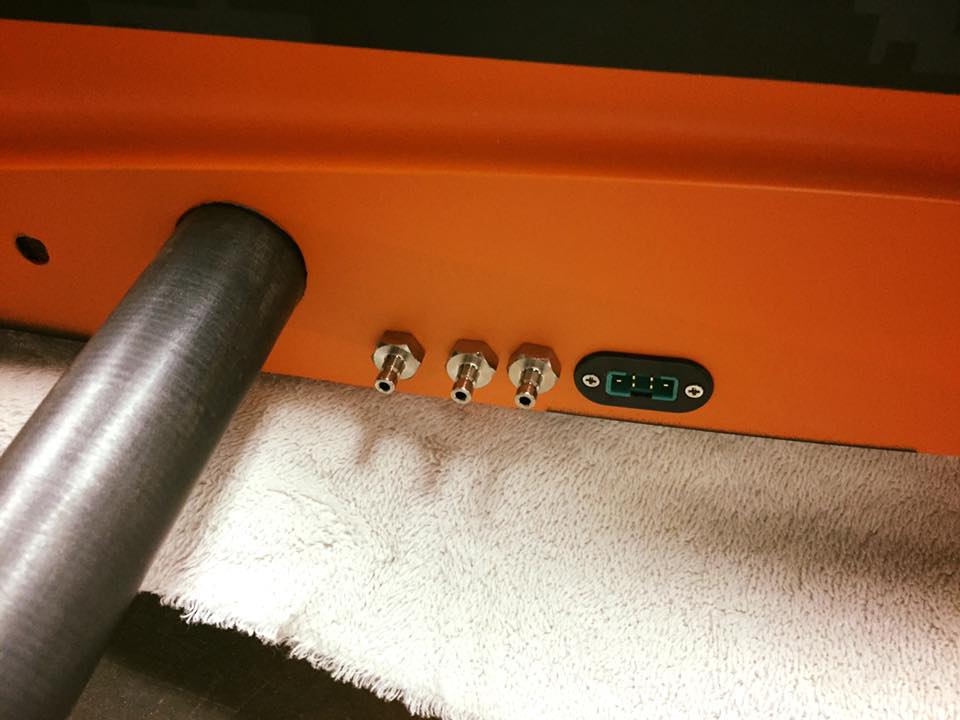
Have made some progress, installation of the tanks and most of the equipment is done. Preliminary balance check has also been completed.
Just need to install the K210, ECU, and Pump and plump up the upper service tray.i
Elite Aerosports provide top notch fittings from JMP and it certainly suits the need for a large jet. Couldn't be happier with how it's turning out.
Also, so far the matte finish has been simple to maintain and hasn't been impacted by handling it like I anticipated.
 12-12-2015, 08:27 AM
#35

Hey Sean,
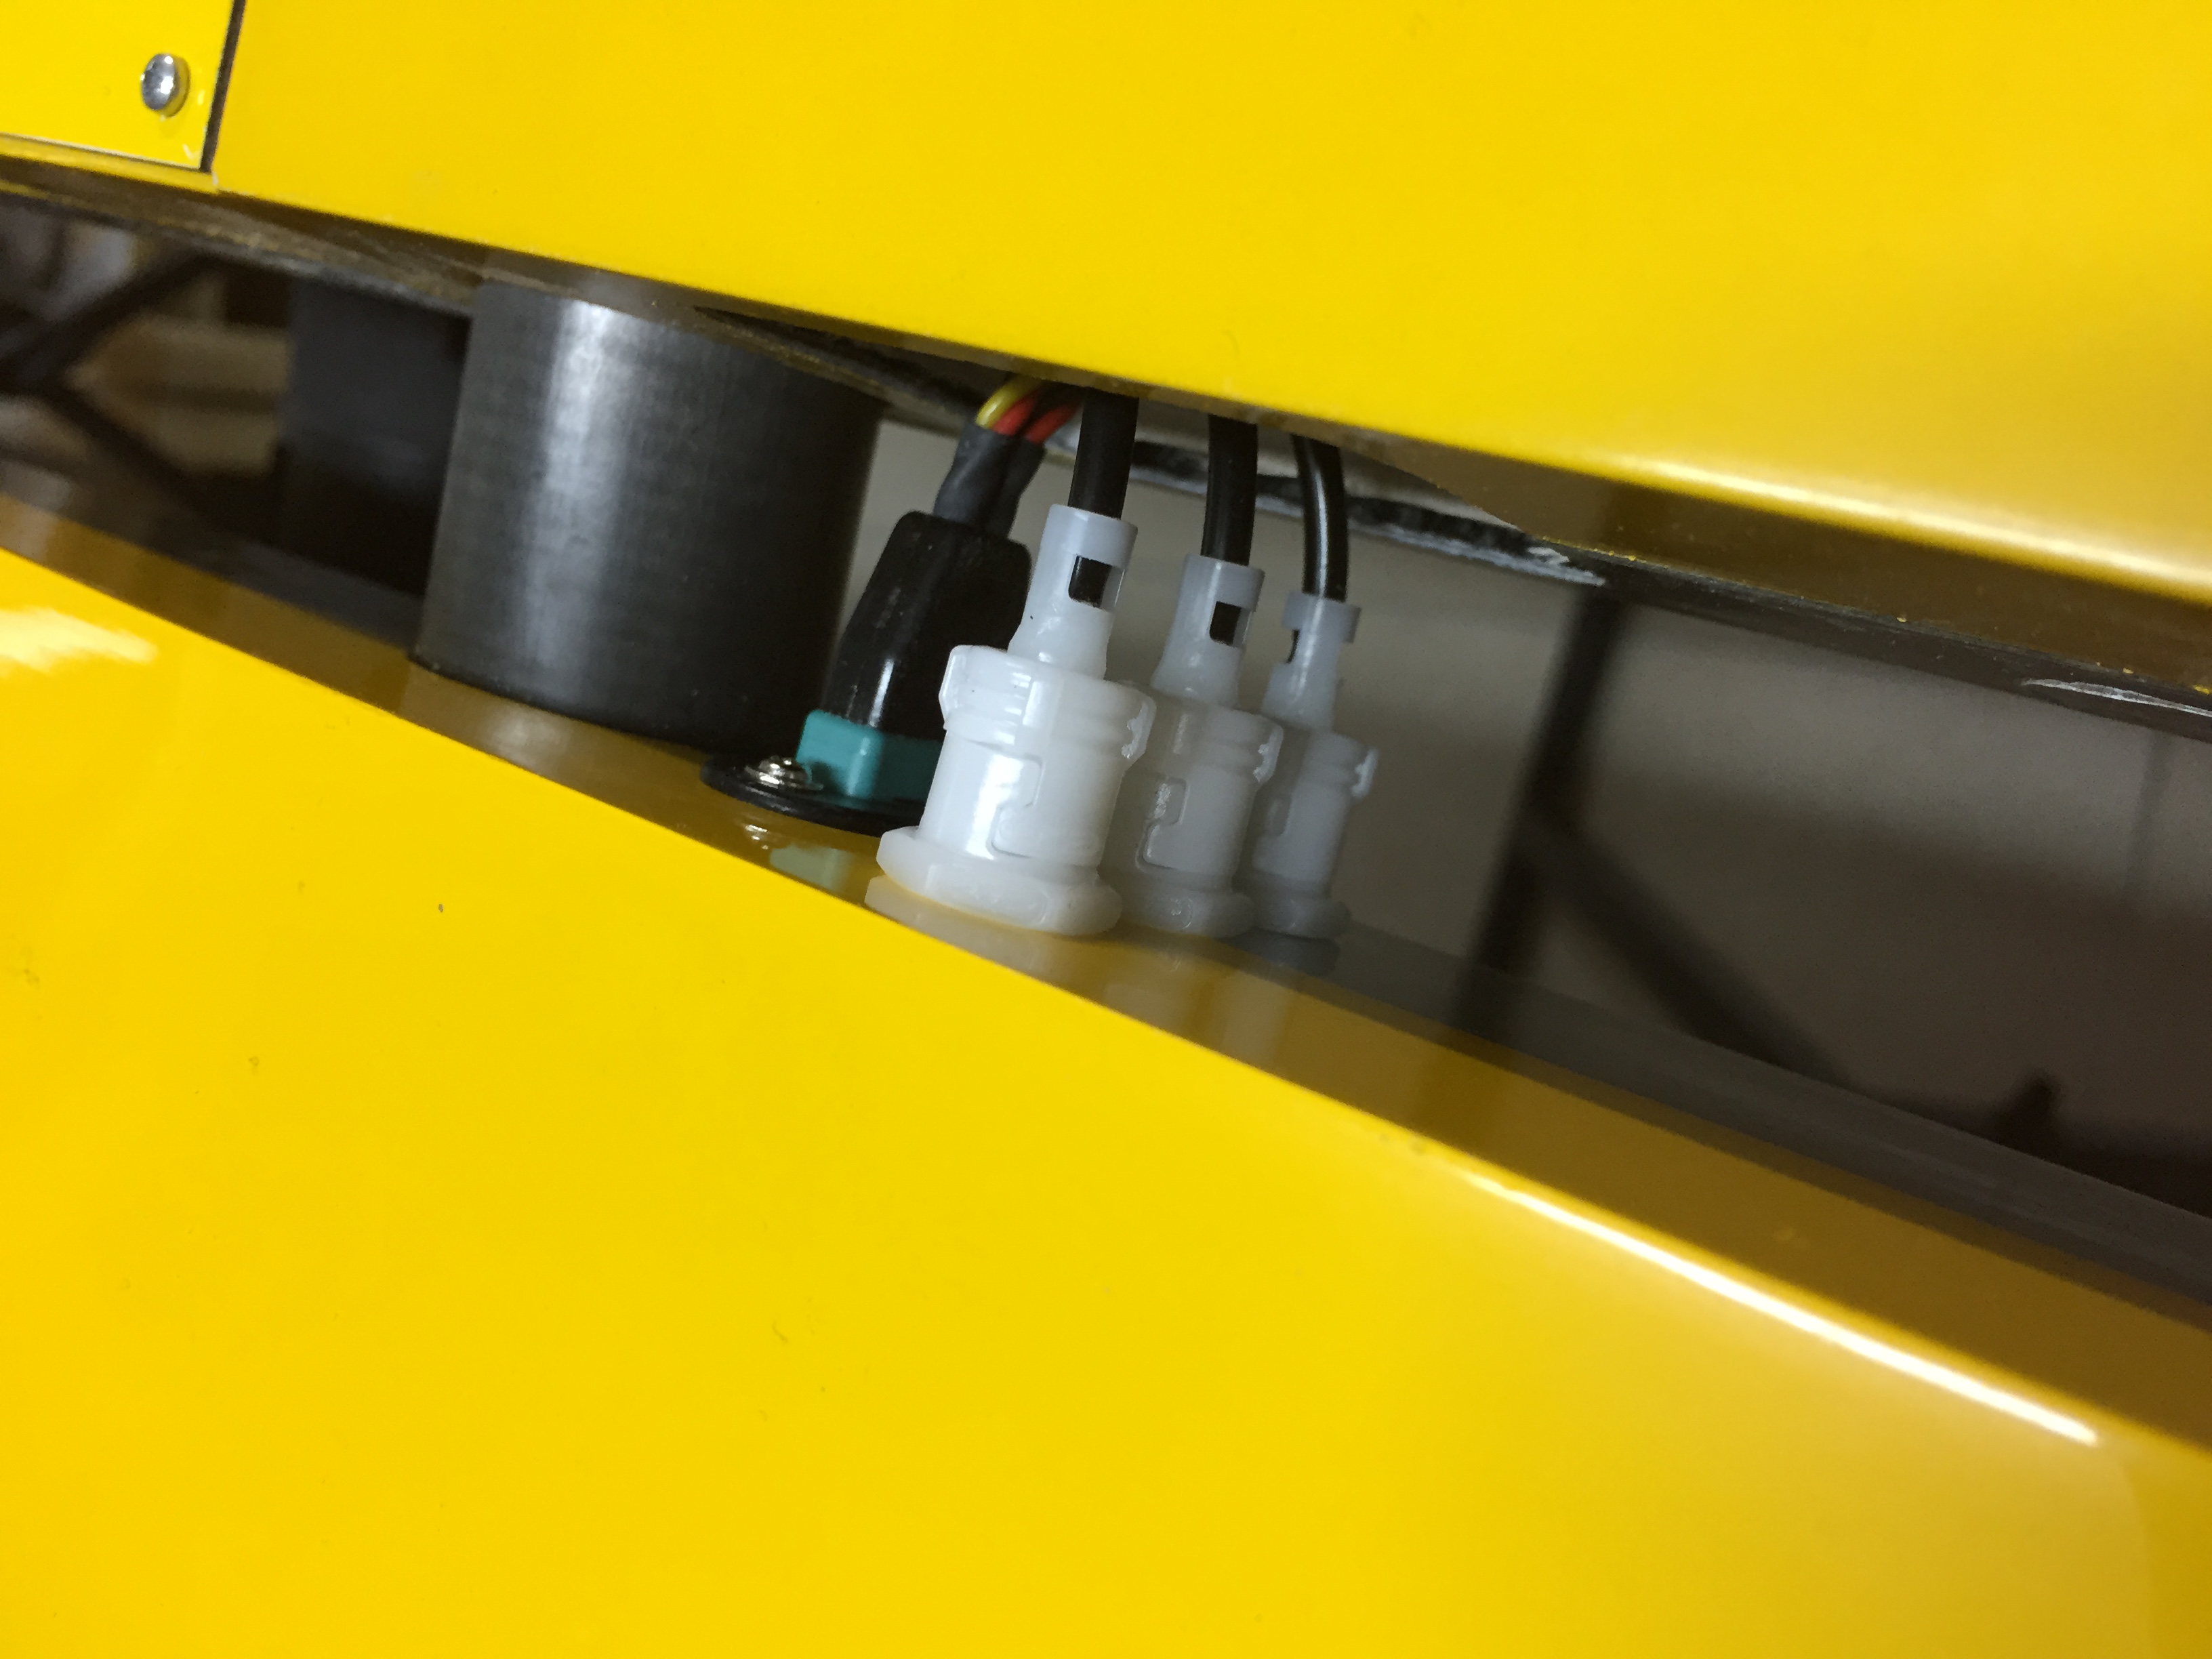
Did you make a small hole in the spar to get the air lines & servo leads to exit in front of the wing tube? I saw a similar method in ZivBit's thread. The stock method of exiting by the rear anti-rotation pin works, but a little cramped for using nice fittings or sockets. I have some paint work to do myself this winter and was also thinking of relocating my wing connections like yours.
So any tips or more pics on how you did it would be appreciated.
Thanks...Scott
Last edited by sc0tt; 12-12-2015 at 08:36 AM.
12-13-2015, 04:35 AM
#36
Scott,
thanks for checking the thread.
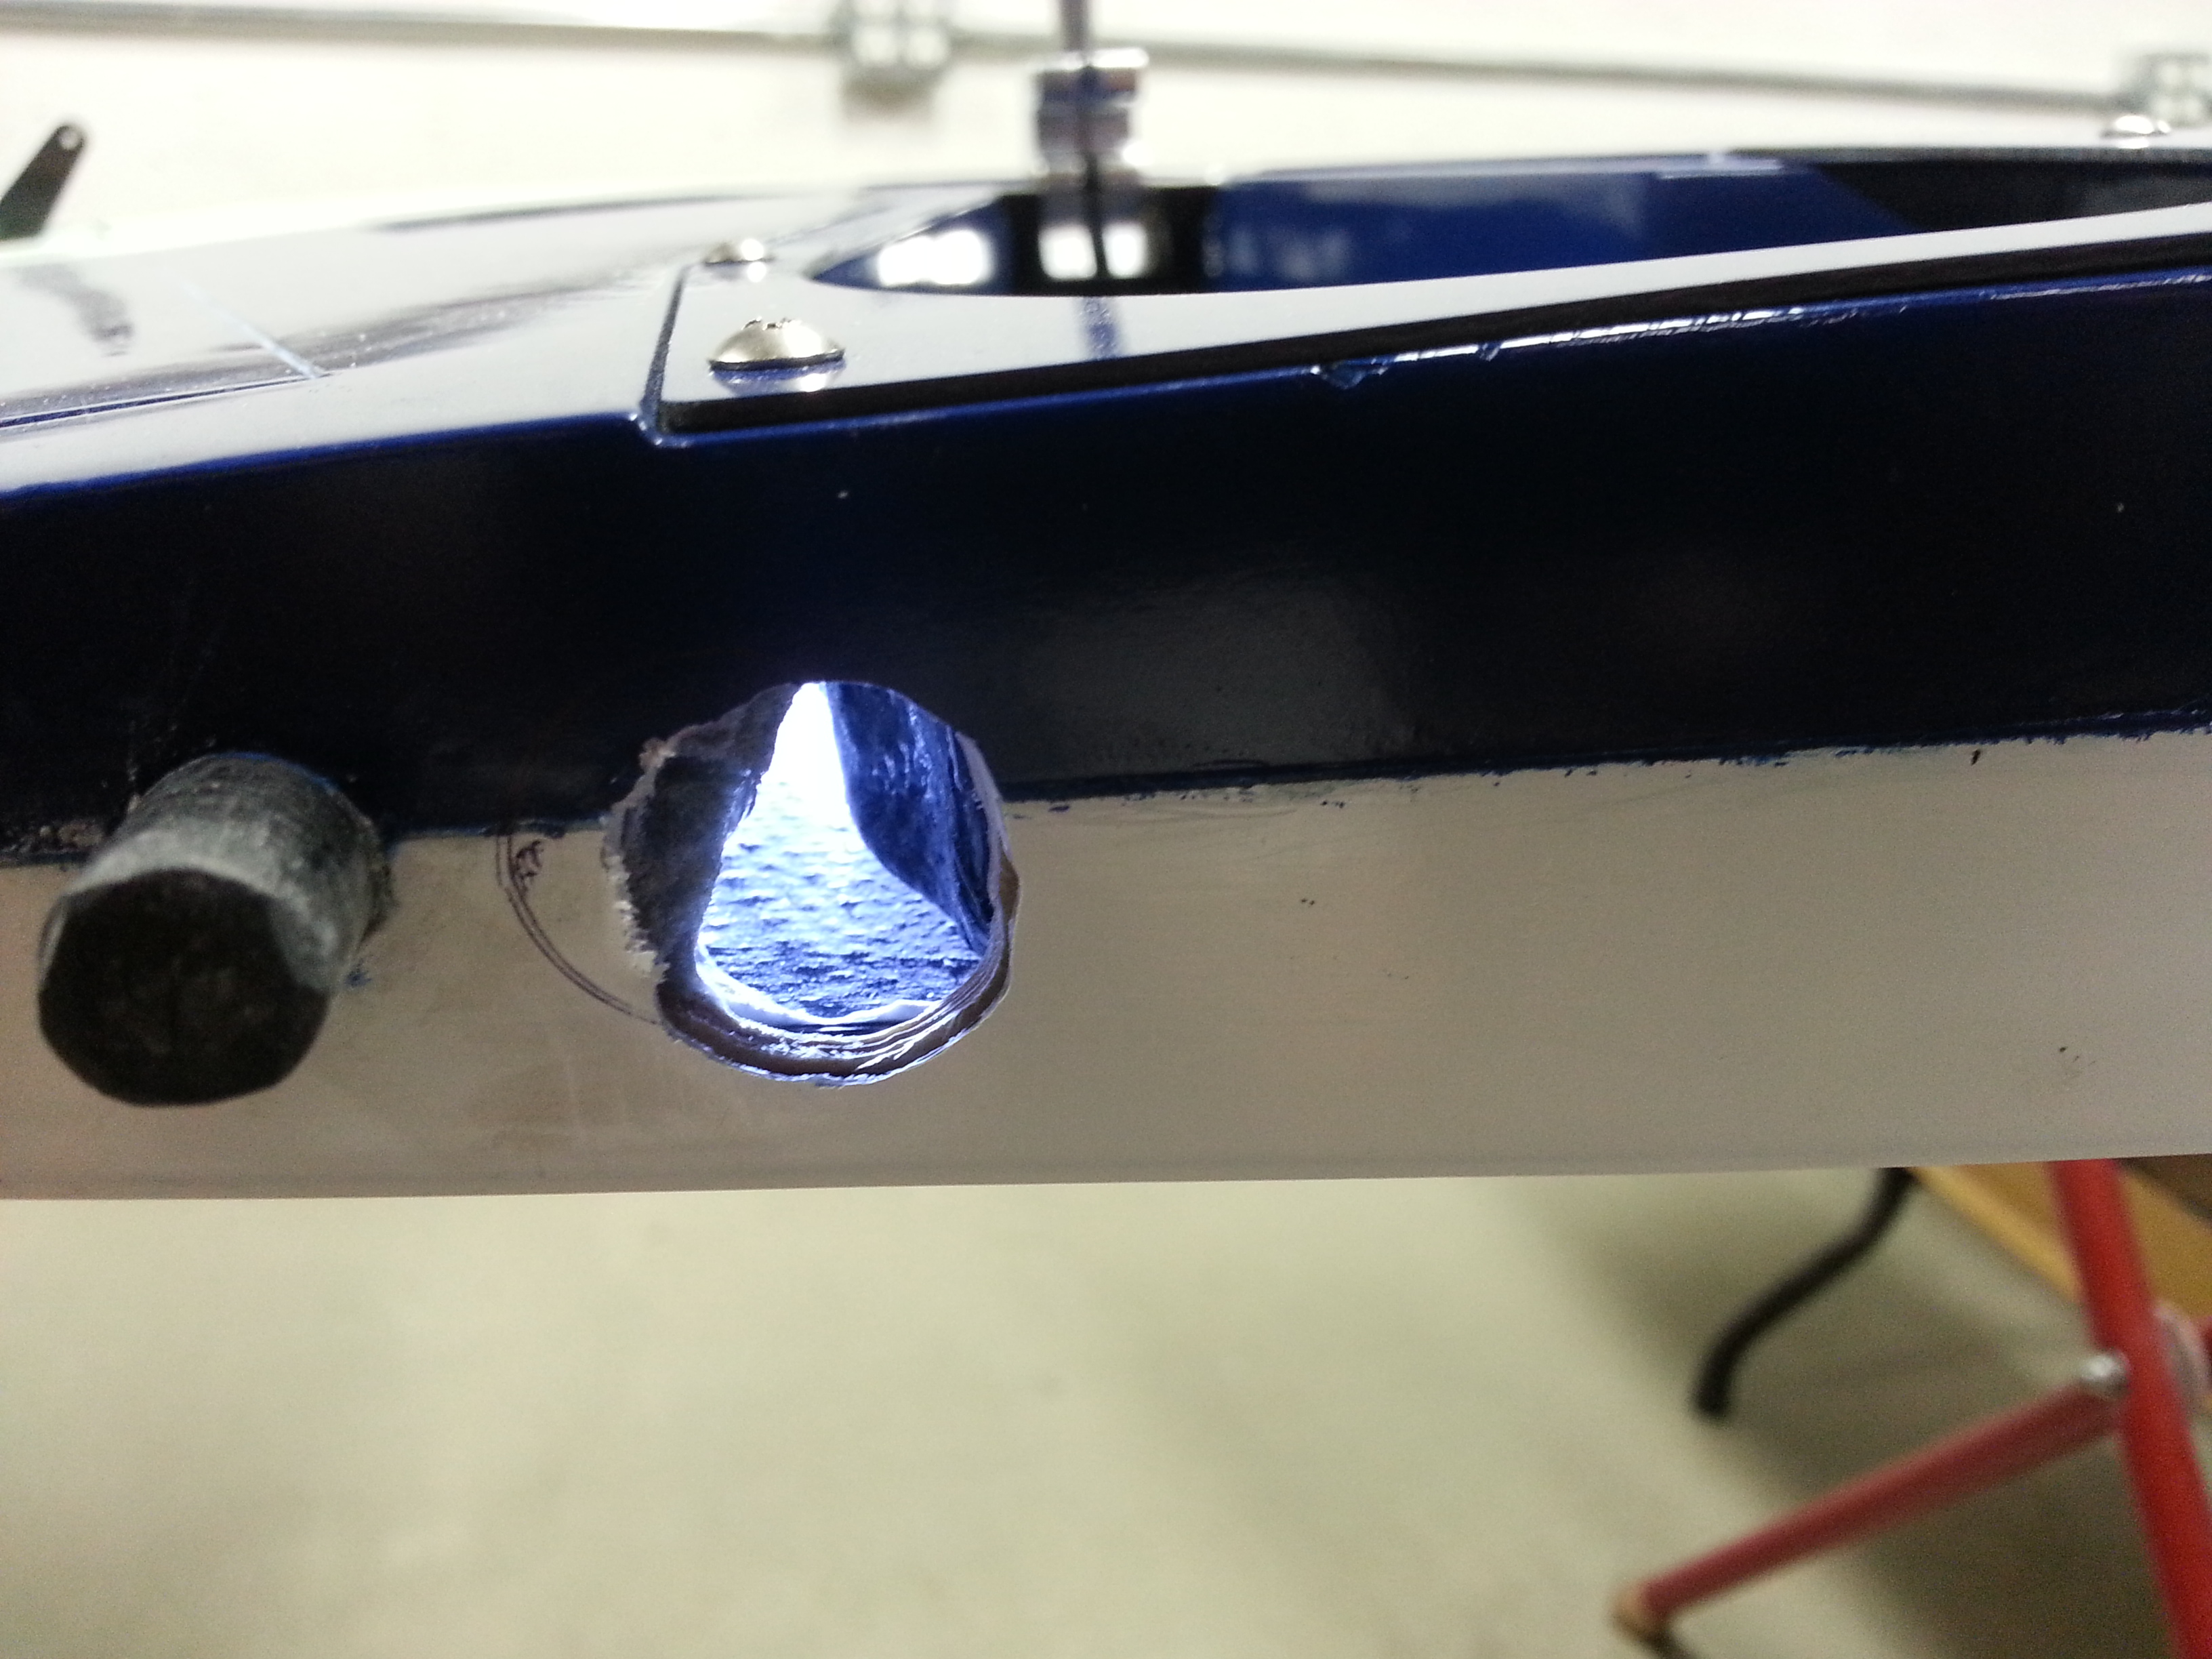
you're correct there is no way to get the leads in front of the spar without a hole. I have two. One small hole out in the aileron servo bay and one close to the wing root. The spar is a lamination of ply at that point.
while typically I would avoid drilling through the spar but with the layup of these wings I don't foresee any risk.
it was quite easy to run all the lines out to the aileron bay, then I used a nut on the end of a string to find the path out the root. Then I used this string to pull the leads through.
the connection points are all low to avoid interference with the fuel tanks. I have blocked those up slightly to provide clearance.
thanks for checking the thread.
you're correct there is no way to get the leads in front of the spar without a hole. I have two. One small hole out in the aileron servo bay and one close to the wing root. The spar is a lamination of ply at that point.
while typically I would avoid drilling through the spar but with the layup of these wings I don't foresee any risk.
it was quite easy to run all the lines out to the aileron bay, then I used a nut on the end of a string to find the path out the root. Then I used this string to pull the leads through.
the connection points are all low to avoid interference with the fuel tanks. I have blocked those up slightly to provide clearance.
12-13-2015, 07:30 PM
#37


Have made some progress, installation of the tanks and most of the equipment is done. Preliminary balance check has also been completed.
Just need to install the K210, ECU, and Pump and plump up the upper service tray.i
Elite Aerosports provide top notch fittings from JMP and it certainly suits the need for a large jet. Couldn't be happier with how it's turning out.
Also, so far the matte finish has been simple to maintain and hasn't been impacted by handling it like I anticipated.
Just need to install the K210, ECU, and Pump and plump up the upper service tray.i
Elite Aerosports provide top notch fittings from JMP and it certainly suits the need for a large jet. Couldn't be happier with how it's turning out.
Also, so far the matte finish has been simple to maintain and hasn't been impacted by handling it like I anticipated.
12-13-2015, 08:24 PM
#38

Sean very clean. I am always tempted but never had the nerve to drill through a spar. Sure makes the routing easier to get in from the front of the spar.
Regarding the paint, is this a new process or is it like a classic semi gloss? Like a flat and gloss mix or something different?
Were you worried that it would get dirty and you could not clean it? Anyway it looks great
Regarding the paint, is this a new process or is it like a classic semi gloss? Like a flat and gloss mix or something different?
Were you worried that it would get dirty and you could not clean it? Anyway it looks great
12-15-2015, 07:48 AM
#39
The Dean's mount I got here:
http://www.aztechaeromodels.com/inde...h&search=deans
Note the owner of Aztech recently passed away and while it does look like the family will continue the business it wouldn't hurt to call or email first.
You can also find them here, when in stock:
http://www.dreamworksrc.com/catalog/...-Connector-Set
The JST socket isn't really it's intended use. It's meant for MPX plugs:
http://www.dreamworksrc.com/catalog/...ket-Housing-(4)
If you spread it apart slightly with a flat screwdriver you can push the JST plug through and it won't fall out the bottom. Just makes it easier to find for charging. It's just laying in there loose.
12-15-2015, 07:56 AM
#40
Sean very clean. I am always tempted but never had the nerve to drill through a spar. Sure makes the routing easier to get in from the front of the spar.
Regarding the paint, is this a new process or is it like a classic semi gloss? Like a flat and gloss mix or something different?
Were you worried that it would get dirty and you could not clean it? Anyway it looks great
Regarding the paint, is this a new process or is it like a classic semi gloss? Like a flat and gloss mix or something different?
Were you worried that it would get dirty and you could not clean it? Anyway it looks great
http://www.eastwood.com/2k-aerospray-matte-clear.html
I experimented to a PPG flattening agent in the PPG gloss clear, but was not happy with the results, and it's repeatability. I also didn't want to add extra weight the heavier paint would add.
I WAS worried about keeping the finish clean. I debated for a long time about going gloss or matte, and in the end I felt the scheme would look better flat and it would be unique. I also researched how to maintain a modern flat finish on a car and found this brand and care system:
http://www.drbeasleys.com/shop/exter...-car-care.html
So far it's worked as advertised and I've been able to keep the surface clean while handling the model. Time will tell I guess but I figured I'd give it a shot. I'm pleased with how it looks.
11-03-2016, 03:18 AM
#41
The Galactic Empire Shockwave is now an airplane. After an extended delay this year while we moved I was able to finally wrap up the install. Running a K180 and looking forward to having my own shockwave. Here are a few photos to wrap up the thread.


