


Pilot Dolphin Jet 86" trainer conversion to EDF
 01-27-2016, 05:08 AM
#1

Thread Starter
My Feedback: (11)
Join Date: Jun 2011
Location: coatesville,
IN
Posts: 121
Likes: 0
Received 0 Likes
on
0 Posts
Like the Title states, I have just received my Pilot Dolphin Jet, and promised Tony at Pilot RC I would do a simple build or conversion thread as I went along.
My Dolphin will have:
Schübeler DS94-700 HST for roughly 28lbs thrust
2x 7s 10000 mah lipos for 14s (custom from Alien Power Systems)
300 amp esc (Alien power systems)
Electric landing gear/controller from Pilot
Custom made Thrust tube - size to be determined
nevermind the dirty shop - just getting things done...lol
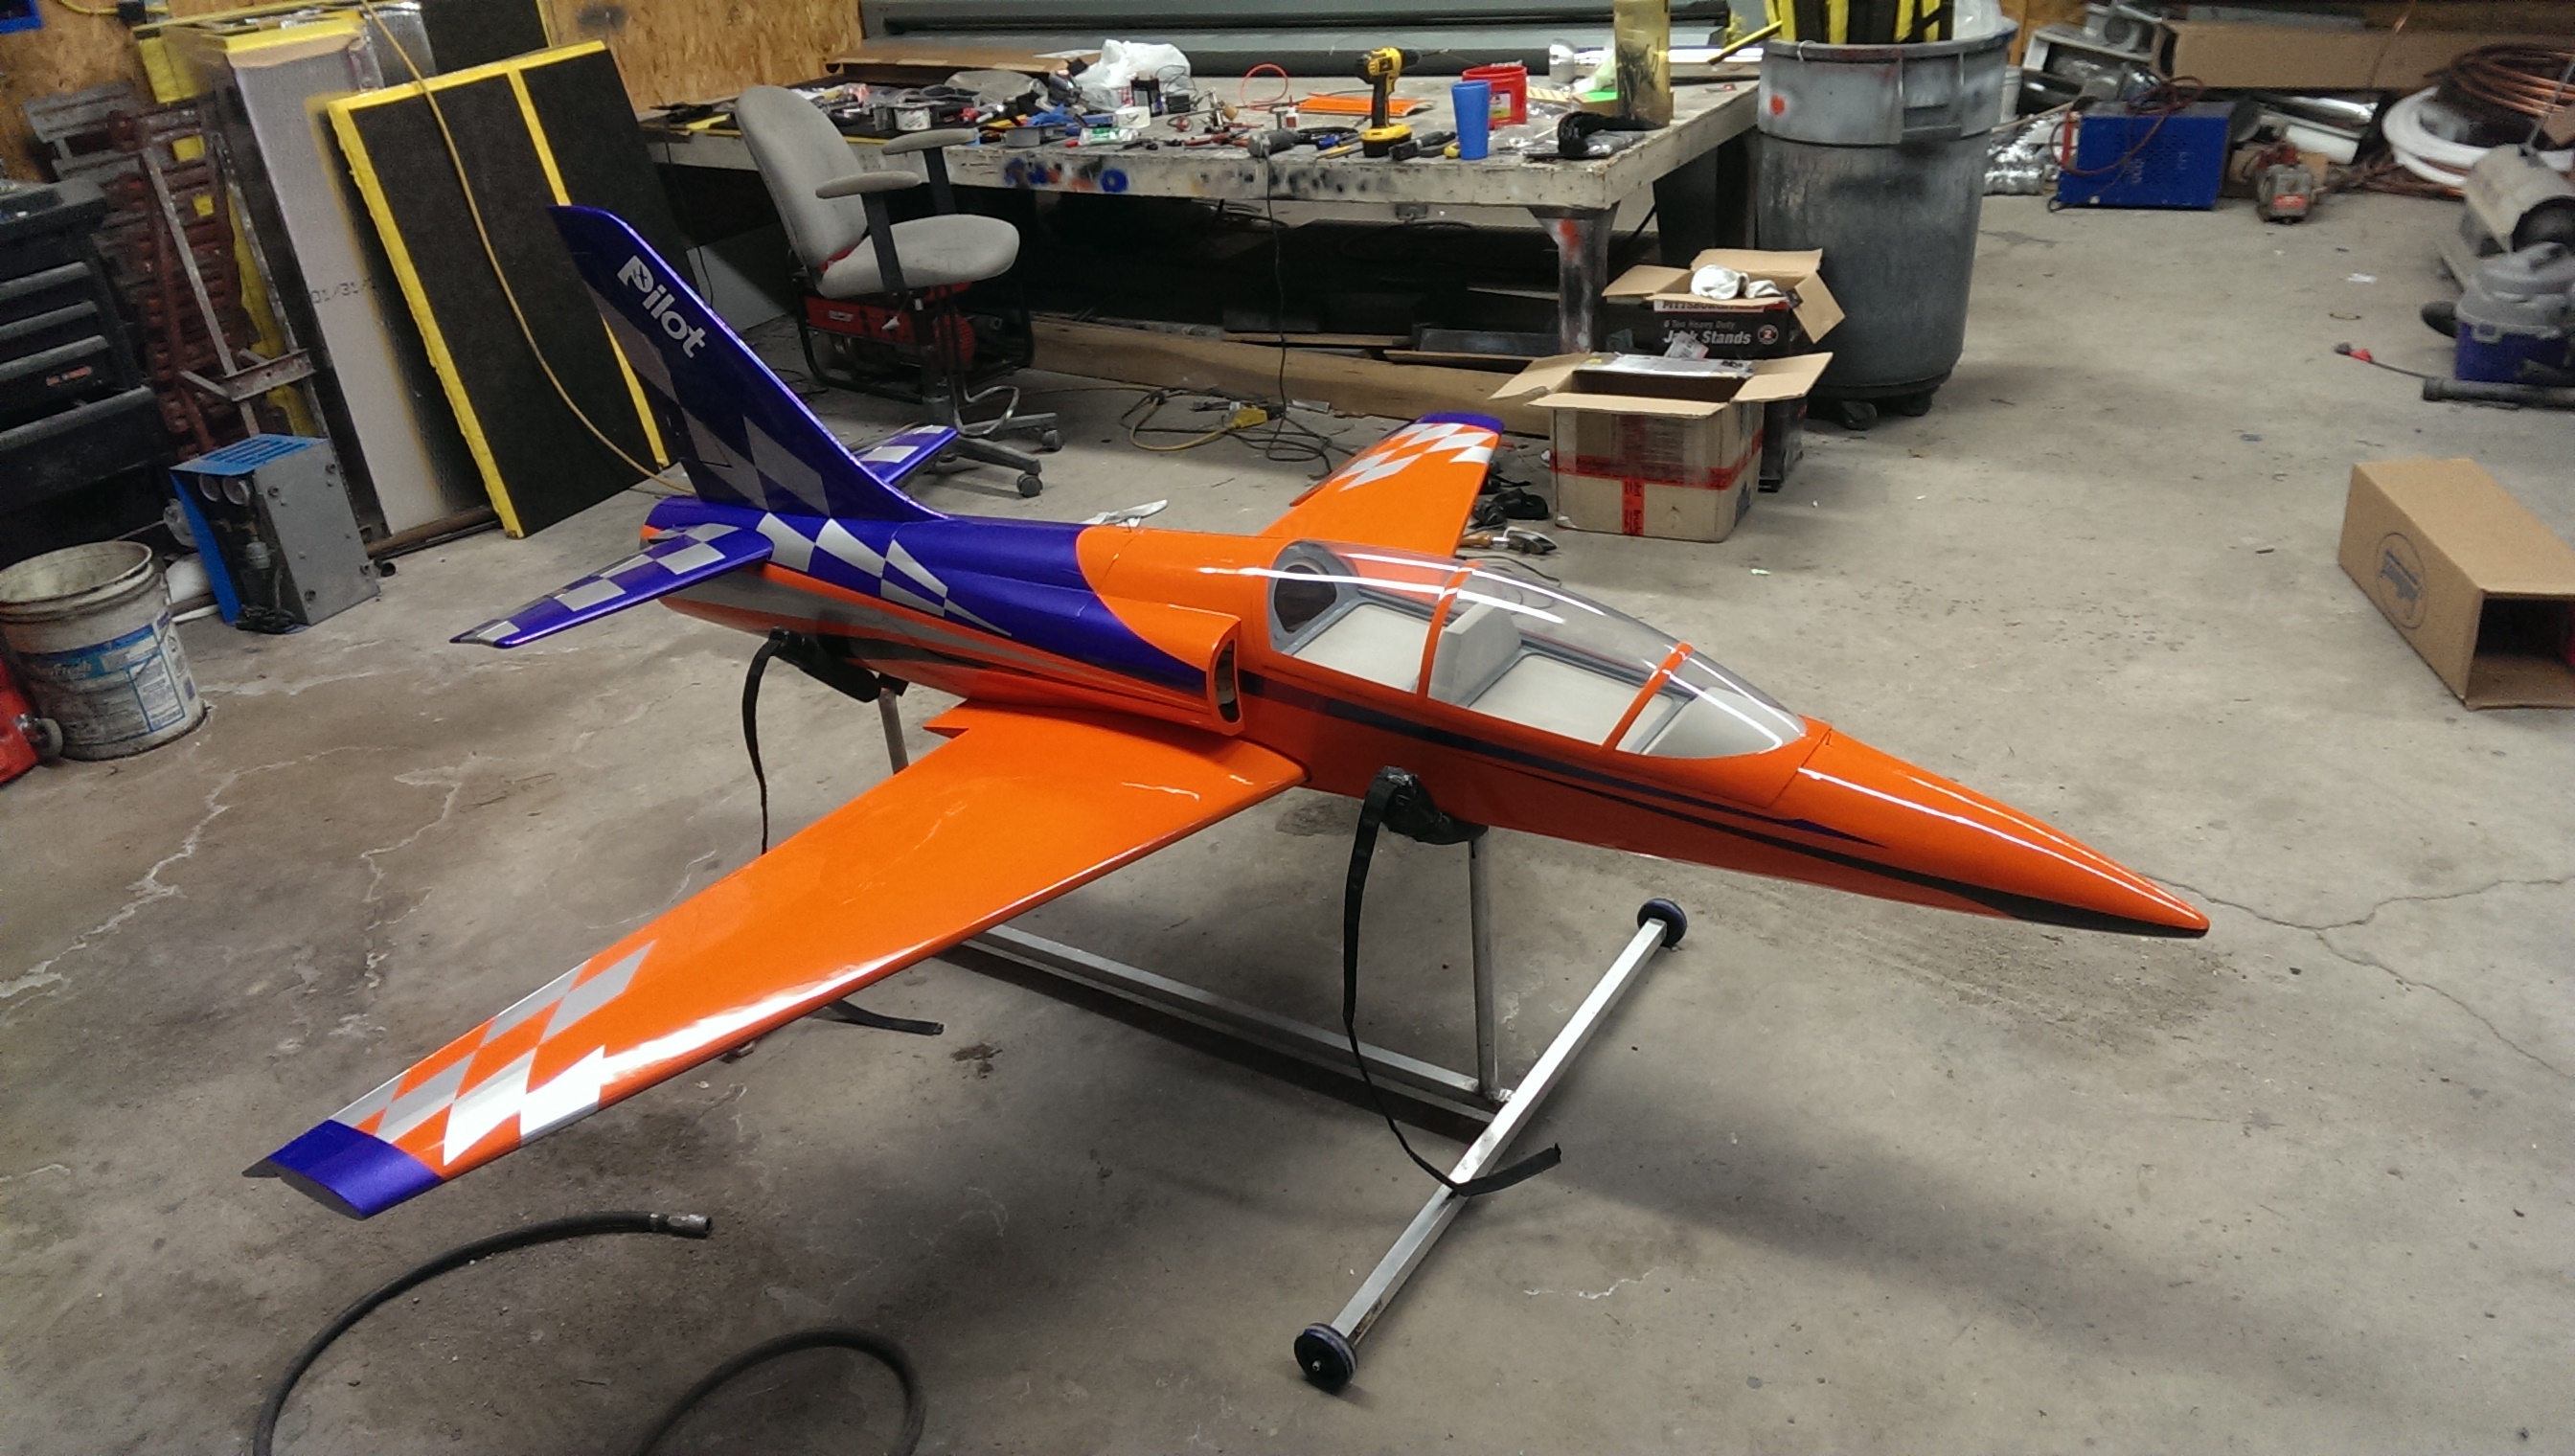
Did I mention this is my first EDF build.....hence the trainer jet...... I have flown RTF edfs, large scale warbirds, large scale 3d, helis, but never built a large scale edf arf....nor have I flown a large scale jet, I have been practicing with a hobby king 90mm cobra jet... So I plan to learn as I go.
Feel free to offer advice, or inspiration as I go, Try not to be overly critical. This is after all a project for fun.
My Dolphin will have:
Schübeler DS94-700 HST for roughly 28lbs thrust
2x 7s 10000 mah lipos for 14s (custom from Alien Power Systems)
300 amp esc (Alien power systems)
Electric landing gear/controller from Pilot
Custom made Thrust tube - size to be determined
nevermind the dirty shop - just getting things done...lol
Did I mention this is my first EDF build.....hence the trainer jet...... I have flown RTF edfs, large scale warbirds, large scale 3d, helis, but never built a large scale edf arf....nor have I flown a large scale jet, I have been practicing with a hobby king 90mm cobra jet... So I plan to learn as I go.
Feel free to offer advice, or inspiration as I go, Try not to be overly critical. This is after all a project for fun.
Last edited by indycustombikes; 01-29-2016 at 05:15 AM. Reason: spelling
 01-27-2016, 05:14 AM
#2
Thread Starter
My Feedback: (11)
Join Date: Jun 2011
Location: coatesville,
IN
Posts: 121
Likes: 0
Received 0 Likes
on
0 Posts
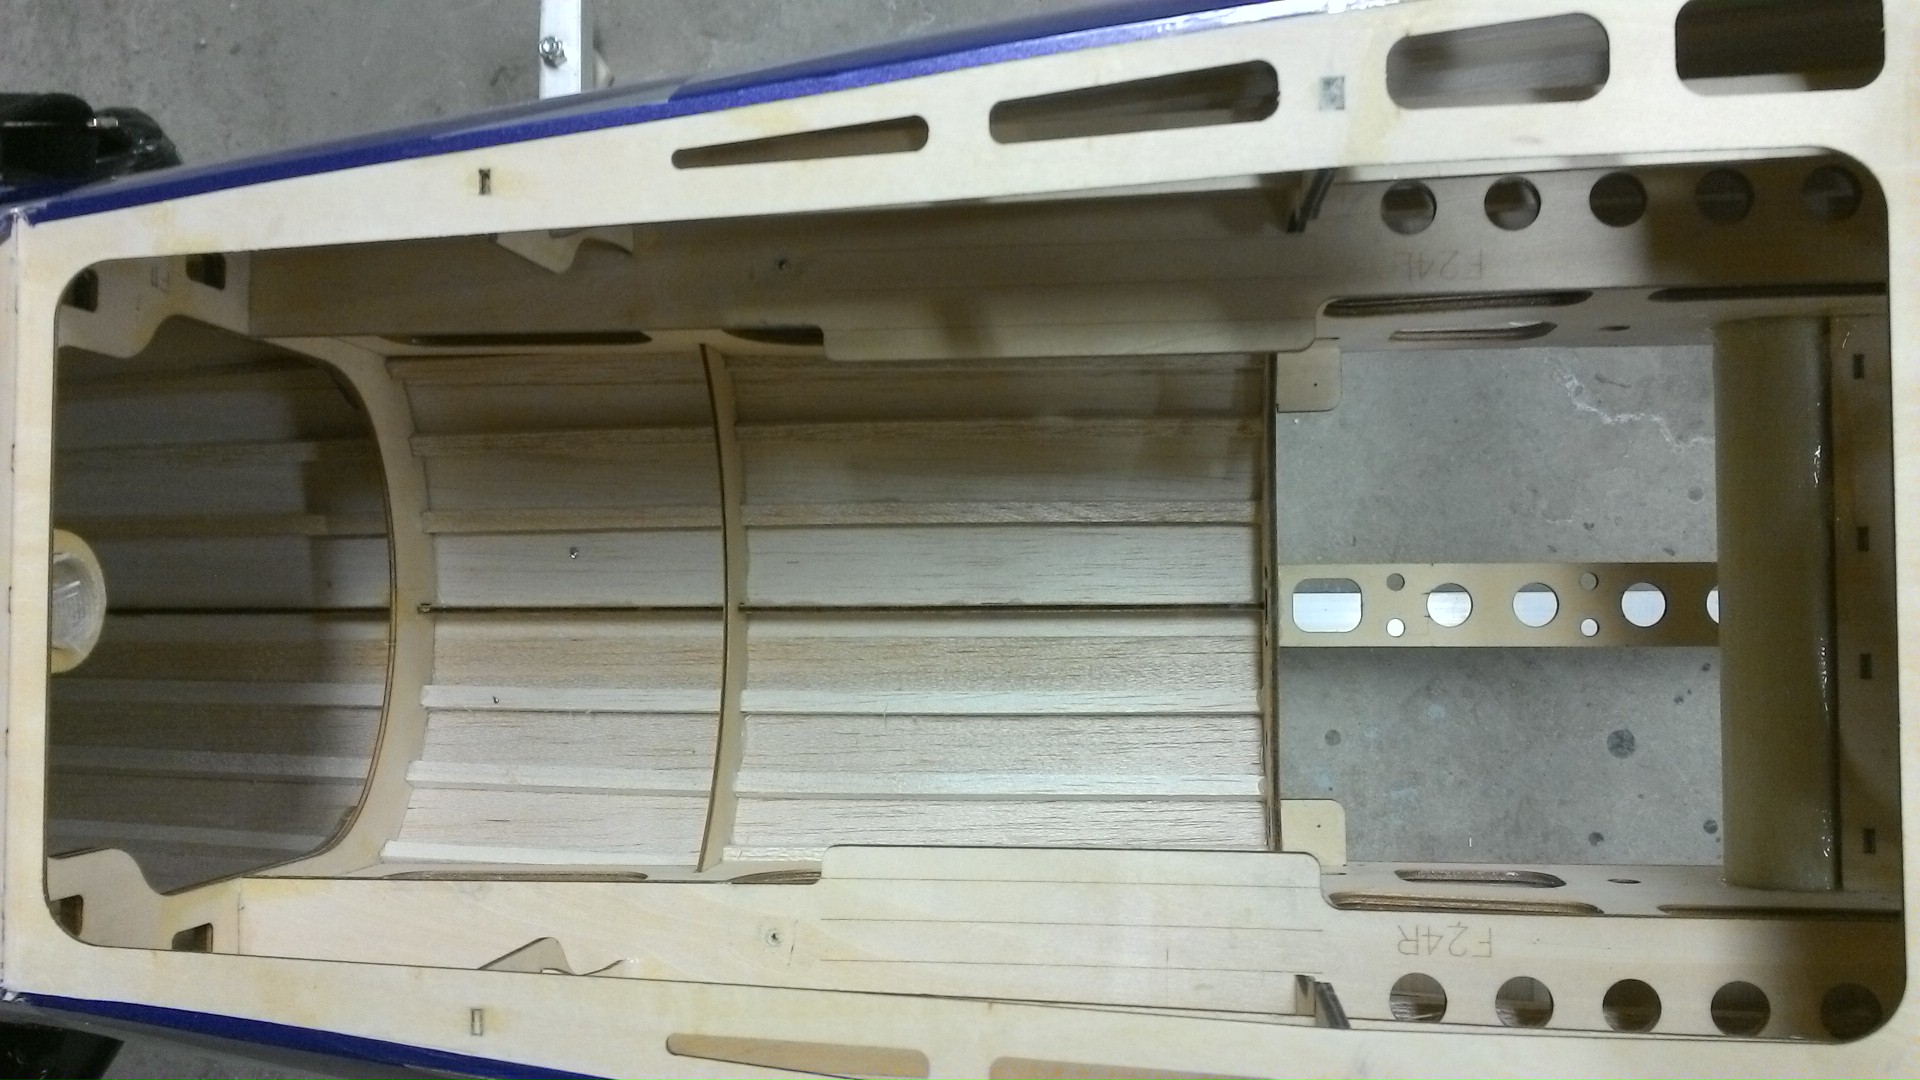
Here is a couple shots of the un-modified turbine mount, intakes and tail section of the plane
Last edited by indycustombikes; 01-27-2016 at 05:16 AM.
 01-27-2016, 02:10 PM
#4
Thread Starter
My Feedback: (11)
Join Date: Jun 2011
Location: coatesville,
IN
Posts: 121
Likes: 0
Received 0 Likes
on
0 Posts
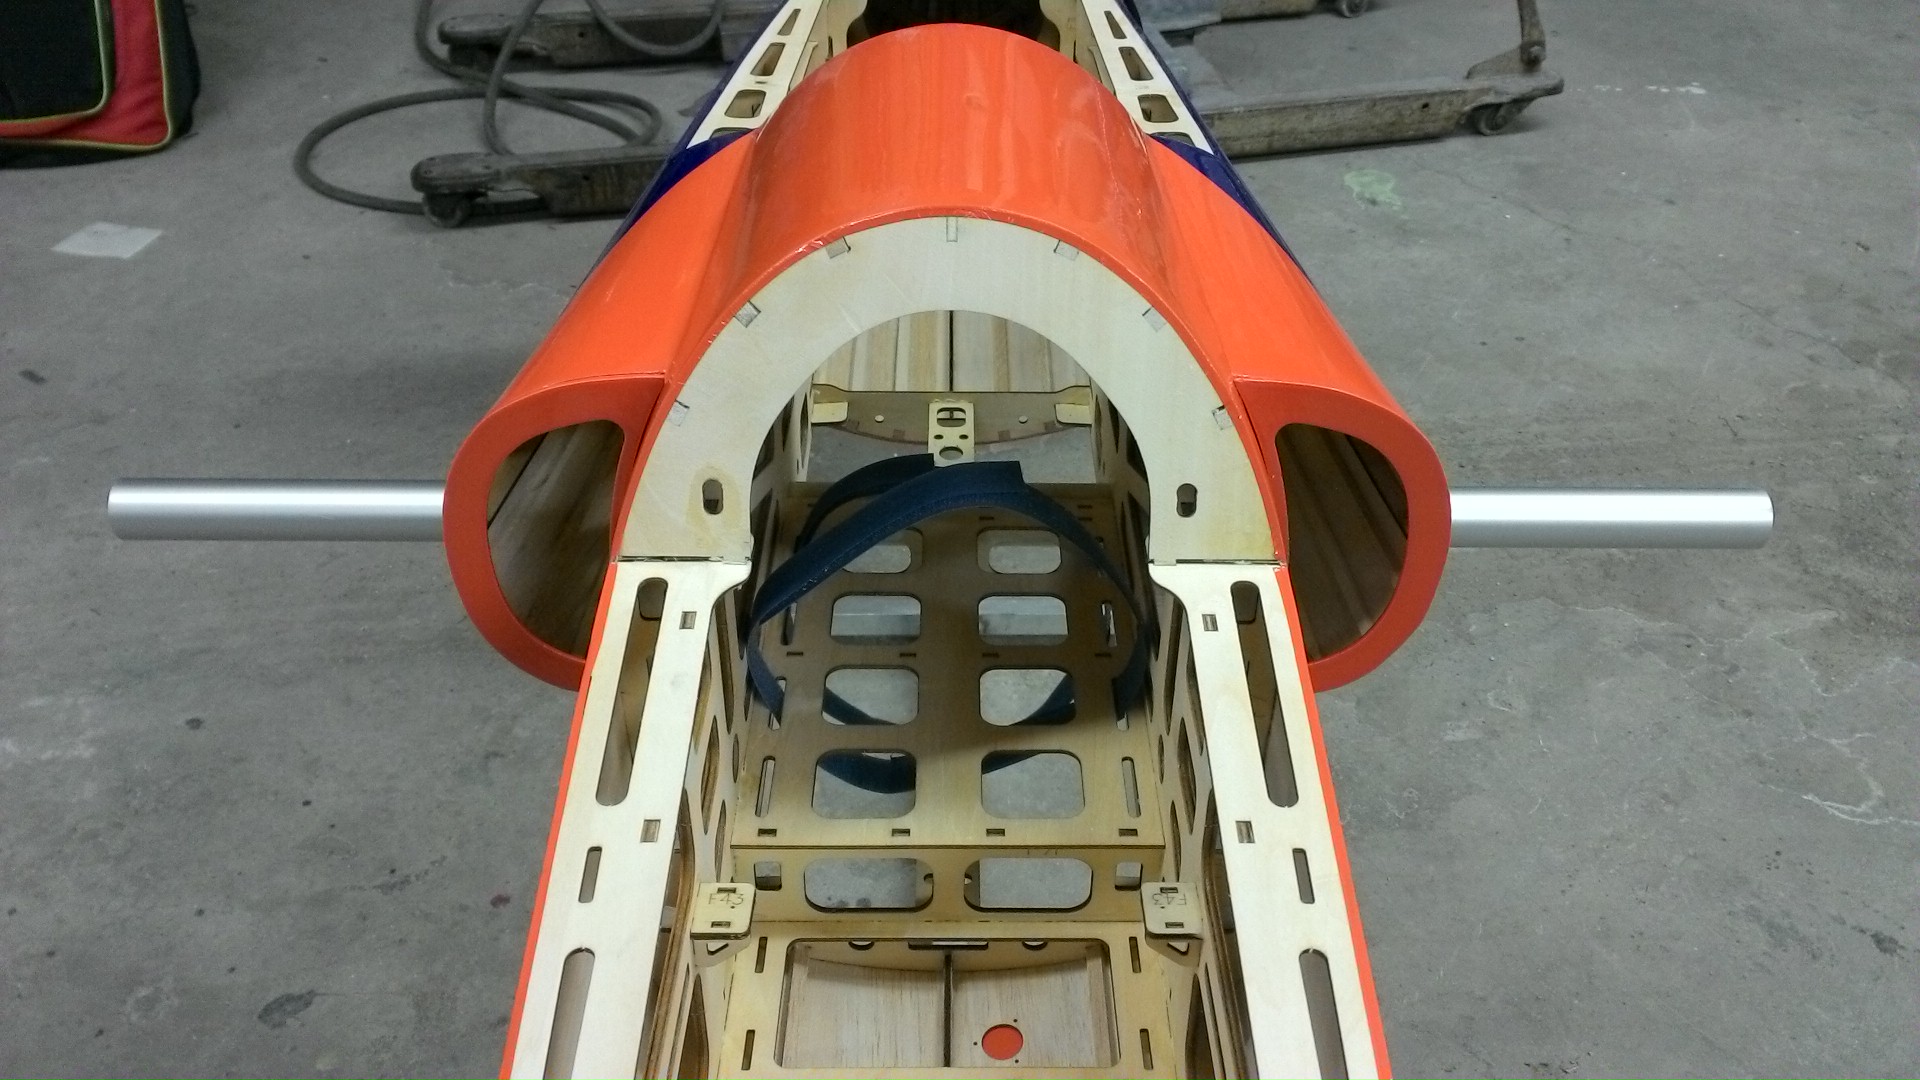
So here we have some progress, Trimmed the mounting rail for edf, trimmed the edge of the intake ring to fit (very snug by the way), opened up the tail section for the 105mm thrust tube....
I ended up coming back and re-working the mounting rail, ended up having to drop the edf about 3/8" to get a straight shot with the thrust tube.....
Last edited by indycustombikes; 02-05-2016 at 12:23 PM.
01-27-2016, 02:22 PM
#5
Thread Starter
My Feedback: (11)
Join Date: Jun 2011
Location: coatesville,
IN
Posts: 121
Likes: 0
Received 0 Likes
on
0 Posts
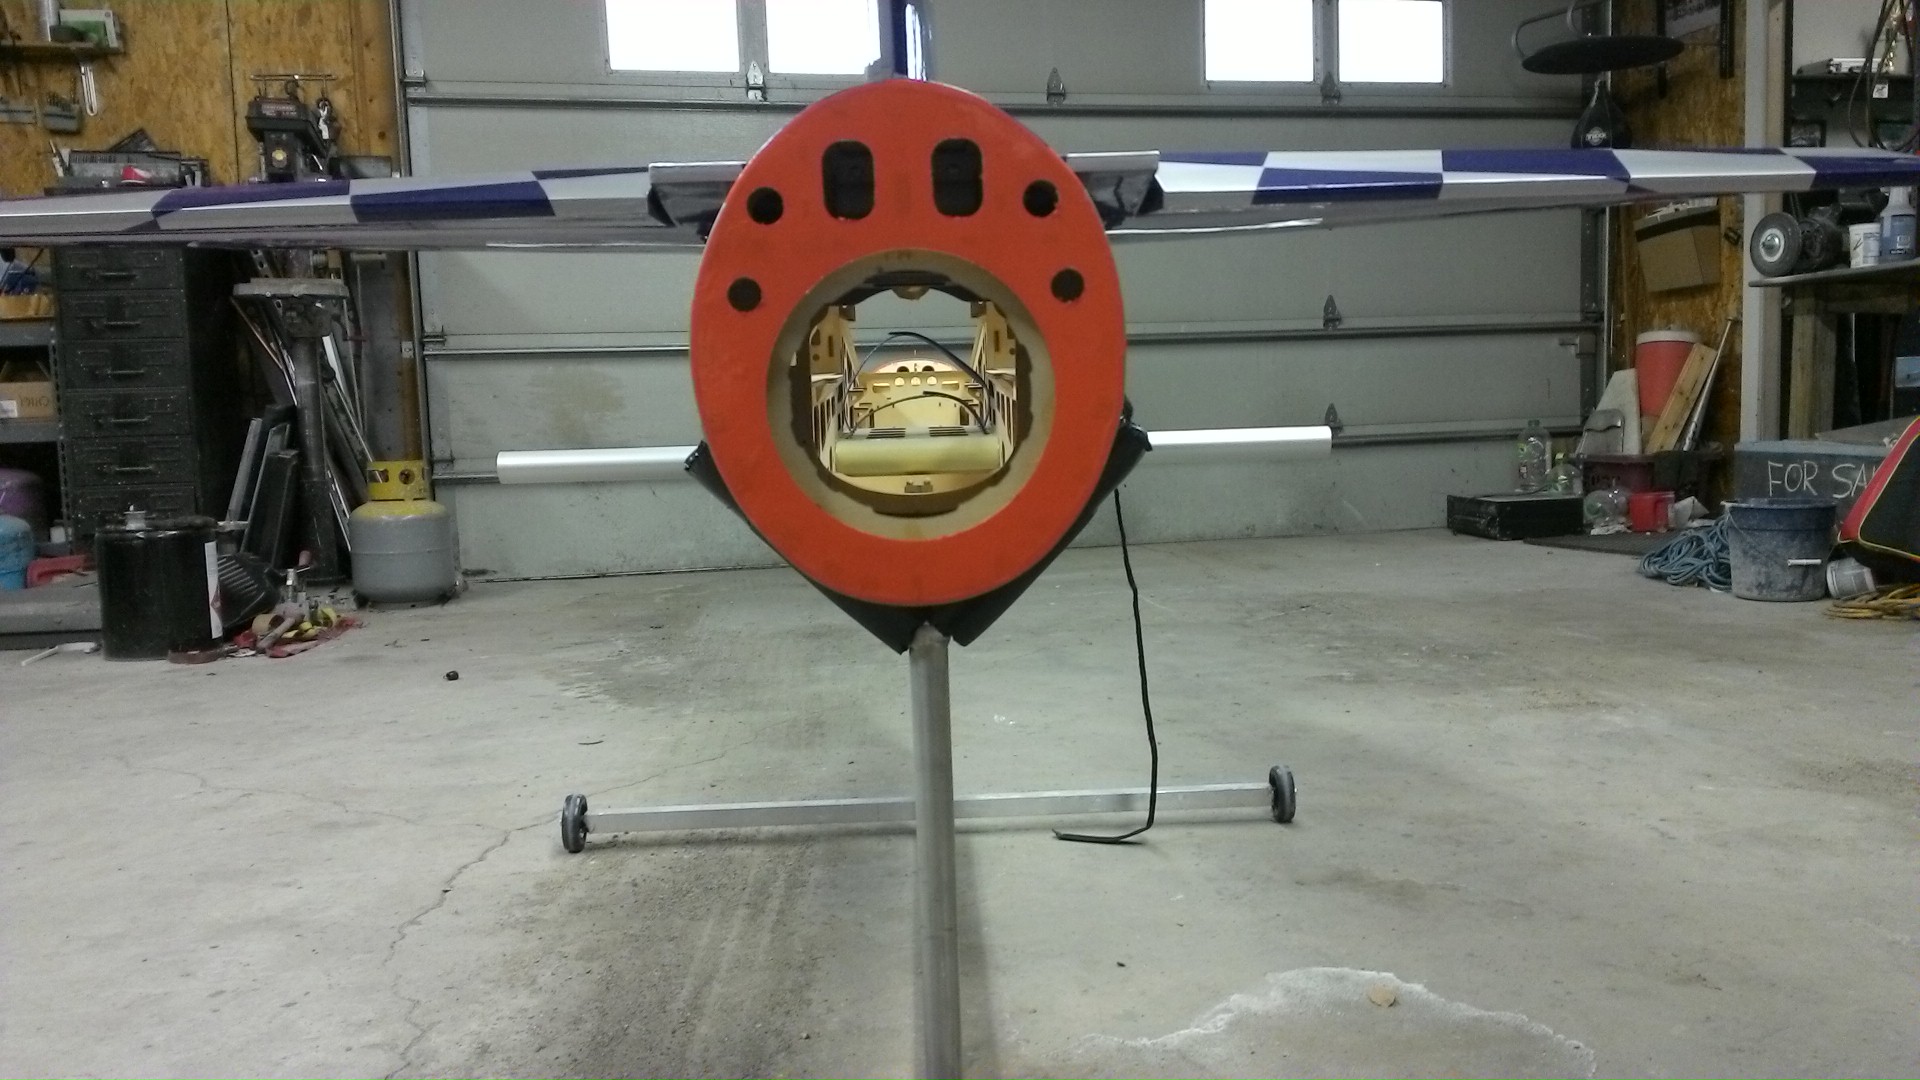
Here I have opened up the intakes for more airflow, this measures out to just about 105mm or equal to the thrust exit, There is also some air around the front gear, and I installed the esc upside down under the battery tray and have a few holes for cooling air down there.... I know it isn't ducted but I feel like this will function quite well as is...
01-27-2016, 02:28 PM
#6
Thread Starter
My Feedback: (11)
Join Date: Jun 2011
Location: coatesville,
IN
Posts: 121
Likes: 0
Received 0 Likes
on
0 Posts
Finally got some time to build a decent Thrust tube. I started by making my template with poster board, then cut .005 mylar, rolled it up and taped inside and outside seams with packing tape, then I etch primed the mylar on the outside and layed a layer of 5 oz. cloth and resin to hold everything together. then I gave it a custom faux carbon paint job....lol came out very light and strong.
Last edited by indycustombikes; 02-06-2016 at 04:05 AM.
01-27-2016, 02:34 PM
#7
Thread Starter
My Feedback: (11)
Join Date: Jun 2011
Location: coatesville,
IN
Posts: 121
Likes: 0
Received 0 Likes
on
0 Posts
Well, had a small bump in the road, Went to test the gear, and plugged the included battery wire harness into the controller, hooked up the gear and rx, plugged in the battery, and smelled the magic smoke.... upon closer inspection, the socket to install the battery wire harness was installed backwards.... so polarity reversed.... I did not think to check this as its designed so you cant plug it in backwards.... or not, so it seems...
Well I have some dreamworks controllers for temporary testing, and sent a note to Tony to see if he will help me out with a new controller...
 01-28-2016, 01:35 PM
#16
Thread Starter
My Feedback: (11)
Join Date: Jun 2011
Location: coatesville,
IN
Posts: 121
Likes: 0
Received 0 Likes
on
0 Posts
I would love to see that theory tested in a wind tunnel with smoke...
For now, I plan to use as is.. If there is any kind of issue then I may modify the intakes (radius), however I would be the first one to have to do so on this arf, the rest seem to be flying well as is.
For now, I plan to use as is.. If there is any kind of issue then I may modify the intakes (radius), however I would be the first one to have to do so on this arf, the rest seem to be flying well as is.
01-29-2016, 05:07 AM
#17
Thread Starter
My Feedback: (11)
Join Date: Jun 2011
Location: coatesville,
IN
Posts: 121
Likes: 0
Received 0 Likes
on
0 Posts
Here is the thrust tube installed, I supported the exit with a balsa ring and glued that to the fuse, I also made a faux nozzle to dress up the rear a little. This was made out of .009 aluminum (roof flashing) and I scored it into 8 equal sides, this is then screwed to the balsa ring...
not decided yet what to do with the rest of the tail section - I might paint it flat black!?
Last edited by indycustombikes; 02-05-2016 at 12:13 PM.
01-29-2016, 02:28 PM
#20
I will check into that, thanks.... I did contact one us distributor and he had no idea about custom thrust tubes..
I own an HVAC business and I have ample access to .009 aluminum flashing, I might just make one out of that. it would still weigh way less than the original tube that came with the arf (it was 14 oz.)
I own an HVAC business and I have ample access to .009 aluminum flashing, I might just make one out of that. it would still weigh way less than the original tube that came with the arf (it was 14 oz.)
01-29-2016, 08:11 PM
#25
Thread Starter
My Feedback: (11)
Join Date: Jun 2011
Location: coatesville,
IN
Posts: 121
Likes: 0
Received 0 Likes
on
0 Posts
I worked some on the intake side of things today, here you see the intake as originally made, and on the opposite side the balsa ducting I made out of 1/16 balsa sheet, then coated with resin to strengthen and smooth the surface some... will sand and paint this after it cures out.
I realize this isn't a full intake duct system, but more of an air scoop without any hard obstructions, I think this is a fair compromise for this airframe.
Last edited by indycustombikes; 02-05-2016 at 12:19 PM. Reason: previous post was retracted