


Kingtech presents the all new T1 sports jet


 10-02-2016, 03:02 PM
#704
Guys,
Keep in mind we are not the only market buying T-1's. As much as I would like to be the only customer T-One Models has, there is every other Country ordering T-1's or Fortunes. The factory is processing the orders as they come in order and sometimes we are not in production on my orders that week. The factory just finished 2 more molds and hired more people to increase production, but I strongly encourage them not to rush a build or paint to try and pump theses out the door. Those new employee's need to be trained to the high standards Mr. Kim demands. Quality is everything to Barry & Myself and we will not jeopardise that just to ship a plane out quickly. It is unfortunate that the original shipping has been moved to at least 12 weeks but when you get your T-1, you will understand why and appreciate it even more. Again, I can't stress enough that if anyone wants a refund, let me know and I will process it immediately. Please don't let this thread become a where is my plane inquiry. I have posted my email numerous times for inquiries. [email protected]
Sorry for the inconvenience,
Dirk
10-02-2016, 03:14 PM
#705

My Feedback: (4)
Dirk,
Thanks for the reply, was not trying to turn this into a "where is my plane thread" but wanted to know as I am planning on taking a few days off work when it arrives to work on this. Just like to know timeline so I can plan things if they should change. I also appreciate you guys upholding the quality of the plane instead of rushing them out he door.
Patrick
10-02-2016, 04:05 PM
#706

This morning I got up early and finished the left wing, installed the servos, linkages, and installed the gear. Got the door done and by 12:00 I was loading her into my car for a field trip 
I had not fitted the wings yet so I really wanted to get this bird all put together.
The wings went on ok, the tube is tight and it binds so I still need to hit it with baby powder, might get a CF tube as this one is heavy. The wing fit fine but one of the forward bolts in the fastener fell out


I may just leave the gear door Carbon Fiber as I was going to paint it black! It's a gloss finish!
I'm not sure if I will paint the interior of the door...yet. May just do the white like the noes door!

I did do some more setup programming as this was the first time the modle has been whole.
We bond the reciever and got everything working right. The left aileron was not working so I need to de bug that.
Field setup was fairely easy and she was on her feet in no time.

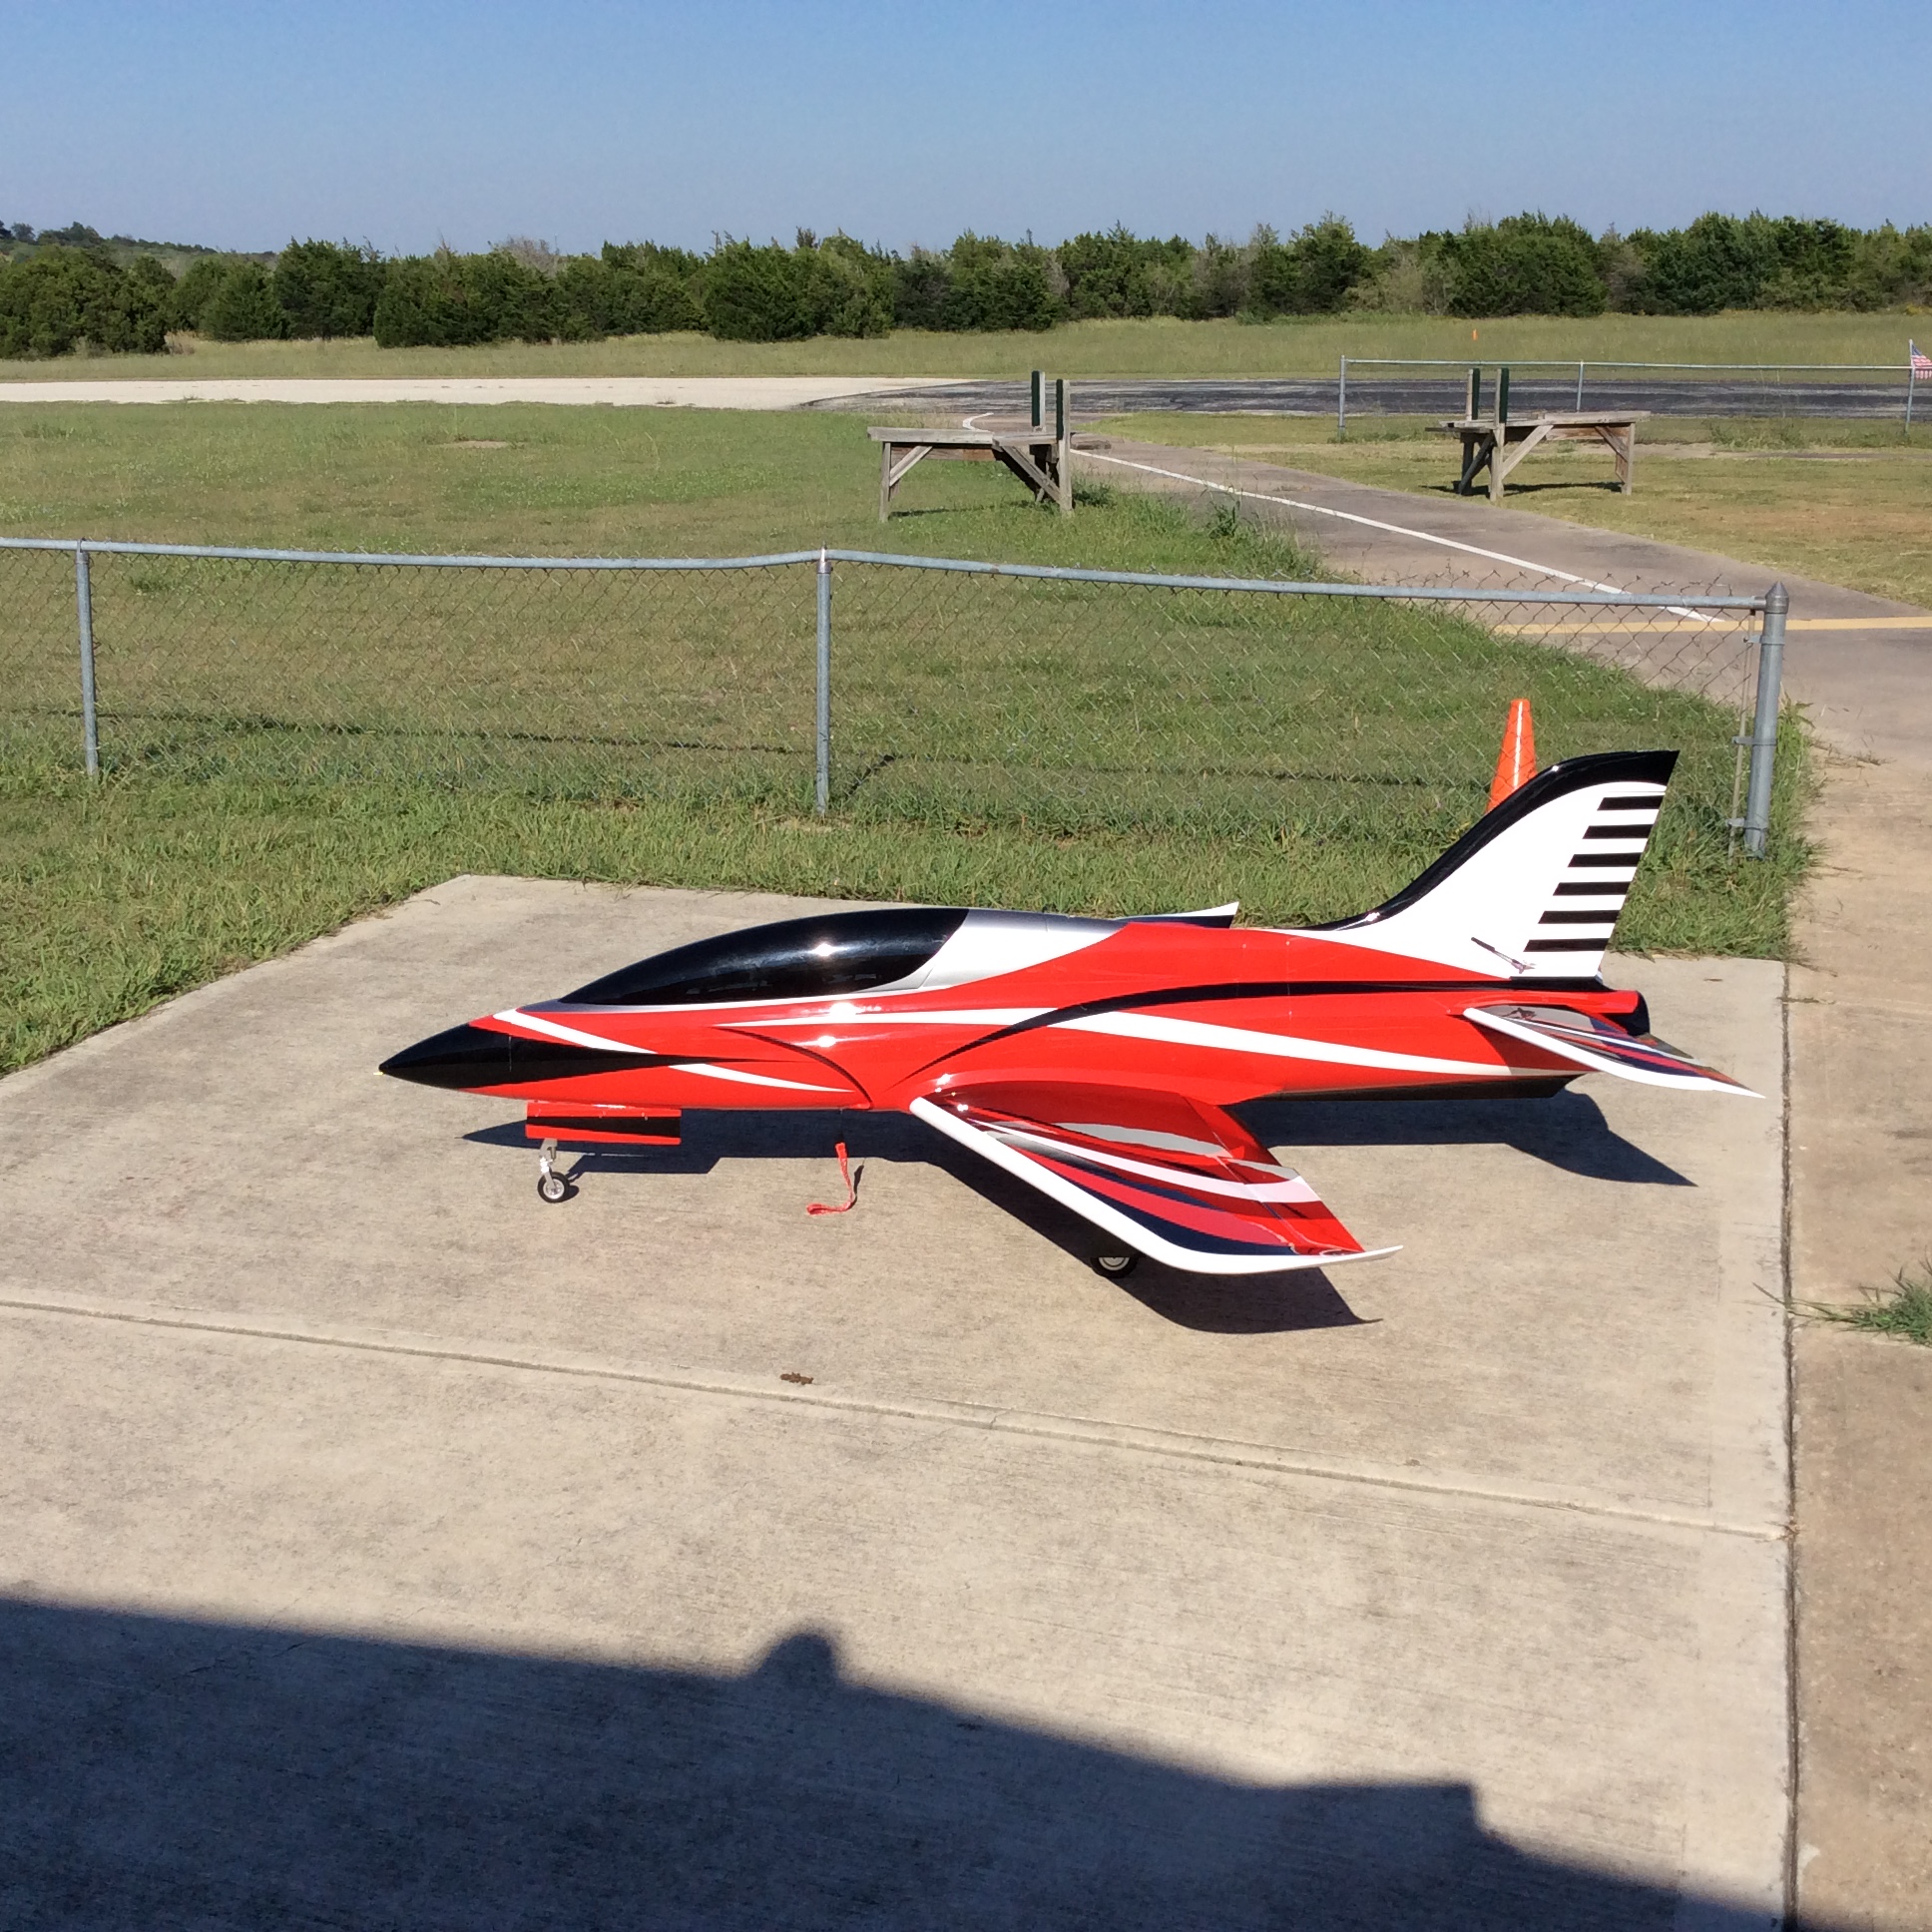

The colors really pop in the sunlight!


I ran out of time so no run up and testing...next time as I have a few issues to work out this week.


TB
I had not fitted the wings yet so I really wanted to get this bird all put together.
The wings went on ok, the tube is tight and it binds so I still need to hit it with baby powder, might get a CF tube as this one is heavy. The wing fit fine but one of the forward bolts in the fastener fell out
I may just leave the gear door Carbon Fiber as I was going to paint it black! It's a gloss finish!
I'm not sure if I will paint the interior of the door...yet. May just do the white like the noes door!
I did do some more setup programming as this was the first time the modle has been whole.
We bond the reciever and got everything working right. The left aileron was not working so I need to de bug that.
Field setup was fairely easy and she was on her feet in no time.
The colors really pop in the sunlight!
I ran out of time so no run up and testing...next time as I have a few issues to work out this week.
TB
Last edited by TonyBuilder; 10-02-2016 at 04:32 PM.
10-02-2016, 05:12 PM
#707
I got her up on the CG stand, I wanted to see where I was based on building off the wing tube I was pretty close. I'm slightly tail heavy if not nutural at 240mm.


I did not balance with the UAT full as it's pretty close to the CG and this was just a pre CG setting. I will ad some weight to the noes and fill the UAT the next time and set it at 235, this was just to see where I currently am at dry.


TB
I did not balance with the UAT full as it's pretty close to the CG and this was just a pre CG setting. I will ad some weight to the noes and fill the UAT the next time and set it at 235, this was just to see where I currently am at dry.
TB
Last edited by TonyBuilder; 10-02-2016 at 05:18 PM.
10-02-2016, 11:44 PM
#708


 10-03-2016, 05:12 AM
#712
Another tip..... When I got to Kentucky to do my first flight after a long trip some of the wing clapping screws where gone. The vibrations from the long drive caused them to fall out. This is a problem on this plane because the screws are bigger them the holes you use to tighten them. So if they fall out you will need to enlarge the holes to reinstall. I asked the factory to apply some lock tight to the new kits but not sure if they did. On some of my other planes with clamp screws lock tight fixed the issue. Another way to to simply tighten them back after removing the wing or installing dowels in the clamps and then tighten them. All they need it just a little tension so during transport they dont fall out. Do not over tighten them.
No locktite on mine, and the foward clamps are inaccessible!
I lost the left side inner bolt!
TB
Last edited by TonyBuilder; 10-03-2016 at 05:23 AM.
10-03-2016, 07:46 AM
#713
Most jets with underside wing bolts will have this issue. if there is room and you can get to them, I normally will hysol or locktite a nut to the top threads of the bolt. You can also just make sure you snug them up before transport.
For size i think they are 4mm
For size i think they are 4mm
 10-03-2016, 03:50 PM
#718
I have already resingned to having to enlarge the hole to get the screw back in.
I got to my punch list on what I needed to do after my field trip.
Got the wings all done as I needed to adjust the gear. They won't lock in the up position without shimming the gear. I finishe off the gear doors too.


Im going to leave the doors in the glossy finish and not paint them. For the little G-10 gear cover I glued in a block of 1/8" ply onto the CF gear mount and drilled two holes in between the holes that are hovering over nothing. This will keep them in place with two #2 screws.


I finished off the inside of the doors with white styrene, I like using it to give parts a paintable surface, but I'm keeping them white so no paint needed.


I trimmed the hoses down coming out of the wing, only need about 1" to connect them to the fuse. I made up some wing bags and tail feather covers for transport hanger rash.
Still need to do few more things before she will be ready to go.
TB
I got to my punch list on what I needed to do after my field trip.
Got the wings all done as I needed to adjust the gear. They won't lock in the up position without shimming the gear. I finishe off the gear doors too.
Im going to leave the doors in the glossy finish and not paint them. For the little G-10 gear cover I glued in a block of 1/8" ply onto the CF gear mount and drilled two holes in between the holes that are hovering over nothing. This will keep them in place with two #2 screws.
I finished off the inside of the doors with white styrene, I like using it to give parts a paintable surface, but I'm keeping them white so no paint needed.
I trimmed the hoses down coming out of the wing, only need about 1" to connect them to the fuse. I made up some wing bags and tail feather covers for transport hanger rash.
Still need to do few more things before she will be ready to go.
TB
Last edited by TonyBuilder; 10-03-2016 at 04:03 PM.
10-04-2016, 03:41 PM
#719
Getting a bit more done, wing bags are done.

Storage and transport stand, puls tail feather anti hanger rash covers are done.


The he gear fail safe is setup and working, only have the breaks to setup and I will do that at the field.
I guess im done")
TB
Storage and transport stand, puls tail feather anti hanger rash covers are done.
The he gear fail safe is setup and working, only have the breaks to setup and I will do that at the field.
I guess im done
TB
Last edited by TonyBuilder; 10-04-2016 at 03:46 PM.
