


New Y/A F/A-18 Hornet Build
 01-15-2017, 10:49 PM
#26

Thread Starter

Howdy,
Got some work done on the bird this week. Got the bulkheads prepped for installation, including the little guide-block for your allen wrench (to tighten/loosen the plug-in fins). Milestone One: Getting all of the major bulkheads in. With the inlet taped in place, I poured the West System mixed with micro-balloons to form the inlet lip joint (as I usually do), but this time, it kicked off way faster than normal and got really hot. Luckily, my wife had a plant mister and I was able to hose it down and 'steam' the heat away. I plan to cut out the control surfaces and cap them tomorrow.


Got some work done on the bird this week. Got the bulkheads prepped for installation, including the little guide-block for your allen wrench (to tighten/loosen the plug-in fins). Milestone One: Getting all of the major bulkheads in. With the inlet taped in place, I poured the West System mixed with micro-balloons to form the inlet lip joint (as I usually do), but this time, it kicked off way faster than normal and got really hot. Luckily, my wife had a plant mister and I was able to hose it down and 'steam' the heat away. I plan to cut out the control surfaces and cap them tomorrow.
 01-20-2017, 09:15 PM
#27
Thread Starter
Howdy,
Plugging along. Cut the wing surfaces off and capped them with the precut 3/8" balsa sticks. Before that, I added some 1/8" ply in the areas I plan to install the scale bottom hinges by using a hot wire to make a slot, then epoxied them in. This was in the flap/aileron side only (and not the wing) because the hinge will tie into the rear spar anyway. Tomorrow, I'll glue the wings onto the spars. That's the 'don't screw it up' step of all steps.


Plugging along. Cut the wing surfaces off and capped them with the precut 3/8" balsa sticks. Before that, I added some 1/8" ply in the areas I plan to install the scale bottom hinges by using a hot wire to make a slot, then epoxied them in. This was in the flap/aileron side only (and not the wing) because the hinge will tie into the rear spar anyway. Tomorrow, I'll glue the wings onto the spars. That's the 'don't screw it up' step of all steps.

 01-22-2017, 09:25 AM
#30
Thread Starter
01-22-2017, 07:13 PM
#32
Thread Starter
Hi,
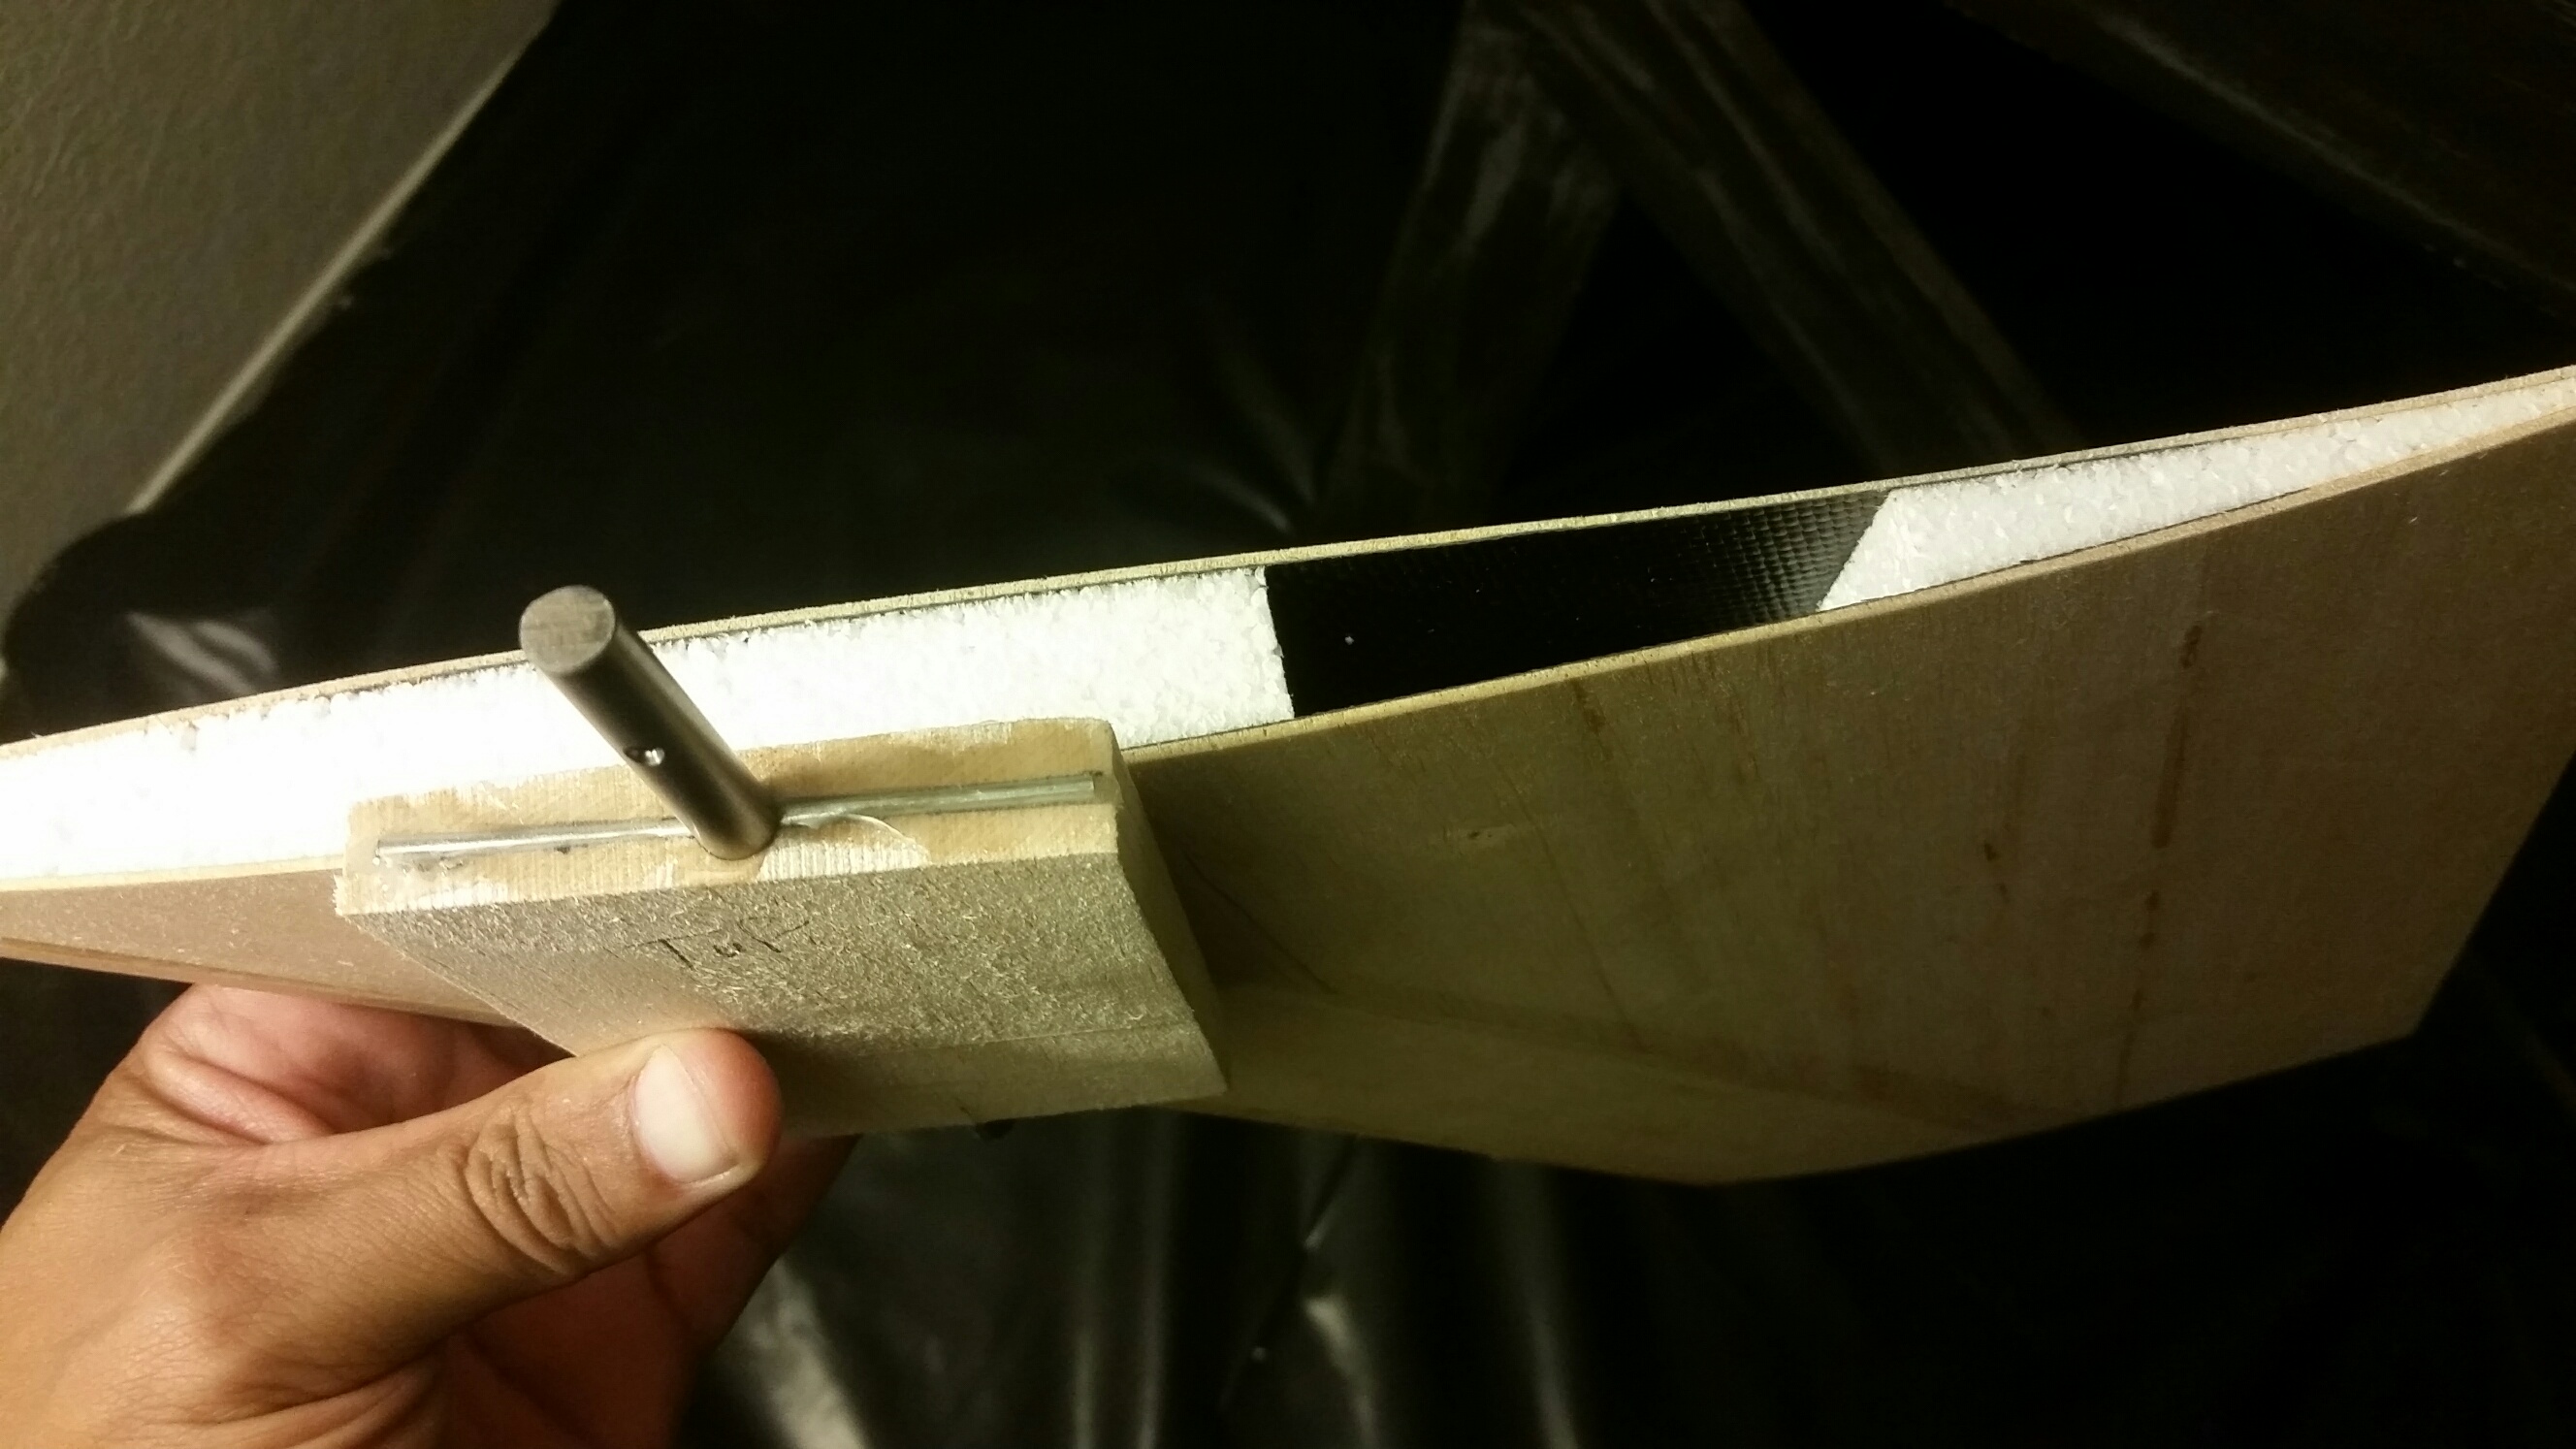
Some of the steps in this build are tedious (at best). With the stabs, you have to glue the titanium shaft into a block of hard balsa. The anti-rotation pin goes into a little groove you cut into the balsa. In the older kits, you glued this block into the cutout in the stab and then sanded it to shape. With the last iteration kit, there's carbon cloth under the balsa sheeting, so you've got to carve the block into shape first. I shave these way down so I can easily fine tune their dihedral to match the wings when I epoxy them into the pocket in the stab.
Like I said, all the carving/shaping of stuff before it gets glued in can be a PITA, but I still prefer it to the uncertainty of some of the composite wings/stabs out there. In some of those old threads where people were posting those jaw-dropping x-ray photos of what lay beneath the skin on some of the 'less reputable' ARF's out there, the cautionary tale was clear. With these 'old-school' techniques, you're working harder to get the plane built, but you know exactly what's going on under the skin AND you know that if you want to get the stab pivots or the wing spars to come apart, you pretty much have to crash it.
 01-24-2017, 04:42 PM
#36
Thread Starter
Thanks, Brian!
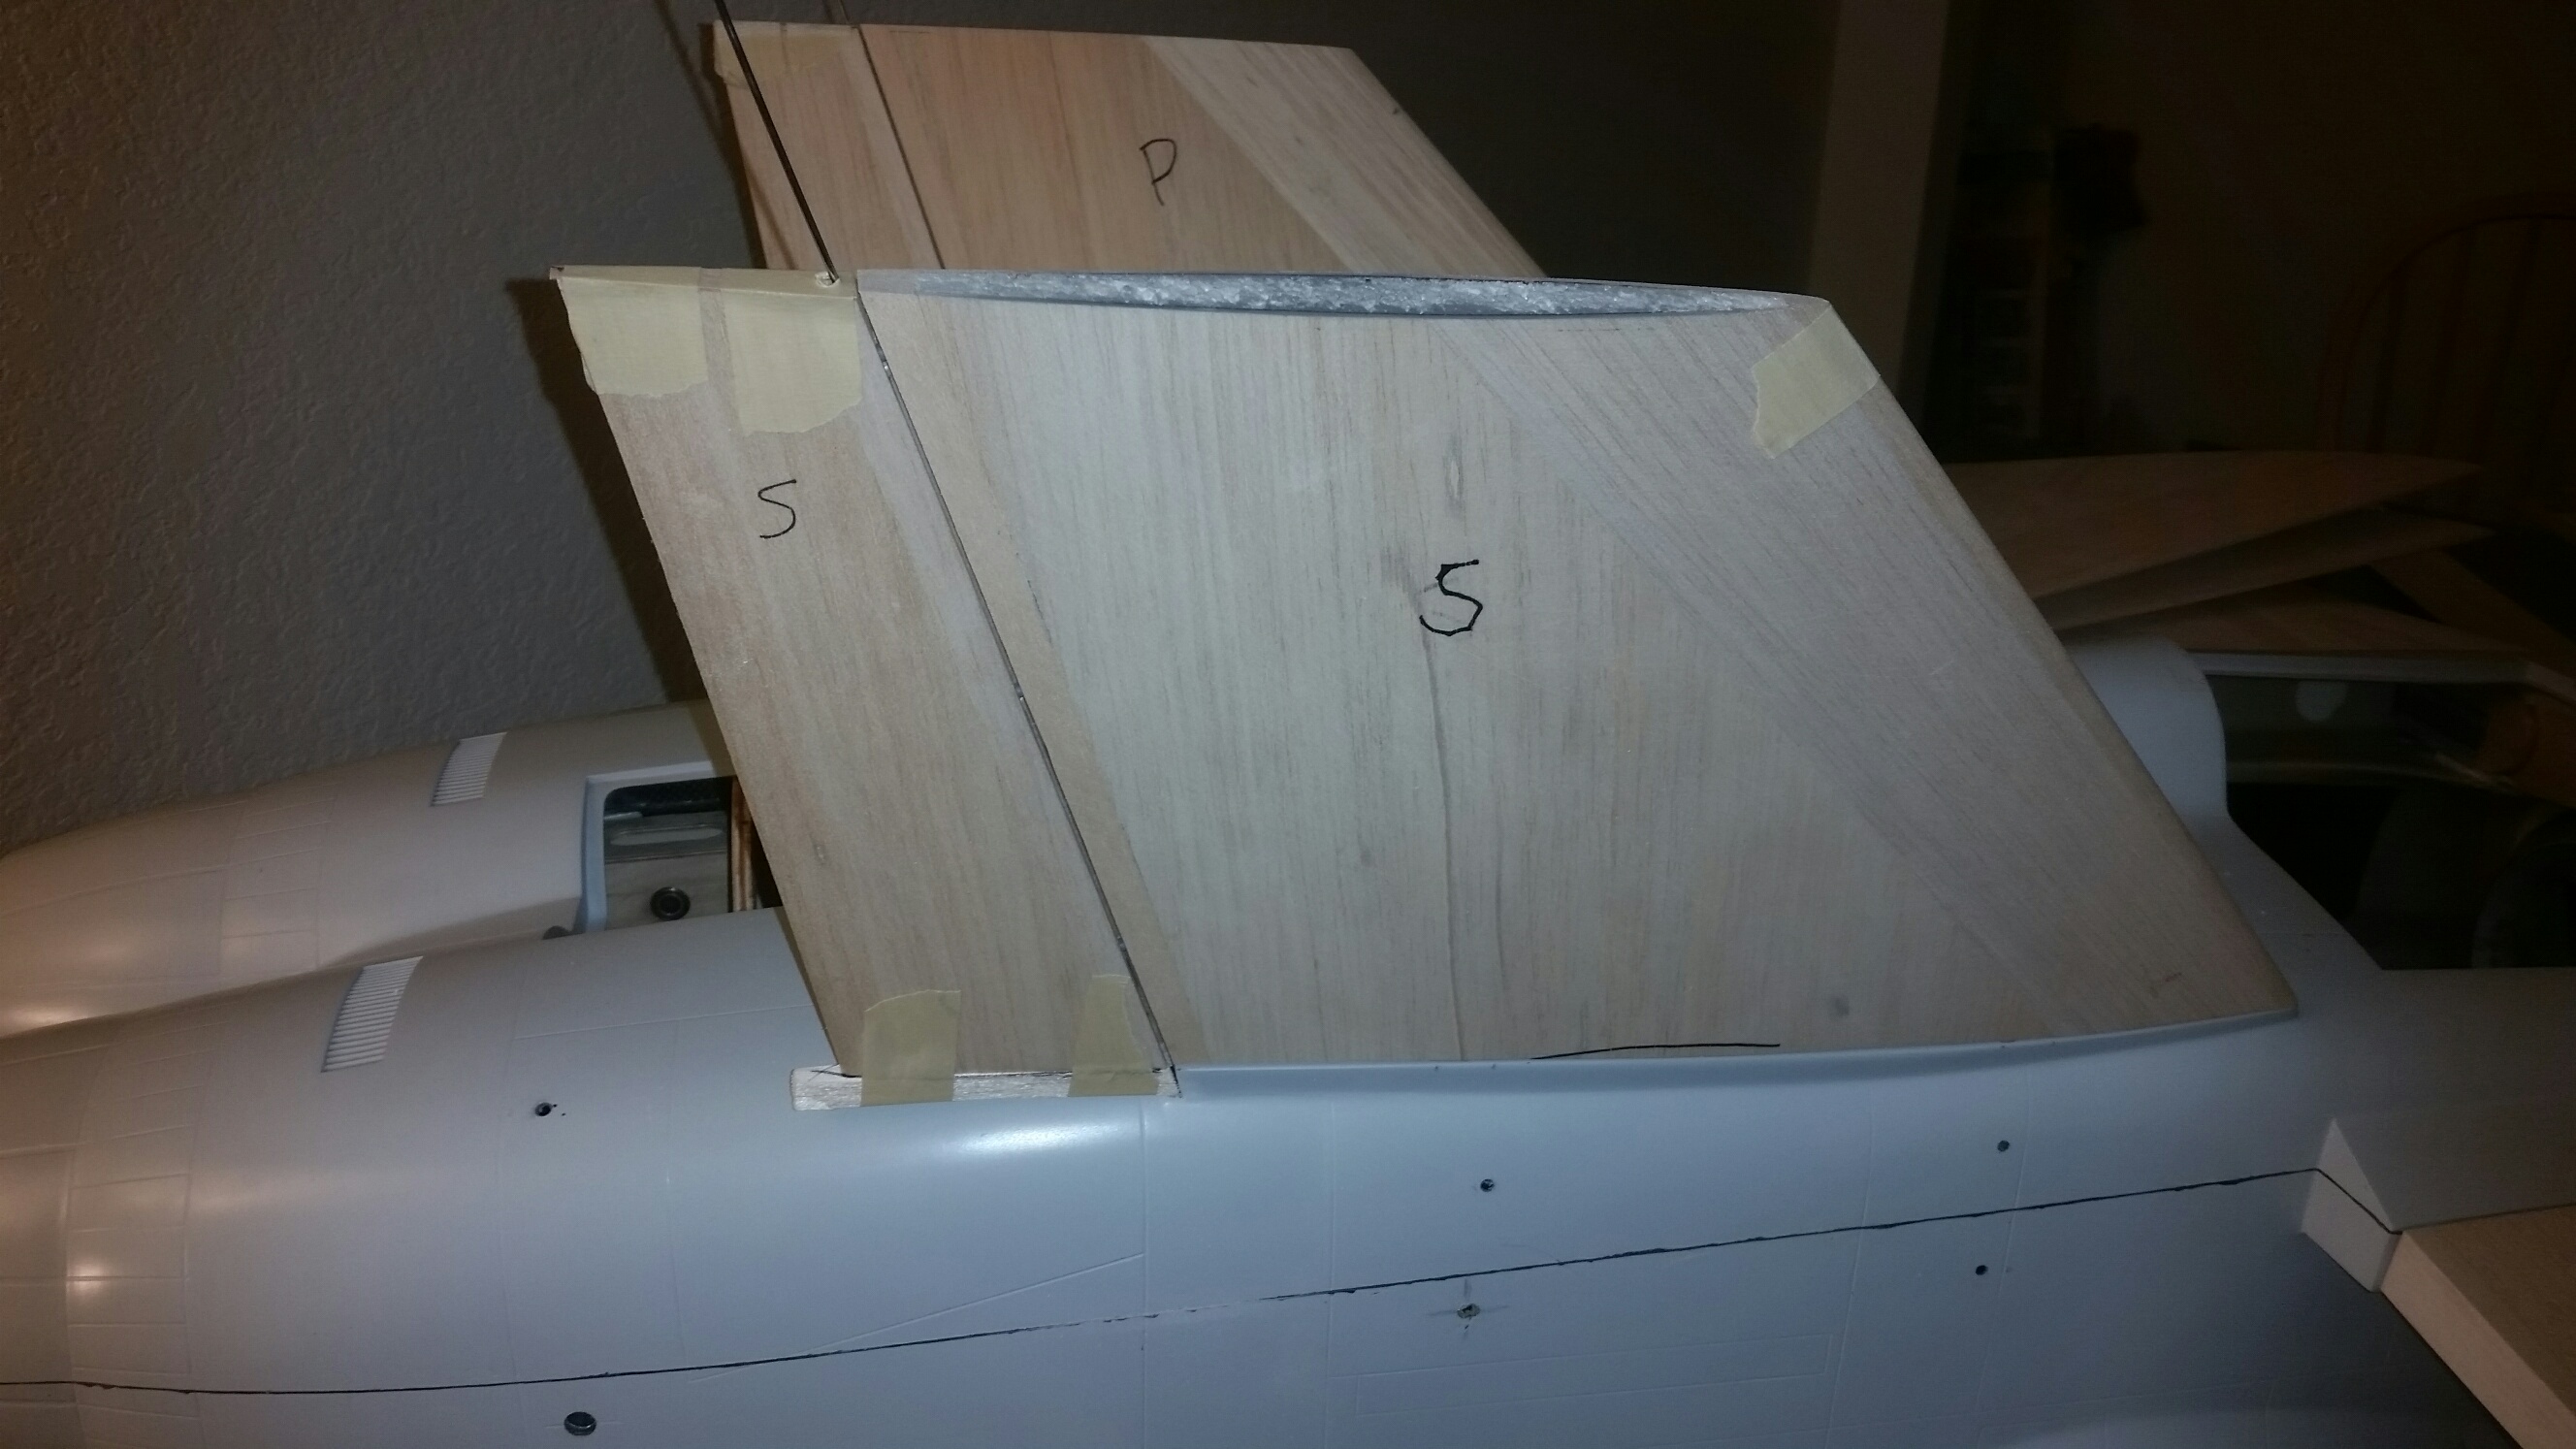
There are some parts of the plane I wish were composite (after all the sanding). Somehow, the balsa stab tips in this kit ended up being rock-hard balsa, but the sheeting on the foam stab is pretty soft. It's a tad trickier sanding the tips to the skin without going through the skin's depth too much. There's a slot in the aft corner of the balsa tip for a 1/32" plywood stiffener. Later, I'll finish sand the stabs and fins (once the spars/spar blocks are glued in).
You're supposed to make a little angle gauge for the fins so you can insure the fins are in at exactly 108.5 degrees.
01-26-2017, 08:36 AM
#40
Thread Starter
Hi,
I got the fins mounted to their spars, which is a critical step because if you misalign them even a little, they'll be a PITA (if not nearly impossible) to take off and put on. I got the removable rudders hinged, but won't glue the hinges or guide-tubes in until after I've glassed everything. The rudder hardware is pretty neat. Not everybody liked it, but I never understood why.


I got the fins mounted to their spars, which is a critical step because if you misalign them even a little, they'll be a PITA (if not nearly impossible) to take off and put on. I got the removable rudders hinged, but won't glue the hinges or guide-tubes in until after I've glassed everything. The rudder hardware is pretty neat. Not everybody liked it, but I never understood why.
01-28-2017, 04:43 PM
#41
Thread Starter
Howdy,
So, I tackled a somewhat critical step in gluing the spars into the wings. I made sure my table was straight and level (it's a commandeered stage prop from the musical "RENT") then had to shim up the fuse a bit to get it dead-level measured from the table to the wing root at the TE. I used hysol in the slots, but really took my time getting the slots totally filled and as bubble-free as possible. The lightening holes in the spars themselves are even filled. Once that was done I measured the tips shimmed them up until they're equal with the proper anhedral and taped everything up to cure. Once that's done, I can glue the stabs onto their pivot blocks and use the wings as anhedral reference points.


So, I tackled a somewhat critical step in gluing the spars into the wings. I made sure my table was straight and level (it's a commandeered stage prop from the musical "RENT") then had to shim up the fuse a bit to get it dead-level measured from the table to the wing root at the TE. I used hysol in the slots, but really took my time getting the slots totally filled and as bubble-free as possible. The lightening holes in the spars themselves are even filled. Once that was done I measured the tips shimmed them up until they're equal with the proper anhedral and taped everything up to cure. Once that's done, I can glue the stabs onto their pivot blocks and use the wings as anhedral reference points.


 01-30-2017, 04:25 PM
#46
Thread Starter
To keep myself motivated and plugging along, I've got some old (VHS) Jet Rally tapes from the 90's and early 2000's going in my shop. One from '96 had 100 jets and I couldn't identify any of them as ARF's. It's amazing how far things have come since then because you also see a lot of wire gear on stock Spring-Air units, but the guys in the videos all built there own planes from kits
01-31-2017, 06:40 AM
#47
Thread Starter
Hi,
I've now got all of the flight surfaces capped and base-sanded except for the stabs. After gluing the pivot blocks into the stabs with slow-curing epoxy (so you can line the stabs up with the wings and make sure the anhedral is equal and the wings are parallel with the stabs), I'll cap those and do my best to get the root of the stab to contour perfectly with the fuse where it meets. After painting, the goal is to have only a paper-thin gap between the stab and the fuse.
Maybe I can get Sean McHale to show me the best way to mate the base of the wings and stabs to the fuselage to get rid of the steps and such
 01-31-2017, 08:02 PM
#50
https://youtu.be/fBRGklYklOI
i need some acting lessons. :-)
keep up the good work with the build!

