


Skymaster F18D Hornet twin build
 02-16-2017, 08:37 PM
#26

Keith I agree I think if they just gave the main tires a larger side wall they would be fine.
Will try and post some pics later. Moving along fast. Hardest part so far is getting the dam servo wires through the wings.... It took about 3 hours just to get the wires through. Also the instructions on their website suck and are not very clear on how to install the wing servos. Pretty sure my servo pockets where different from the ones in the manual.
Will try and post some pics later. Moving along fast. Hardest part so far is getting the dam servo wires through the wings.... It took about 3 hours just to get the wires through. Also the instructions on their website suck and are not very clear on how to install the wing servos. Pretty sure my servo pockets where different from the ones in the manual.
 02-18-2017, 03:39 PM
#27


I was testing the retracts while I had them out for painting by using my air pump direct into the gear. Well the nose gear would never unlock and just bind up. So I disassembled the actuator and lubed the locking poppet valve. Still same problem. Barry emailed LiKai for me and he promptly resonded a gear valve must be used. So I tried it with a gear valve and it works perfect! I guess it needs the air to enter a little slower to function correctly.
02-18-2017, 06:31 PM
#28
Hey gun if it's like the nose gear on the f-14 it will not unlock until you hook a valve up its needs the release side of the two-way valve. I tried the same with my f-14 it wouldn't unlock no matter the pressure. Works like a charm with a valve.
02-20-2017, 06:04 AM
#29
Finally got the wings done.... I installed a powerbox wire connector to make installing the wings easy. With 3 servos on each wing it helps make feild assembly easy.
For those building this. Don't do it in the order of the instructions you need to start at the aileron,flap then slat. If you do the slat first you don't have room to route the wires.


For those building this. Don't do it in the order of the instructions you need to start at the aileron,flap then slat. If you do the slat first you don't have room to route the wires.
02-20-2017, 02:03 PM
#32
02-22-2017, 07:36 PM
#33
Lots of progress! Almost done installing equipment. Gear is working perfect. It will even swing on 50 PSI. I had to remove the little down locked springs on the mains. Had problems with them unlocking and I remember jim had the same problem on his. All works great now.
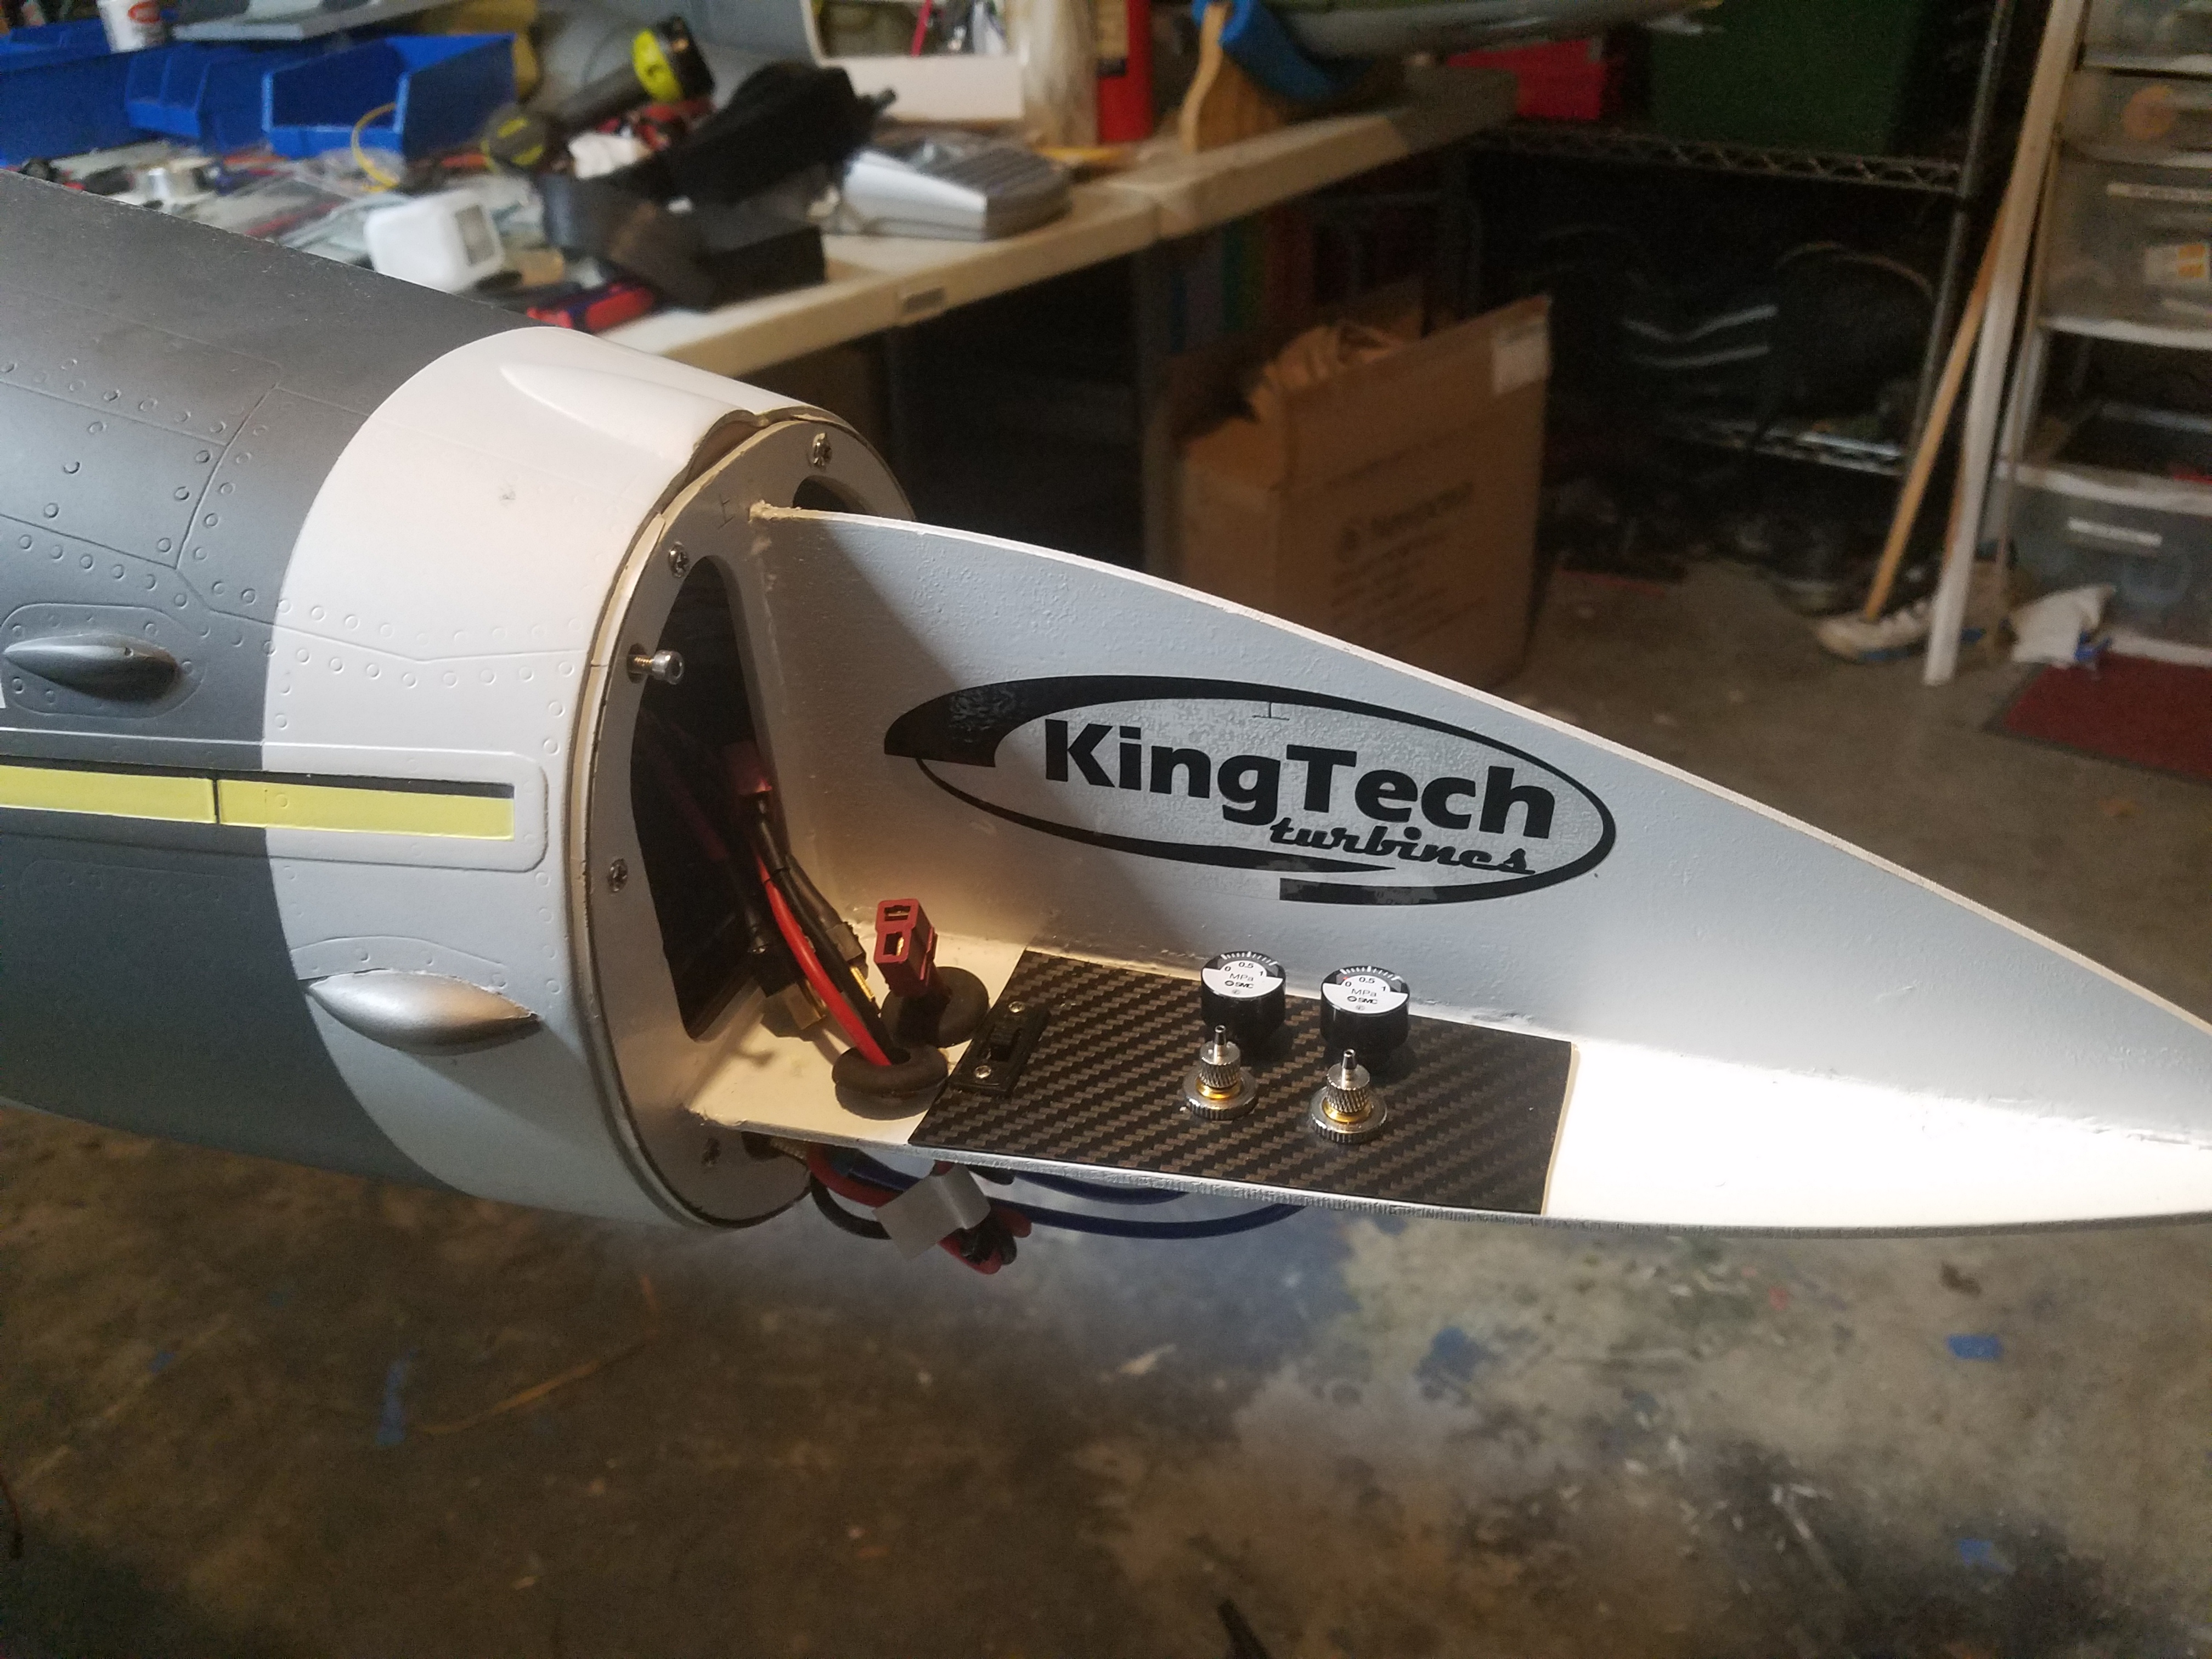
Canopy is not reliable. Will need to try and redo the linkages and bell crank to make it work better. All servicing is done from the nose cone. Air fuel charge power all done from the nose.
The installed lights worked for a min or two then the controller started smoking and is now inop. Waiting to see what skymaster will do. Also never got the pockets that go into the elevators. Still waiting for skymaster to also get those to me. Hope to fly in in a week and a half.
 02-23-2017, 06:47 AM
#35
Thnx Pat!
Skymaster sent my parts out with a new light controller. So should be here soon.
I got the canopy working reliable now. Had to move the entire mechanism down some to give it a better angle. Picture shows the new hole I drilled below the existing hole.
02-23-2017, 06:55 AM
#37
Been doing lots of research on the little lights on the nose gear. It turns out they are angle of attack indicators for night ops on the carrier. The kit comes with LED lights for all three little lights. They look cool all lit up but that's not scale. Only one should be lit up so I guess I will only plug in the amber light for a good glide slope  . Learn so much building scale planes!
. Learn so much building scale planes!
02-23-2017, 07:00 AM
#38

Join Date: Jun 2003
Location: Santiago, CHILE
Posts: 57
Likes: 0
Received 0 Likes
on
0 Posts
Hi, i am building 2 1/6 F-18 -F from skymaster and i figured you will need another two way valve only for those pistons that lock the main landing gear down, if the landing gear is down the locking pistons have to satart moving before the mains landing gear, lets say 1 second before but when the landing gear is up the valve that's move the mains and the valve that move the locking piston can start at the same time, i hope you understand my english, i can upload a video to my facebook wall if you need it, take care and keep up the good work.
02-23-2017, 07:30 AM
#39
Yep good job you are correct. I am already using all 18 channels so no room for another valve lol. Easy fix was just to remove the spring. It still locks down its just that you can move it over center if not careful with out the springs. They also tried to color all the preinstalled lines for up and down..... well some of these where backwards lol. So no big deal just took a little time to figure it all out. I am very impressed how well and how little pressure the gear works with.
Hi, i am building 2 1/6 F-18 -F from skymaster and i figured you will need another two way valve only for those pistons that lock the main landing gear down, if the landing gear is down the locking pistons have to satart moving before the mains landing gear, lets say 1 second before but when the landing gear is up the valve that's move the mains and the valve that move the locking piston can start at the same time, i hope you understand my english, i can upload a video to my facebook wall if you need it, take care and keep up the good work.
 02-24-2017, 01:47 AM
#41
Here is comment from Likai as below:
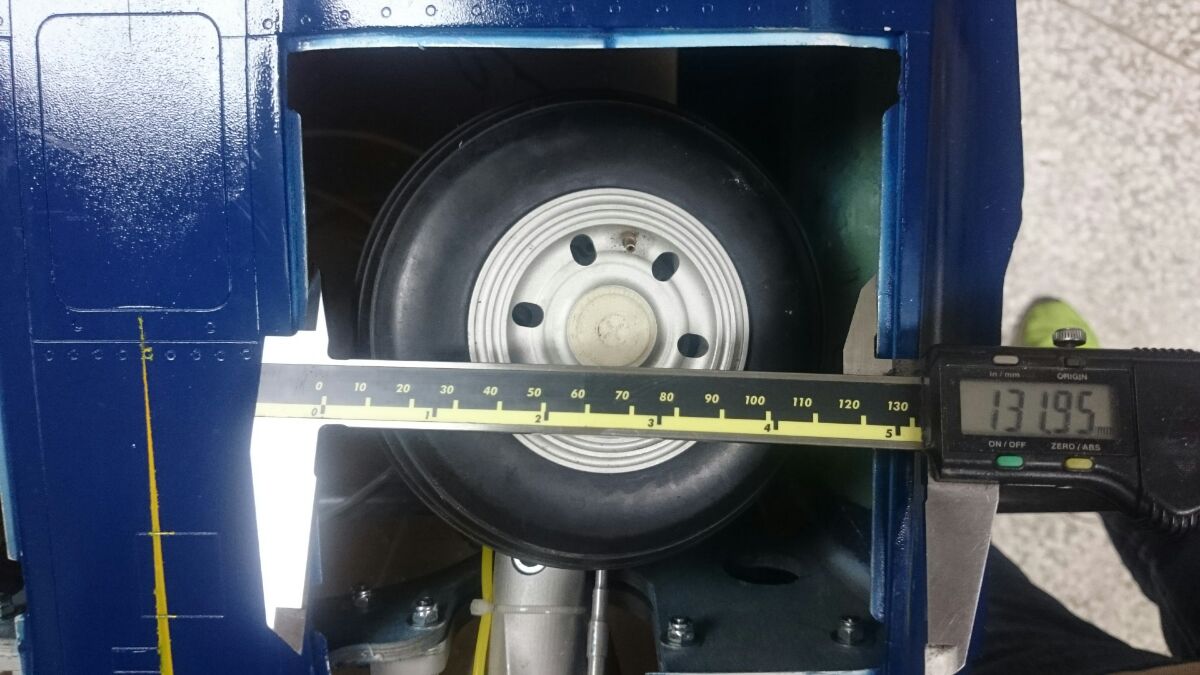
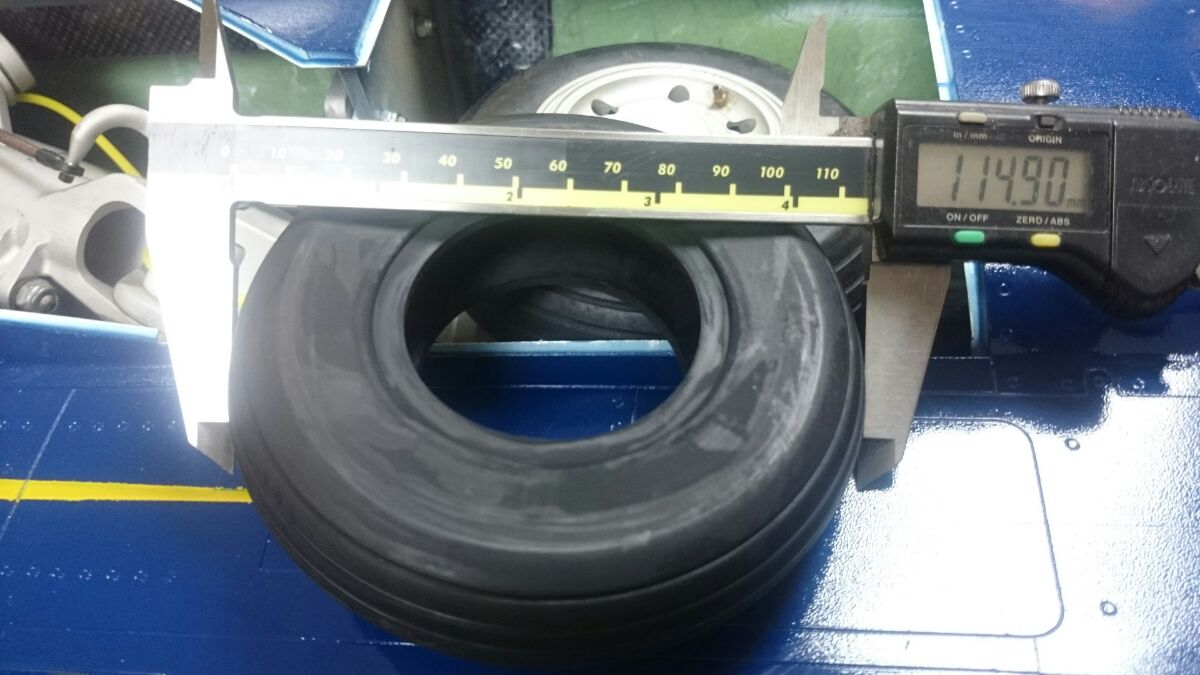
"The F-18 1/6 main door opening width is 132mm, this size is scale. The tire must be inflated to correct diameter 126mm, so the clearance on each side is only 3mm.
In a long period storage, the tire will flat to 115 mm.
The main tire of F-16 1/5 is inflated to 143mm and 134 mm when flat. It's no way to fitted in a scale sized 1/6 F-18 main door."
02-24-2017, 06:08 AM
#43
Read that again he's using measurements from a 1/5 scal f-16 tire, i wouldn't expect that to fit. I checked the 1/6 scale f-16 tires I have from the above measurements it should fit a little closer to the edges but will fit.
Last edited by FenderBean; 02-24-2017 at 06:45 AM.

 02-24-2017, 06:53 AM
#45
More work done. Started fitting the cockpit's. Fit the pilots but they sit a little high. So today I'm trimming out the seat bottoms a little so the pilots sit right. Also routing all the servo wires out of the cockpits since each pilot has 3 servos on him for head and both arms movement.
Also modifying the saddle fuel tanks. They are a strange shape and you almost have to break the plane to wedge them in. They also are very close to the wing servo plugs. So decided to cut them open and trim them up some.

Also modifying the saddle fuel tanks. They are a strange shape and you almost have to break the plane to wedge them in. They also are very close to the wing servo plugs. So decided to cut them open and trim them up some.
02-24-2017, 07:32 AM
#46
I also did a quick rough CG check and it was a little nose heavy but thats UATs empty and only one engine installed. So the CG should come in pretty good and not need a bunch of weight. Very happy about this with the bigger rear mounted engines.

02-24-2017, 09:05 AM
#47

More work done. Started fitting the cockpit's. Fit the pilots but they sit a little high. So today I'm trimming out the seat bottoms a little so the pilots sit right. Also routing all the servo wires out of the cockpits since each pilot has 3 servos on him for head and both arms movement.
Also modifying the saddle fuel tanks. They are a strange shape and you almost have to break the plane to wedge them in. They also are very close to the wing servo plugs. So decided to cut them open and trim them up some.
Also modifying the saddle fuel tanks. They are a strange shape and you almost have to break the plane to wedge them in. They also are very close to the wing servo plugs. So decided to cut them open and trim them up some.
Yikes! That seems unusual wouldn't you say? Thanks for posting progress a great project.


