


setting up a workshop!! Need ideas!!!


 03-29-2017, 08:03 AM
#30


Join Date: Sep 2007
Location: Beeton, Ontario, CANADA
Posts: 1,339
Likes: 0
Received 5 Likes
on
4 Posts
its a Williams.. All kinds to choose from here...https://www.alpinehomeair.com/viewpr...ctID=453058936
Mine is 65,000btu and it way more than needed. I rarely hear the furnace on.. but If I really want to get the place cooking I turn on the fan.

Last edited by Vettster; 03-29-2017 at 08:10 AM.
03-29-2017, 08:54 AM
#31

My Feedback: (18)
Join Date: Jun 2002
Location: New City, NY
Posts: 3,021
Likes: 0
Received 0 Likes
on
0 Posts
its a Williams.. All kinds to choose from here...https://www.alpinehomeair.com/viewpr...ctID=453058936
Mine is 65,000btu and it way more than needed. I rarely hear the furnace on.. but If I really want to get the place cooking I turn on the fan.
Mine is 65,000btu and it way more than needed. I rarely hear the furnace on.. but If I really want to get the place cooking I turn on the fan.
12-08-2017, 01:11 PM
#33

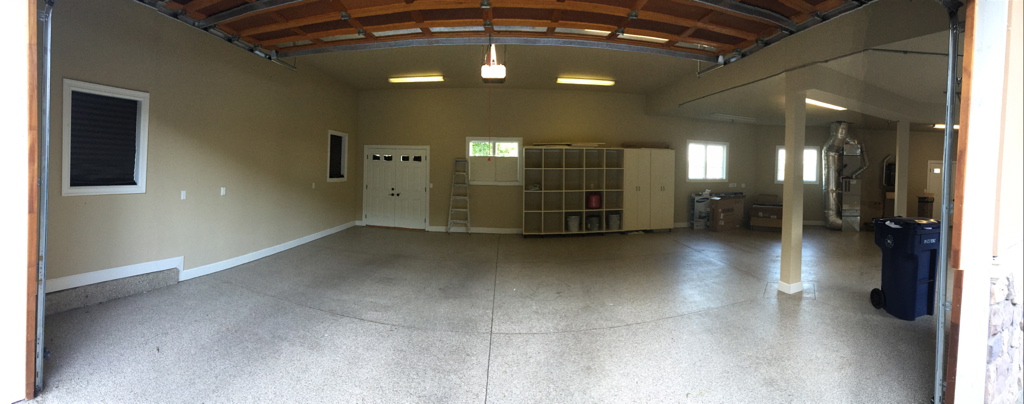
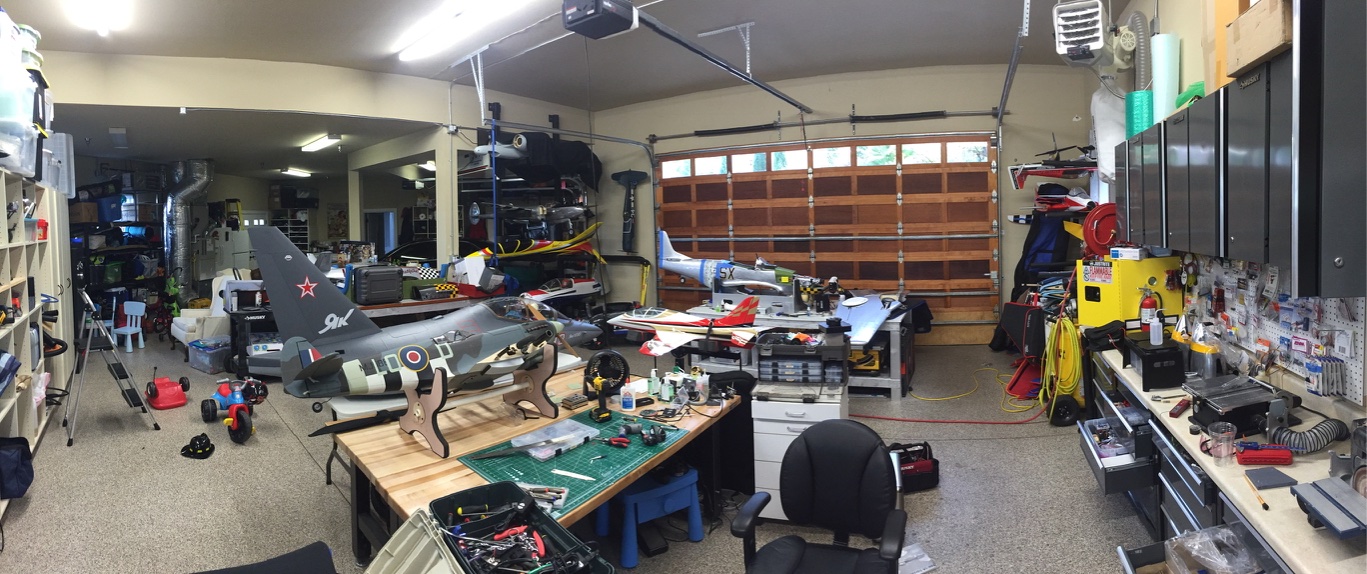
I have a 28x28' shop dedicated to building stuff. metal mill, metal lathe, mig welder, all the woodworking stuff on dedicated suction, 3D printer, delta air filter... it is my favorite part of our new home :-) I made a few of the tables. The EAA has a easy plan online to build it. I made them larger than they suggested. Here are some pics. I'll post more in a few... Biggest thing to me is lighting. Make sure you have adequate lighting. Changing or adding bulbs is worth it!
Thanks

 12-09-2017, 01:16 PM
#37

Hi guys,
I am in the process of setting up a new workshop about 60 square meters in L shape and need some good ideas for storage of jets, Giant planes, a few foamies and accessories...
Will also have to design power outputs to be able to have optional AC/DC voltage access from different points of the workshop. Same goes for Lighting!!!
on the other hand ideas/photos for a practical workbench are also welcomed.
Thanks in advance
Regards,
Hi Guys,
Everyone has been giving really good advise. I have a 40'X60' steel building with 20' ceiling that would be next to impossible to climatize without going broke. I built a 20' W X 30' L X 9'6" H hobby room inside my building that is fully insulated due to the extreme weather I have. I installed a dual head Mini Split HVAC unit to keep the comfort level to PERFECT regardless if it is 115* F or 0*F !! For those of you in the U.S. interested in the Mini Split, they are very affordable and easy to install. I purchased mine from www.comfortup.com as they were half the price of Home Depot including free shipping. I used a 4' long, 4 bulb, T-5 lighting every 6' double row to make a hobby surgical center, as the guys are right, you can not have enough lighting. The white painted walls really help as well. I have wall outlets every 8' in the walls and a bank of outlets on separate dedicated breakers for the Bench tools i.e. saws, sanders, grinders etc. I also put outlets in the ceiling with a drop down cord for the extra ease of needing electricity. I have the Mini Fridge, 50" TV on the wall, 42" computer monitor and of course the security system is installed as well. The 60 gal Compressor is out in the main shop and with the 6" insulated walls, I hardly hear it when it kicks on. I also have Air outlets throughout the shop with a wall mounted retractable air hose. I had a 14KW solar system installed that covers all the shop electricity and most of the home as well. I have the extra storage on top of my room for other planes and such that works out really good without taking up space from the rest of the building. I will say this for the guys that are just now planning on building a shop, YOU CAN NOT GO BIG ENOUGH!! When I moved into this place and seen the huge 40x60 empty building, I thought what the heck am i going to do with this much space?? Trust me, you will find all kinds of things to fill it up. Same when I built the interior shop and looking at others posted pictures, you will find all kinds of things to clutter it up so go bigger if you have the luxury of doing so.
Cheers everyone!!
Dirk
12-10-2017, 01:27 PM
#38

 .. Snap together floor tiles. They are not expensive, look great, and are replaceable I work on cars in the garage and even for that, these have proven to be very durable. My RC shop is in the basement, so I'm debating what to do there .. I might do the snap tiles there also.
Same as you, I just did not want to do the acid wash in the garage, and there were grease stains there from the previous owners. With CVT, you have to polish it every once in a while, and I did not want the hassle.
www.speedwaytile.com
Last edited by wojtek; 12-10-2017 at 01:41 PM.
12-11-2017, 03:49 AM
#40
Hey Alan ! if you can't paint the floor, you can always use either CVT ( like the tiles in a supermarket ) or do what i did and go the easy way .. Snap together floor tiles. They are not expensive, look great, and are replaceable I work on cars in the garage and even for that, these have proven to be very durable. My RC shop is in the basement, so I'm debating what to do there .. I might do the snap tiles there also.
Same as you, I just did not want to do the acid wash in the garage, and there were grease stains there from the previous owners. With CVT, you have to polish it every once in a while, and I did not want the hassle.
RacewayTile.com - Home
.. Snap together floor tiles. They are not expensive, look great, and are replaceable I work on cars in the garage and even for that, these have proven to be very durable. My RC shop is in the basement, so I'm debating what to do there .. I might do the snap tiles there also.Same as you, I just did not want to do the acid wash in the garage, and there were grease stains there from the previous owners. With CVT, you have to polish it every once in a while, and I did not want the hassle.
RacewayTile.com - Home
~al
12-11-2017, 06:48 AM
#41
extra 300,
i agree 100% about having enough lights, plus add electrical points every 2 meters along the walls. Even where you might be storing. It makes charging very easy when you can do that with the model in it's storage space. A few other 'must have' i won't compromise on:
- get the floor finished in a light coloured, smooth, but non-slip surface.
- dedicate a section for storage. You don't want to mix working area and storage area if at all possible.
- put all your bench tools along a wall with tool/parts shelves below and tool hanging above it against the wall.
- if possible get a worktop that you can sit at along the wall somewhere.
- dedicate the maximum open space in the center of your working area so that you can use movable workbenches and or model stands there. This will become the most used space in your workshop as it is for building, assembly and preflight checking. If you have a roof/ceiling height that changes in your workshop - i suggest you position this area under the highest spot. Height is very important as you never have to worry about picking up and manoeuvring your models inside the workshop. (especially as they are getting bigger all the time). Make sure you have very good access in and out of this area. In my workshop i have a 3m garage door on two sides of it. This also improves ventilation and you can even test run your models very close to your workshop.
A note on storage. There are many options and no doubt everyone uses the method that works best for them in their situation. For me - after trying many different options; i make a pvc pipe storage/carry/transport stand for every one of my jet models. This allows me to store them in shelves like a 'morgue' and put everything belonging to that model with it. I can charge them in there, then slide them out and transfer them into my model van for transport or onto a workbench or model stand.
Like everything customised - a successful result is directly related to the planning and preparation you put into it. List everything you have, then write down how you would like to handle it, then see where your space will give you what you need.
Good luck and enjoy,
jan
 . Renovation of my house is taking ages...
