


Boomerang Sprint V2 October 2018
 10-07-2018, 06:25 AM
#1

Thread Starter
My Feedback: (1)
Join Date: Dec 2010
Location: Pittsford, NY
Posts: 290
Likes: 0
Received 0 Likes
on
0 Posts
Just starting my build on the Boomerang Sprint V2 but I am building a 14 foot plane and one other at the same time so pictures may come slow.
This new Jet has many new great features and Larry has helped in the design of the new plane.
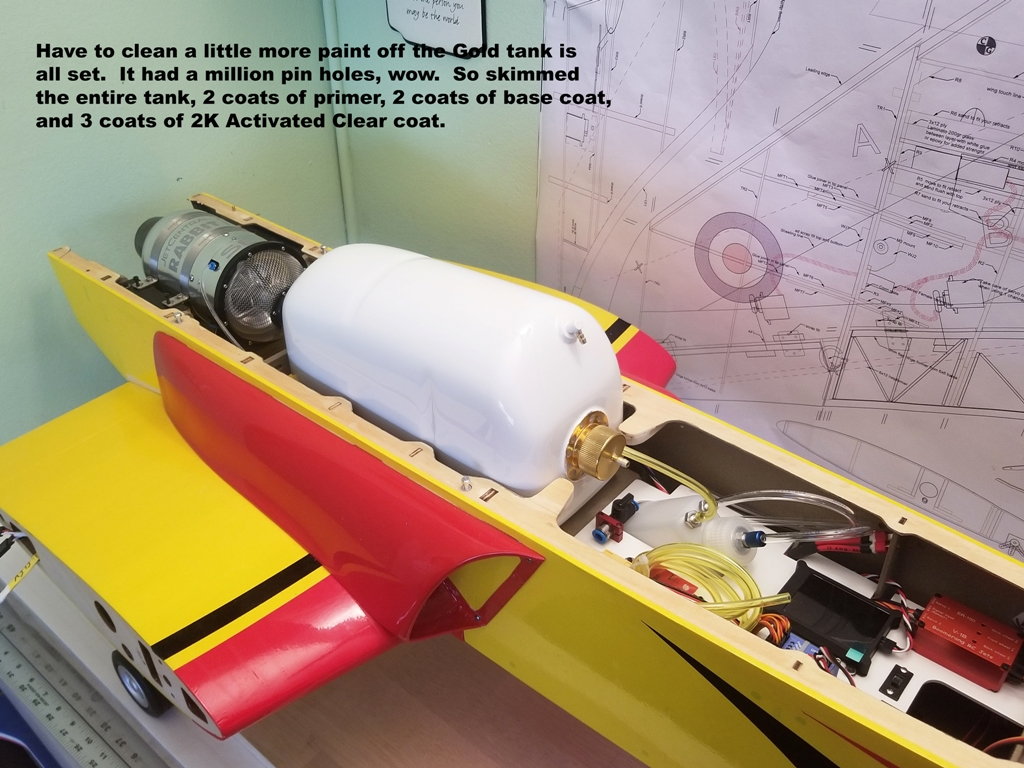
It has a Kevlar fuel tank, the gear is a work of art as well as the covering on mine is perfect.
No giant glue runs anywhere I had zero.
I am super picky so I still Hysoled all joints but not necessary. I use a 3 inch nozzle and after use my finger in 91% alcohol and wipe it clean and tight.
I weighed my Hysol before and after and used less that a 1/4 ounce for the entire jet, " World Record HaHa". That is what tight glue joints will do.
Please give Larry a call for more questions this is a great plane for the price and a huge improvement over the old ones in build quality but they ALL FLY GREAT.
This jet is to good to pass up for an every day jet.
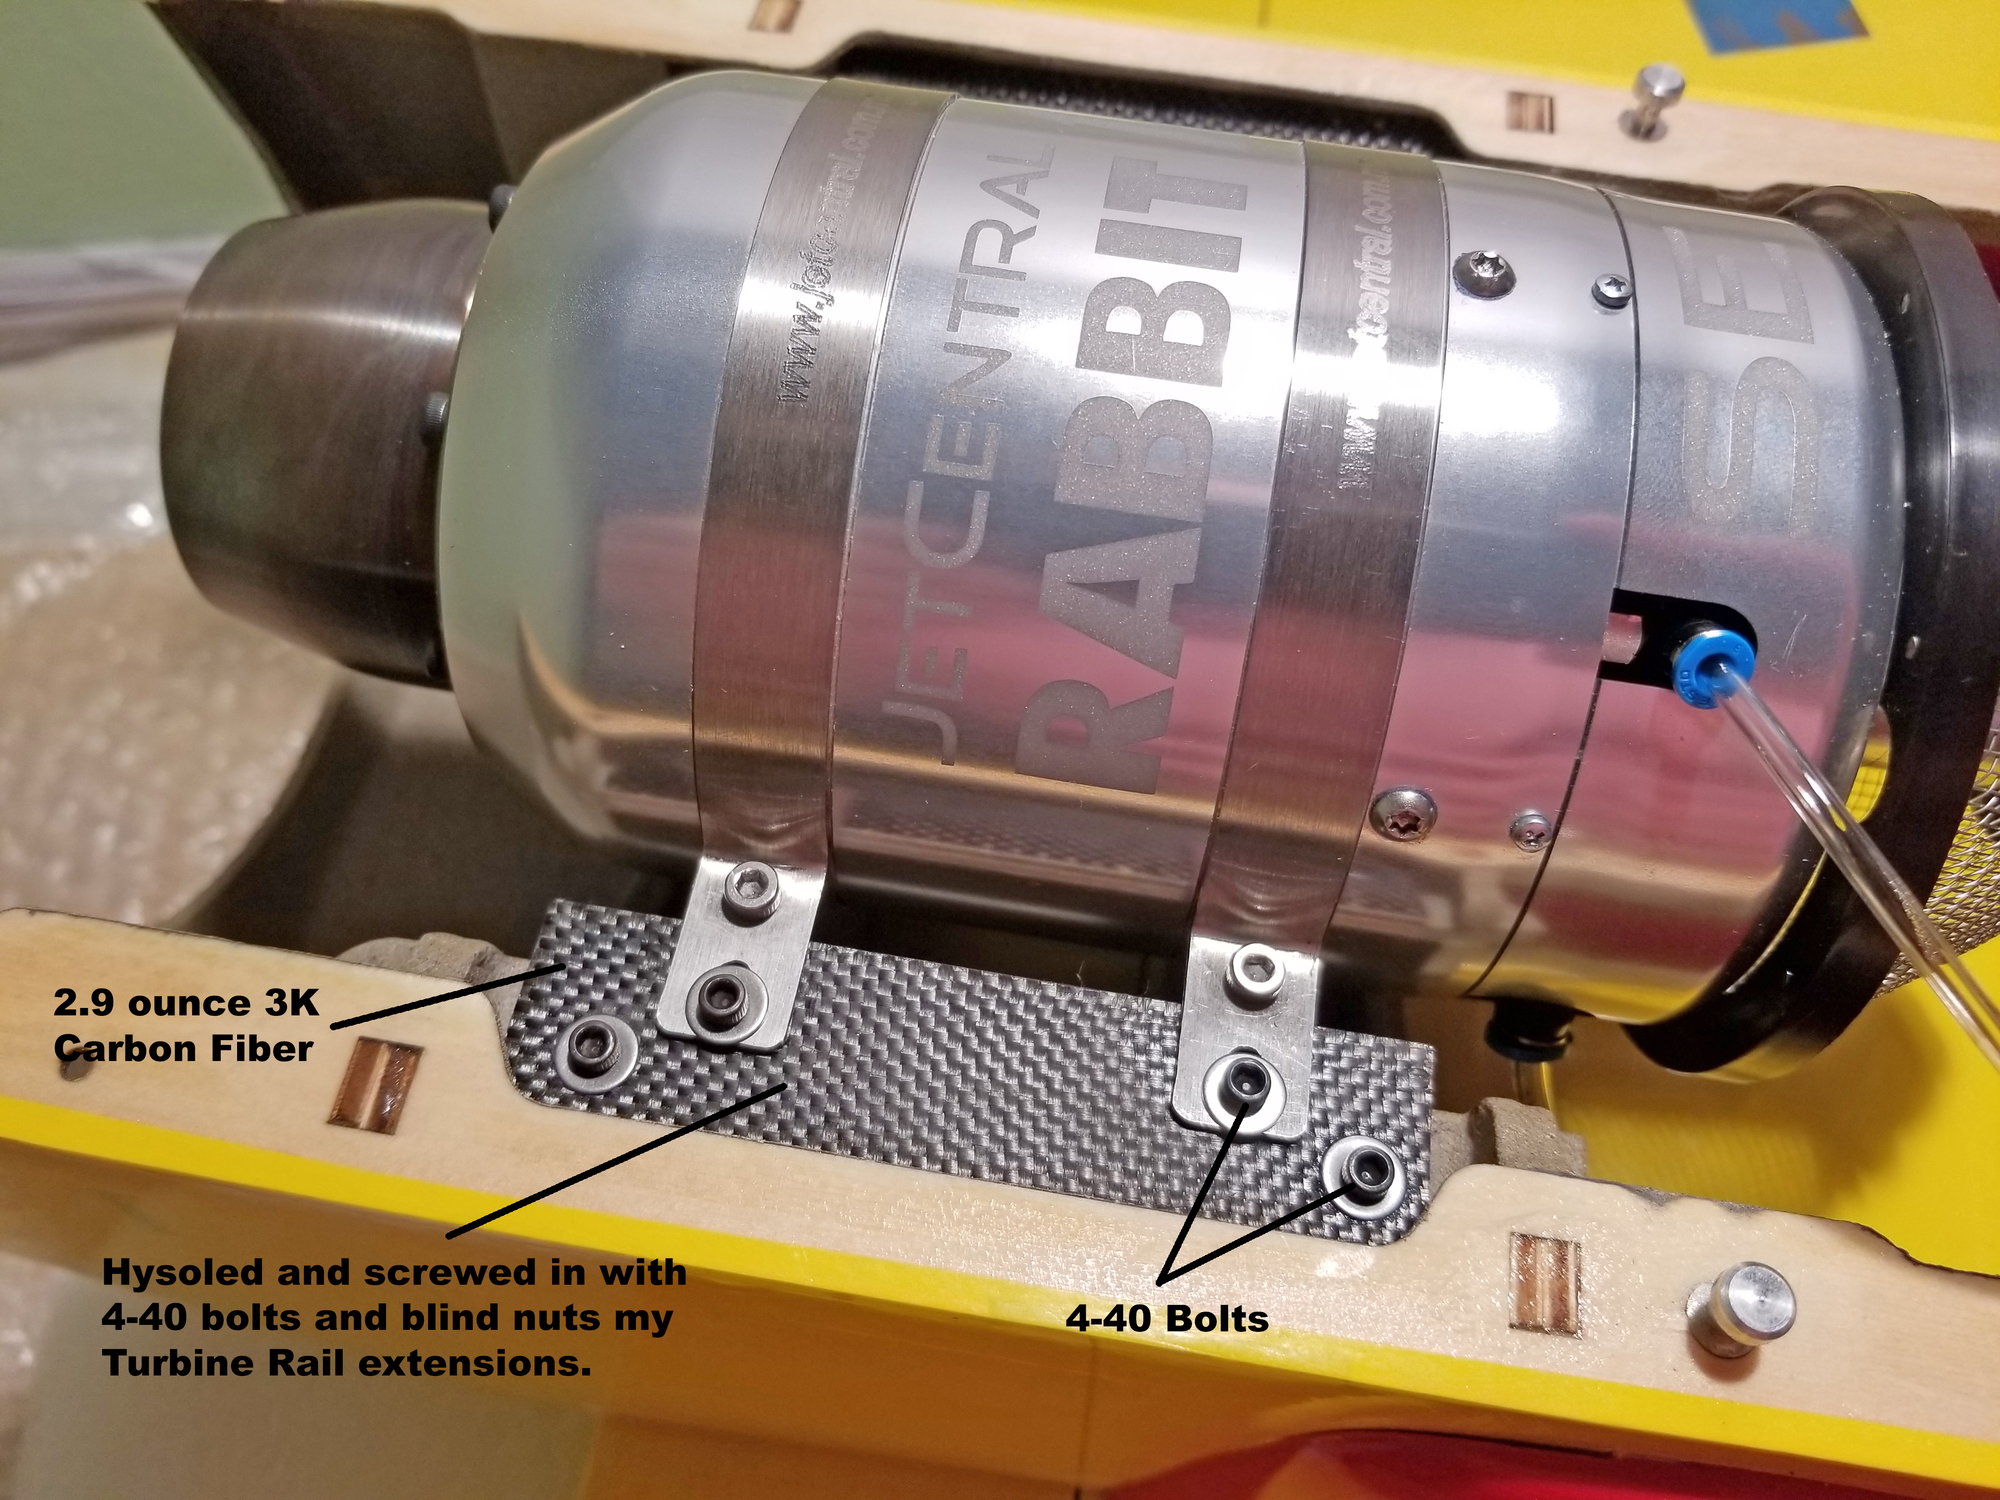
Putting a Jet Central Rabbit 100SE in mine, yes overkill.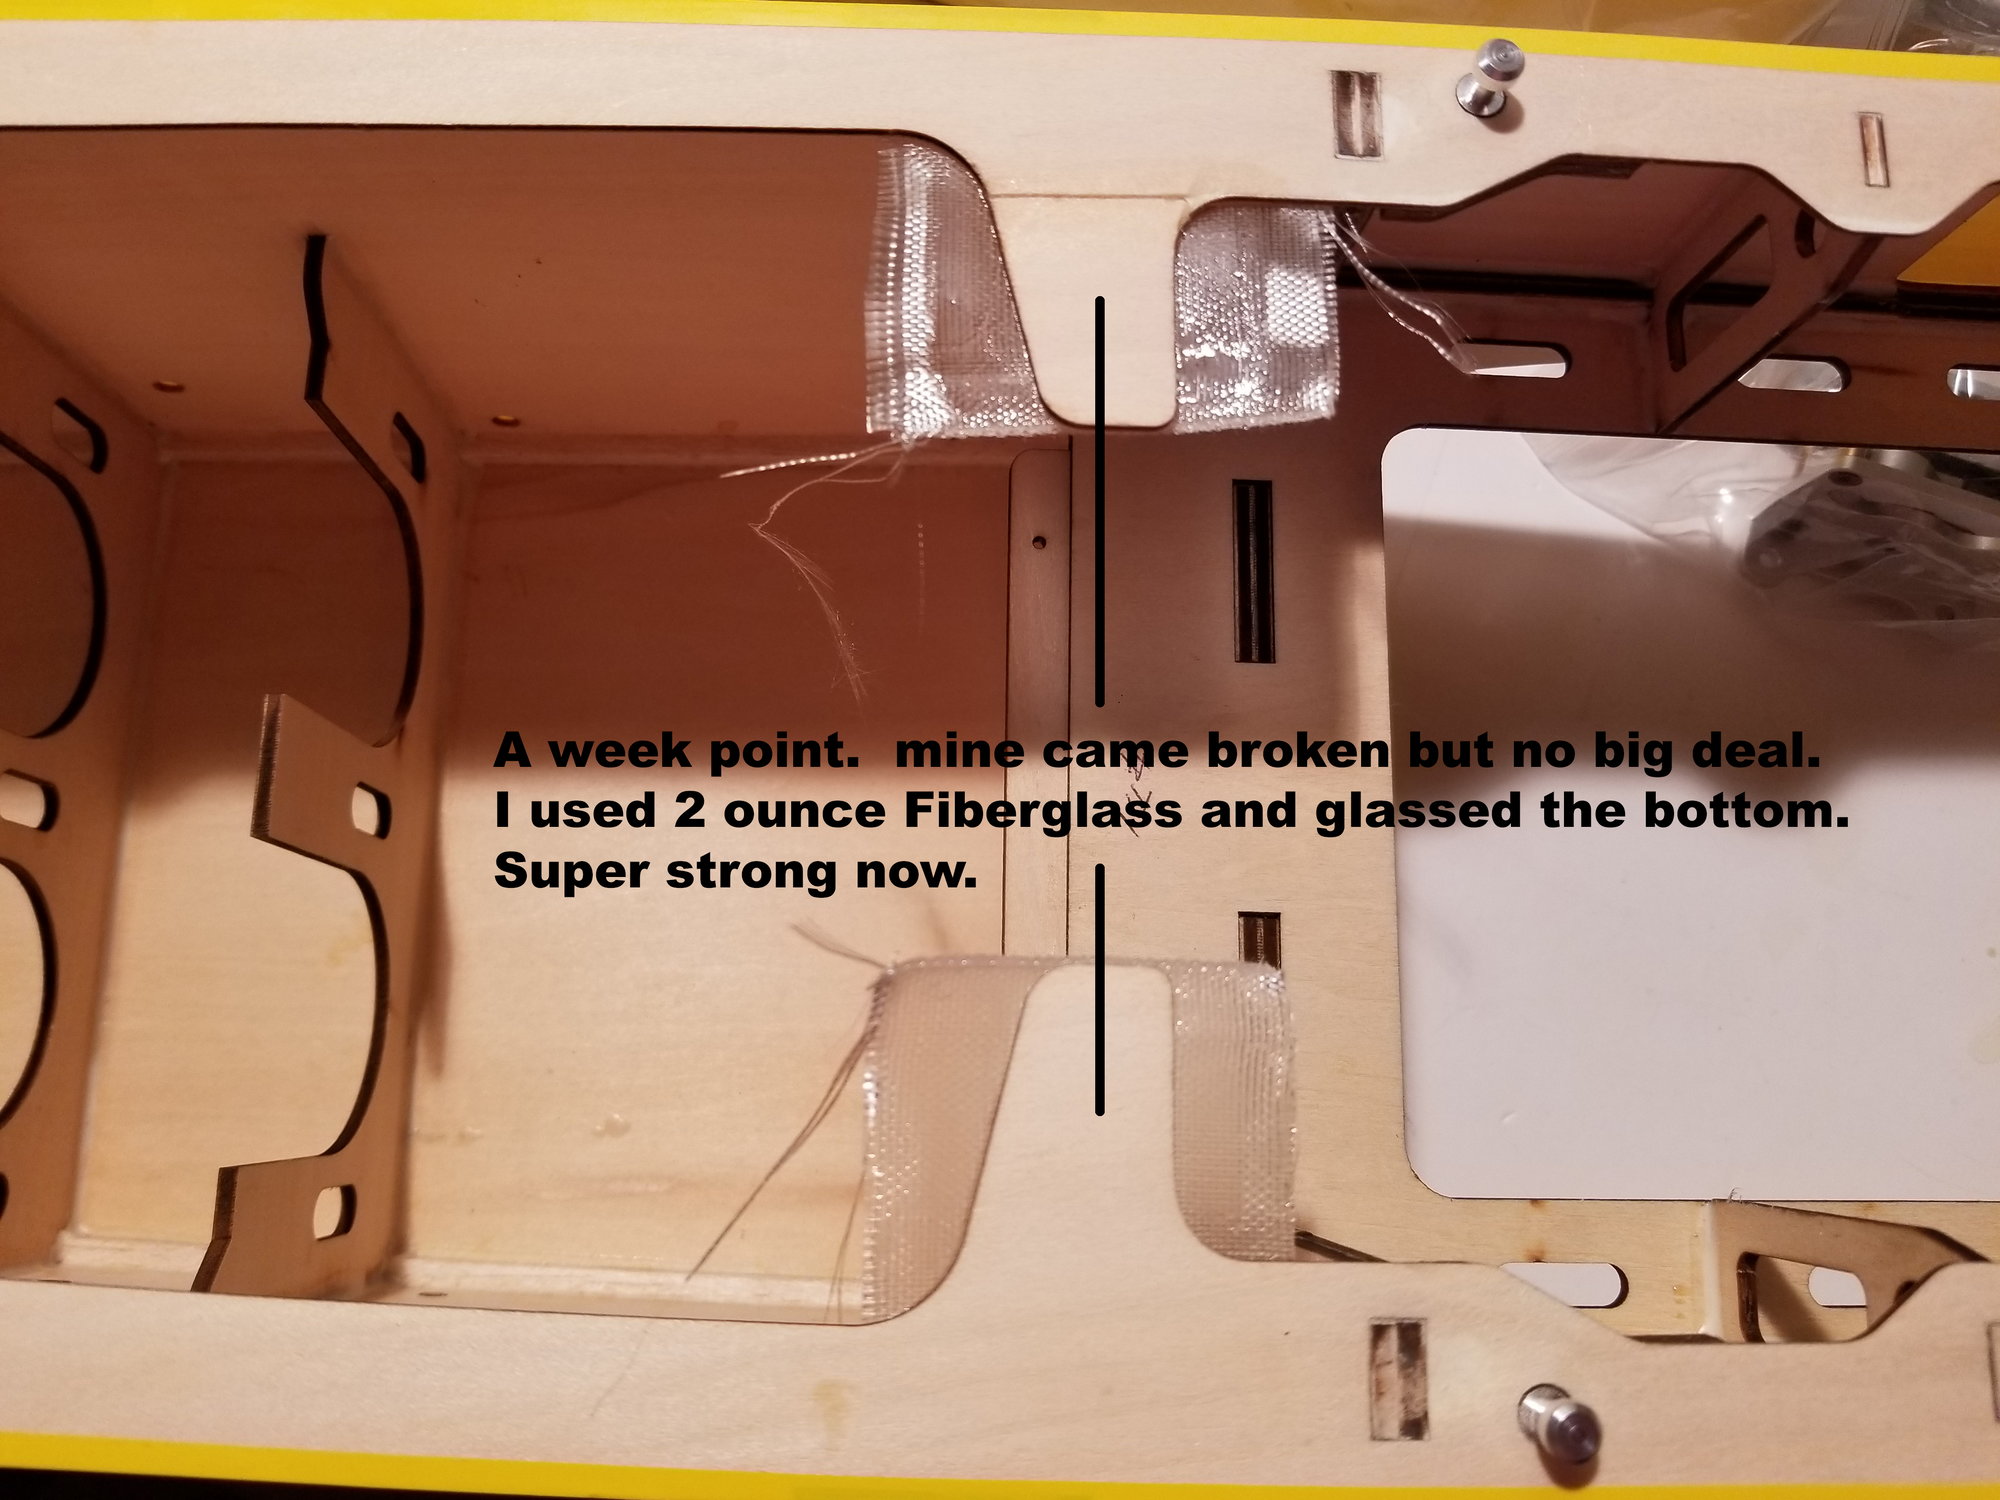

This new Jet has many new great features and Larry has helped in the design of the new plane.
It has a Kevlar fuel tank, the gear is a work of art as well as the covering on mine is perfect.
No giant glue runs anywhere I had zero.
I am super picky so I still Hysoled all joints but not necessary. I use a 3 inch nozzle and after use my finger in 91% alcohol and wipe it clean and tight.
I weighed my Hysol before and after and used less that a 1/4 ounce for the entire jet, " World Record HaHa". That is what tight glue joints will do.
Please give Larry a call for more questions this is a great plane for the price and a huge improvement over the old ones in build quality but they ALL FLY GREAT.
This jet is to good to pass up for an every day jet.
Putting a Jet Central Rabbit 100SE in mine, yes overkill.
 10-15-2018, 07:21 PM
#2

My Feedback: (24)
Have one of the original Sprints with a P80SE, Jet-Tech Split tank, TamJets Smoke pump, Mad-Dog smoke tube, Pro-Link gear, and Intairco wheels/brakes.
You may want to paint the whole inside of the Fuselage with some thinned out Z-Poxy. Just in case you have any fuel or smoke oil leak.
Which I had during priming the fuel system. Saved the wood from Kerosene soak.
The Sprint is known for the Turbine exhaust flow causing an "E-Flux" problem pulling the elevator down. This necessitates large down elevator trim for level flight.
I made 3/8" down to nothing wood wedges that fit on the whole engine mount area giving as much down thrust as I could get. This gives my elevator
almost perfect level trim. Always wondered why my KingCat Turbine mount area had so much built in downward thrust angle. With my KingCat-P120 combo you still
add three small washers at the front for more angle.
BAD-DOG Smoke tubes are fantastic. Guy sells them on RC-Universe. Tried everything over the years and nothing as good. Doubled my smoke time.
With 35oz. of smoke from Jet-Tech split tank I can dial in a good smoke stream for almost 6-minutes. He drills a .020" or .040" hole in the solid round stainless
piece then machines 45 degree slot at the hole exit making the best atomizing I've seen. I have the .040" one on the Sprint and two .020" ones on my KingCat.
Good luck and maybe see you at the Highland Jet meet next summer. Just south of Utica, 3000' x 65' paved runway. Fantastic club and great place to fly, You fly facing North so no sun in your eyes.
10-16-2018, 02:19 AM
#3
Thread Starter
My Feedback: (1)
Join Date: Dec 2010
Location: Pittsford, NY
Posts: 290
Likes: 0
Received 0 Likes
on
0 Posts
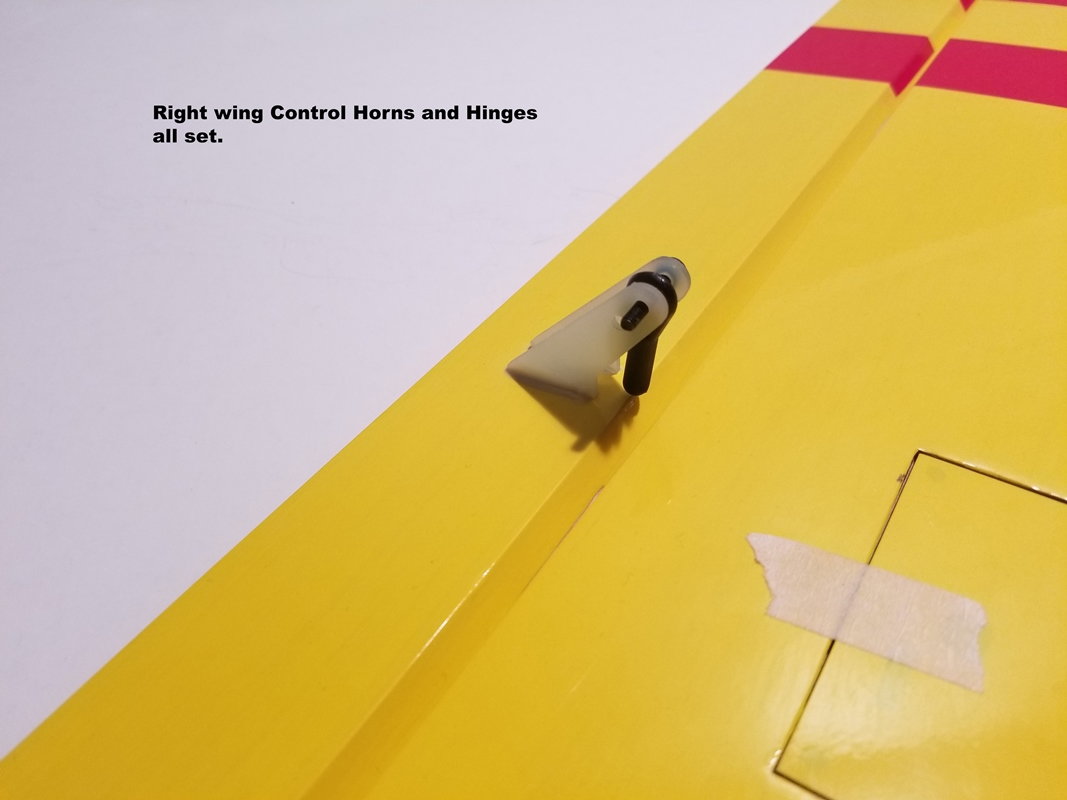
Yes already used ZPoxy thinned out and then painted it. Not sure about the Turbine issue hope mine new one is different ?? Yes that sounds like a great event and not terribly far for me .
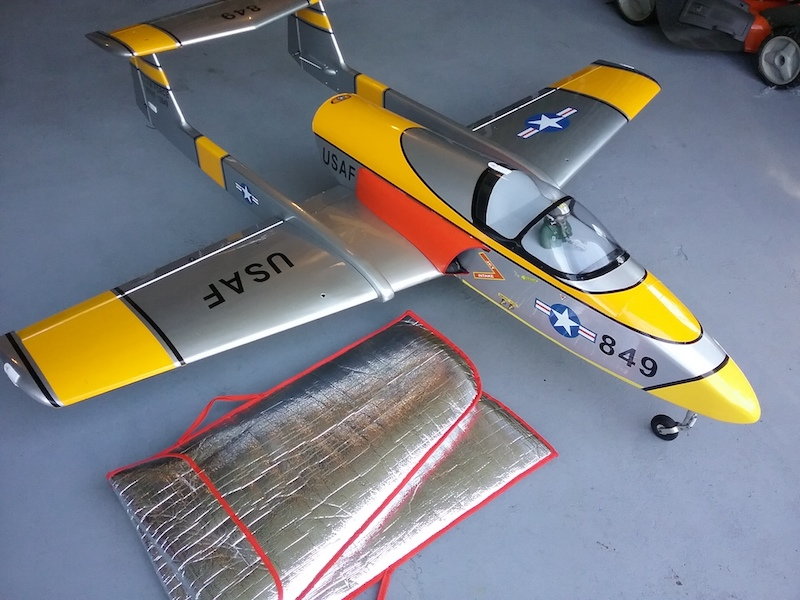
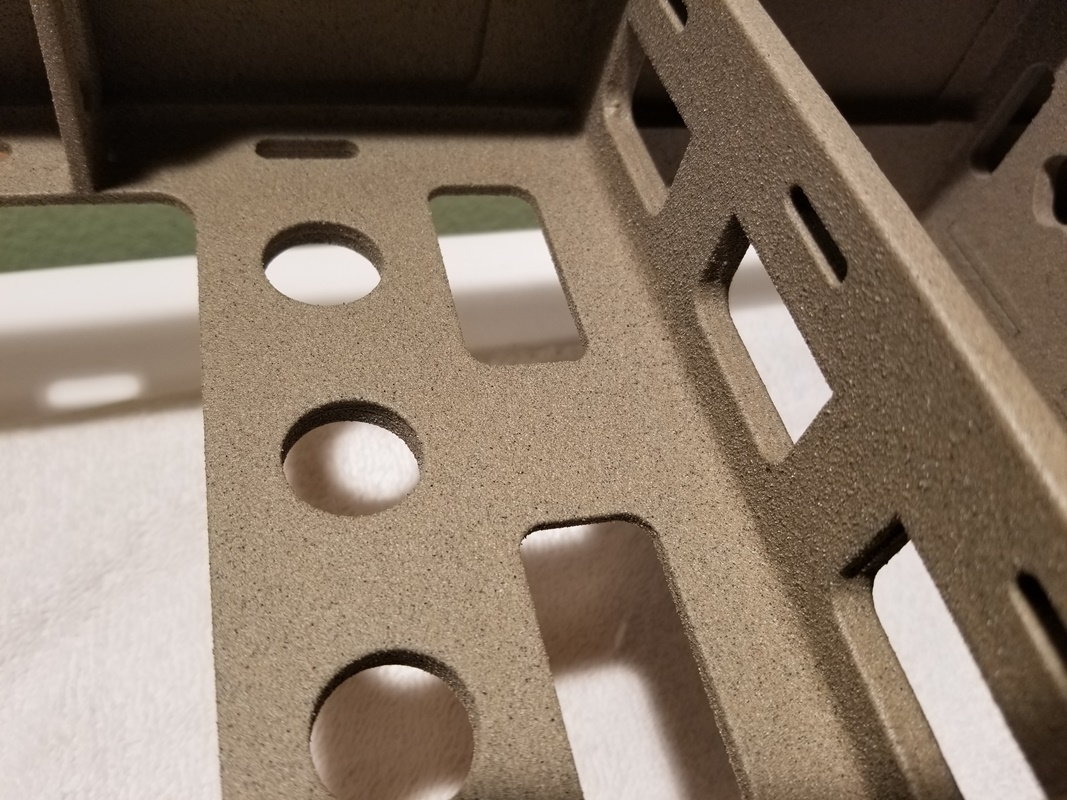
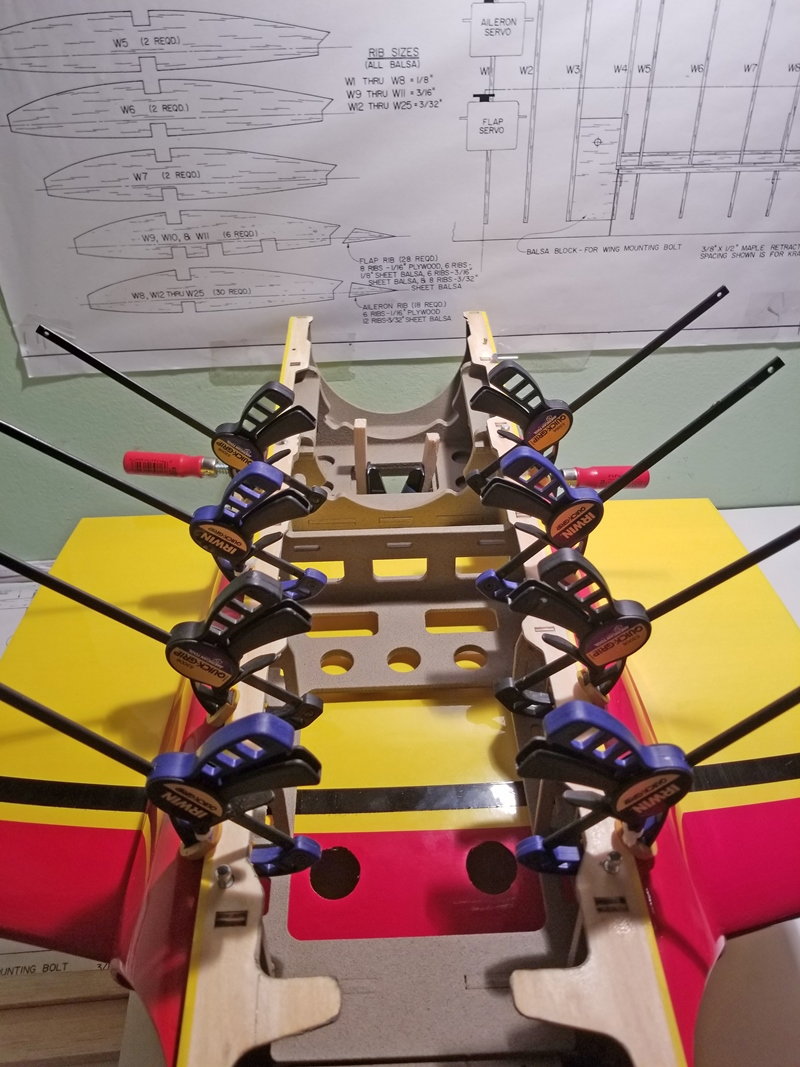
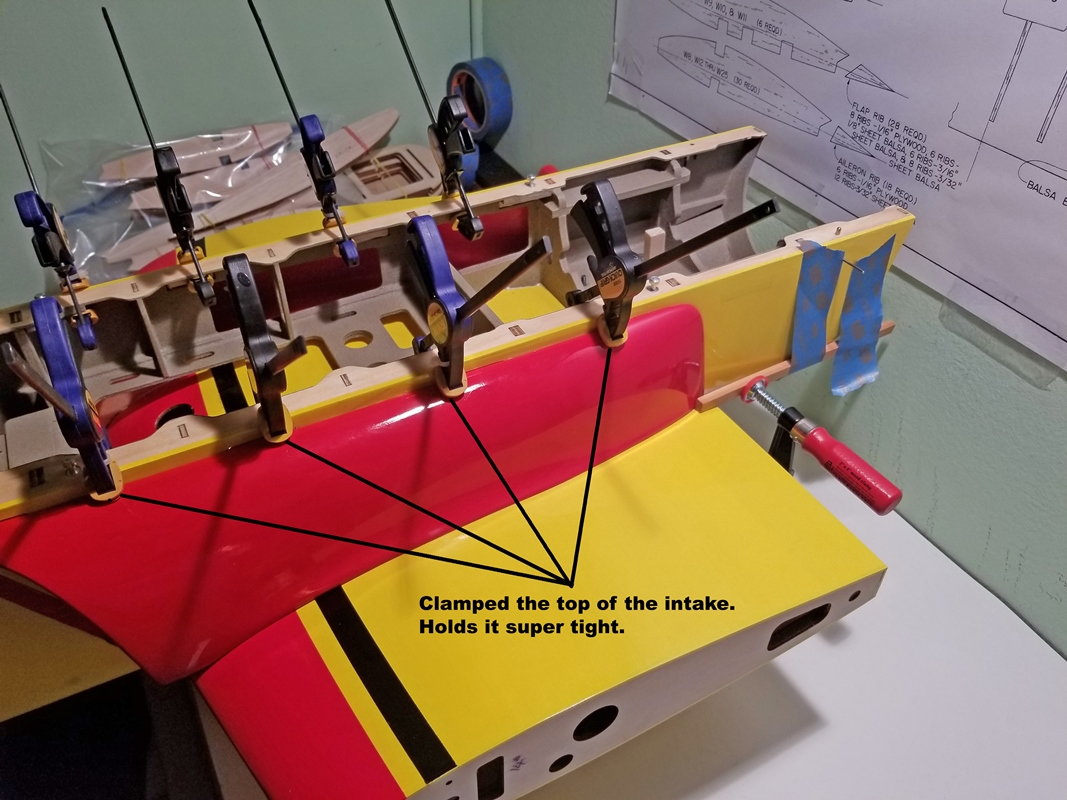
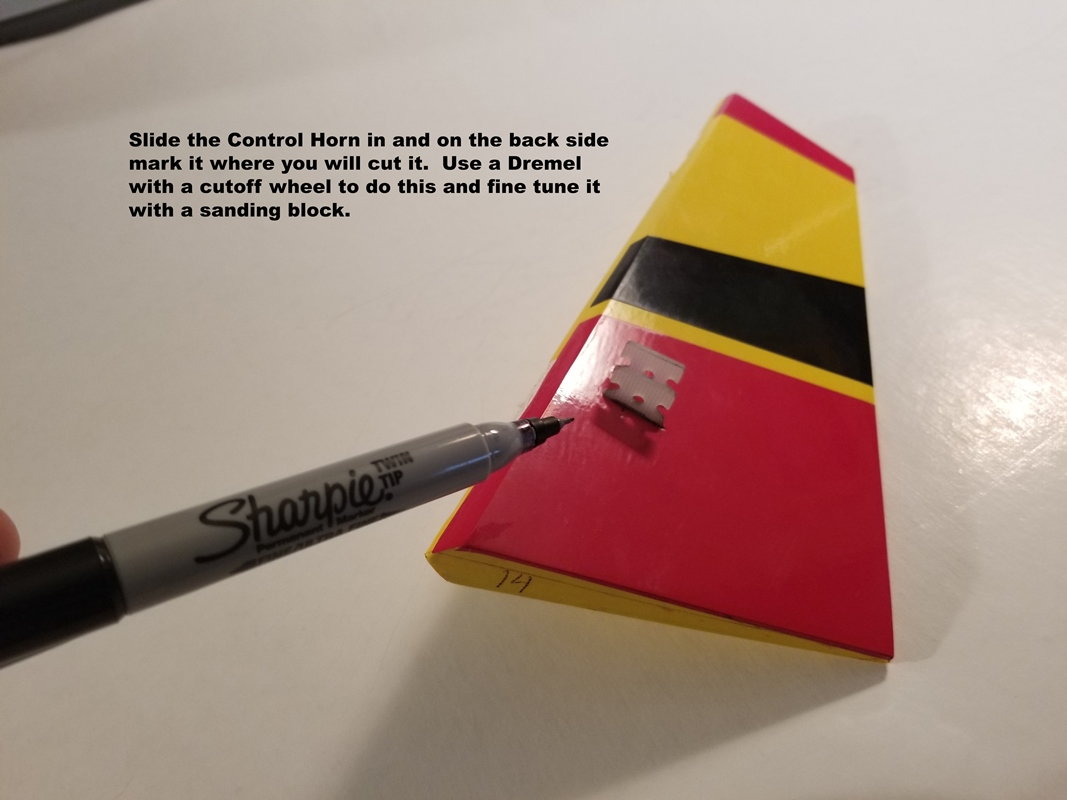
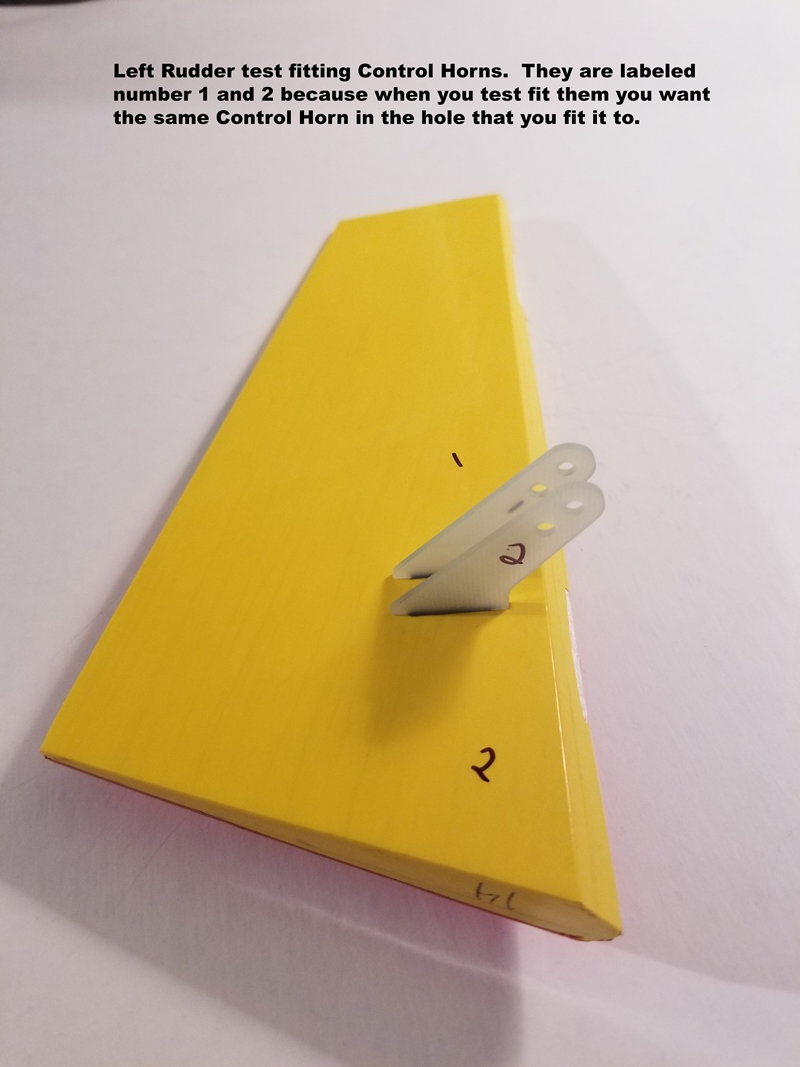
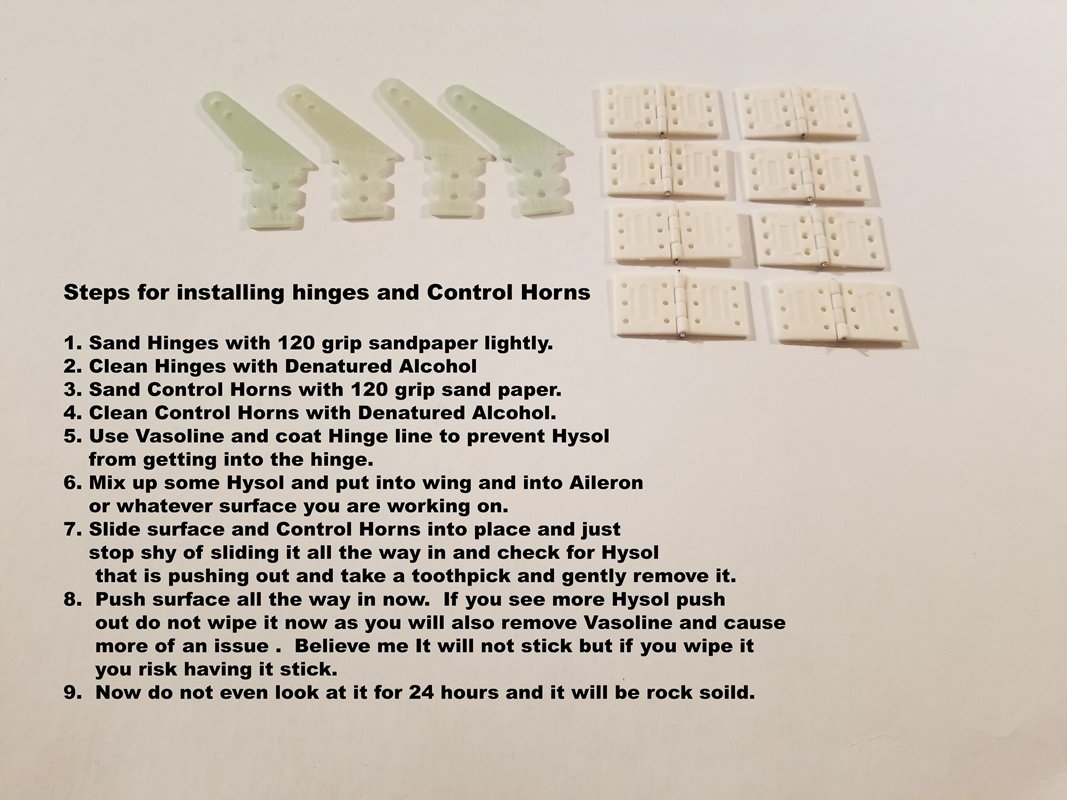
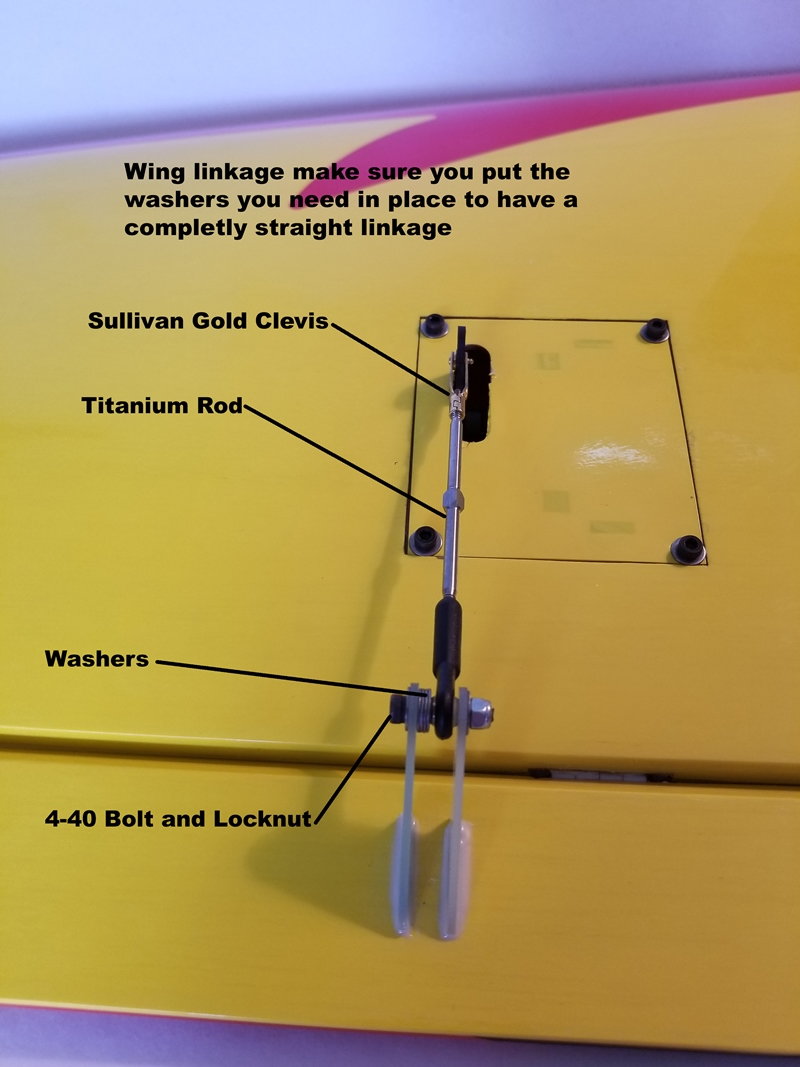
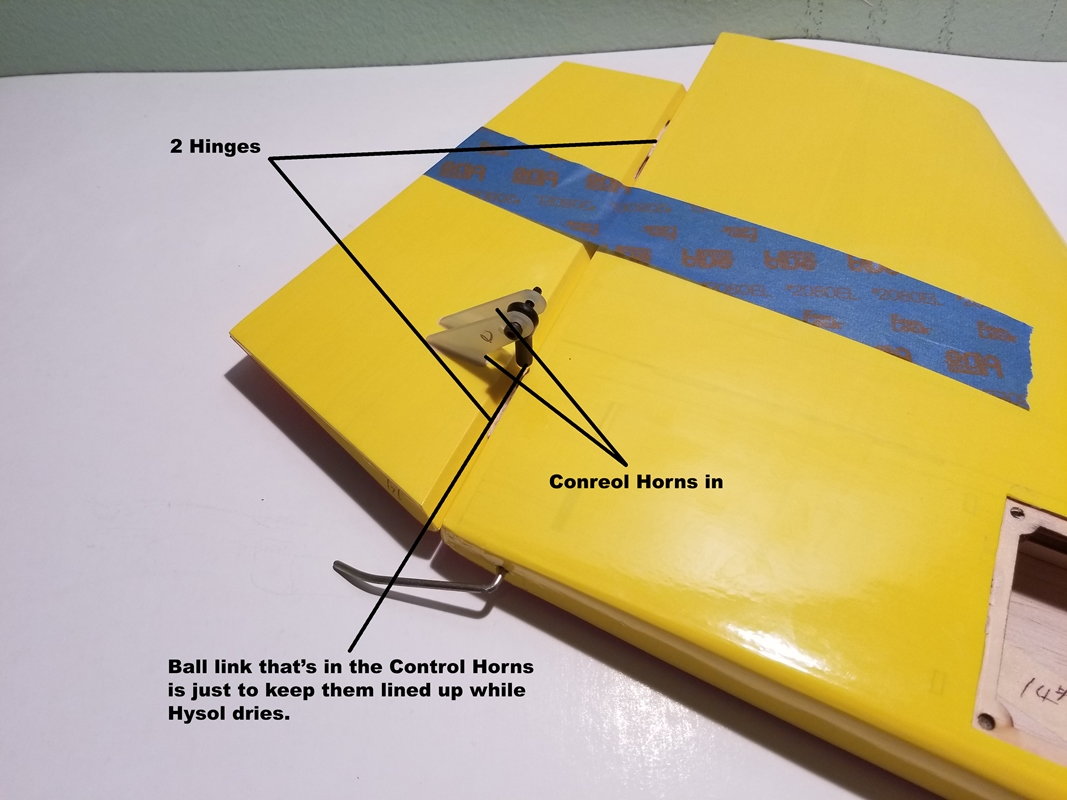
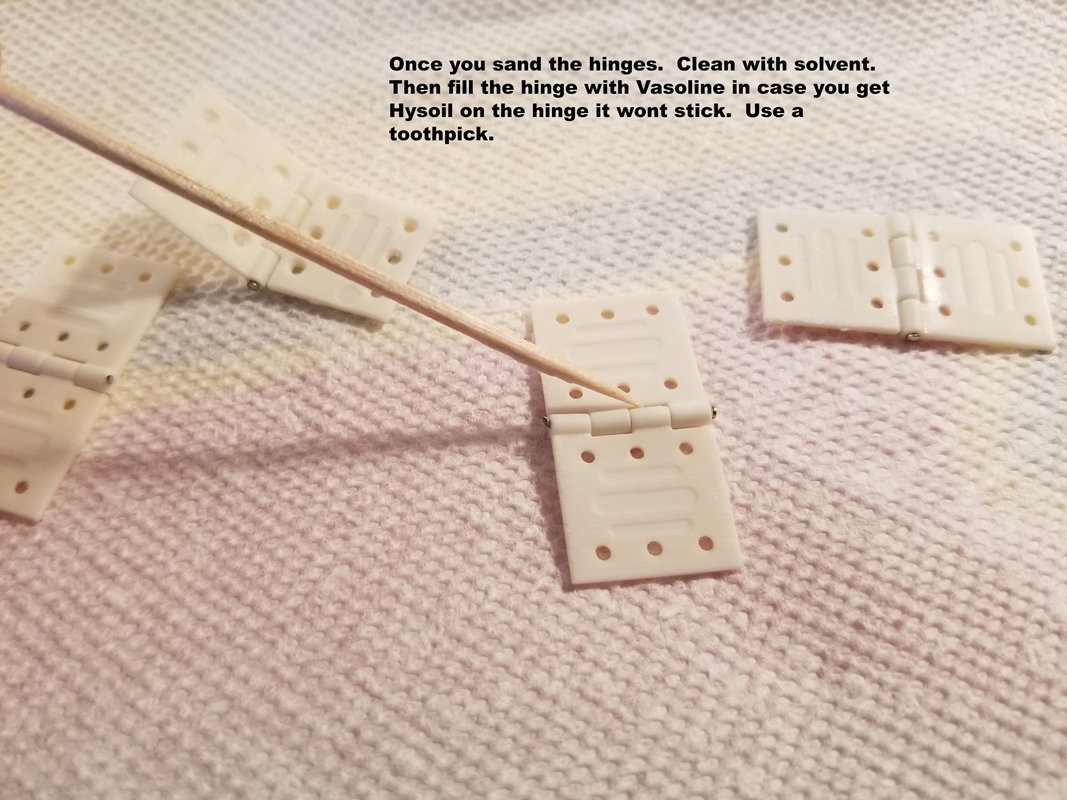
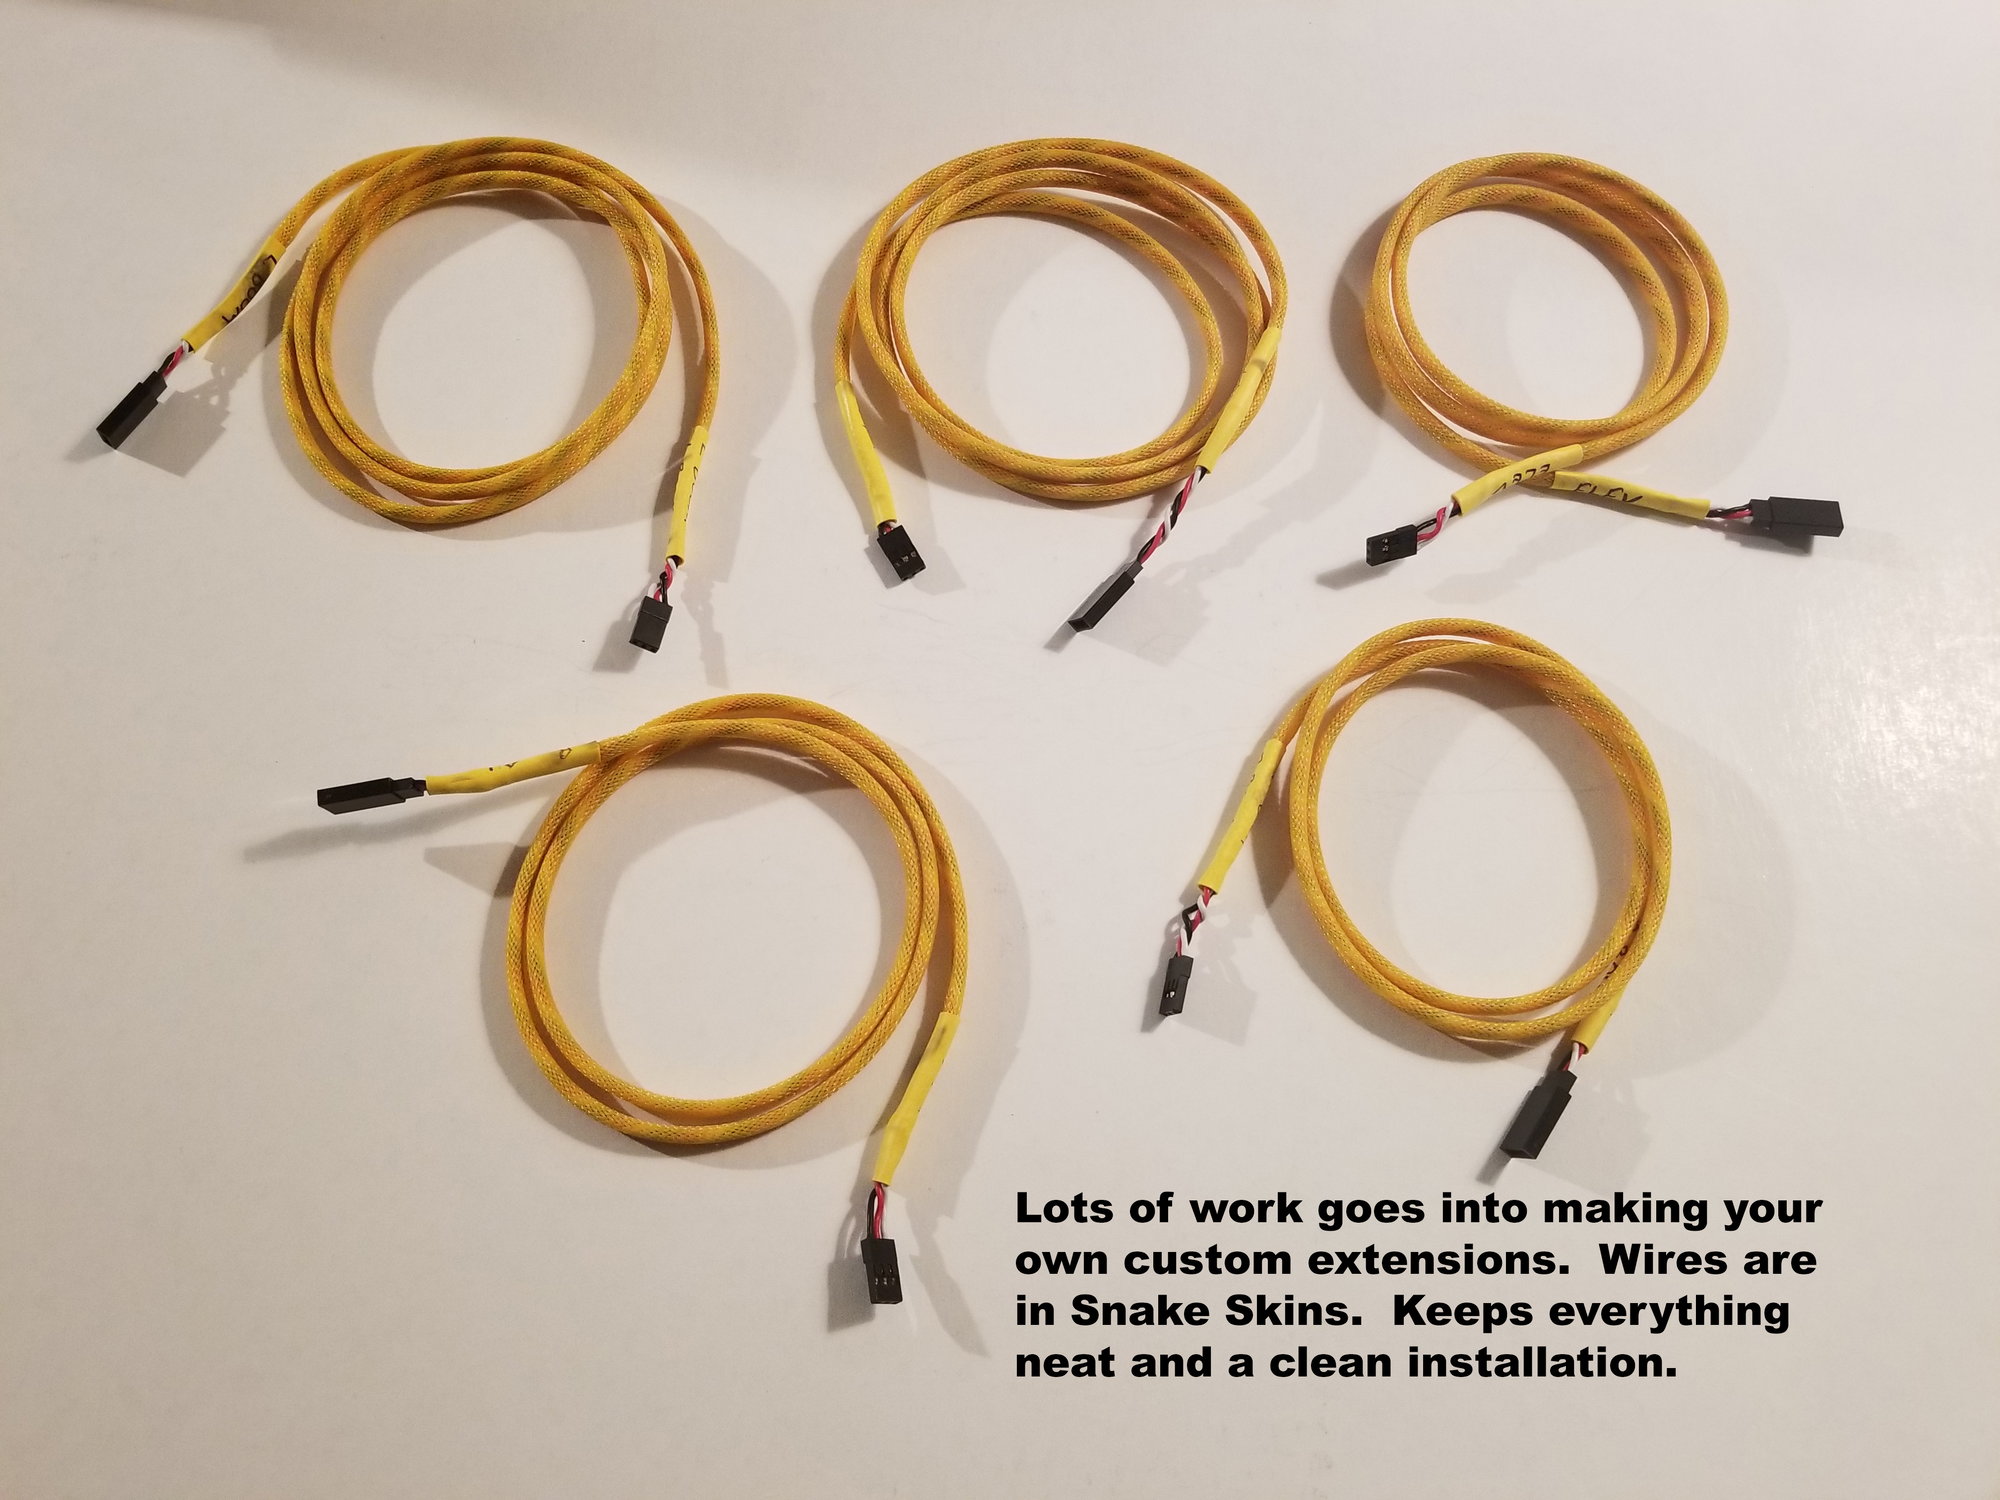
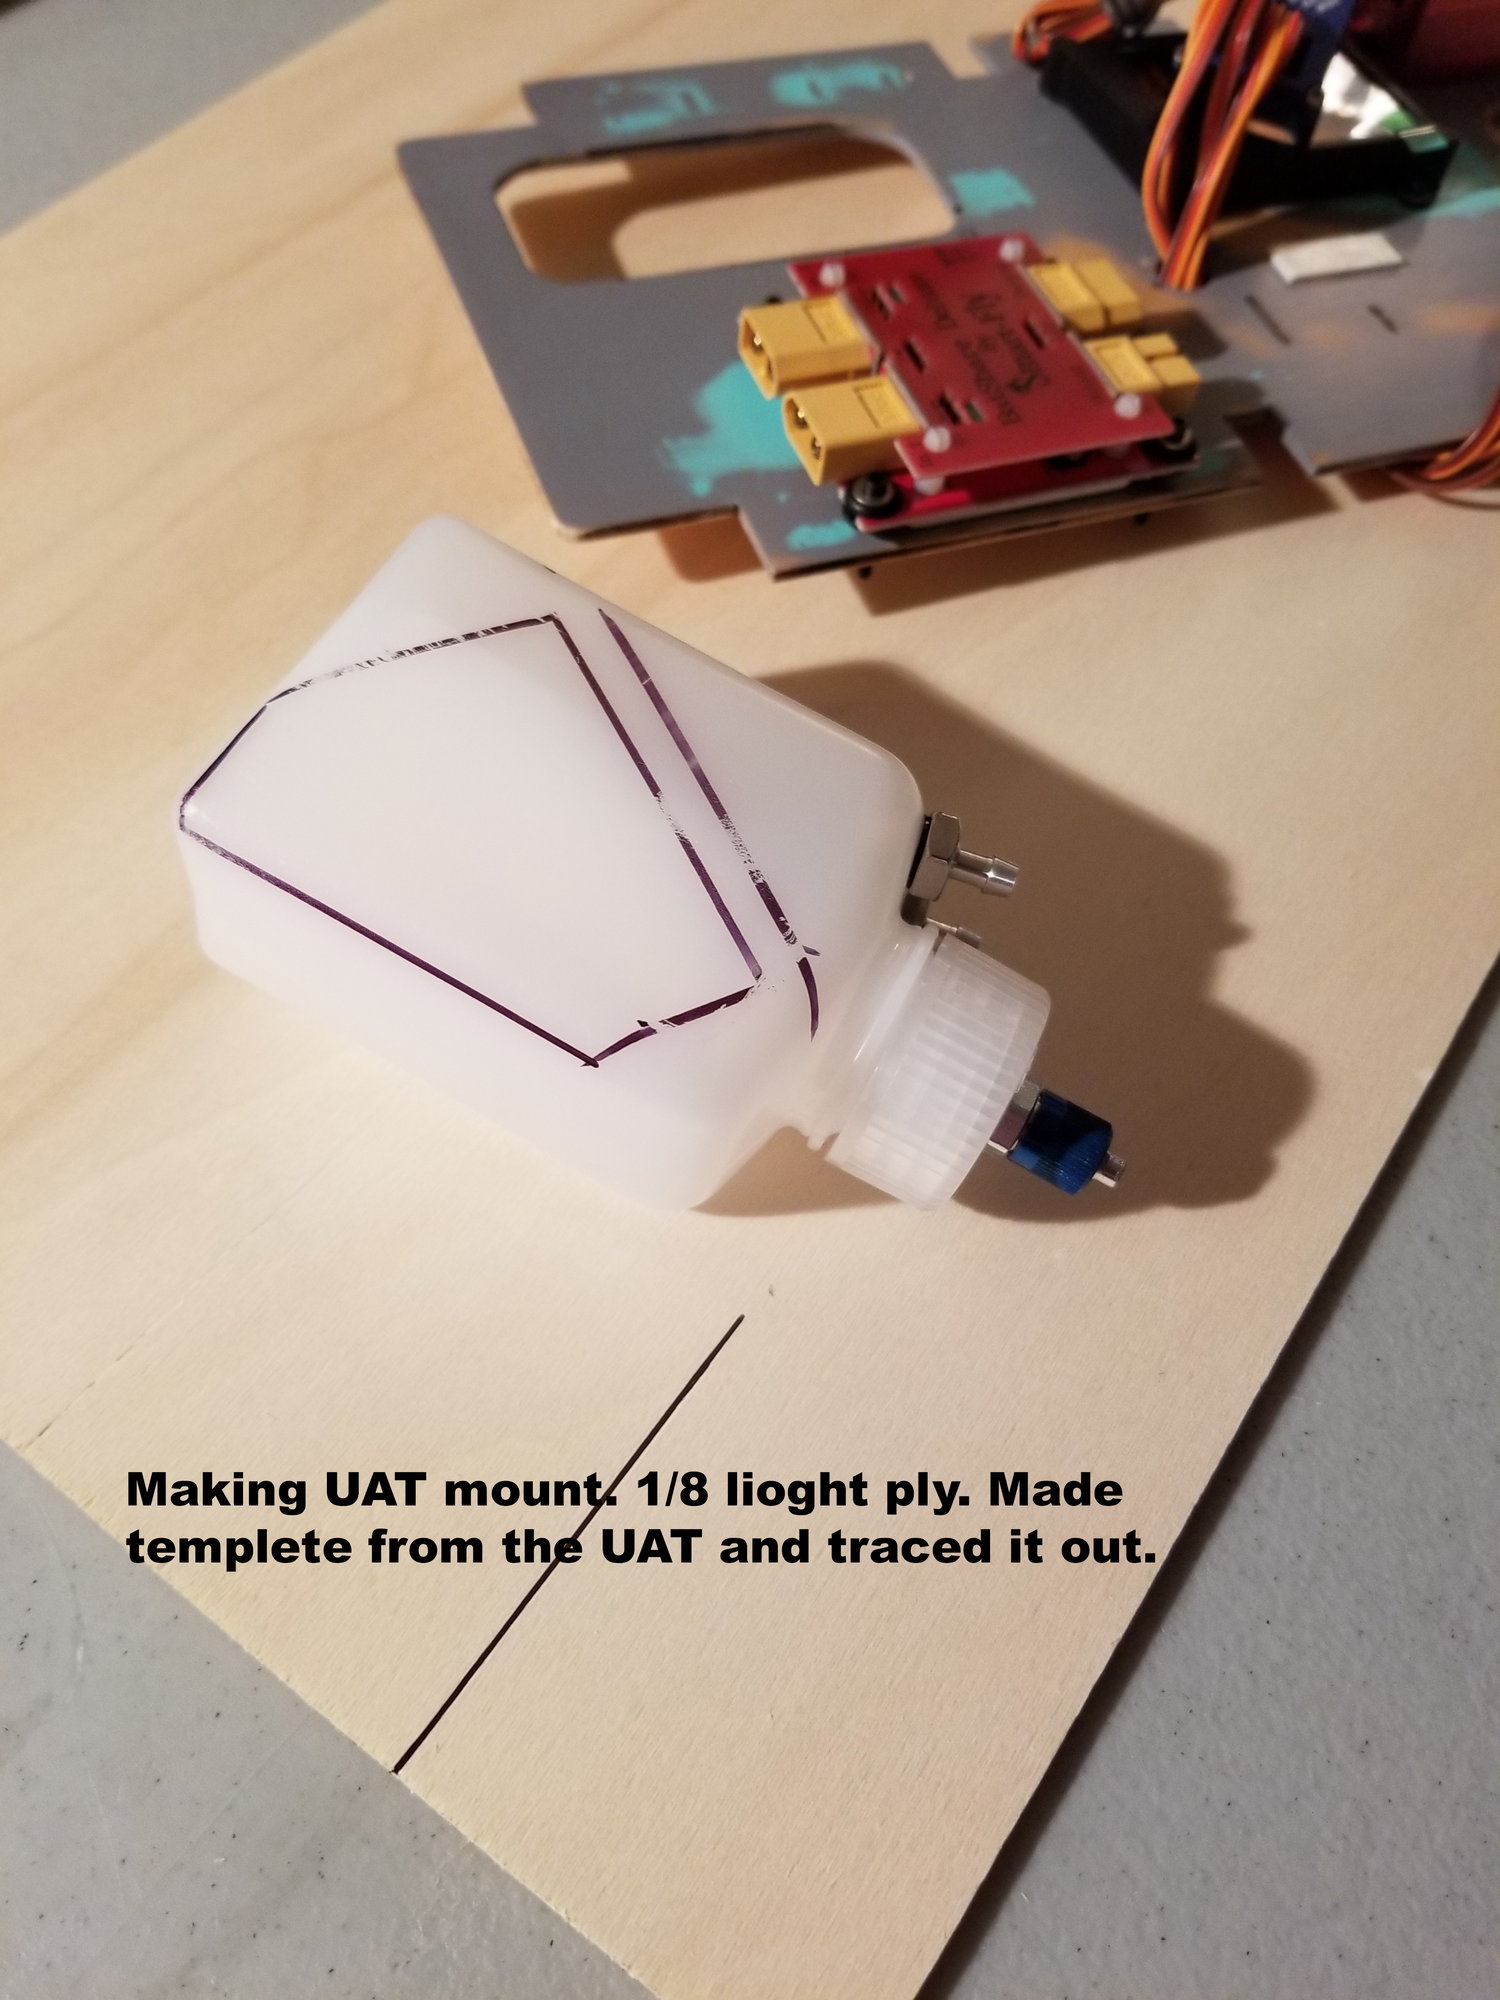
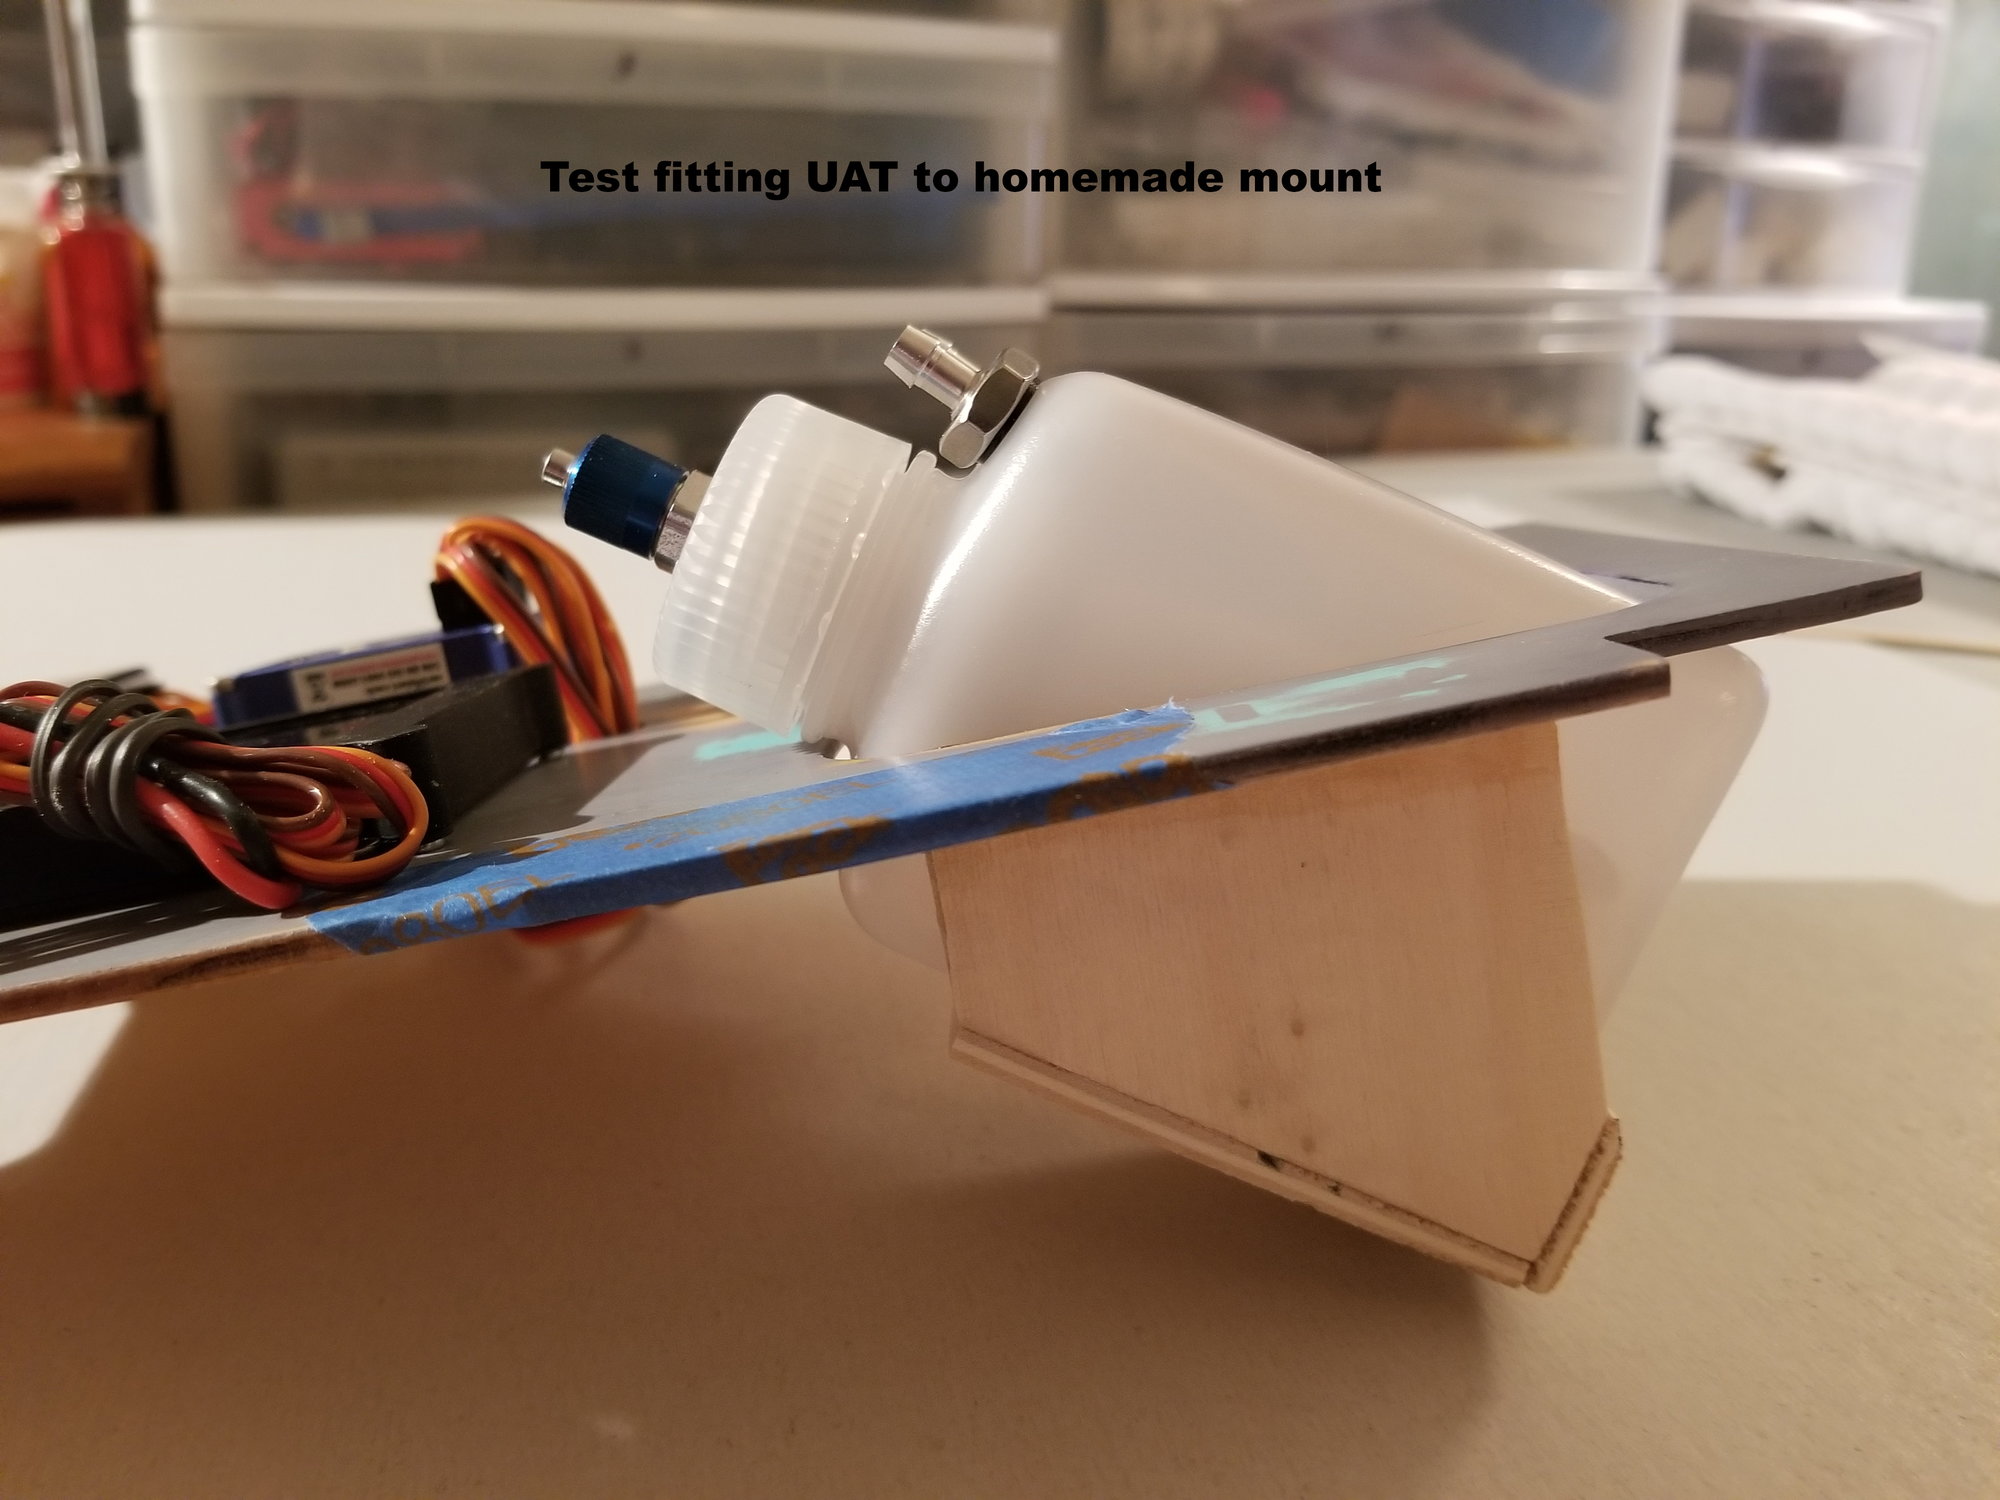
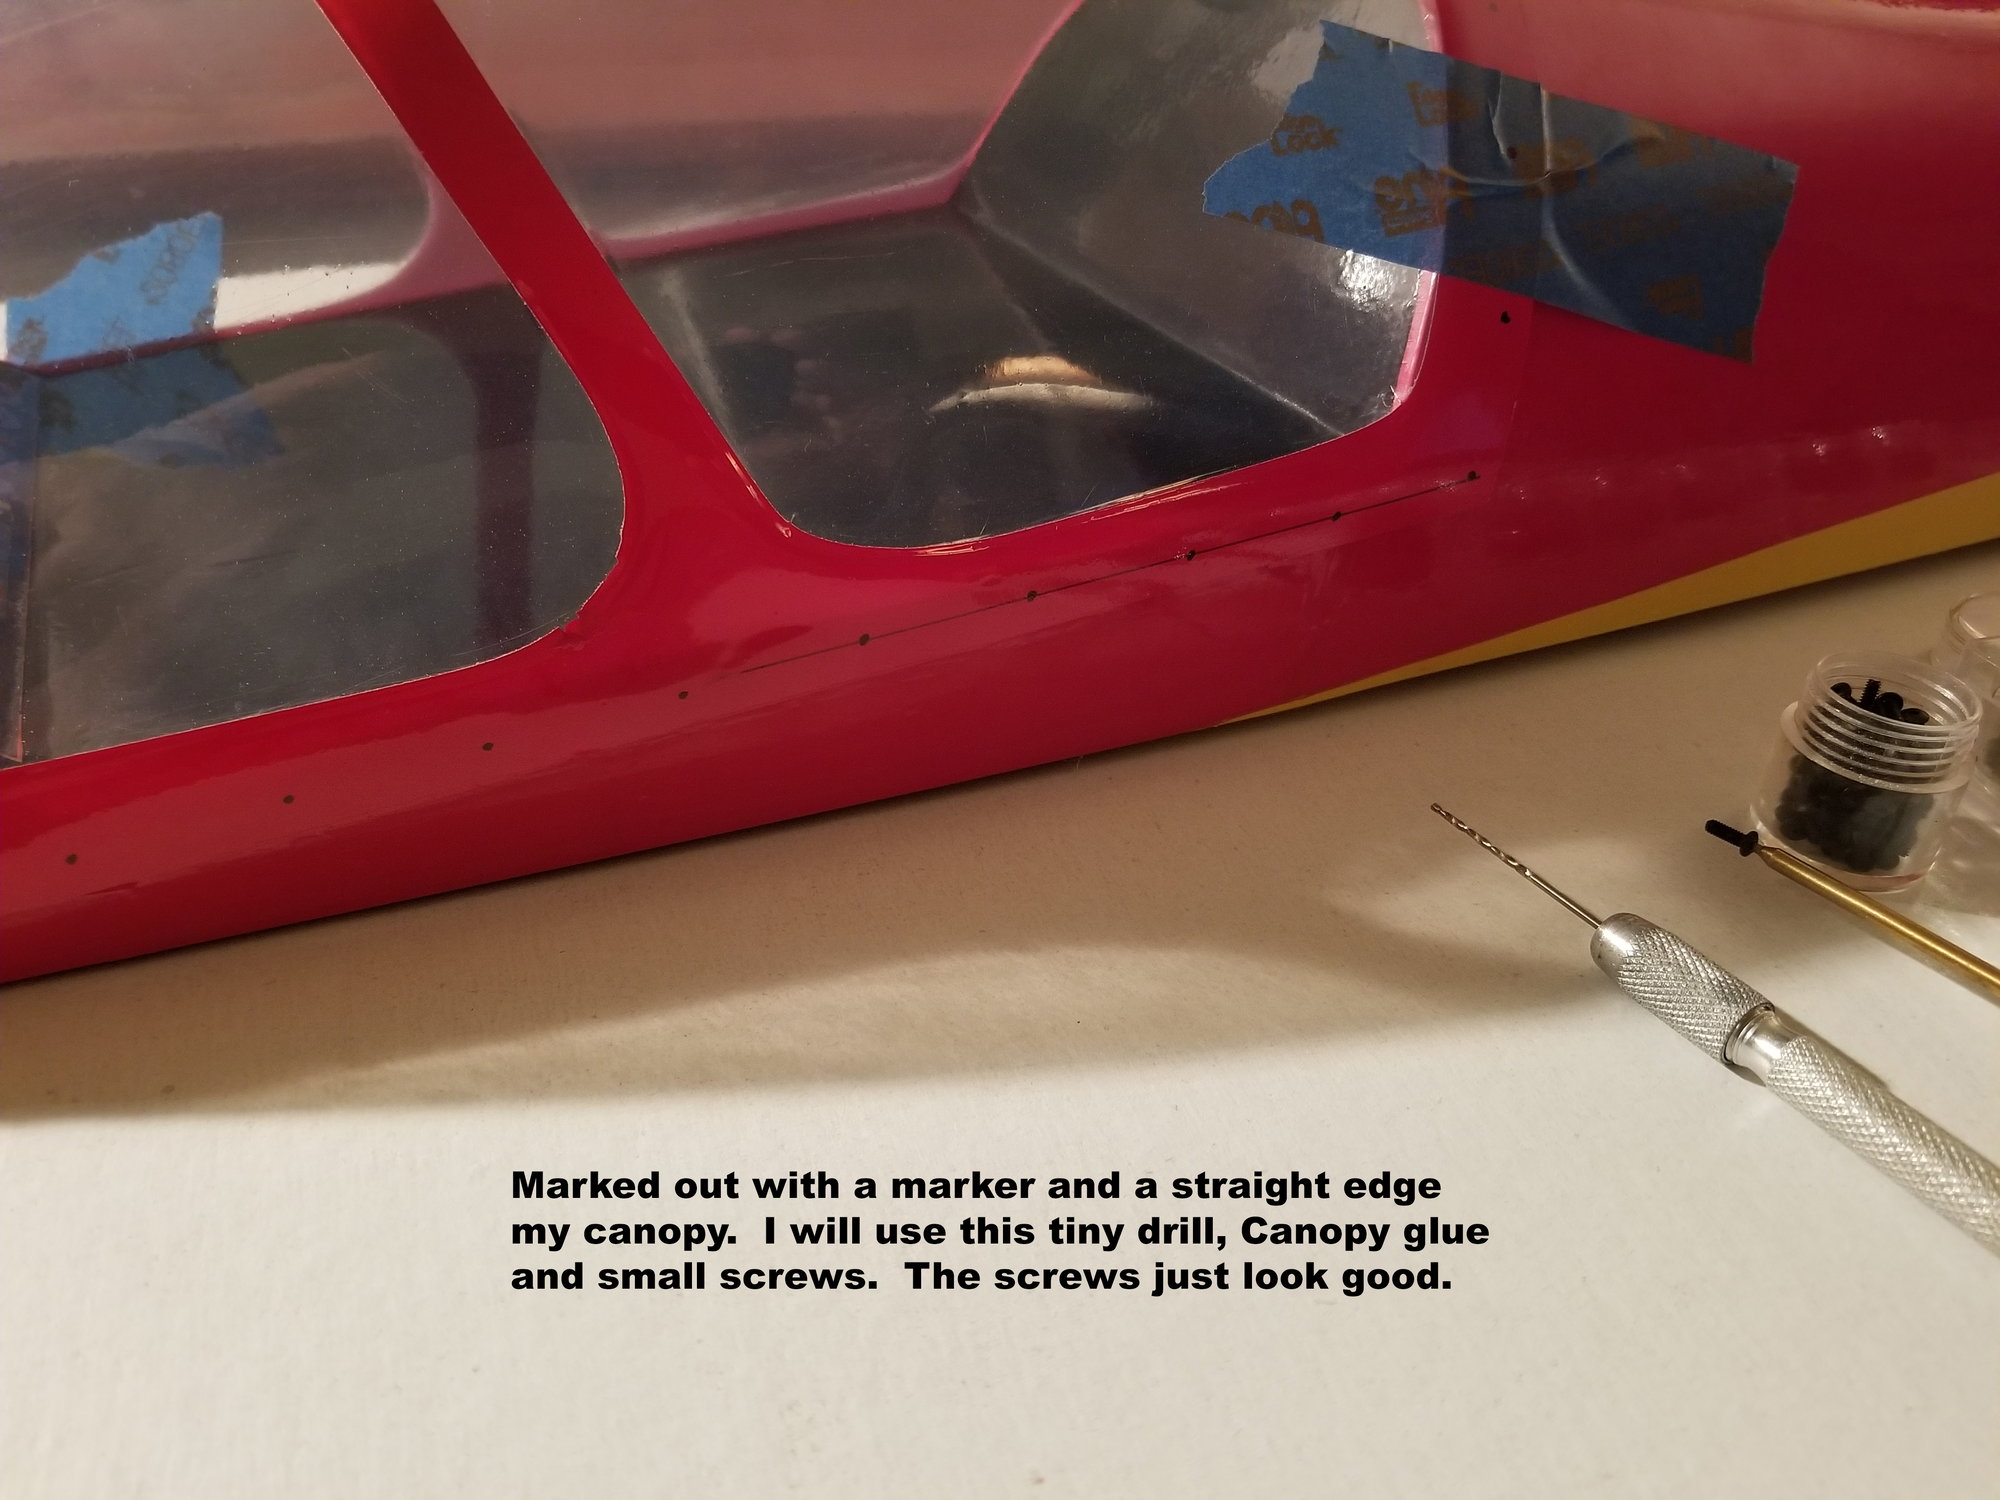
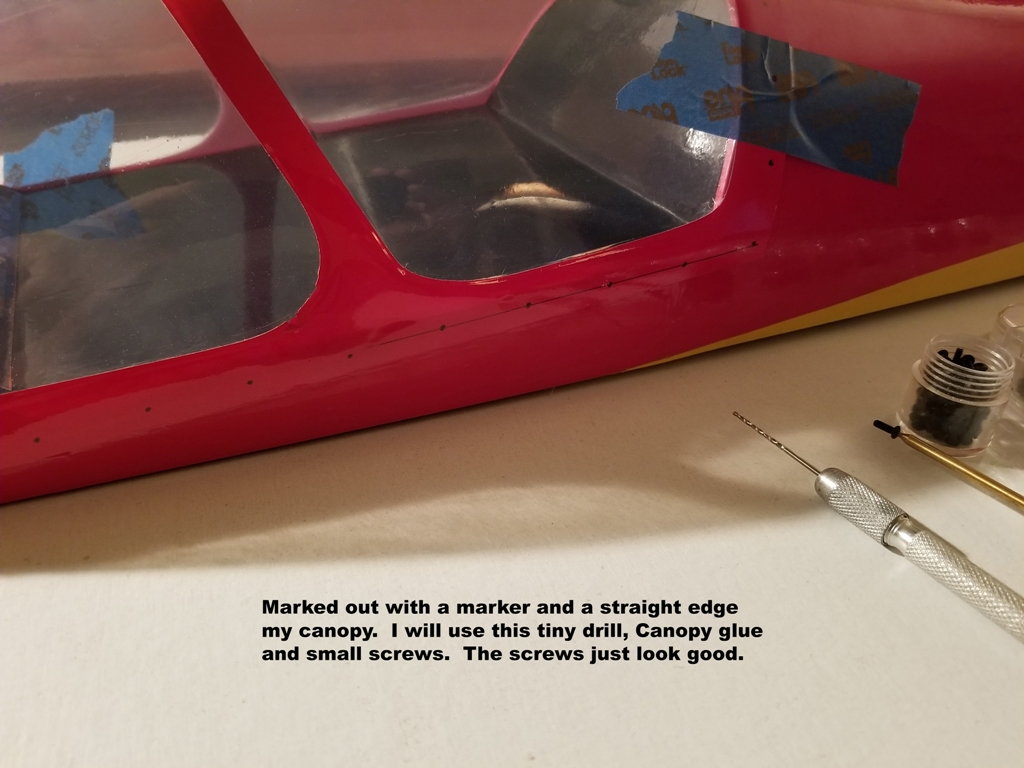
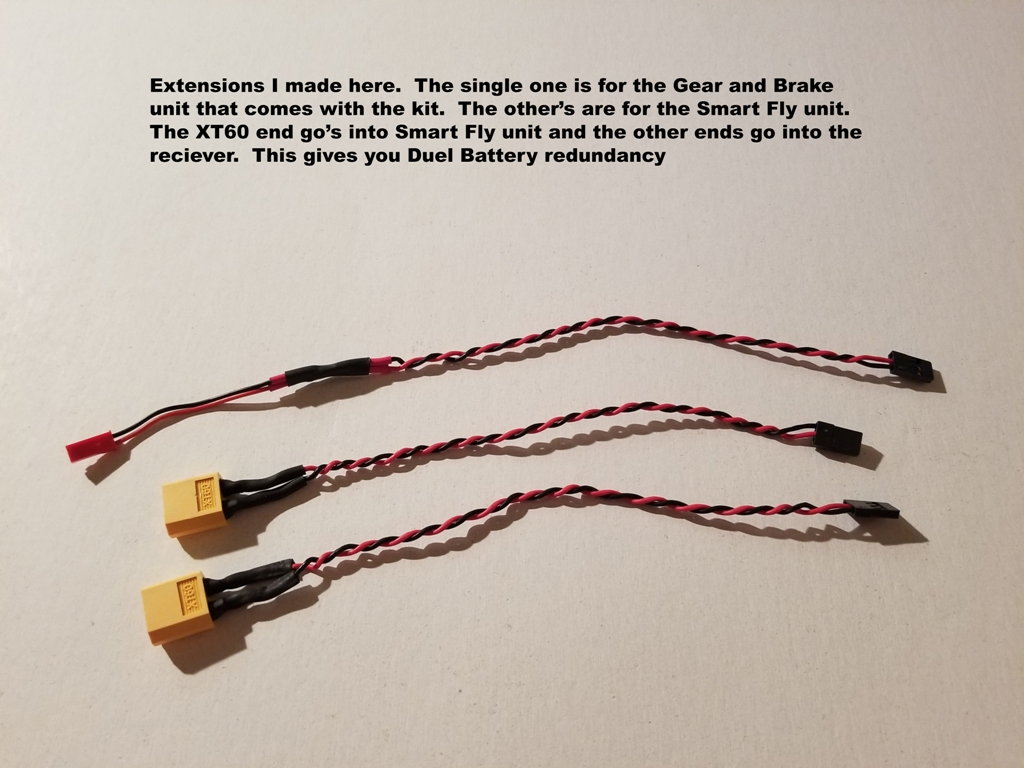
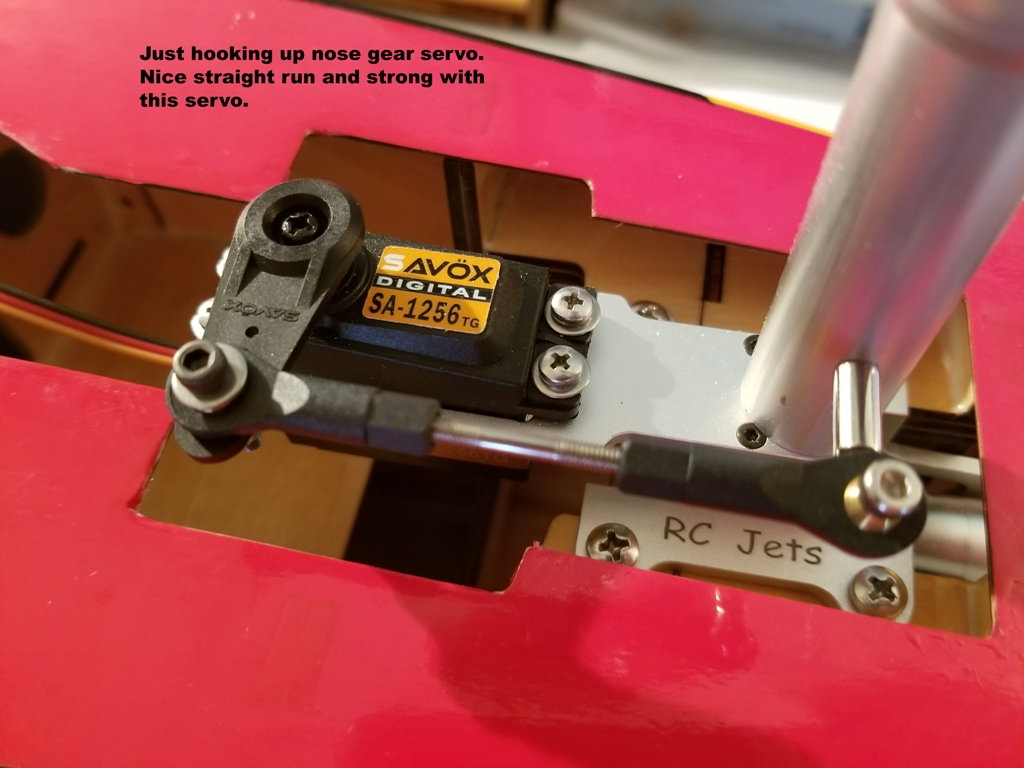
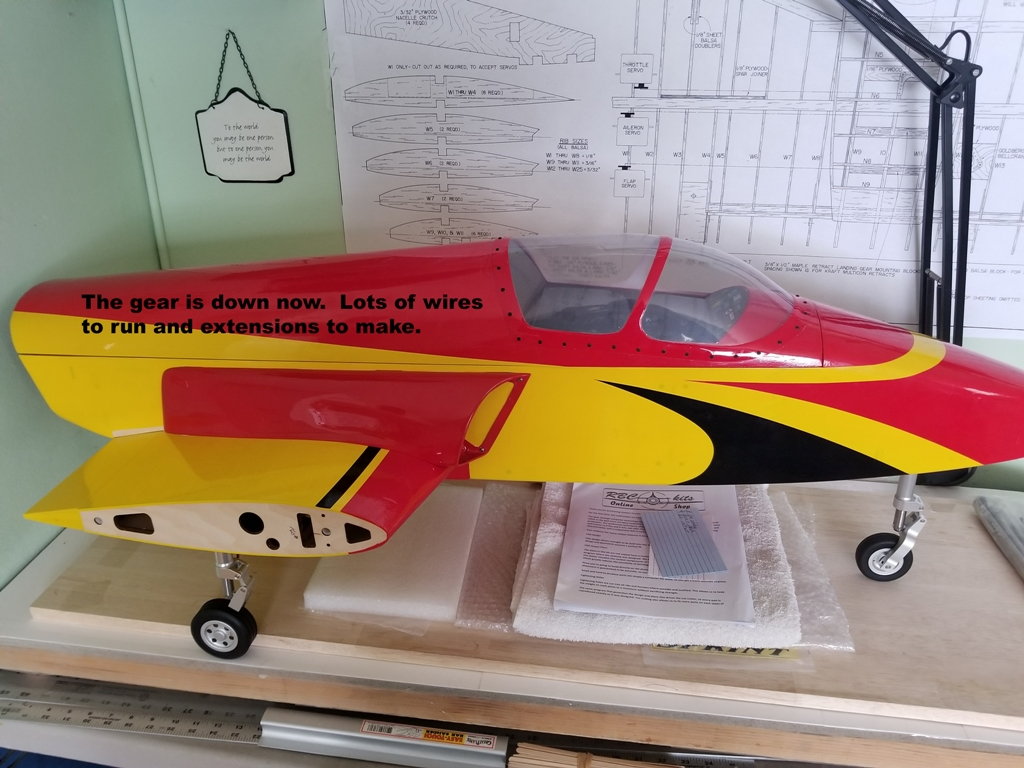
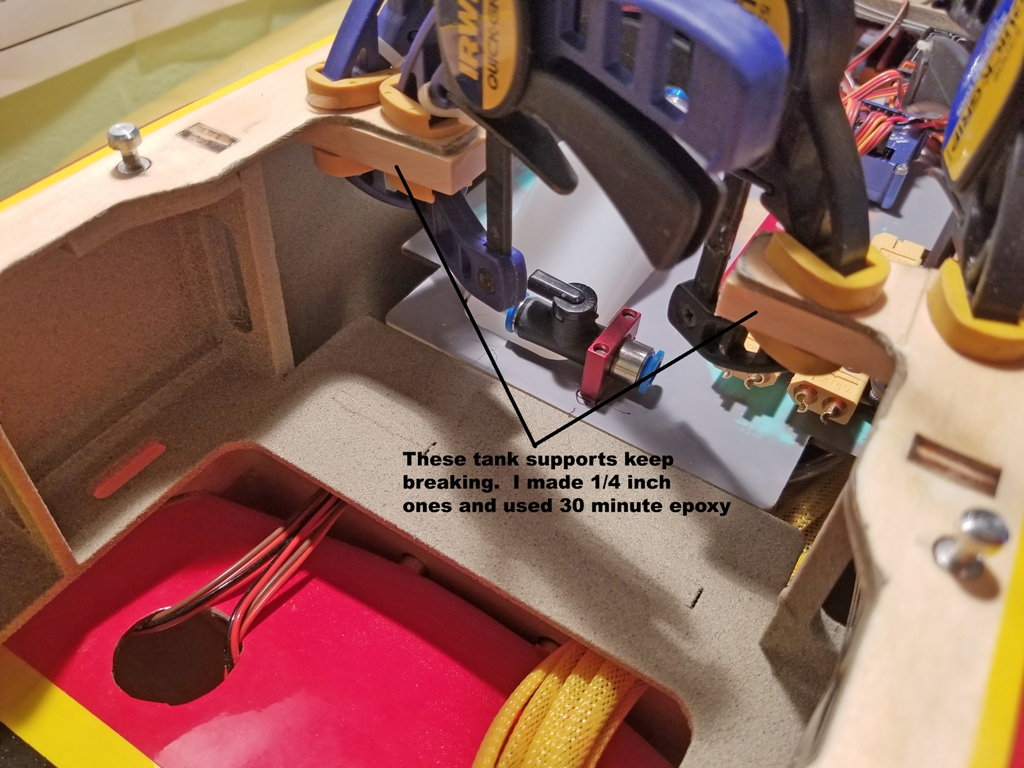
Here are some more pictures.
Here are some more pictures.


 12-15-2018, 03:04 PM
#20
My Feedback: (24)
Where's the Smoke System !! Gotta have Smoke.
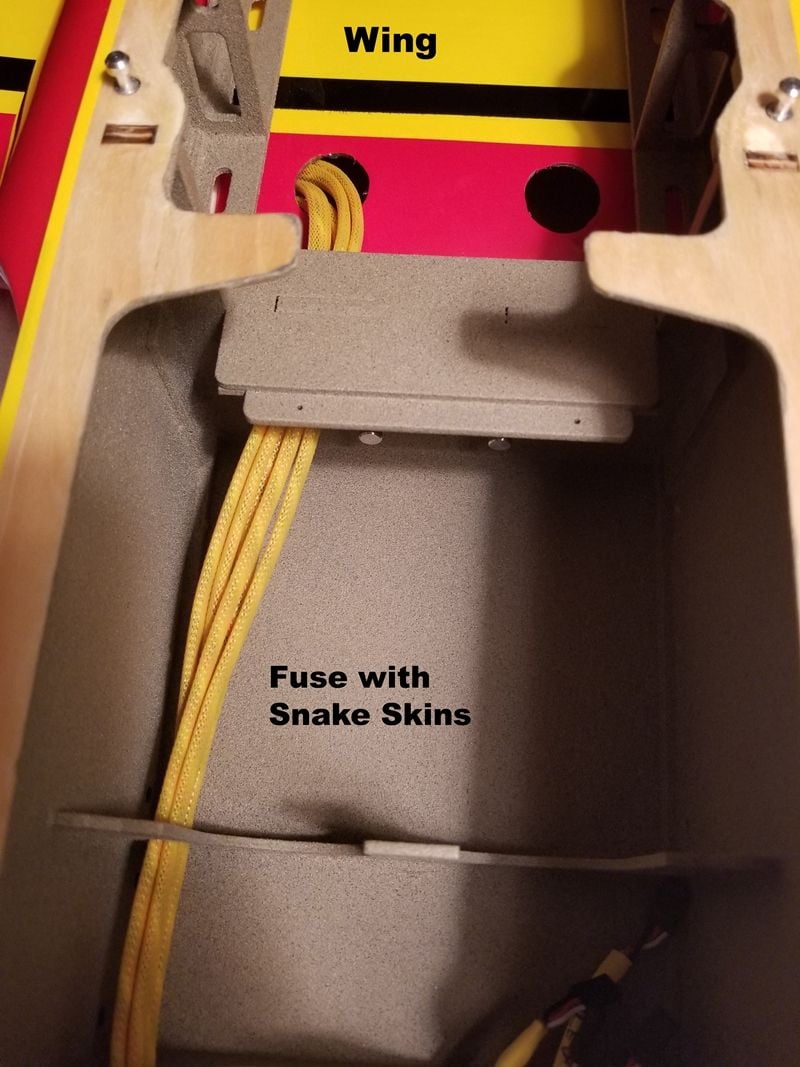
Surprised the nose wheel area is not enclosed on the V2 Sprint like the old one.
Keeps the wheel from kicking up junk and moisture onto the bottom of the electronics tray.
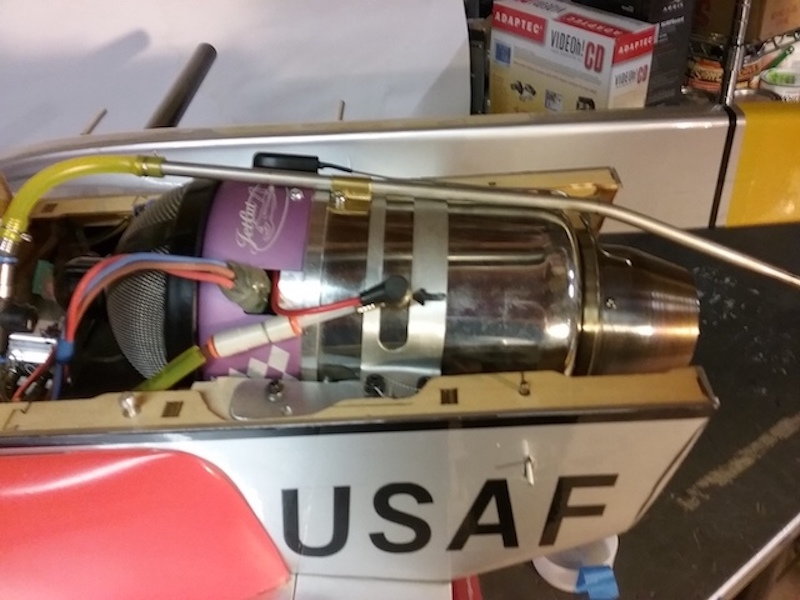
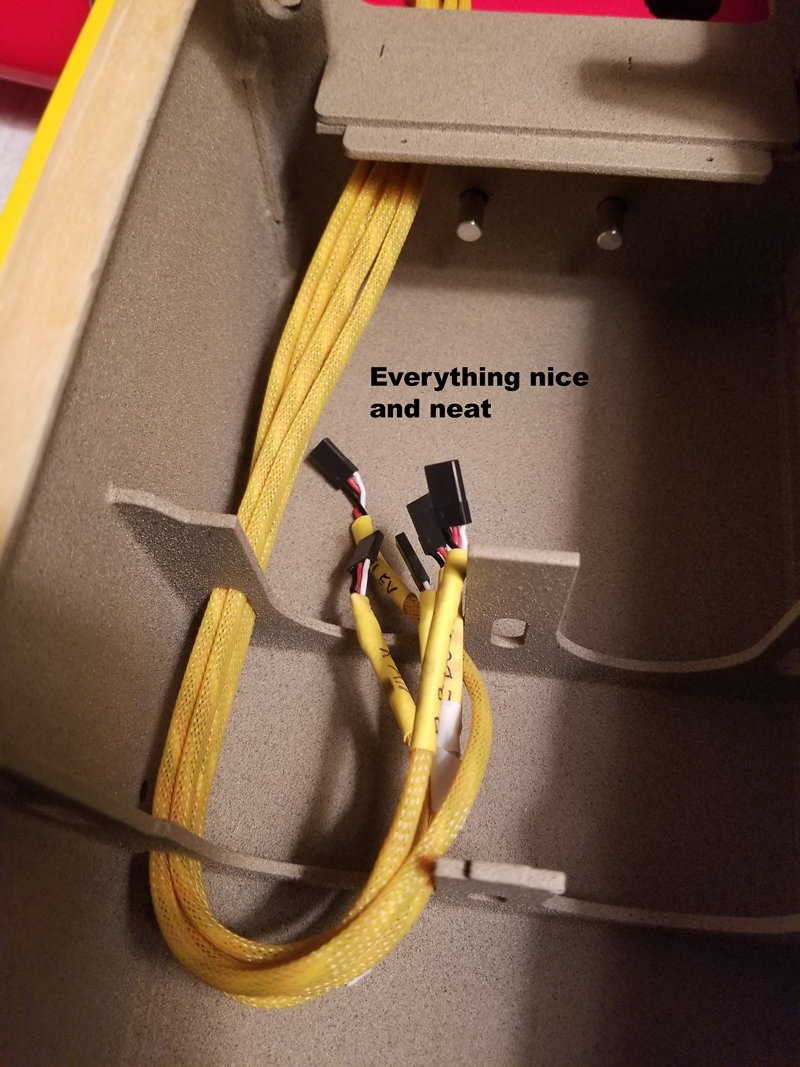
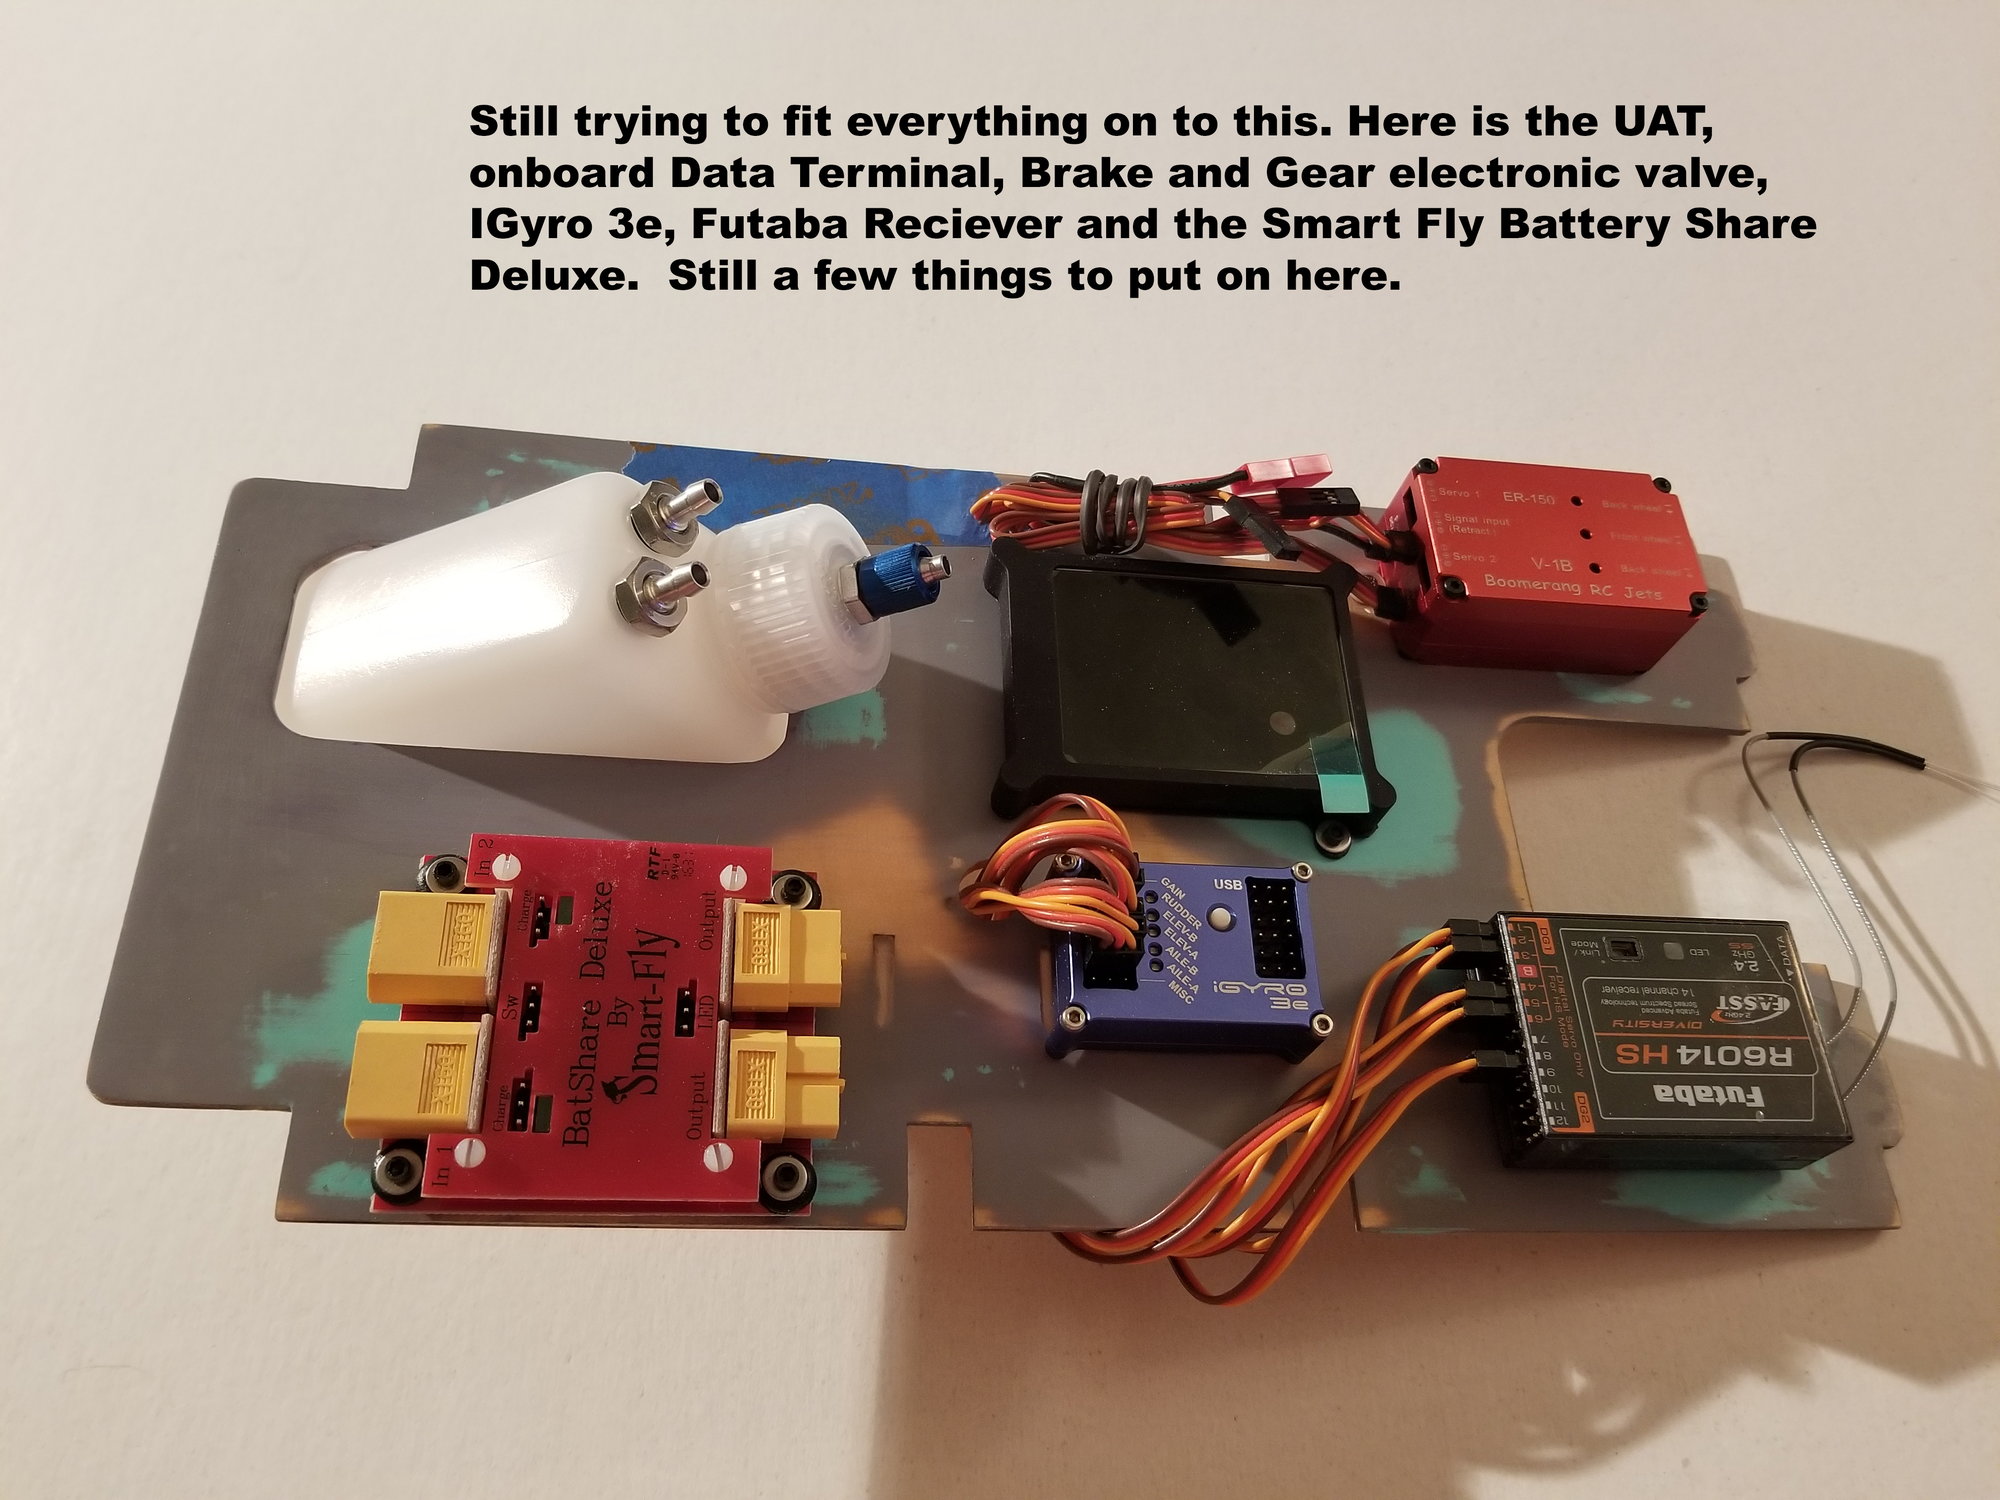
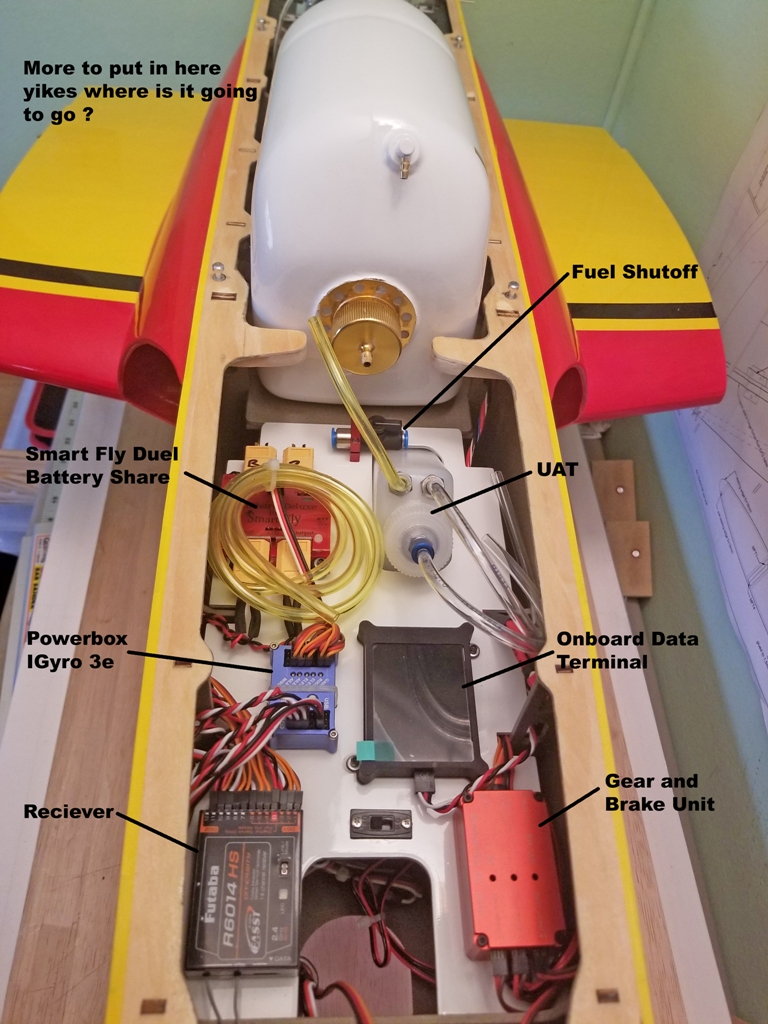
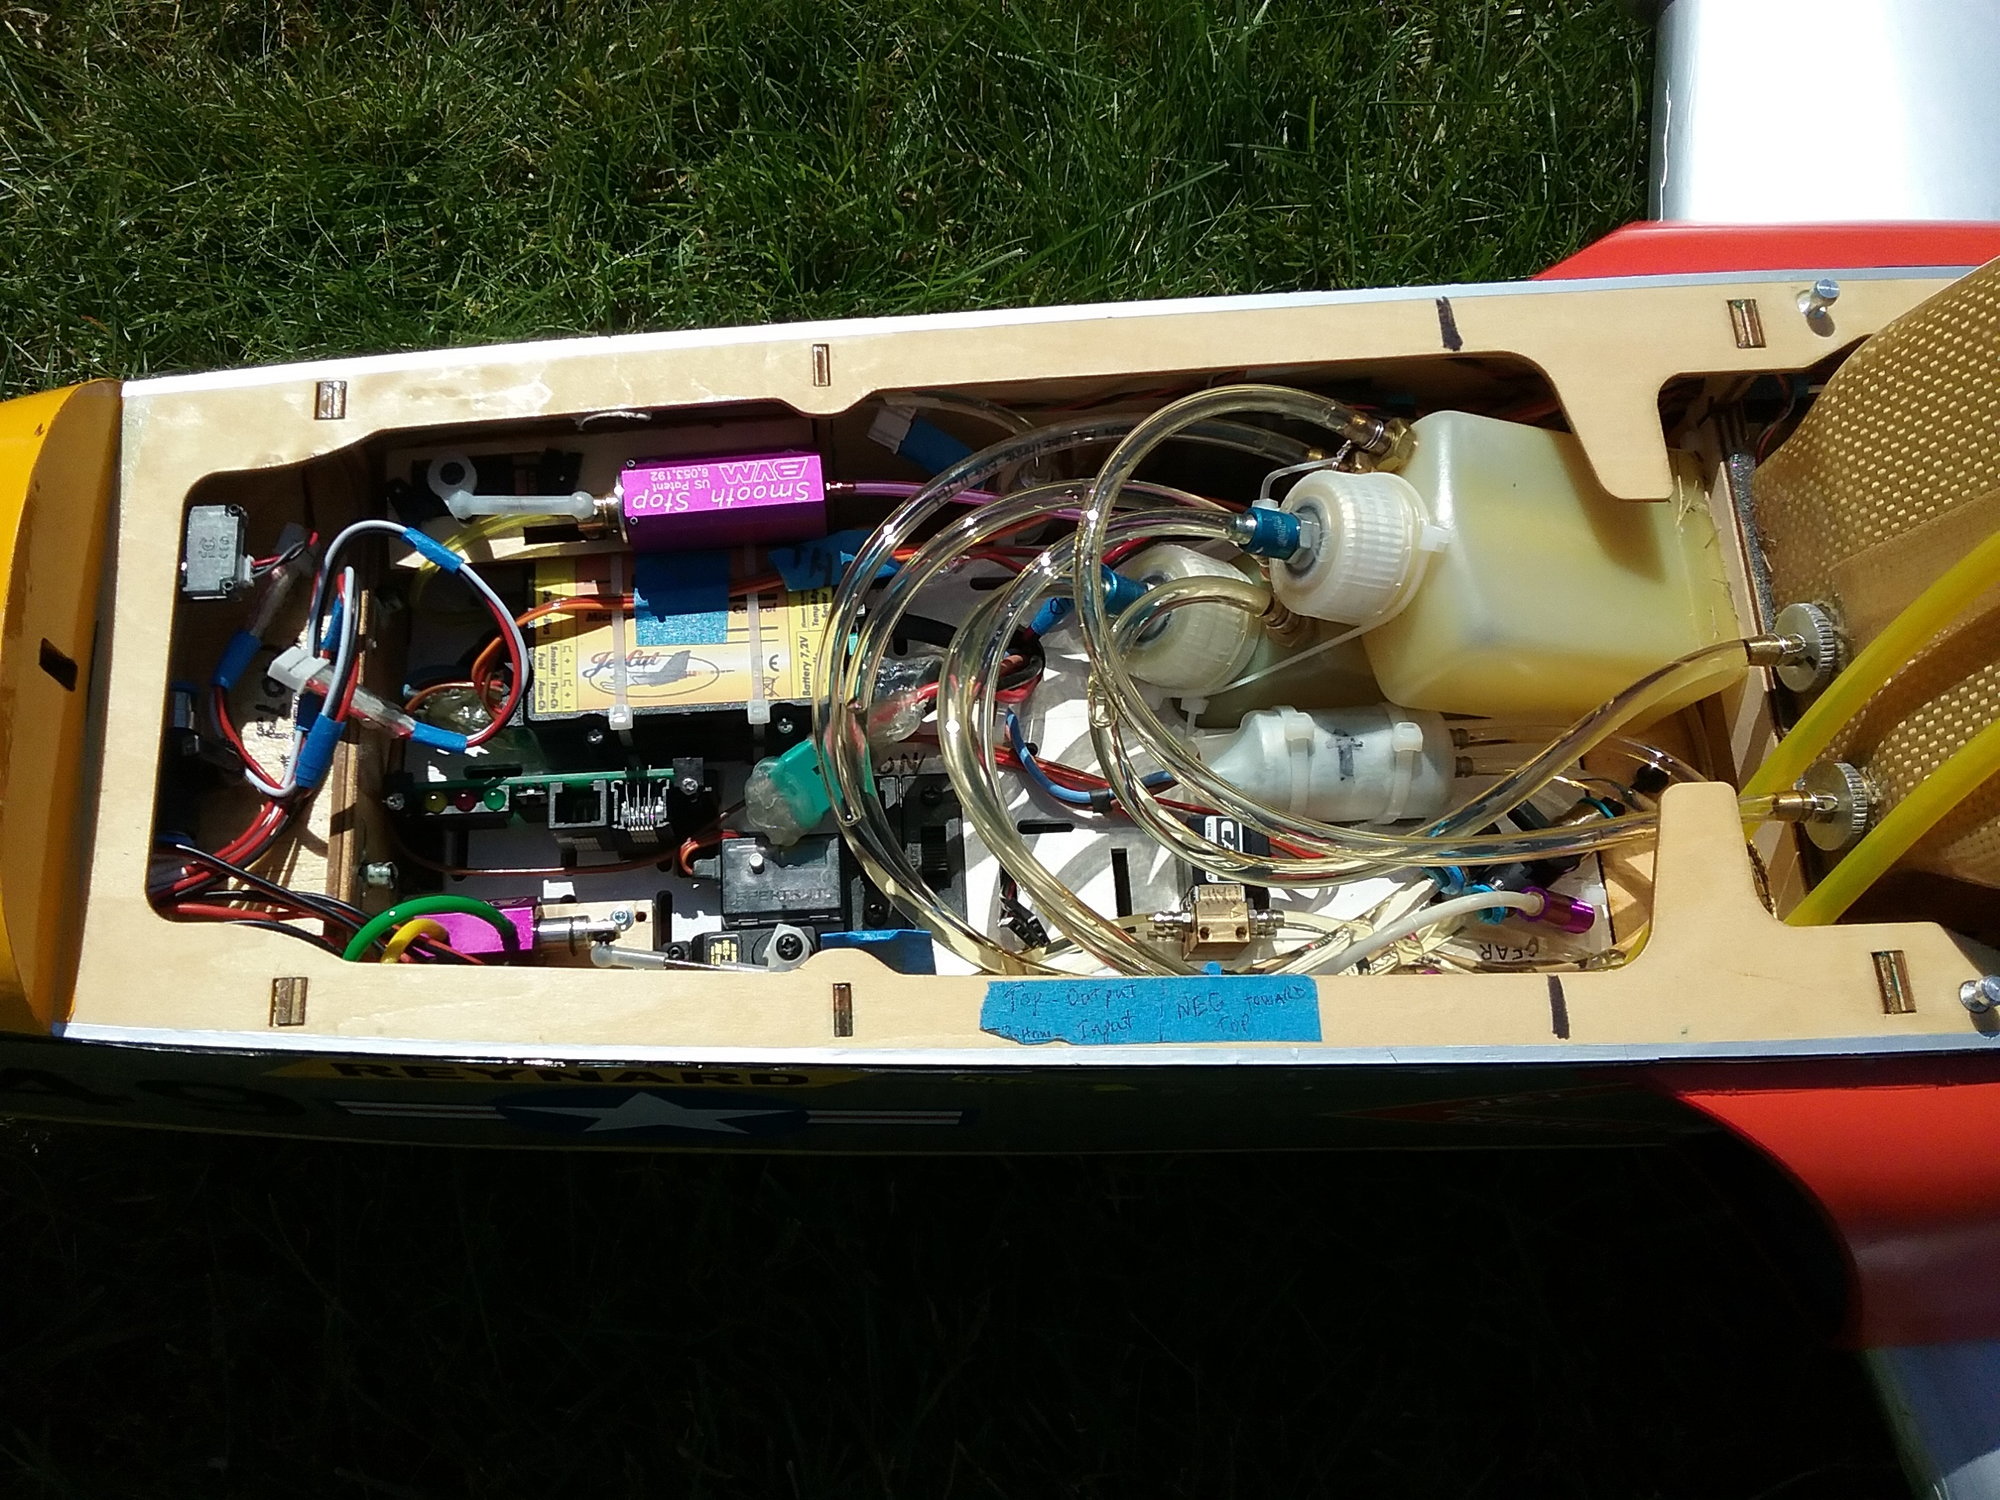
Yes after everything is hooked up it will look something like this.
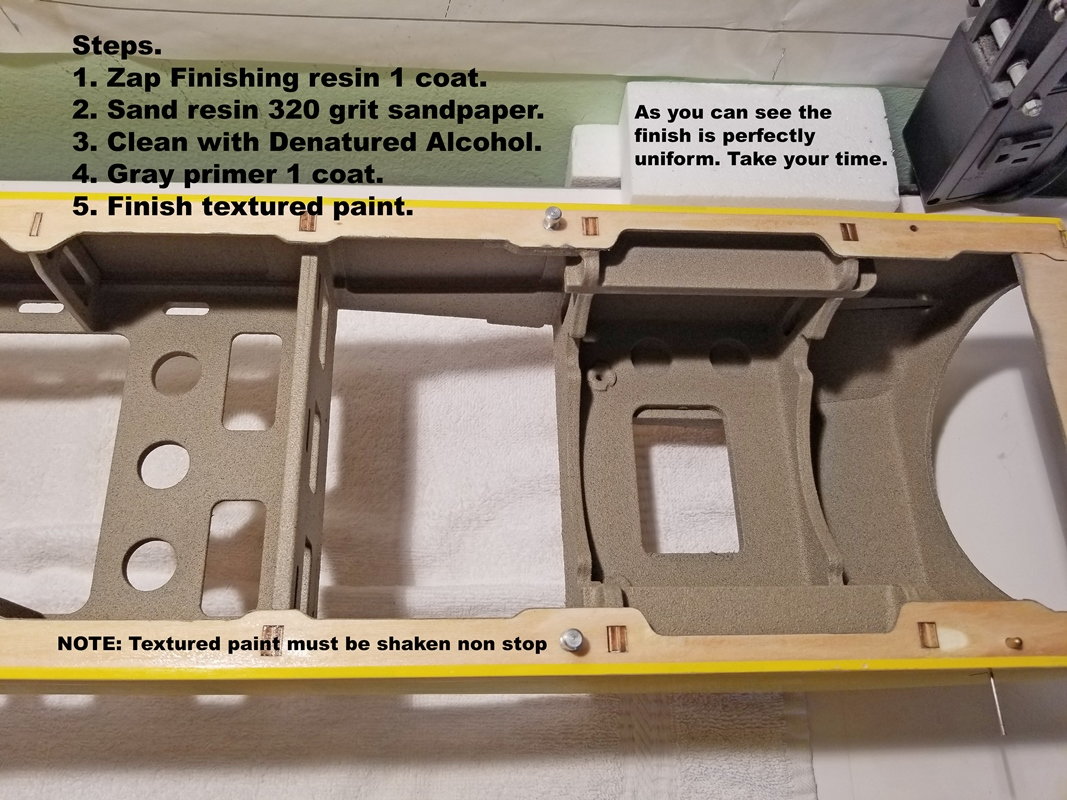
Nice interior paint job.
Surprised the nose wheel area is not enclosed on the V2 Sprint like the old one.
Keeps the wheel from kicking up junk and moisture onto the bottom of the electronics tray.
Yes after everything is hooked up it will look something like this.
Nice interior paint job.
Last edited by TJP; 12-16-2018 at 06:25 AM.
12-16-2018, 07:20 AM
#21
With electric gear, one can put a lot of the components under the deck. Makes things a lot cleaner looking. But, nice job on all the detailed work.
Also, everything you add, including paint and glue adds weight. While you can compensate for that extra weight with a rabbit, the plane still tends to come apart when you overpower it, especially when you change directions quickly. That stab will only take so much before it separates. Believe me, I know from experience.
Also, everything you add, including paint and glue adds weight. While you can compensate for that extra weight with a rabbit, the plane still tends to come apart when you overpower it, especially when you change directions quickly. That stab will only take so much before it separates. Believe me, I know from experience.


 04-21-2019, 11:45 PM
#25
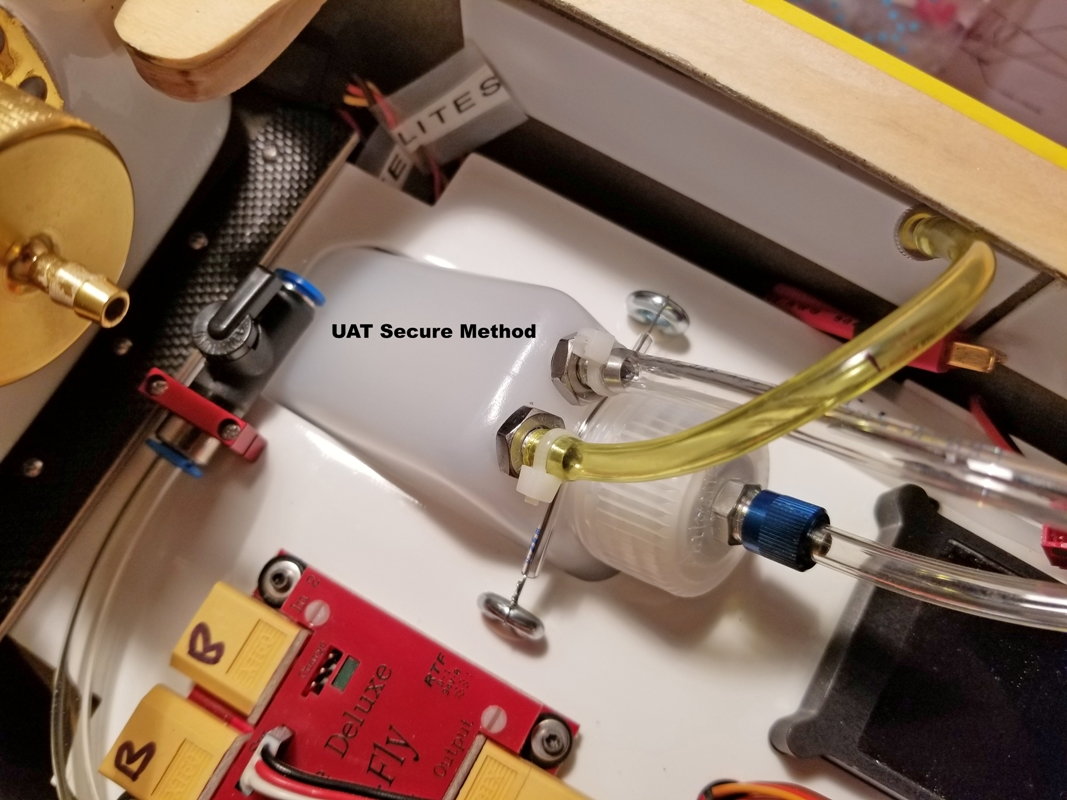
Nice install, but you should remove the tywraps and use safetywire to secure the fuel lines.
The tywraps can cause air in your fuelsystem wich can result in a flame out.
Danny
The tywraps can cause air in your fuelsystem wich can result in a flame out.
Danny

