


Byron F-16 build thread
 10-25-2018, 09:31 AM
#1

Hello all,
Yes, that is correct, this is a build thread for a Byron F-16 Ducted fan model. Before we get too far into this I'd like you to understand this is a retro build project. So before we go off on tangents such as converting to EDF or Turbine, I'd like to get that out in the open. When I was a young lad growing up and impressionable, these models were the height of technology and my dreams back then, but I didn't have the resources, experience or guidance to properly follow a project like that through then. Today, I believe we are living in a golden age. Few people are building and all the kit collectors seem to be liquidating there stock. Over time in the past few years I collected (on E bay) a totally unmolested Byron F-16 kit NIB, Byron Ducted fan unit, OS 91 large head NIB and pipe. Before Spring air went out of business last year I acquired a new retract kit from them for this kit. I've had it all on the shelf for a little over a year and now I have a clean workbench, not much money to spend on a new project and the entire winter coming up. It's a perfect storm of events to embark on this journey now.
I did something similar a few years ago - if you are from that era you may recall Dick Sarpolus and Bob Kress I built and flew a version of there Mini-F 16 located here:http://www.rcuniverse.com/forum/1-2-...ideration.html
It appears after taking inventory that I am only missing the accessory bag in the kit for the retracts and the starter wand. I'm sure if I can't find them I can make something to replace those. As far as electronics - I'll use my current equipment. I'll put my Jeti DC24 with some telemetry (airspeed / RPM) in it.
To regress for a moment, the thought of converting this to a turbine, after initially dismissing it as ridiculous, did come back across my mind. This model always had a good reputation as a good flier if not under powered, and if I can snag another kit for $600 it's a heck of alot cheaper then $2K for a Comp ARF....
And EDF I dismissed. There are ton of great flying EDF kits out there I would just go ahead and purchase. It makes no sense to me to bash this kit to convert it to EDF.
For background I am an IMAC pilot for more than 10 years now and have a strong interest in old turn around pattern planes (Glow and pipe). I'm sure a turbine is in my near future.
This is a nostalgic trip down memory lane for me and if there is much interest past this point I'll keep posting updates and pictures and you all are more than welcome to come along. The Mini F-16 build was very satisfying and while it's flying performance was not all that great (which I expected), I expect much more from this project.
Here is some Eye candy....
Regards,
Rick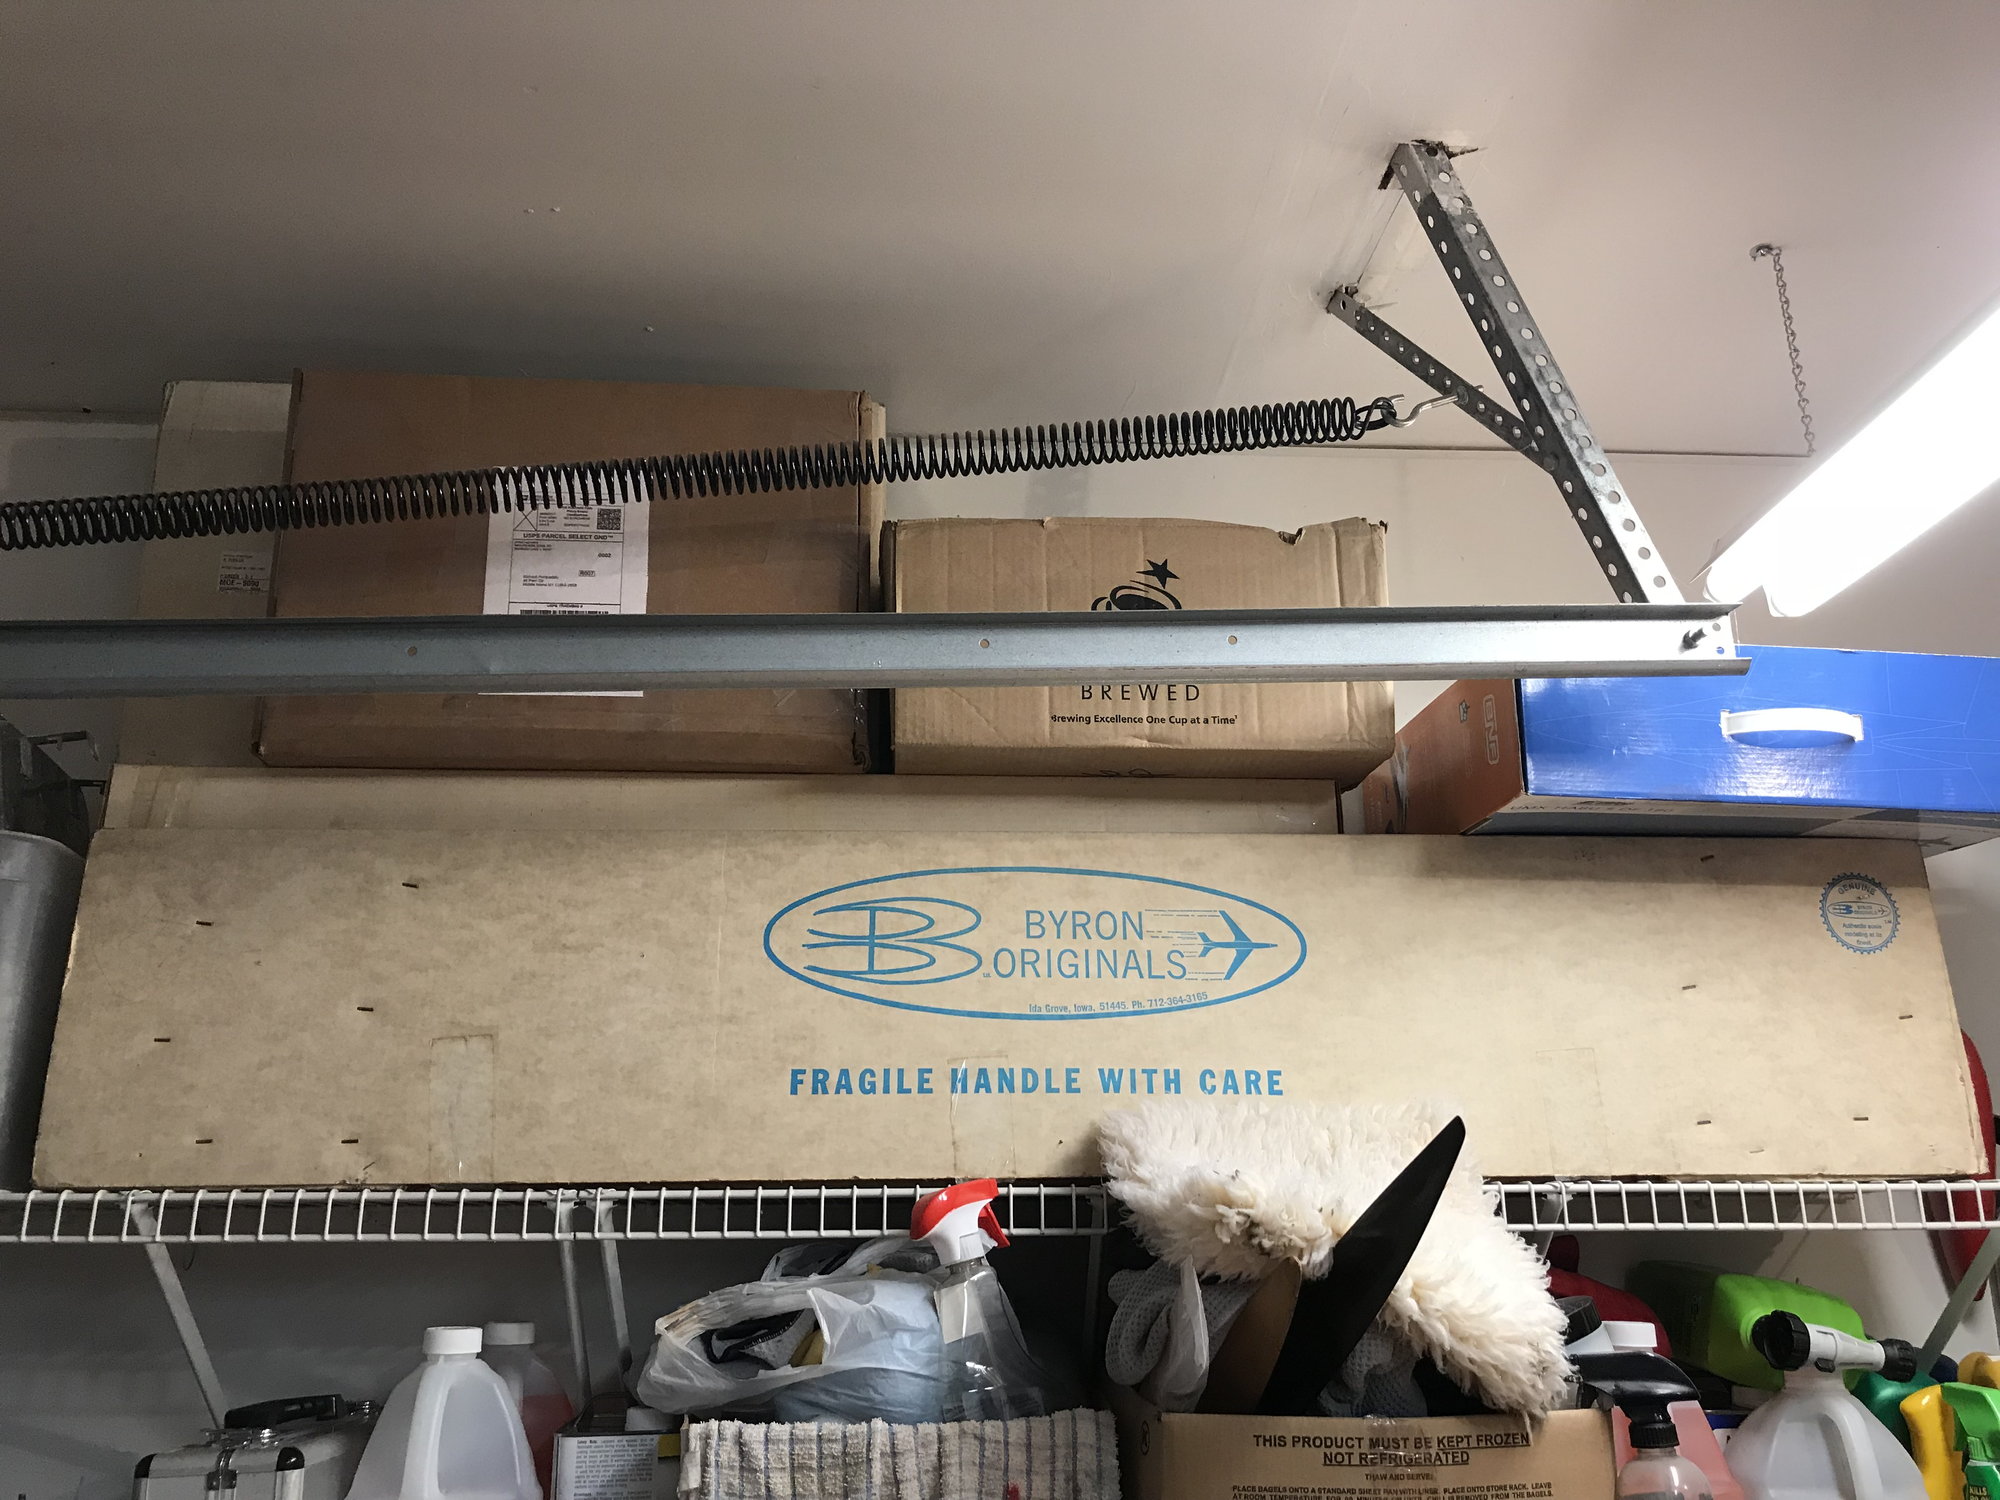
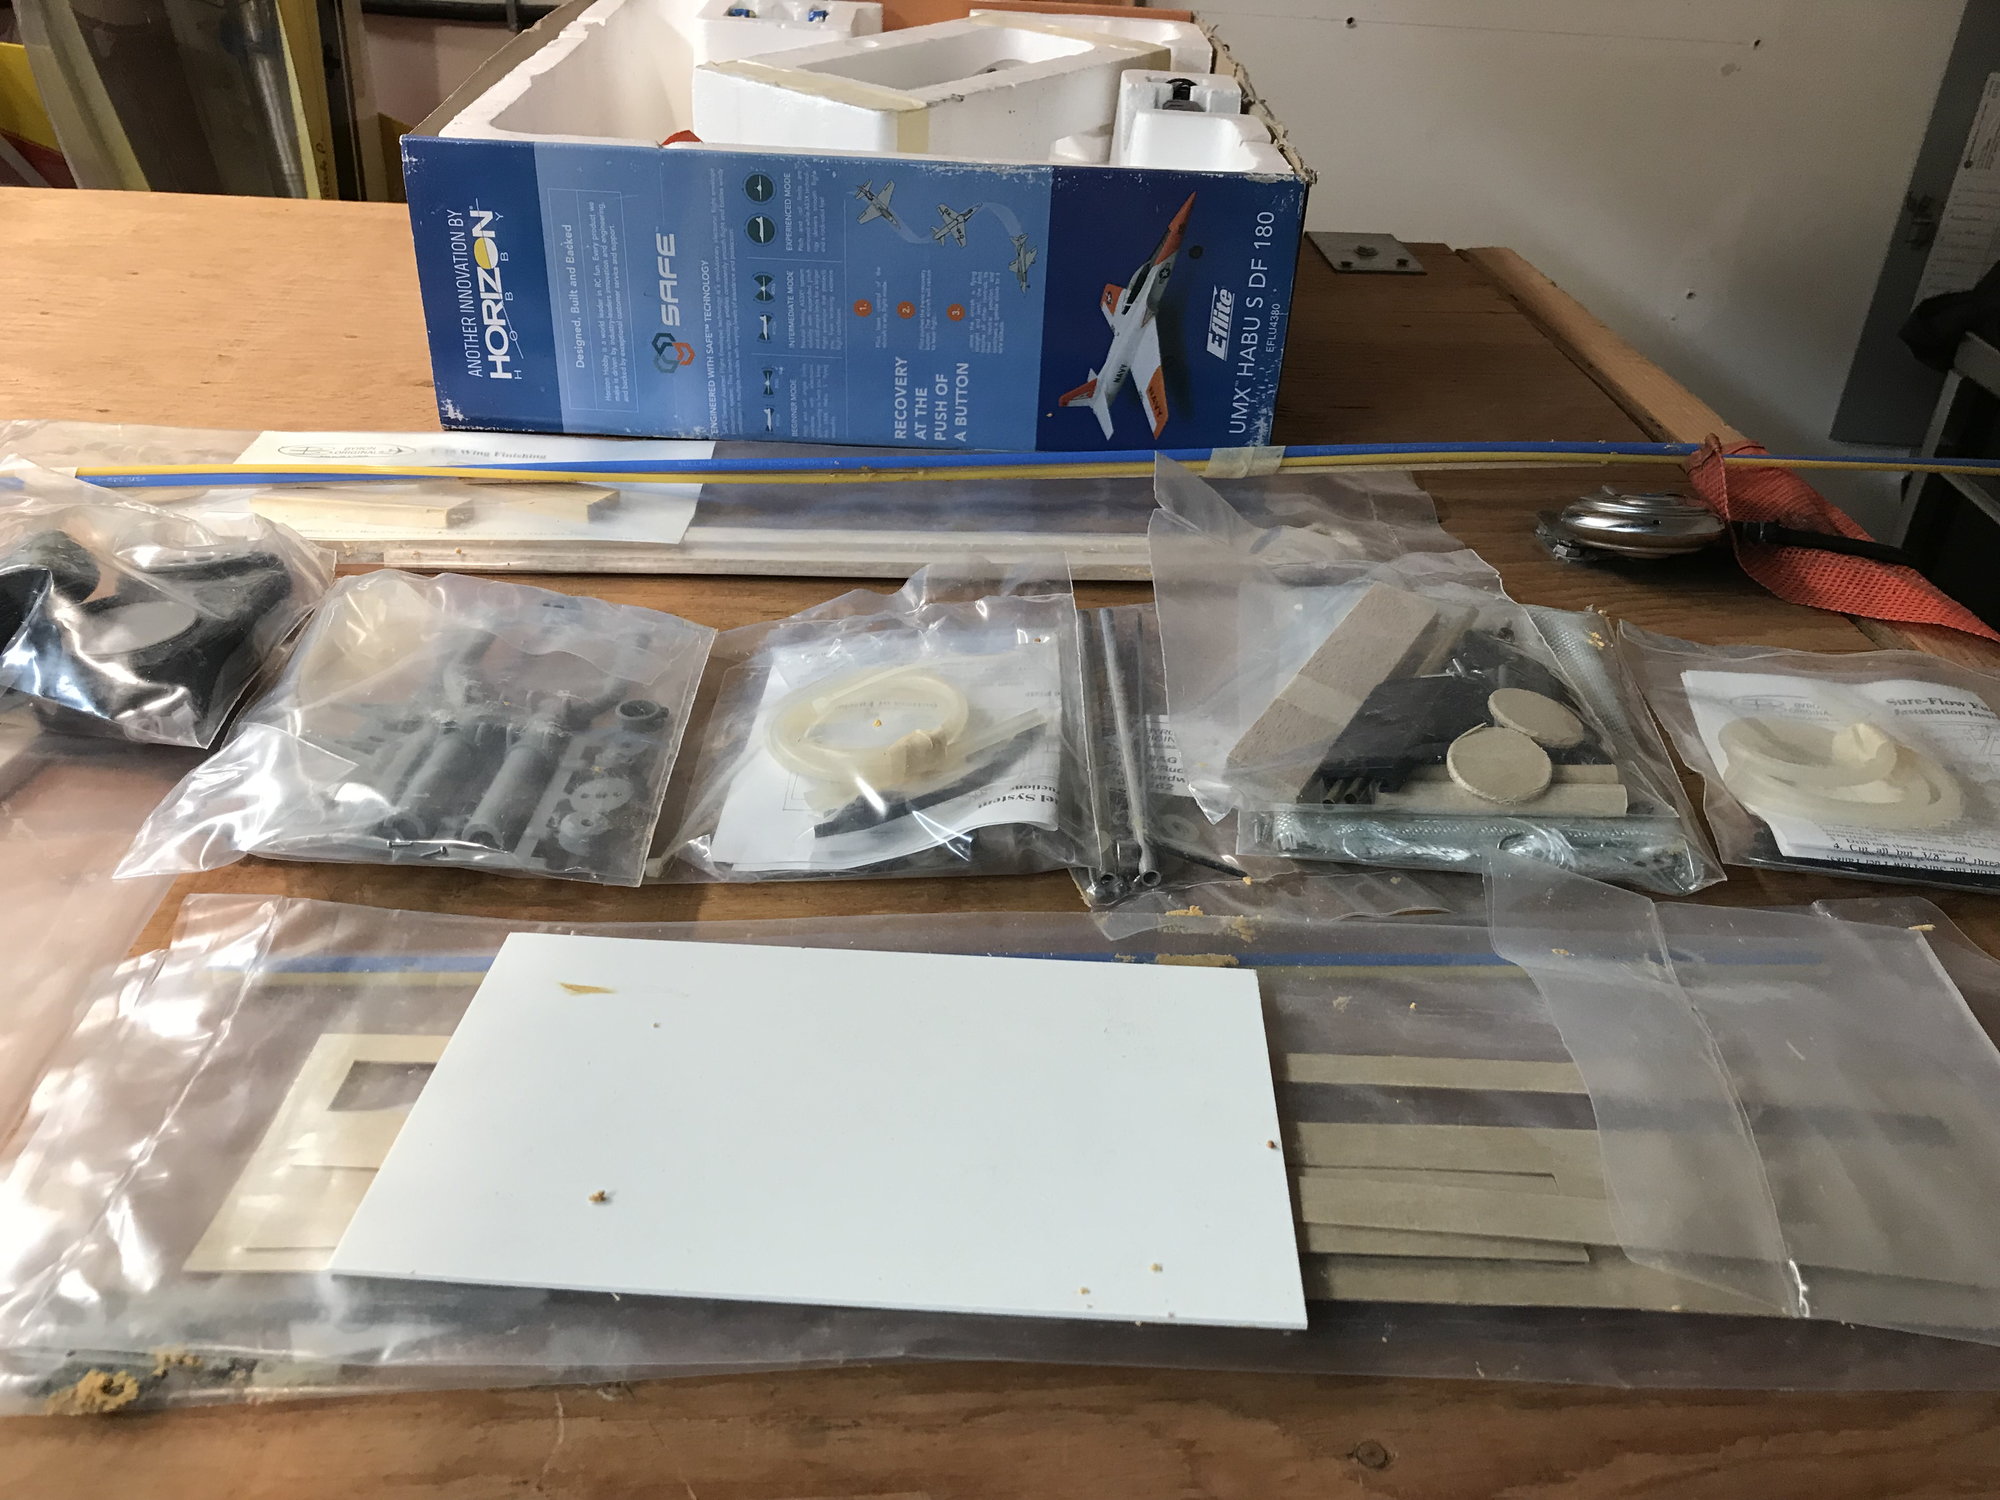
Where the kit sat for a year on the shelf contemplating life...
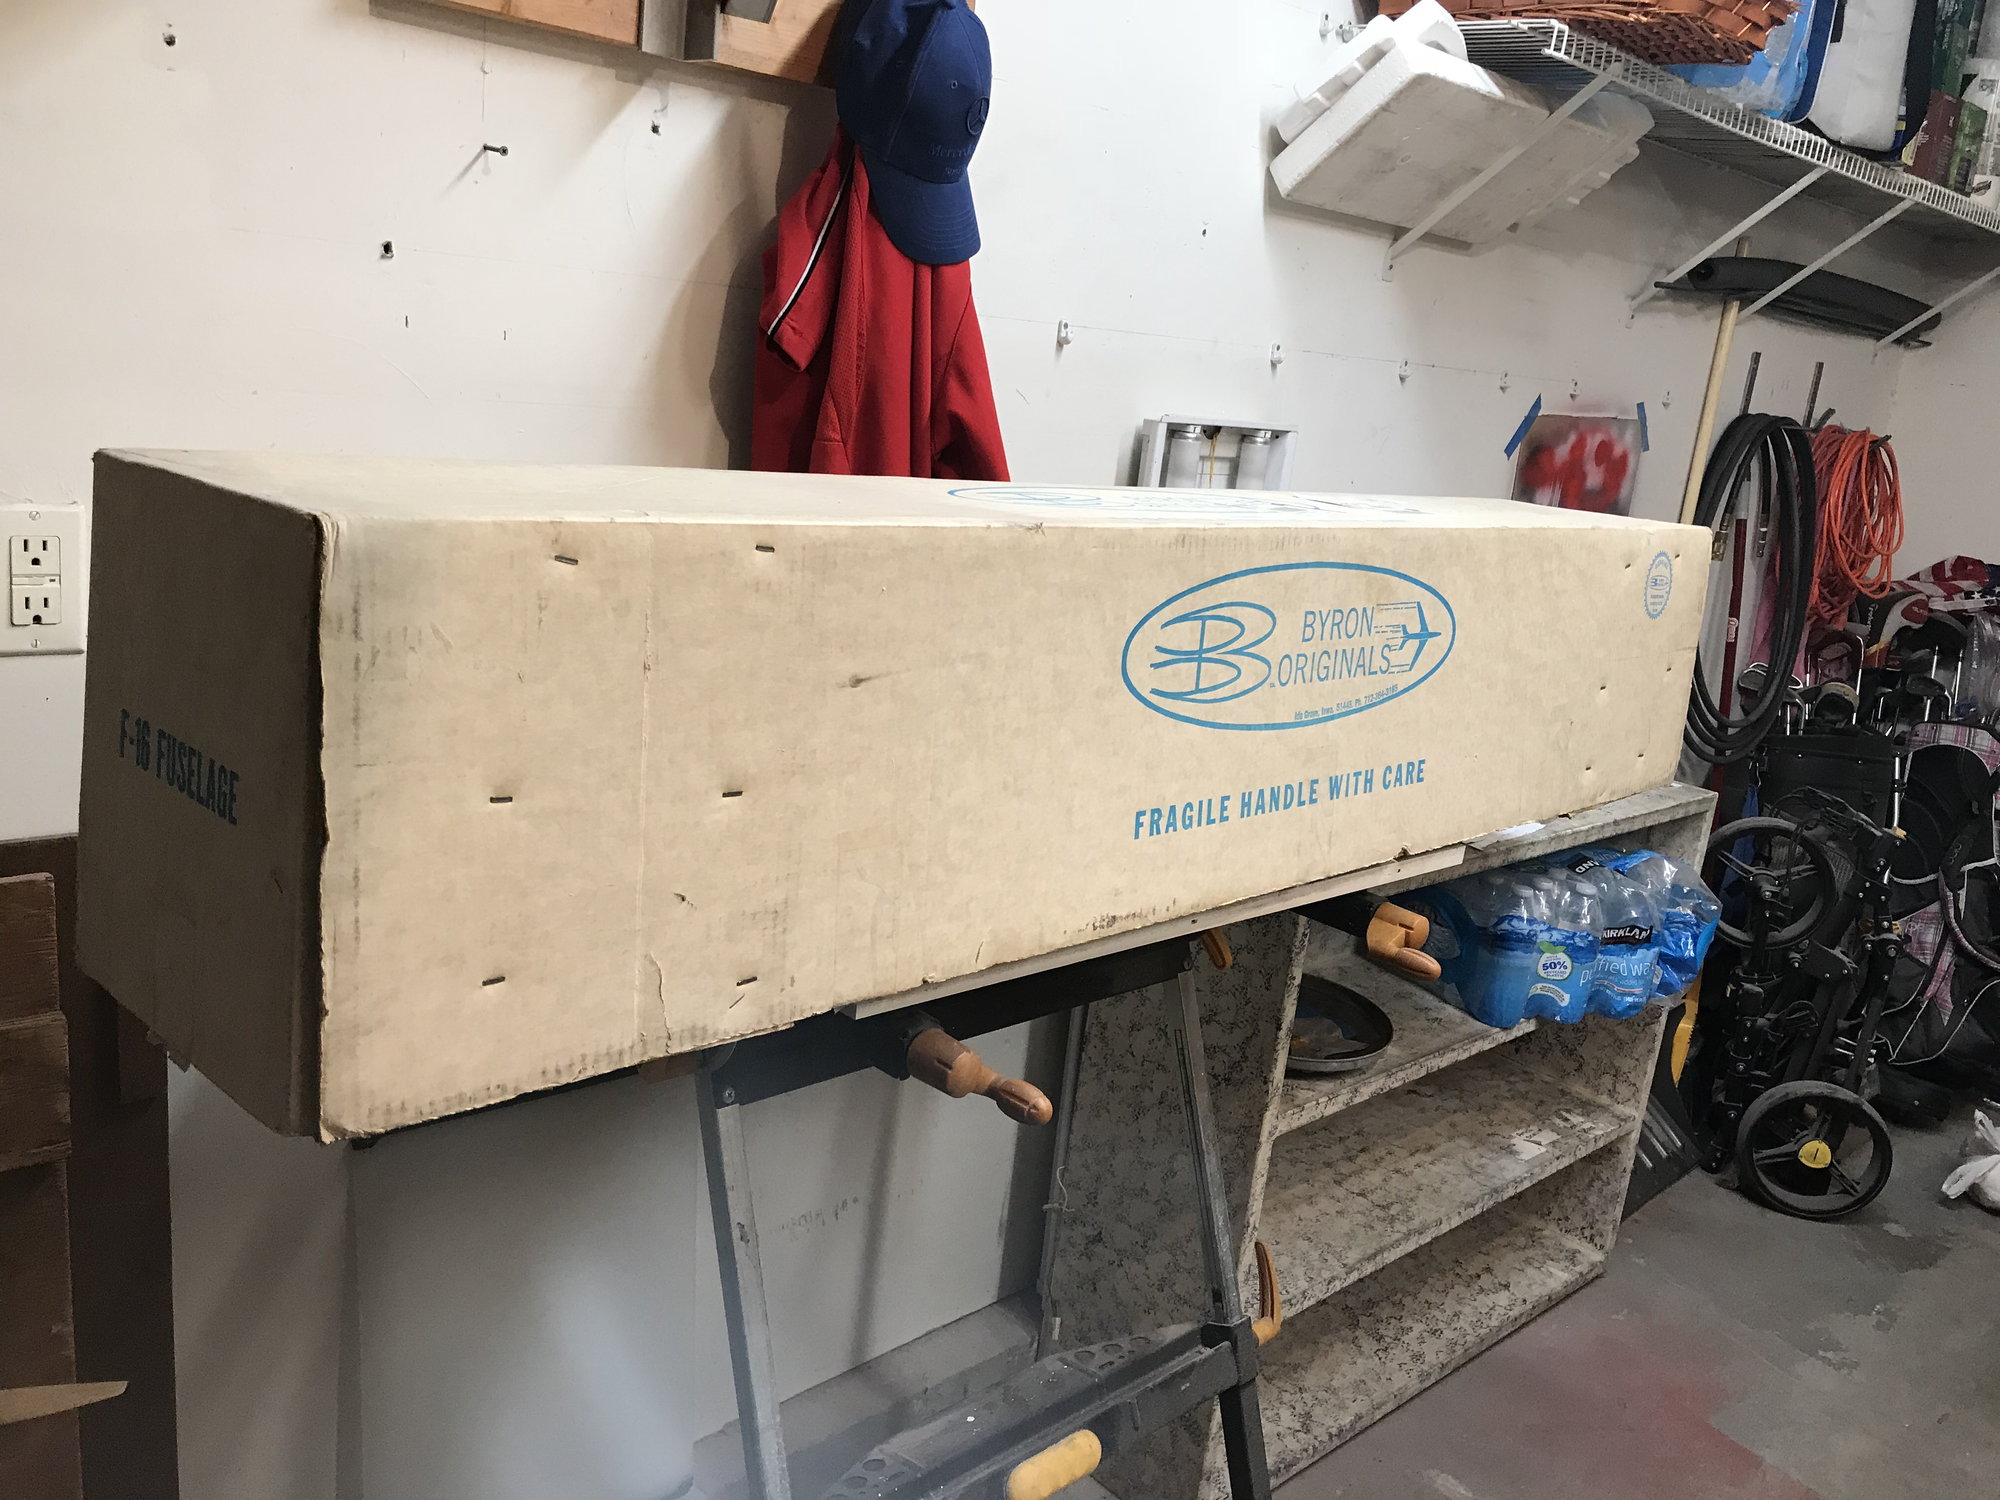
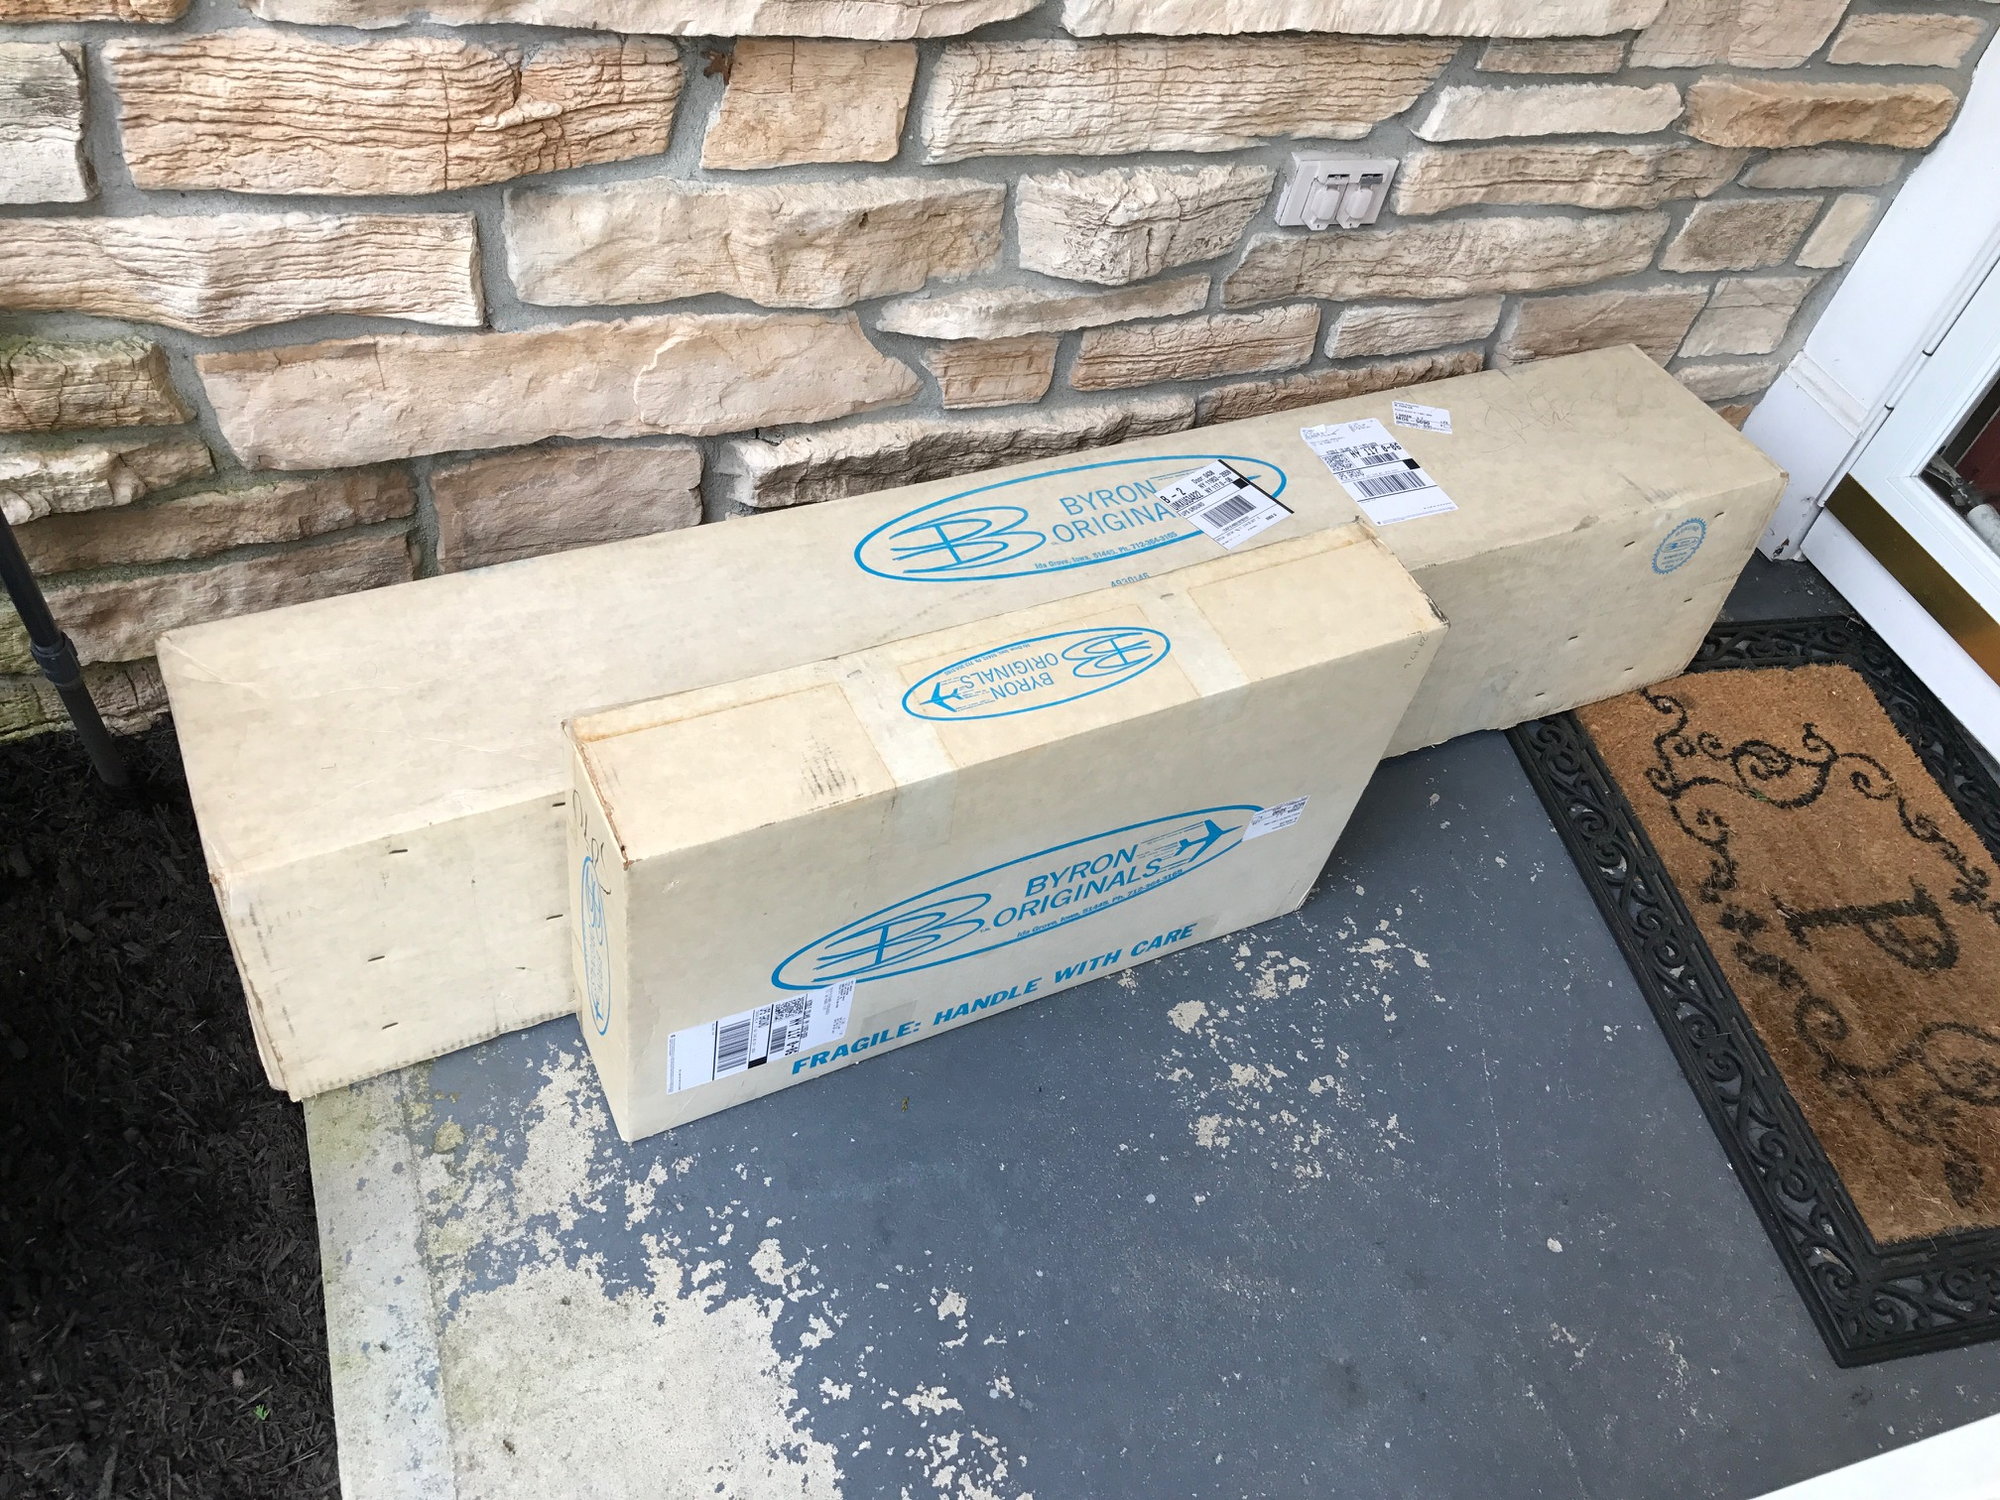
Slightly out of order, sorry. This is the day the kit arrived on my doorstop after purchasing from E-bay.
Yes, that is correct, this is a build thread for a Byron F-16 Ducted fan model. Before we get too far into this I'd like you to understand this is a retro build project. So before we go off on tangents such as converting to EDF or Turbine, I'd like to get that out in the open. When I was a young lad growing up and impressionable, these models were the height of technology and my dreams back then, but I didn't have the resources, experience or guidance to properly follow a project like that through then. Today, I believe we are living in a golden age. Few people are building and all the kit collectors seem to be liquidating there stock. Over time in the past few years I collected (on E bay) a totally unmolested Byron F-16 kit NIB, Byron Ducted fan unit, OS 91 large head NIB and pipe. Before Spring air went out of business last year I acquired a new retract kit from them for this kit. I've had it all on the shelf for a little over a year and now I have a clean workbench, not much money to spend on a new project and the entire winter coming up. It's a perfect storm of events to embark on this journey now.
I did something similar a few years ago - if you are from that era you may recall Dick Sarpolus and Bob Kress I built and flew a version of there Mini-F 16 located here:http://www.rcuniverse.com/forum/1-2-...ideration.html
It appears after taking inventory that I am only missing the accessory bag in the kit for the retracts and the starter wand. I'm sure if I can't find them I can make something to replace those. As far as electronics - I'll use my current equipment. I'll put my Jeti DC24 with some telemetry (airspeed / RPM) in it.
To regress for a moment, the thought of converting this to a turbine, after initially dismissing it as ridiculous, did come back across my mind. This model always had a good reputation as a good flier if not under powered, and if I can snag another kit for $600 it's a heck of alot cheaper then $2K for a Comp ARF....
And EDF I dismissed. There are ton of great flying EDF kits out there I would just go ahead and purchase. It makes no sense to me to bash this kit to convert it to EDF.
For background I am an IMAC pilot for more than 10 years now and have a strong interest in old turn around pattern planes (Glow and pipe). I'm sure a turbine is in my near future.
This is a nostalgic trip down memory lane for me and if there is much interest past this point I'll keep posting updates and pictures and you all are more than welcome to come along. The Mini F-16 build was very satisfying and while it's flying performance was not all that great (which I expected), I expect much more from this project.
Here is some Eye candy....
Regards,
Rick
Where the kit sat for a year on the shelf contemplating life...
Slightly out of order, sorry. This is the day the kit arrived on my doorstop after purchasing from E-bay.
 10-25-2018, 09:40 AM
#2
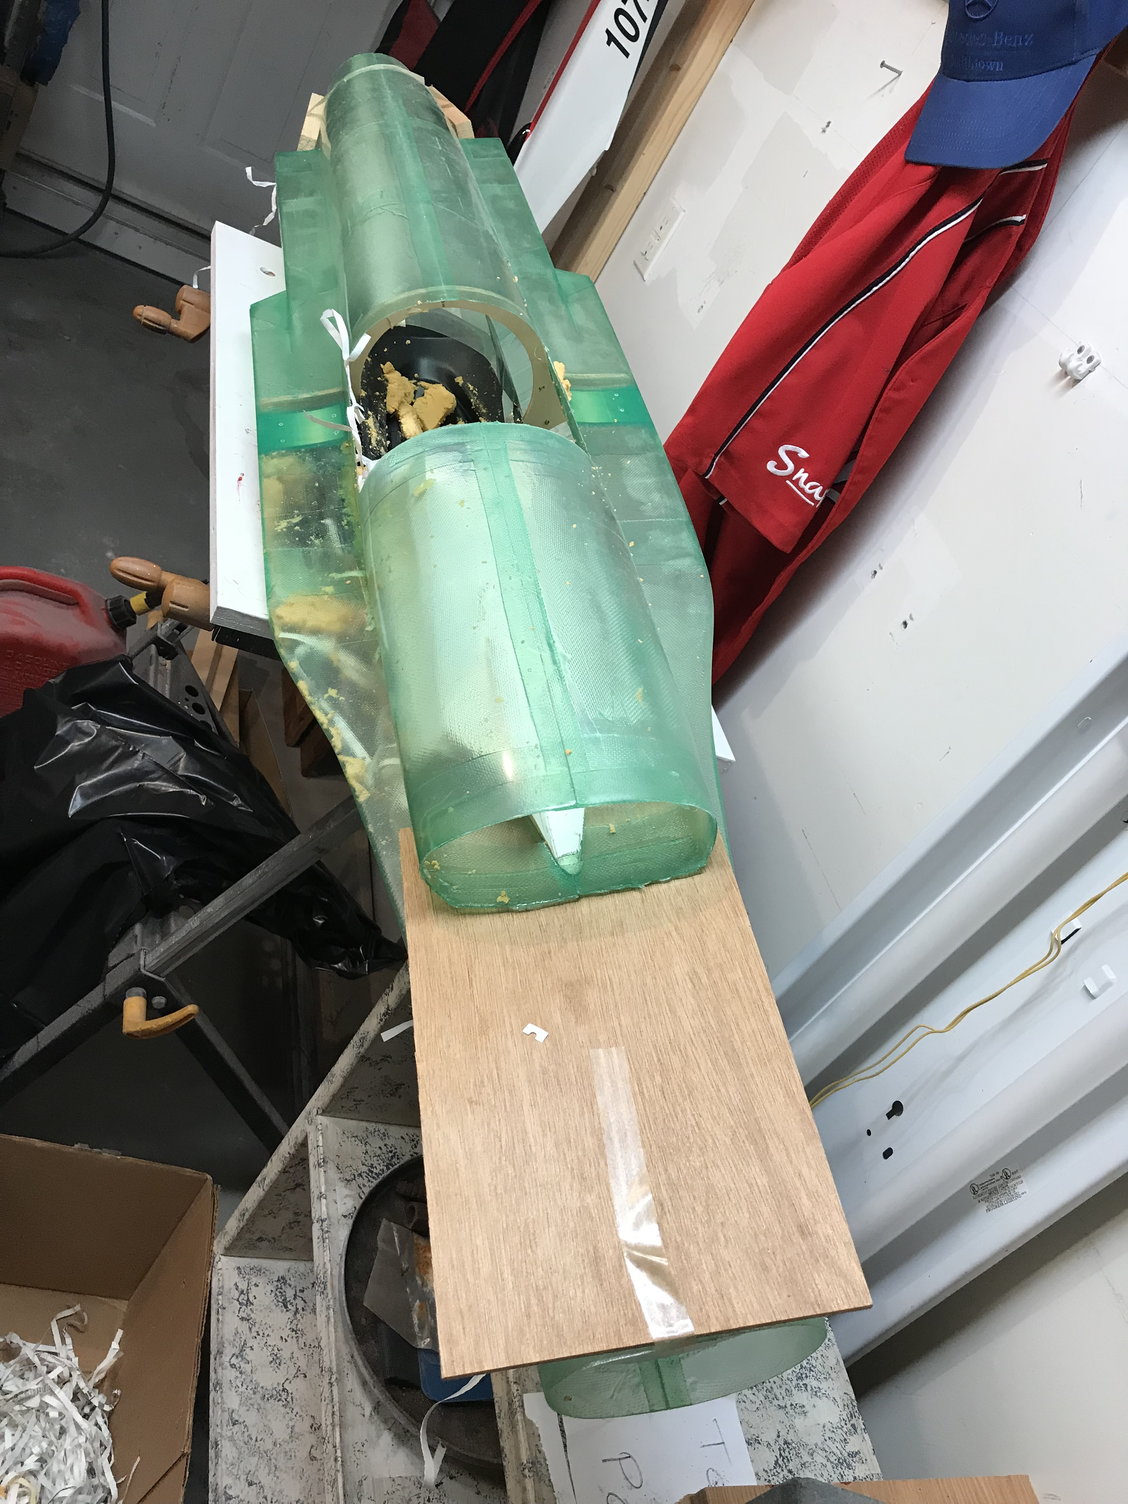
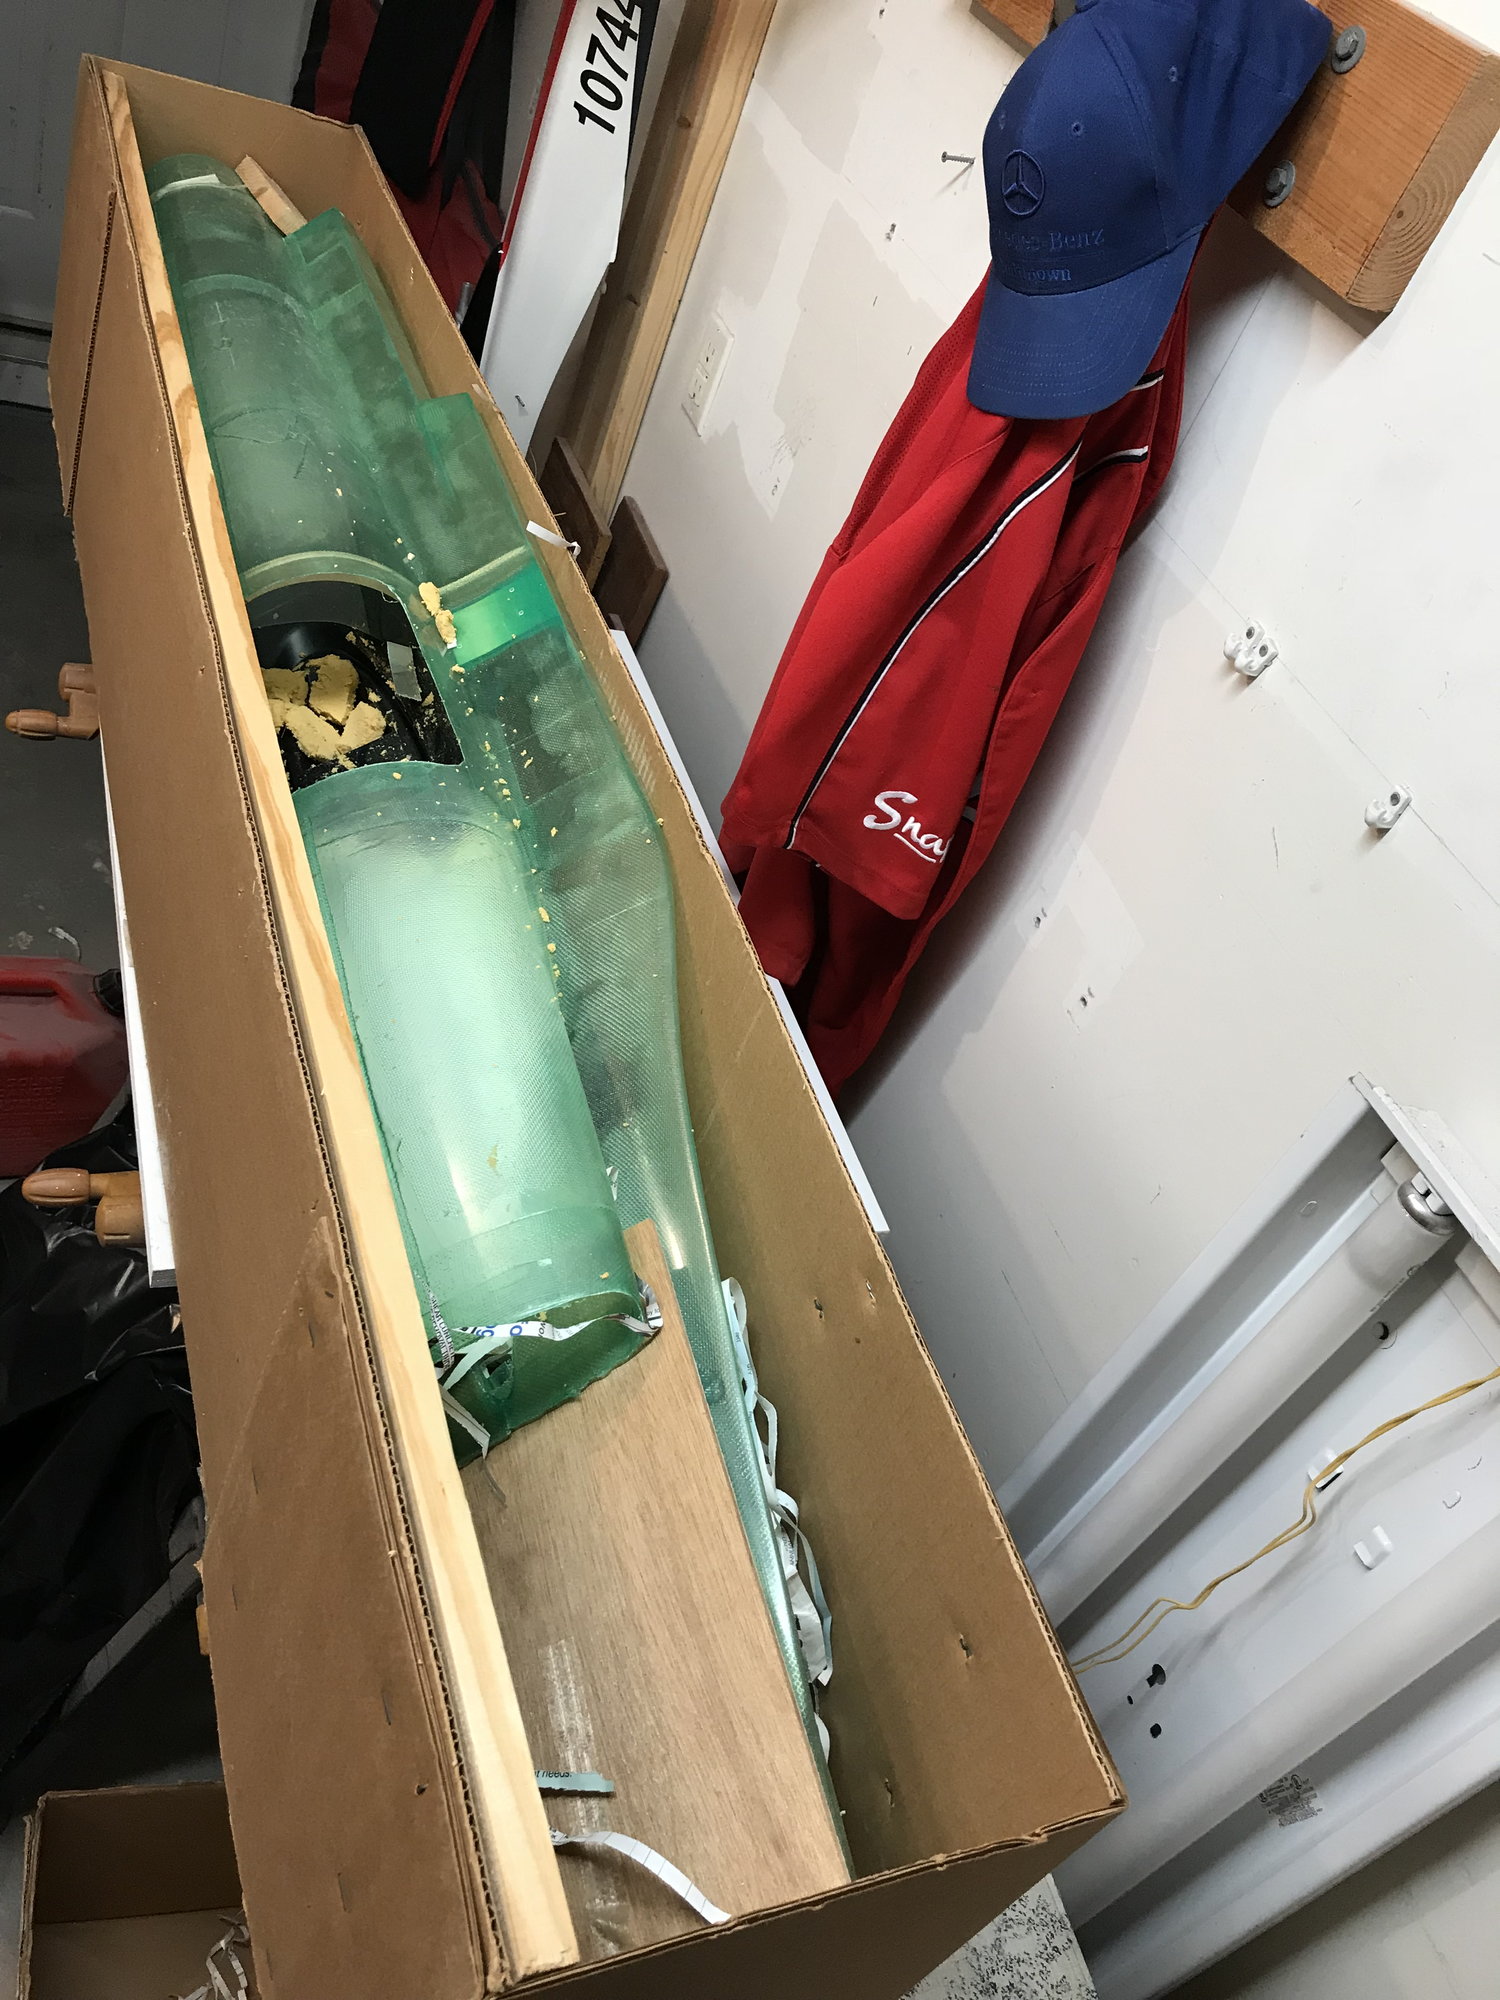
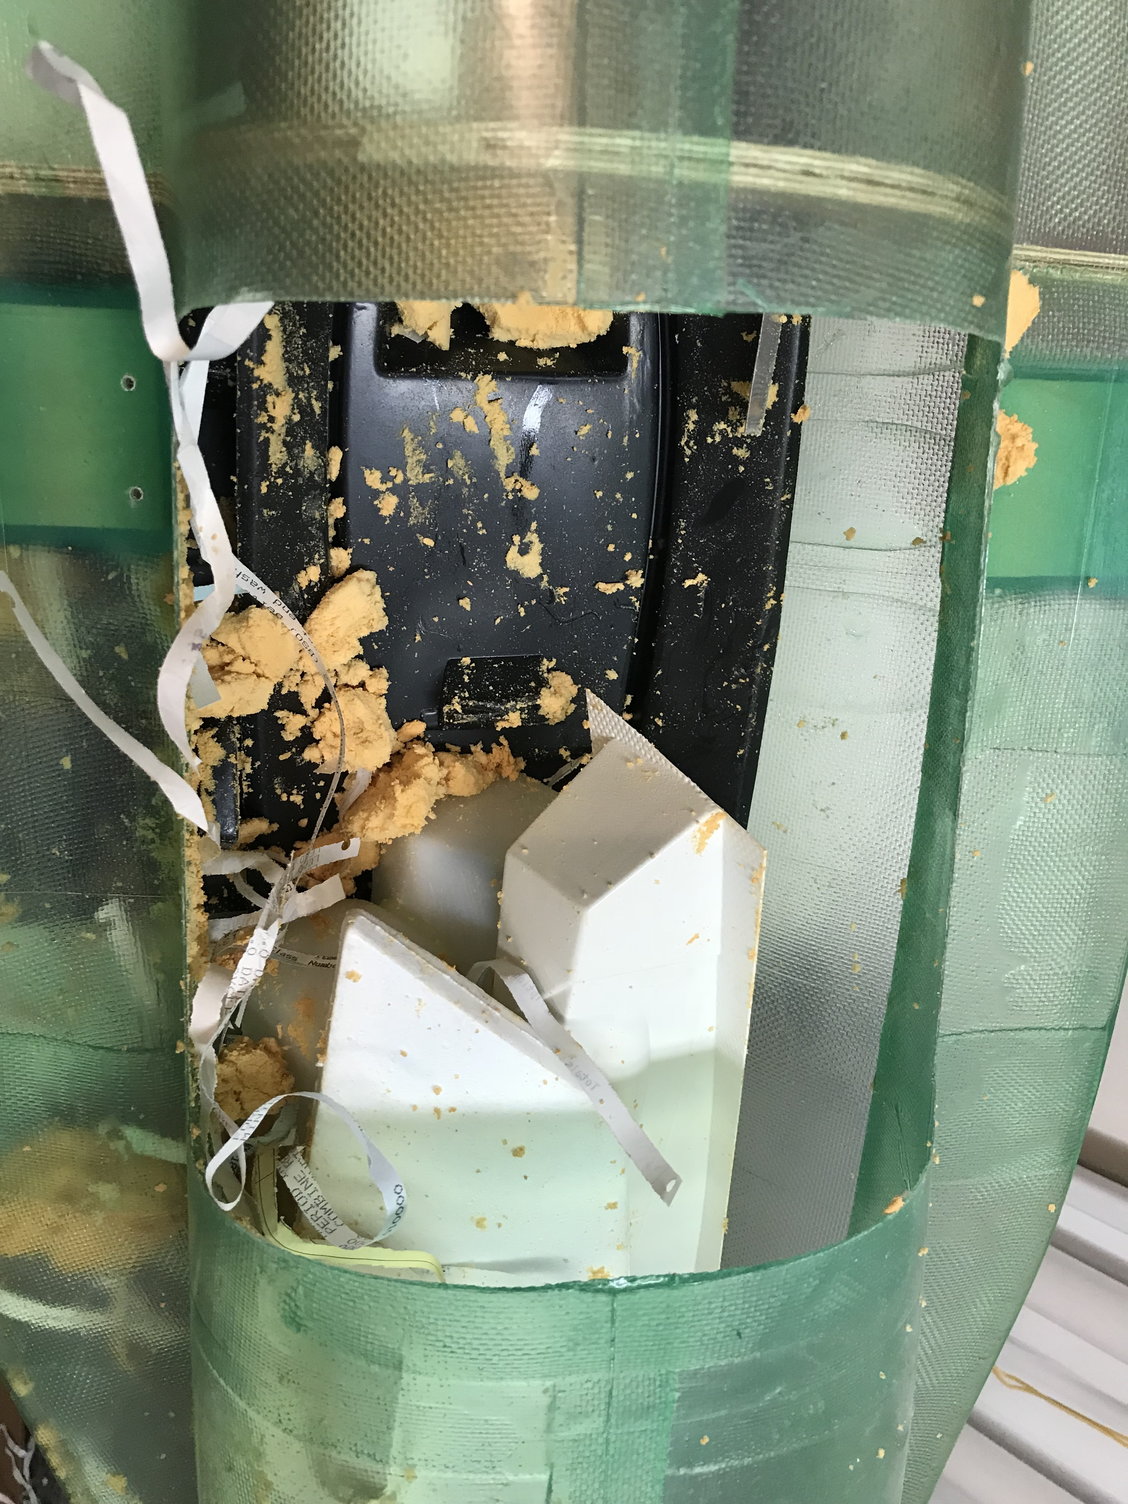
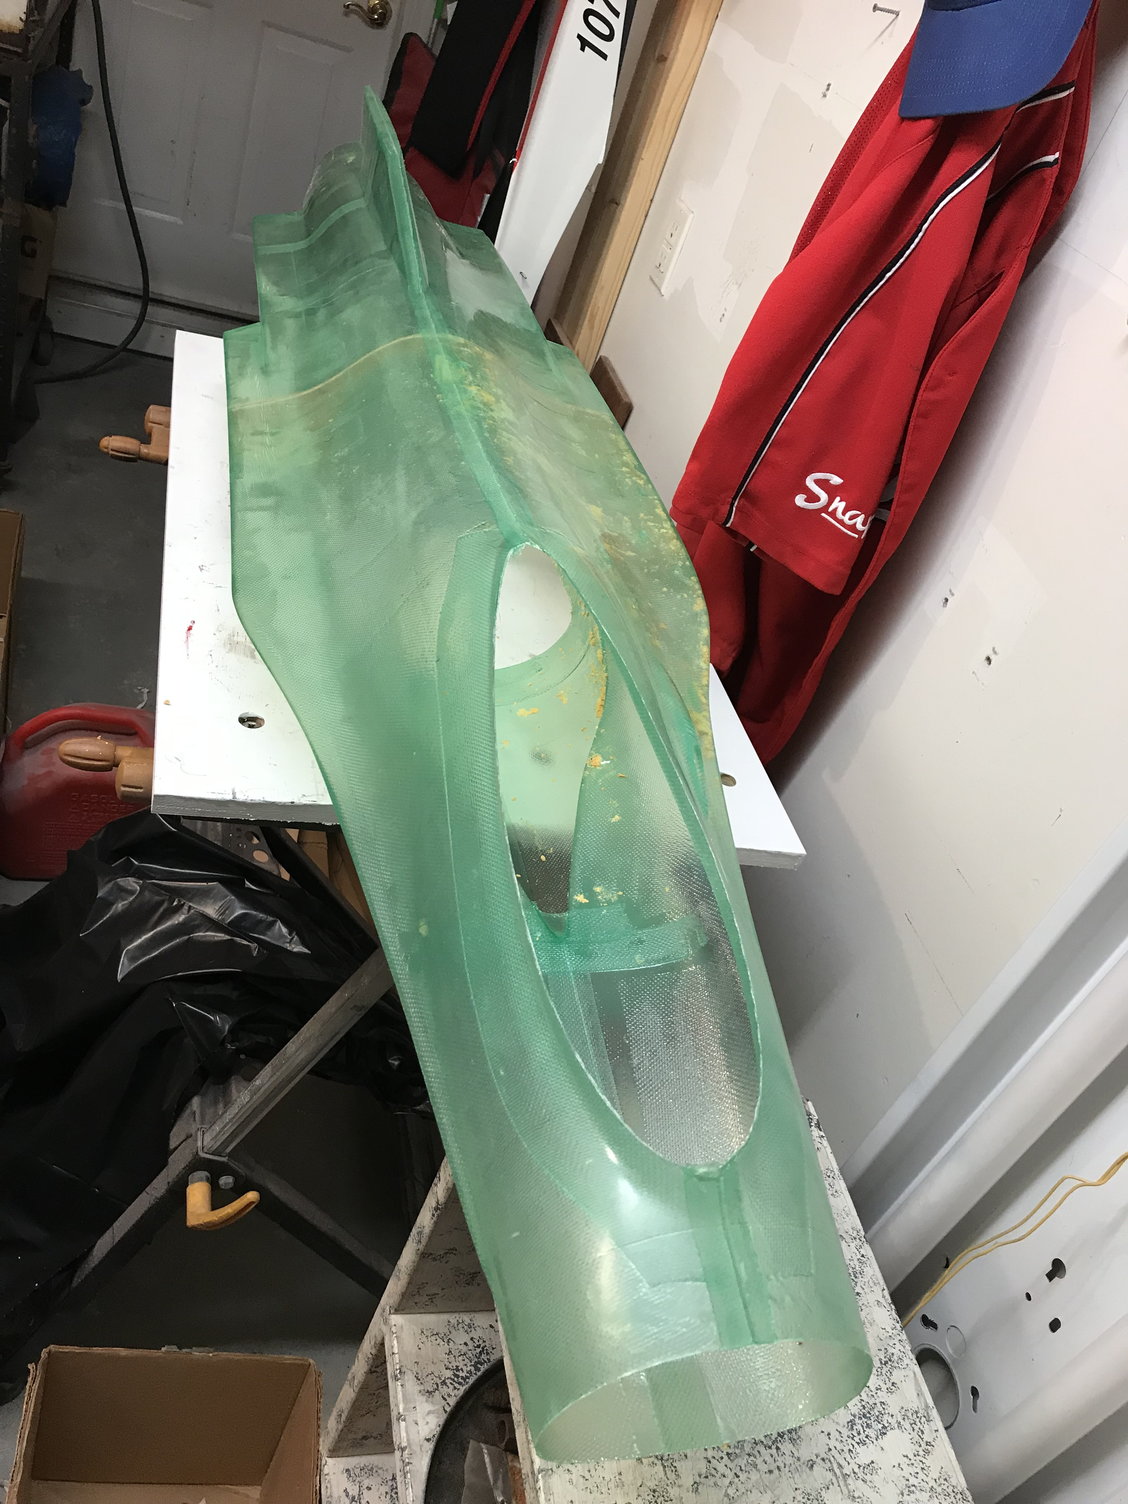
Upon unpacking the kit I found this nasty old yellow deteriorated foam all over everything. It was a mess and difficult to clean off. It required a solvent to remove and you may be aware that solvent on anything other than the fiberglass just wont work and I didn't even want to stress the fiberglass that much so I just really used soap and water and elbow grease, but what a mess.
Is there anyone out there from this era? What the heck was that yellow foam for??? I have to assume it was padding for around the fuel tank they intended on you using for mounting inside the model. 25 years later its a big mess.
RP
Is there anyone out there from this era? What the heck was that yellow foam for??? I have to assume it was padding for around the fuel tank they intended on you using for mounting inside the model. 25 years later its a big mess.
RP
10-25-2018, 11:20 AM
#3


Join Date: Oct 2006
Location: Zebulon,
NC
Posts: 309
Likes: 0
Received 0 Likes
on
0 Posts
Wow, I was just taken back to 1980! The Byron F-16 was my first successful ducted fan jet and it was way beyond its time for that period. I'll be following along just for the nostalgia! Good luck and it should be a fun journey!
10-25-2018, 11:26 AM
#4


I used to have one that was built by a friend. He sheeted all of the foam surfaces with 1/64th ply and glassed and painted it. If I remember right, it weighed around 15 & 1/2 pounds. It flew good but would not get off our grass runway on real hot days.
A few weeks ago, I pulled a partially built one (not by me) out of my attic and have started building it. I will be converting this one to a Dynamax fan and OS.91. I purchased an inlet that was designed for that conversion almost 20 years ago, when I acquired the kit.
I think there would be some out there that would like to see your build. I know I would.


 10-26-2018, 04:46 AM
#7
I used to have one that was built by a friend. He sheeted all of the foam surfaces with 1/64th ply and glassed and painted it. If I remember right, it weighed around 15 & 1/2 pounds. It flew good but would not get off our grass runway on real hot days.
A few weeks ago, I pulled a partially built one (not by me) out of my attic and have started building it. I will be converting this one to a Dynamax fan and OS.91. I purchased an inlet that was designed for that conversion almost 20 years ago, when I acquired the kit.
I think there would be some out there that would like to see your build. I know I would.
A few weeks ago, I pulled a partially built one (not by me) out of my attic and have started building it. I will be converting this one to a Dynamax fan and OS.91. I purchased an inlet that was designed for that conversion almost 20 years ago, when I acquired the kit.
I think there would be some out there that would like to see your build. I know I would.
The Dynamax fan should give you even more thrust, that would be a great conversion. If you have any info / pics you can share I would appreciate it.
Sheeting and glassing the foam I am sure gave it an awesome finish, but with 10 lbs thrust I think we need to keep this as light as possible. I'm working on finding a sealer for the foam so I can paint it directly, I don't know how realistic it is but the instructions say it should come out around 11 1/2 lbs?
RP
 10-26-2018, 04:51 AM
#9
Hi Guys,
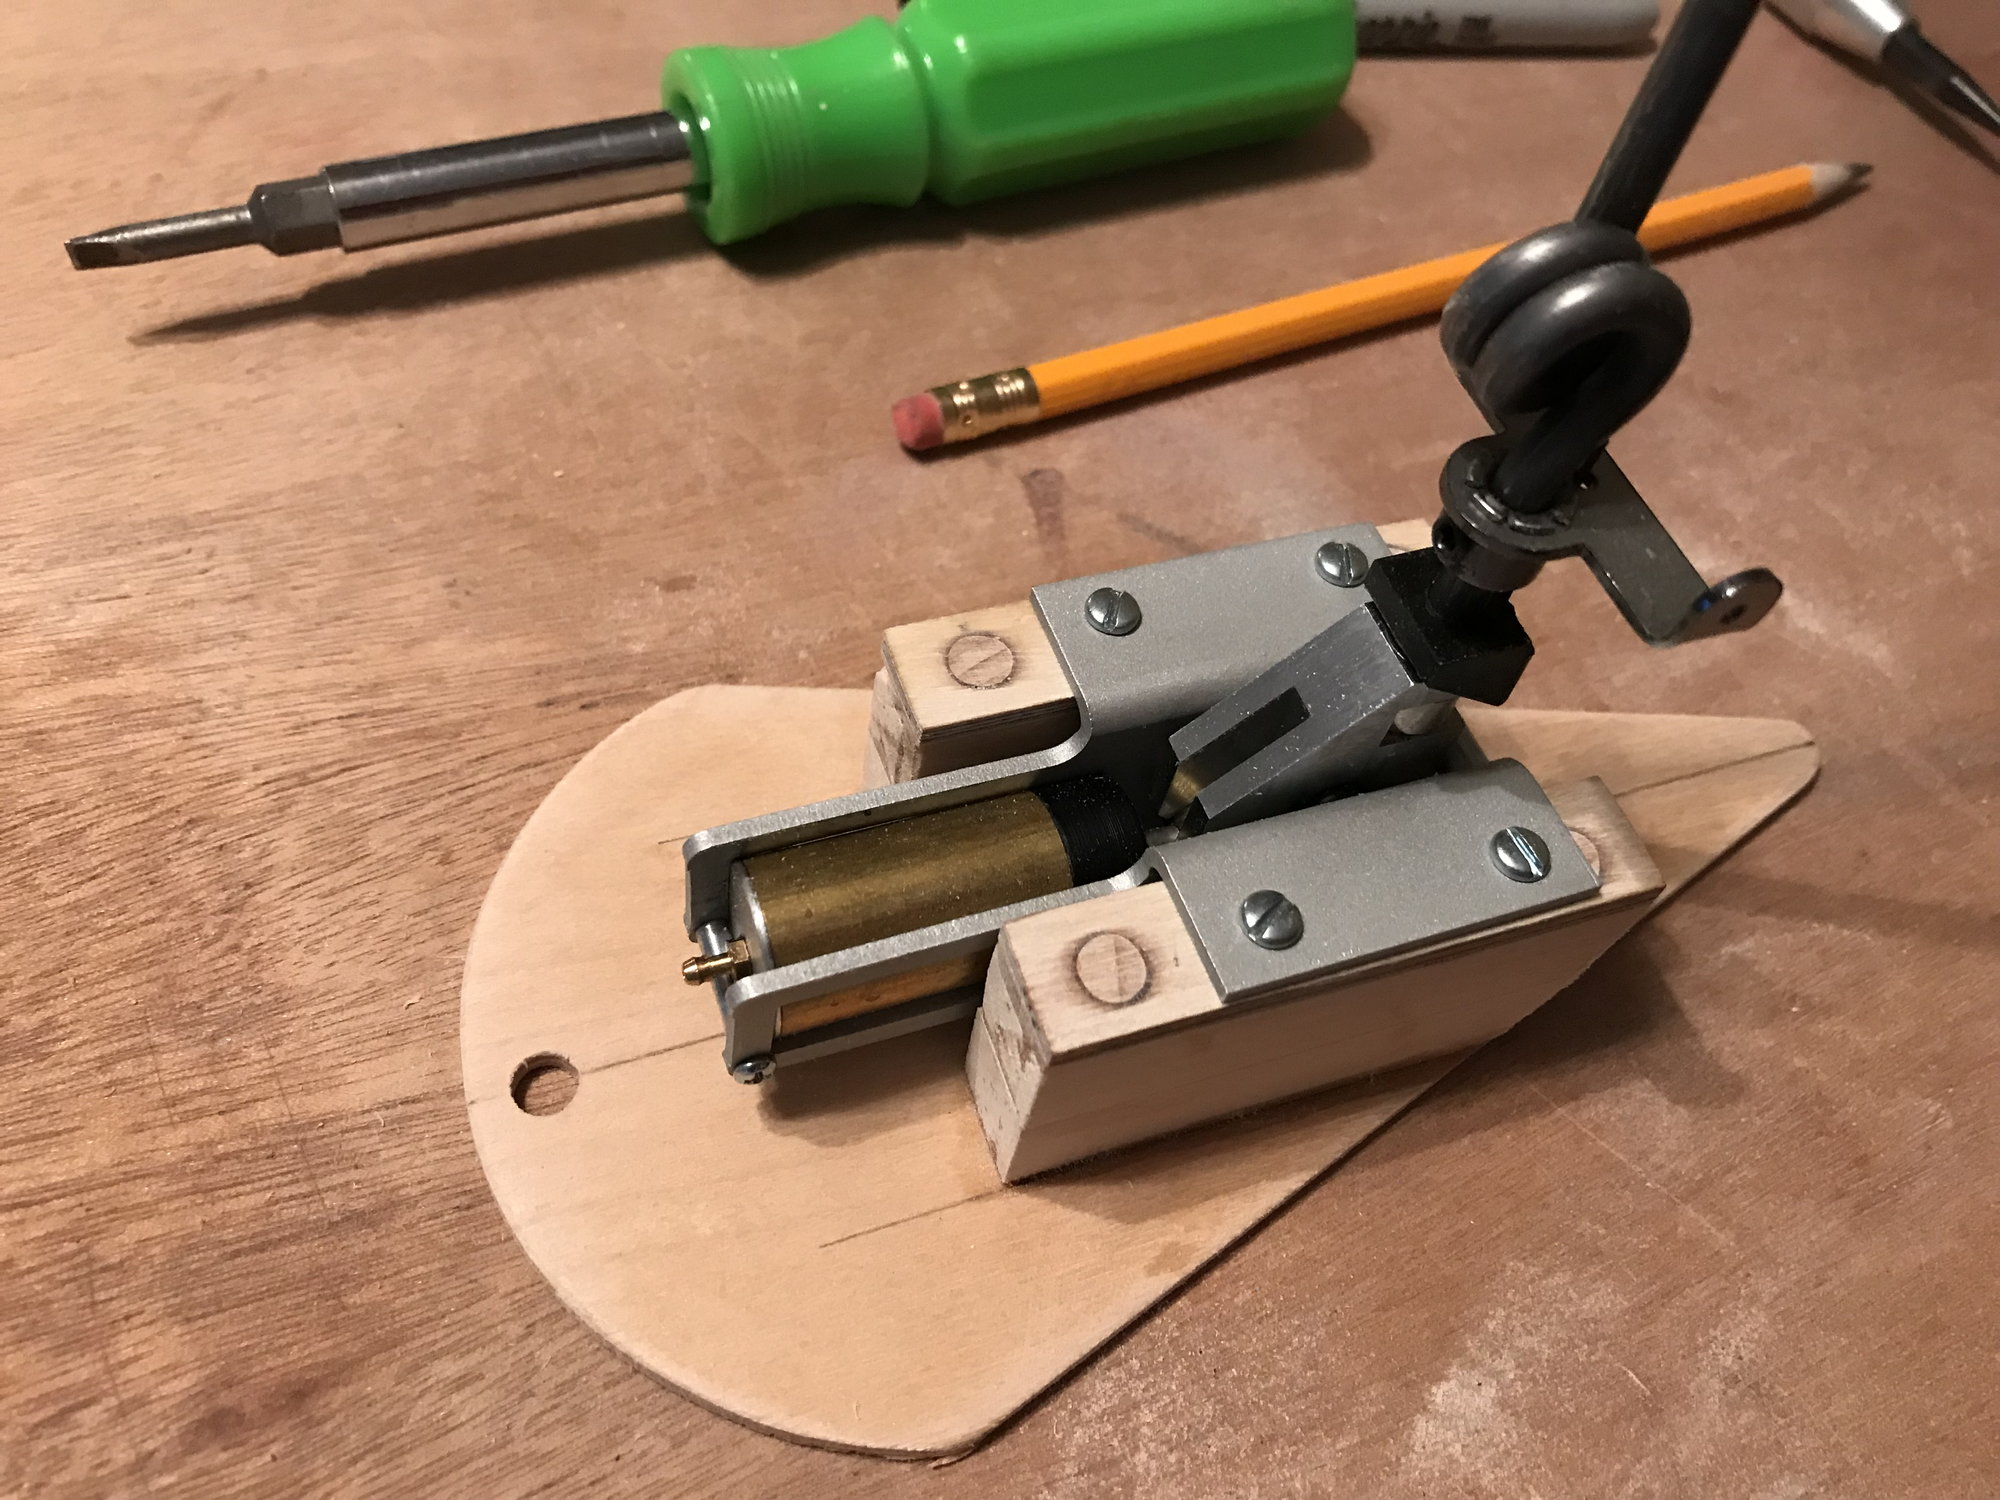
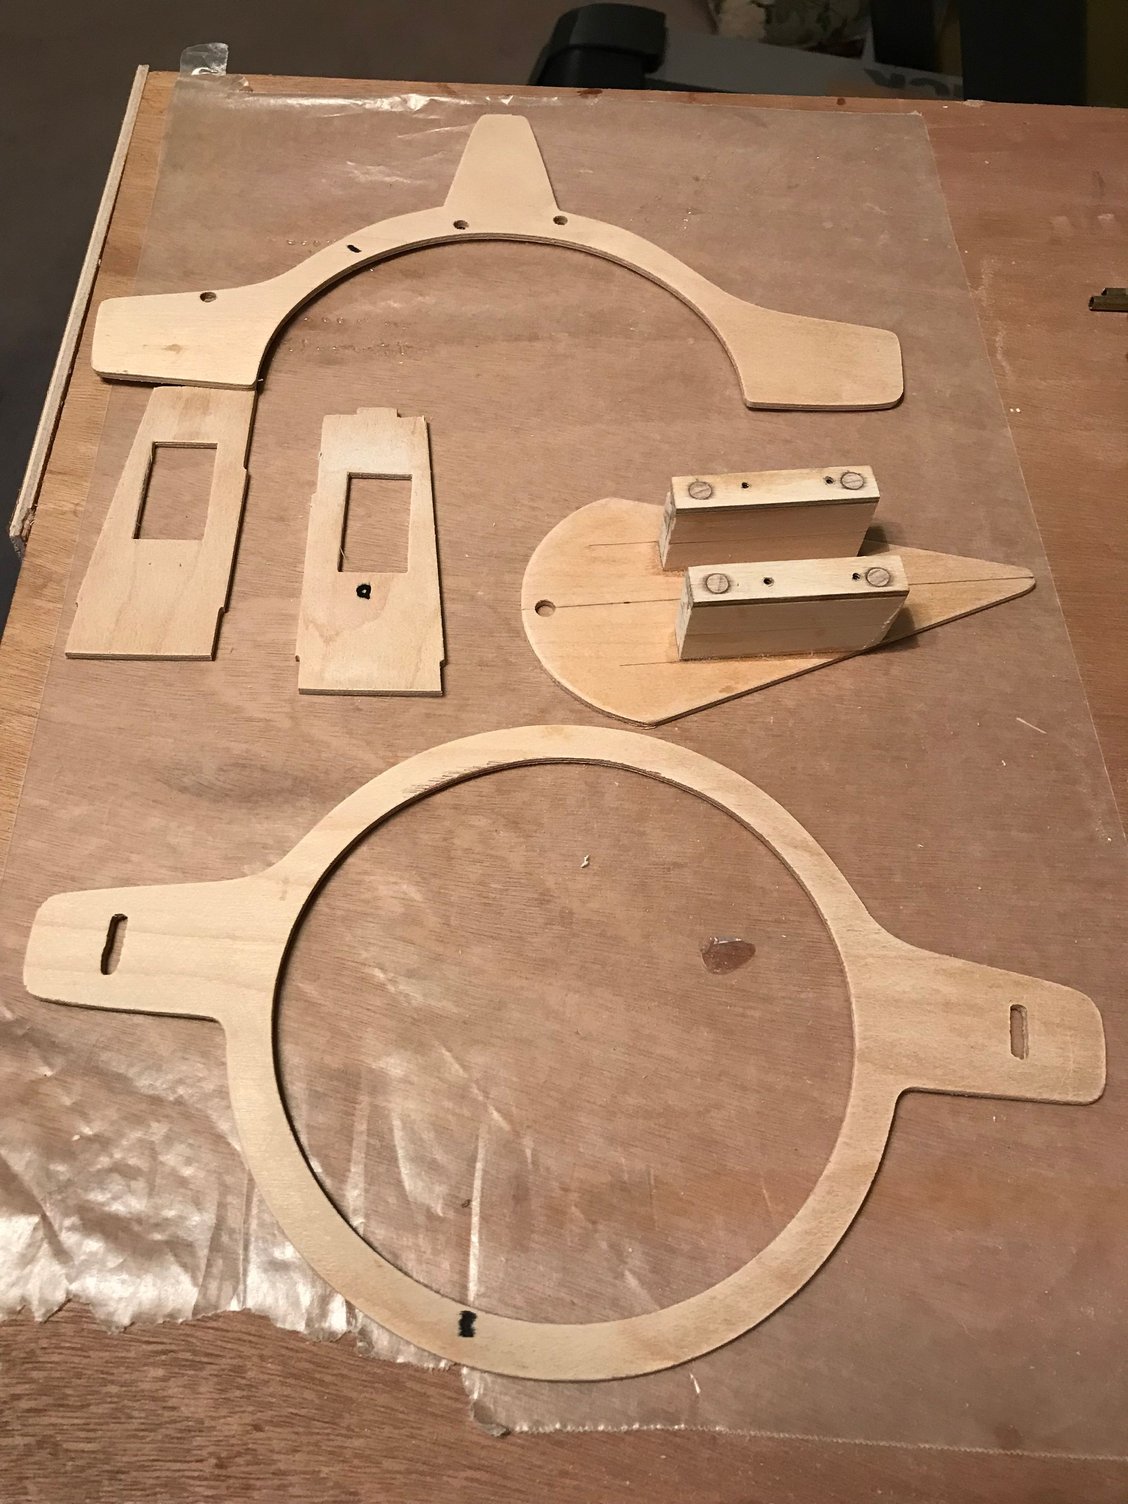
Okay Step 1! assembling the engine / fan former. Building has begun!
RP
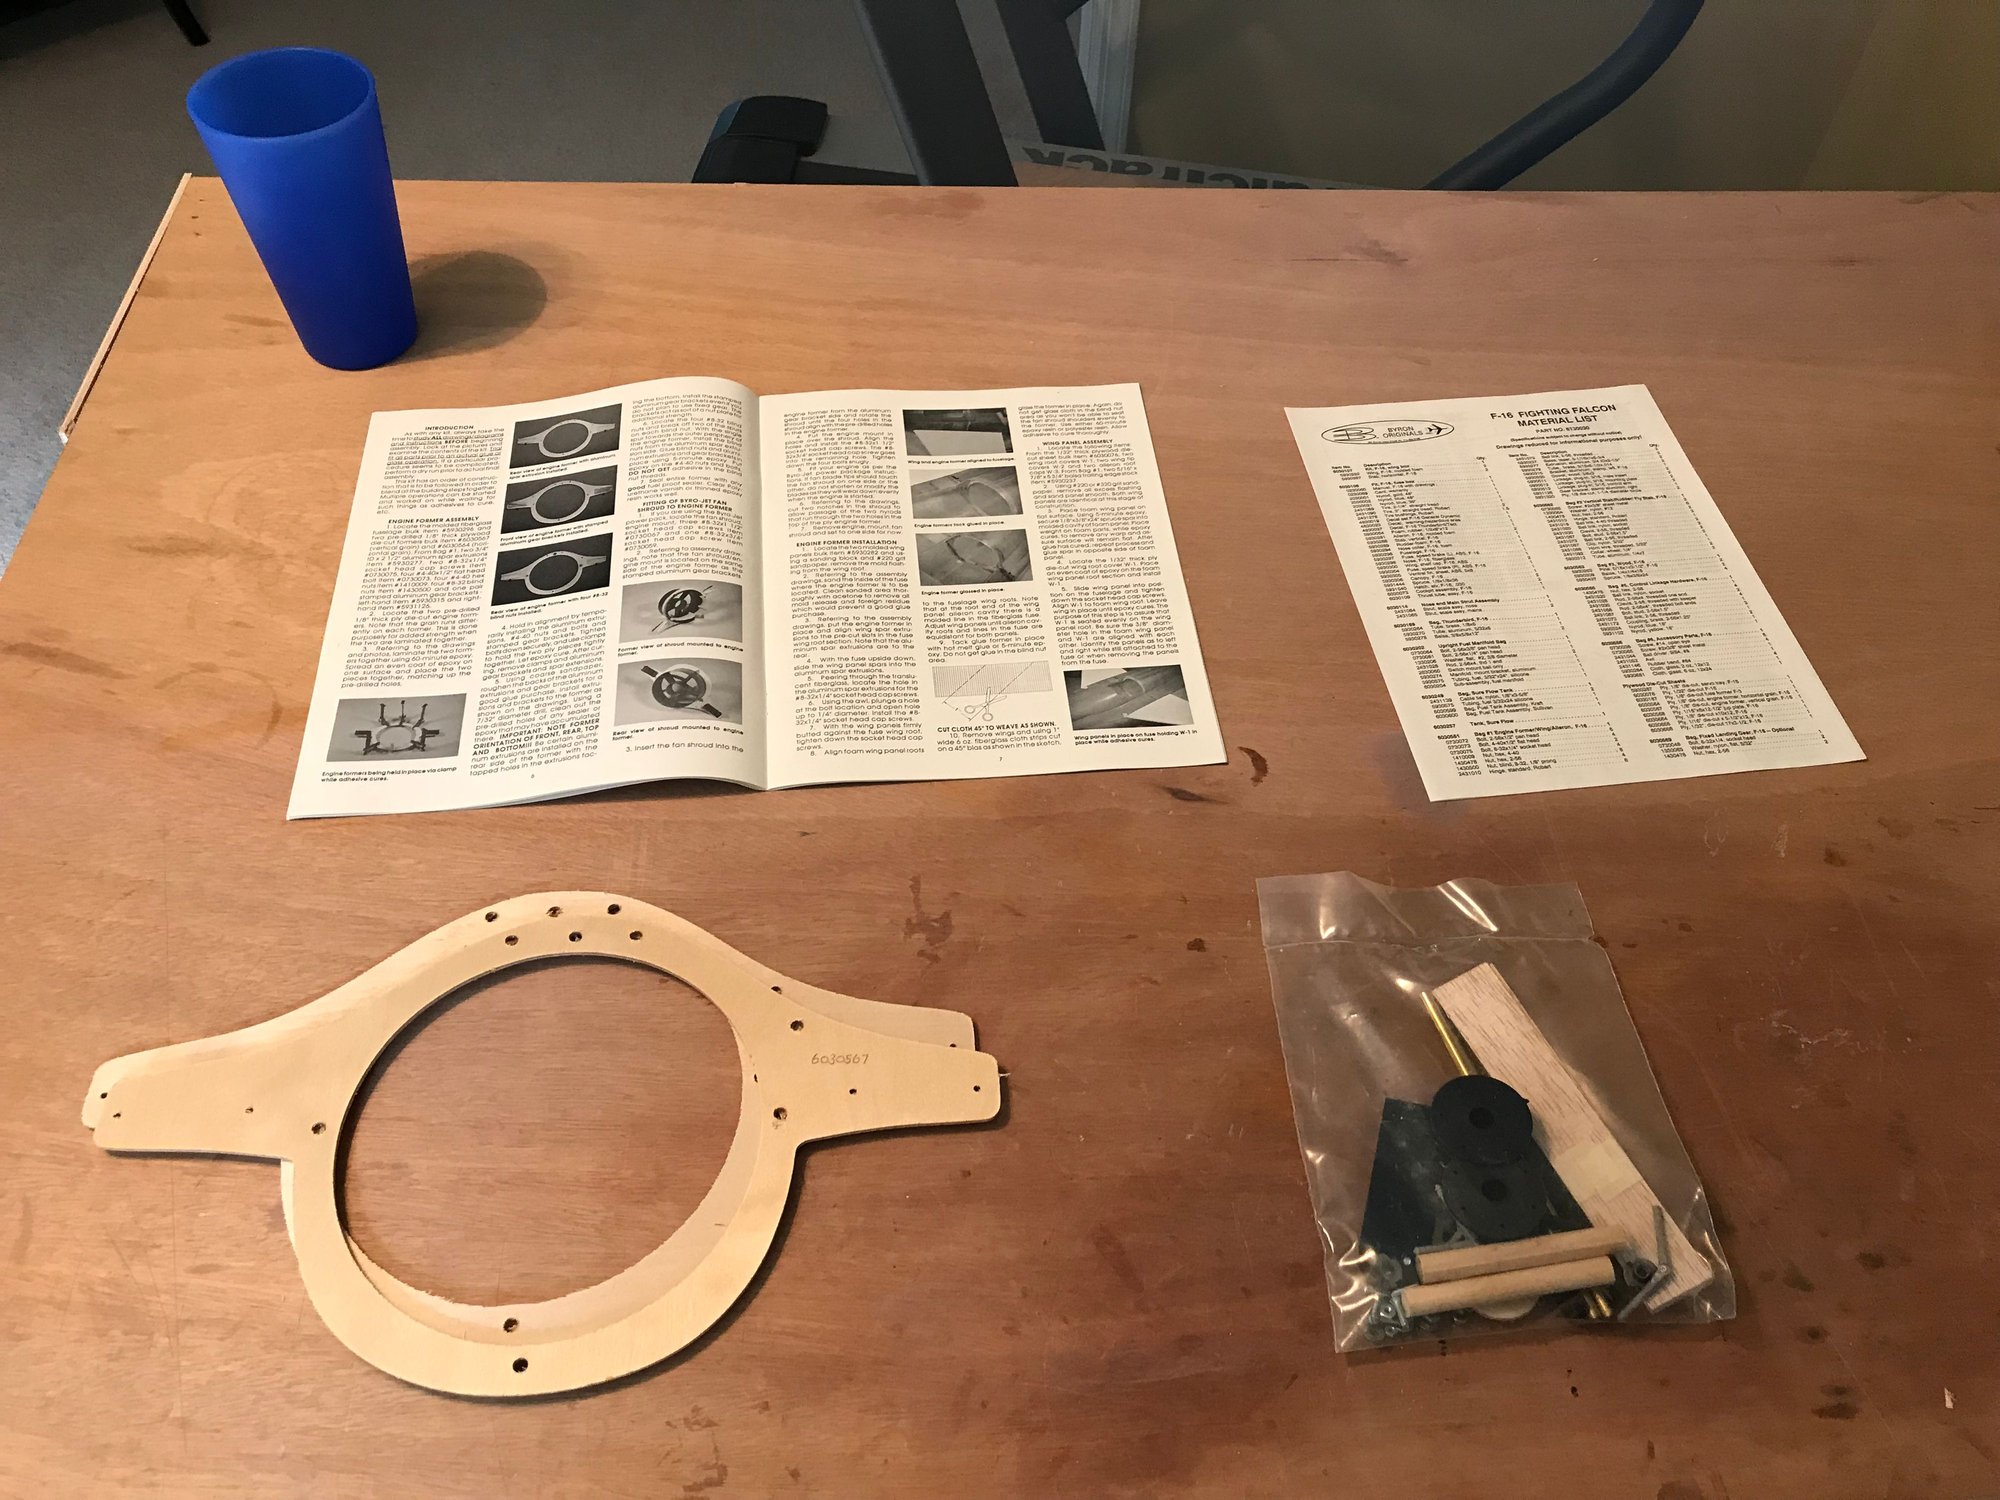
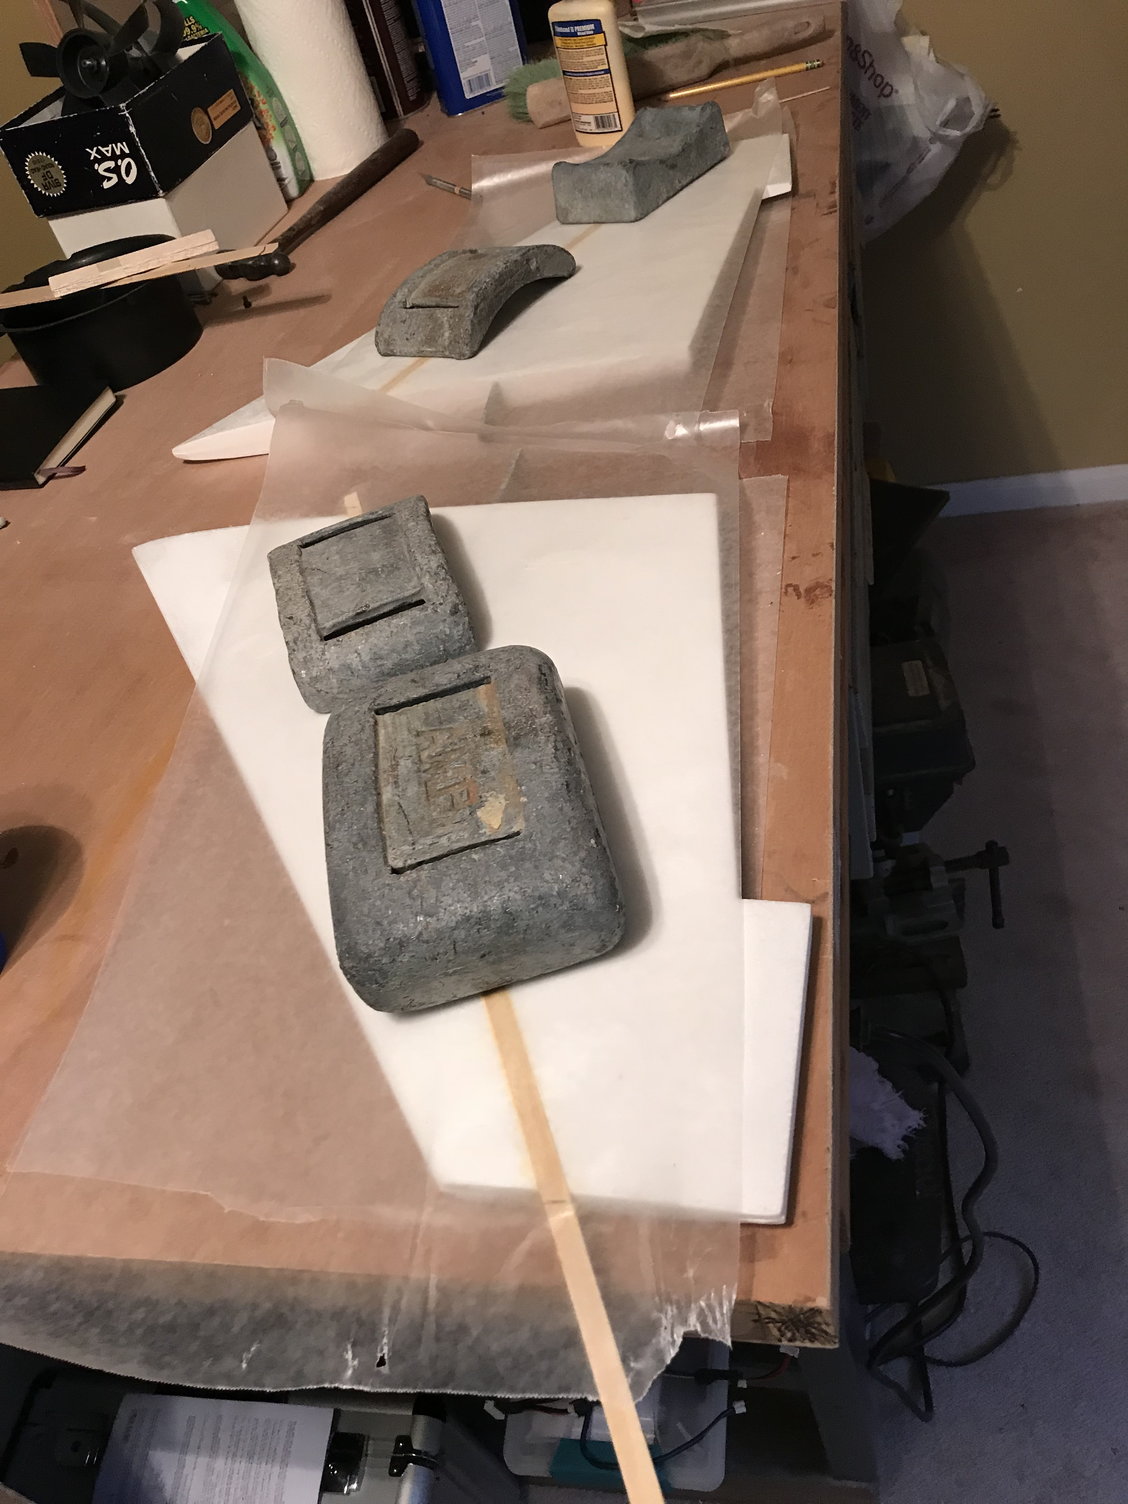
Okay, getting started. step 1 the fan / engine former assembly.
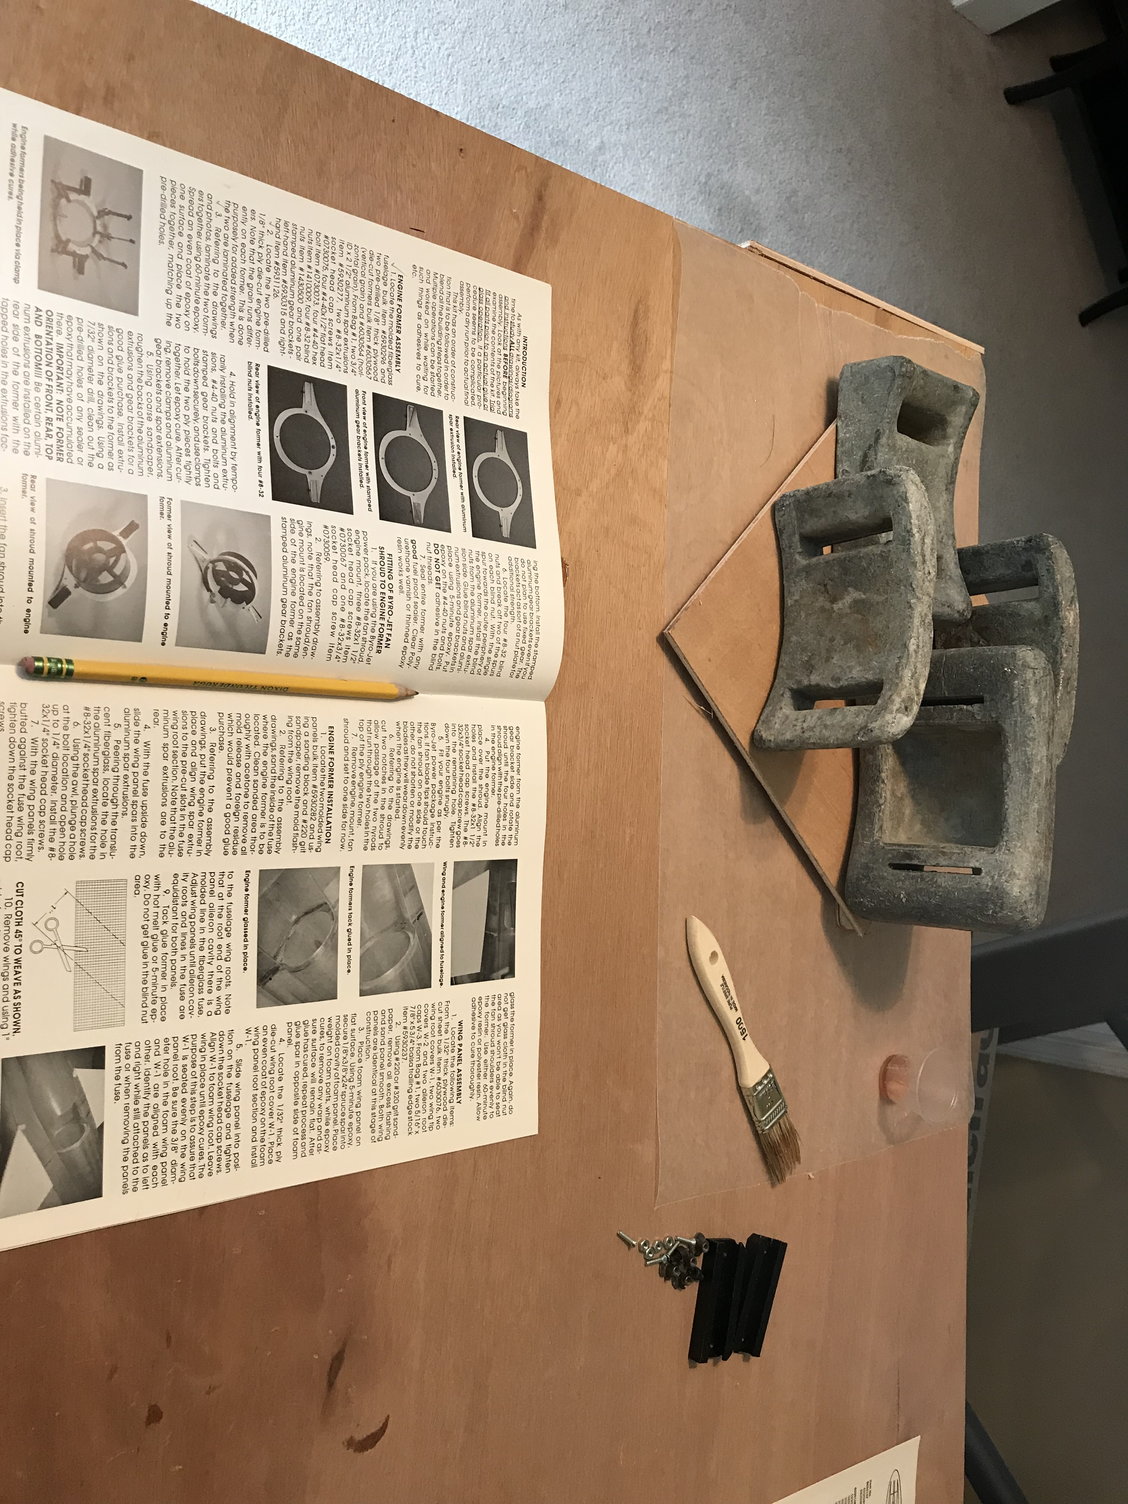
Sandwiched and weighted while epoxy cures.
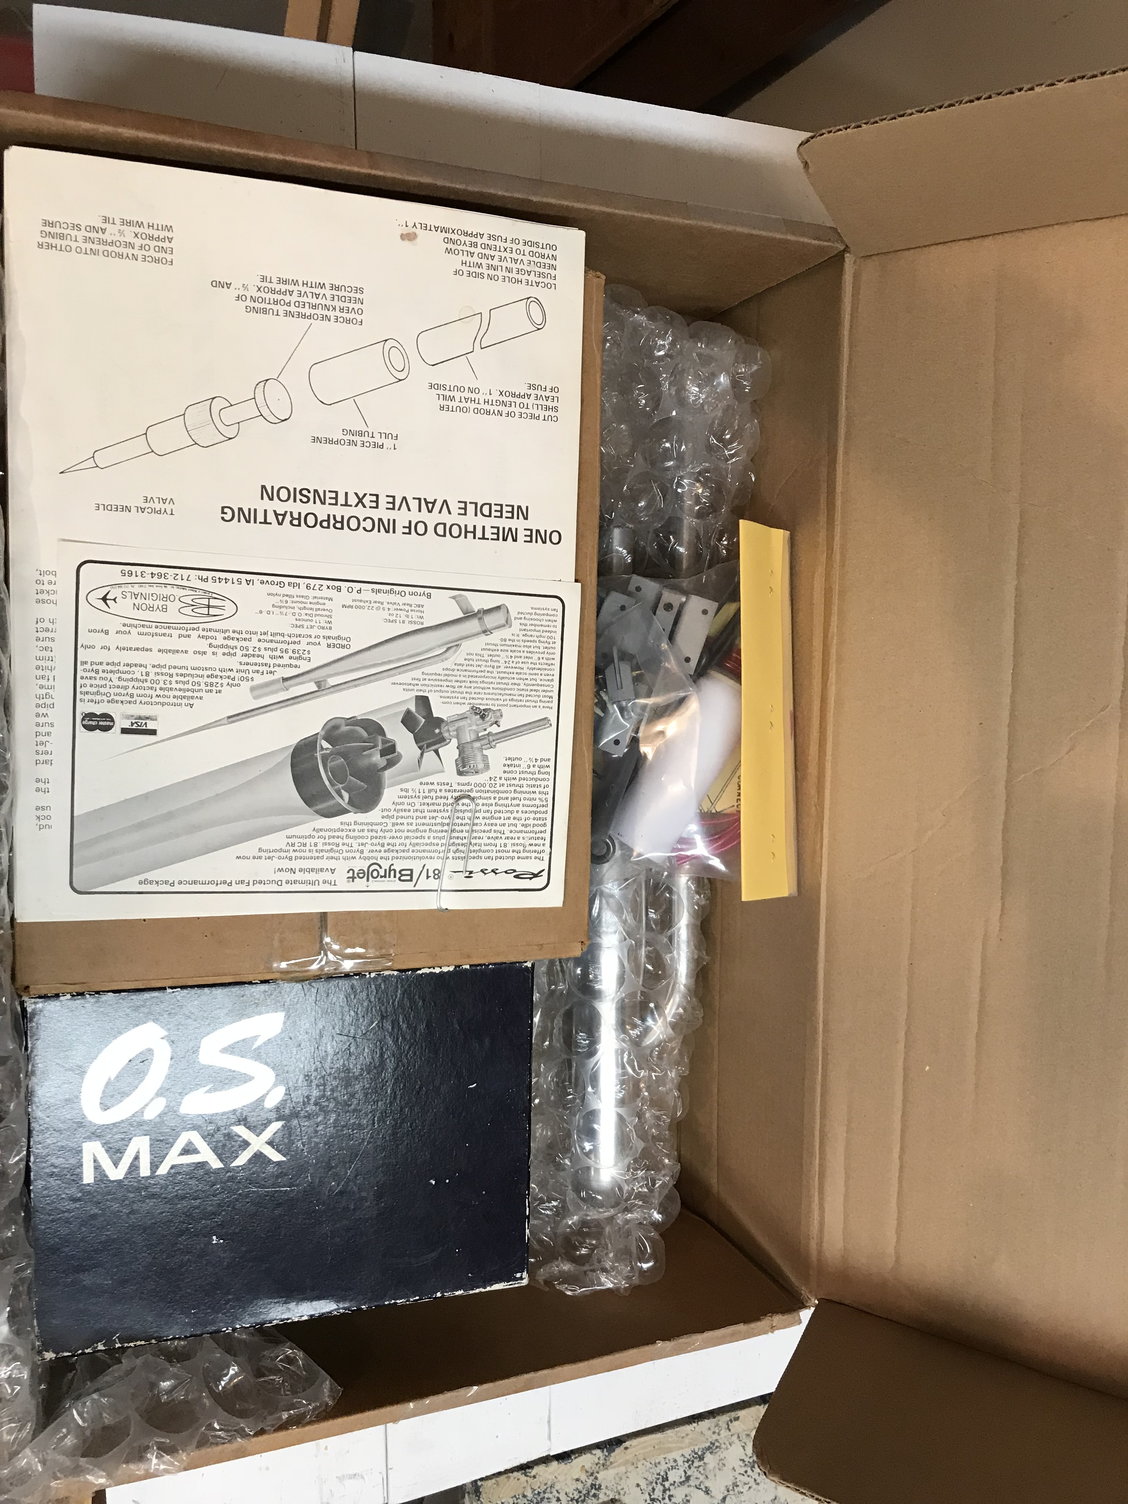
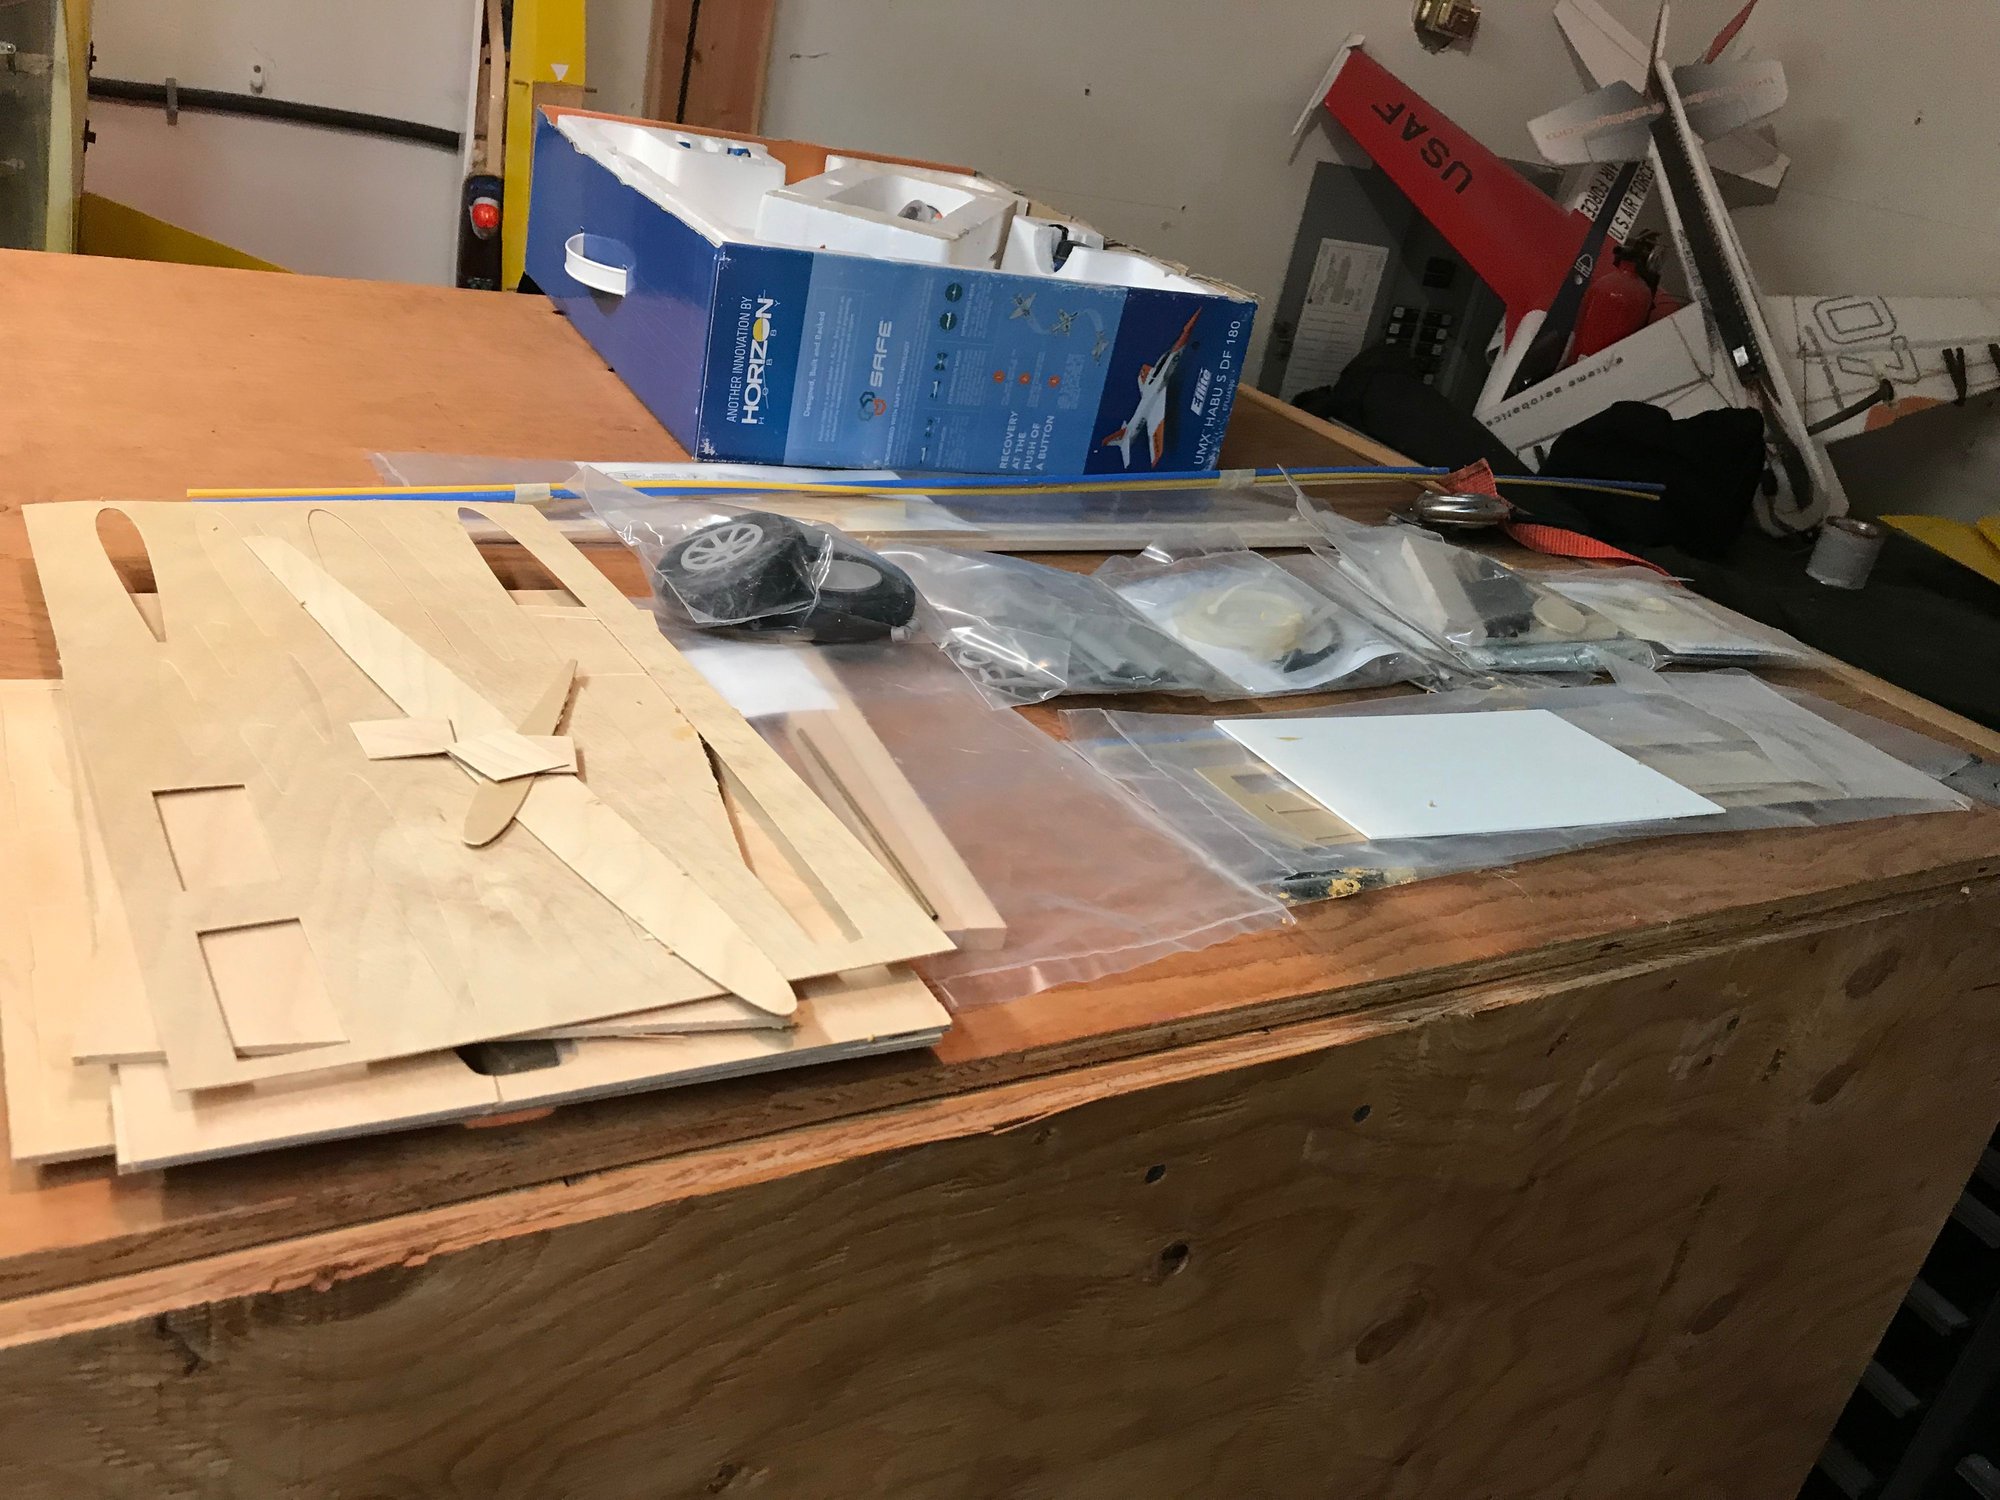
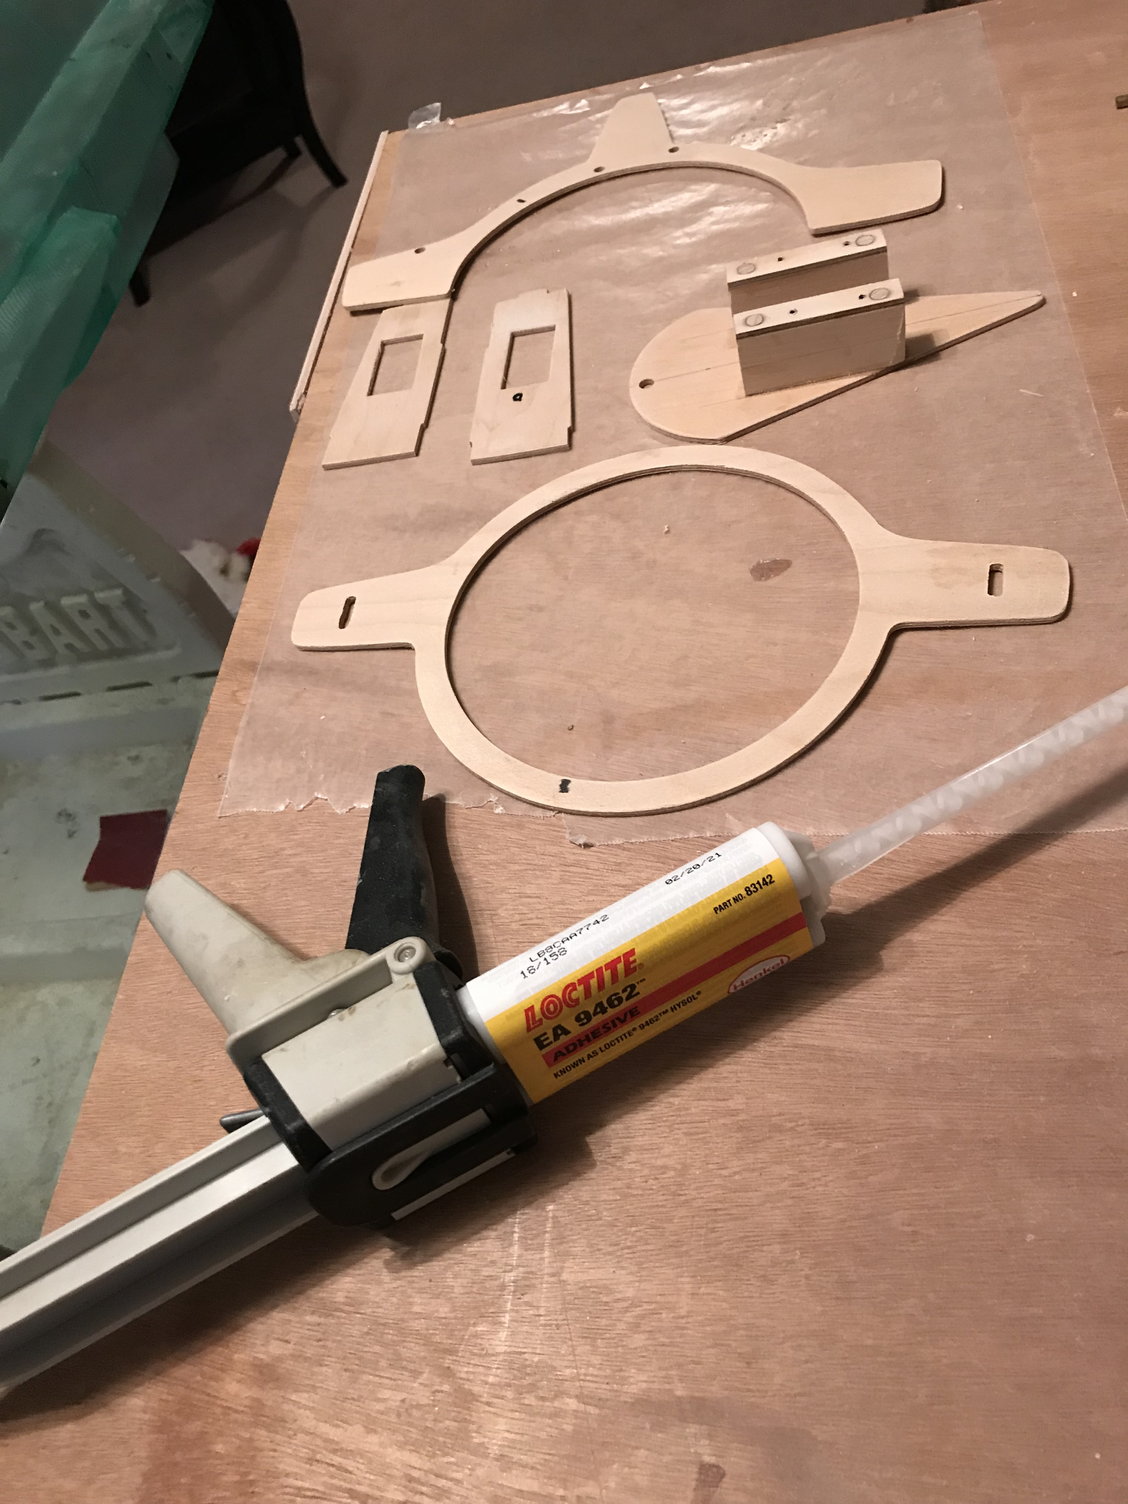
Box of goodies, fan engine and pipe!

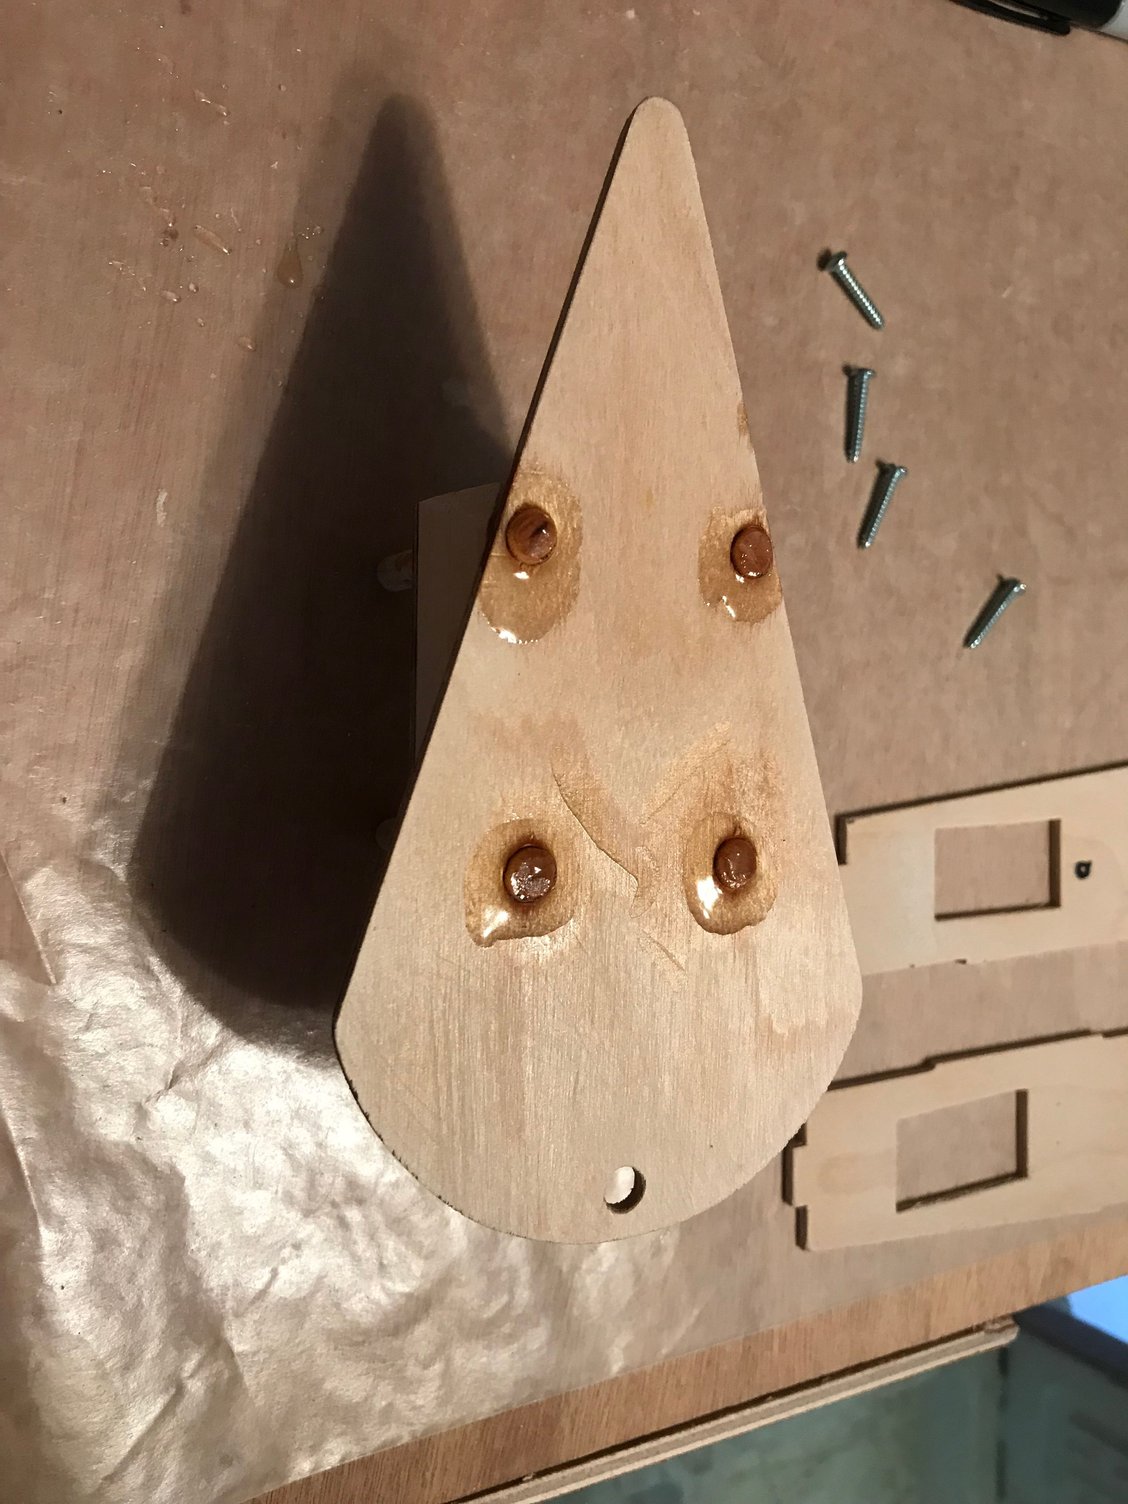
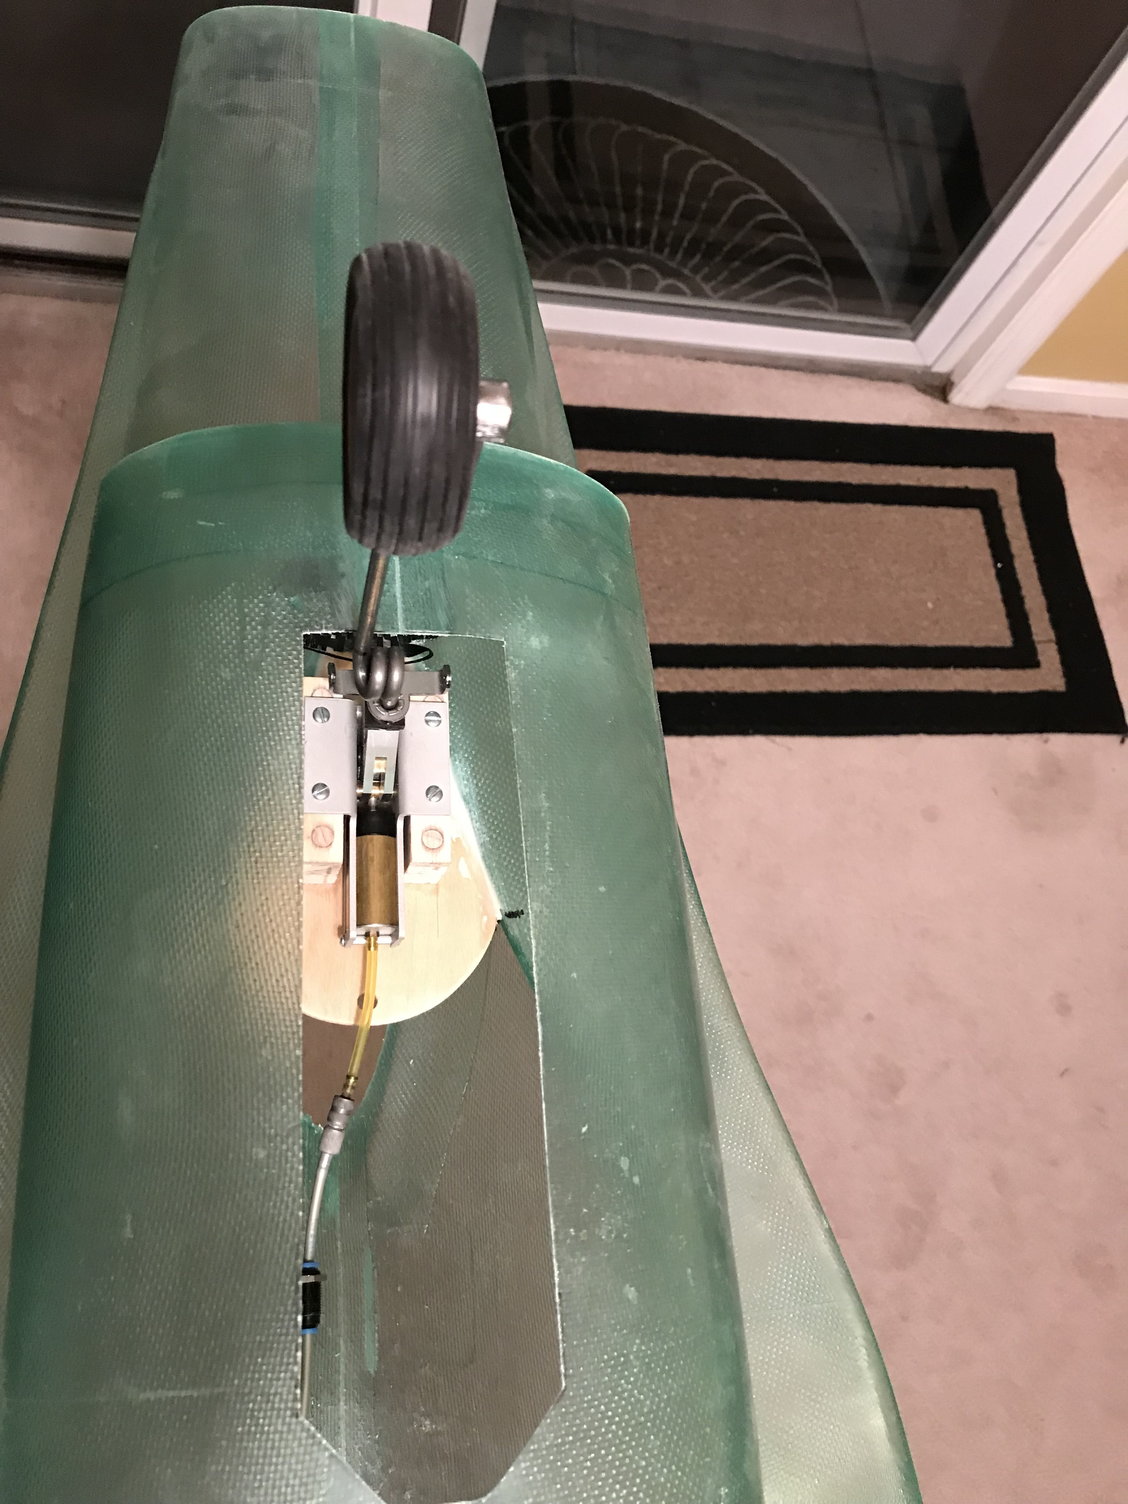
Like I said, this kit was missing the retract accessory bag so I was missing the fixed gear plate (also in that bag) for the back side of the wing mount. I hate to add weight but I didn't think I could omit it here so I made my own.
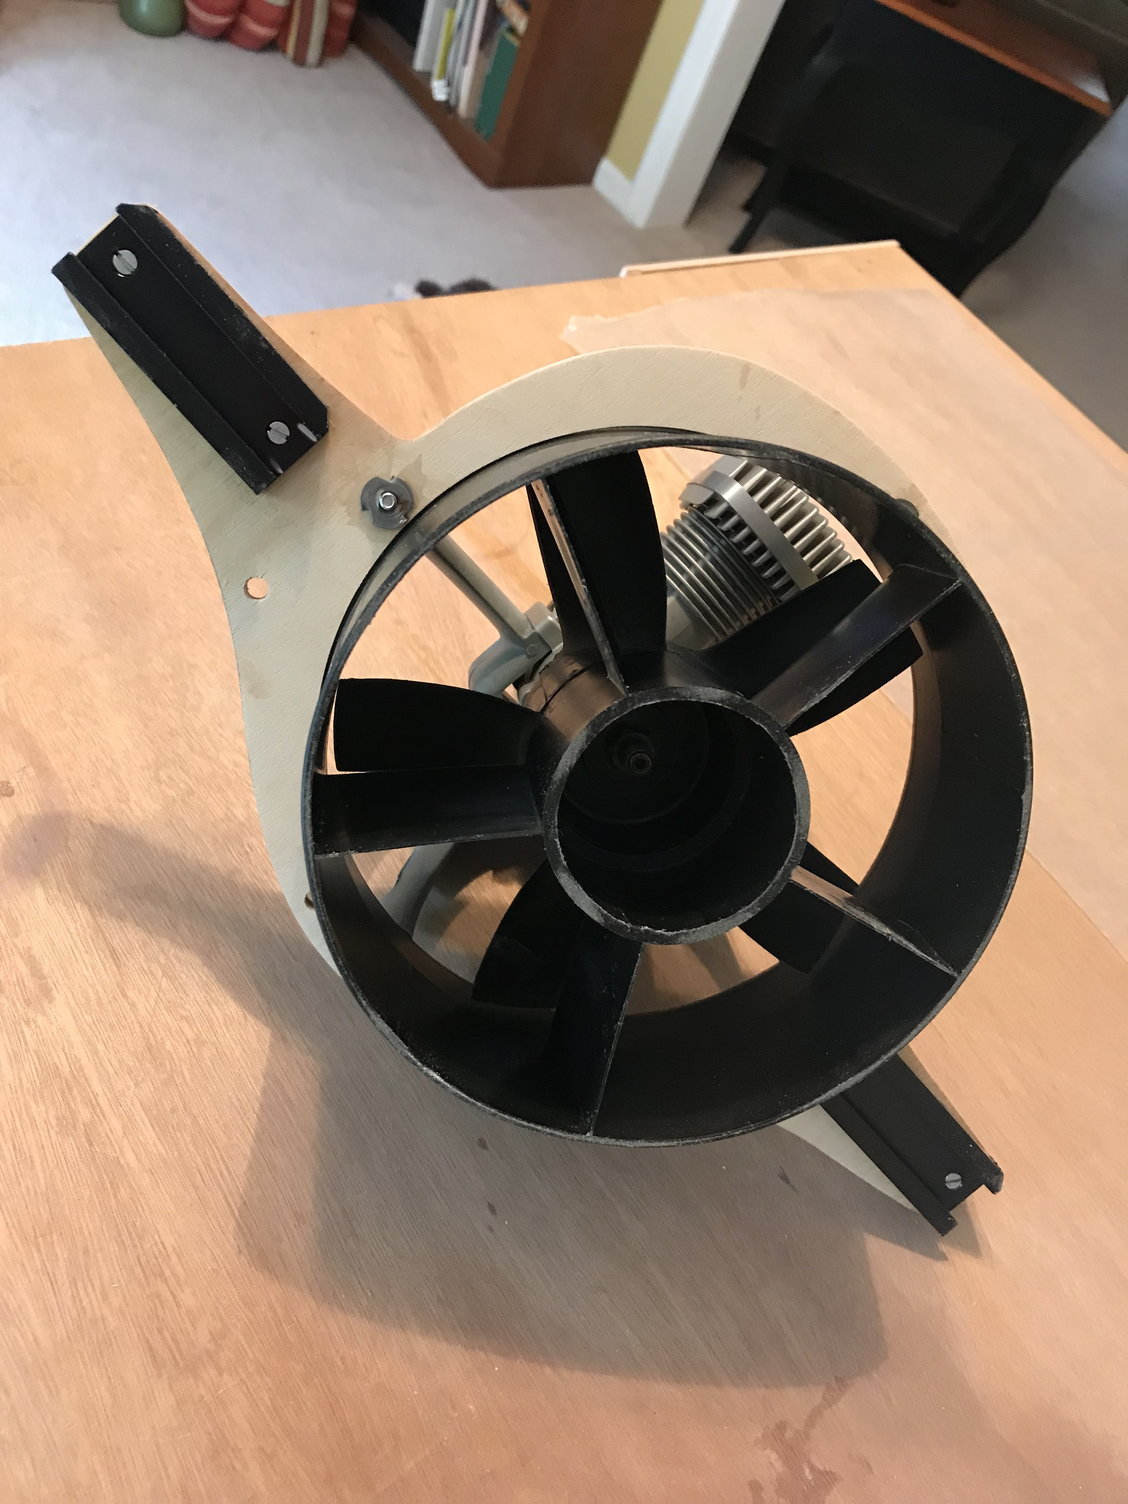
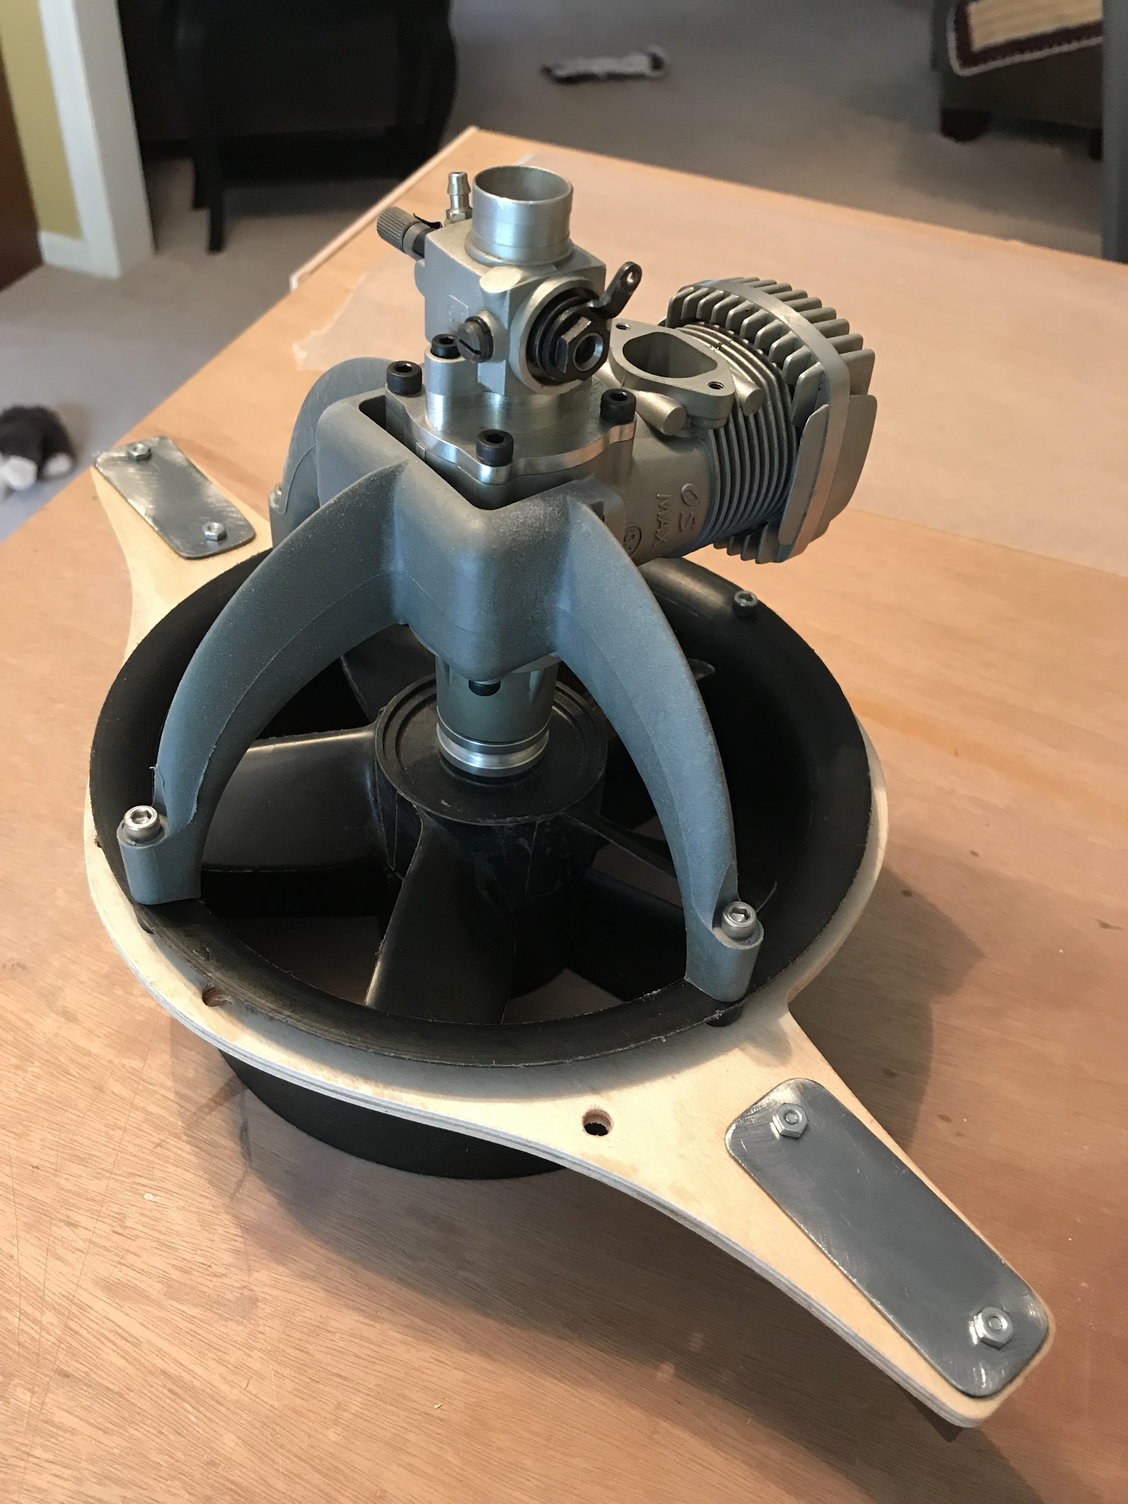

Okay Step 1! assembling the engine / fan former. Building has begun!
RP
Okay, getting started. step 1 the fan / engine former assembly.
Sandwiched and weighted while epoxy cures.
Box of goodies, fan engine and pipe!
Like I said, this kit was missing the retract accessory bag so I was missing the fixed gear plate (also in that bag) for the back side of the wing mount. I hate to add weight but I didn't think I could omit it here so I made my own.
10-26-2018, 04:54 AM
#10
I eluded to this in my initial post. I think you are correct. Possibly in the future I may do something, but for right now my modeling budget it pegged so I'm building with what I have. So right now it's DF. But for sure a turbine is in my future.
RP

 10-29-2018, 04:10 AM
#14
My Feedback: (1)
Join Date: Sep 2003
Location: Talamanca de JaramaMadrid, SPAIN
Posts: 583
Received 4 Likes
on
4 Posts
Rick, if you are going to use Hysol make some tests first. Dan suggestion sure is about epoxy based glues not properly adhering to polyester fuselages even sanding and cleaning them well.
So as Hysol is a relatively expensive glue, it is better you make some tests before expending a lot with your project only to discover formers snap after a hard landing or 4-5 flights from G�s load.
I am also more than interested in following your building log.
Best Regards,
So as Hysol is a relatively expensive glue, it is better you make some tests before expending a lot with your project only to discover formers snap after a hard landing or 4-5 flights from G�s load.
I am also more than interested in following your building log.
Best Regards,
 10-29-2018, 02:41 PM
#16
The biggest trick is to make sure the fiberglass is prepped and cleaned extremely well. Epoxy doesn't stick well to polyester and polyester doesn't stick well to epoxy. That said it is mechanical bond we are looking for. Sand your glue surfaces with 80 grit paper (any coarser doesn't really cut well, it just glides over the surface too much) or 100grit. Clean it extremely well. Many people use acetone, I prefer a good quality virgin gun wash or laquer thinner. The truth is if you don't prep it well even polyester doesn't like to stick to polyester or epoxy to epoxy. If you have concerns about the hysol you can use an automotive product known as panel bond. 3m makes it, so does proform. It is a thixotropic polyester adhesive designed for gluing new panels into cars in the bodywork industry.
on major structural formers like the fan and wing mount even with hysol in there I personally would still sand and reinforce with fiberglass cloth and resin too. It helps spread out the load over a bigger area.
on major structural formers like the fan and wing mount even with hysol in there I personally would still sand and reinforce with fiberglass cloth and resin too. It helps spread out the load over a bigger area.
10-29-2018, 05:56 PM
#17

Good advice in reinforcing that engine former, those old IC ducted fan motors used to shake the hell out of everything. If something wasn't loctited with the red stuff, it would vibrate loose! Turbines are so much smoother. But ah the good old days of blown glow plugs, oily residue on everything and trying to turn after takeoff without stalling. Ha! Nope, still don't miss it! But I applaud you for doing it, we all know how colossal a pain in the butt it is to get those things to run just right. We are all a bit spoiled now.

 10-30-2018, 06:42 AM
#19
Good advice in reinforcing that engine former, those old IC ducted fan motors used to shake the hell out of everything. If something wasn't loctited with the red stuff, it would vibrate loose! Turbines are so much smoother. But ah the good old days of blown glow plugs, oily residue on everything and trying to turn after takeoff without stalling. Ha! Nope, still don't miss it! But I applaud you for doing it, we all know how colossal a pain in the butt it is to get those things to run just right. We are all a bit spoiled now.
Danno

P.S. I used to keep a bag of kitty litter in the trailer to clean up the ramp where I had it parked !!! LOL

Last edited by rcjetsaok; 10-30-2018 at 06:44 AM.
10-30-2018, 10:56 AM
#21
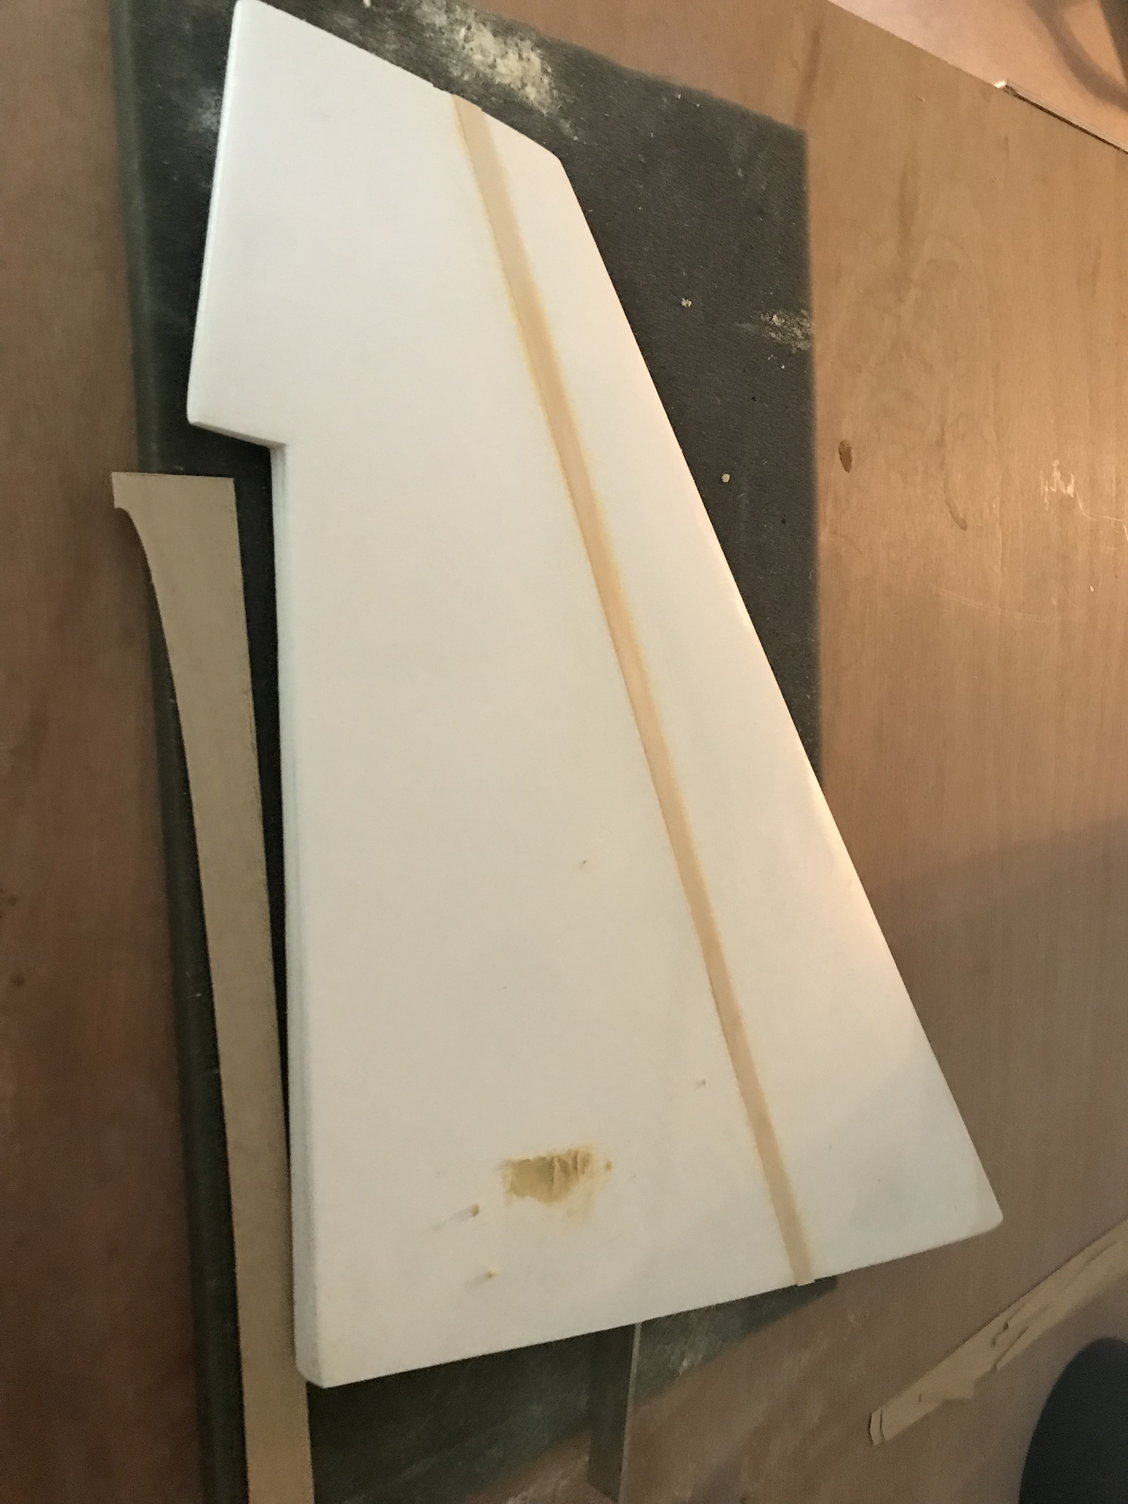
The foam is still slightly bowed in the center.

TE looks much straighter...
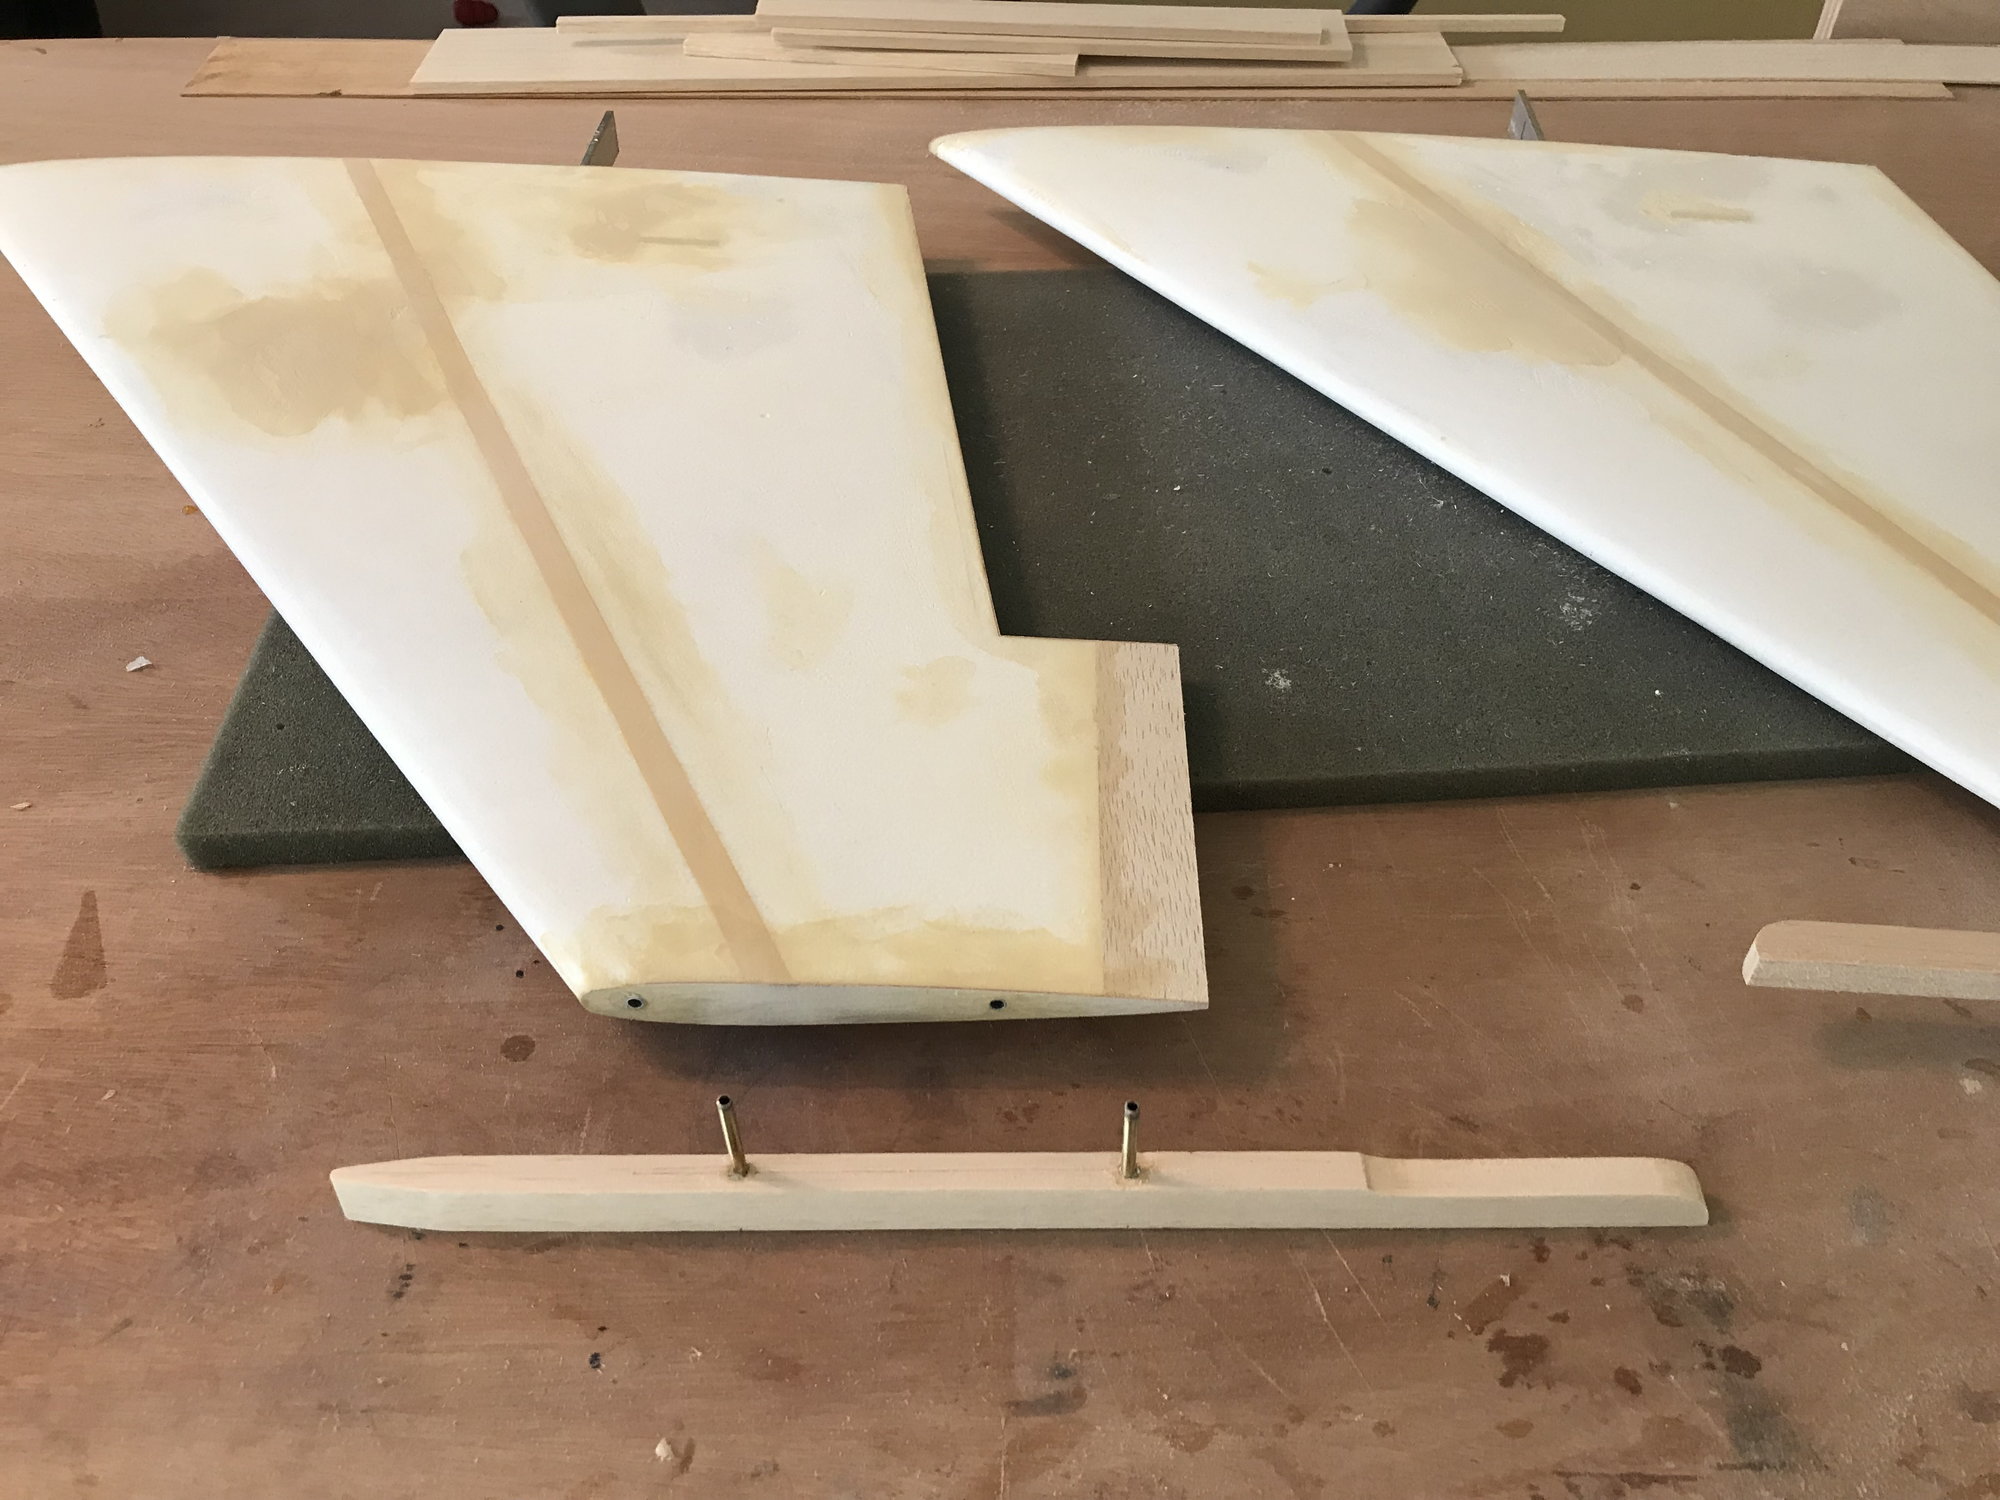

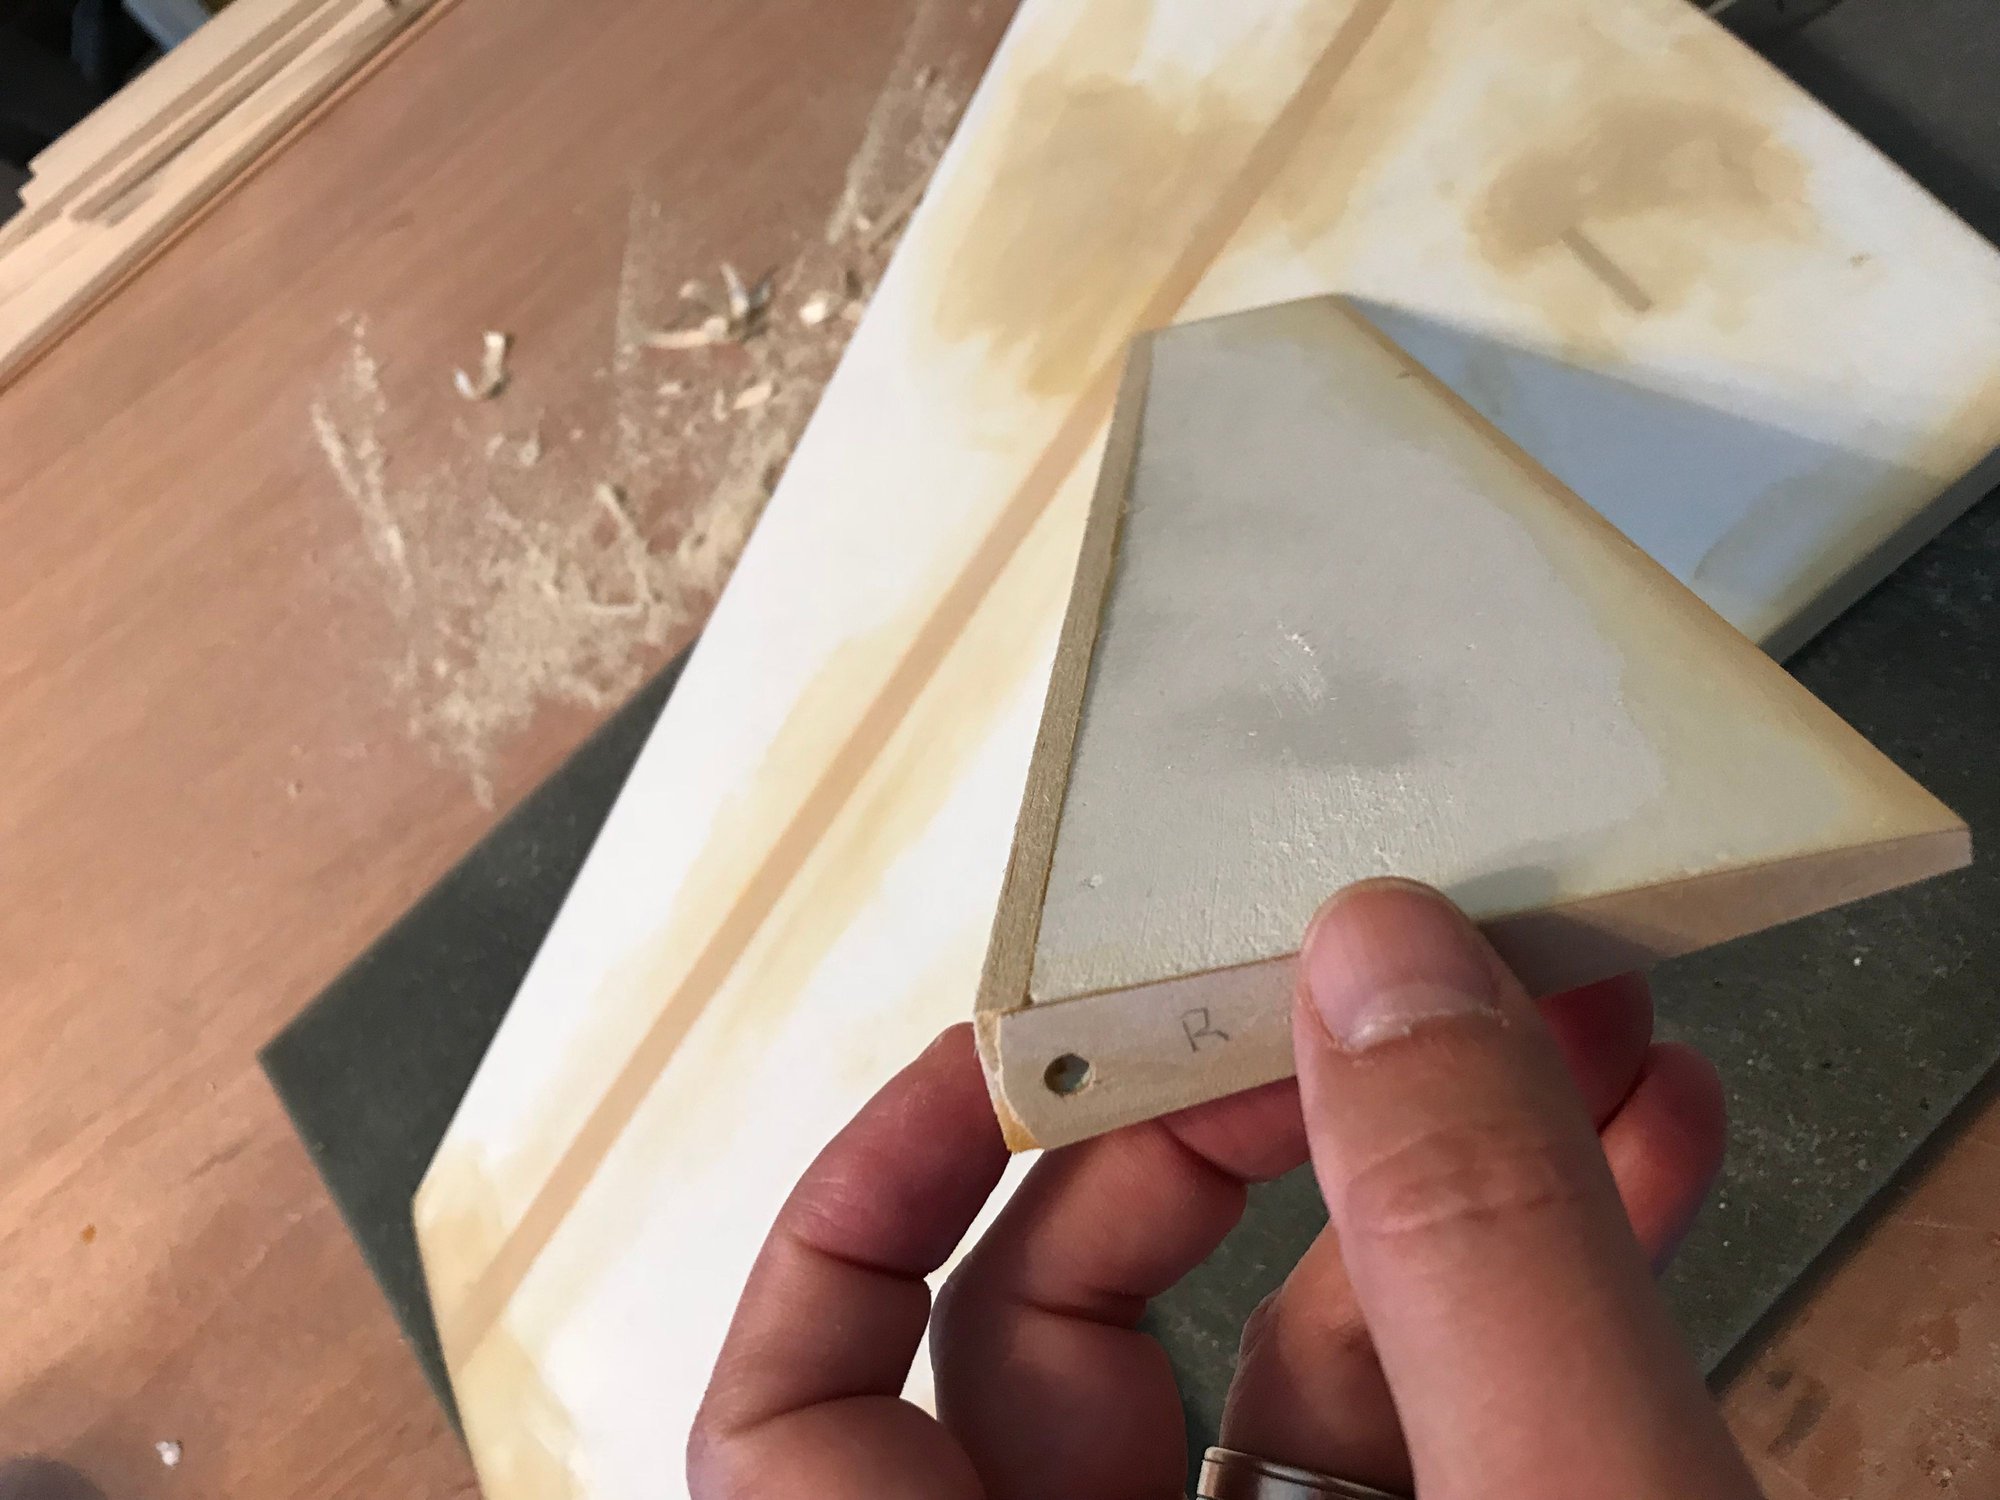
I probably should not have bothered, but I just couldn't take it anymore. the ailerons were warped pretty well. While I probably could have just put them on that way, I did want to do better. I cut off the LE of the aileron and glued on a spar and weighted the foam down. It took out about 90% of the warp but there is still some filing and and sanding to do. I also worked on the missle launch rails.
11-02-2018, 05:28 AM
#22
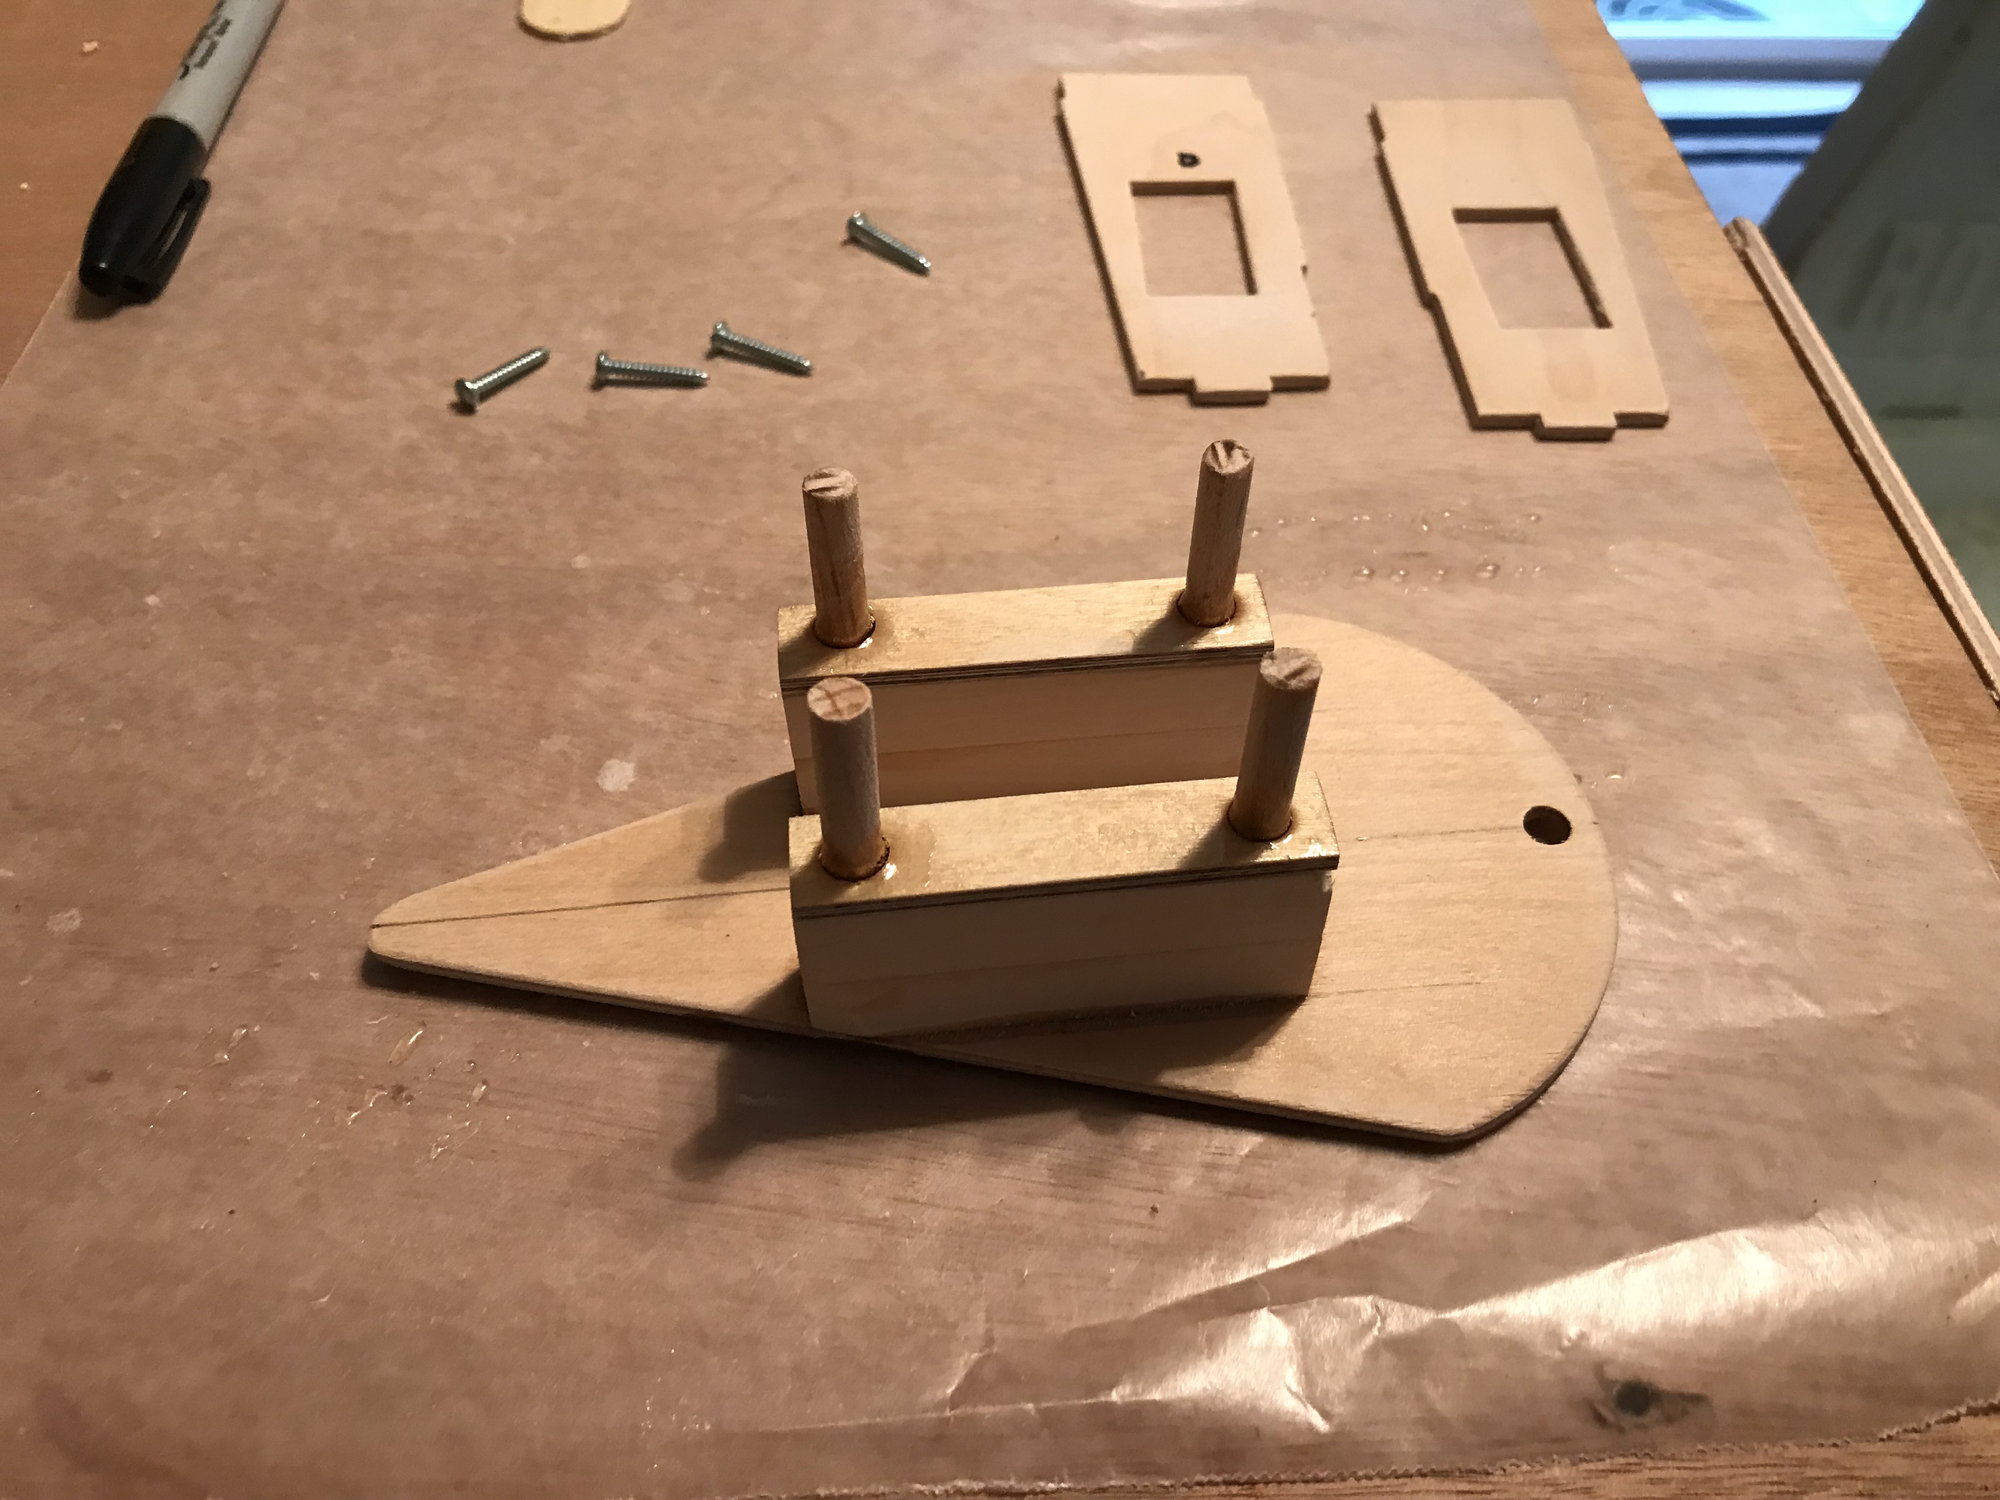
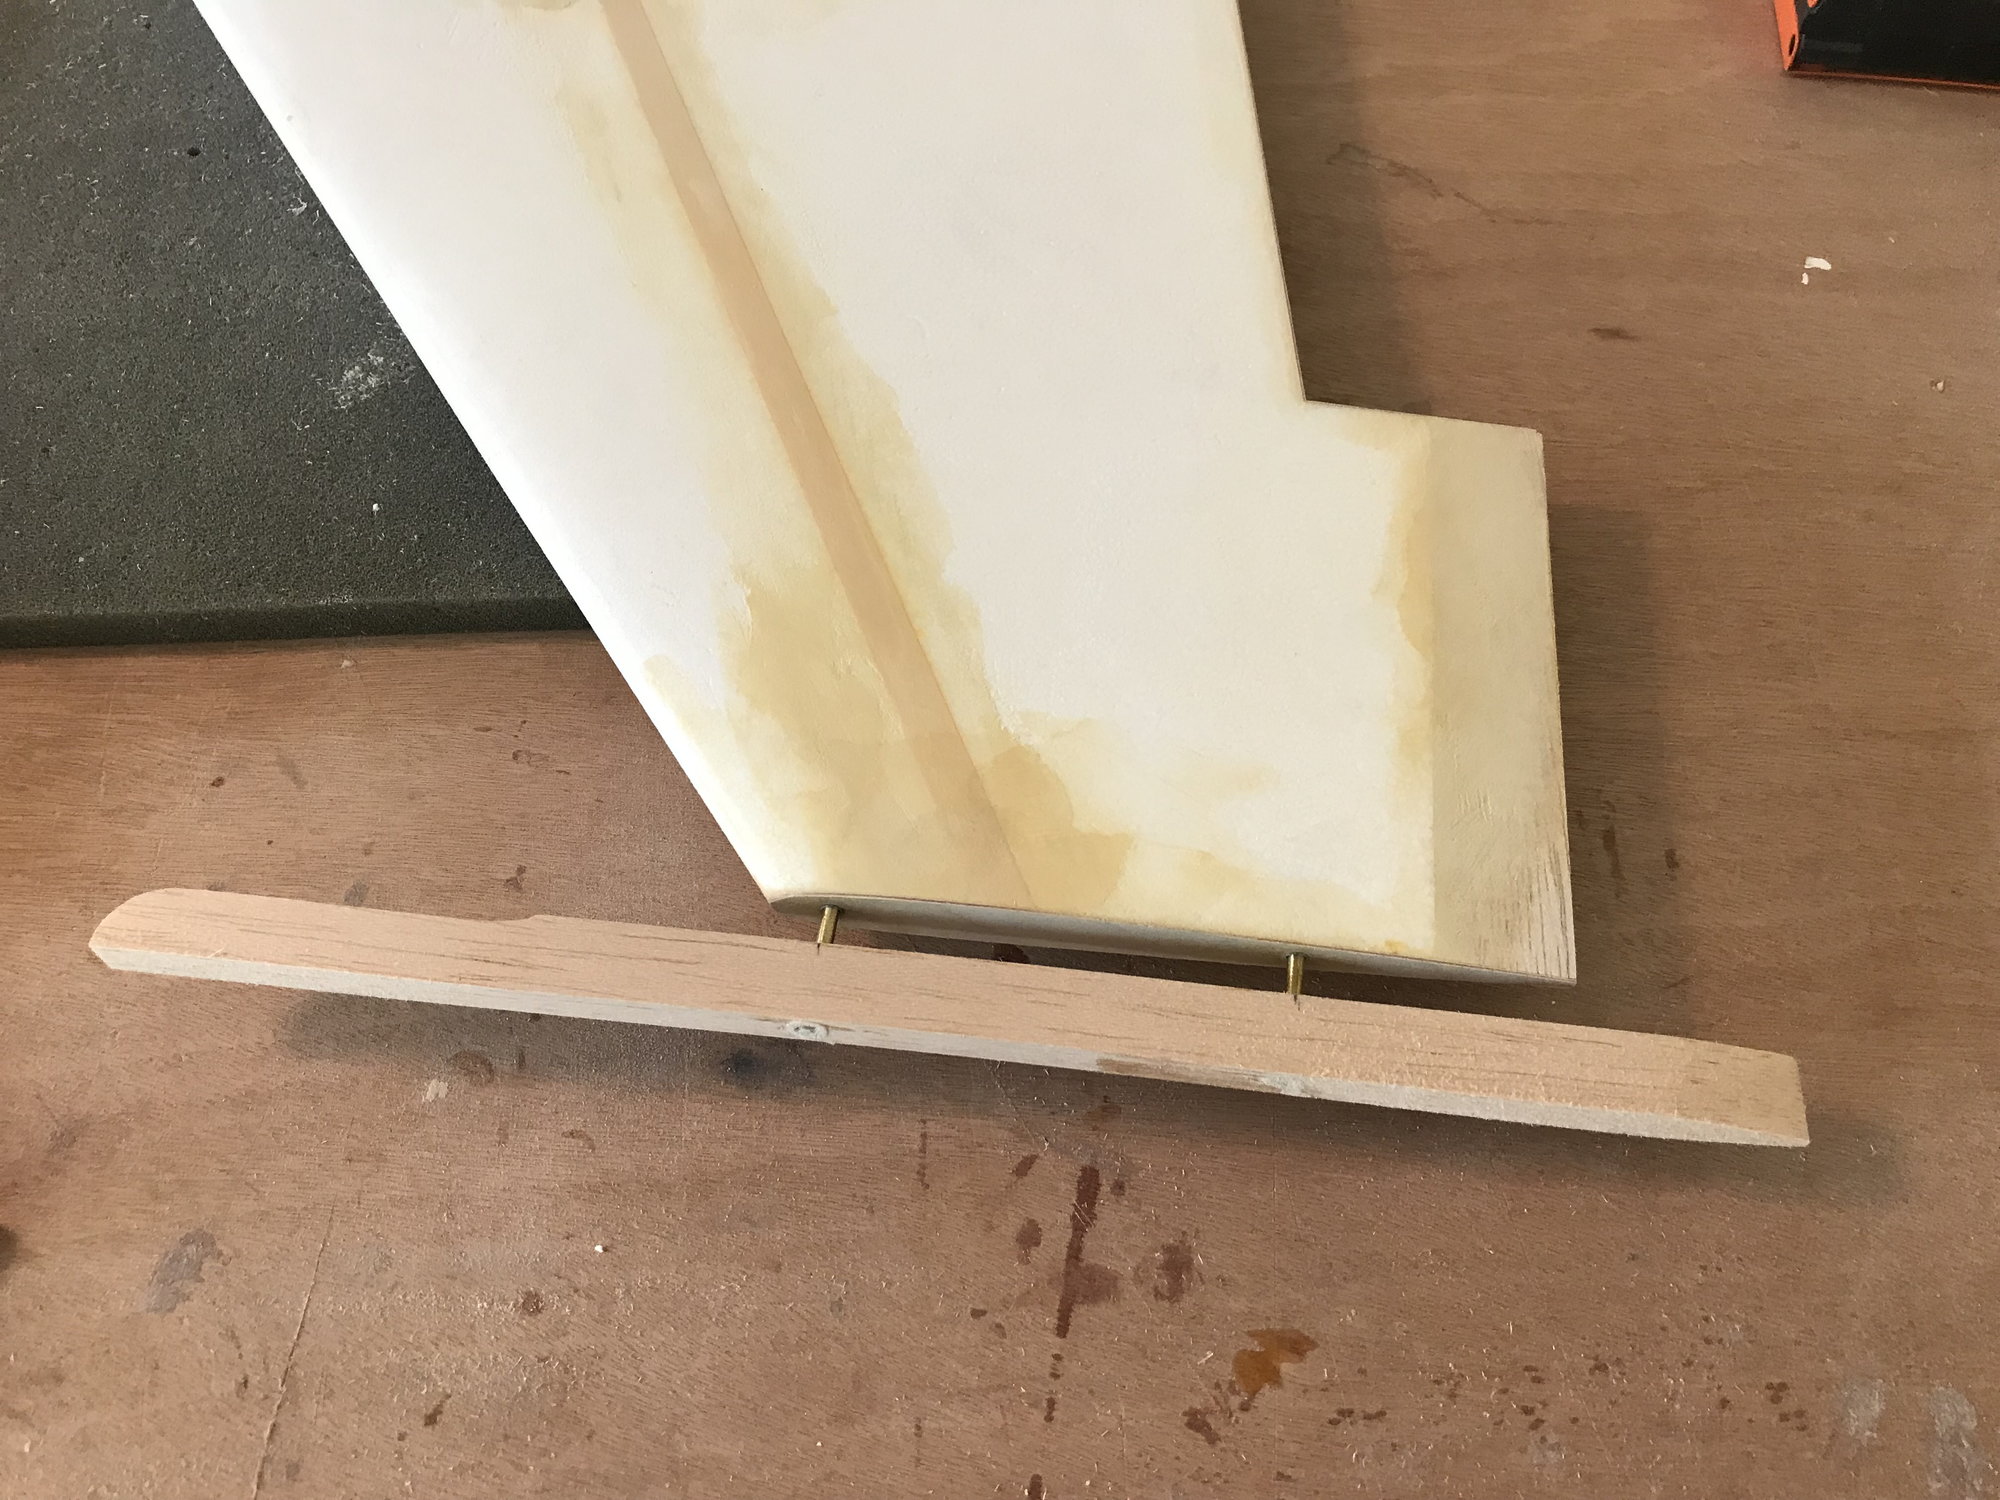
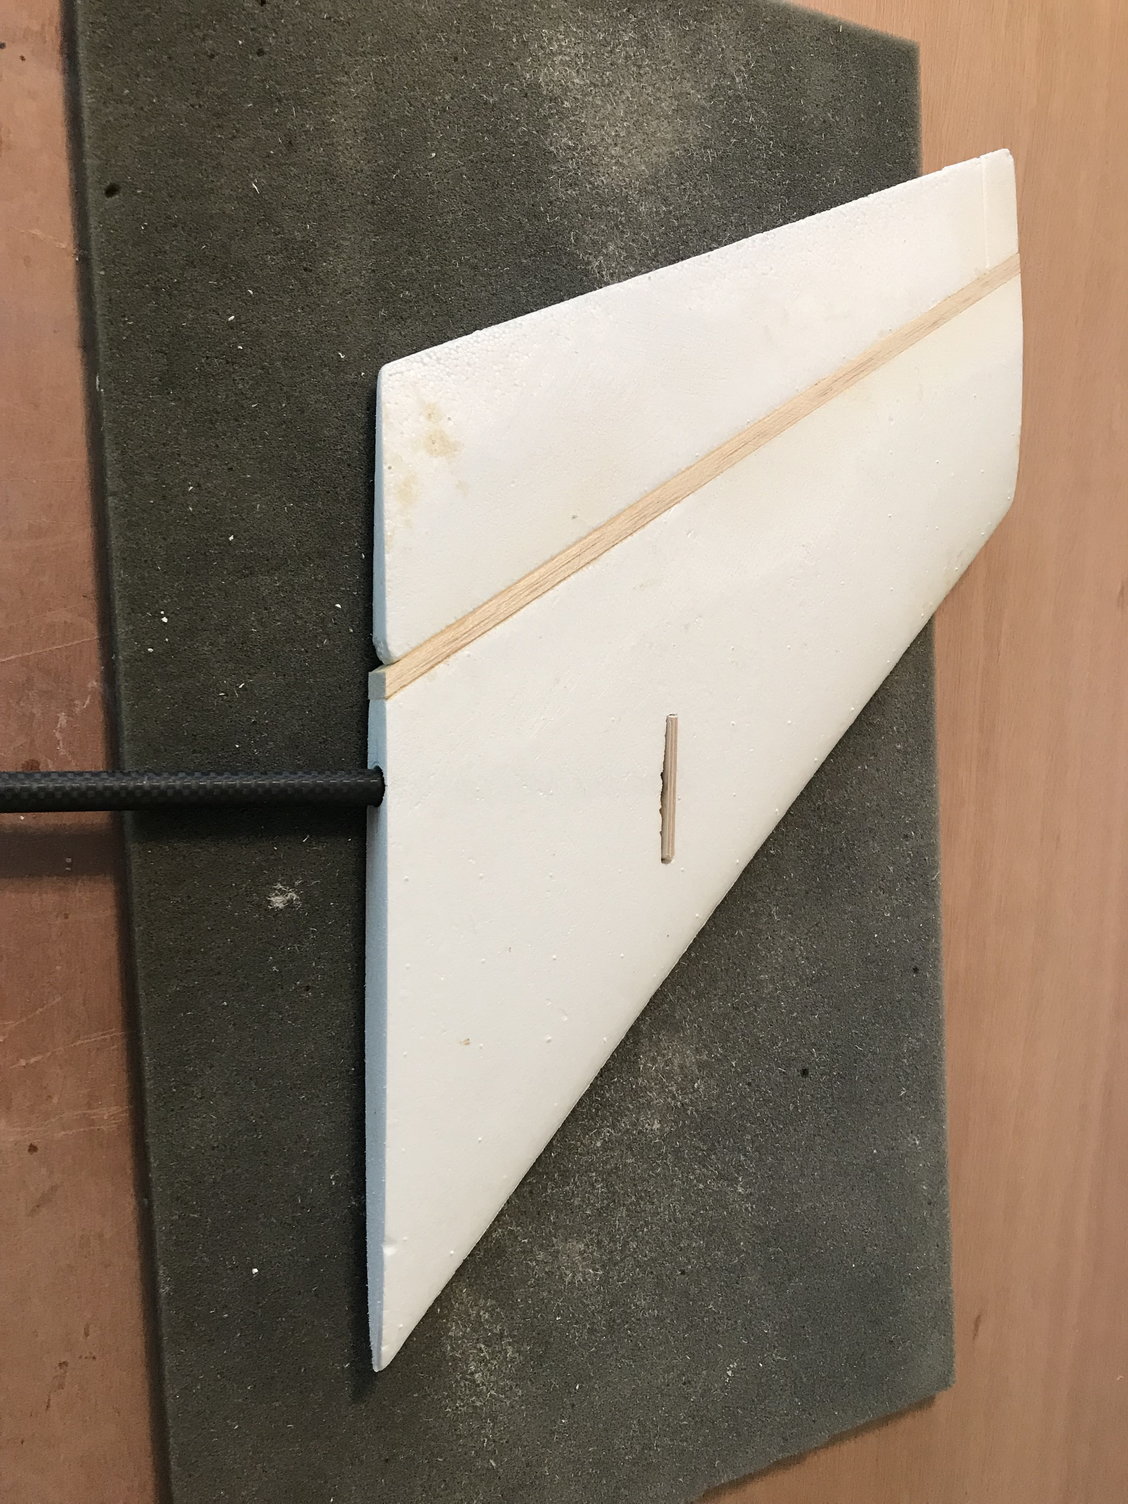
I did some work on the vertical stabilizer. One of the things I read up on this kit is that the rudder was pretty ineffective and most were leaving it off to save weight. I decided to try and increase it's effectiveness by making it a flying surface. I hope I'm not making a mistake but I decided to copy the flying elevators and make the vertical stab flying as well. The elevators are 30% of the surface area ahead of the pivot. I did the same for the rudder. Here are some pictures. I am going to have to make sure the linkage is very stiff and strong with no slop.
I purchased a carbon fiber stab tube assembly to use as the pivot. I took the outer sleeve and cut some teeth into it and used it as a drill to open up a clean hole in the foam at the proper dimension I calculated.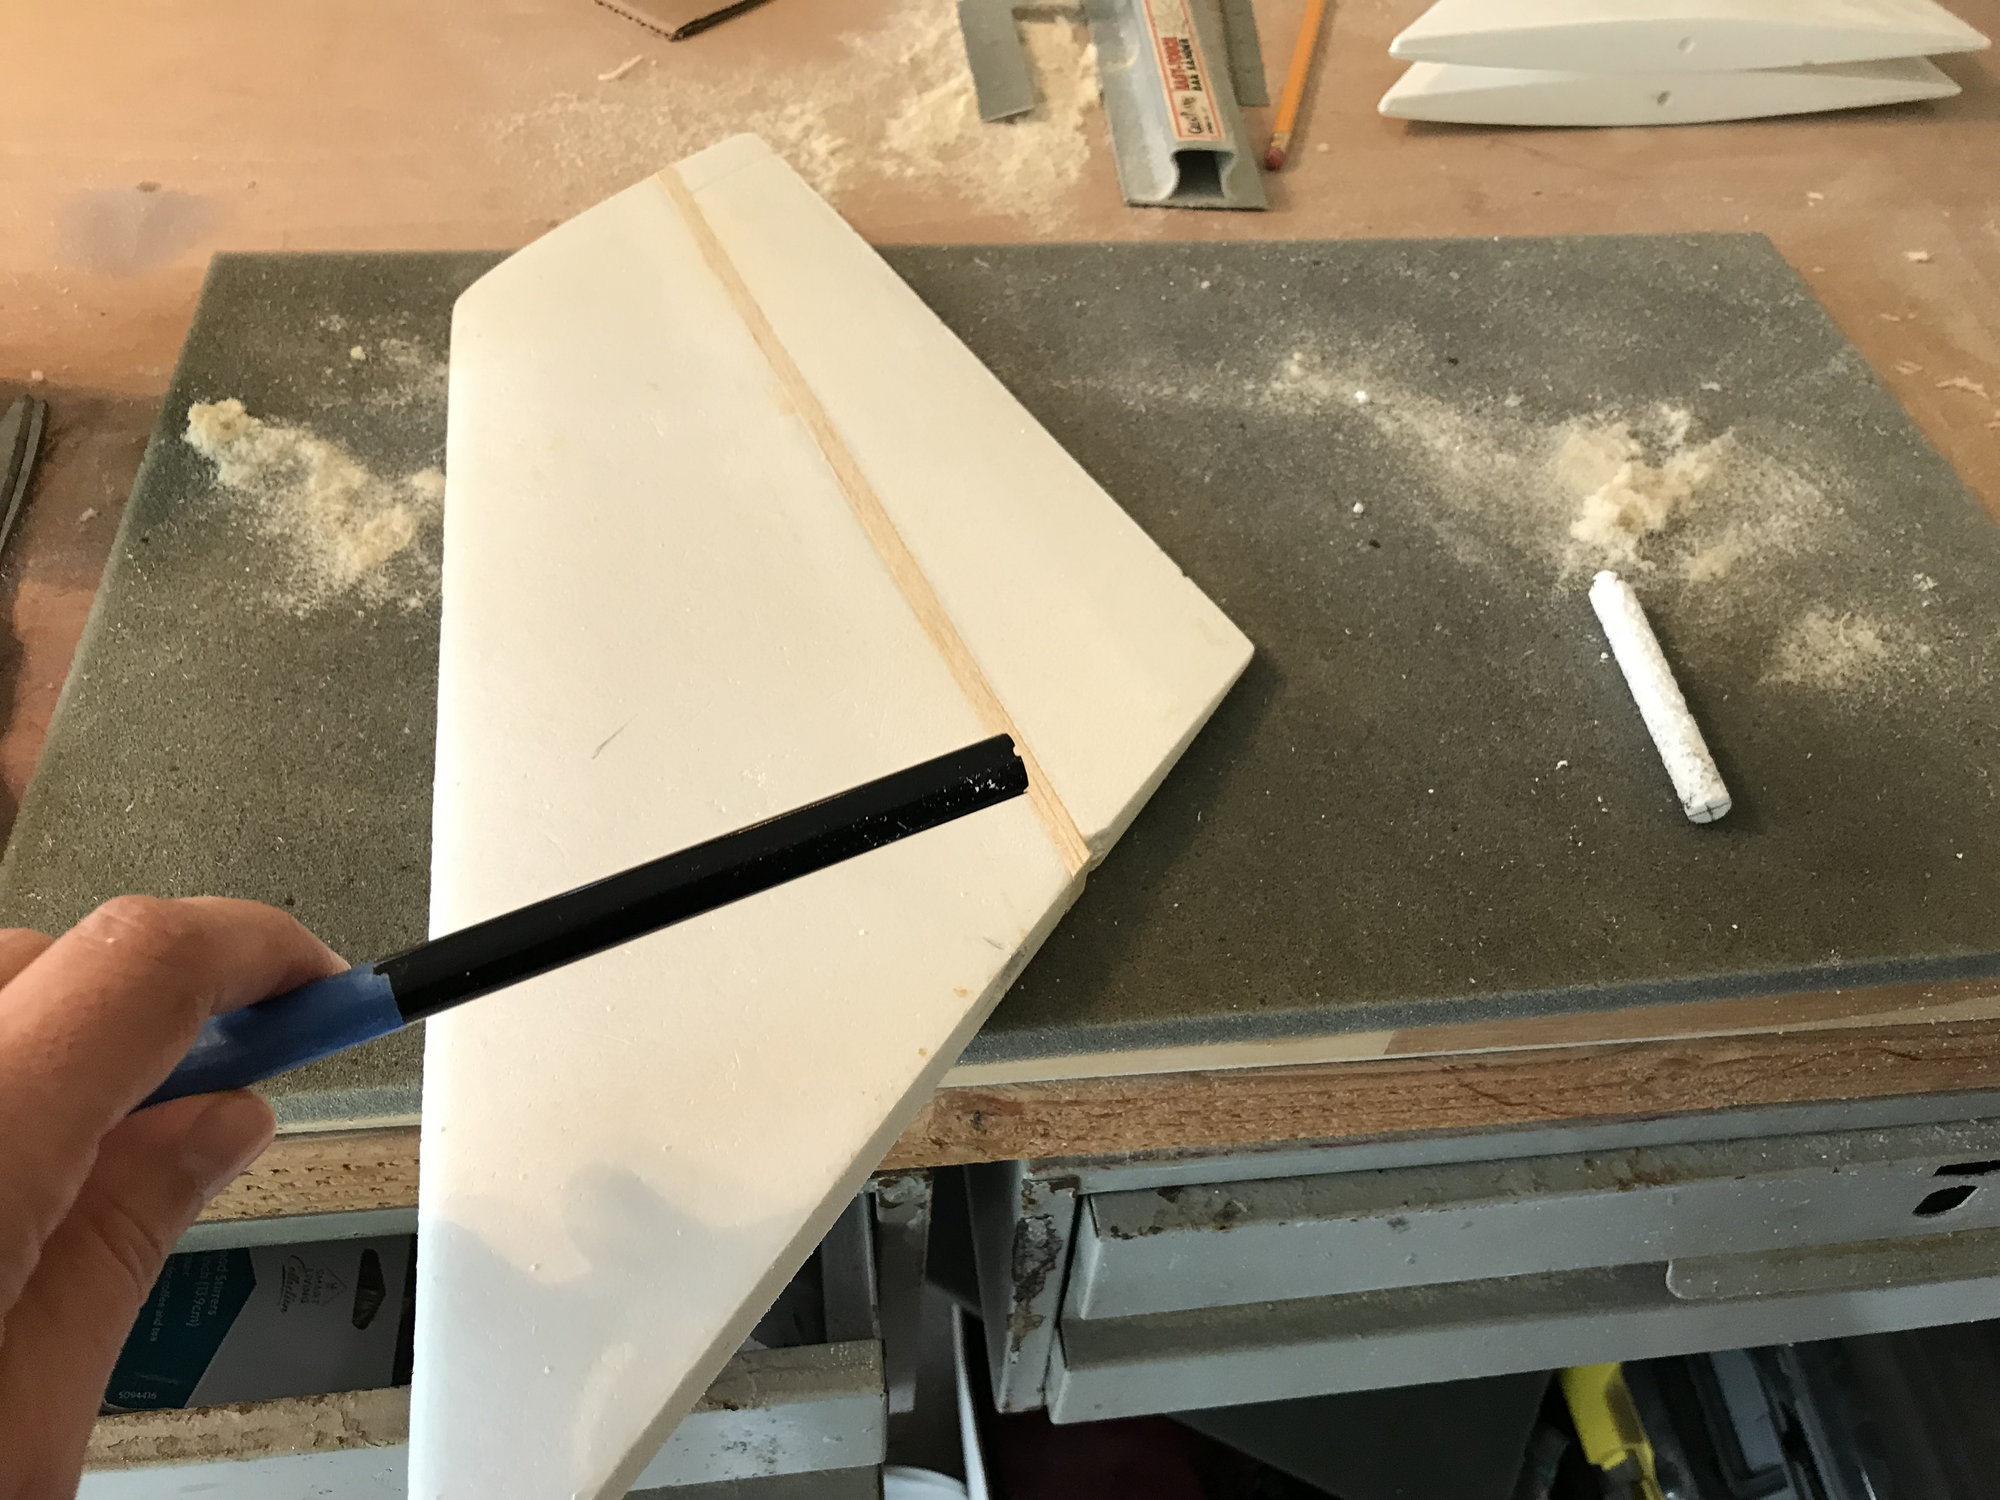
Cut some teeth into the end of the CF tube to use as a drill.
RP
I purchased a carbon fiber stab tube assembly to use as the pivot. I took the outer sleeve and cut some teeth into it and used it as a drill to open up a clean hole in the foam at the proper dimension I calculated.
Cut some teeth into the end of the CF tube to use as a drill.
RP
 11-02-2018, 07:14 AM
#24
Most people built it with a fixed rudder because it was very prone to flutter and to save weight. I don't remember it being in-effective.
I think I am going to install my rudder servo in the vertical fin. I have changed the vertical fin former to a full former instead of the Byron design. My vertical fin spar is perpendicular to the fin base.
I think I am going to install my rudder servo in the vertical fin. I have changed the vertical fin former to a full former instead of the Byron design. My vertical fin spar is perpendicular to the fin base.
04-30-2019, 10:35 AM
#25
Time for a little update,
Work has been progressing, but sorry I have not been updating at all. I had some issues trying to figure out the proper installation position for the elevator shelves on the fuse. They way they were molded and laid on naturally did not make sense with respect to the incidence of the elevator. There are no numbers for incidence that I am aware of, so I mounted the wing and zeroed the top of the horizontal stabilizer shelf. This apeared to make sense with the wing mounted. I adjusted the wings to +1/2 to 1 degree and set the horizontal stabs to zero and mounted the shelves which did not fit well and was a big PITA.
RP

