T-one models F22A Raptor scale build!!!
 02-08-2019, 01:43 PM
#76


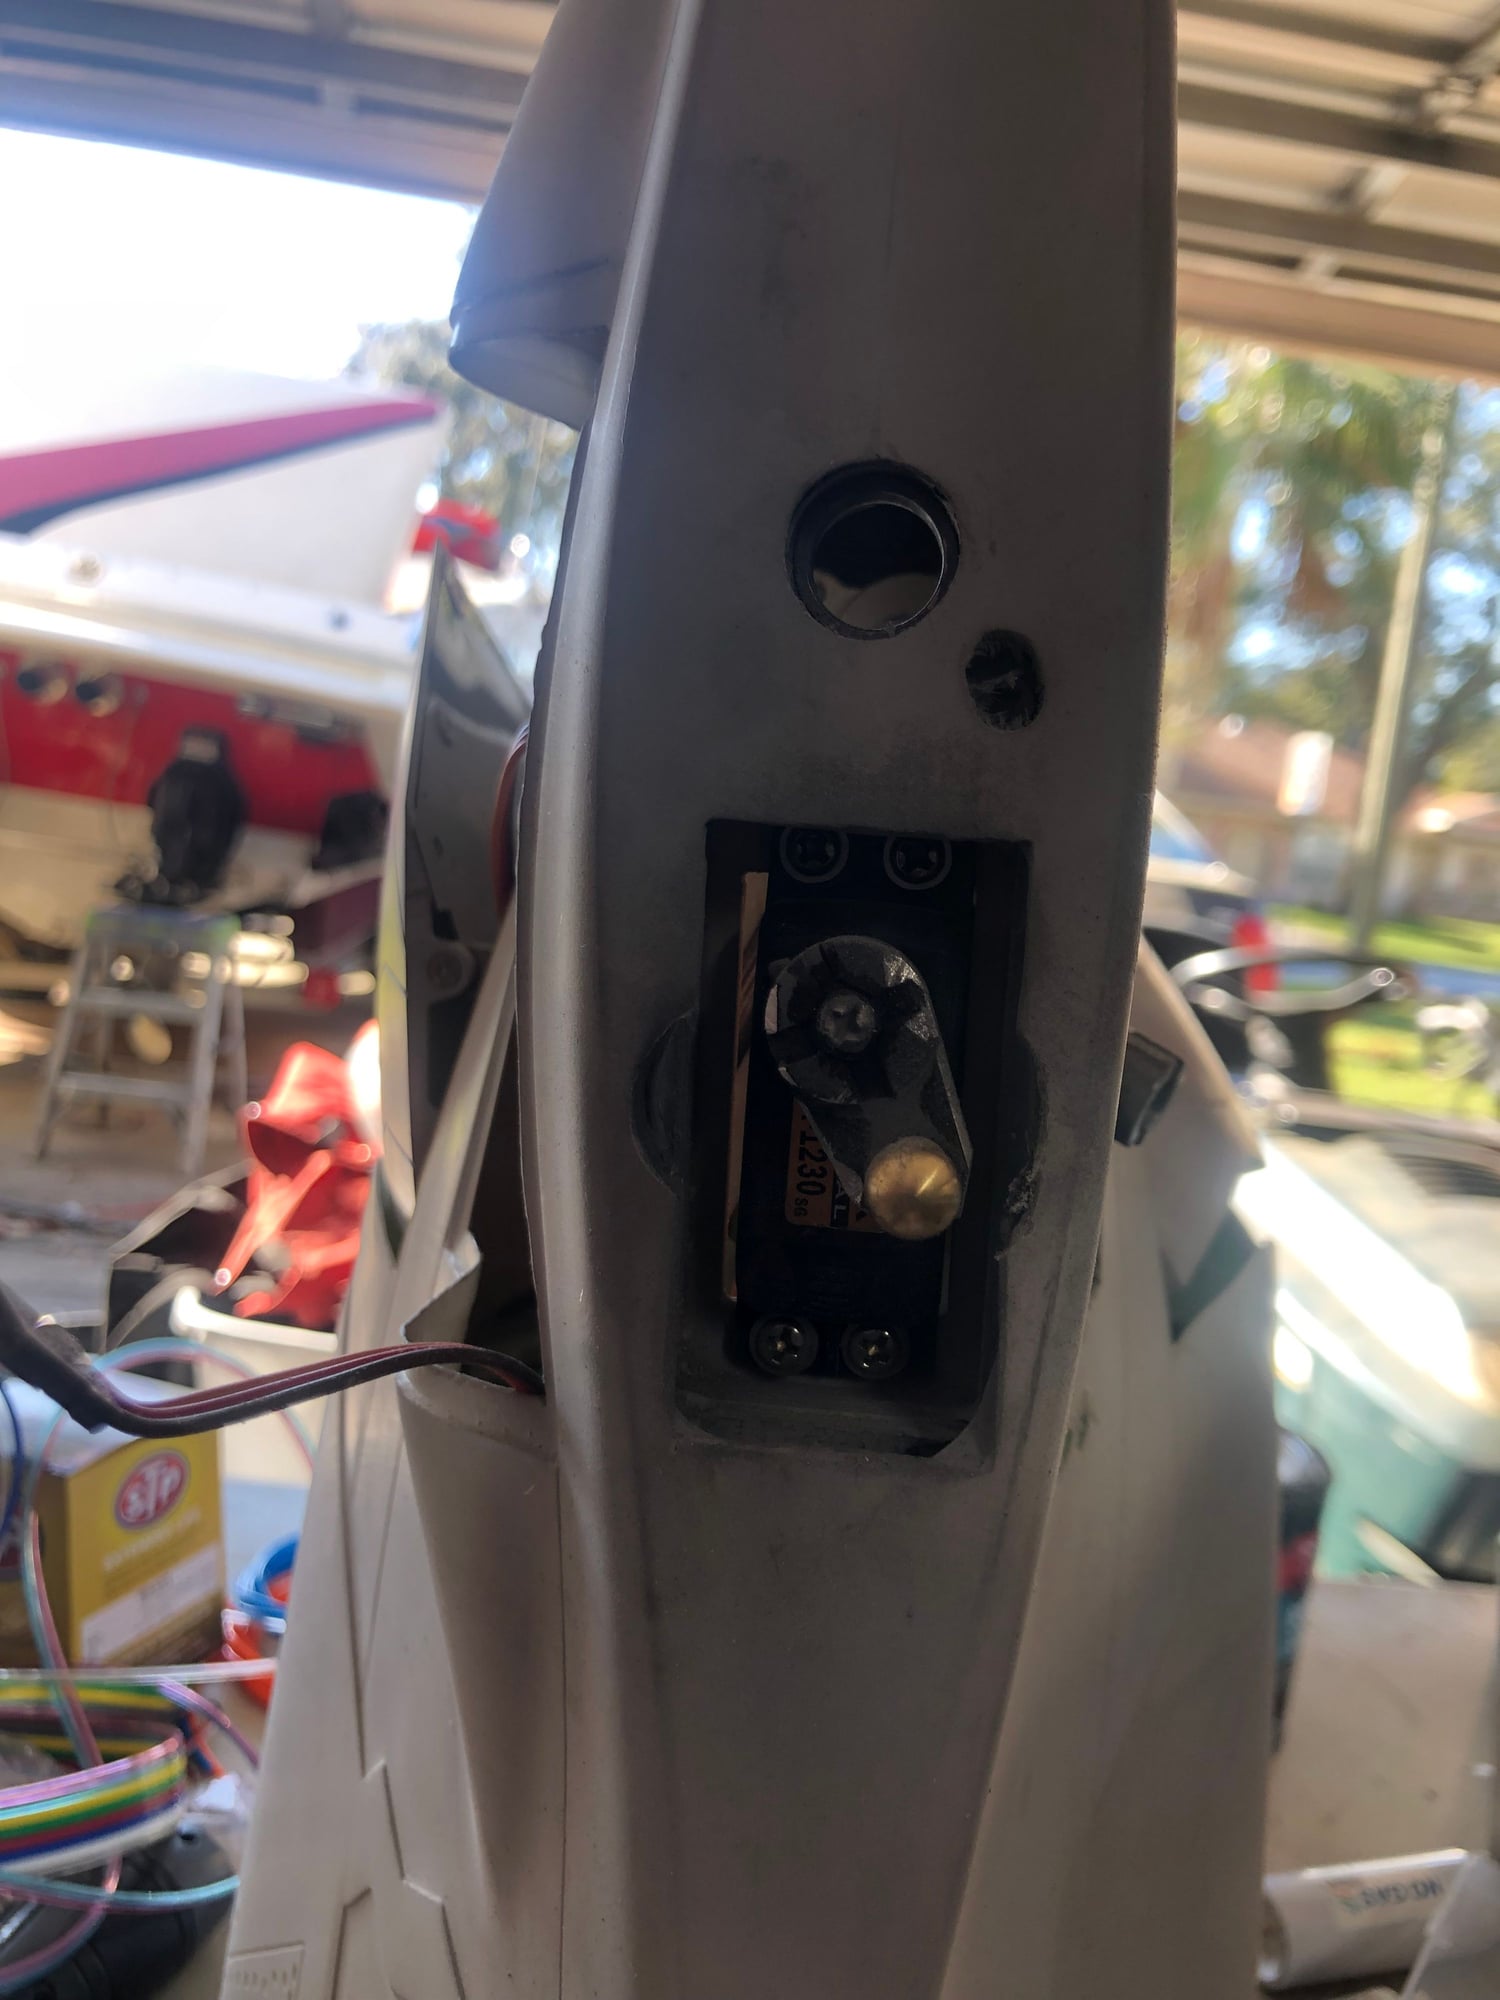
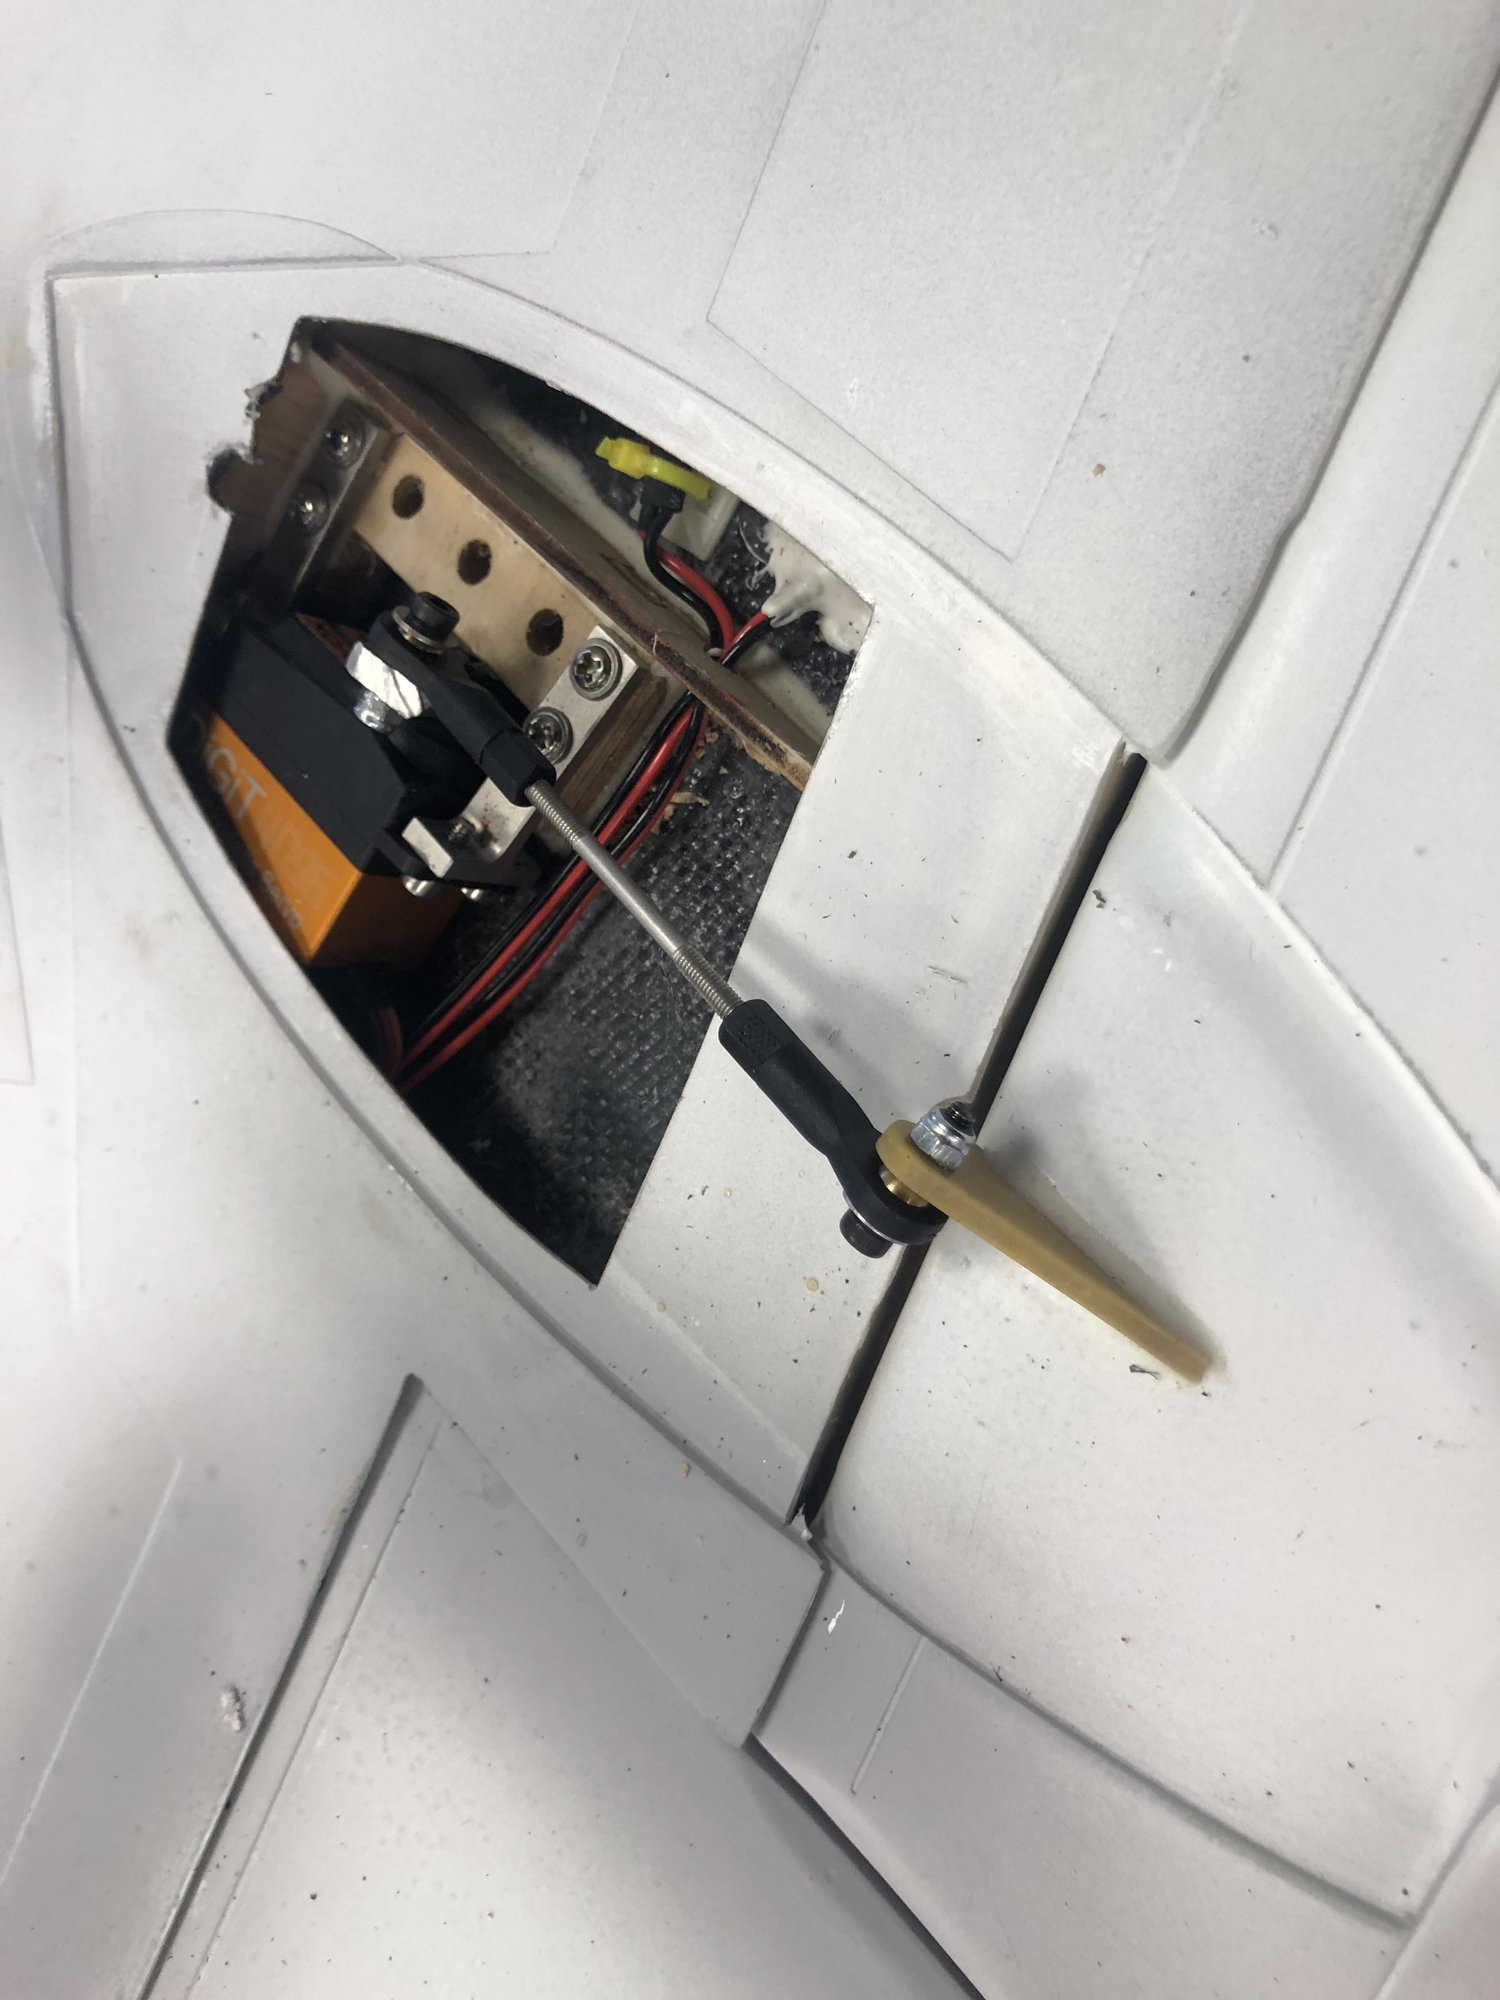
Horizontal stabs took a little more effort but still not bad. Hardest part was having to cut down the servo arms since mine where to long. You will want about a 3/4 inch servo arm. These give lots of torque and resolution. I had to trim the fuselage back a little to get decent throw.


 02-08-2019, 05:57 PM
#81
Hello Gary
Using normal 6MM line. High flow would be 8MM.
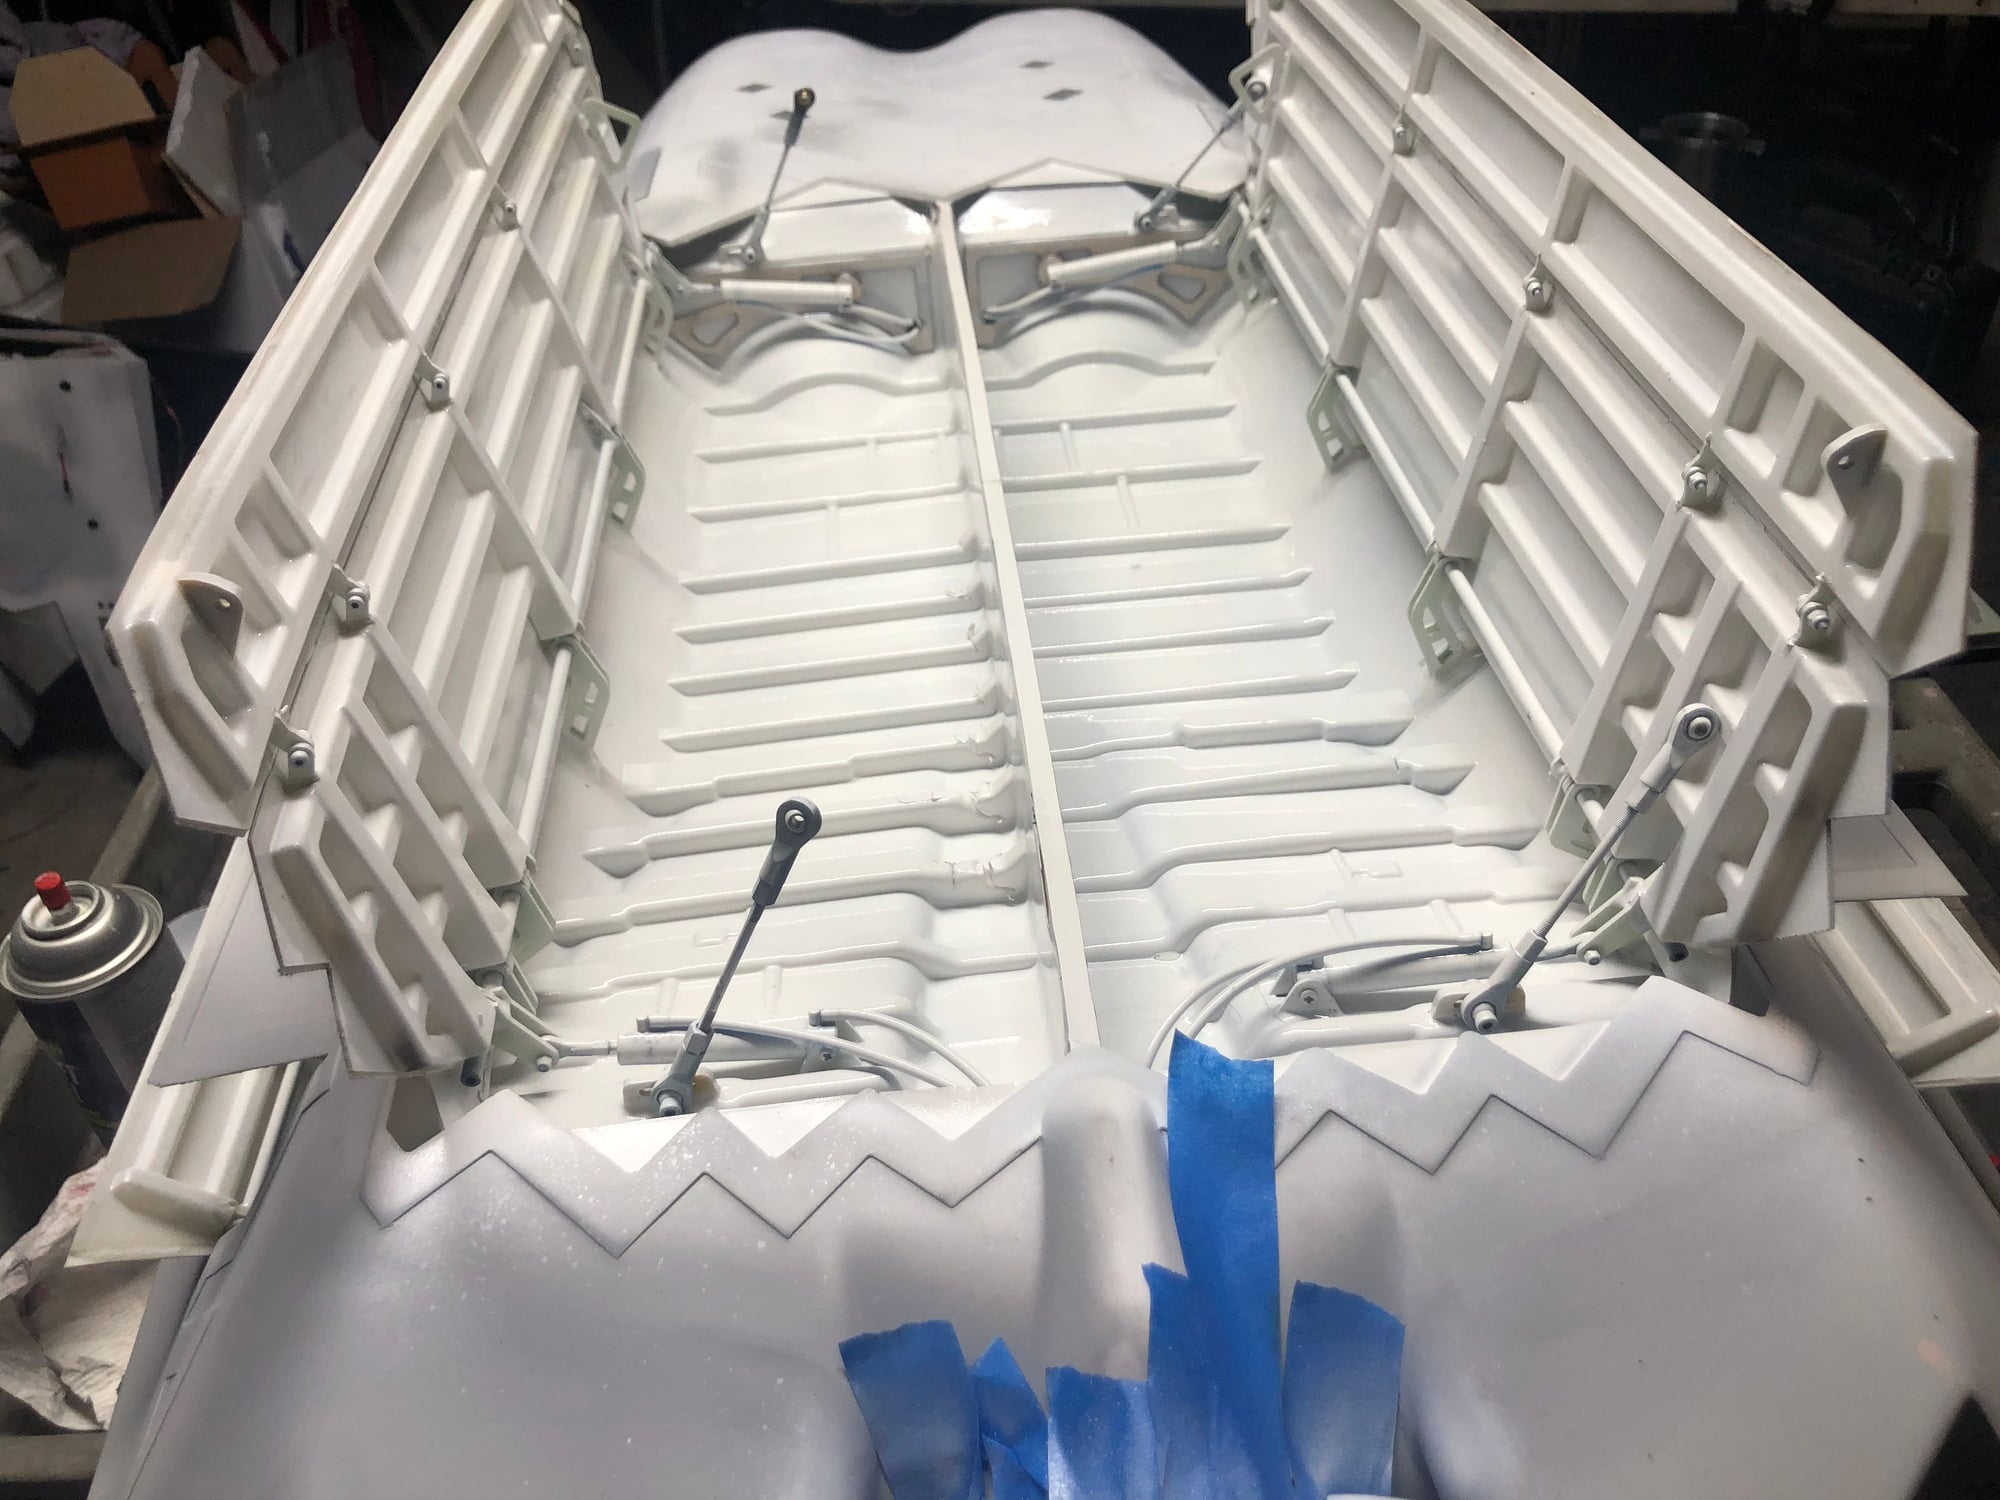
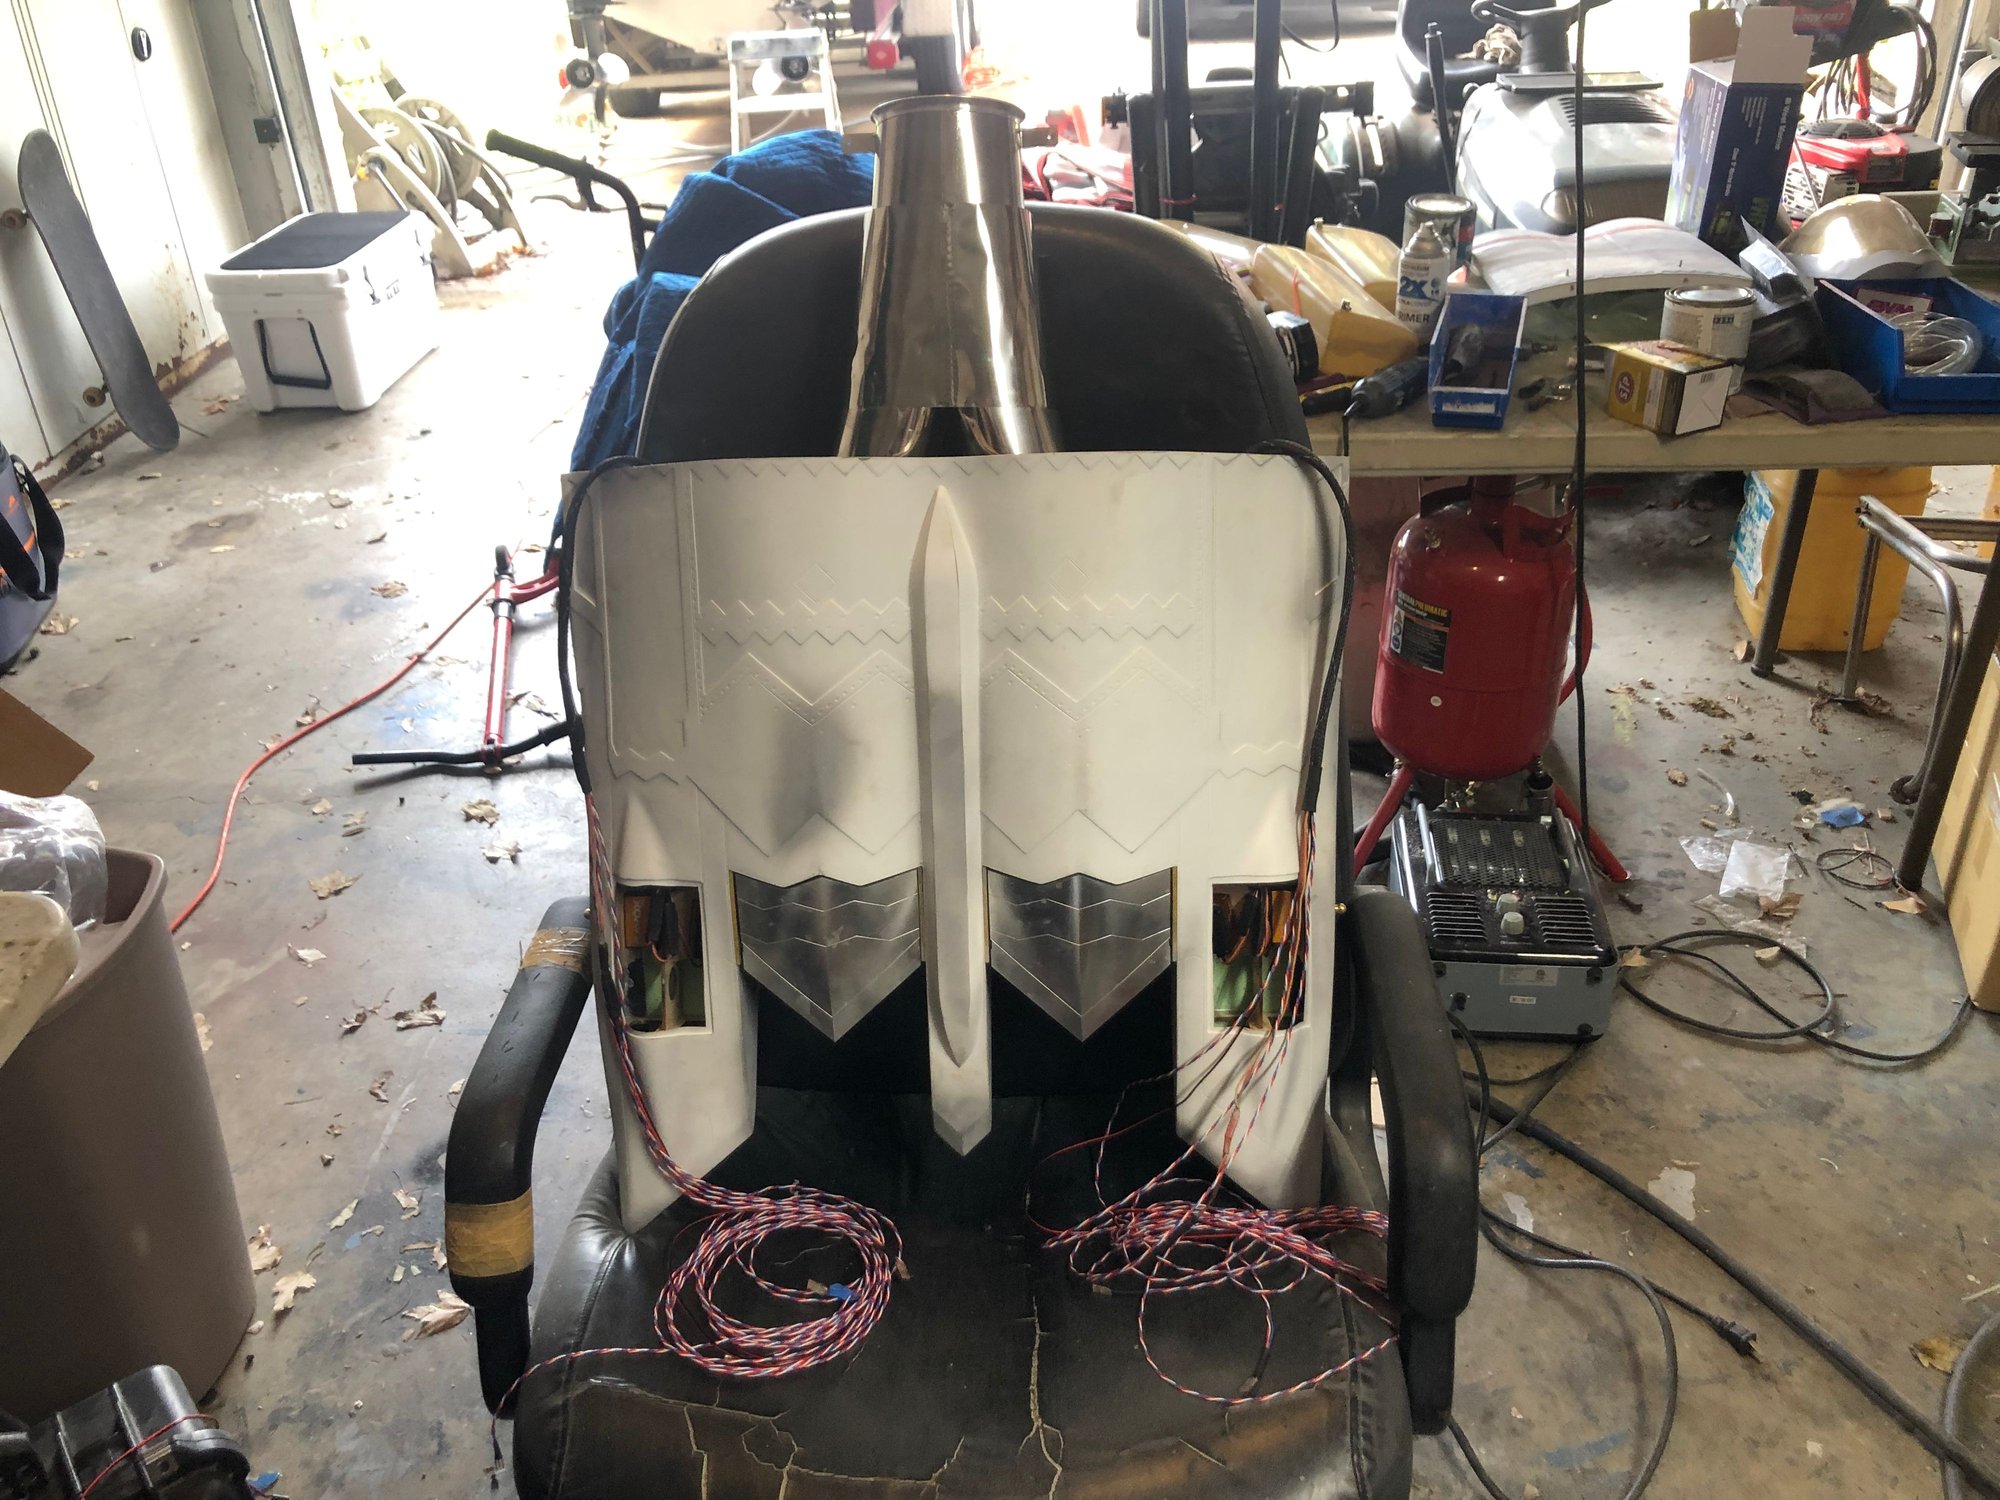
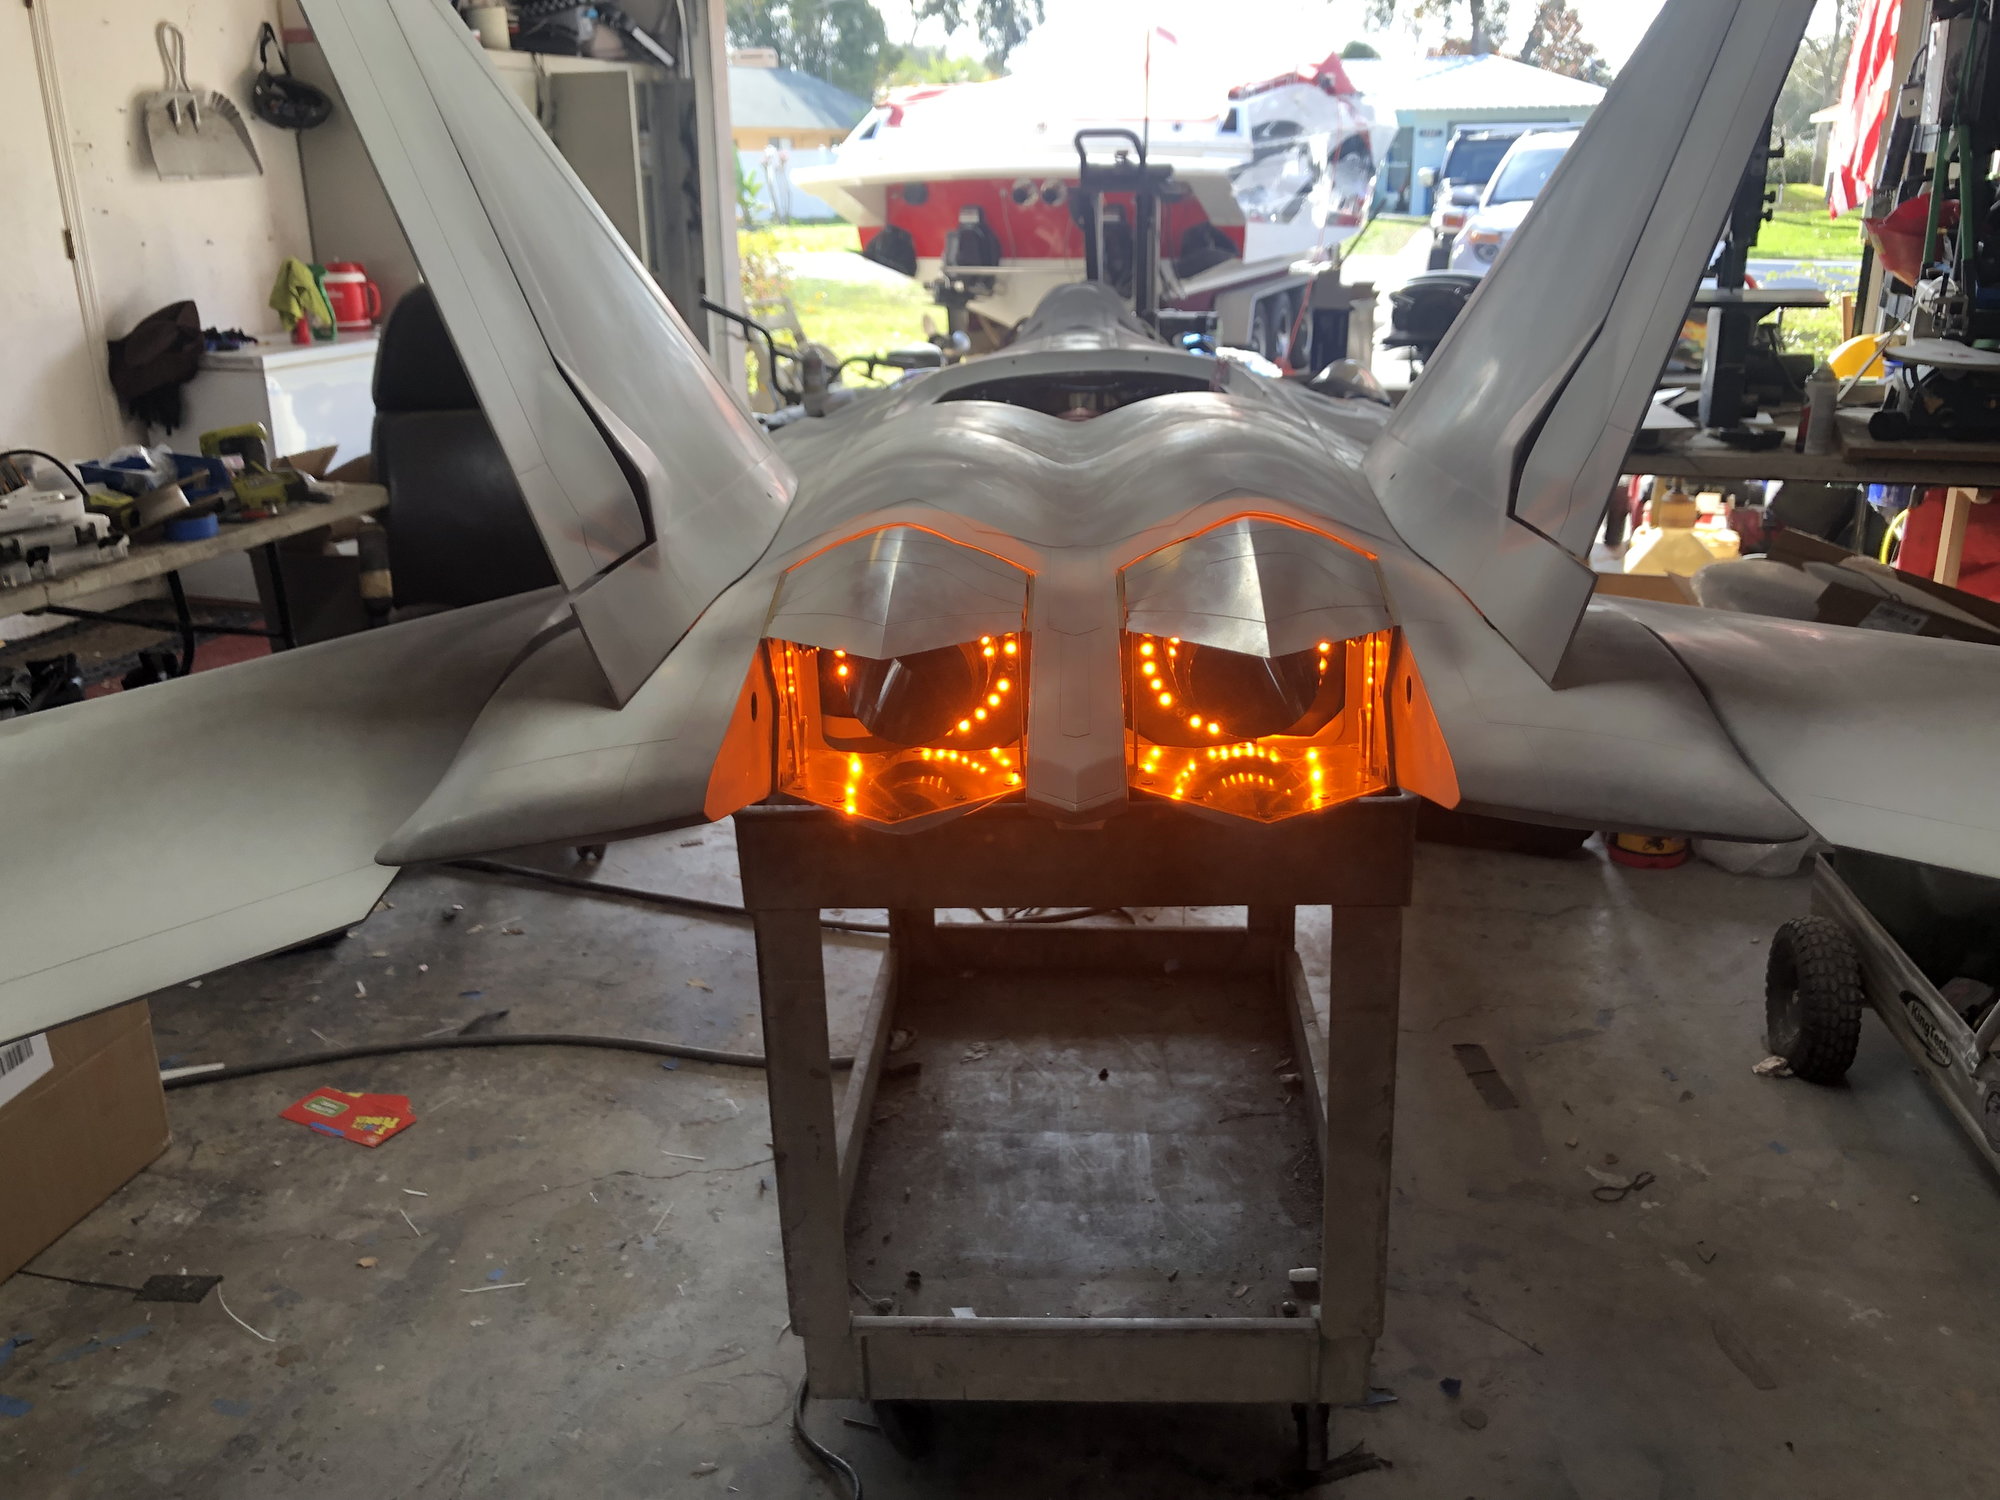
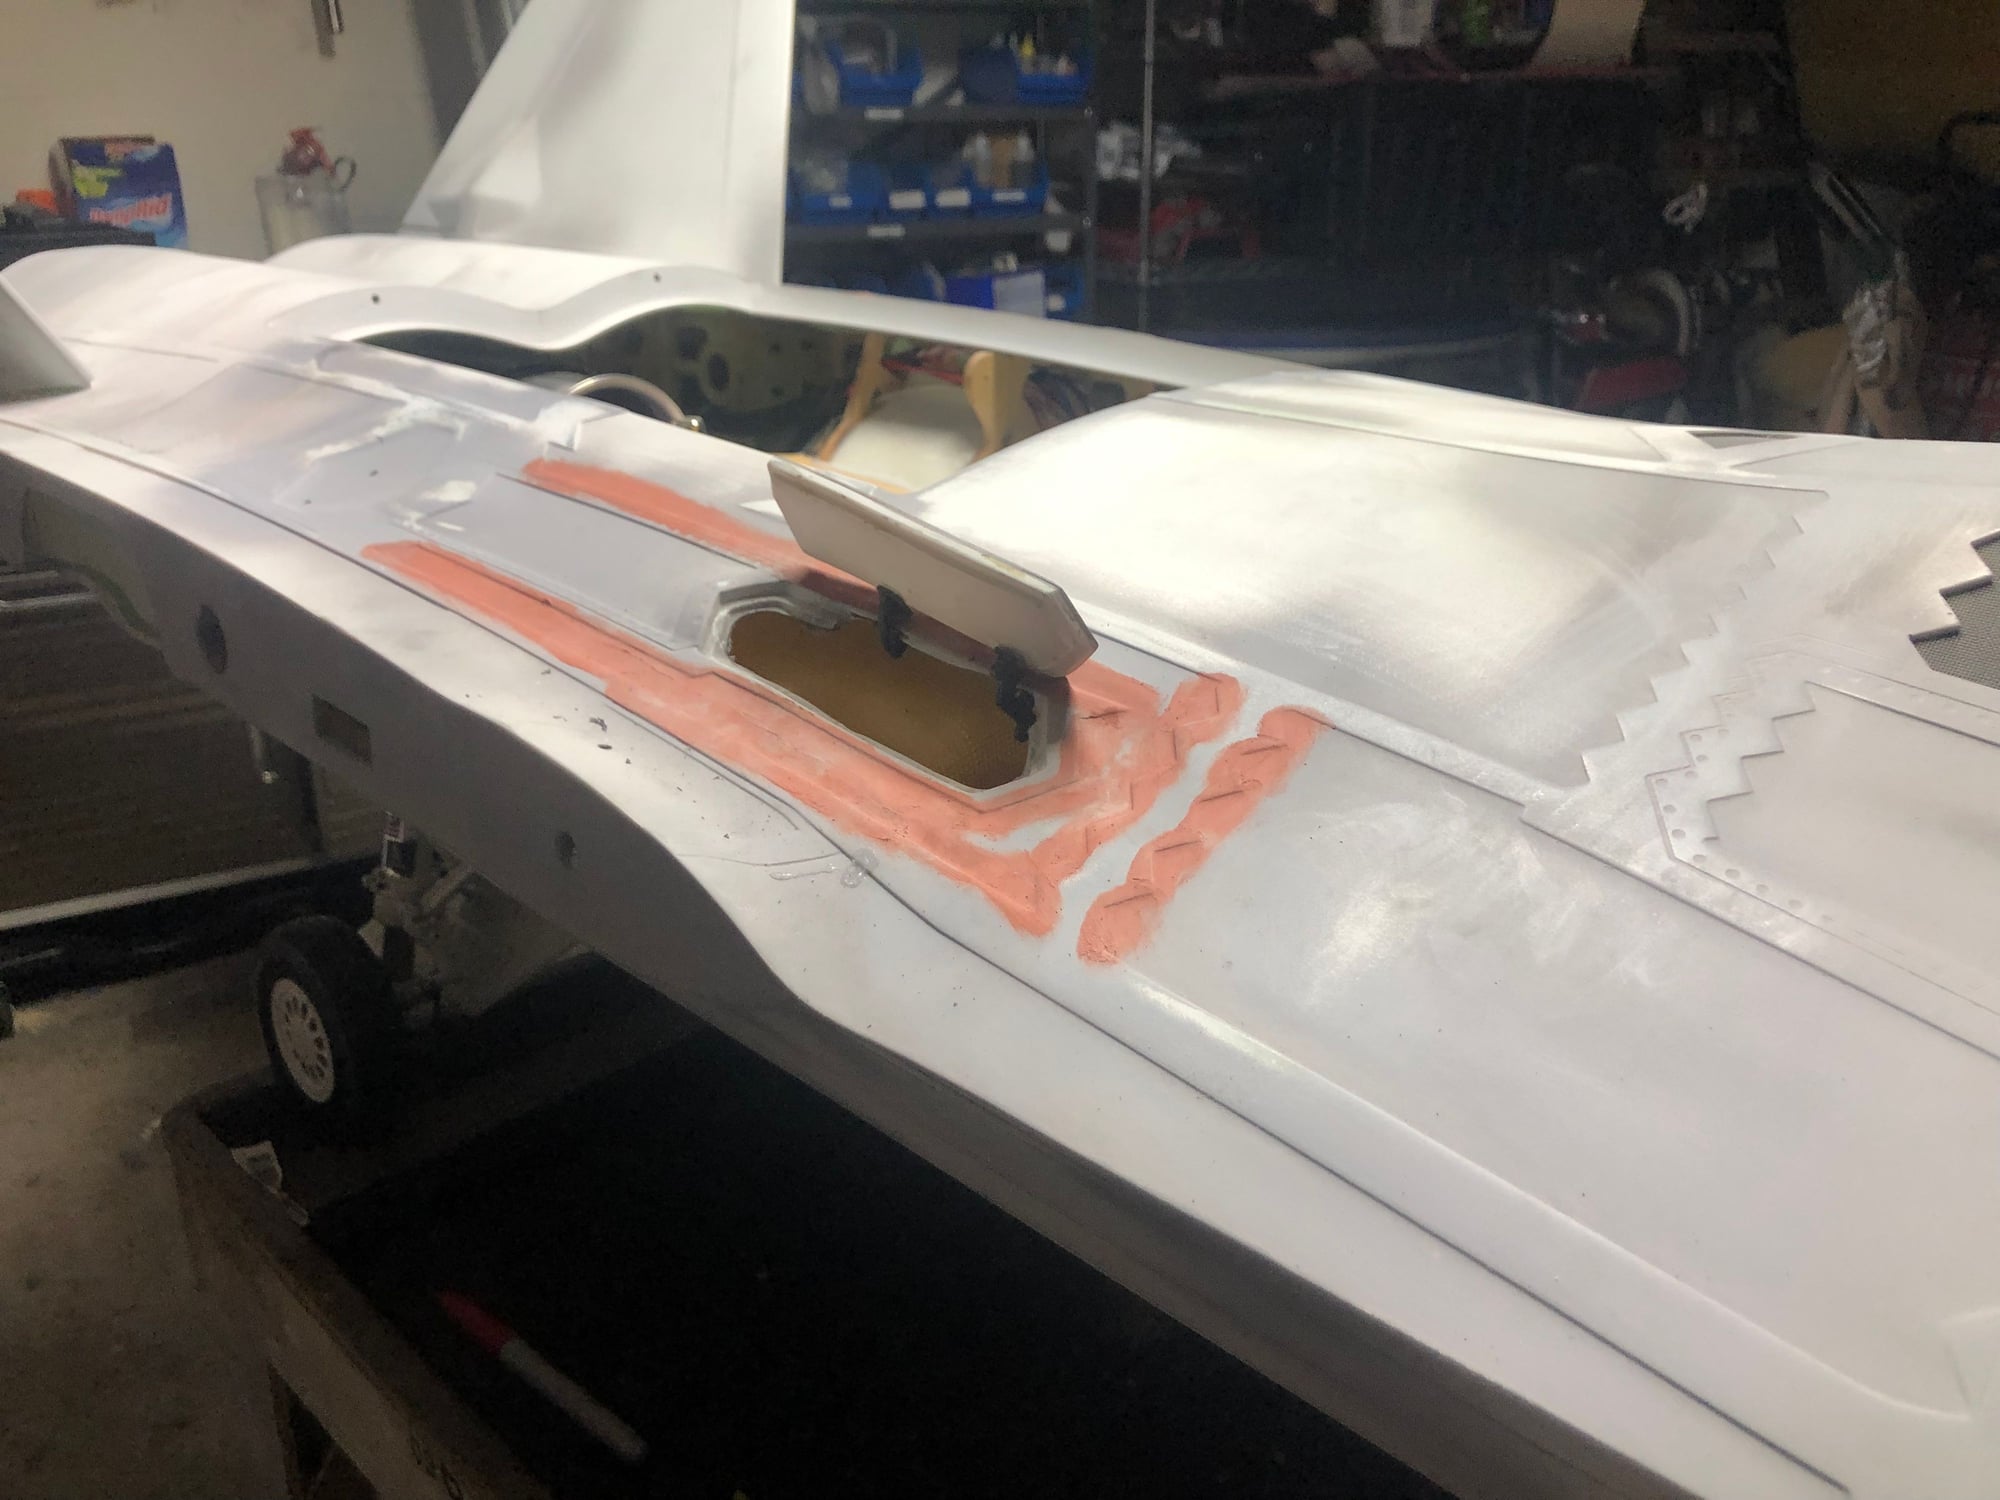
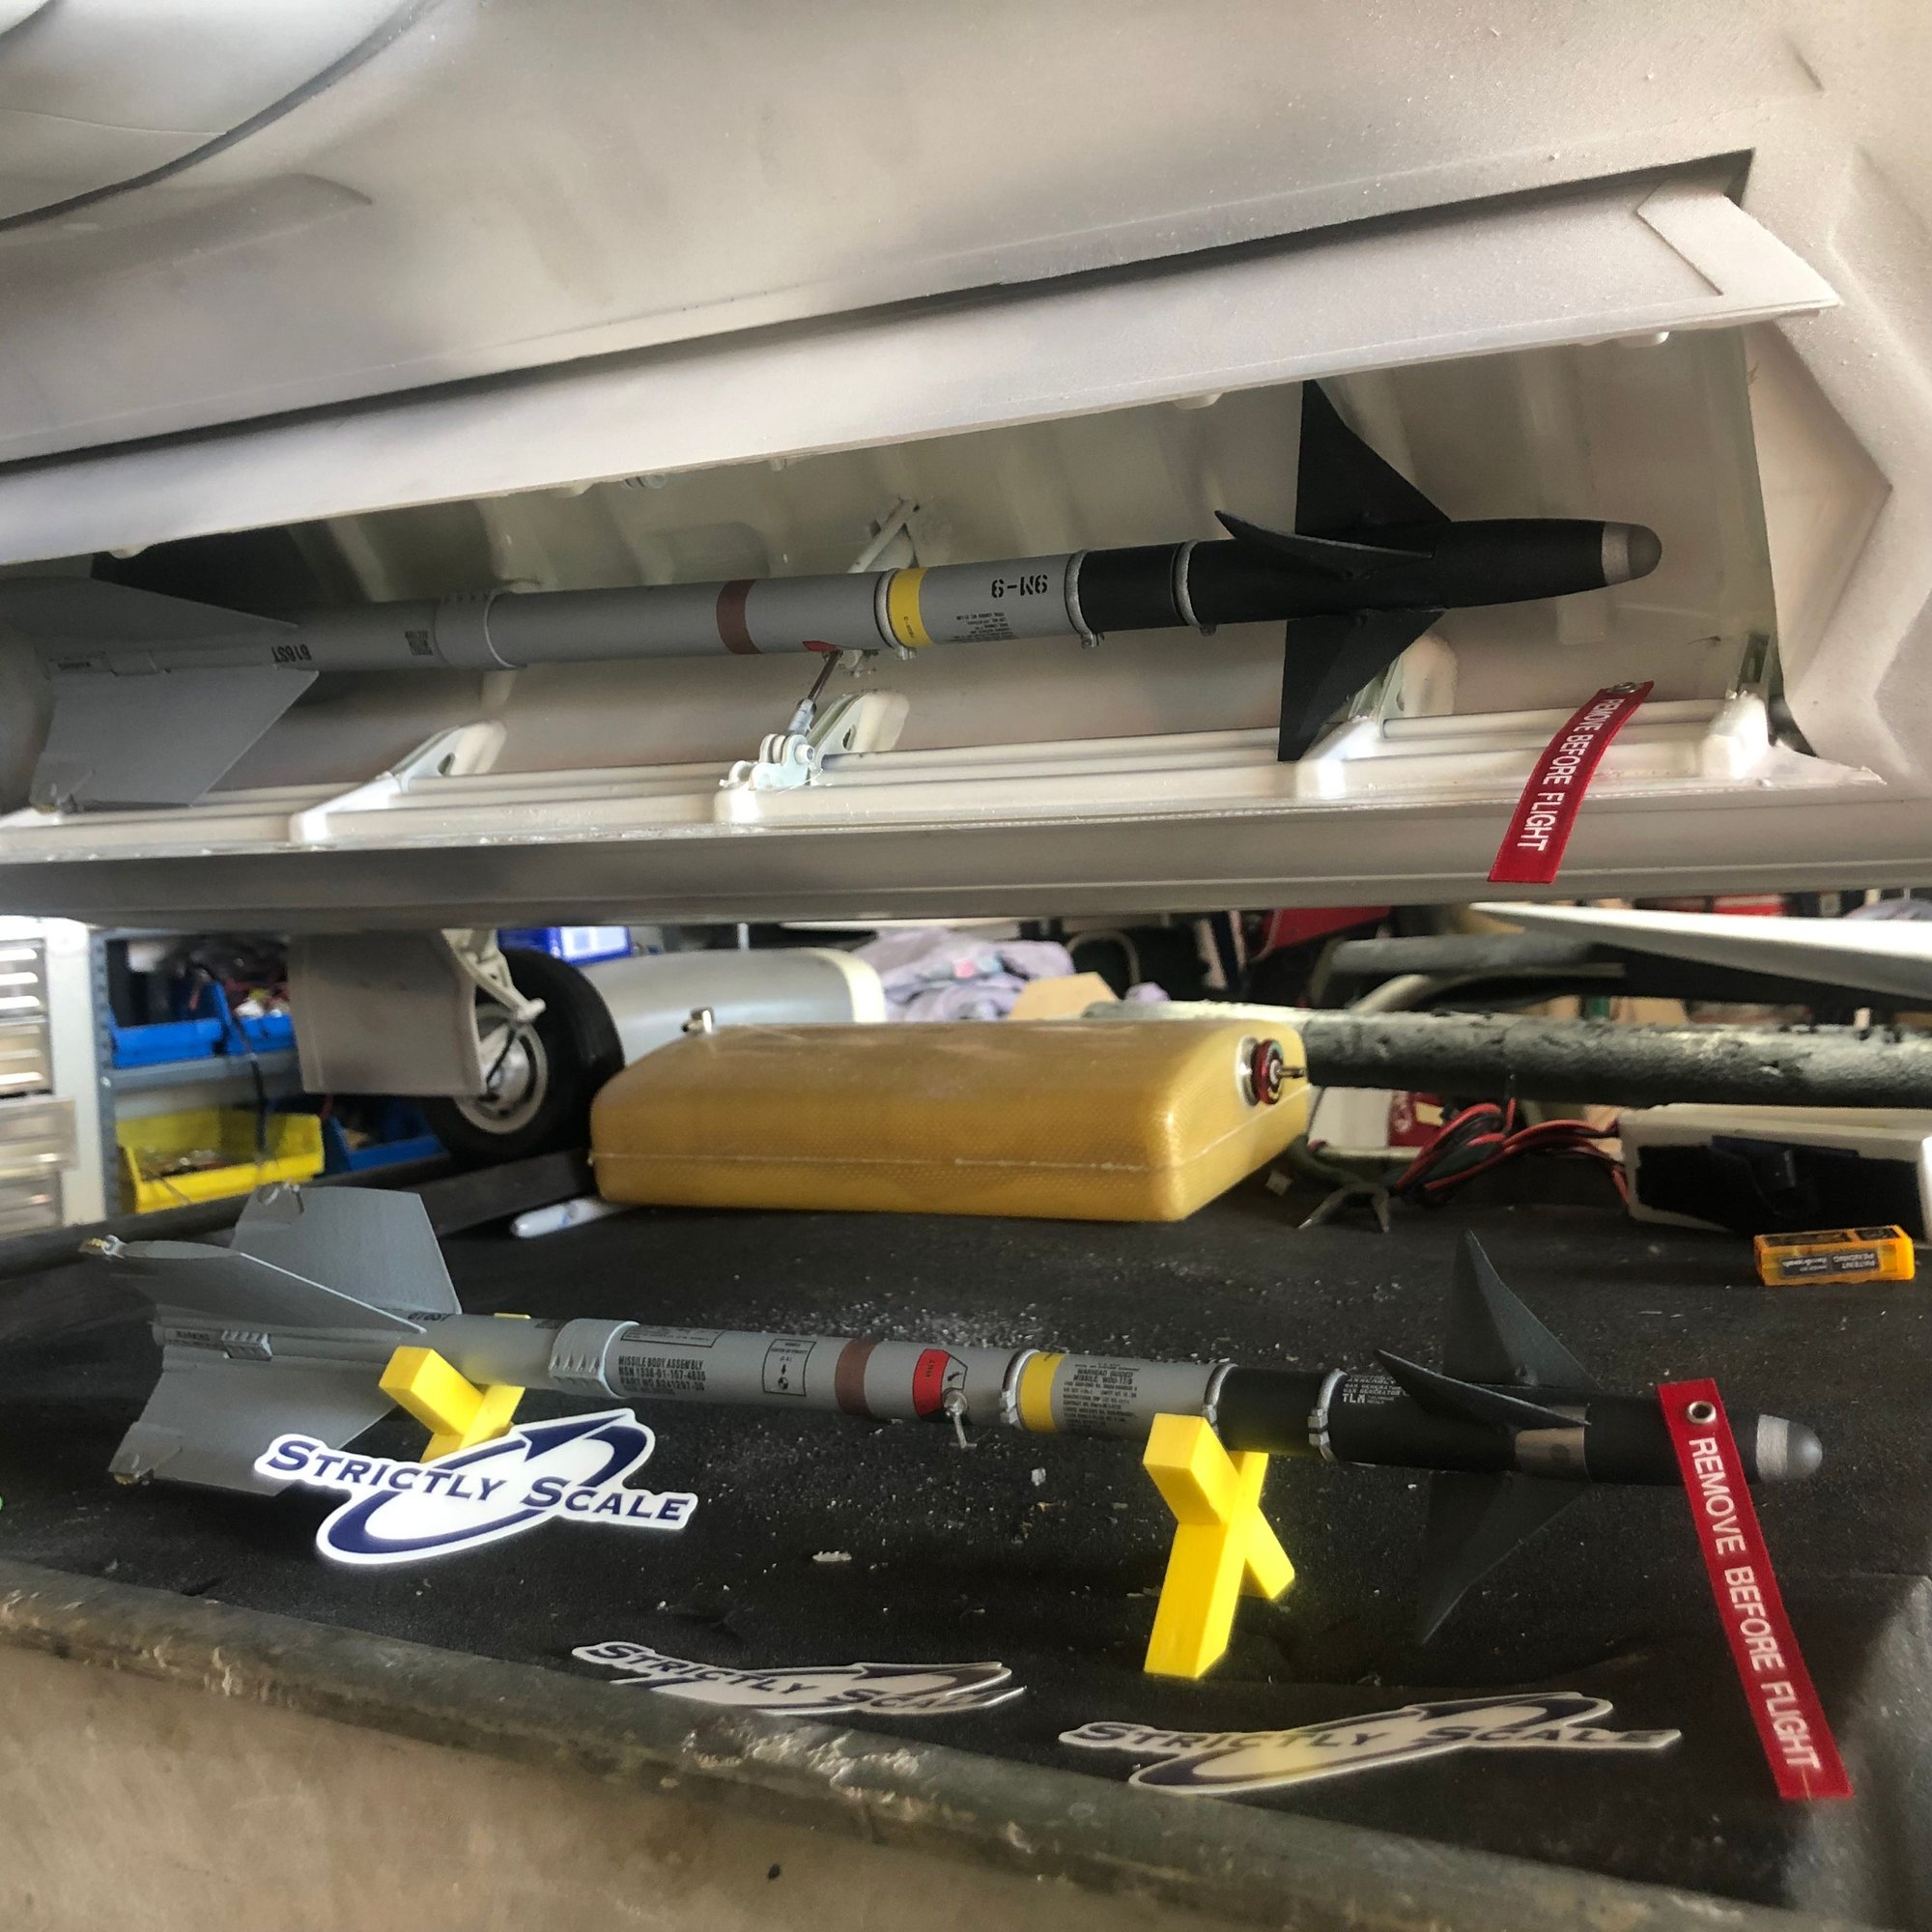
The paint is some white spray bomb used to paint full scale aircraft parts. Its an enamel. Cant wait to get into the weather side. Going to get nice and dirty in the bays. Sean McHale is sending me some beautiful missiles for the side bays. The trick will be finding time to make them stick out with the doors open. Not allot of room in this area with the inlets and fuel tanks. We will see.
Using normal 6MM line. High flow would be 8MM.
The paint is some white spray bomb used to paint full scale aircraft parts. Its an enamel. Cant wait to get into the weather side. Going to get nice and dirty in the bays. Sean McHale is sending me some beautiful missiles for the side bays. The trick will be finding time to make them stick out with the doors open. Not allot of room in this area with the inlets and fuel tanks. We will see.
 02-10-2019, 01:30 PM
#87
Are your going to put any protect on the walls that extend past the vectoring nozzles? Damn cool project, I have lost all motivation for the F-18 and benching it for one of these. 

 02-10-2019, 05:39 PM
#91
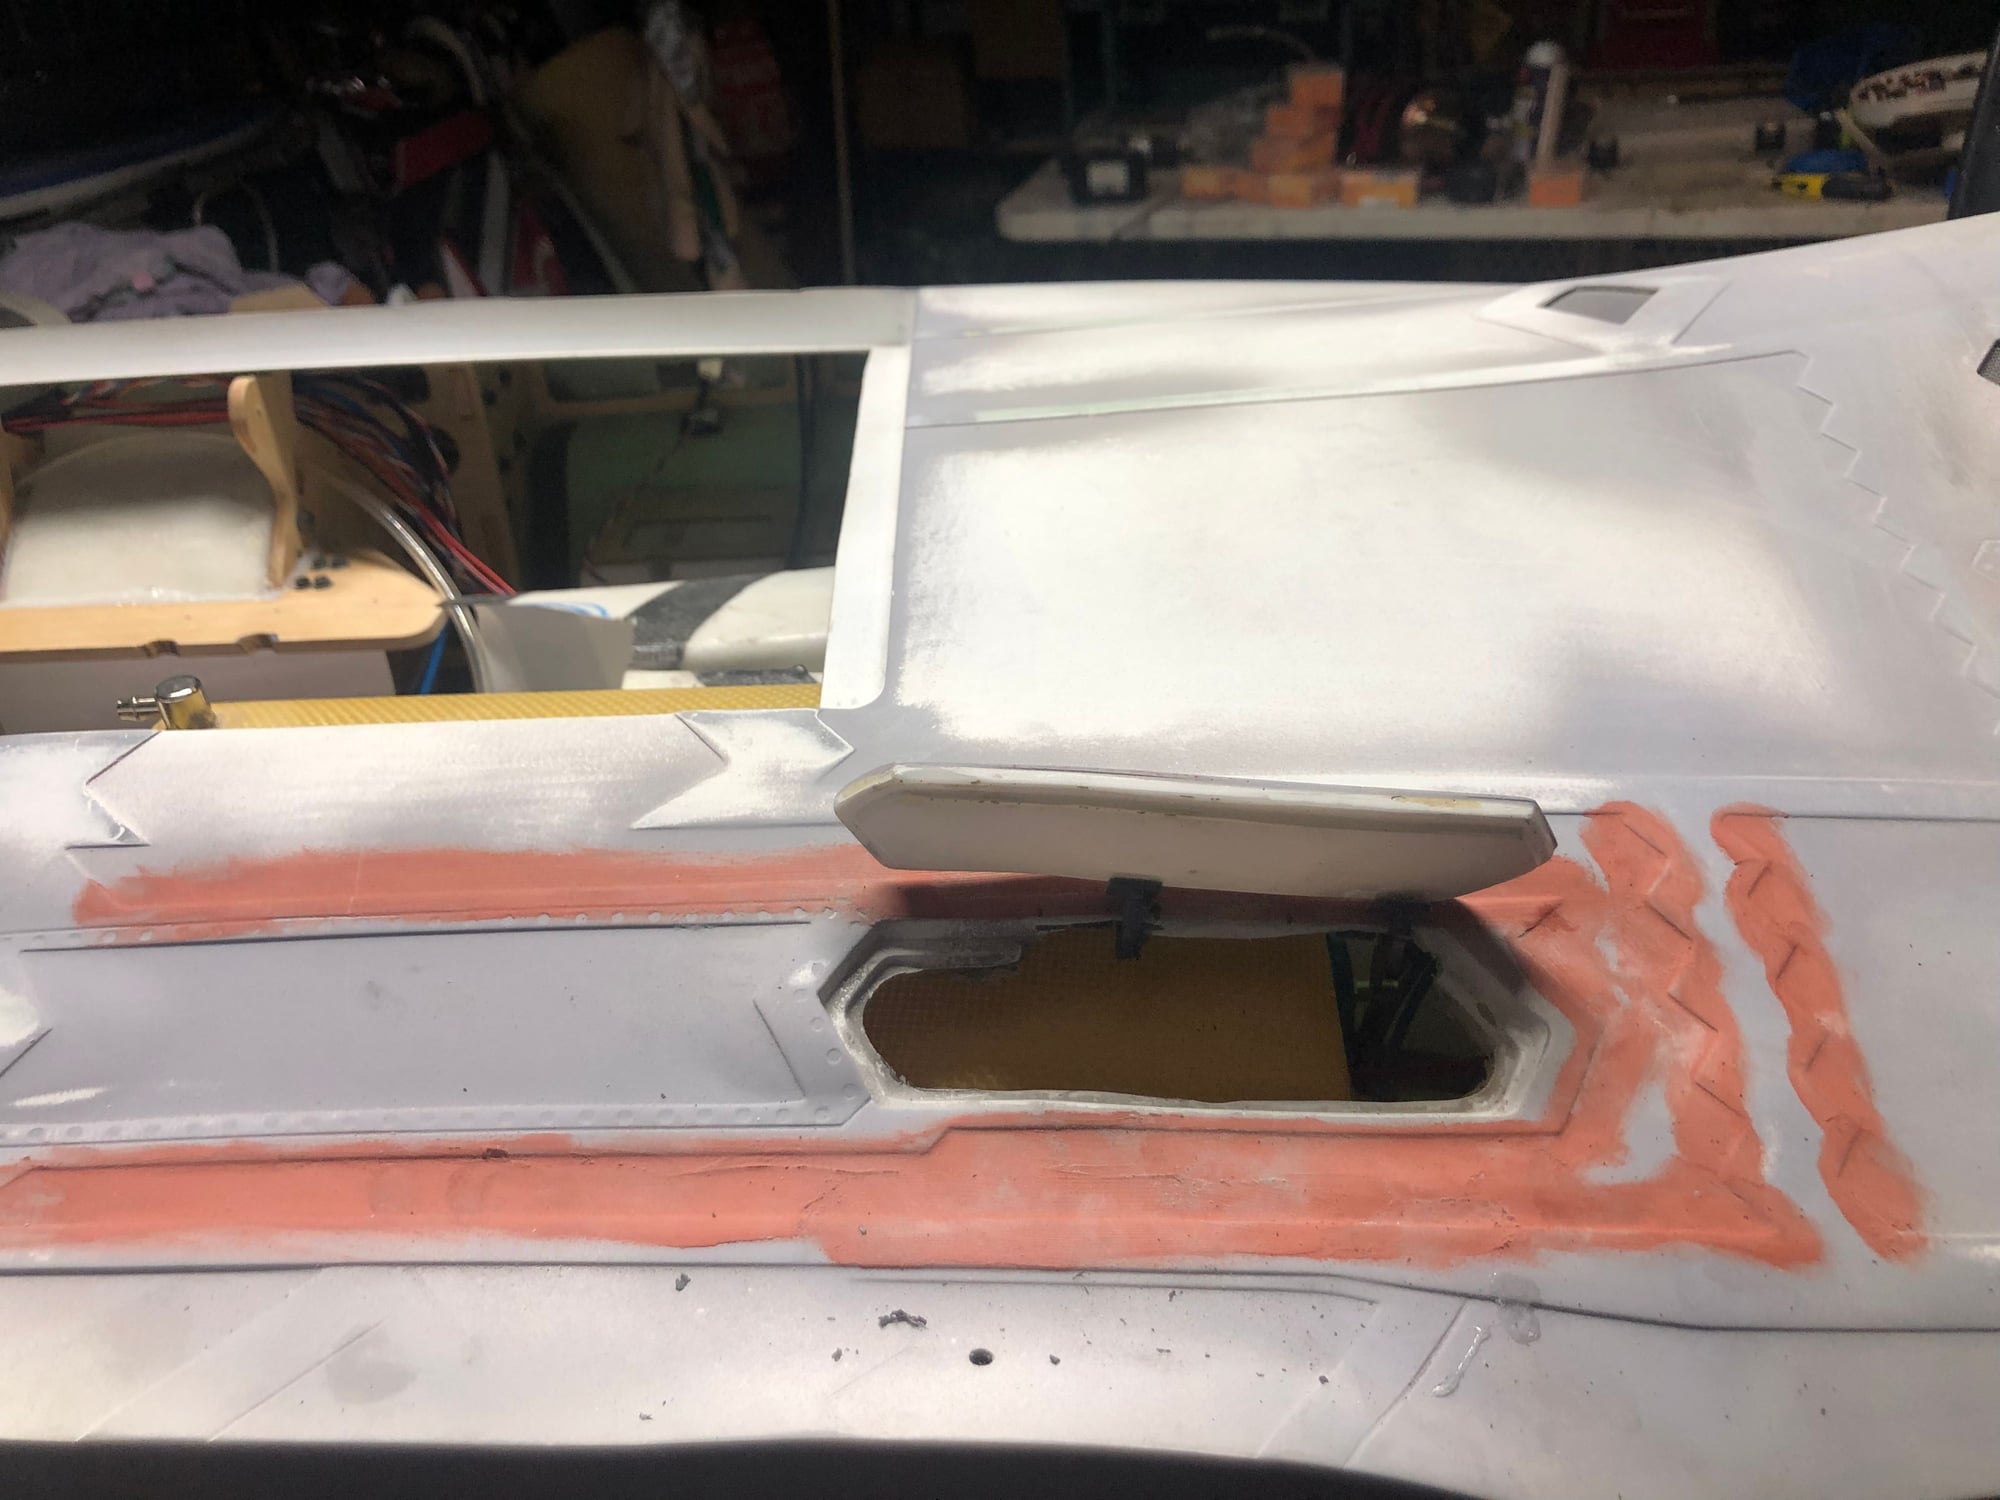

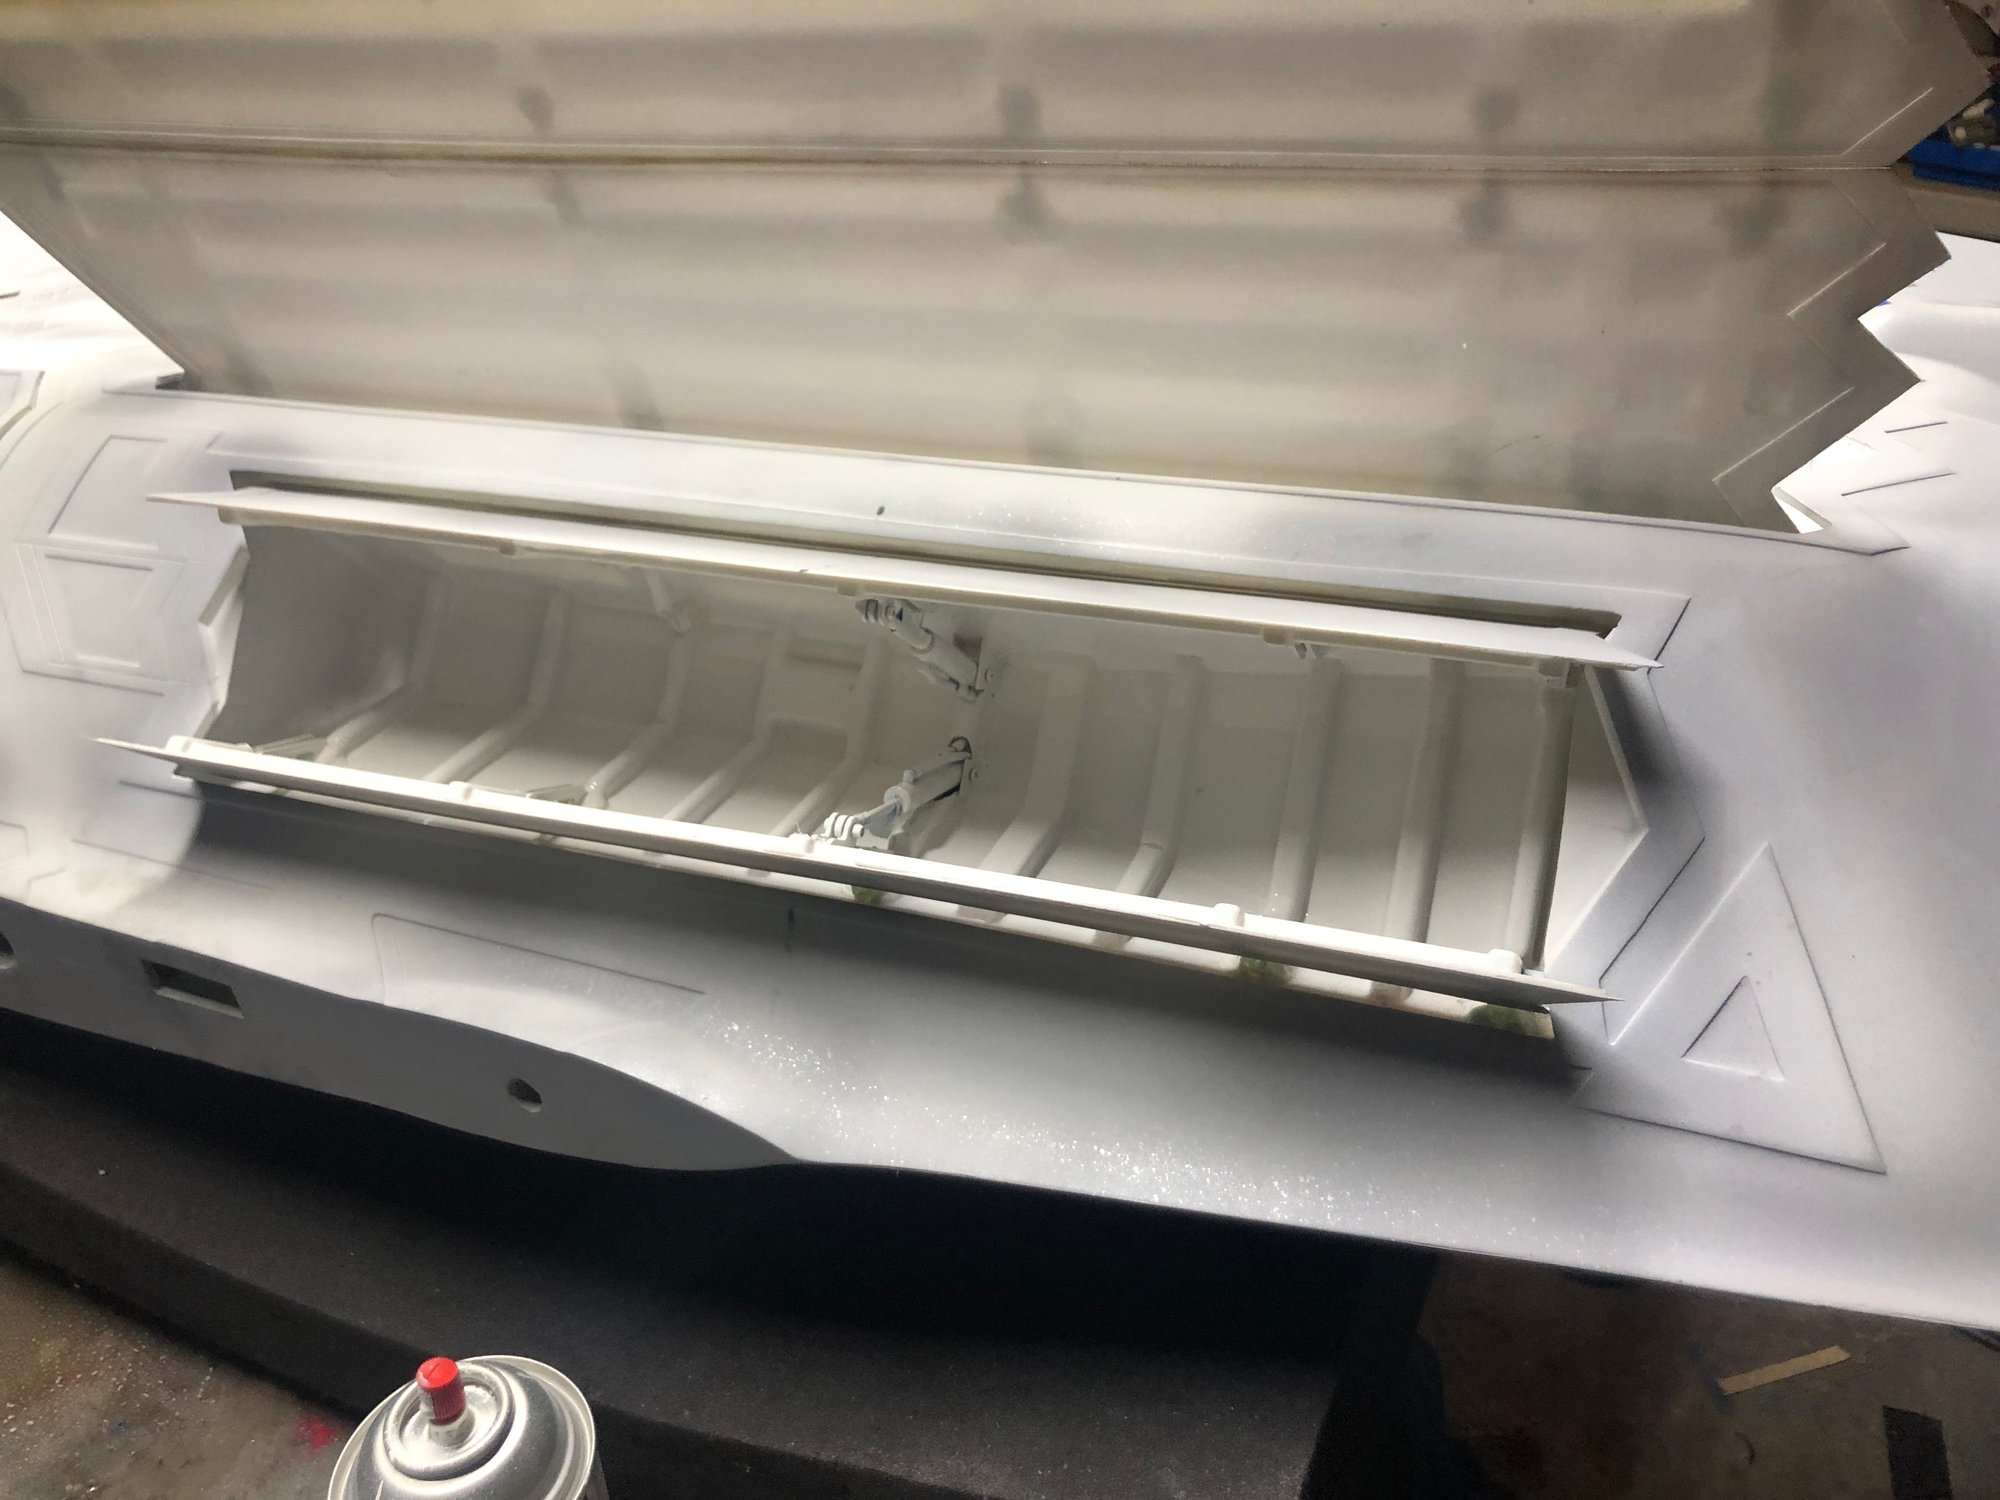
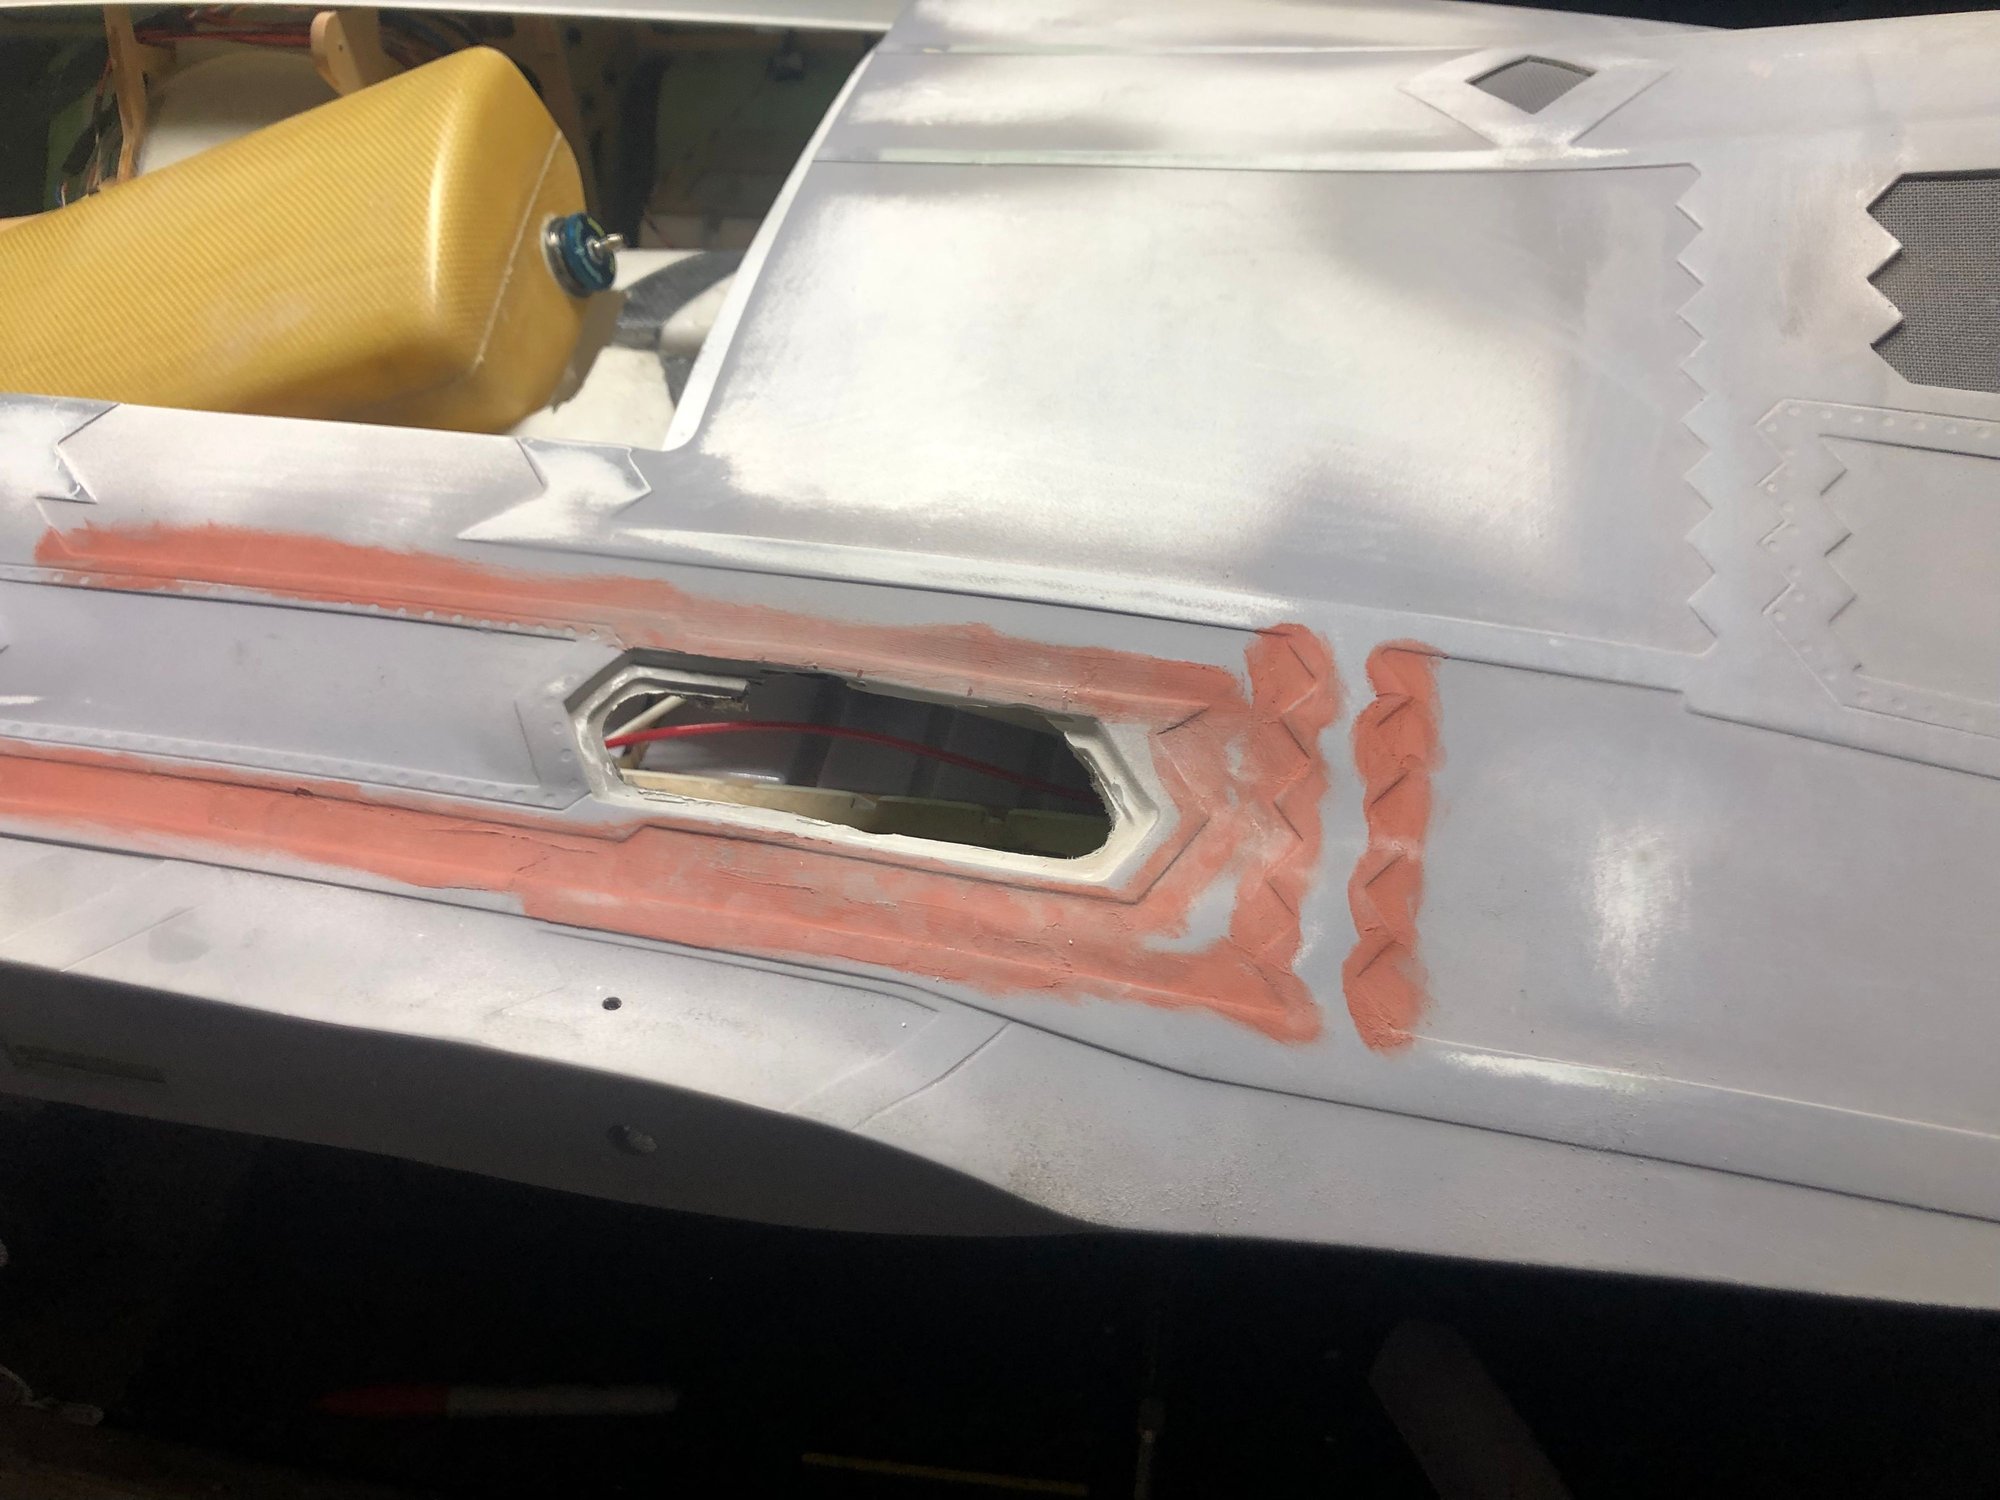
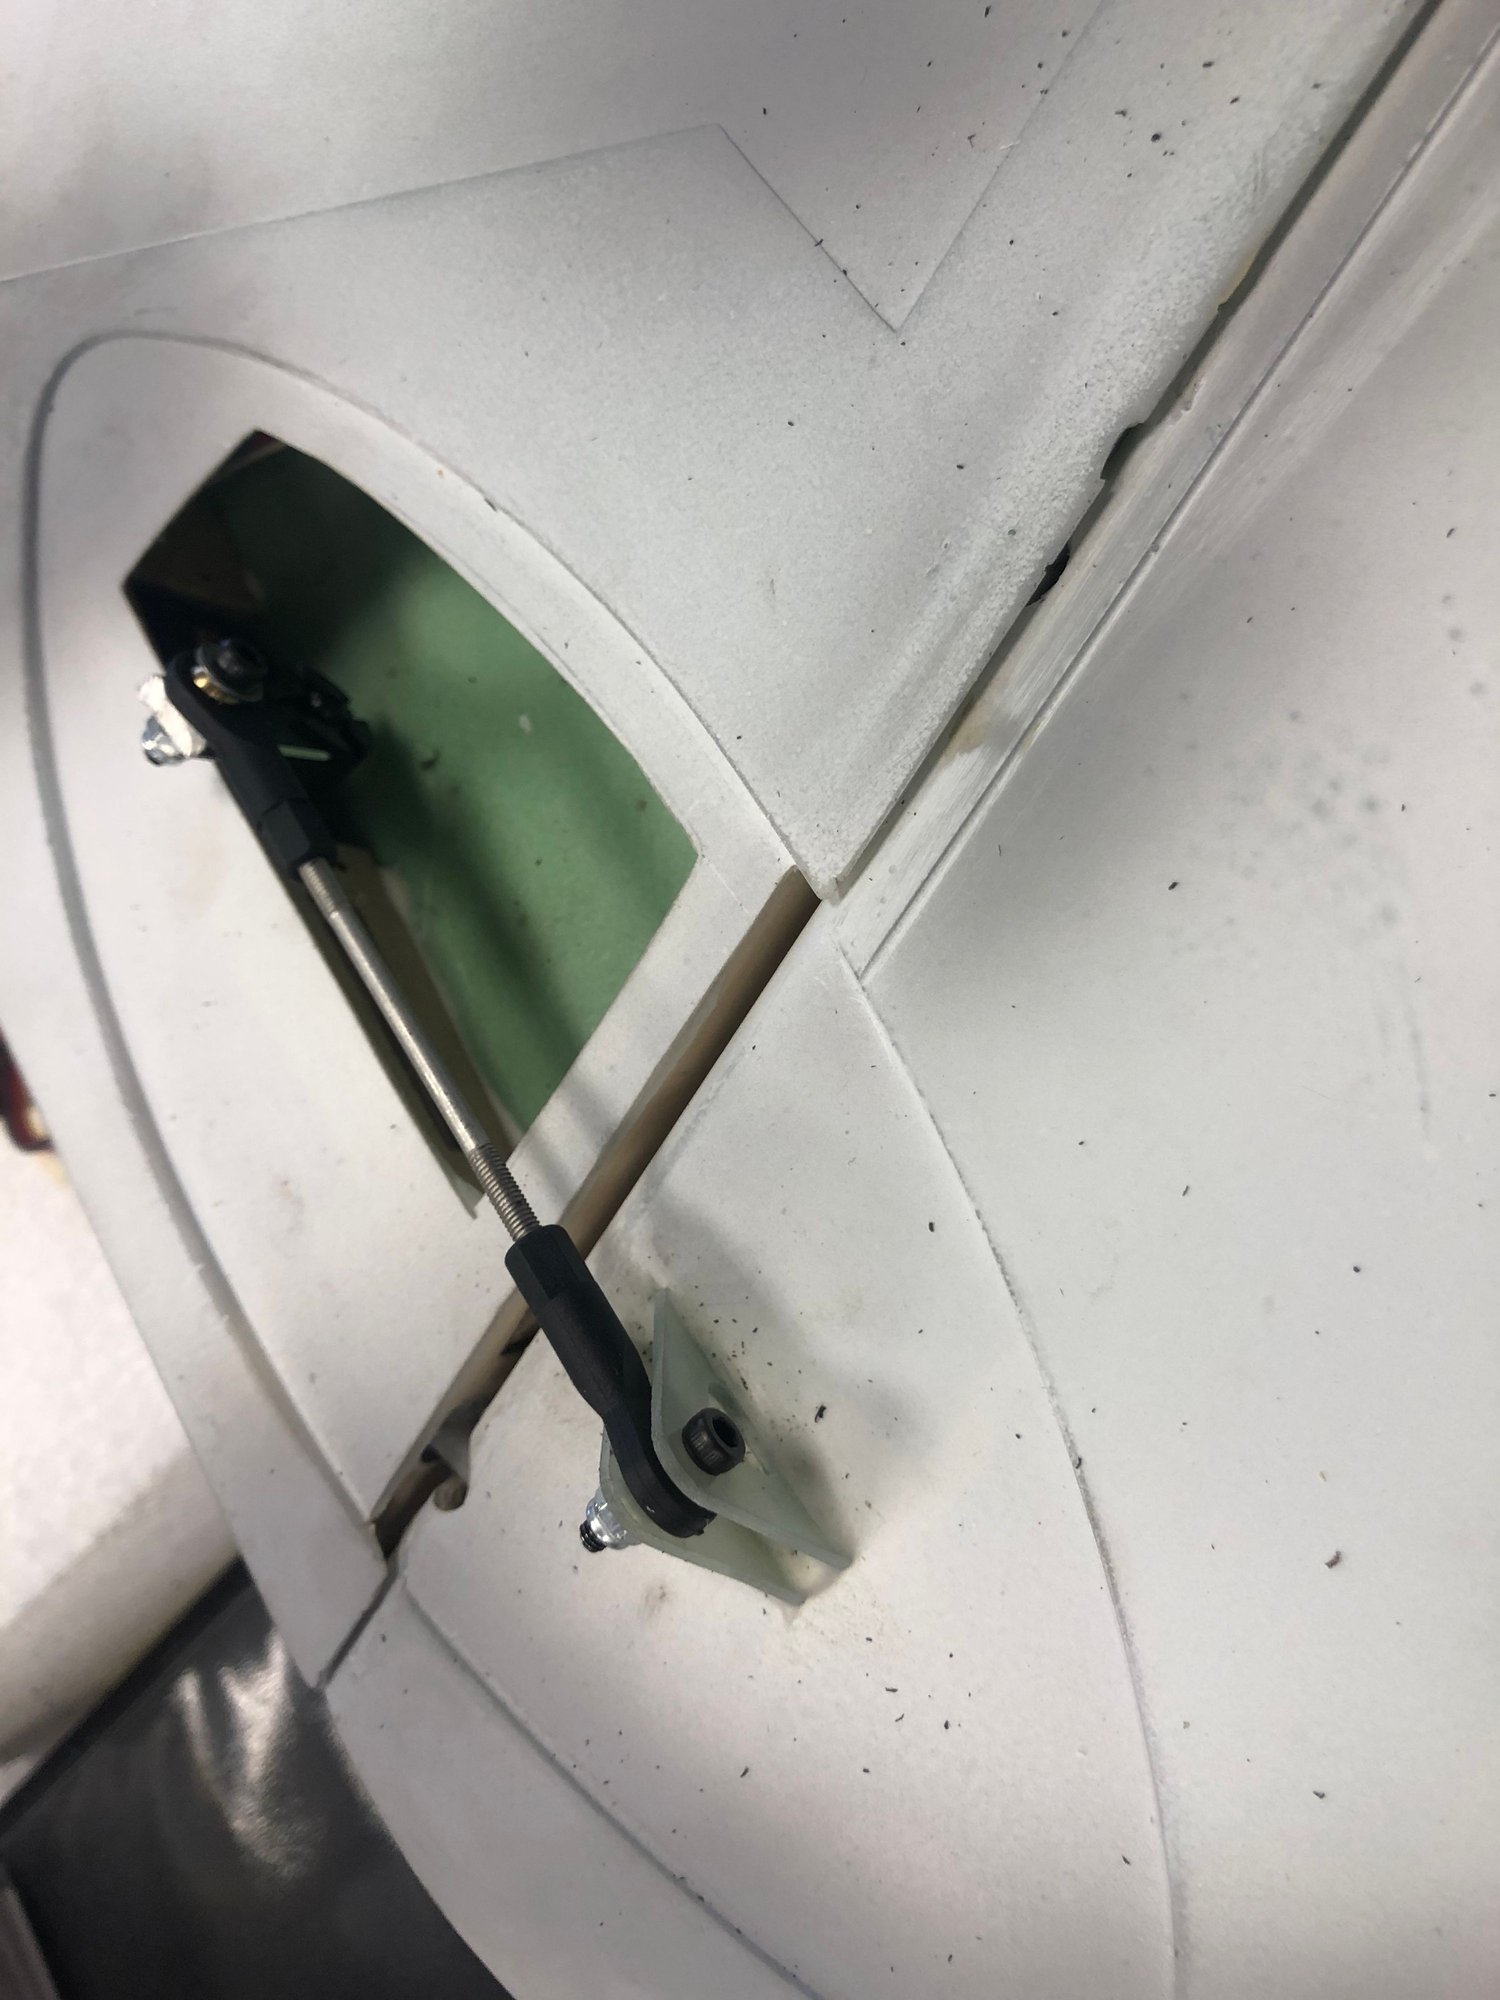
Got hinges on. Forward hinge will just clear the fuel tank. Going to be allot of fun installing a servo for it though.
I also cut the hatch latches off! I hate hatch latches. They ruin the plane. So I will be trying to come up with a hidden latch system. I have something in mind but not sure if it will work. We will see.
Last edited by gunradd; 02-10-2019 at 05:43 PM.
02-10-2019, 06:38 PM
#92

So am I understanding correctly on the vents that you will not be able to hook up an overflow/taxi tank?
Last edited by Auburn02; 02-11-2019 at 06:35 AM.

 02-11-2019, 05:50 PM
#96
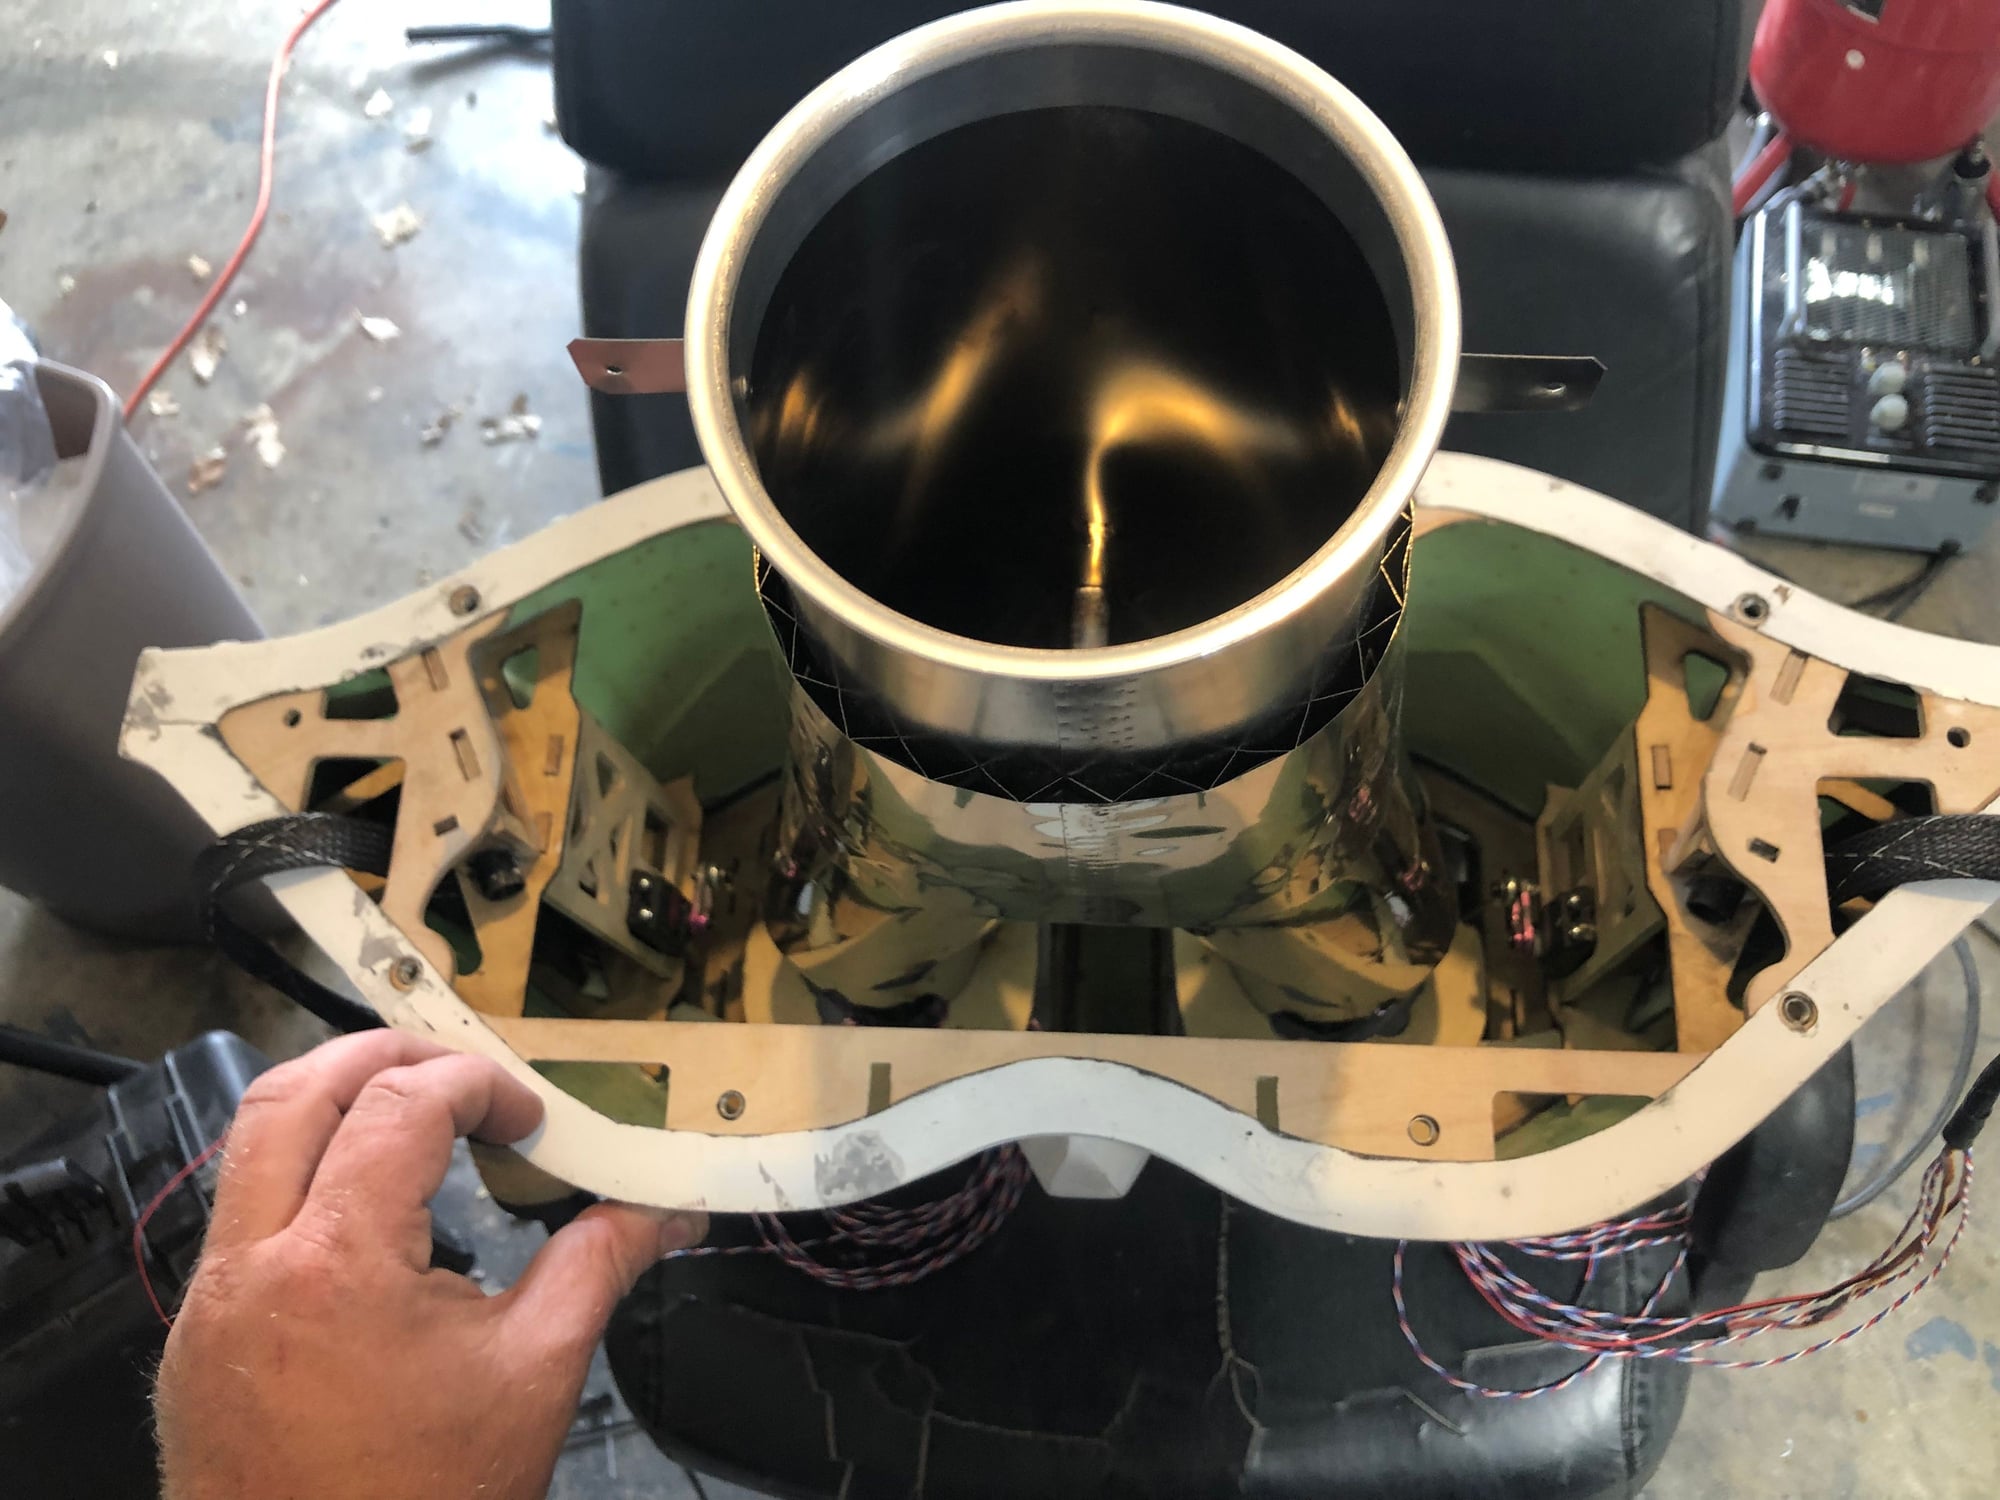
Here is what I�m thinking for the ejector rack... this might change so it�s not in stone. The challenge is the only spot for a servo to operate it is from behind. So my idea is to use an old drag brace from a plane I had laying around with a hinge at the back. This way I can connect a linkage to the middle and have it function from behind. 

02-13-2019, 04:13 AM
#97
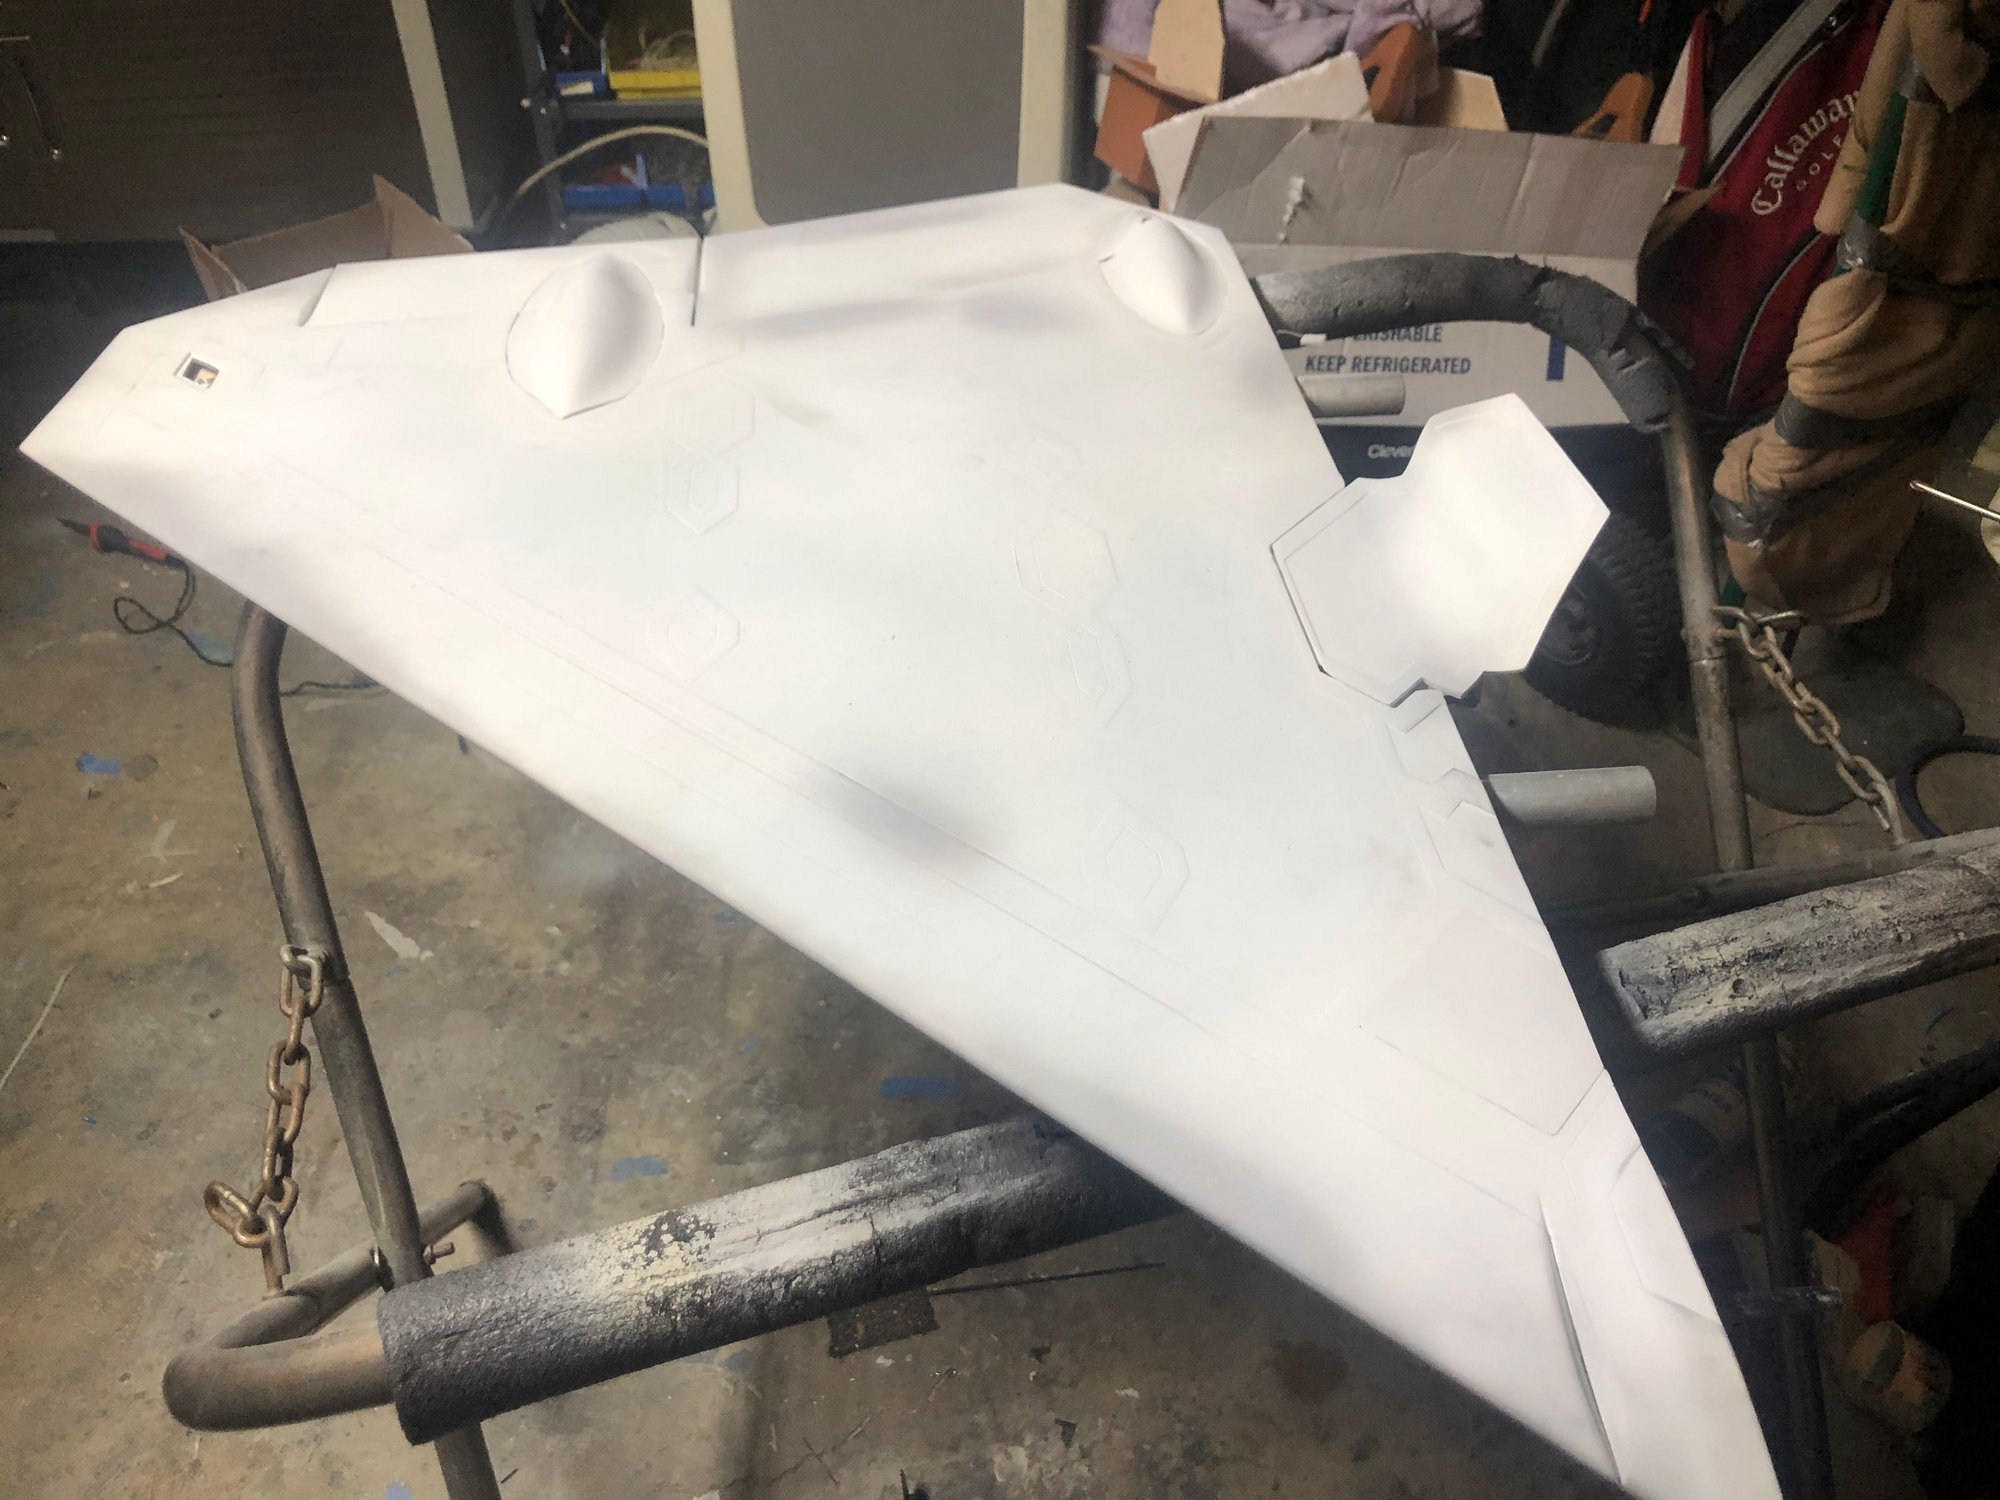
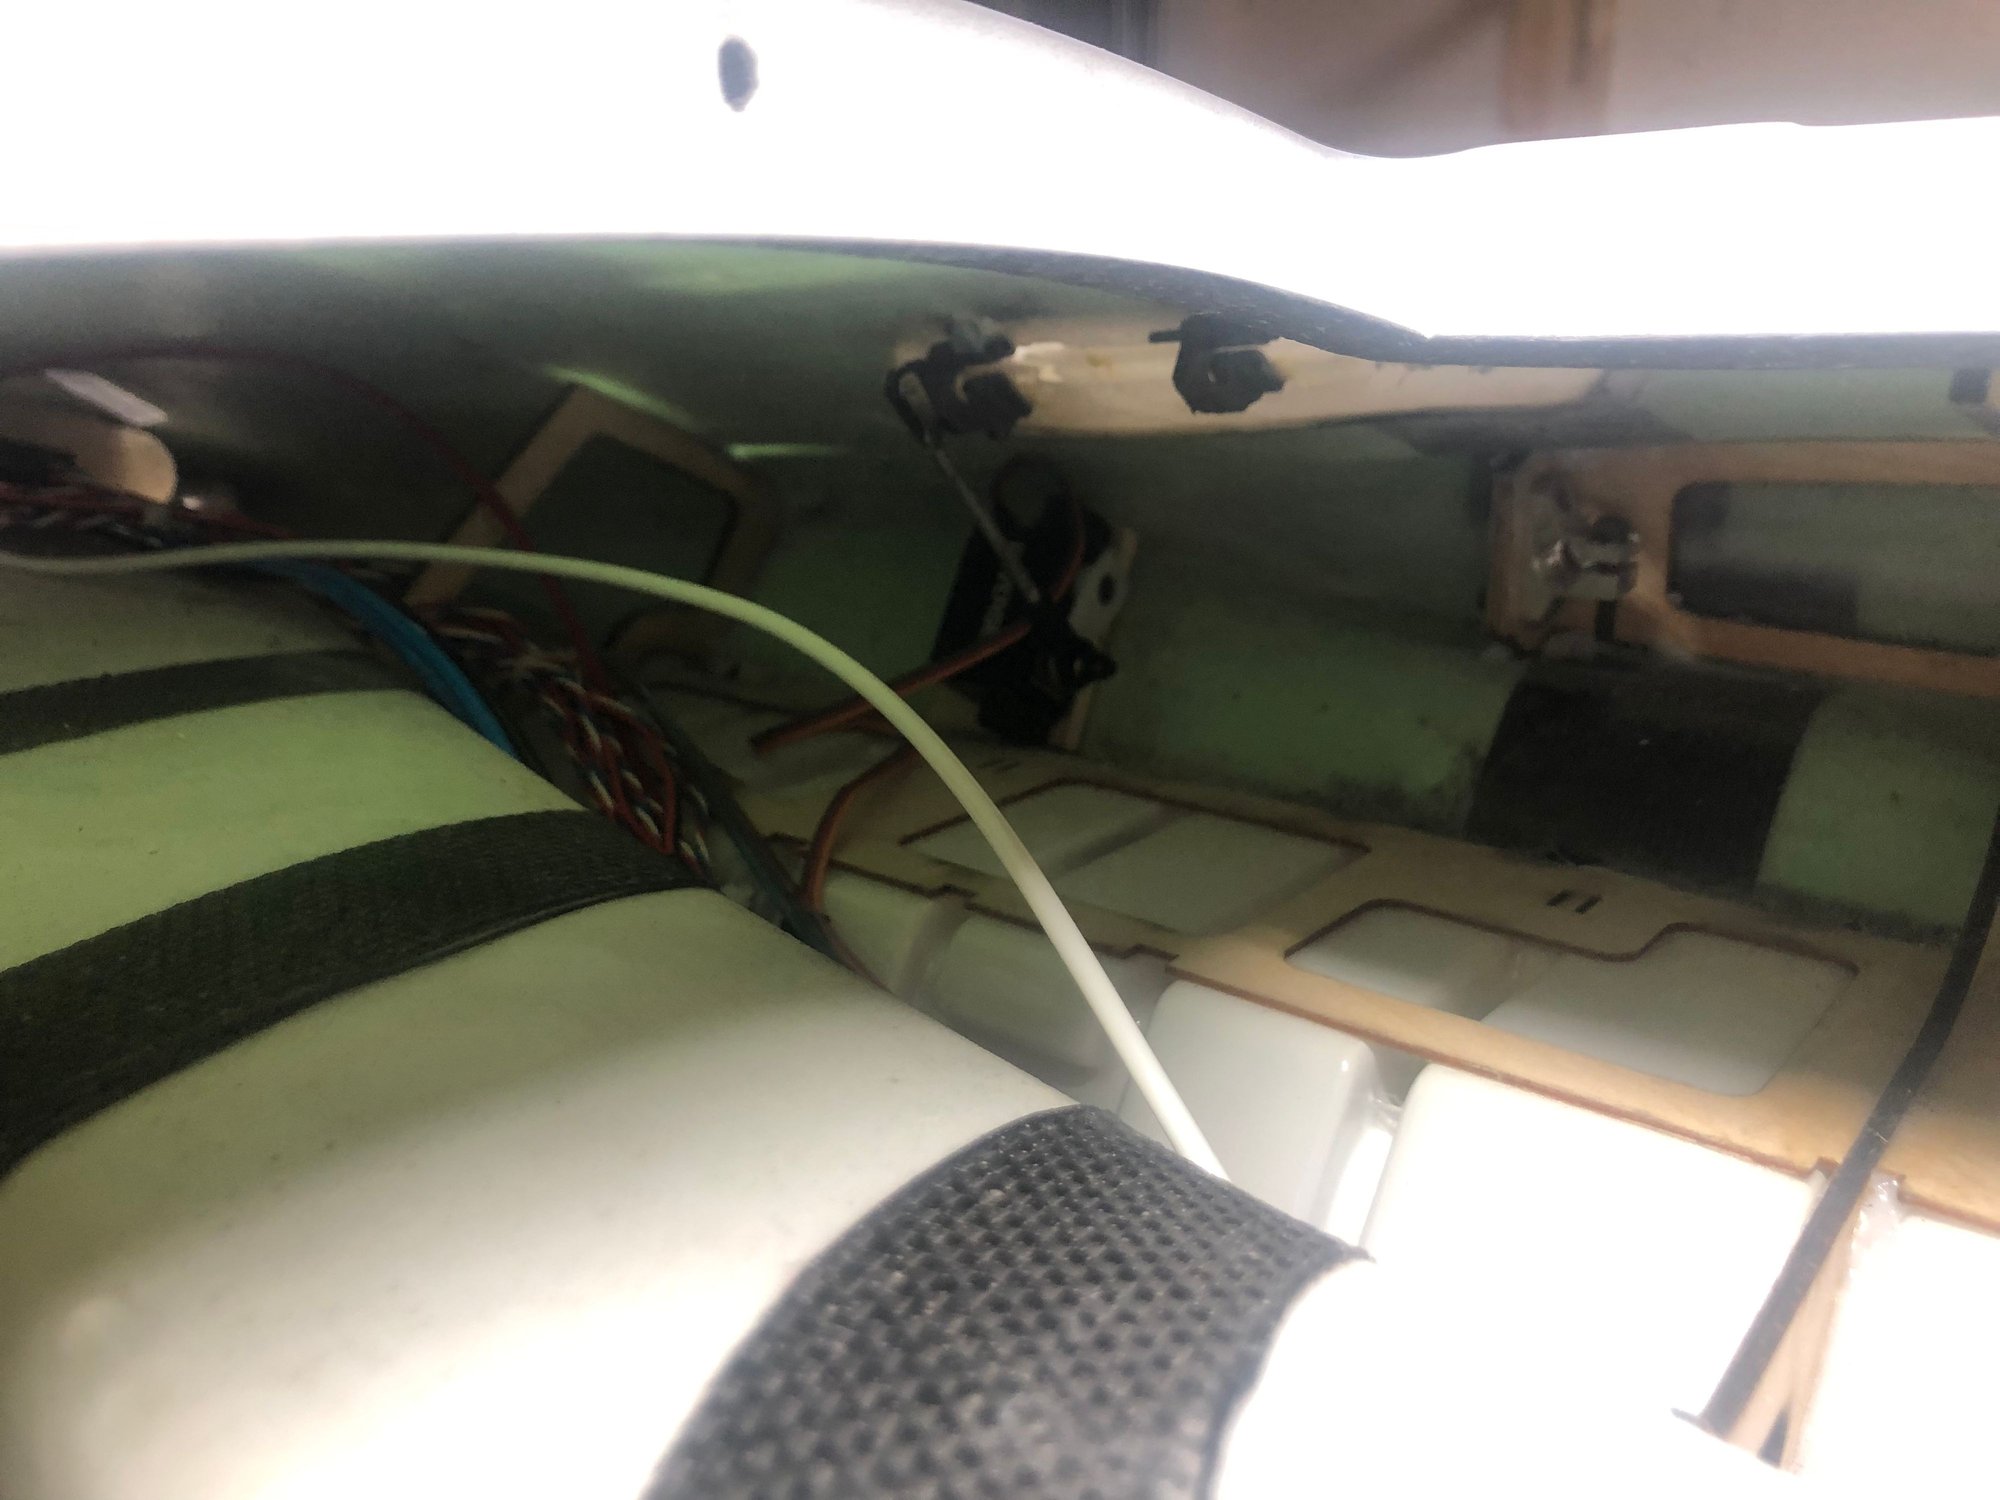
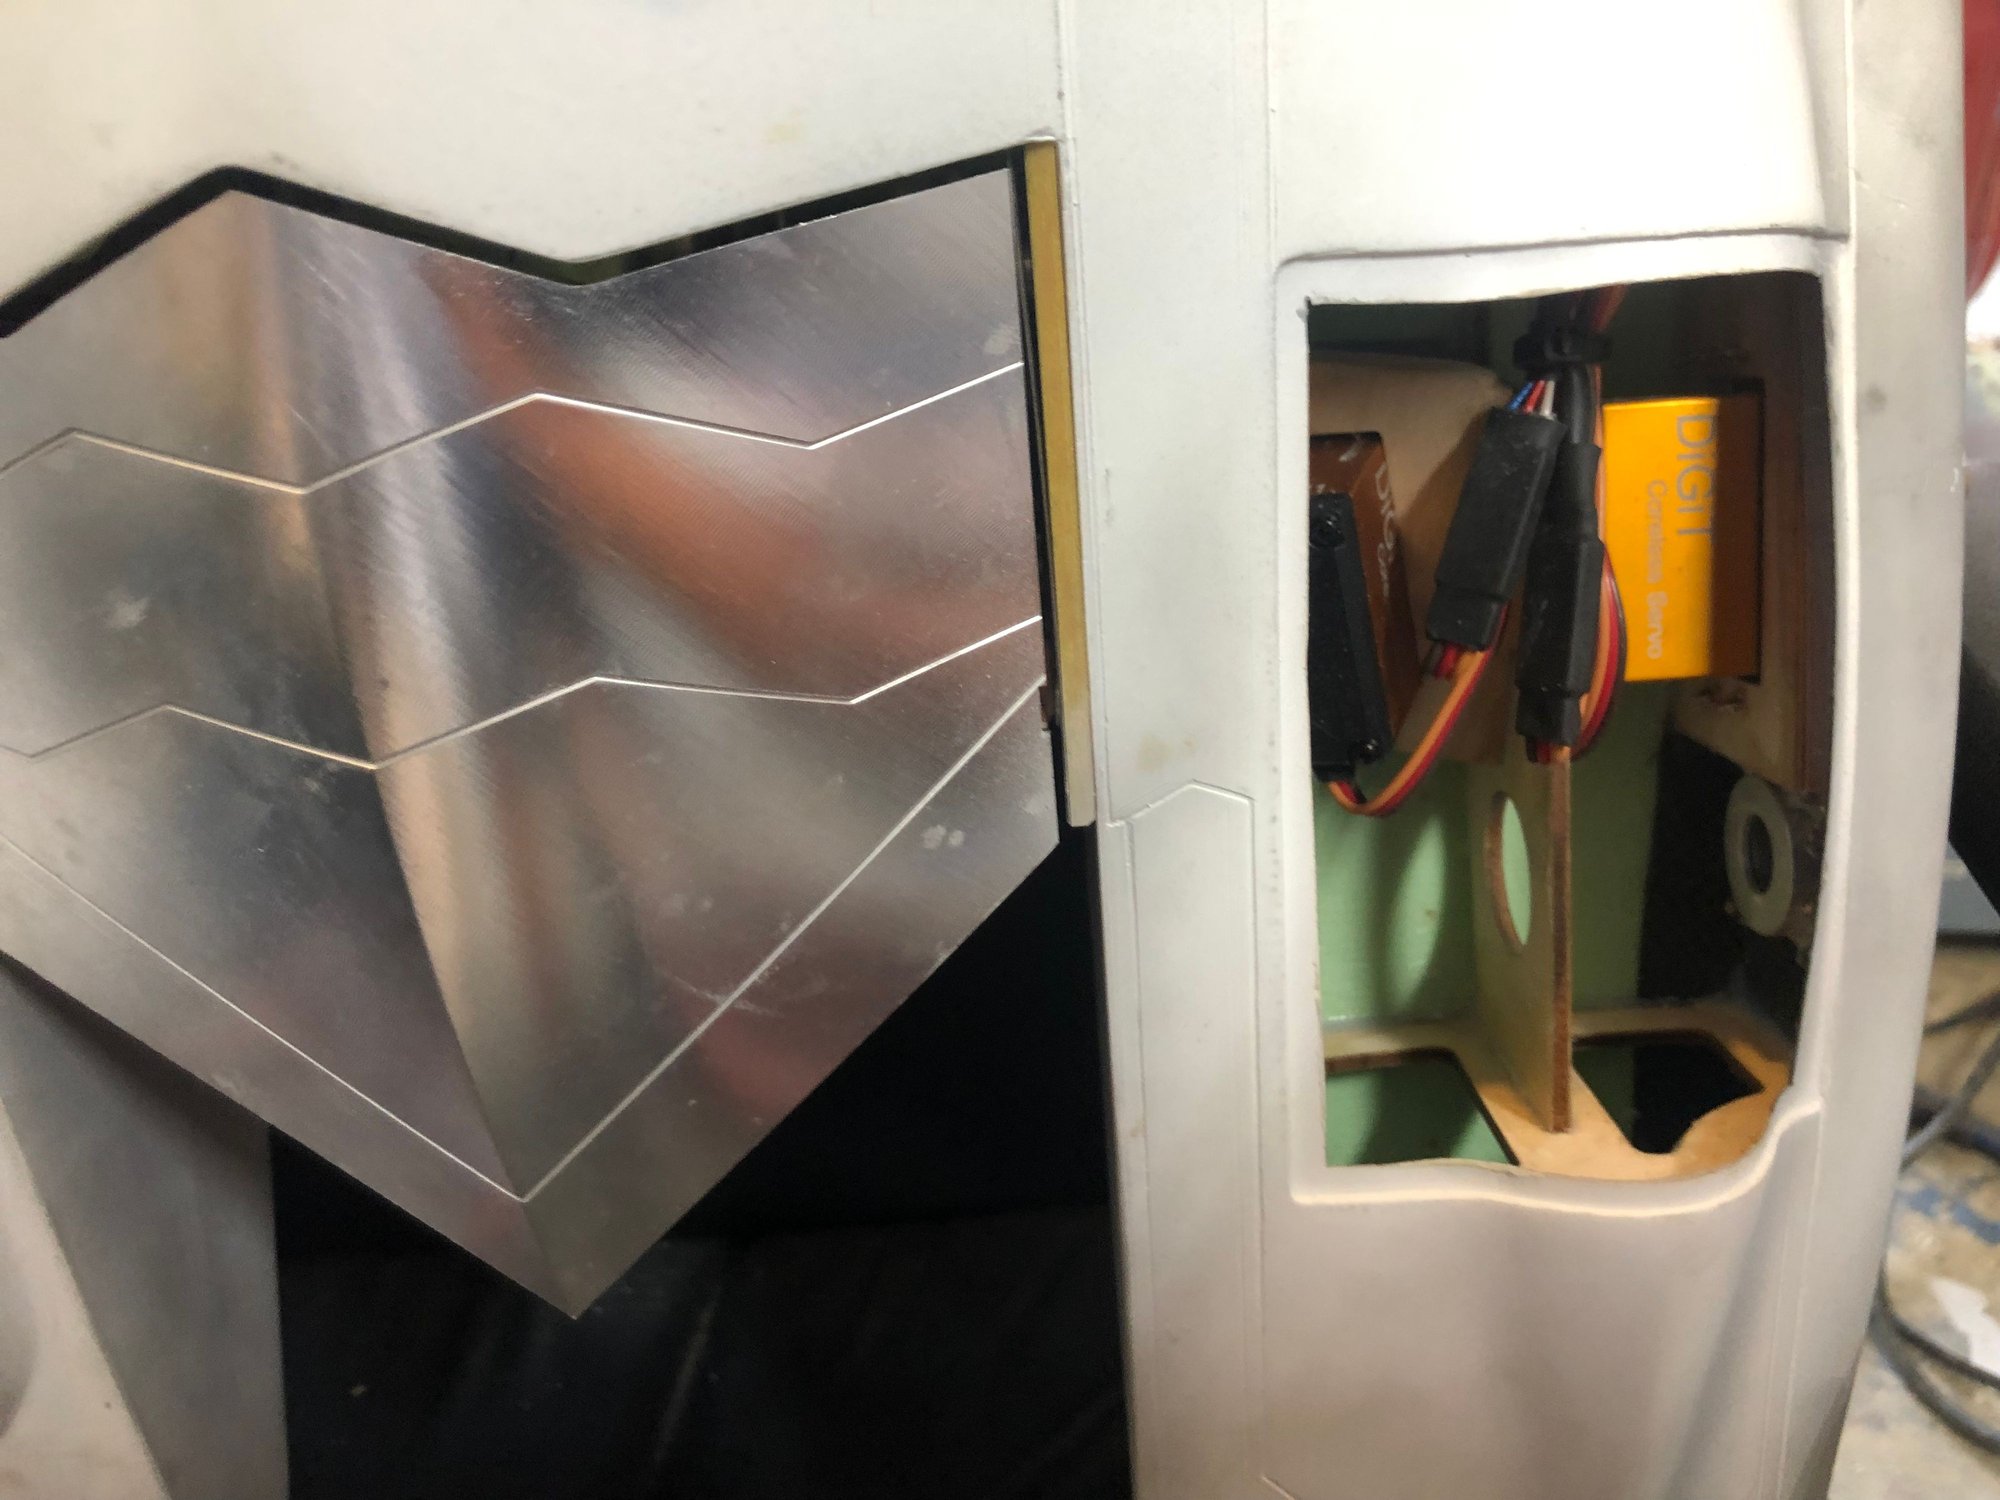
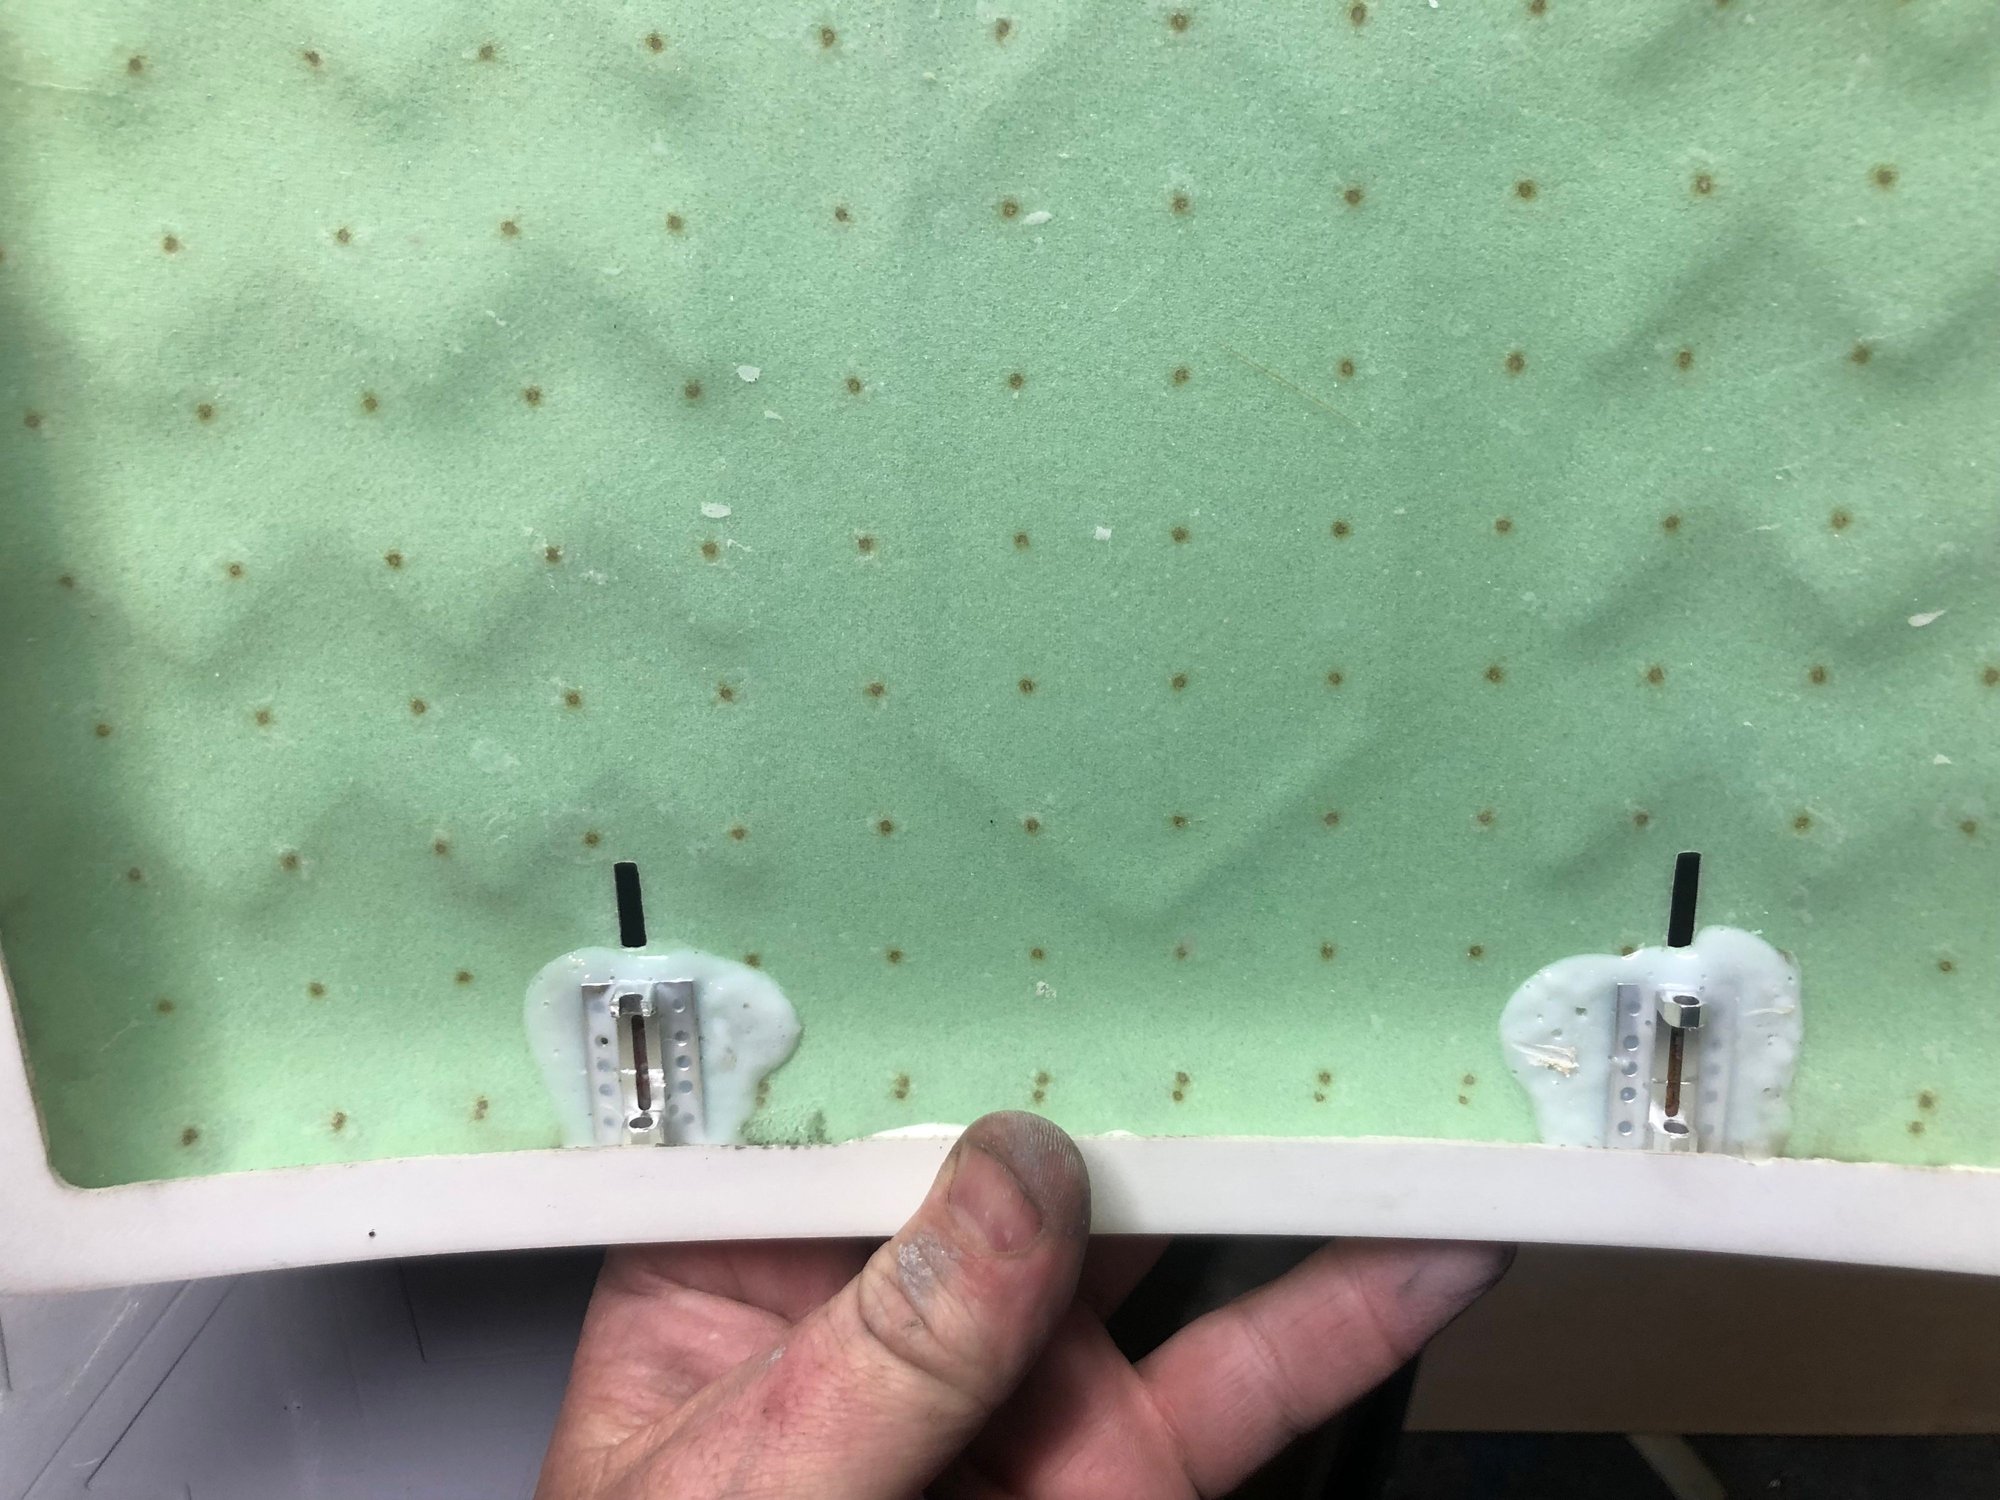
All servos installed for wings. Took a couple evenings to get done. Pretty straight forward and easy to do. Biggest thing is to use small servo arms and strong servos for the leading edge flaps.
When i I built my skymaster F18 I think I spent almost 2 weeks getting the wings done. It was a complete cluster *uck. Spent so much time with a dremel trying to make servos fit and get wired through along with trimming the rear spar...
this is is nothing like that and is well thought out and goes together pretty smoothly.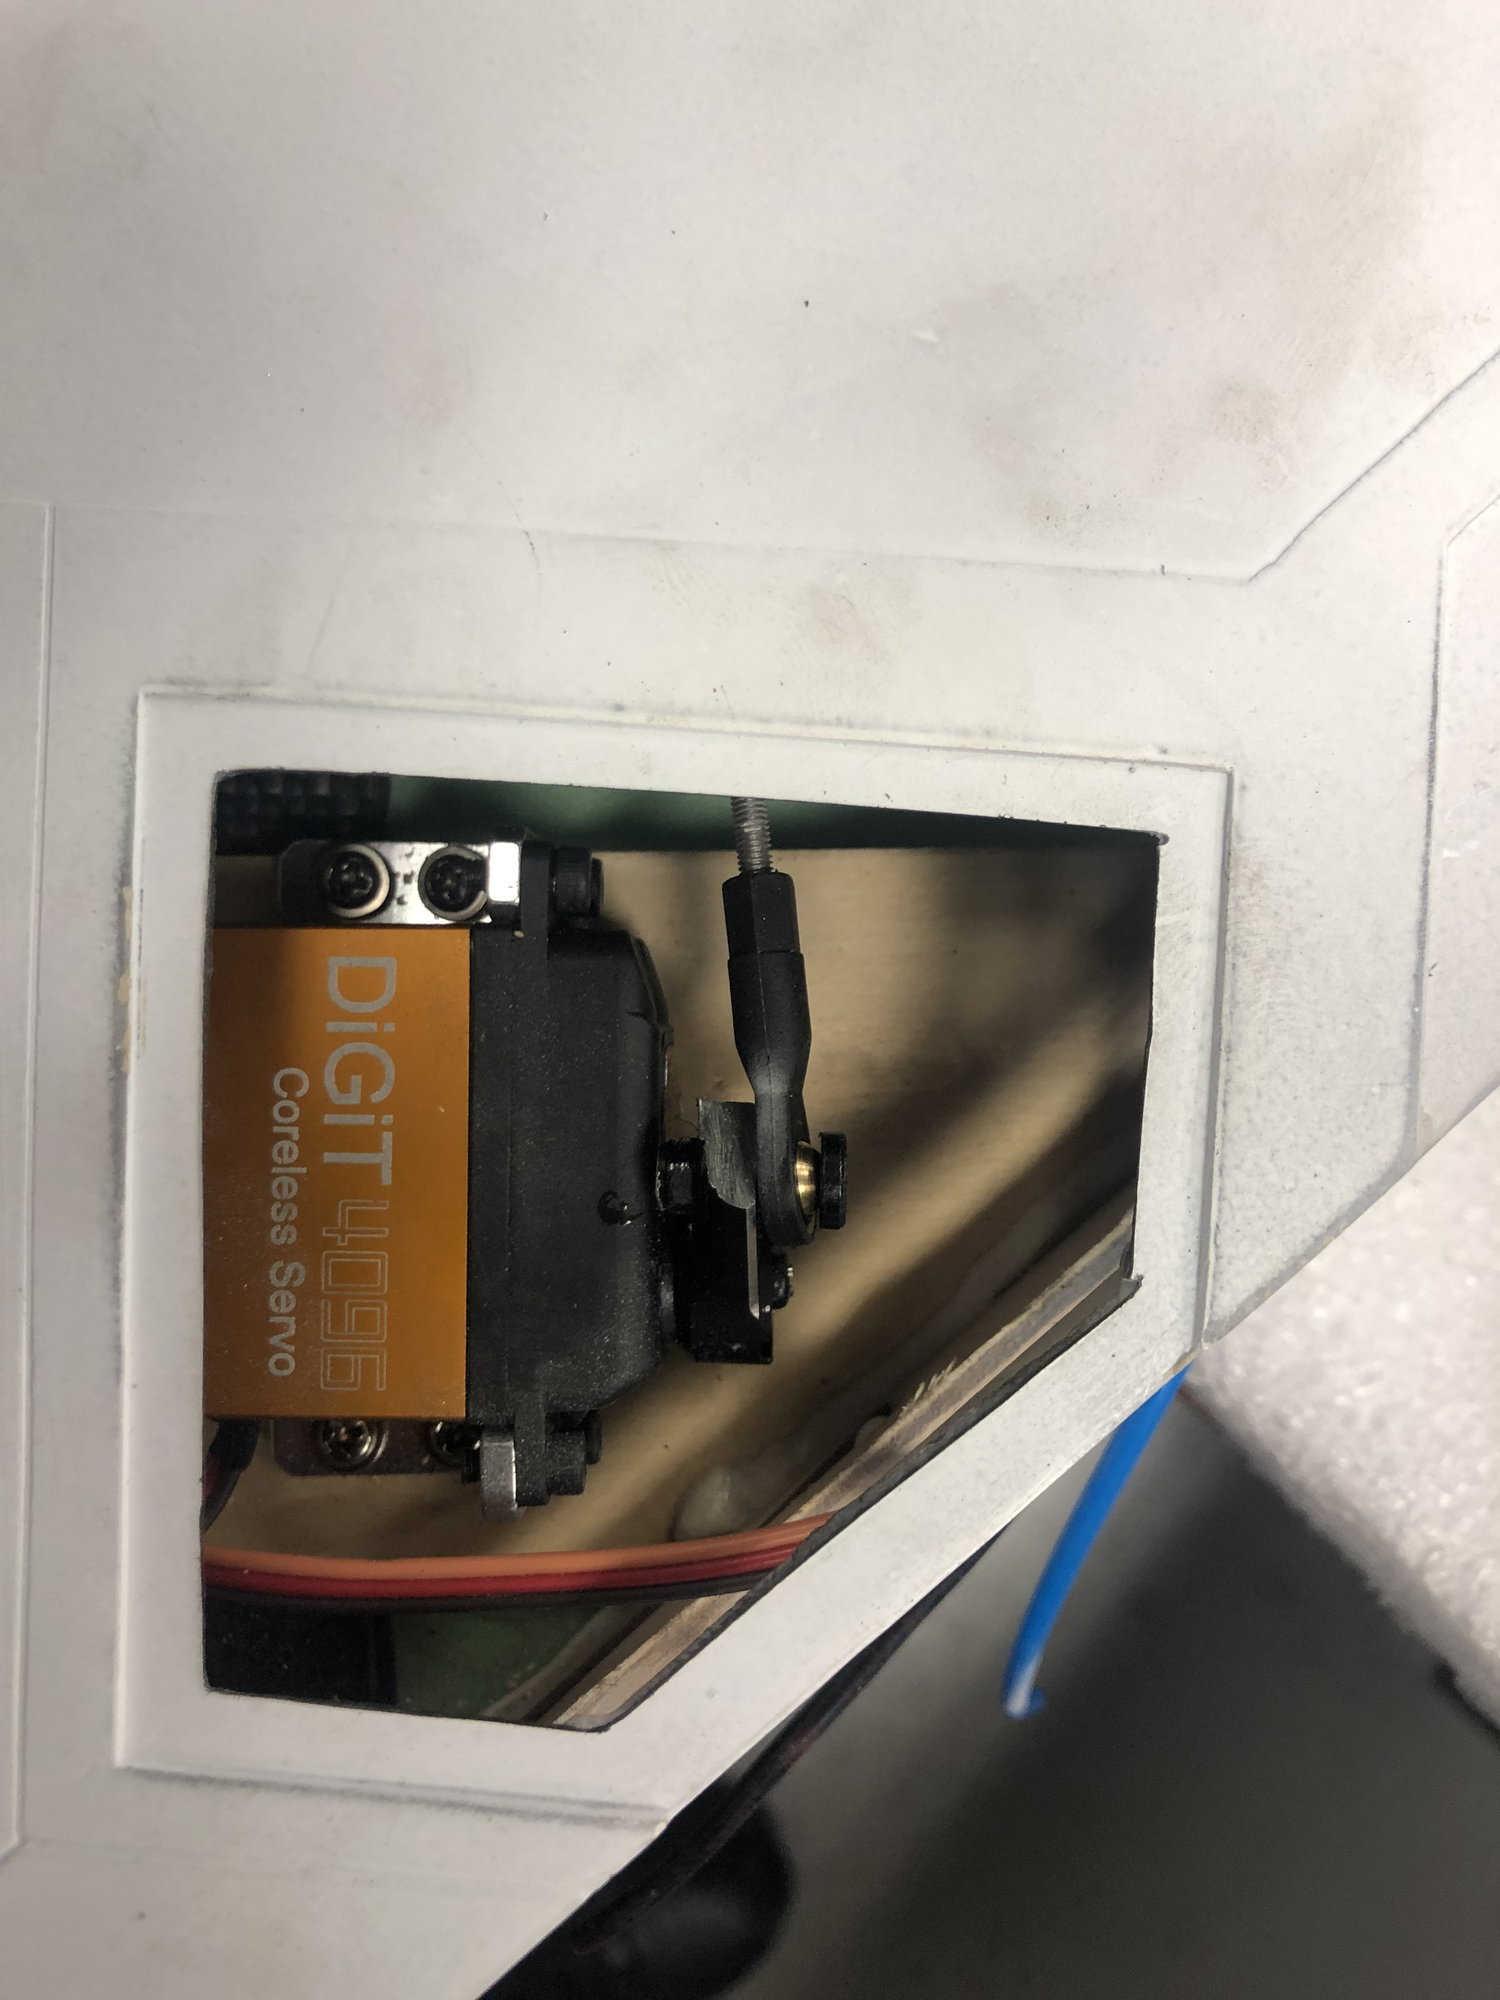
Leading edge flap.
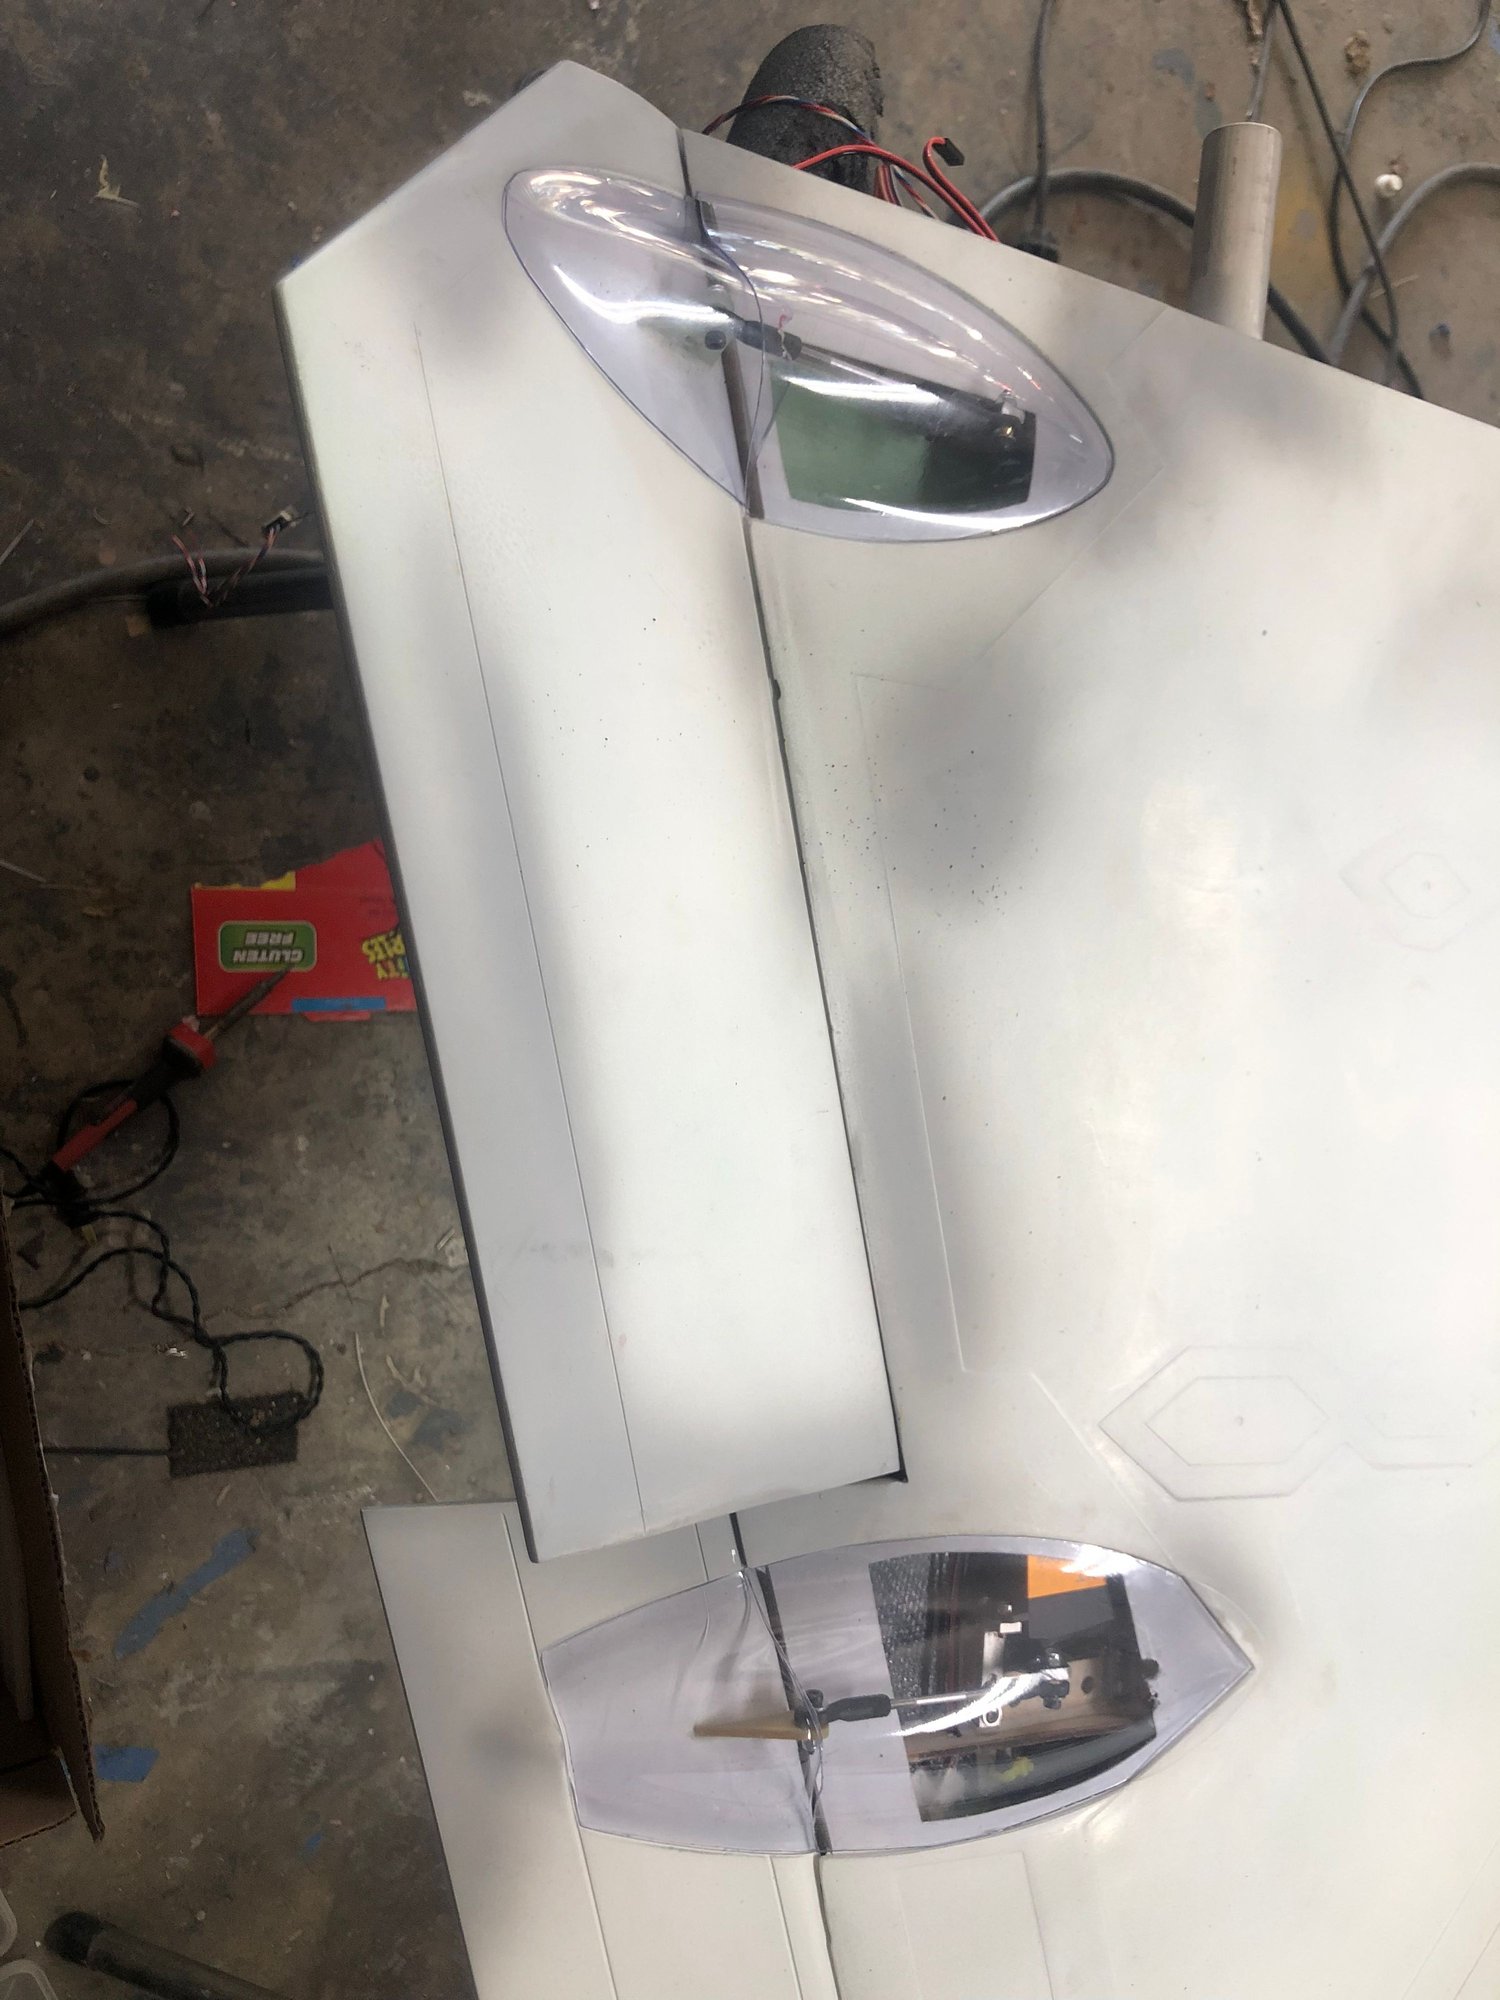
Covers are clear.
Aileron servo
Flap servo
When i I built my skymaster F18 I think I spent almost 2 weeks getting the wings done. It was a complete cluster *uck. Spent so much time with a dremel trying to make servos fit and get wired through along with trimming the rear spar...
this is is nothing like that and is well thought out and goes together pretty smoothly.
Leading edge flap.
Covers are clear.
Aileron servo
Flap servo