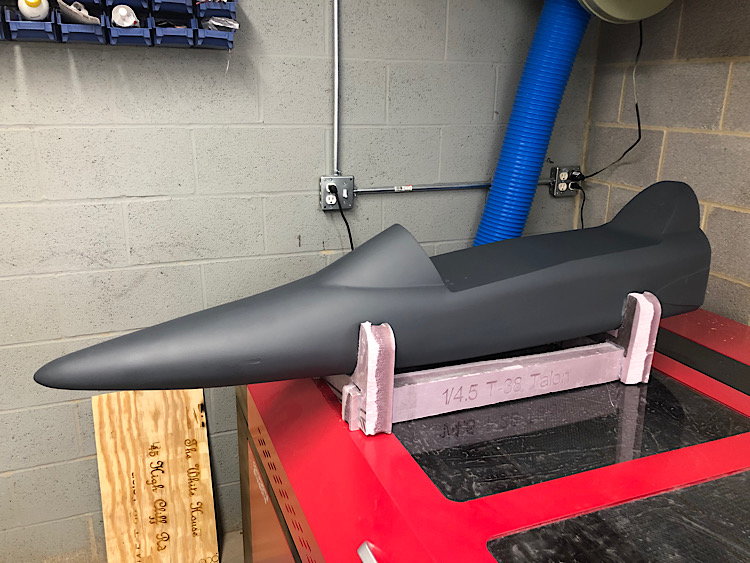
1/4.5 T-38C Talon scratch build


 12-03-2019, 03:35 PM
#33


This is a beautiful airplane. The only way I could afford one is to be able to buy it in kit form. I like to build, I prefer painting my own airplanes, and for me being able to buy in stages is the only way I can do it.
ie: airframe kit
Landing gear
Tanks and pipe
I would likely try to purchase these at once but often the dollar committment in having to purchase at once is a huge mental block for me. That and it's much more difficult for me to save the full amount for an all at once purchase vs buying in stages.
I will likely never buy a pnp jet as the up front costs just feel unreachable to me. I'm sure in some cases it's cheaper in the long run although I also don't want to pay for labor I can do myself.
 12-05-2019, 07:31 PM
#35

Join Date: May 2007
Location: Snohomish,
WA
Posts: 61
Likes: 0
Received 0 Likes
on
0 Posts
Hey guys,
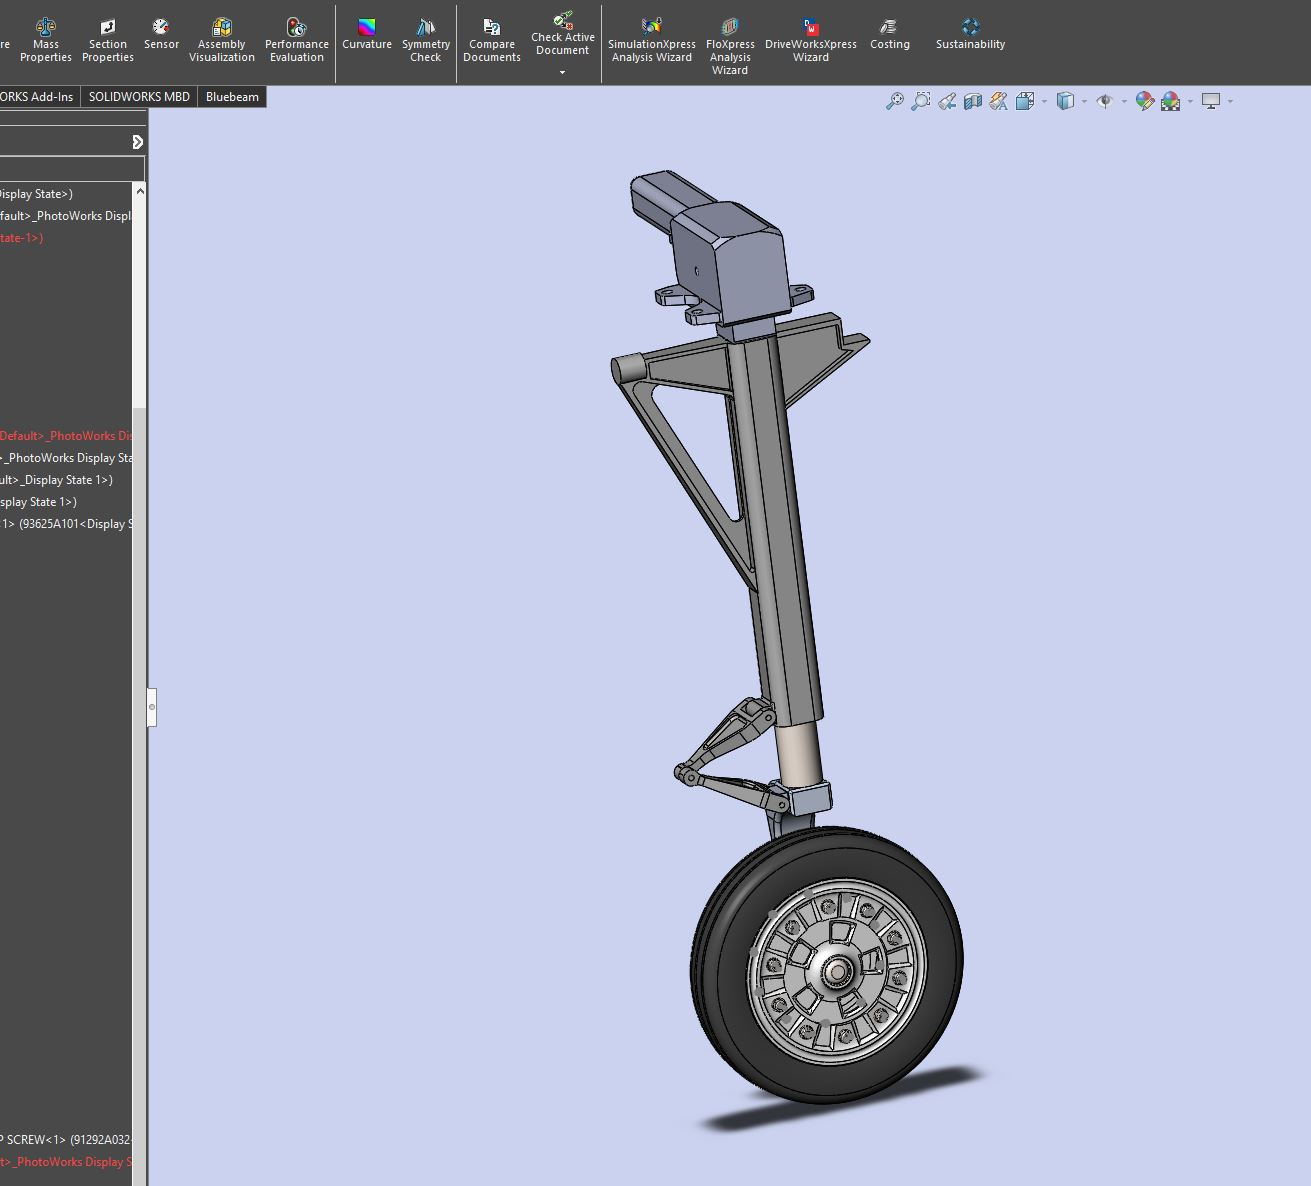
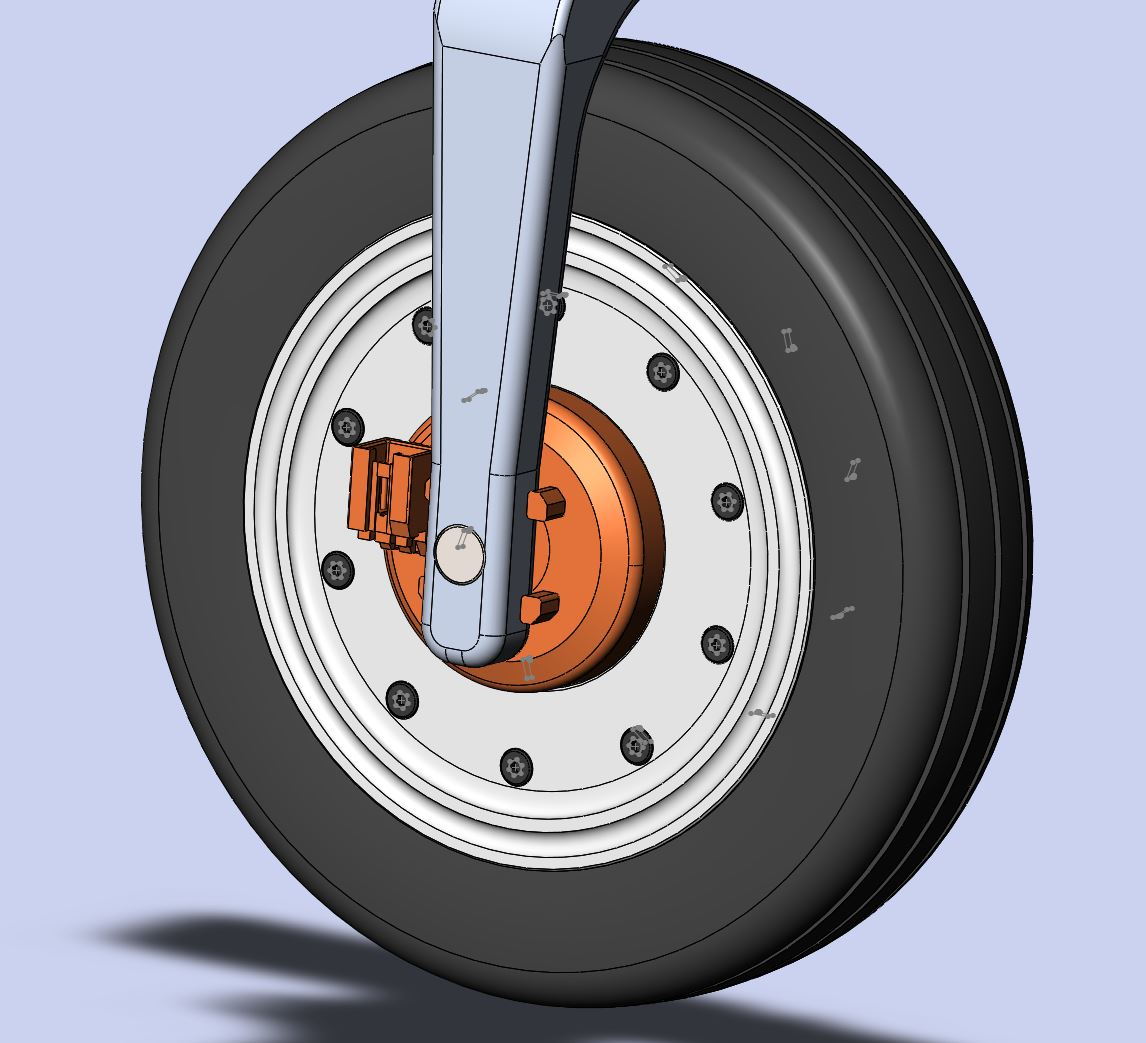
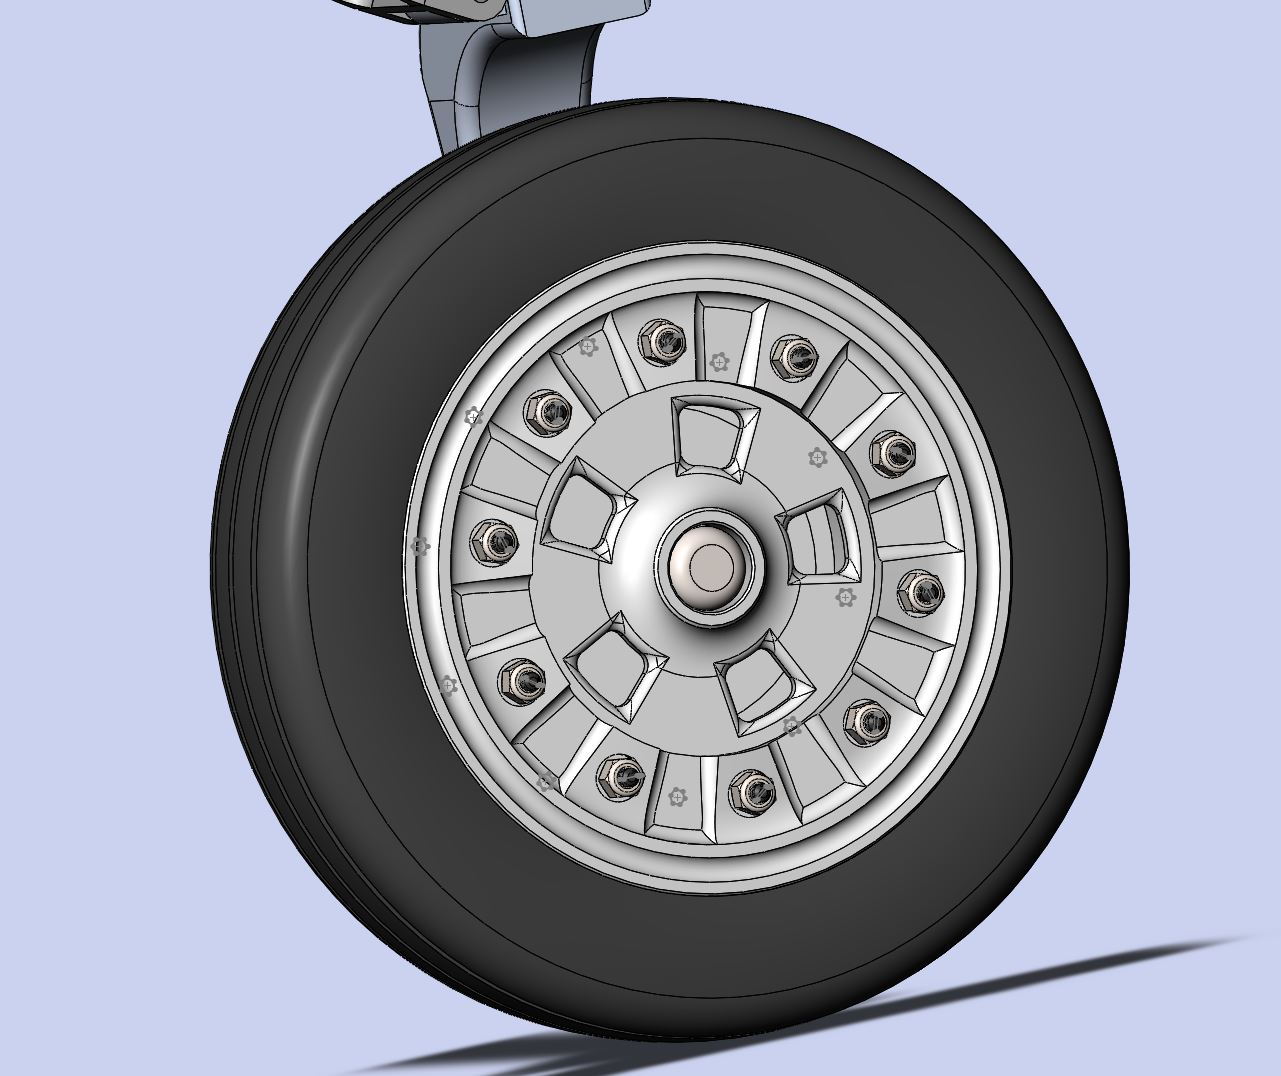
Thought I would share some progress pics of the gear were are designing. I will be machining all the aluminum parts, wheels will be 6061 with ball bearings, gear structure will be 7075. The retracts/controller and brakes are all from Electron - ER40 set.
We will be 3d printing the scale details so the machining will be more easily done and the option is there to leave the gear plain or add the scale details at any time. We will also do the tires, Thomas has some really good ideas so I'll let him comment to these.
12-13-2019, 05:45 PM
#36

Slow progress the past few weeks. I bought a 36�x55� 130watt laser cutter and that arrived so i spent some time getting that all situated and doing some adjustments.
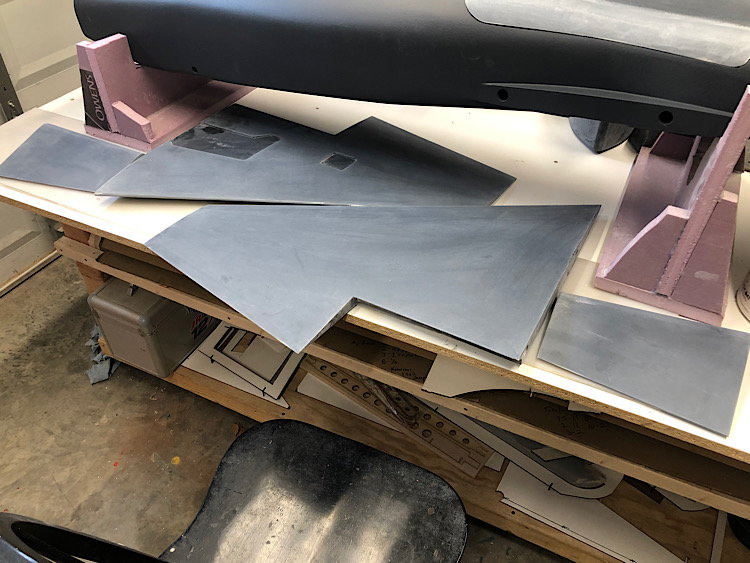
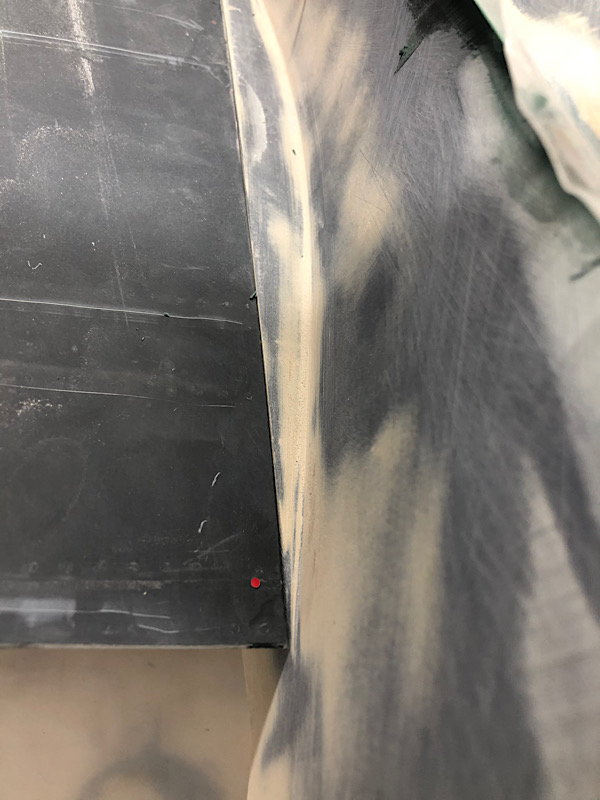
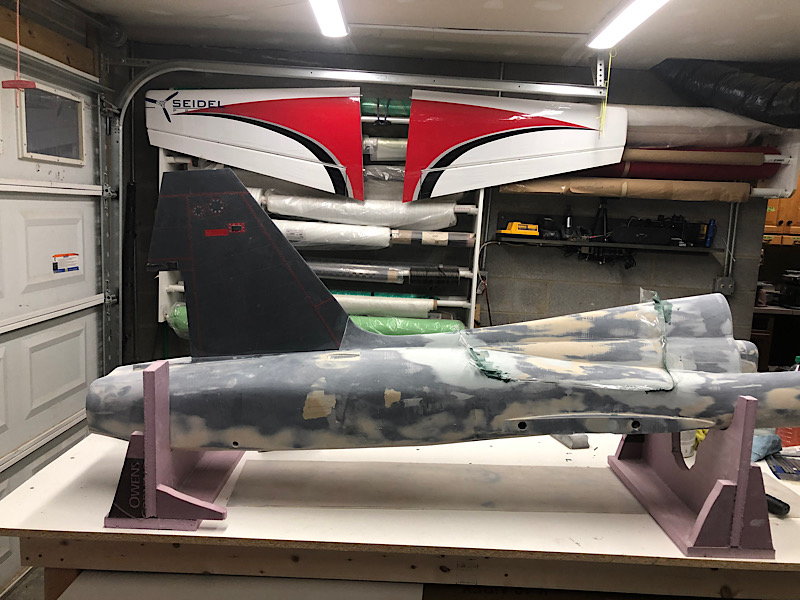
i put the fuselage in the holding cradle and put the wings on to check there fit since they hadnt been installed on the fuselage since i finished printing everything back at the beginning of the year, here is how the joint turned out.
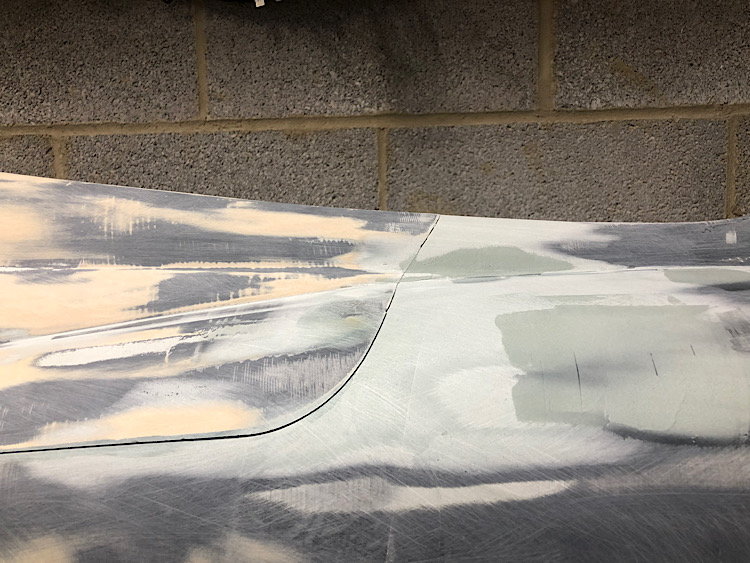
I then reinstalled the vertical stab to check its fit. It needs just a Little bit of filling on its saddle and it�ll fit perfect. I also am still refining the main engine hatch� fit to the fuselage. I�m shooting for an extremely thing seam so the molded parts will fit nearly perfectly.
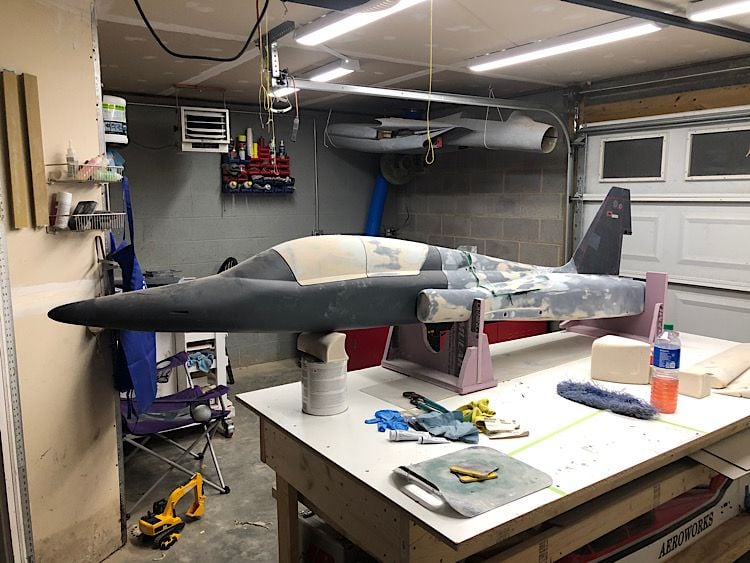
I then installed the nose section to check its fit to the main fuselage. It needs little to no additional work thankfully. The canopy frame plugs need some additional work to fit as well as I expect them to.
i put the fuselage in the holding cradle and put the wings on to check there fit since they hadnt been installed on the fuselage since i finished printing everything back at the beginning of the year, here is how the joint turned out.
I then reinstalled the vertical stab to check its fit. It needs just a Little bit of filling on its saddle and it�ll fit perfect. I also am still refining the main engine hatch� fit to the fuselage. I�m shooting for an extremely thing seam so the molded parts will fit nearly perfectly.
I then installed the nose section to check its fit to the main fuselage. It needs little to no additional work thankfully. The canopy frame plugs need some additional work to fit as well as I expect them to.
12-15-2019, 03:43 PM
#37
after a few more rounds of filling and sanding, ive got the main fuselage hatch fitting properly.
This essentially finishes whats left of the main fuselage. I had plans to spray the final coats of duratec primer on, but 35mph winds today kept that from happening.
Since i couldnt spray paint, i decided i would get to work on making the canopies fit perfect. The first problem was keeping the nose section from rolling around on the table. So i jumped into Solidworks and designed a cradle to be cut from 2� insulation board.
I then imported the parts into my laser cutter software and cut out the parts on the laser. The laser wasnt able to cut completely through the foam without catching it on fire.
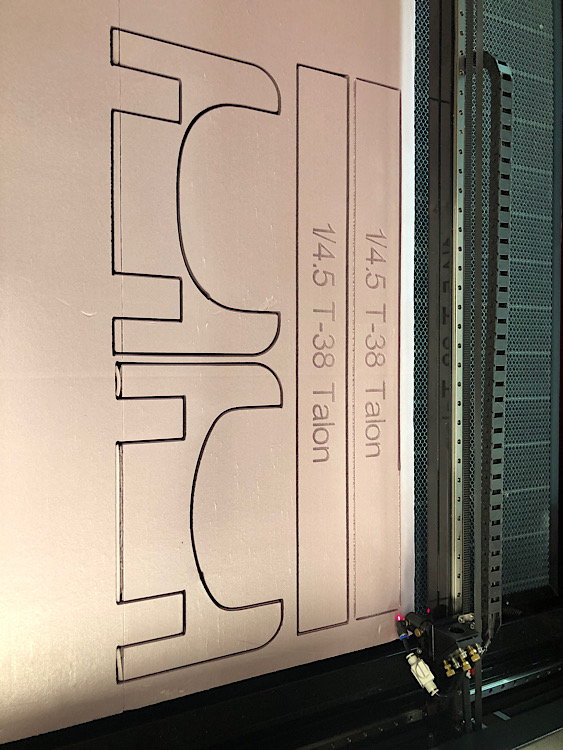
Using a hand saw i finished cutting through the foam and then used a hot glue gun to assemble the pieces.
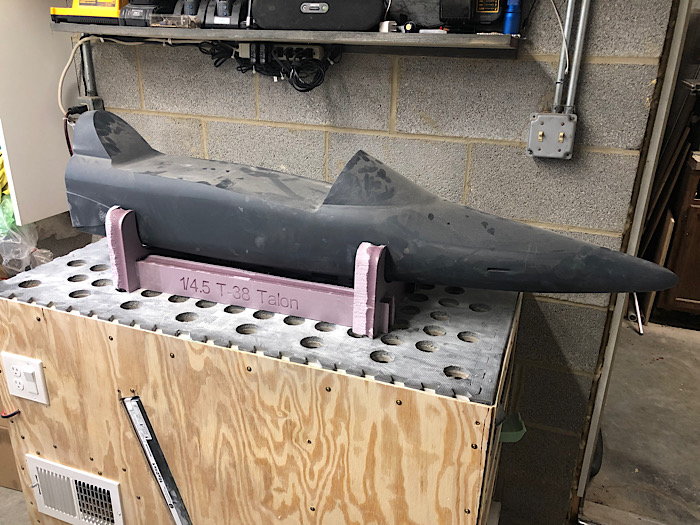
With the nose section now secured, i fixed the bow on the bottom surface of each canopy plug and stuck it on the nose section. The fit is pretty good i think.
with the fit being as good as it was, i brushed a few Heavy coats of duratec base primer onto the bottom of the canopy plugs. This should provide enough material to finish flattening the bottoms to make the fit even better and if so, will finish the body work of all the plugs.
This essentially finishes whats left of the main fuselage. I had plans to spray the final coats of duratec primer on, but 35mph winds today kept that from happening.
Since i couldnt spray paint, i decided i would get to work on making the canopies fit perfect. The first problem was keeping the nose section from rolling around on the table. So i jumped into Solidworks and designed a cradle to be cut from 2� insulation board.
I then imported the parts into my laser cutter software and cut out the parts on the laser. The laser wasnt able to cut completely through the foam without catching it on fire.
Using a hand saw i finished cutting through the foam and then used a hot glue gun to assemble the pieces.
With the nose section now secured, i fixed the bow on the bottom surface of each canopy plug and stuck it on the nose section. The fit is pretty good i think.
with the fit being as good as it was, i brushed a few Heavy coats of duratec base primer onto the bottom of the canopy plugs. This should provide enough material to finish flattening the bottoms to make the fit even better and if so, will finish the body work of all the plugs.
12-18-2019, 05:09 AM
#38
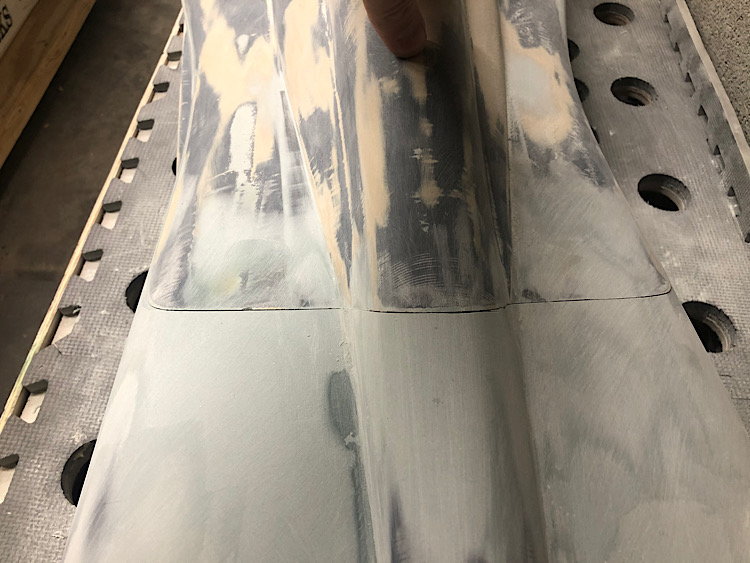
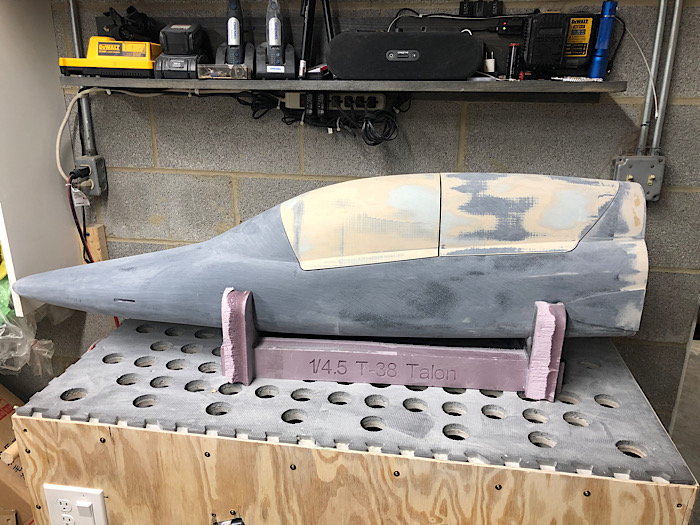
I got the canopies fitting nicely and did some sanding and filling on the nose section. All of these pieces are now ready for the final coats of Duratec once the weather cooperates.
me being the inpatient person i can be, i used some un-thinned DuraBuild primer and brushed it on the tail section pieces and got to sanding those smooth.
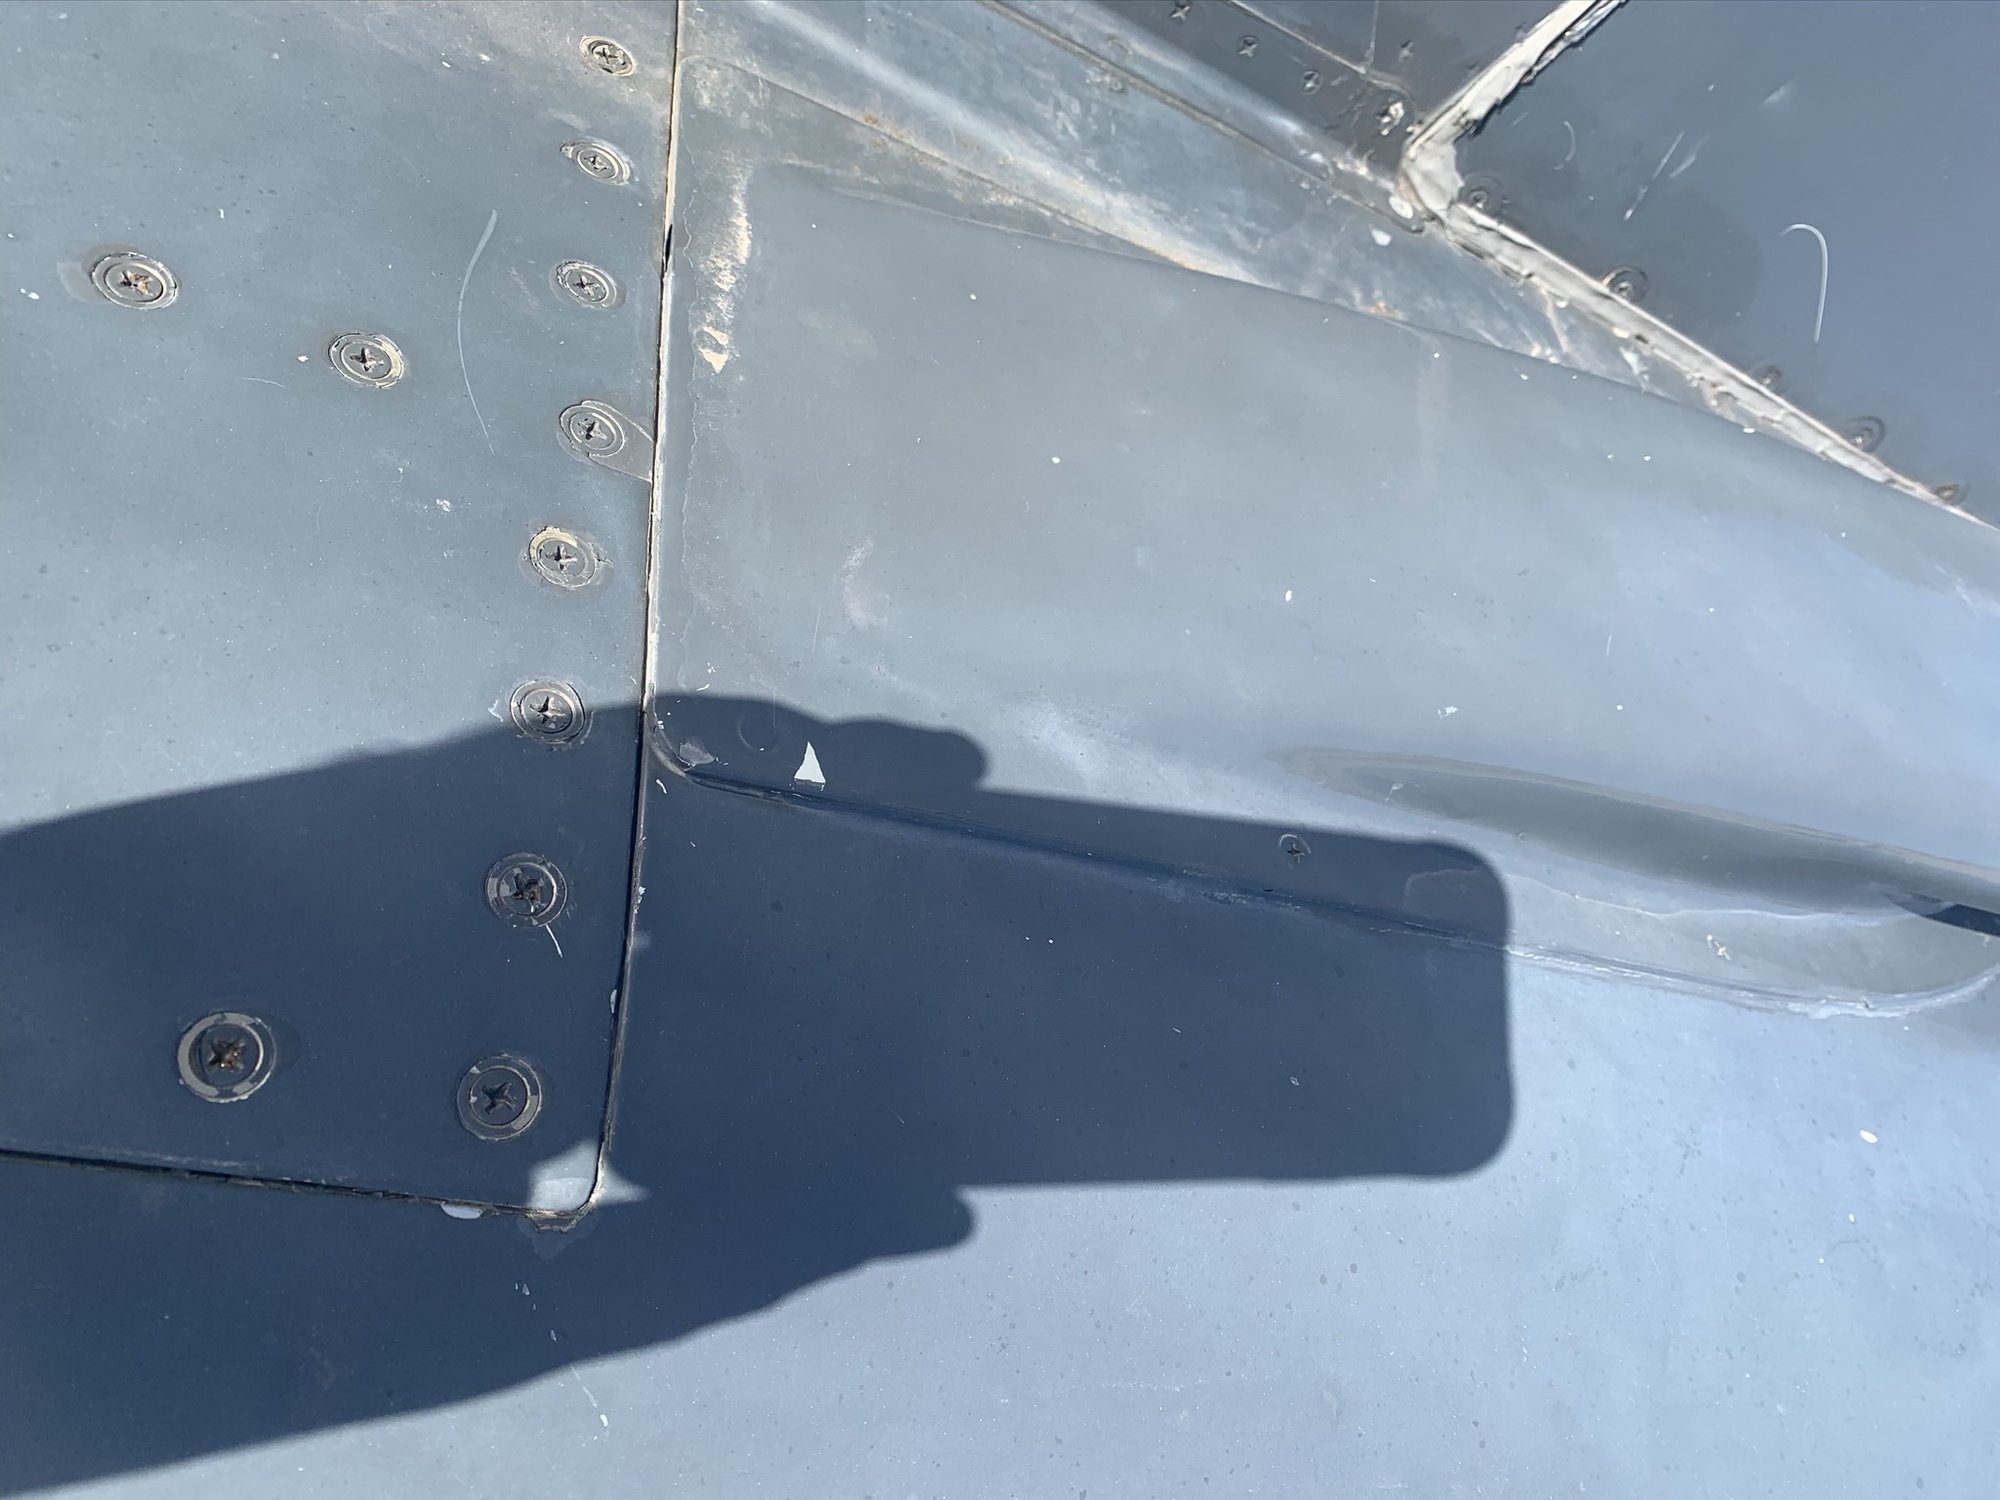
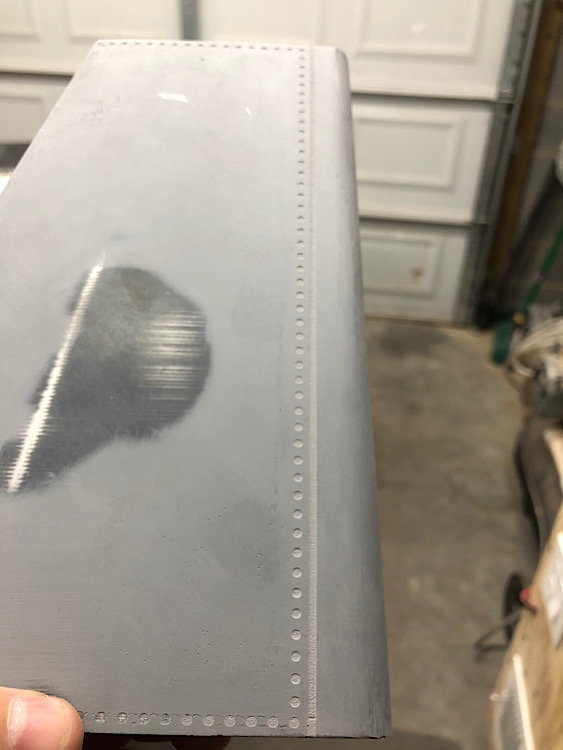
unfortunately i sanded through the rivets in a few places. Since rivet visibility on full scale aircraft can vary based on there installation and finishing methods over the entire aircraft, im tempted to leave it how it is to add to the scale/ness of the model. Anyone have any thoughts? Adding them back on wouldnt be a huge undertaking if need be.
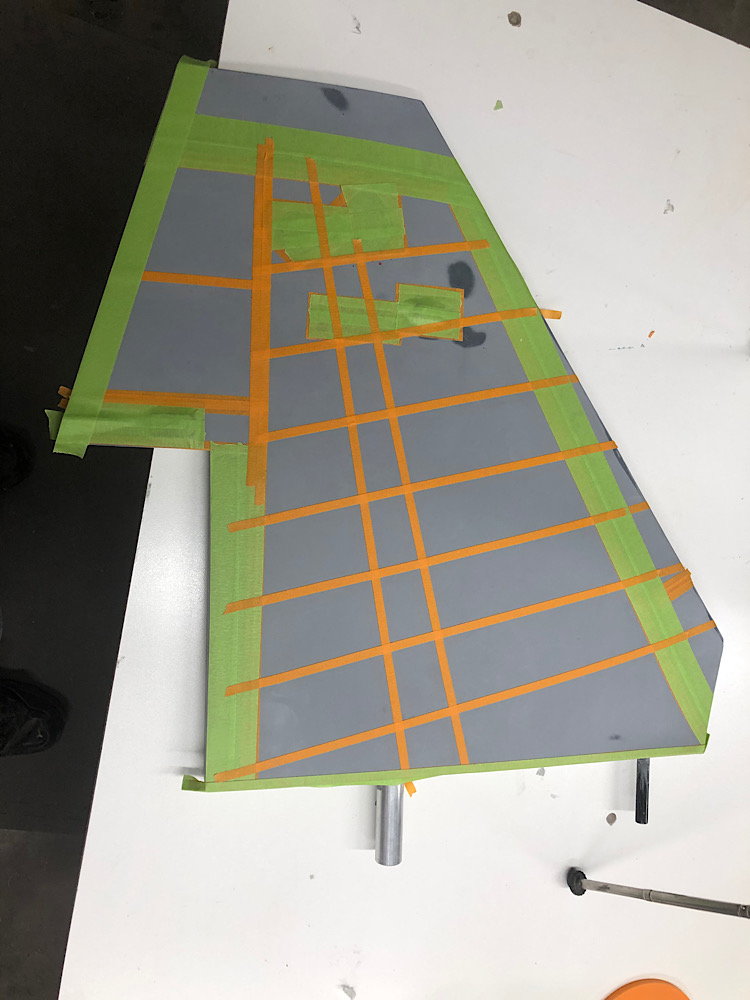
with the rudder sanded smooth, i placed 1/4� masking temp centered over the rivet rows and any �bonded� internal stiffeners. Fyi, the rivets in the rudder were near impossible to see in numerous photo�s, so i placed them in what i would �expect� to see based on other jets.
i then made up a 220 grit sanding sponge and sanded away the primer between the masking tape. I then removed the masking tape leaving a subtle �waviness� to the rudder. This waviness is very difficult to see in primer, but is easily felt. I am hoping that once the final paint is applied, it will be more easily seen, especially with semi-gloss color schemes. My plan is to mold the rudder first and see how it comes out before proceeding to far along this process with the wings and fuselage. The horizontal stabs had very little waviness to there surface that i could see in photos, so im less concerned about adding this feature to them
me being the inpatient person i can be, i used some un-thinned DuraBuild primer and brushed it on the tail section pieces and got to sanding those smooth.
unfortunately i sanded through the rivets in a few places. Since rivet visibility on full scale aircraft can vary based on there installation and finishing methods over the entire aircraft, im tempted to leave it how it is to add to the scale/ness of the model. Anyone have any thoughts? Adding them back on wouldnt be a huge undertaking if need be.
with the rudder sanded smooth, i placed 1/4� masking temp centered over the rivet rows and any �bonded� internal stiffeners. Fyi, the rivets in the rudder were near impossible to see in numerous photo�s, so i placed them in what i would �expect� to see based on other jets.
i then made up a 220 grit sanding sponge and sanded away the primer between the masking tape. I then removed the masking tape leaving a subtle �waviness� to the rudder. This waviness is very difficult to see in primer, but is easily felt. I am hoping that once the final paint is applied, it will be more easily seen, especially with semi-gloss color schemes. My plan is to mold the rudder first and see how it comes out before proceeding to far along this process with the wings and fuselage. The horizontal stabs had very little waviness to there surface that i could see in photos, so im less concerned about adding this feature to them
12-18-2019, 05:59 AM
#39
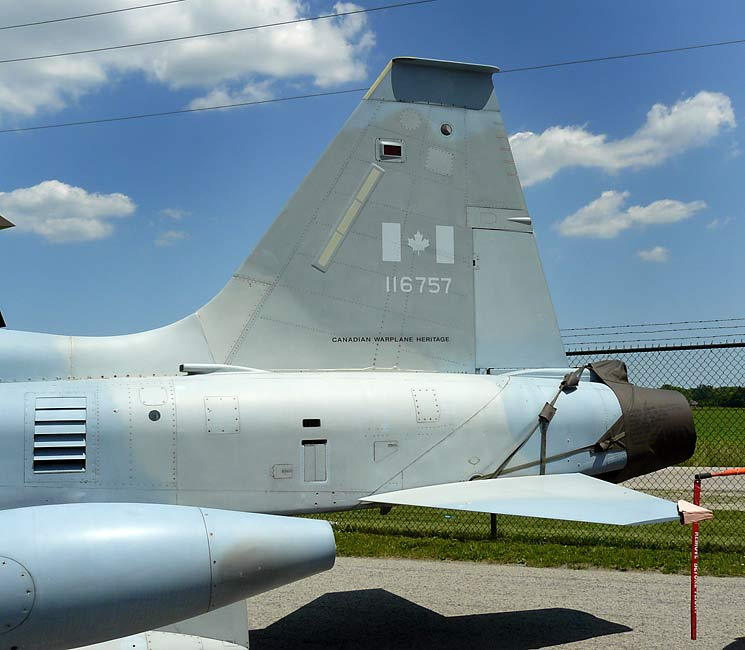
I'm pretty inclined to say there are no rivets on the rudder? I've looked at tons of T38 and F5 pictures and I don't see any on any pictures.
there is somebody on RCU that owns a full scale F5 or has a friend who does but I don't remember who it is. The tails are the same between the 2 aren't they?
there is somebody on RCU that owns a full scale F5 or has a friend who does but I don't remember who it is. The tails are the same between the 2 aren't they?
12-18-2019, 03:33 PM
#41
I'm pretty inclined to say there are no rivets on the rudder? I've looked at tons of T38 and F5 pictures and I don't see any on any pictures.
there is somebody on RCU that owns a full scale F5 or has a friend who does but I don't remember who it is. The tails are the same between the 2 aren't they?
there is somebody on RCU that owns a full scale F5 or has a friend who does but I don't remember who it is. The tails are the same between the 2 aren't they?
im kind of on the side of the fence with removing the rivets. Your photo and a few a friend sent me only show a vertical row of rivets around the Leading edge, so im going to with that.
12-18-2019, 03:55 PM
#42
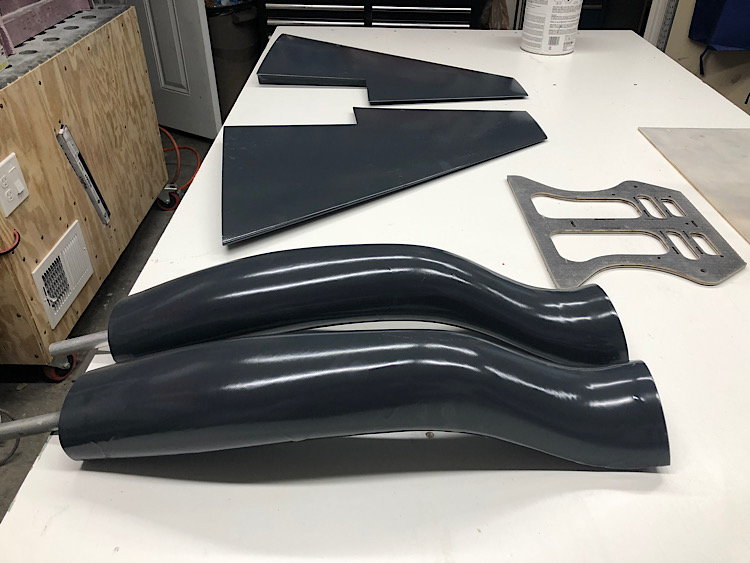
I cut out and assembled the rudder parting planes. The rudder fits pretty dang good, just a 1/16� gap on one of the 4 edges, a little offset for the laser kerf and it should fit perfect.
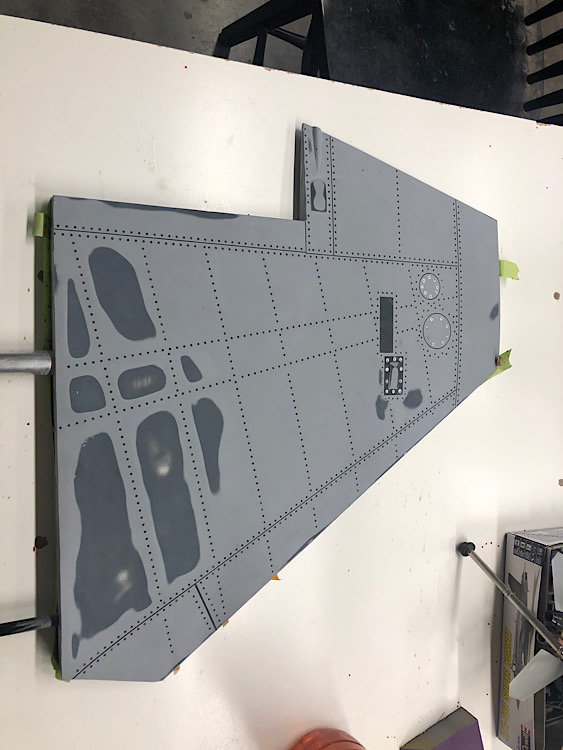
i also did some more sanding and have both Horizontal stabs sanded down to 500 grit. Once the rivets are plucked out, these are ready for molding.
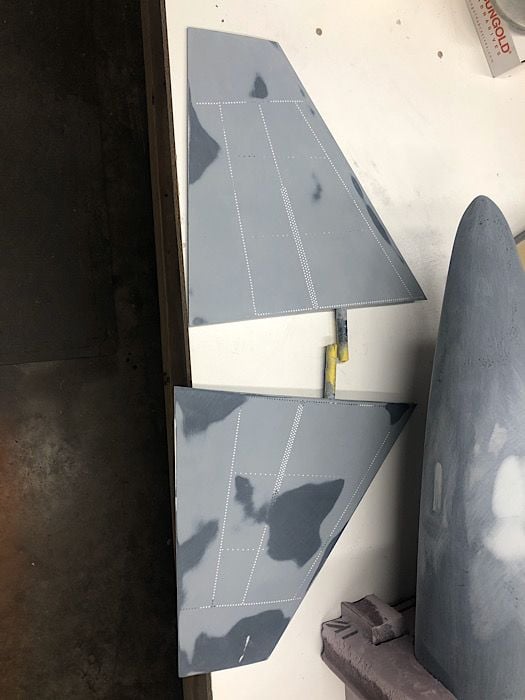
i also got the vertical stab sanded down with 180 grit paper to the point where the surface details are just beginning to show. I will finish sanding it with 325 and 500 grit paper tomorrow.
i also did some more sanding and have both Horizontal stabs sanded down to 500 grit. Once the rivets are plucked out, these are ready for molding.
i also got the vertical stab sanded down with 180 grit paper to the point where the surface details are just beginning to show. I will finish sanding it with 325 and 500 grit paper tomorrow.

 12-20-2019, 05:54 PM
#44
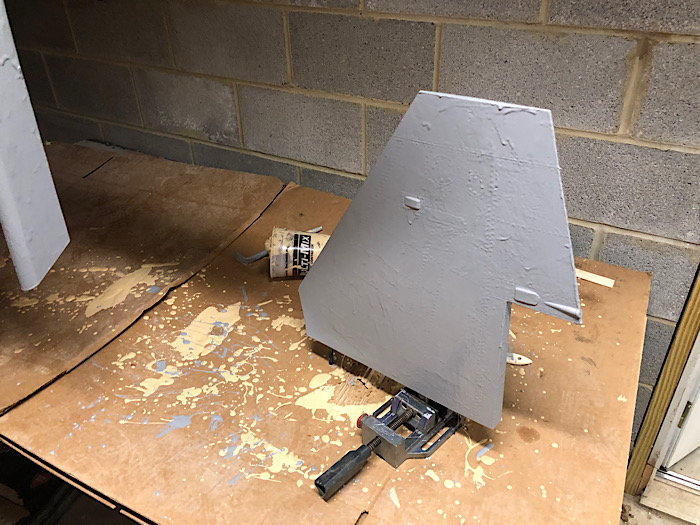
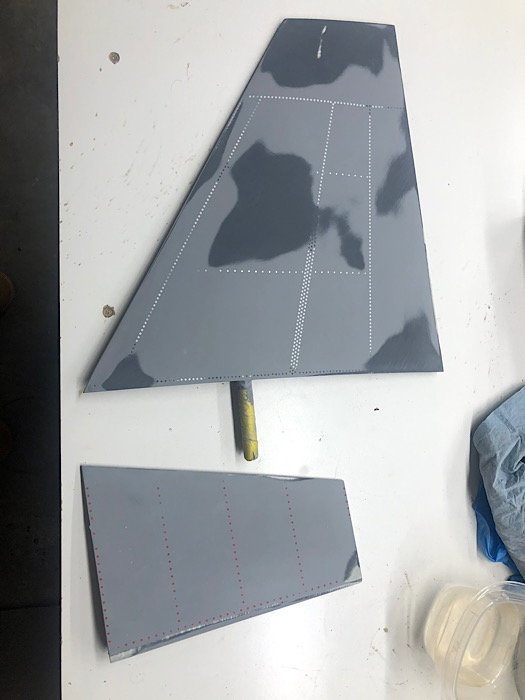
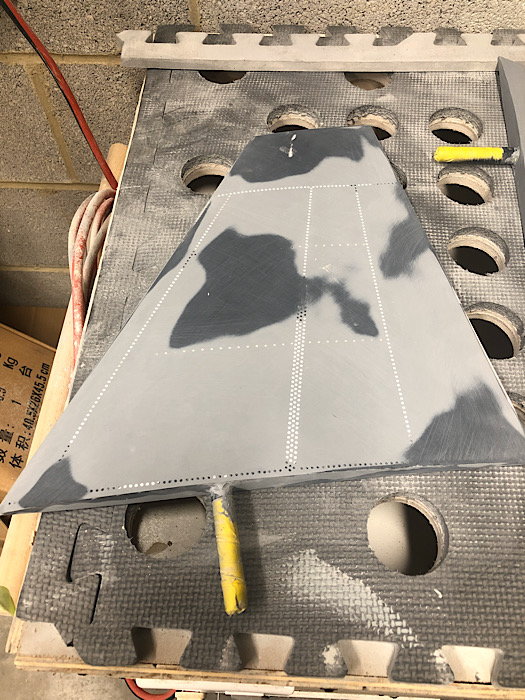
After doing some photo research, i noticed the vertical stab only has the wavey skin on the bottom 20% of the stab, so i sanded that into the stab, removed all the tape and plucked out all of the individual rivets and panel lines. The vertical stab is now ready for wax and molding.
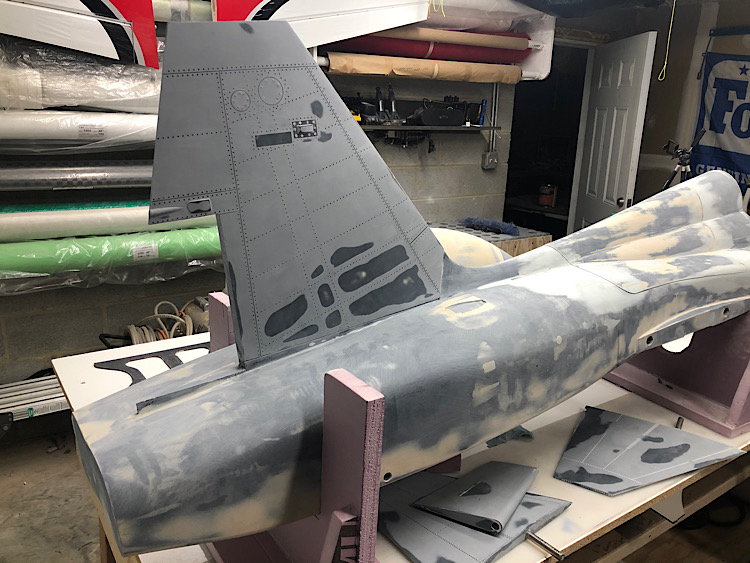
I put the vertical stab on the fuse for a little motivational shot. Its amazing how the addition of the surface details turn a bland flat surface into an impressive model. I really enjoy the detailing parts of modeling, it lets your OCD... errr imagination go wild with as much as your OCD.. err ambition will allow. Lol
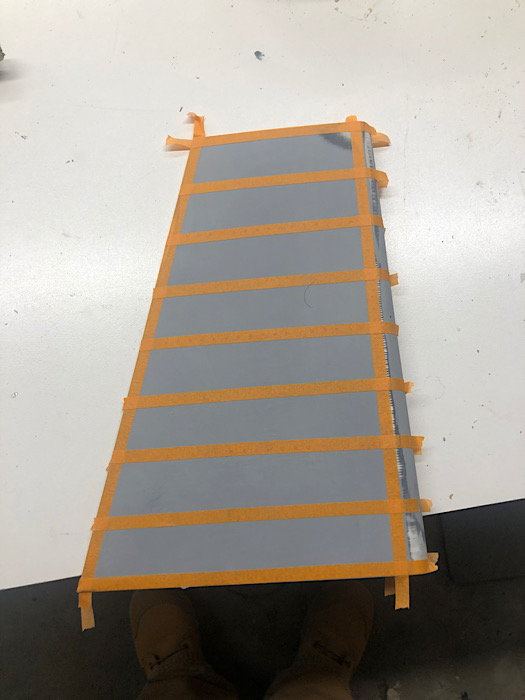
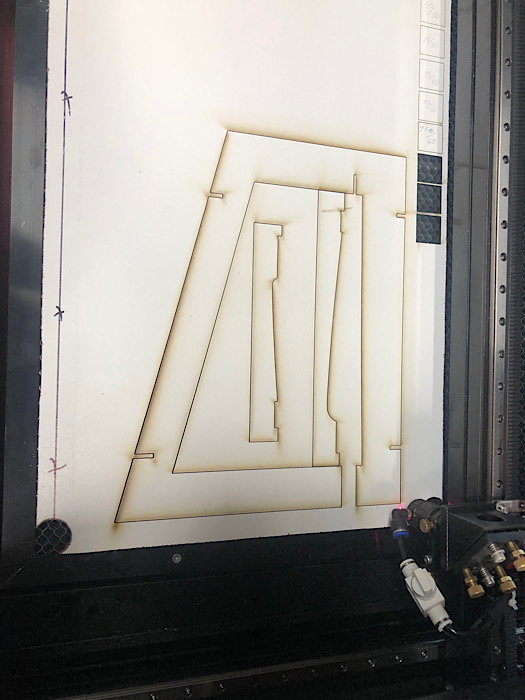
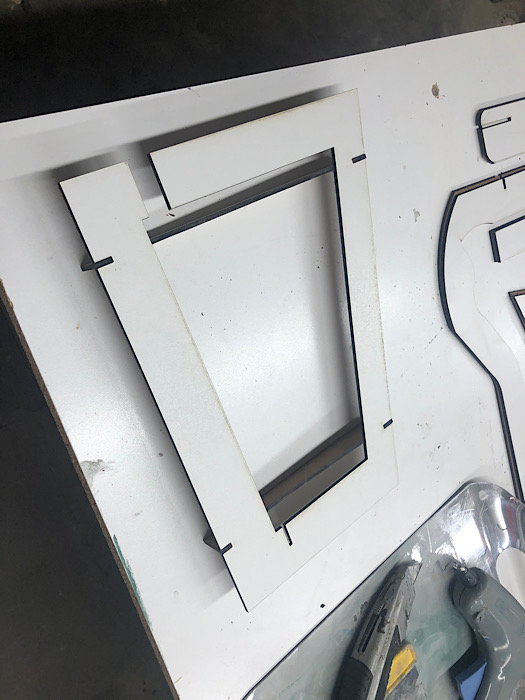
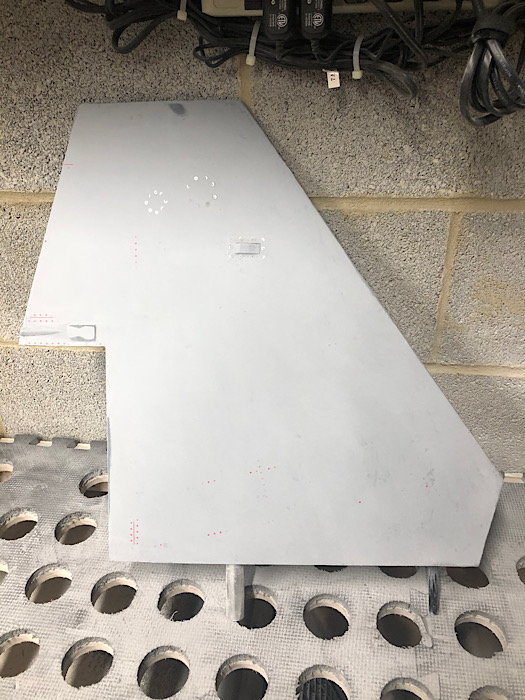
I also decided to remove the majority of the surface details from the rudder since i found more photos showing no waves or rivets than anything else. So i sanded down the rudder flat and smooth. Then drew up the panel line for the LE panel and added the rivets aft of that panel line and at the root/tip ribs in CAD. I then used the laser cutter to cut out the outline of the rudder in some 1� insulation foam:
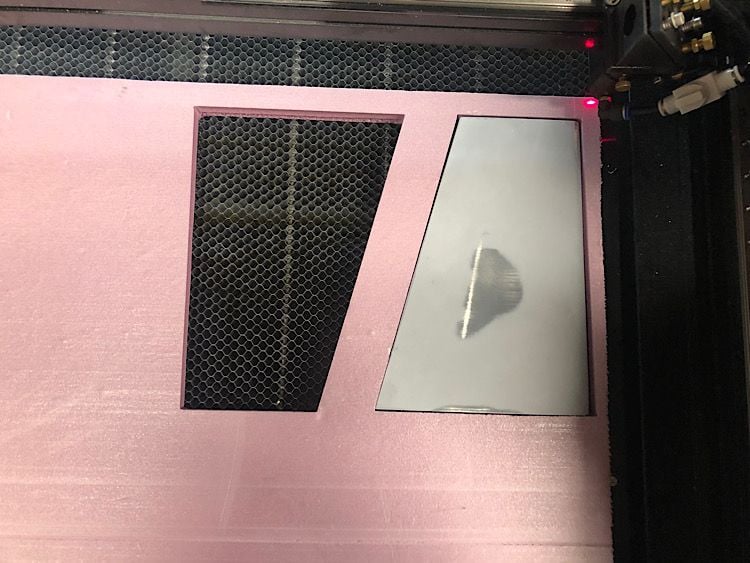
Then i used some scrap foam to block the rudder up so it was colinear with the top of the foam sheet:
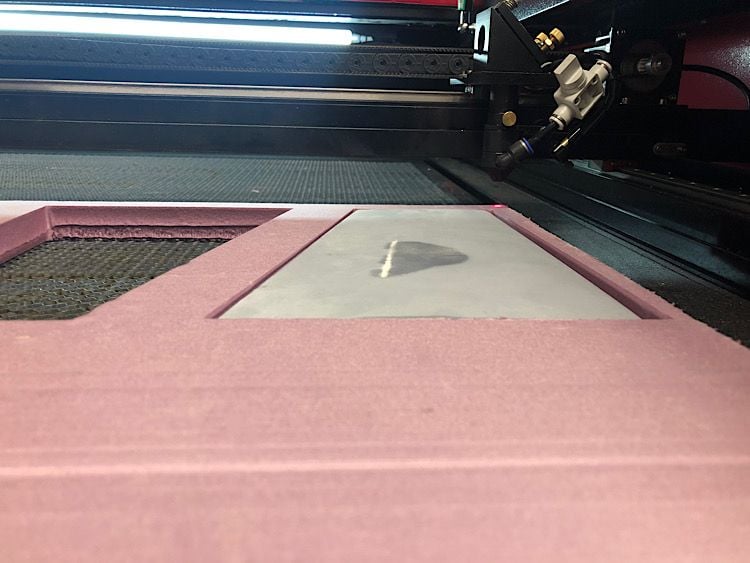
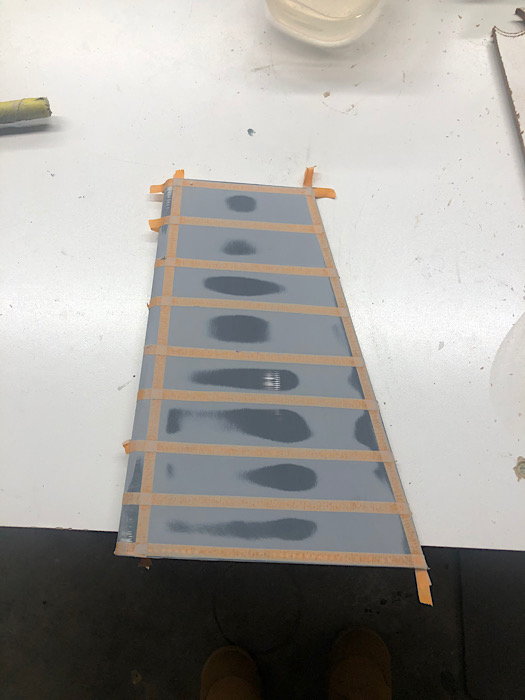
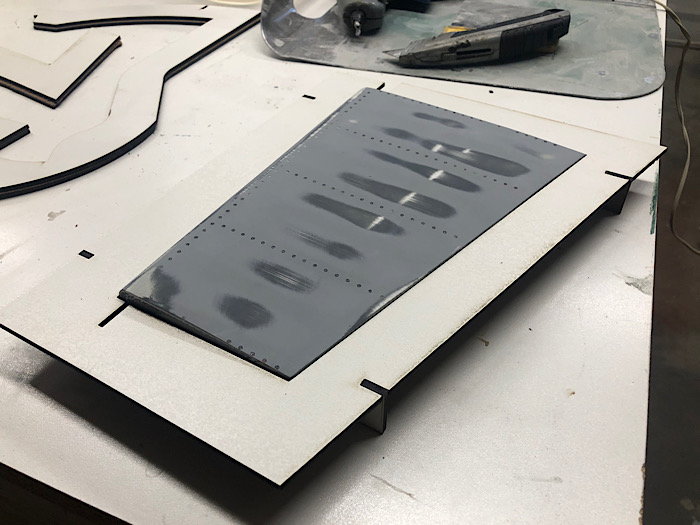
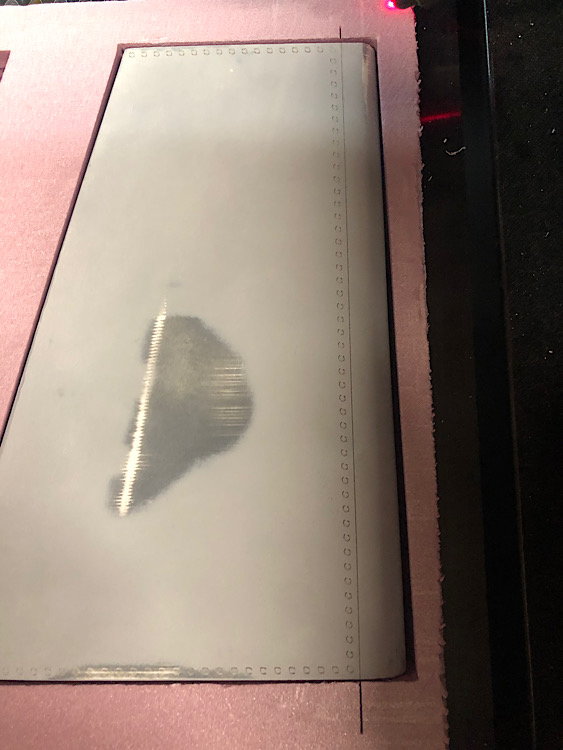
The laser was then used to etch the panel line and rivets onto the rudder. I had the speed pretty high doing this, so the circles for the rivets arent very circular, i�ll likely brush some more primer on the rudder and try again at a slower speed. The panel line is also to narrow i believe, so i may adjust that a little bit as well.
I put the vertical stab on the fuse for a little motivational shot. Its amazing how the addition of the surface details turn a bland flat surface into an impressive model. I really enjoy the detailing parts of modeling, it lets your OCD... errr imagination go wild with as much as your OCD.. err ambition will allow. Lol
I also decided to remove the majority of the surface details from the rudder since i found more photos showing no waves or rivets than anything else. So i sanded down the rudder flat and smooth. Then drew up the panel line for the LE panel and added the rivets aft of that panel line and at the root/tip ribs in CAD. I then used the laser cutter to cut out the outline of the rudder in some 1� insulation foam:
Then i used some scrap foam to block the rudder up so it was colinear with the top of the foam sheet:
The laser was then used to etch the panel line and rivets onto the rudder. I had the speed pretty high doing this, so the circles for the rivets arent very circular, i�ll likely brush some more primer on the rudder and try again at a slower speed. The panel line is also to narrow i believe, so i may adjust that a little bit as well.
12-23-2019, 11:27 AM
#45
Junior Member
Join Date: Dec 2019
Posts: 1
Likes: 0
Received 0 Likes
on
0 Posts
I came across this thread while doing some research for my own (static, nonflying) scale model and am following with interest.
This is certainly an impressive project.
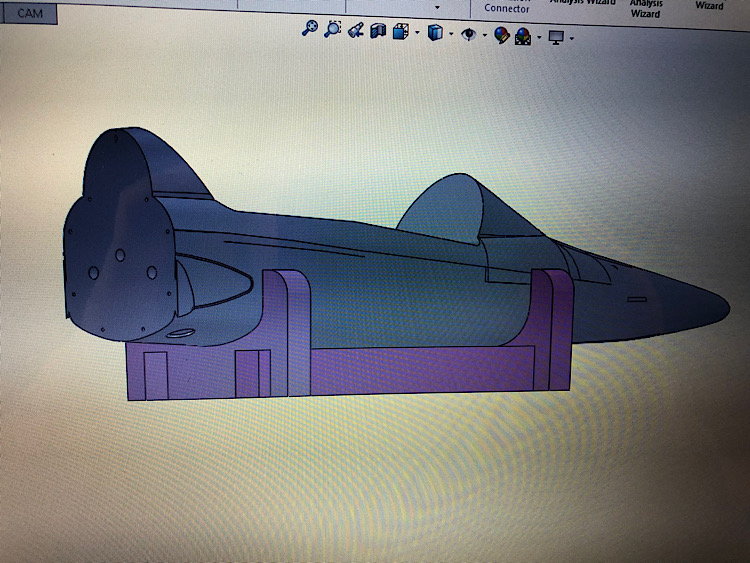
In one of your early posts you mentioned that you were rather disappointed by the cad model that you purchased.
I'm considering buying a cad model for use as a reference but wanted to avoid your bad experience.
Could you name the place where you got it? I'm currently looking at some models at turbosquid.com. They seem to look good, but are pricey.
This is certainly an impressive project.
In one of your early posts you mentioned that you were rather disappointed by the cad model that you purchased.
I'm considering buying a cad model for use as a reference but wanted to avoid your bad experience.
Could you name the place where you got it? I'm currently looking at some models at turbosquid.com. They seem to look good, but are pricey.
12-23-2019, 11:56 AM
#46

Be careful when buying CAD models as alot of the time they are done in non-cad formats and look great yet are not great for working off.
Alot of free stuff on gradcad.com that you can download and some models are very impressive and a good place to start for free.
Regards,
Alot of free stuff on gradcad.com that you can download and some models are very impressive and a good place to start for free.
Regards,
12-23-2019, 07:51 PM
#47
I came across this thread while doing some research for my own (static, nonflying) scale model and am following with interest.
This is certainly an impressive project.
In one of your early posts you mentioned that you were rather disappointed by the cad model that you purchased.
I'm considering buying a cad model for use as a reference but wanted to avoid your bad experience.
Could you name the place where you got it? I'm currently looking at some models at turbosquid.com. They seem to look good, but are pricey.
I�d prefer not to name any names, but it wasnt listed as commercially available. We inquired on purchasing it strictly because it was said to be �made from Northrop manufacturing data�. If you include 3 views as manufacturing data.... then i guess it wasnt false advertising.
honestly after this model, unless i find a VERY high quality model, i will just draw my own from now on. Even the best Cad models will require some modifications to wing airfoils and similar items. And depending on how/what the cad model is made with, can be very difficult.
12-23-2019, 07:53 PM
#48
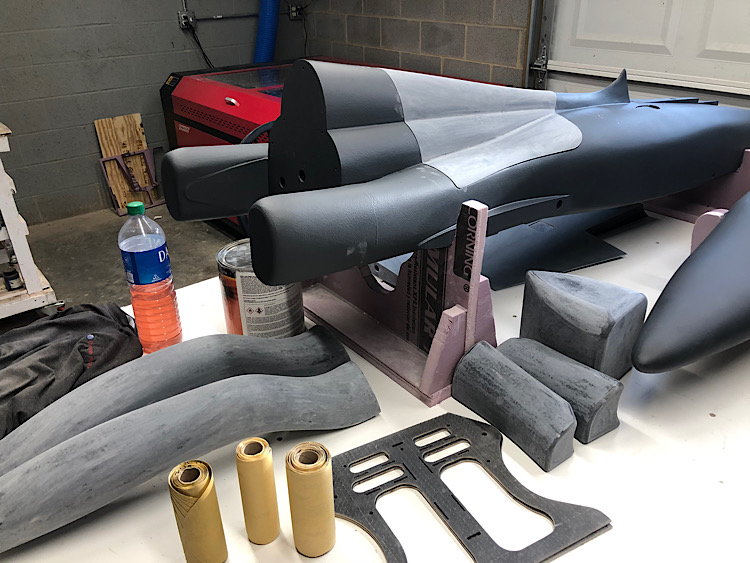
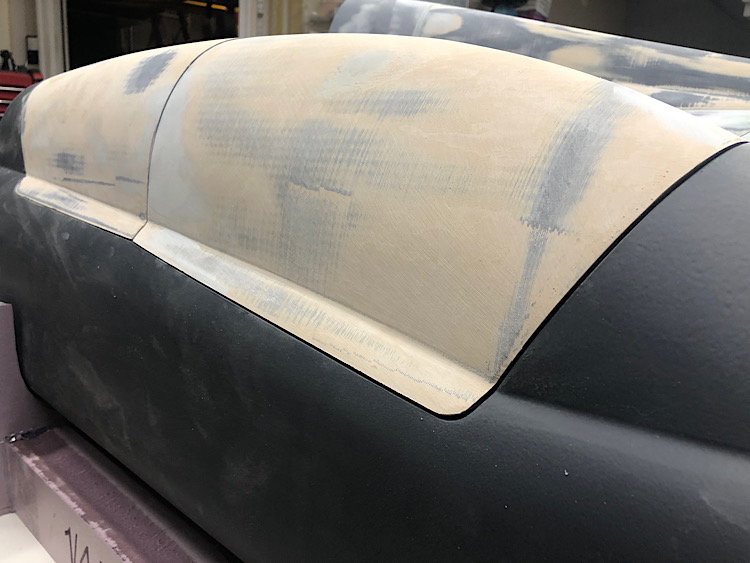
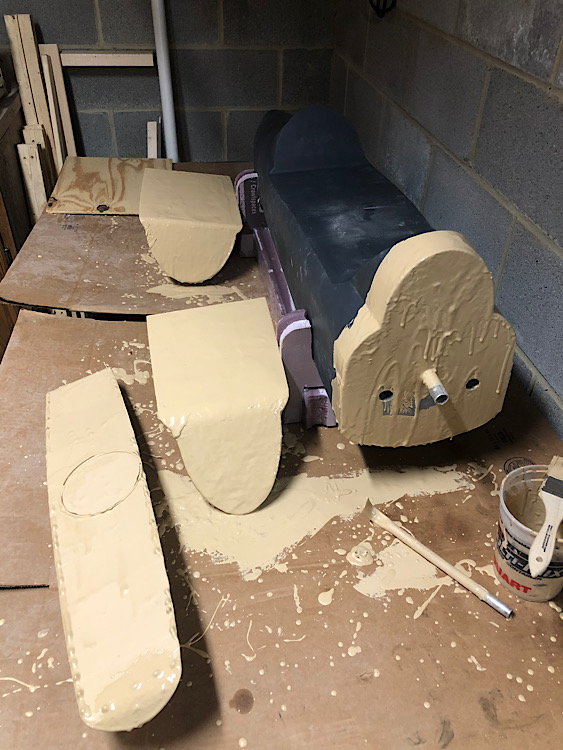
Between yesterday and today, i got the last gallon of Duratec i had sprayed onto all of the plugs. Lots of orange peel on most of the parts, but they are all sprayed and ready for final sanding and detailing now:

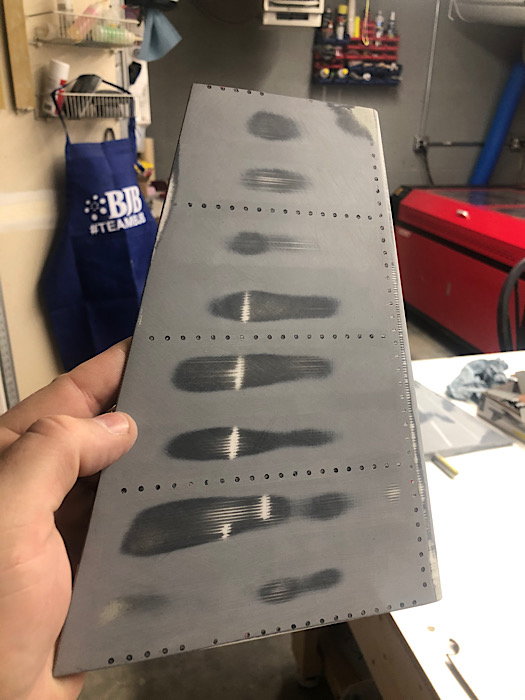
i also redid the rudder details so they would match the vertical stab better.
i also redid the rudder details so they would match the vertical stab better.
12-23-2019, 11:51 PM
#49

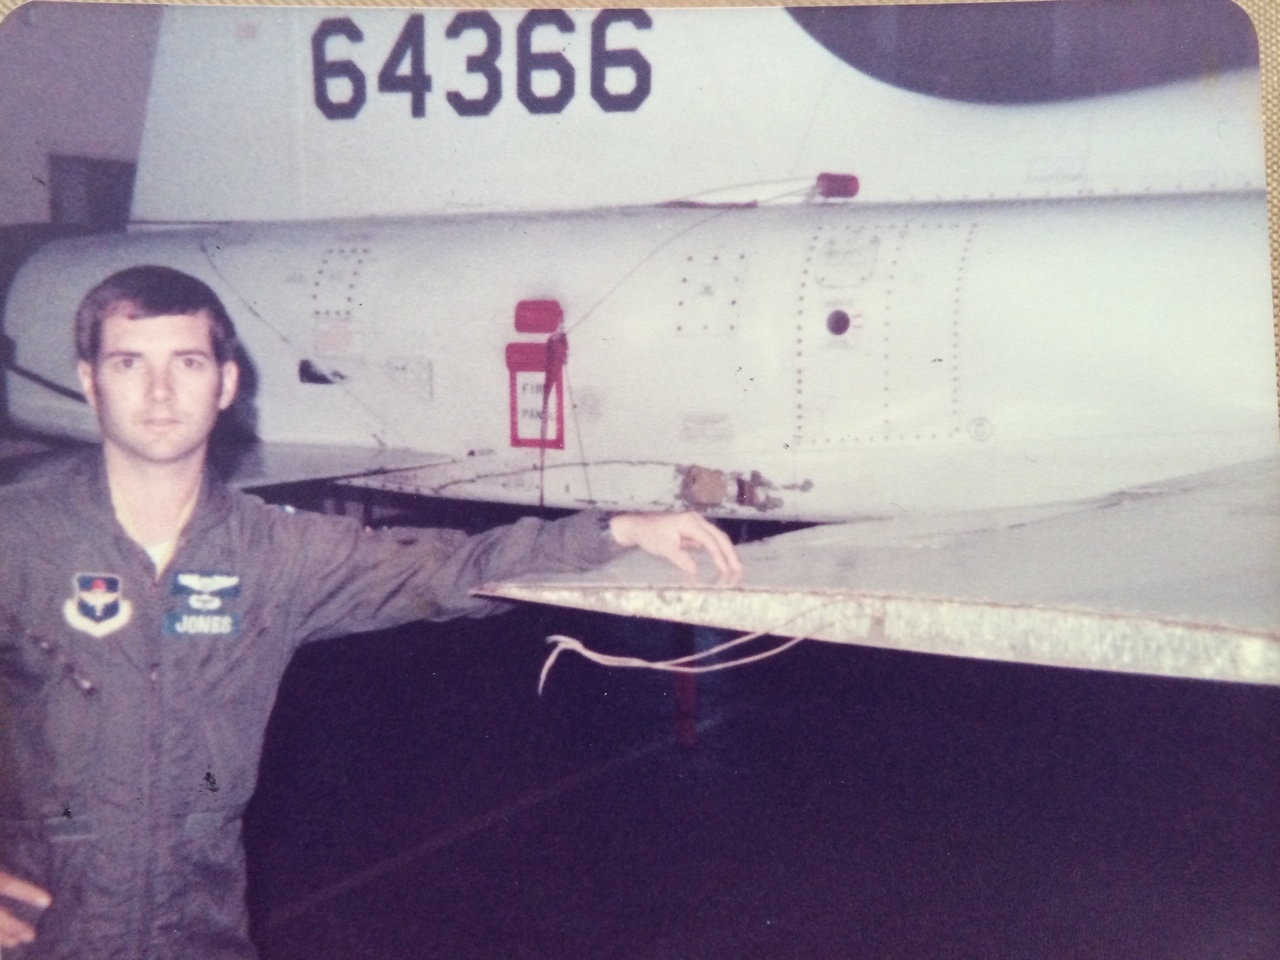
Whats the story here? Did you damage the aircraft while flying it ?
Also is that a foam core wing ?
Paul.