Go Back  RCU Forums > RC Airplanes > RC Jets
Reload this Page >

Reaction 54 Jet Kit

Community
Search
Notices
RC Jets Discuss RC jets in this forum plus rc turbines and ducted fan power systems

Reaction 54 Jet Kit

Thread Tools
 
Search this Thread
 
Old 03-20-2018, 08:54 PM
  #3826  
CARS II
My Feedback: (7)
 
CARS II's Avatar
 
Join Date: Oct 2002
Location: Sacramento CA
Posts: 6,589
Received 123 Likes on 106 Posts
Default


Ok, back from HD and I made my third sanding block, 150 grit.

The first LE sheeting is glued, now we wait.

Last edited by CARS II; 03-21-2018 at 08:16 AM.
Old 03-21-2018, 08:23 AM
  #3827  
redtail
My Feedback: (15)
 
redtail's Avatar
 
Join Date: Oct 2002
Location: Alexandria, VA
Posts: 2,625
Received 6 Likes on 6 Posts
Default

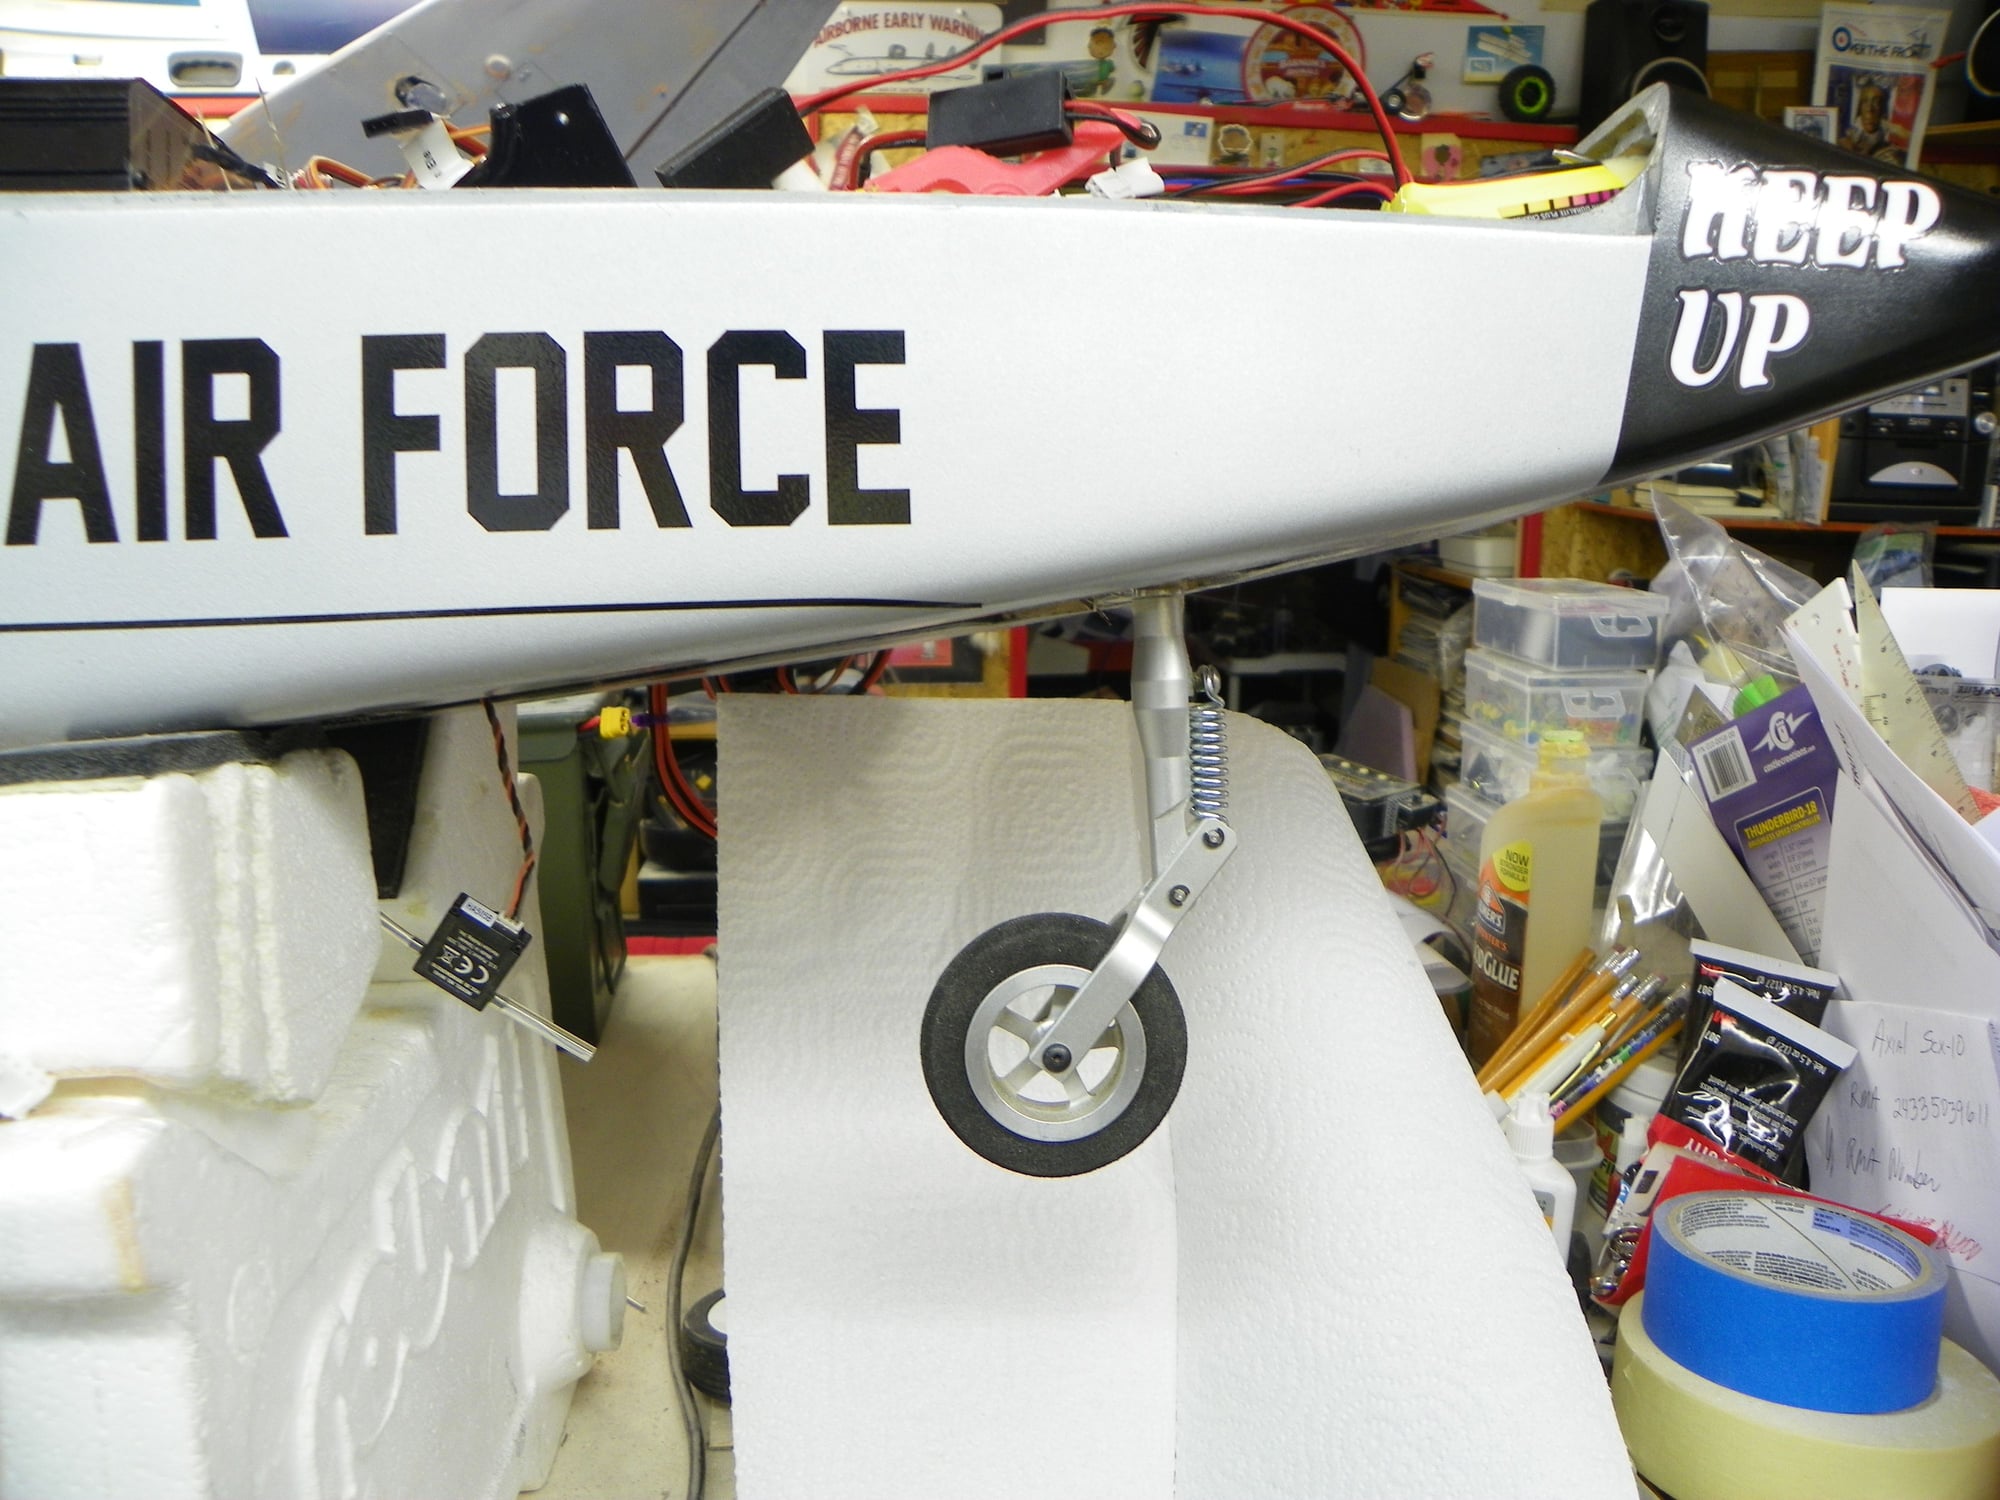
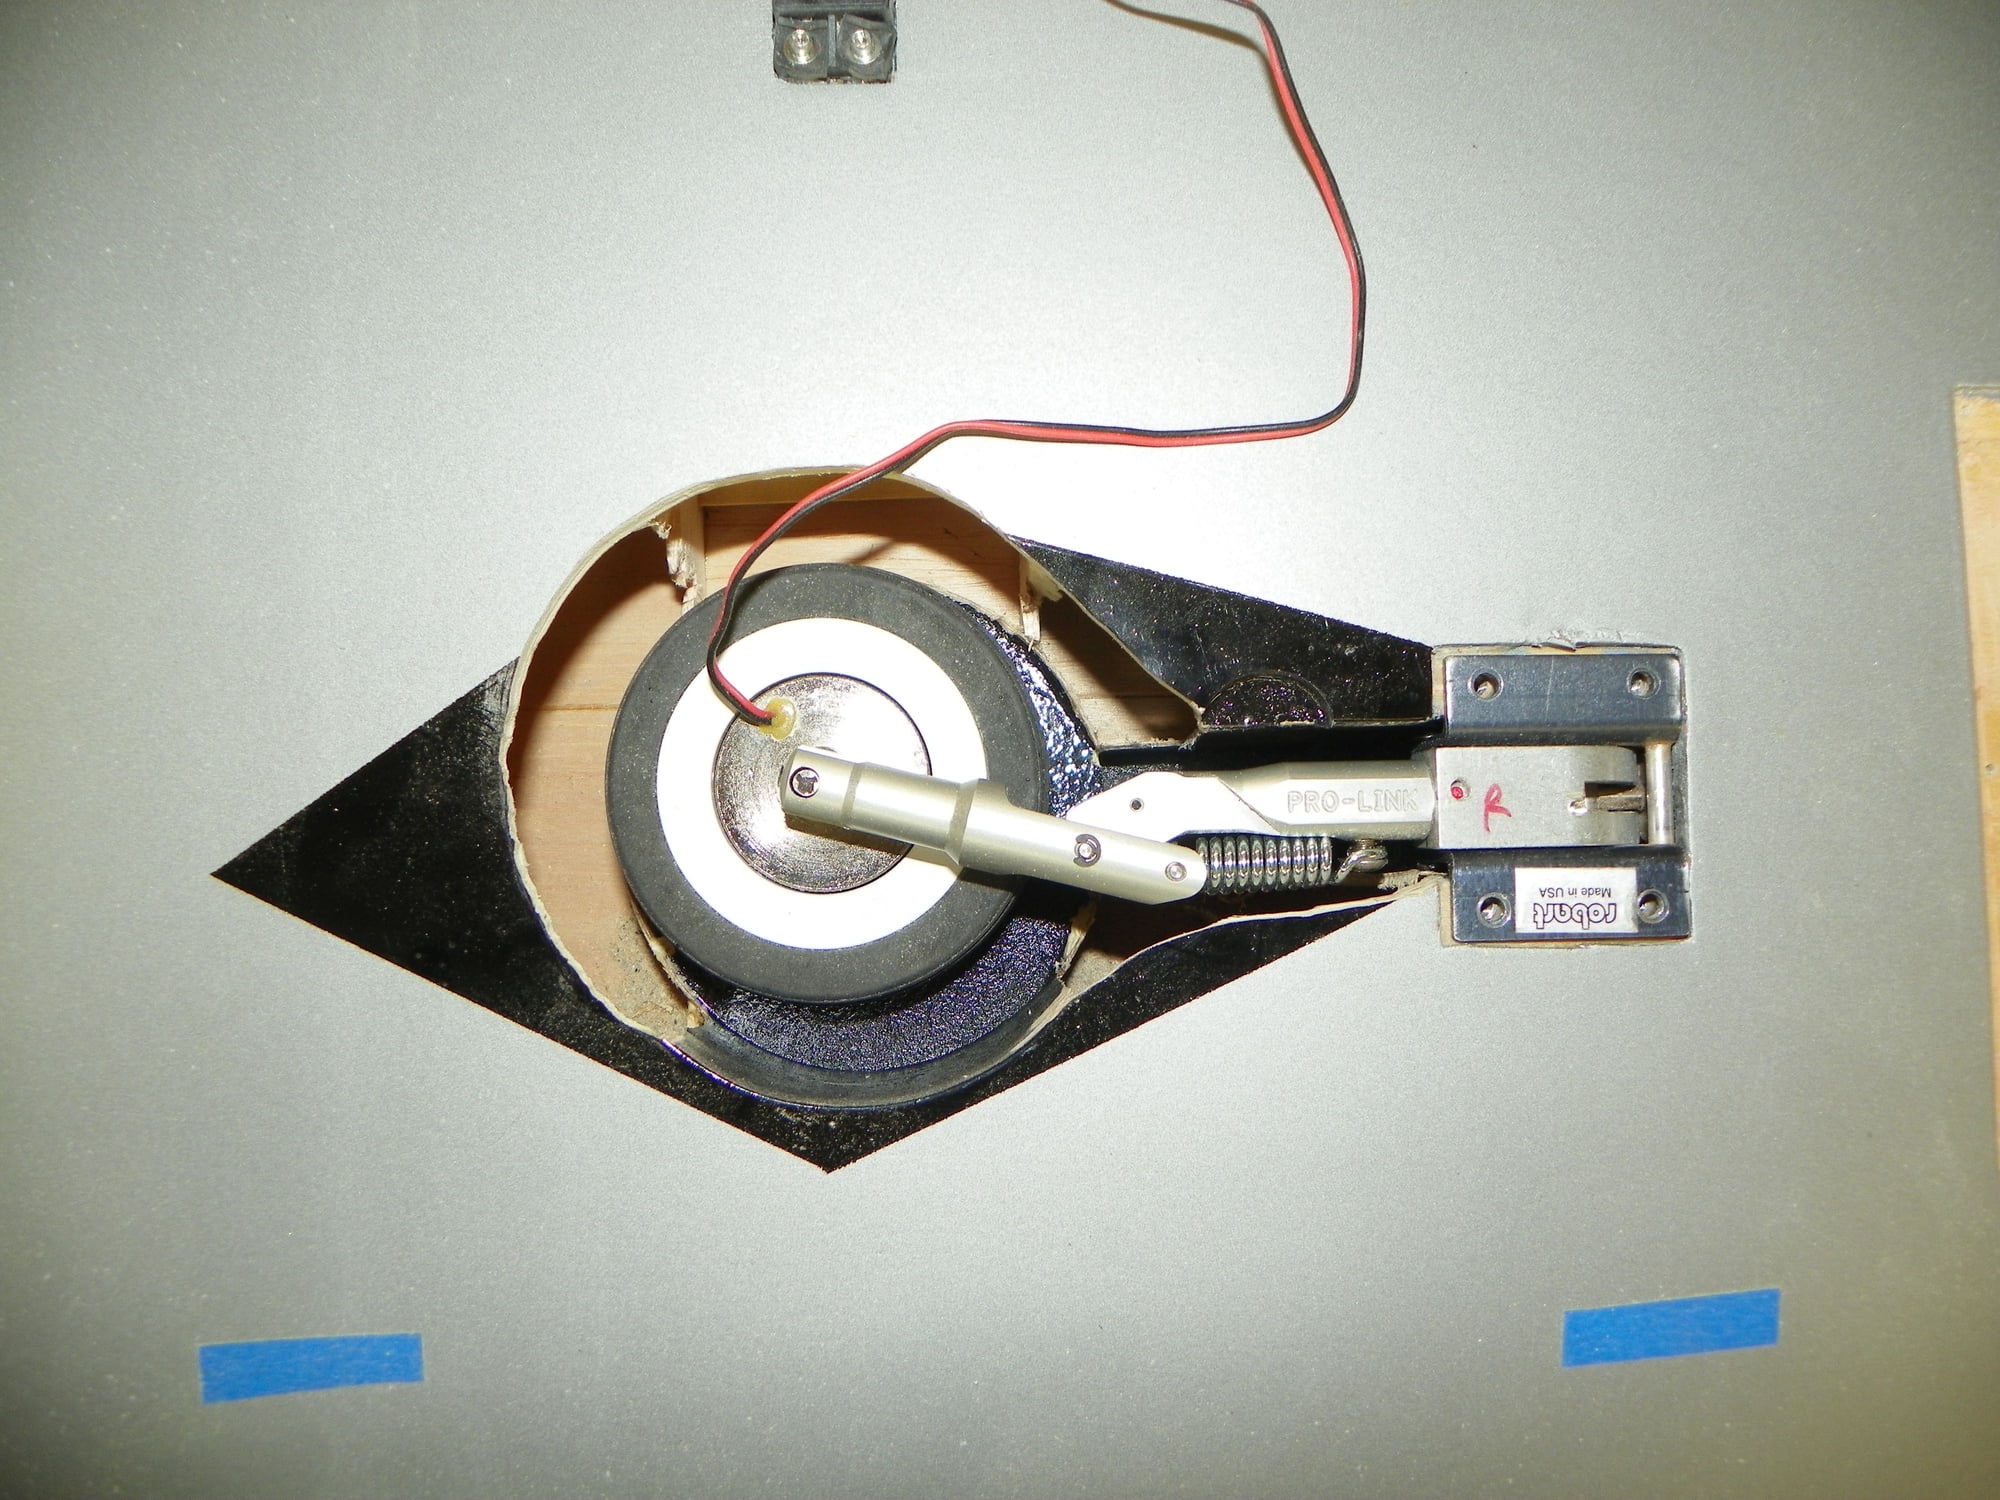
Wow. Rec'd the Boomerang Nano Gear Strut Set (Mains, Nose Gear) "Pro-Links" today from DreamWorks. Chris, from DreamWorks was great to work with. Thanks. The Pro-Link struts drop right into the kit recommended Robart trunions (7/16") landing gear.. Looks like an easy modification removing the three wire struts and replacing them with the Pro-Link struts. Will post photos later this afternoon. Looks Great Carlos. With your Pro-Links, your model will sit higher off the ground. Heard good things about that posture. With mine already built, I have to stay with the normal stance. But I am pleased to have the Pro-Links onboard. Chic

Last edited by redtail; 03-21-2018 at 08:26 AM.
Old 03-21-2018, 11:45 AM
  #3828  
Eaglepilot2
 
Eaglepilot2's Avatar
 
Join Date: Oct 2006
Location: Zebulon, NC
Posts: 309
Likes: 0
Received 0 Likes on 0 Posts
Default

Hopefully this new build thread will generate enough additional interest that it will be beneficial for Bruce to run a few more kits. I'd be in line!
Old 03-21-2018, 12:25 PM
  #3829  
redtail
My Feedback: (15)
 
redtail's Avatar
 
Join Date: Oct 2002
Location: Alexandria, VA
Posts: 2,625
Received 6 Likes on 6 Posts
Default


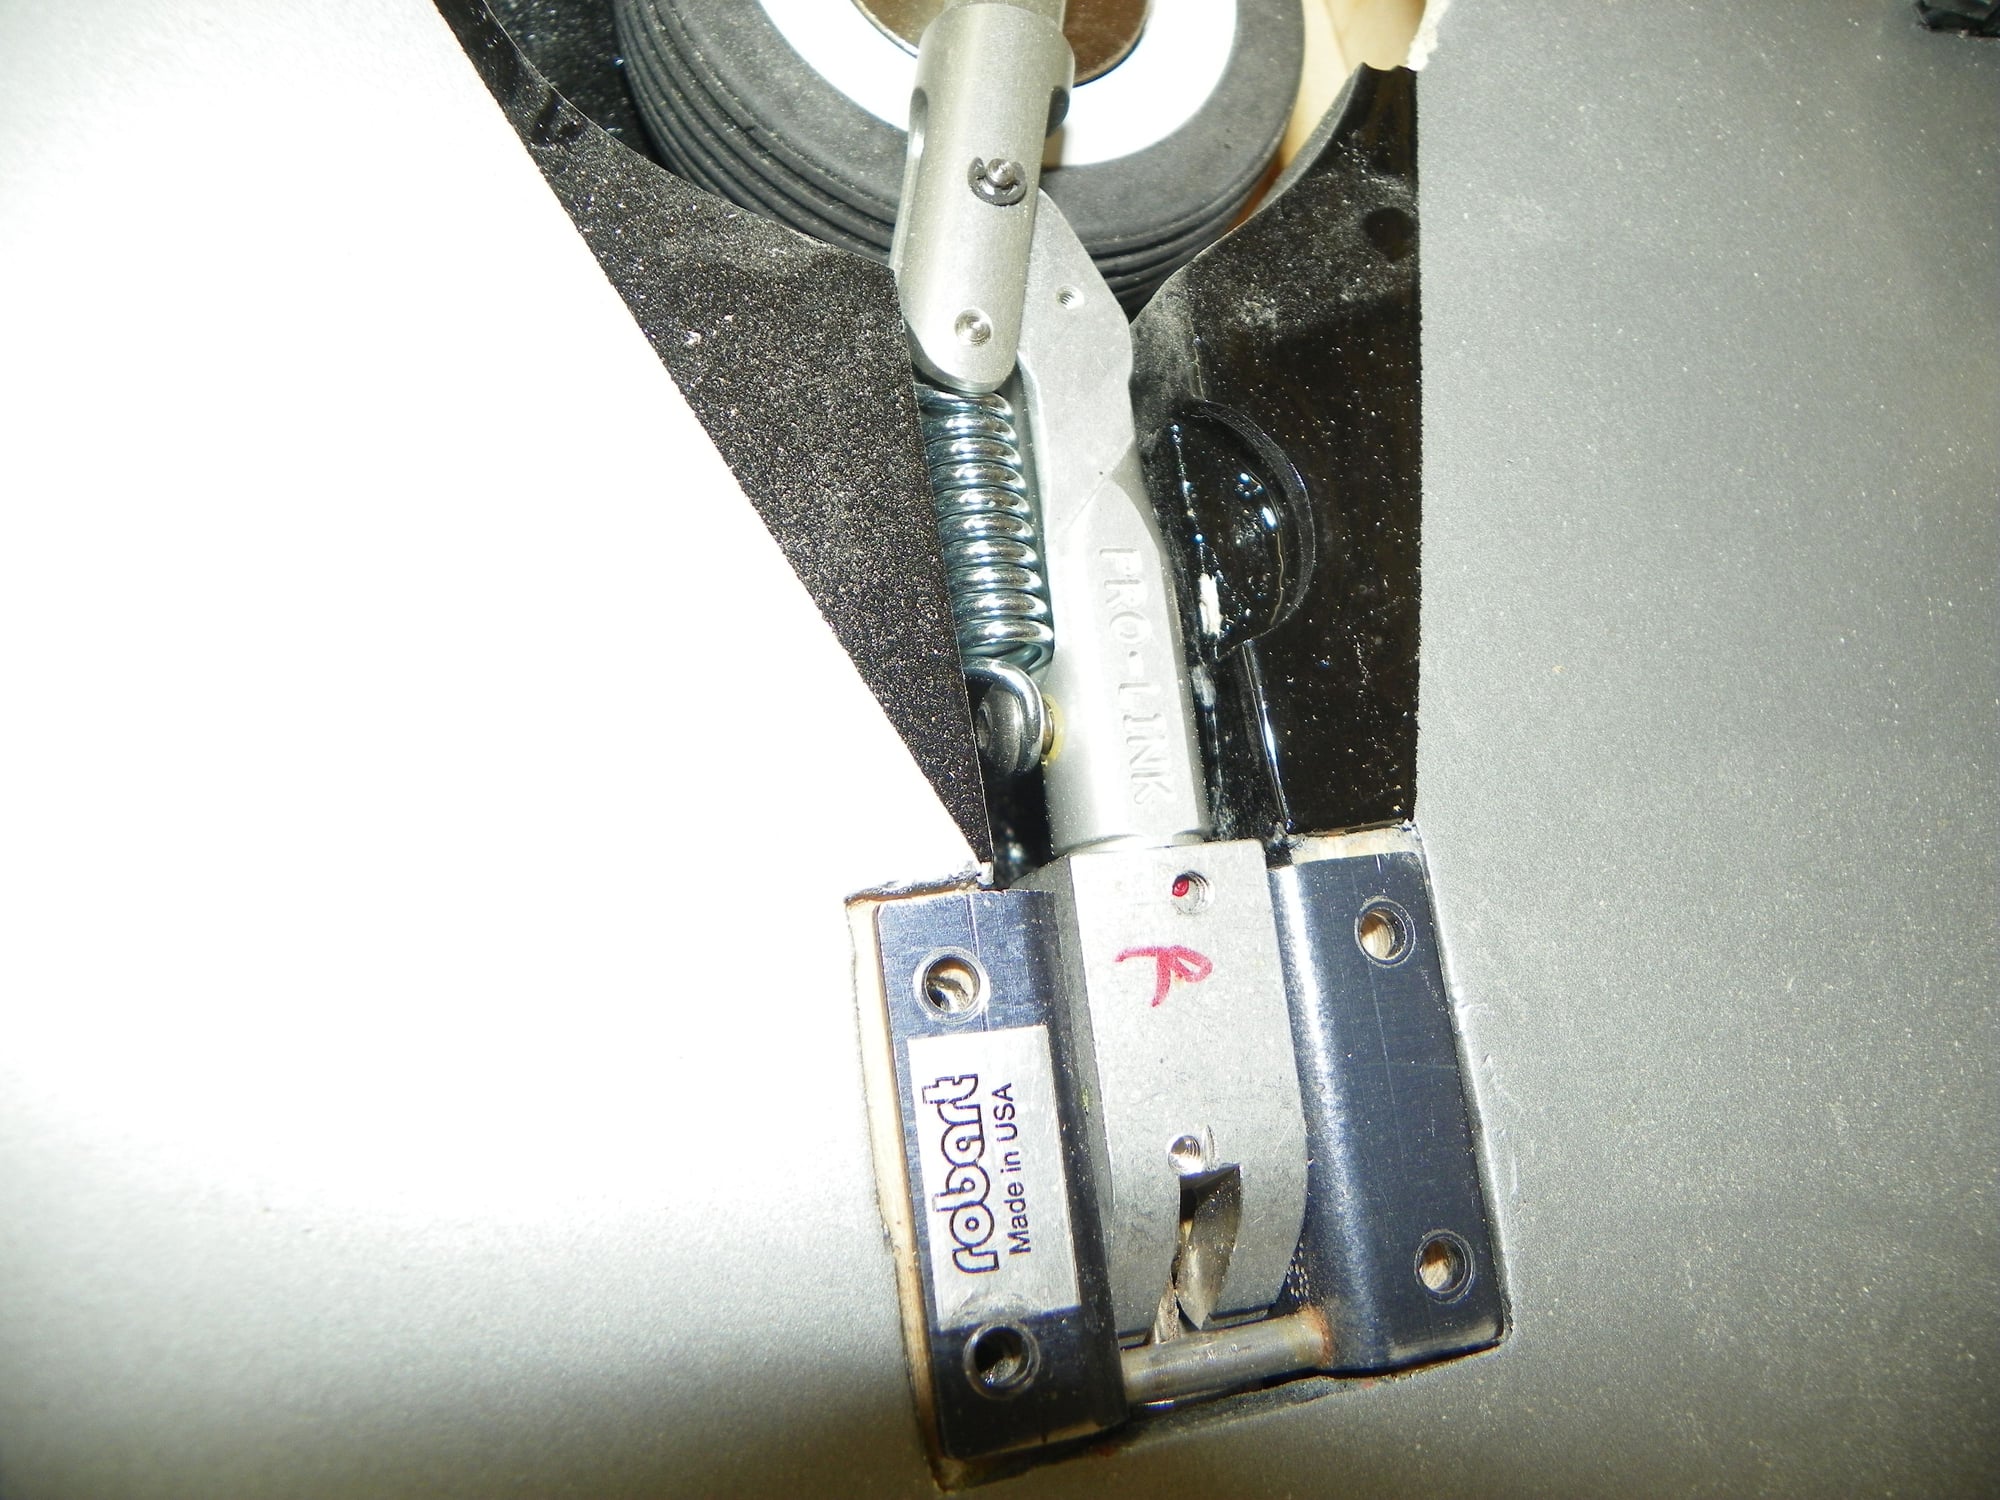
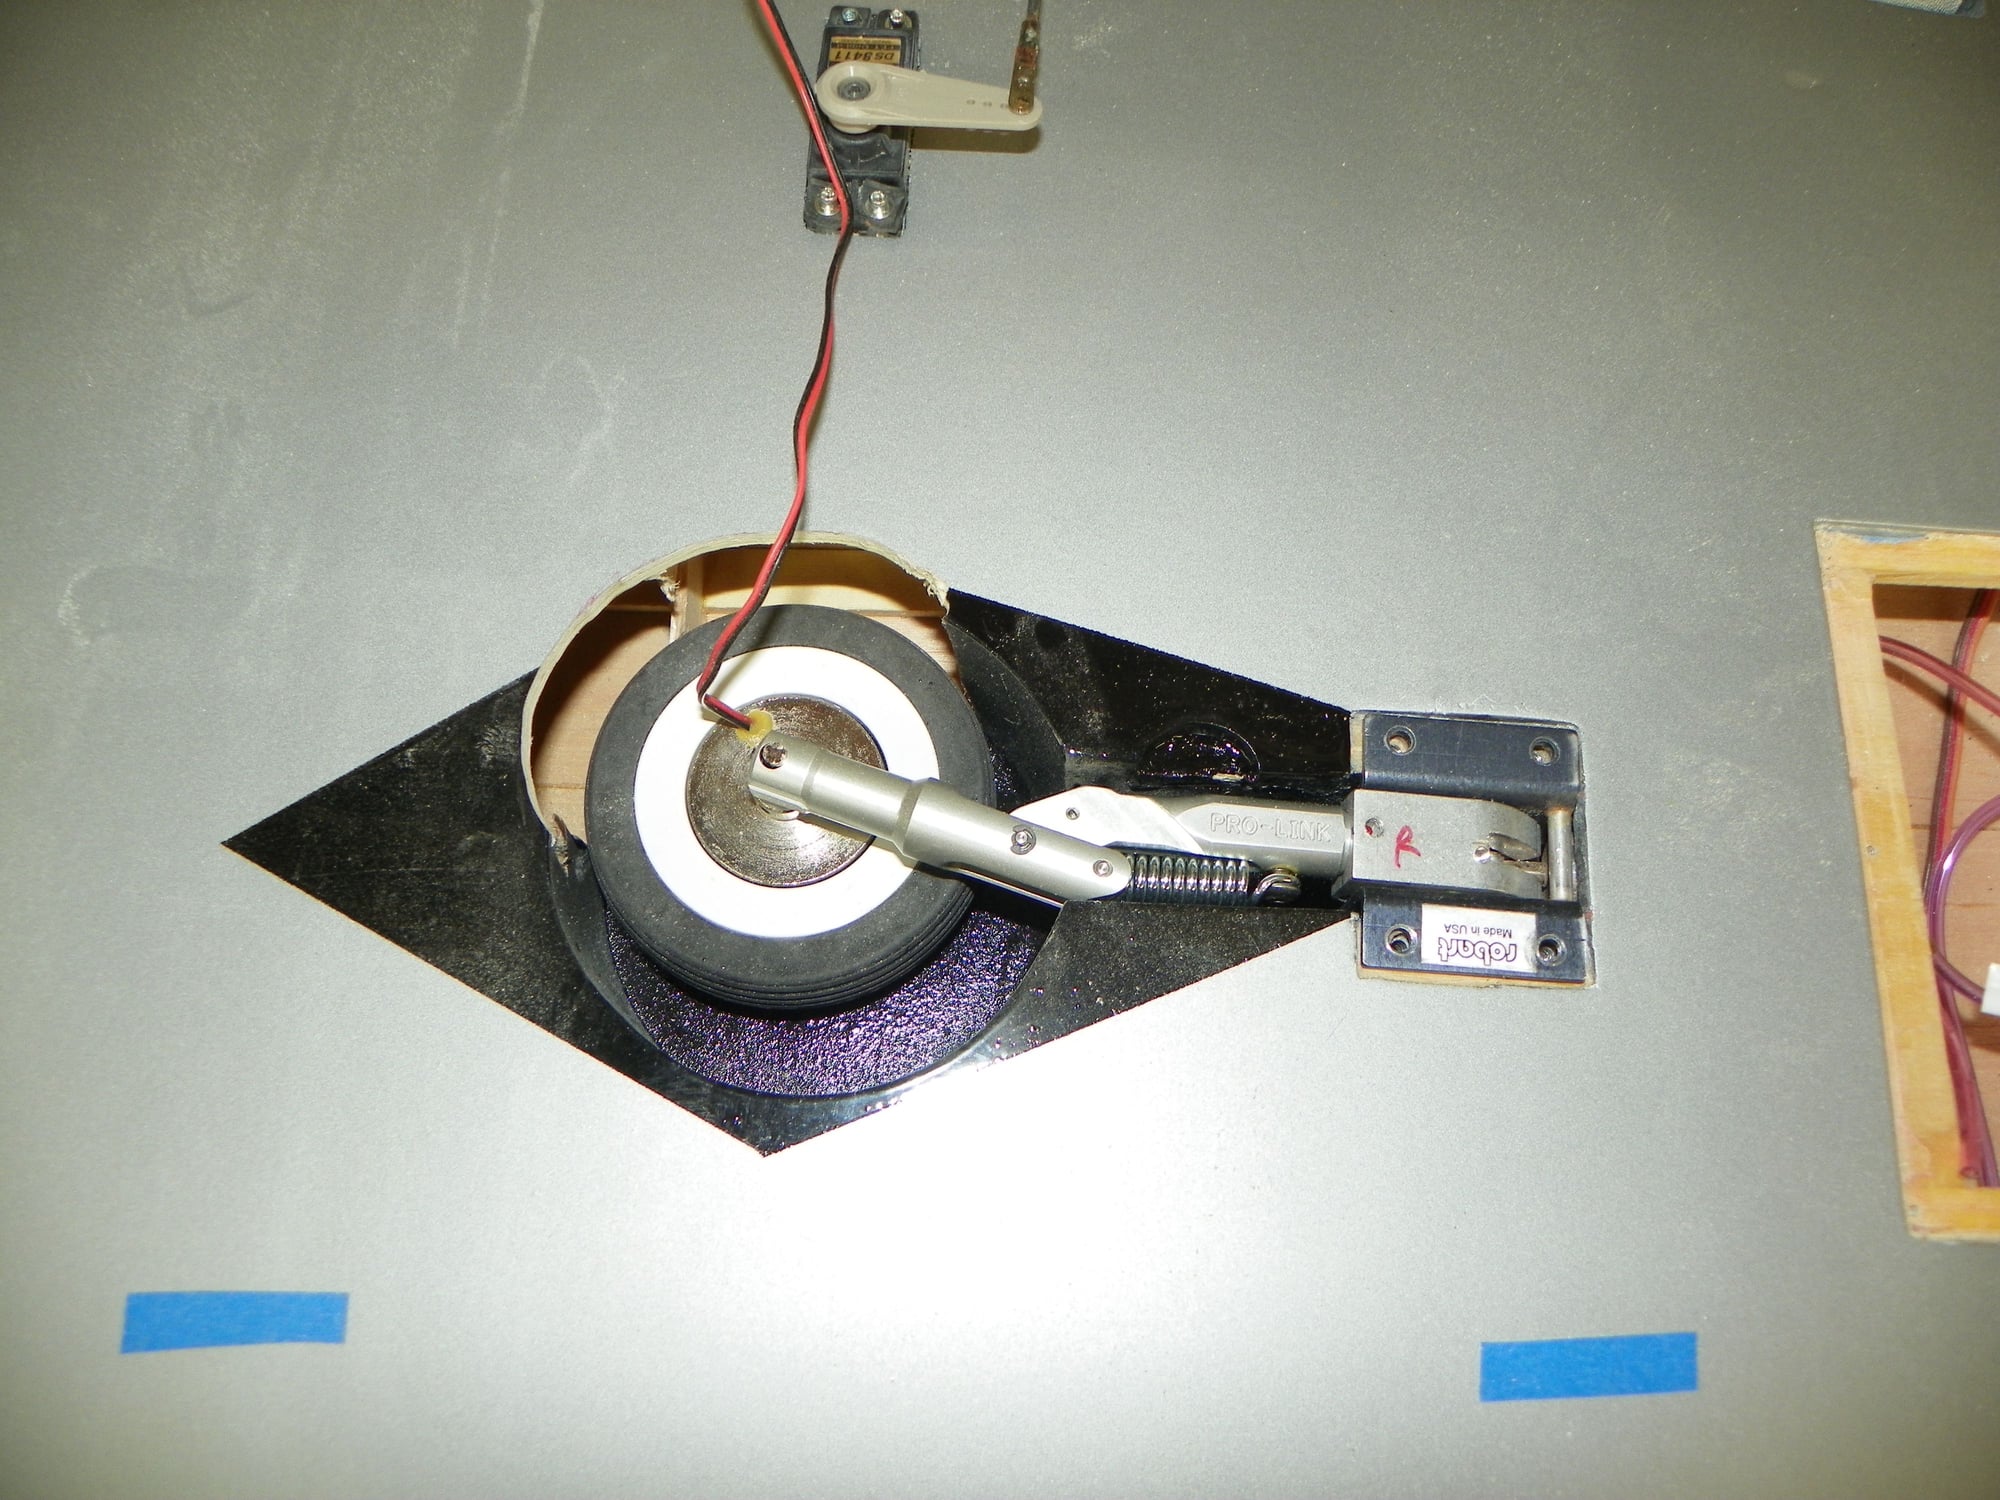
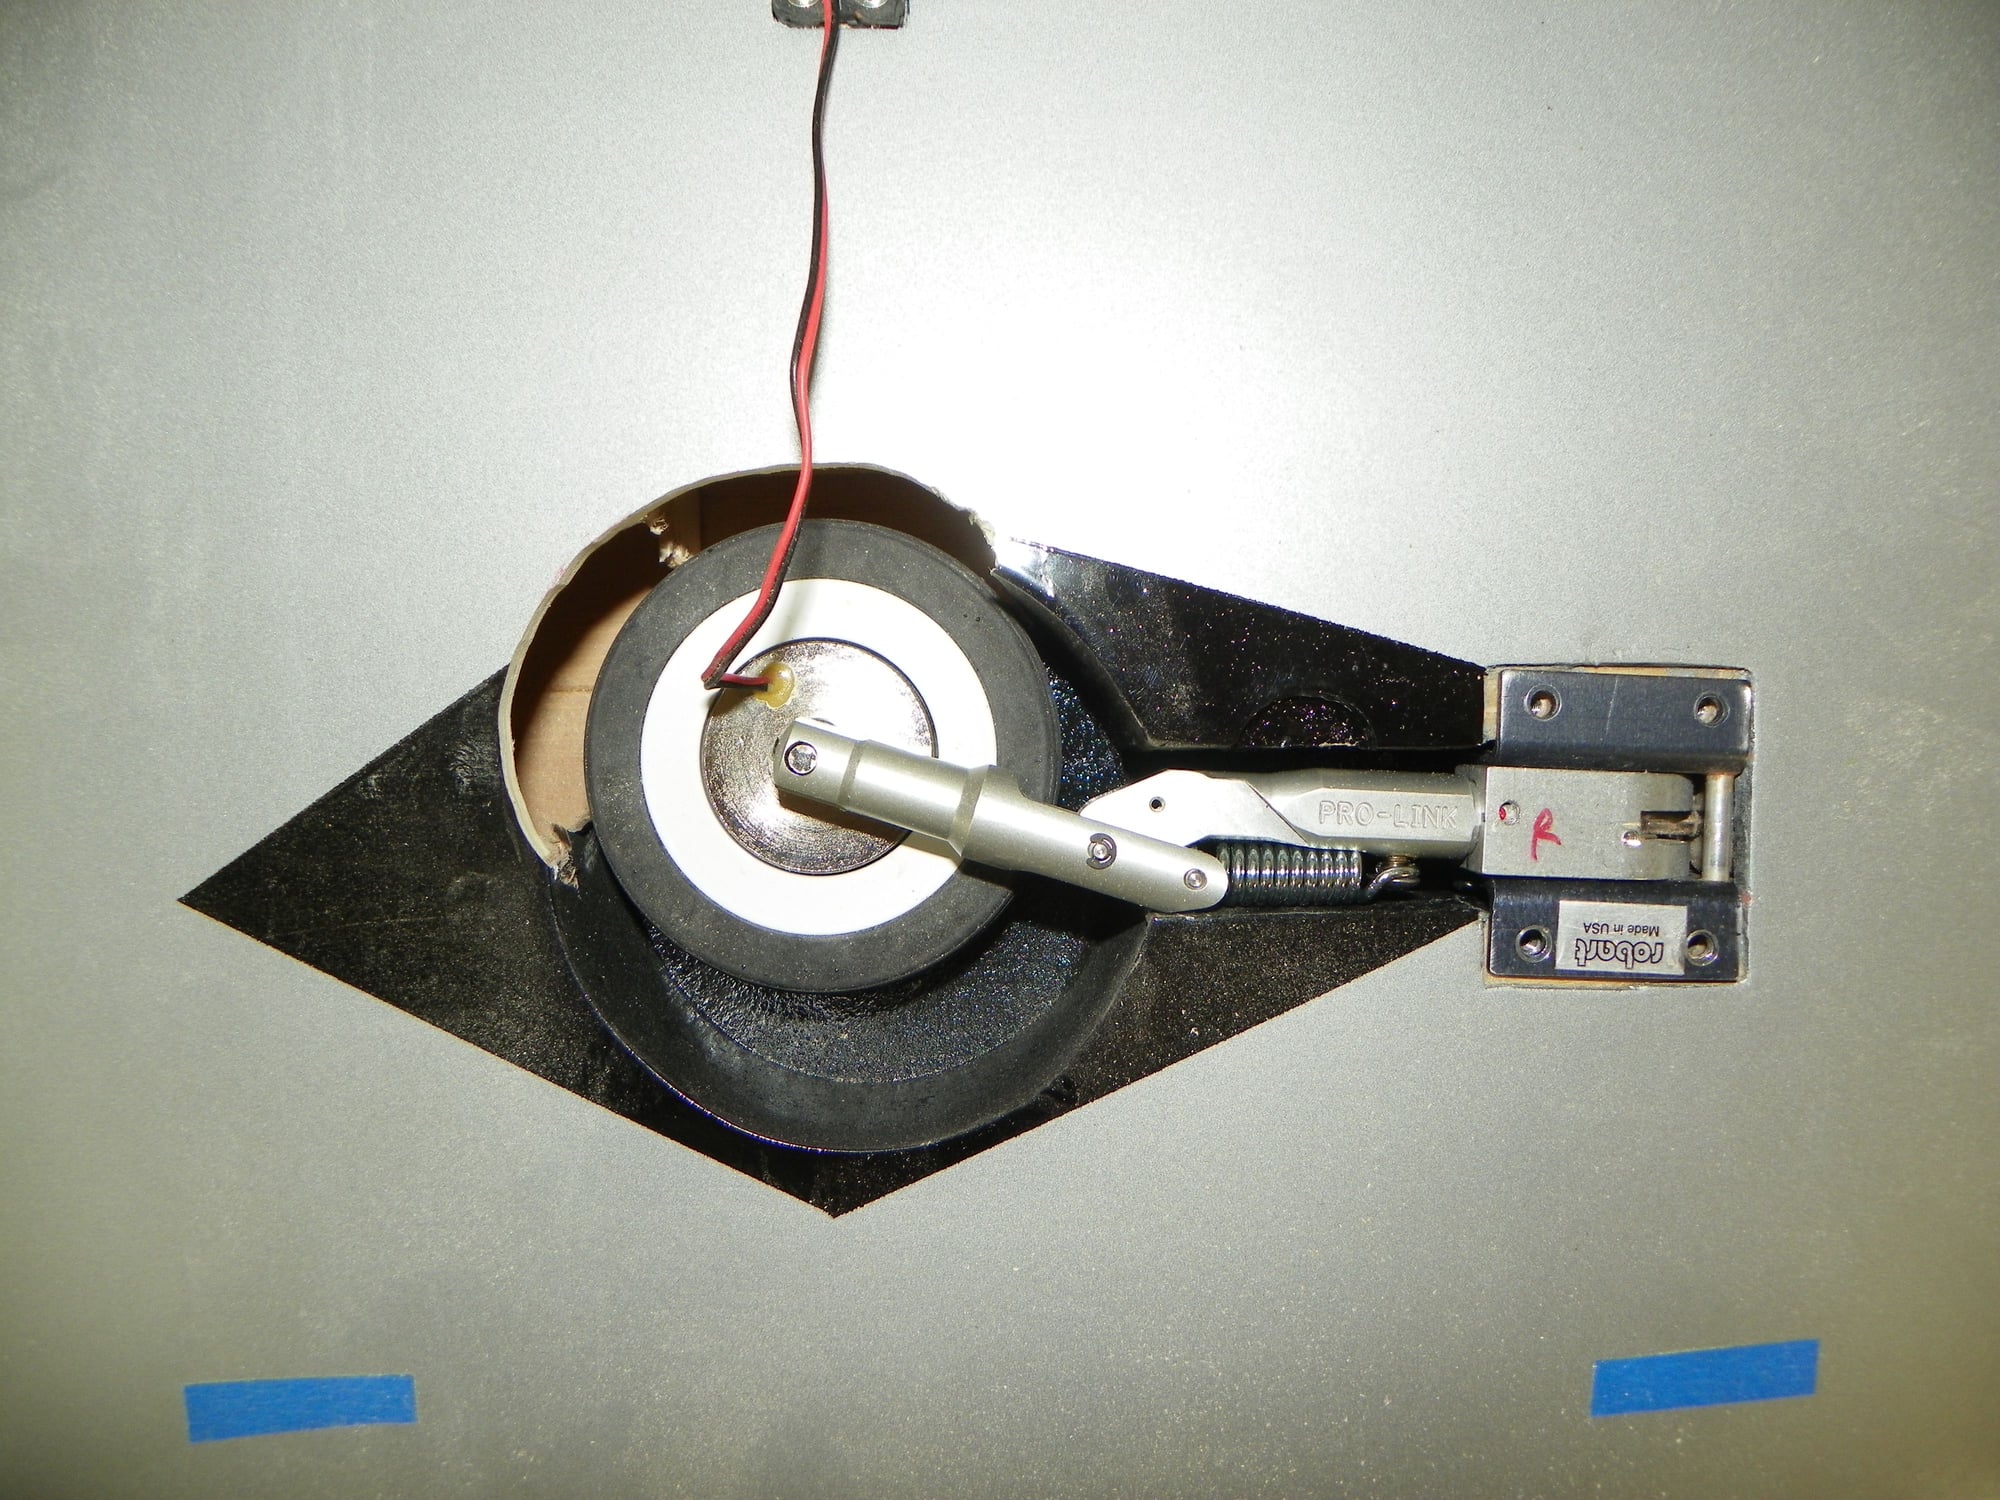
OK - The Pro-Link Nose Strut fell into place without any mods necessary. However, the Pro-Link Mains, will require some modification to the wheel well. Due to the slight backward stance of the Pro-Link Strut, the wheel well needed augured out a bit for the wheel to sit well within the wheel well. Will fill in the cut outs in the existing wheel wells tomorrow. Got to go shovel "SOME" snow.
Old 03-21-2018, 12:27 PM
  #3830  
redtail
My Feedback: (15)
 
redtail's Avatar
 
Join Date: Oct 2002
Location: Alexandria, VA
Posts: 2,625
Received 6 Likes on 6 Posts
Default


Last Set of Photos. Chic
Old 03-21-2018, 12:31 PM
  #3831  
redtail
My Feedback: (15)
 
redtail's Avatar
 
Join Date: Oct 2002
Location: Alexandria, VA
Posts: 2,625
Received 6 Likes on 6 Posts
Default

Will also open up the wheel well area that is very close around the strut knuckle and then rebuild the open area of the wheel well where the wheel "ONCE" was. Chic
Old 03-21-2018, 01:02 PM
  #3832  
CARS II
My Feedback: (7)
 
CARS II's Avatar
 
Join Date: Oct 2002
Location: Sacramento CA
Posts: 6,589
Received 123 Likes on 106 Posts
Default

Very nice ! Chic.

That's a side effect I like to see from the build, a renew interest in the kit.
Old 03-21-2018, 05:56 PM
  #3833  
CARS II
My Feedback: (7)
 
CARS II's Avatar
 
Join Date: Oct 2002
Location: Sacramento CA
Posts: 6,589
Received 123 Likes on 106 Posts
Default


The wing has been removed from the building board, sanded down and mid CA has been added all around

Last edited by CARS II; 03-21-2018 at 06:16 PM.
Old 03-21-2018, 06:28 PM
  #3834  
redtail
My Feedback: (15)
 
redtail's Avatar
 
Join Date: Oct 2002
Location: Alexandria, VA
Posts: 2,625
Received 6 Likes on 6 Posts
Default

[QUOTE]Doing a great job with the build. That Wing looks solid[. Chic/QUOTE]
Old 03-21-2018, 10:46 PM
  #3835  
CARS II
My Feedback: (7)
 
CARS II's Avatar
 
Join Date: Oct 2002
Location: Sacramento CA
Posts: 6,589
Received 123 Likes on 106 Posts
Default


Thank you, thank you Chic.

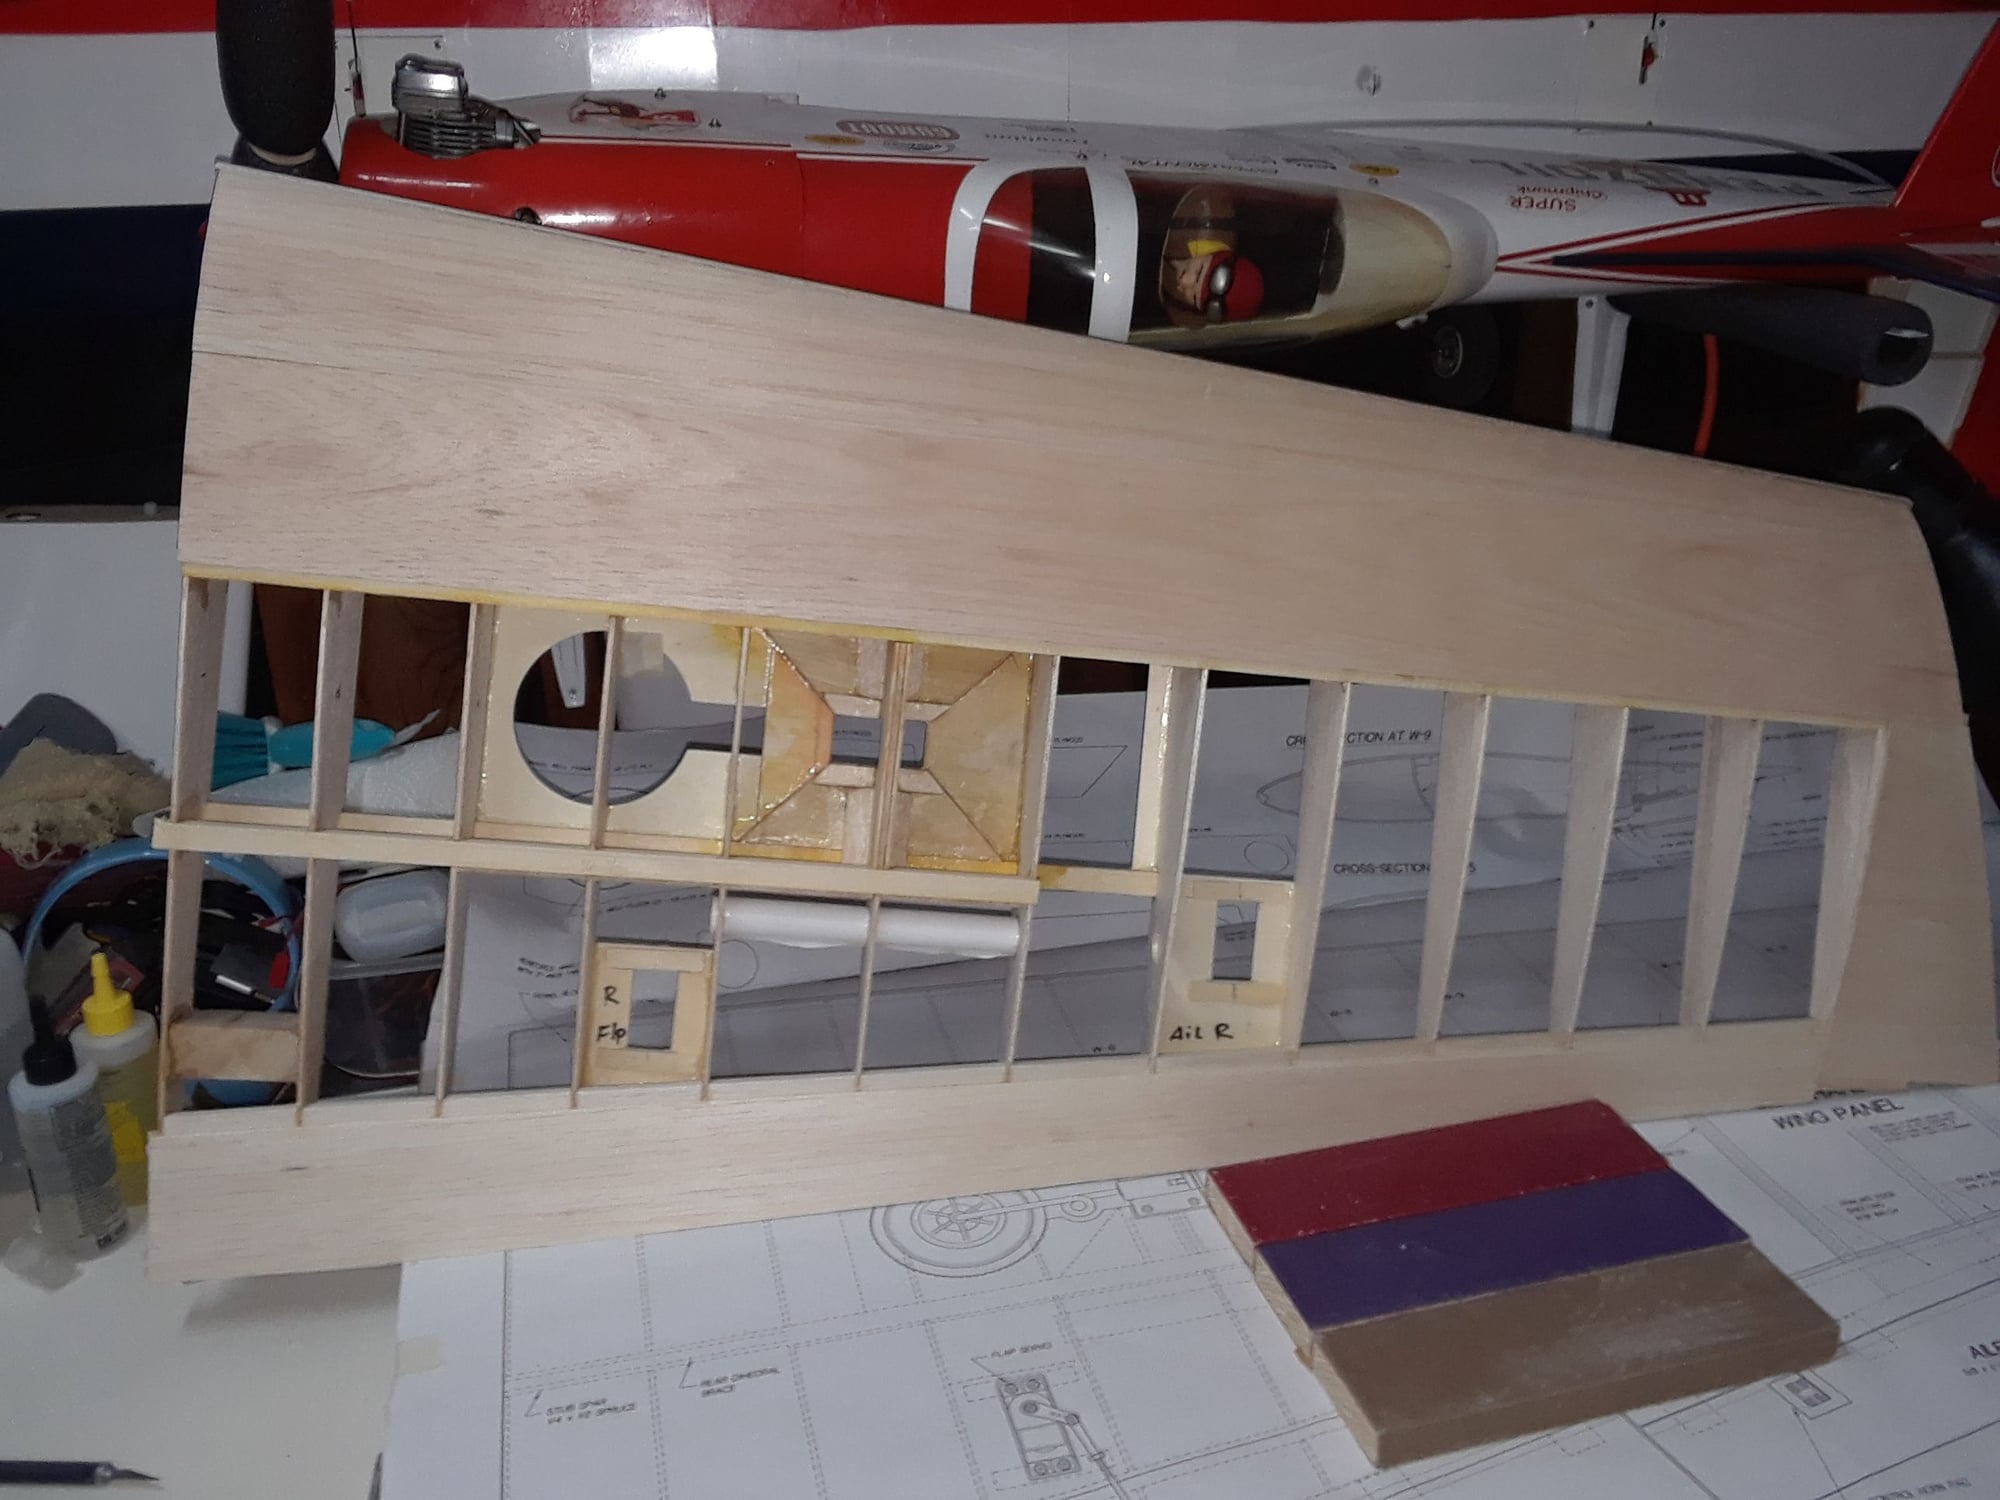
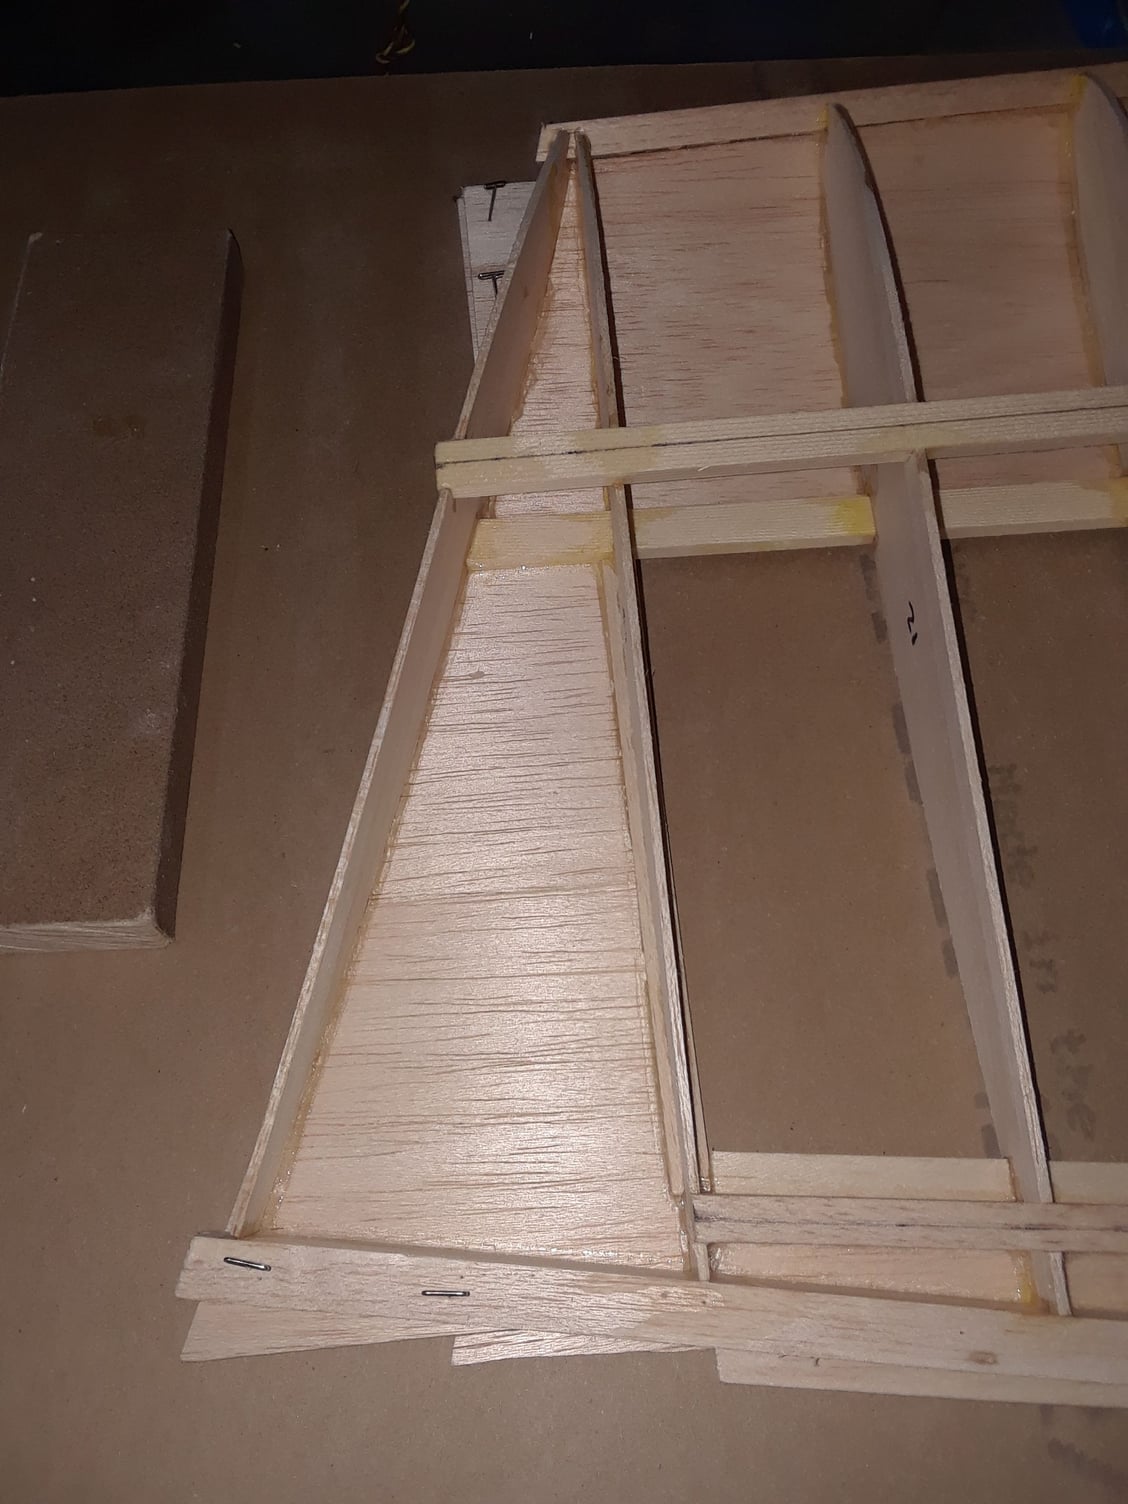
The wing is back on the work bench, secured ready for the LE and TE sheeting, a friend of mine convinced me to use TamJets flap hinges for the flaps, the anchor points have been added to the wing TE, these can also be used for the Robart hinges if needed, the reason for using the TJ hinges is to be able to get a 90° deflection, the paper hinges will be use on the ailerons,

Last edited by CARS II; 03-21-2018 at 10:50 PM.
Old 03-22-2018, 08:40 AM
  #3836  
redtail
My Feedback: (15)
 
redtail's Avatar
 
Join Date: Oct 2002
Location: Alexandria, VA
Posts: 2,625
Received 6 Likes on 6 Posts
Default


Wheel Well Area modified to accept the Boomerang Nano Pro-Links. Will begin rebuilding the wheel wells. Chic

Last edited by redtail; 03-22-2018 at 08:42 AM.
Old 03-22-2018, 08:44 AM
  #3837  
redtail
My Feedback: (15)
 
redtail's Avatar
 
Join Date: Oct 2002
Location: Alexandria, VA
Posts: 2,625
Received 6 Likes on 6 Posts
Default


Sorry Guys, posted a photo of the underside of my Grumman TBF Avenger Build. Here is the correct photo. Chic
Old 03-28-2018, 04:04 PM
  #3838  
N99JH
My Feedback: (66)
 
Join Date: Jun 2002
Location: Hartsville, SC
Posts: 382
Likes: 0
Received 2 Likes on 2 Posts
Default


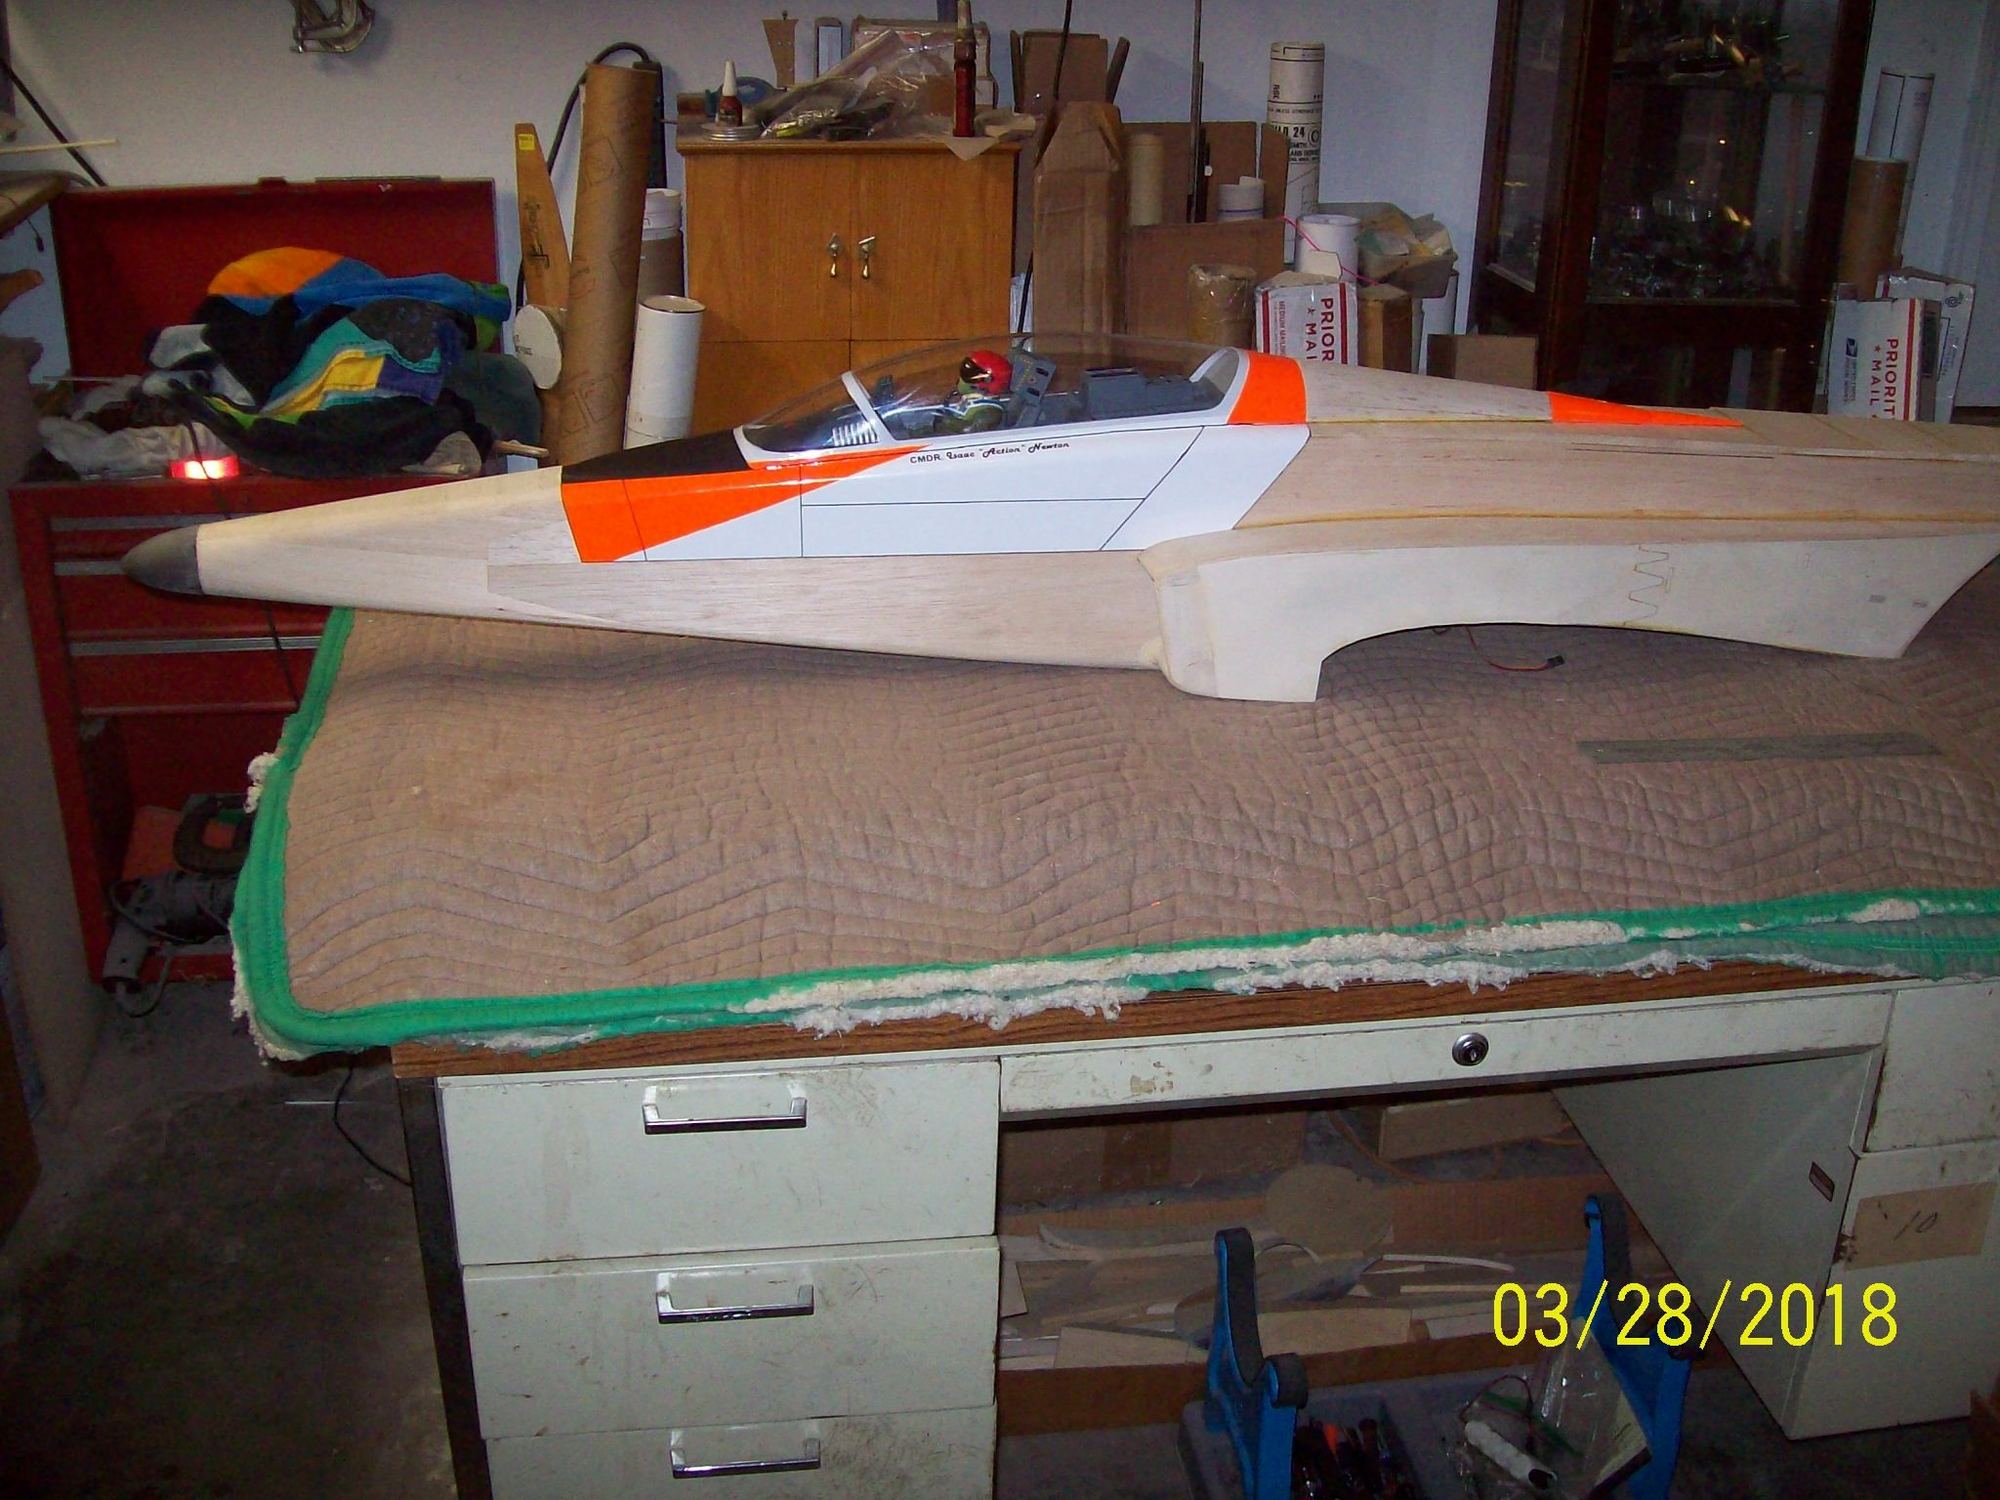
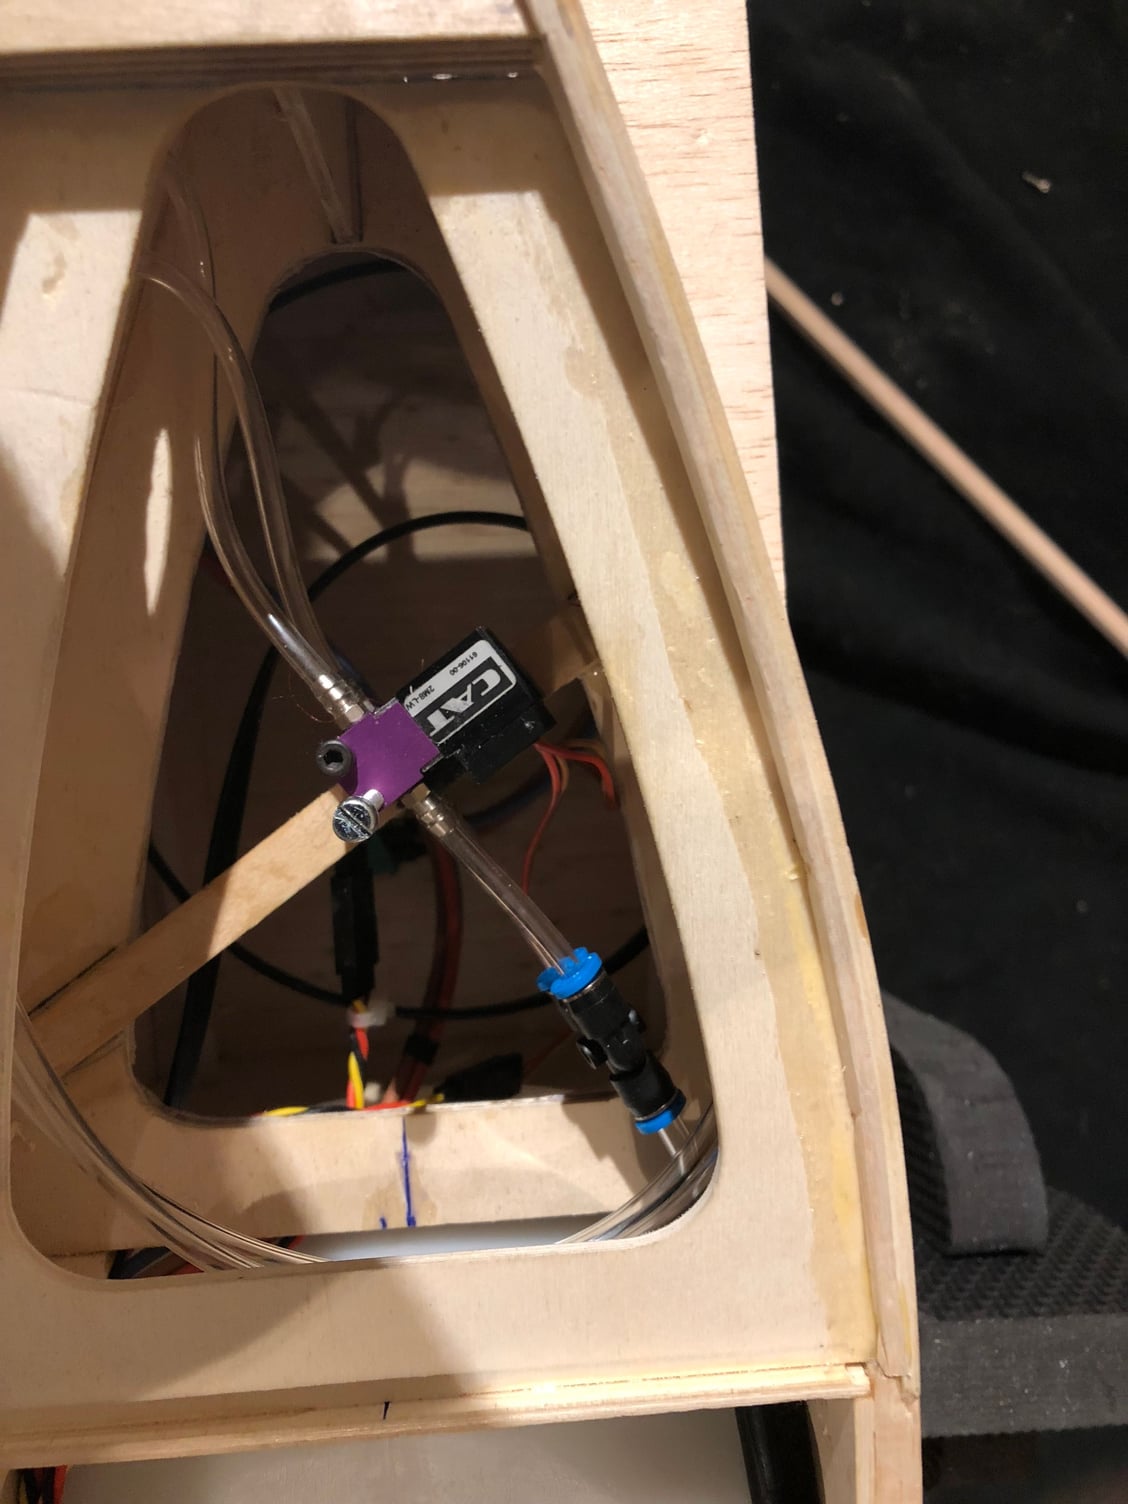
THe cockpit is done.
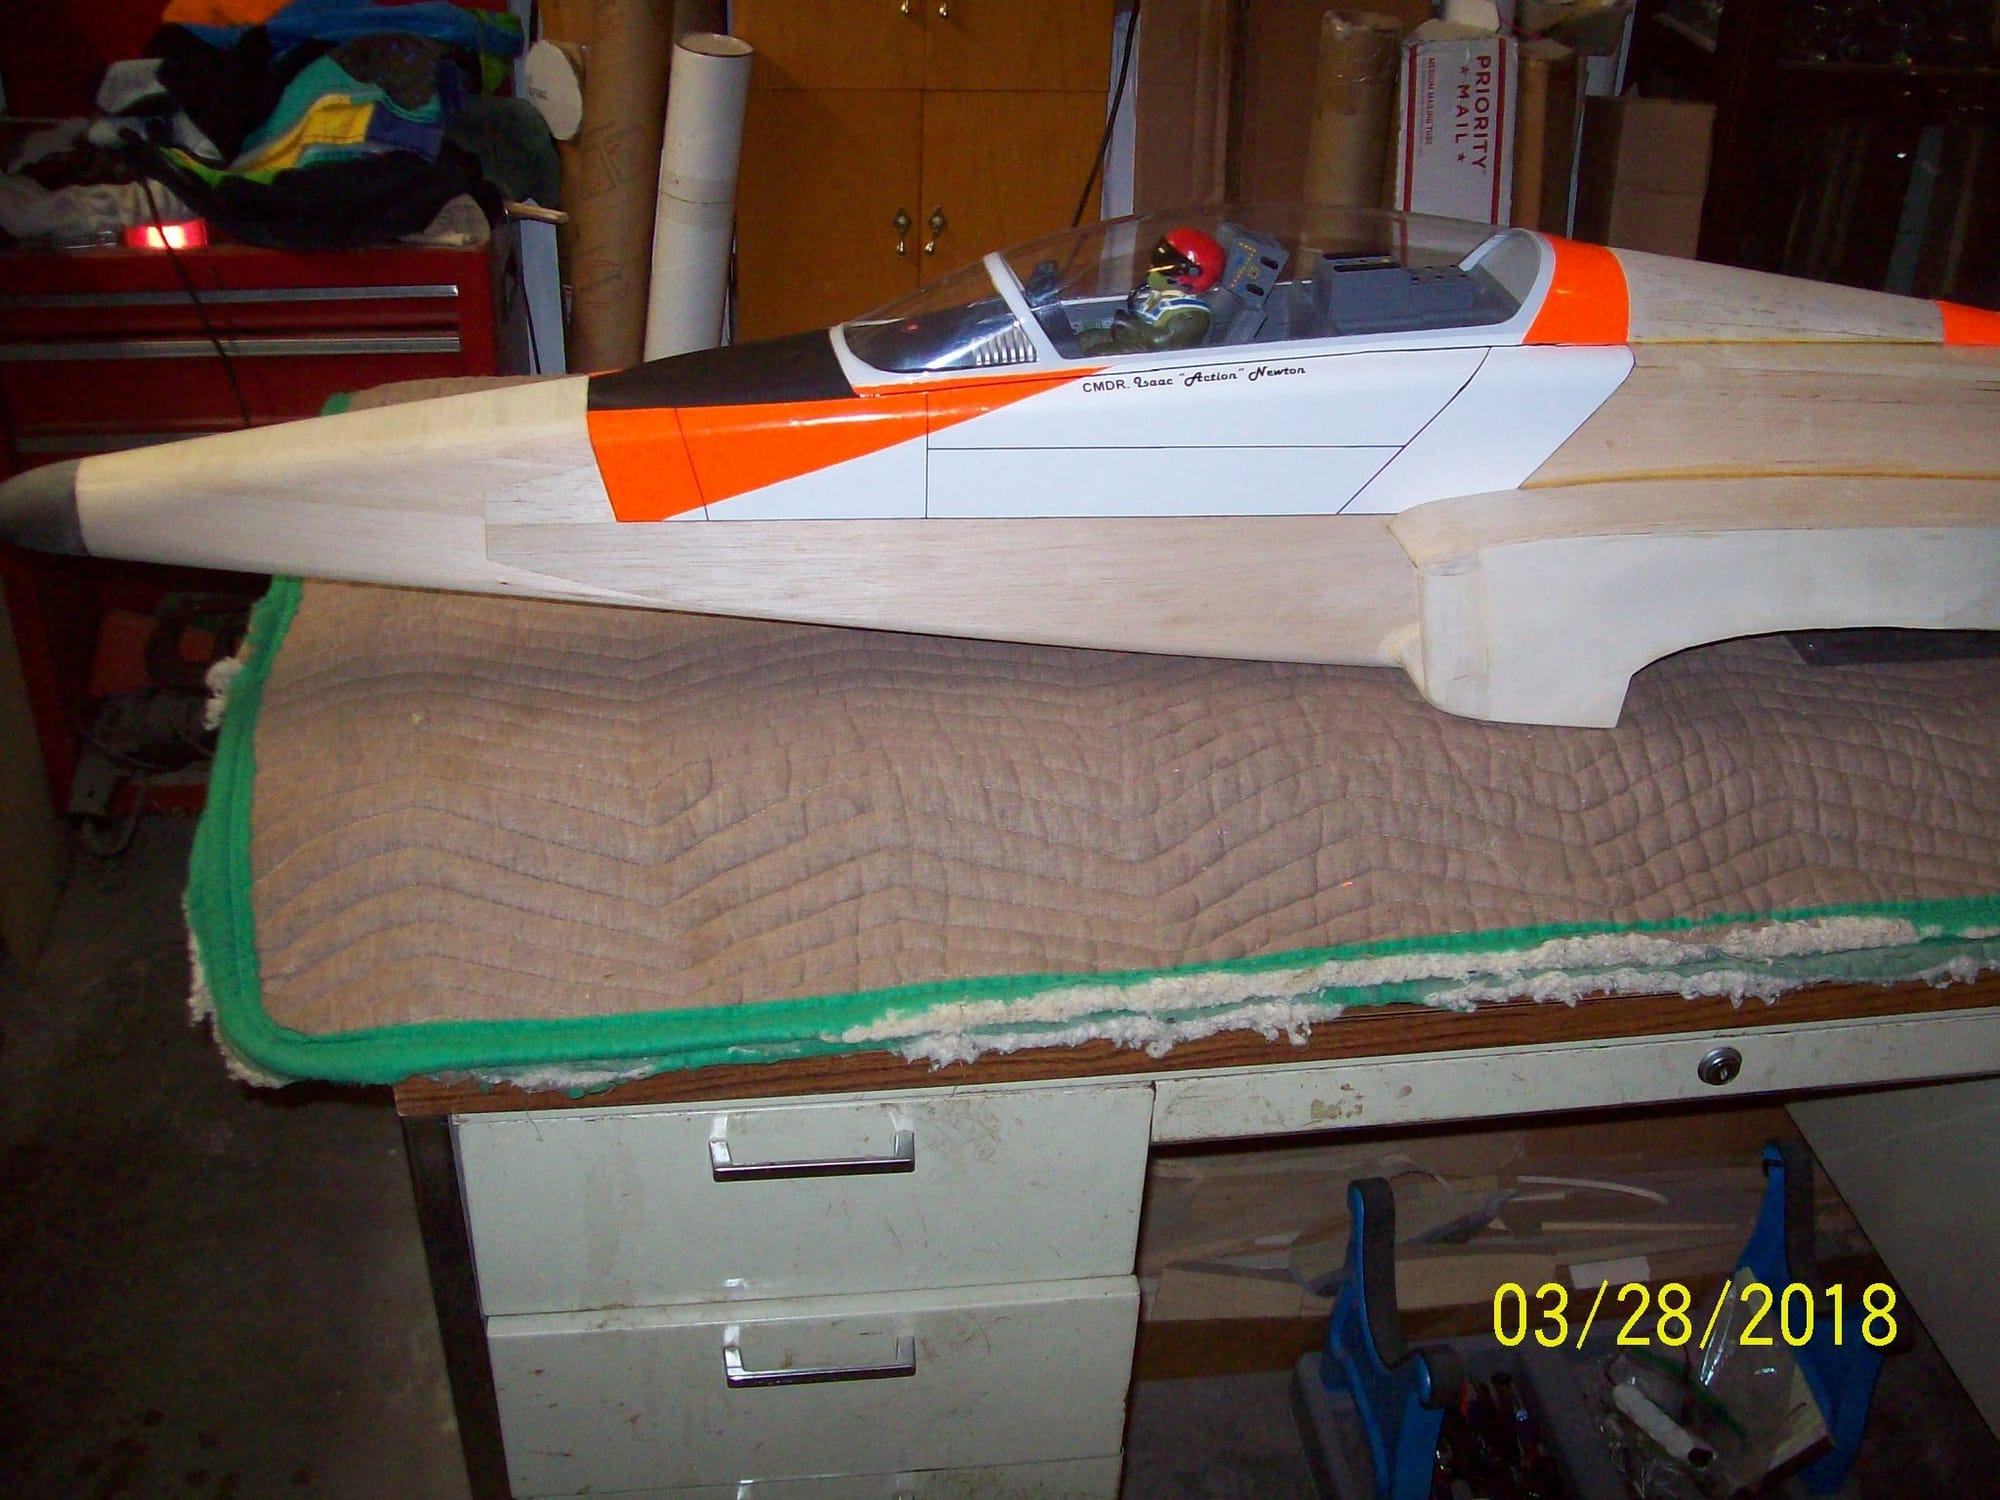

Close-up


Rear fairing.


Rear hatch. The "Blade Antenna" is used as handle.


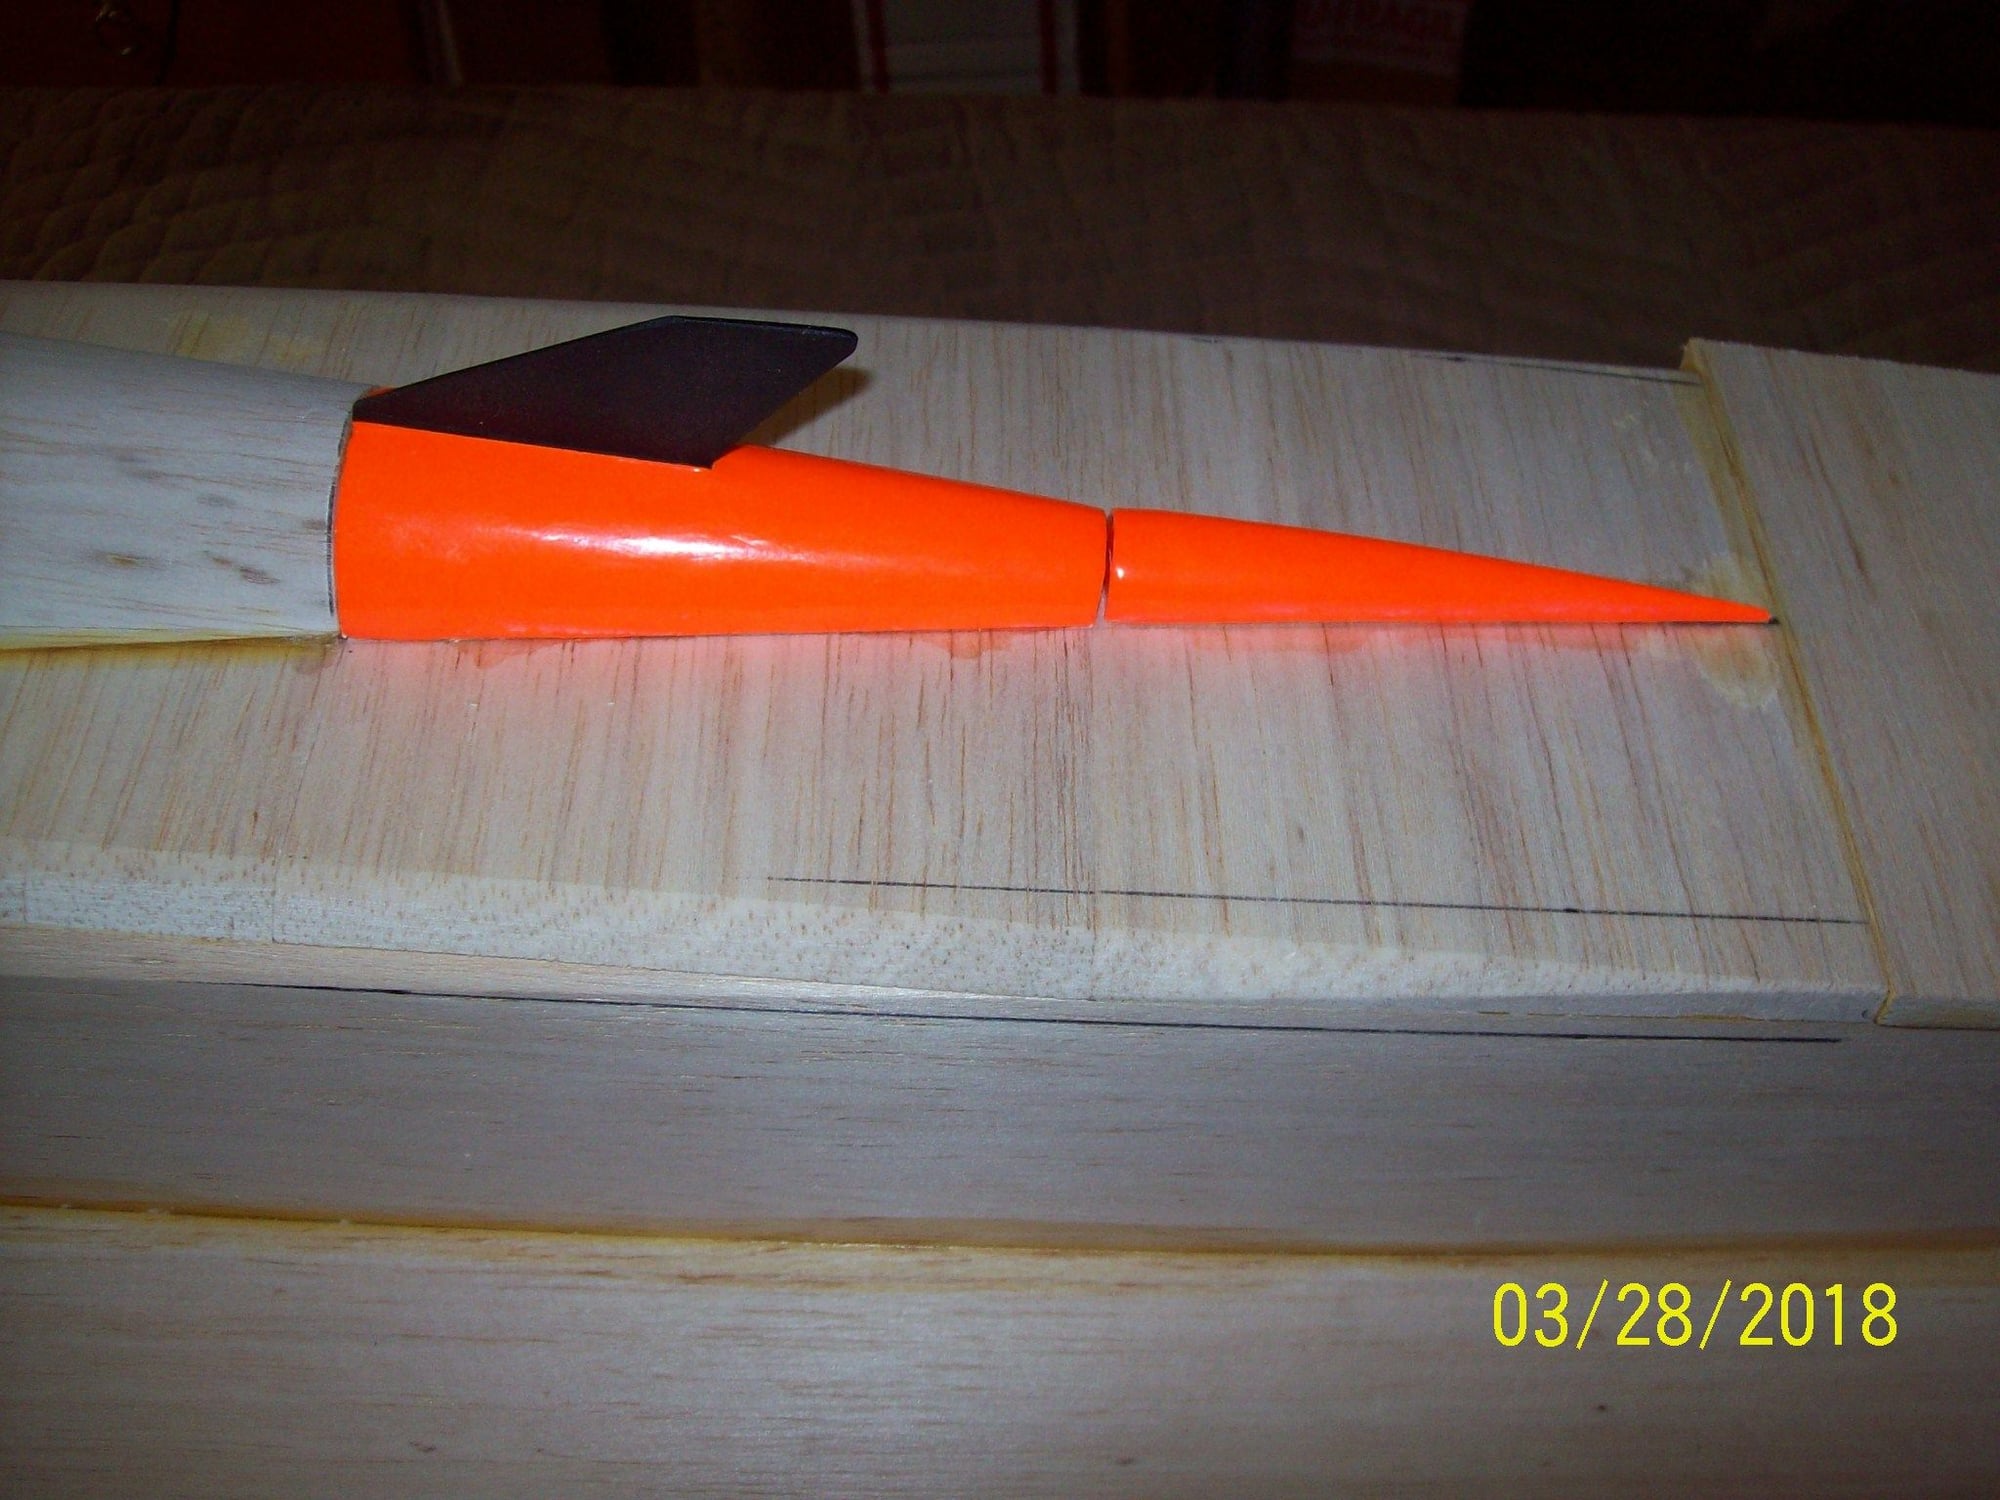
Close-up view of the hatch area.


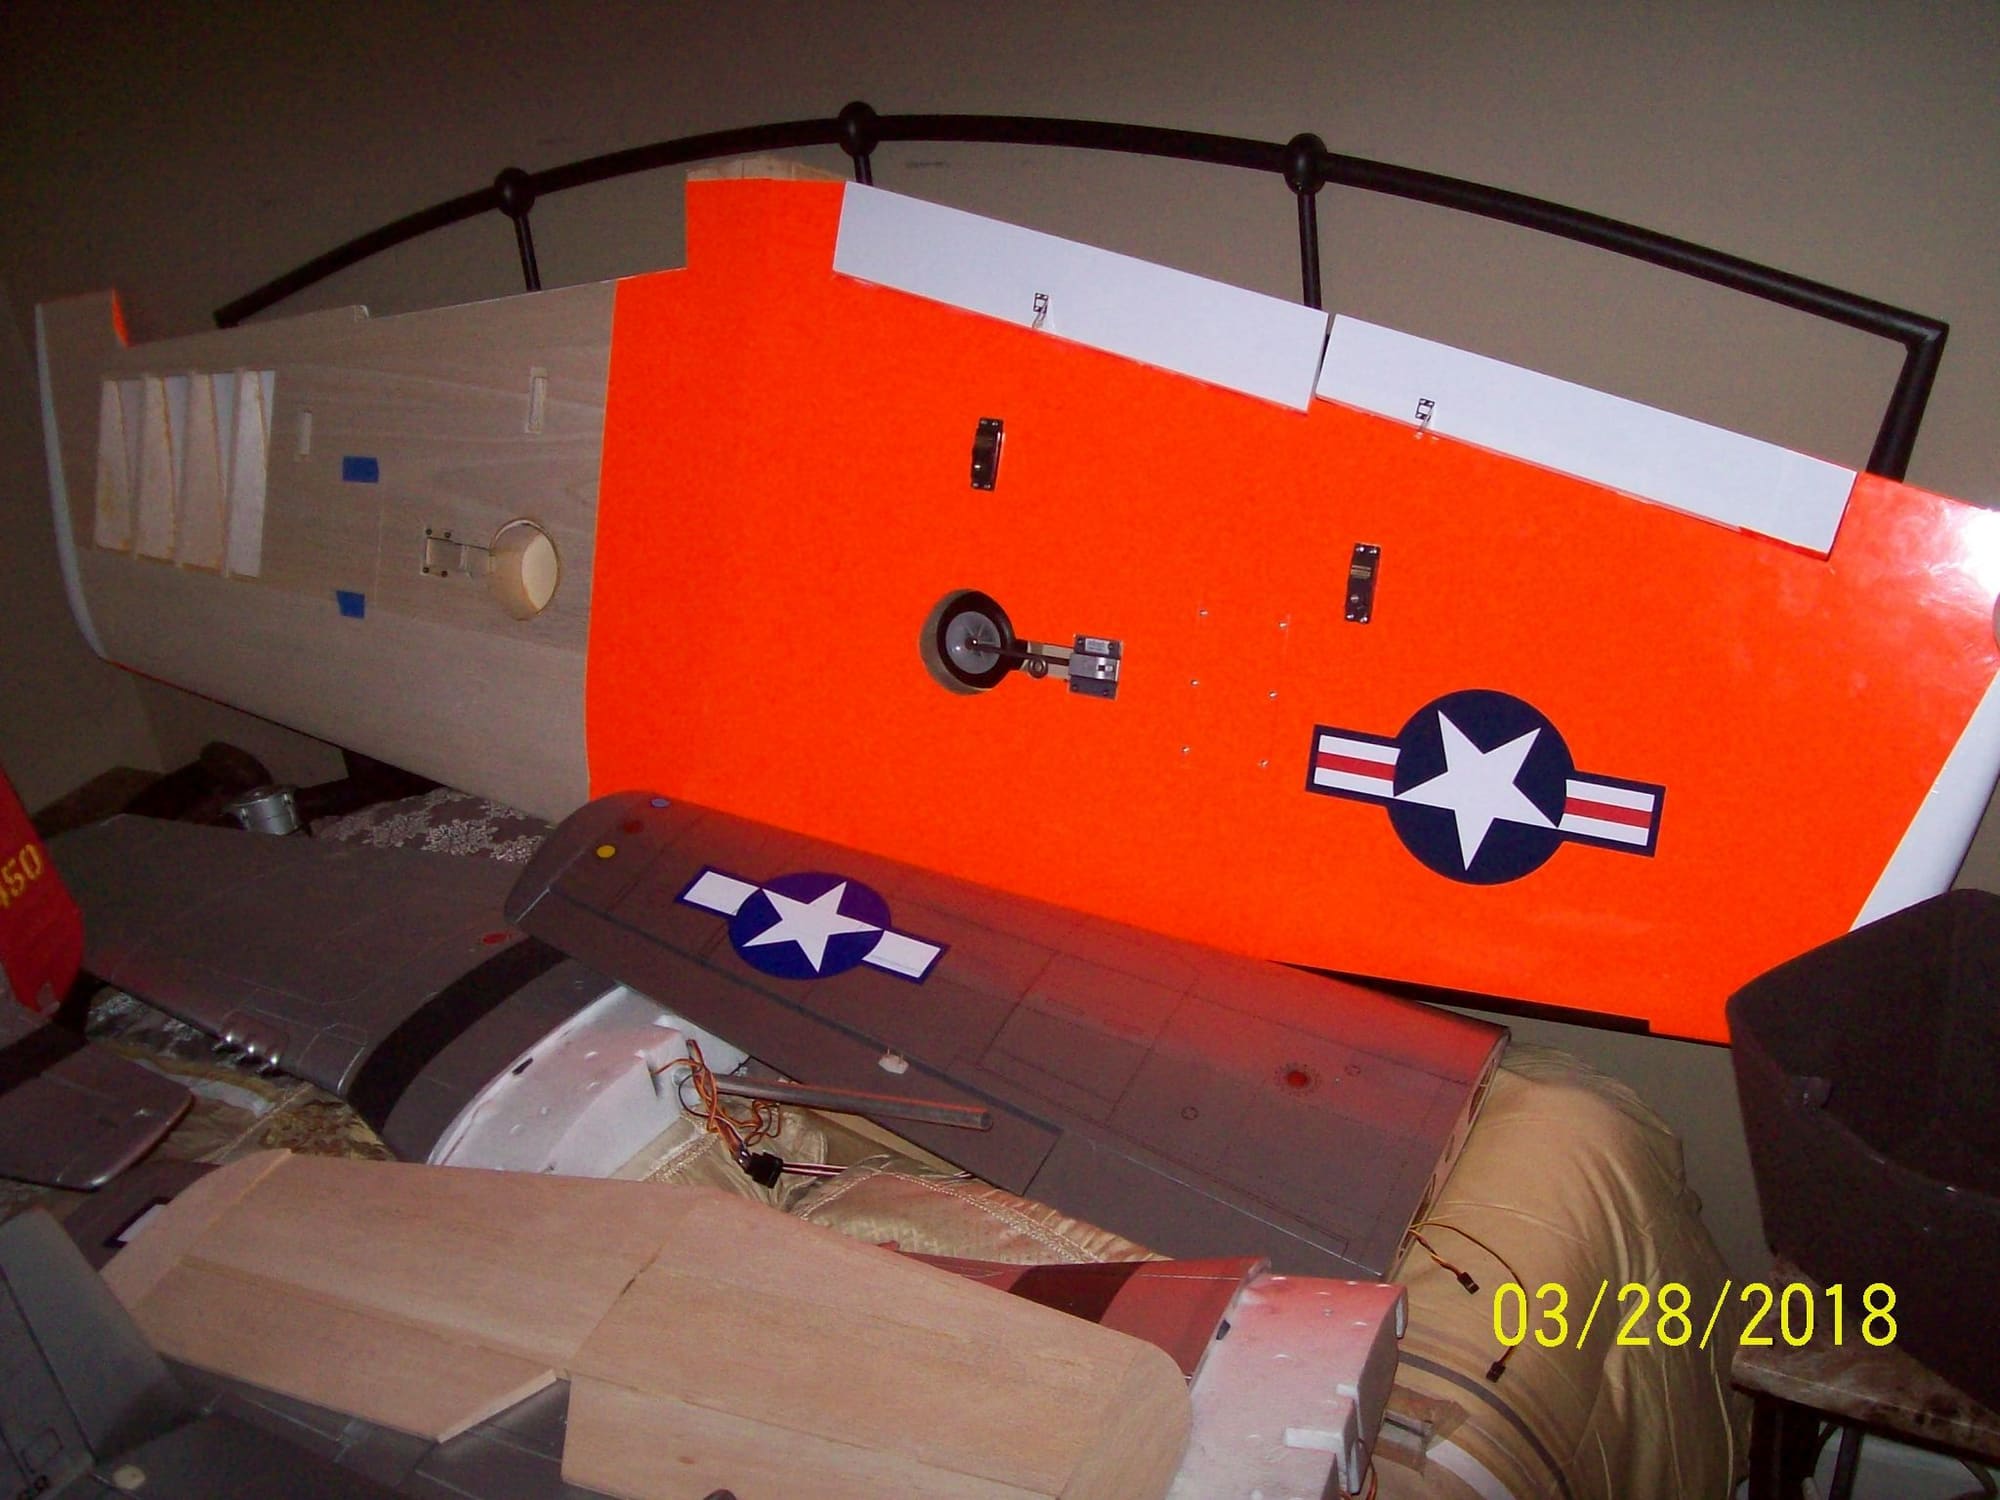
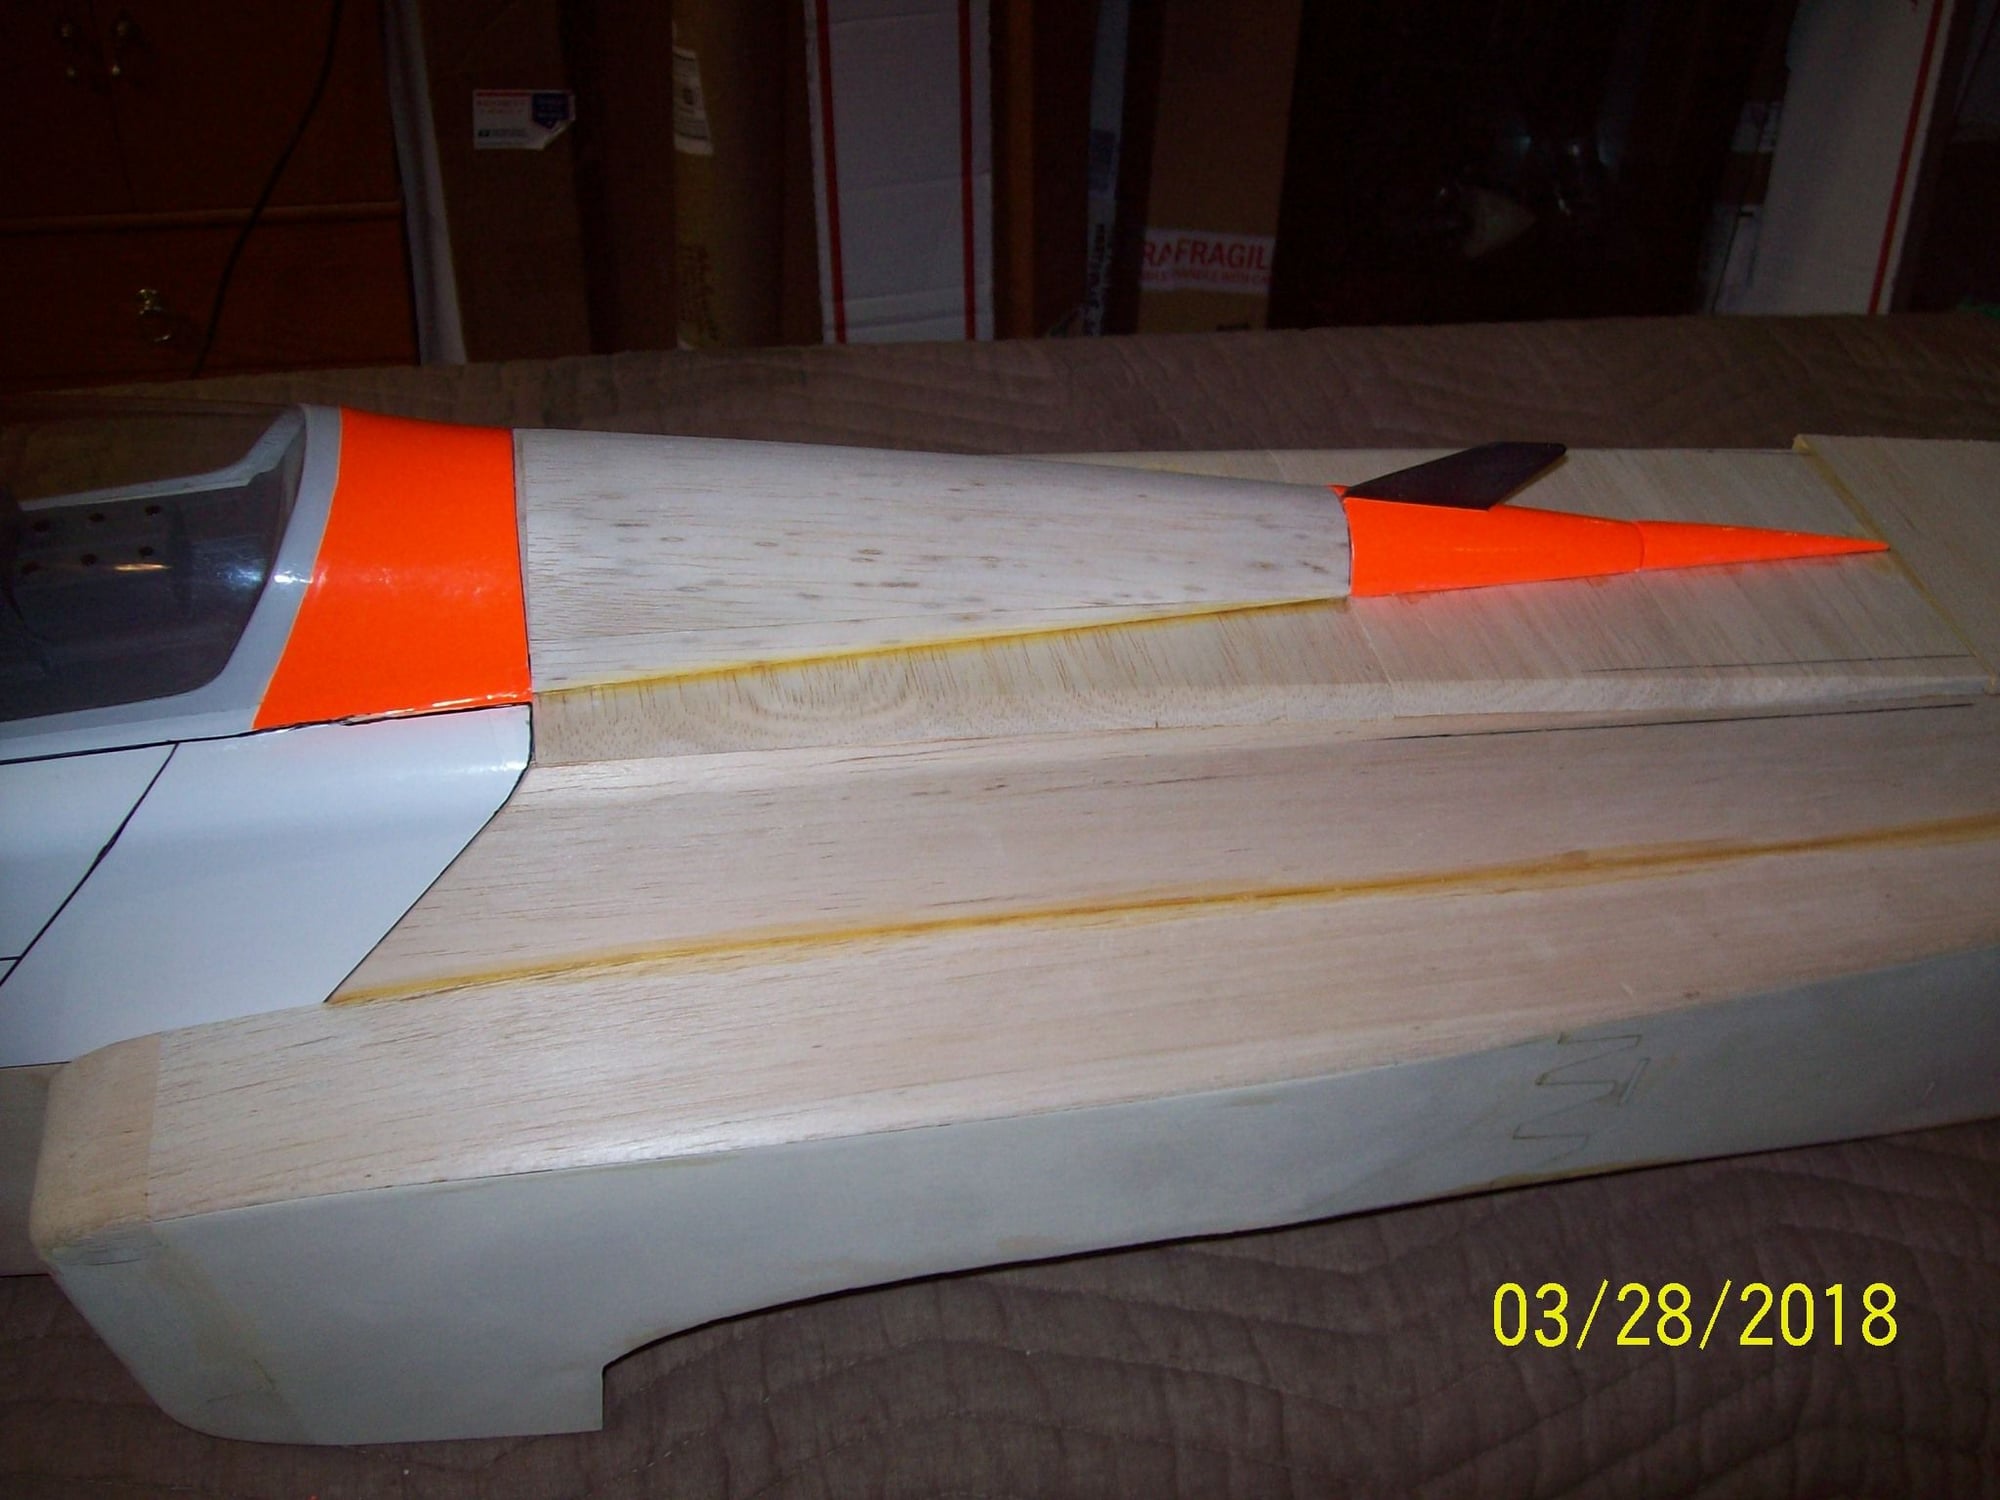
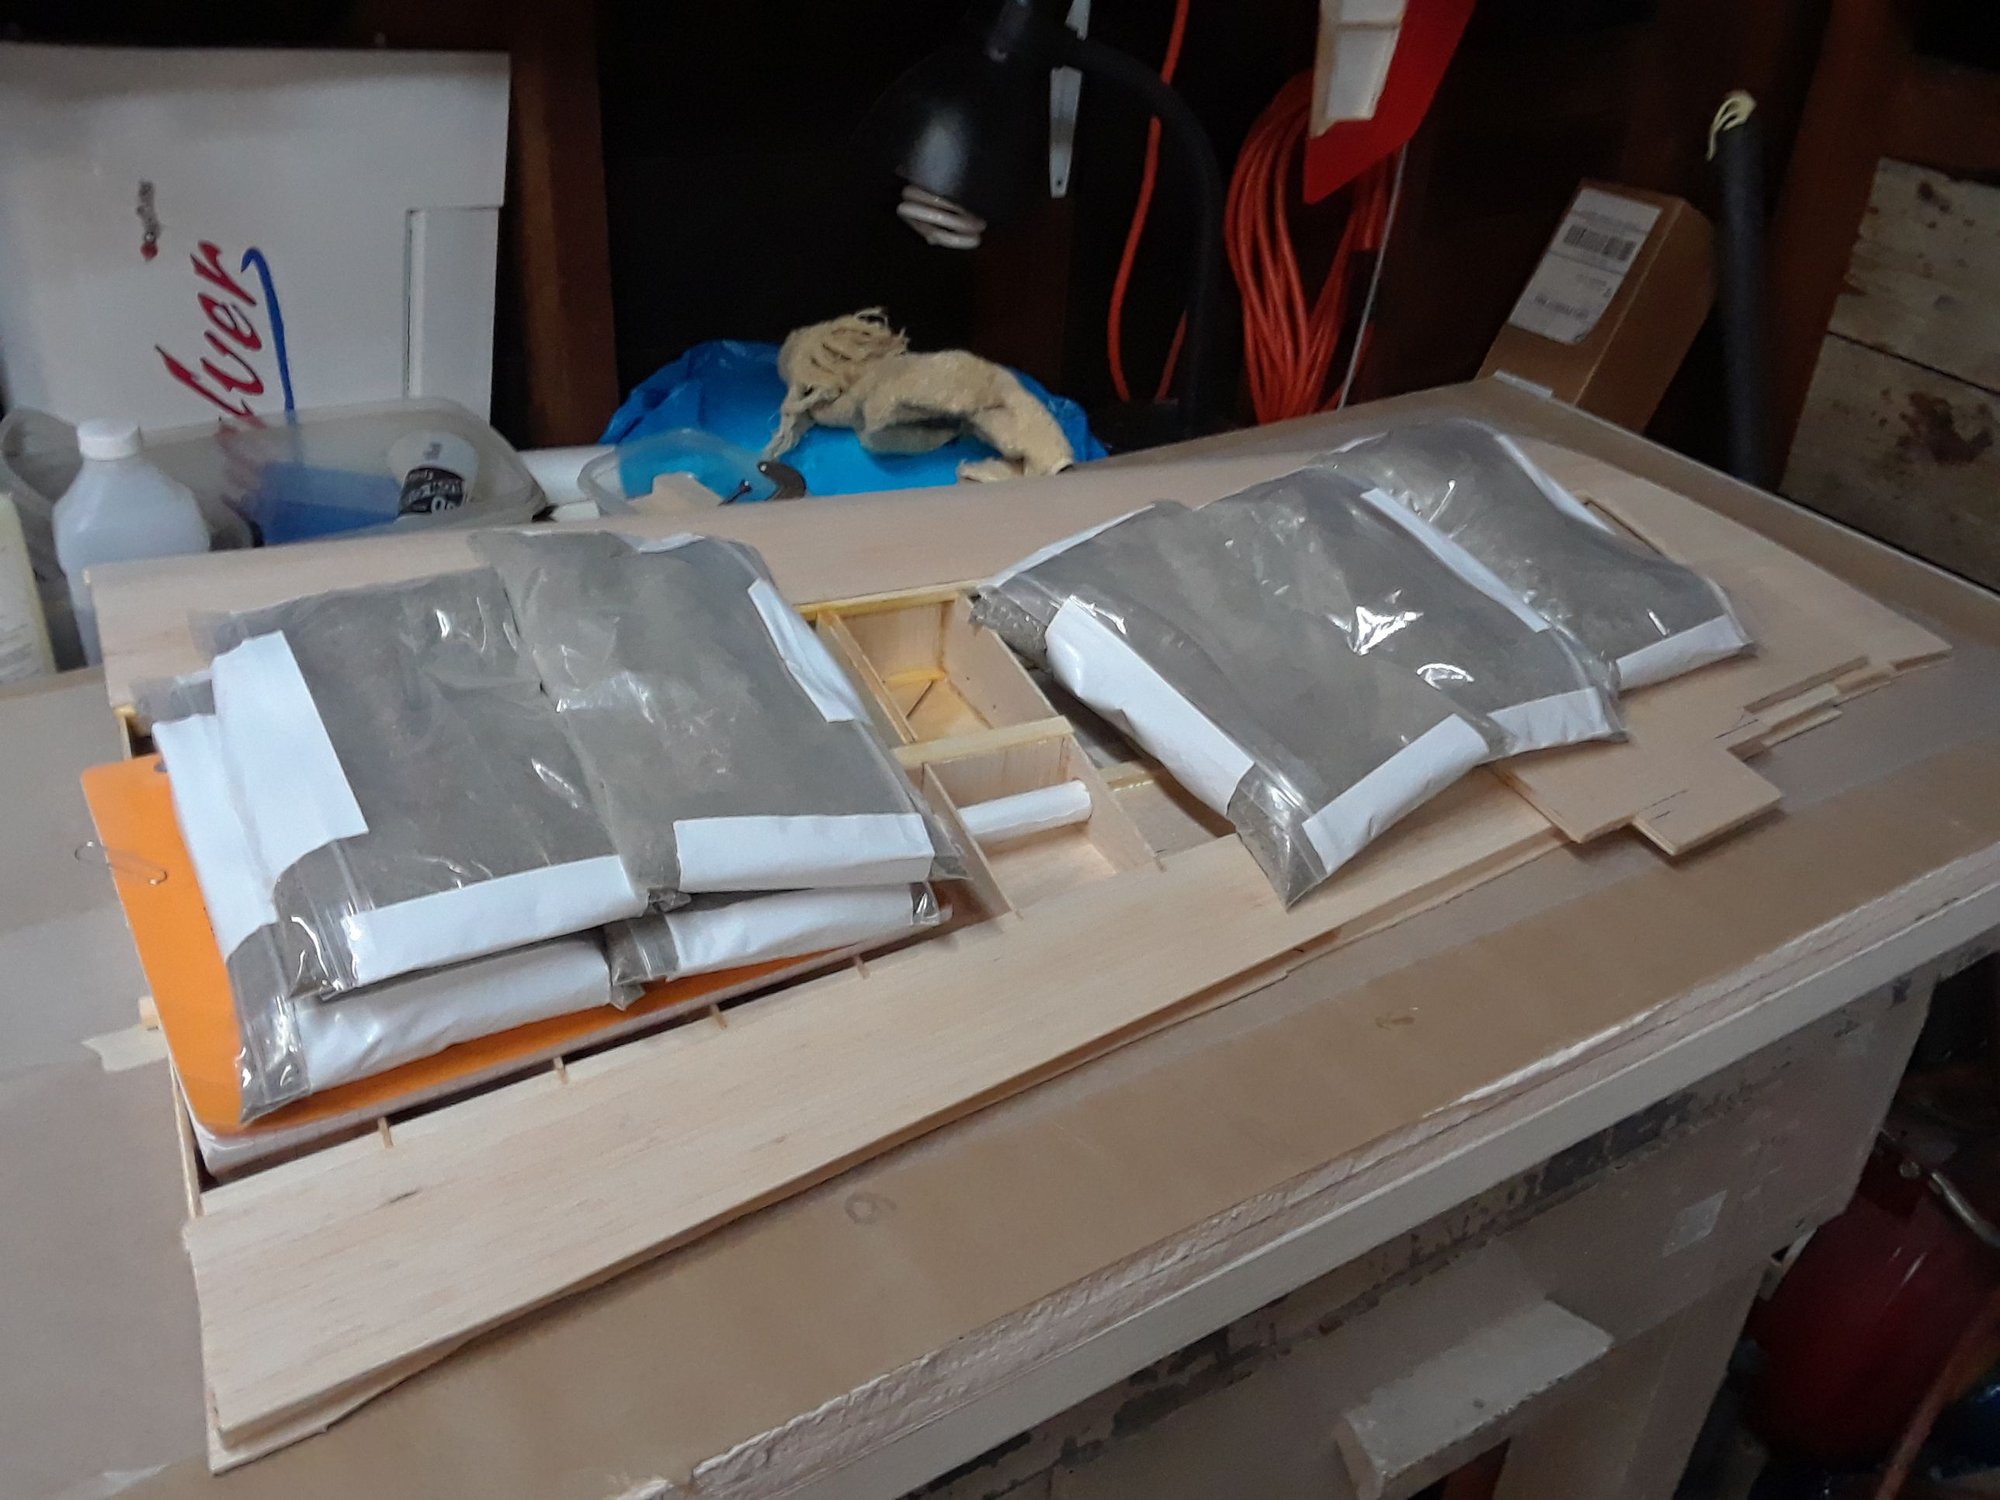
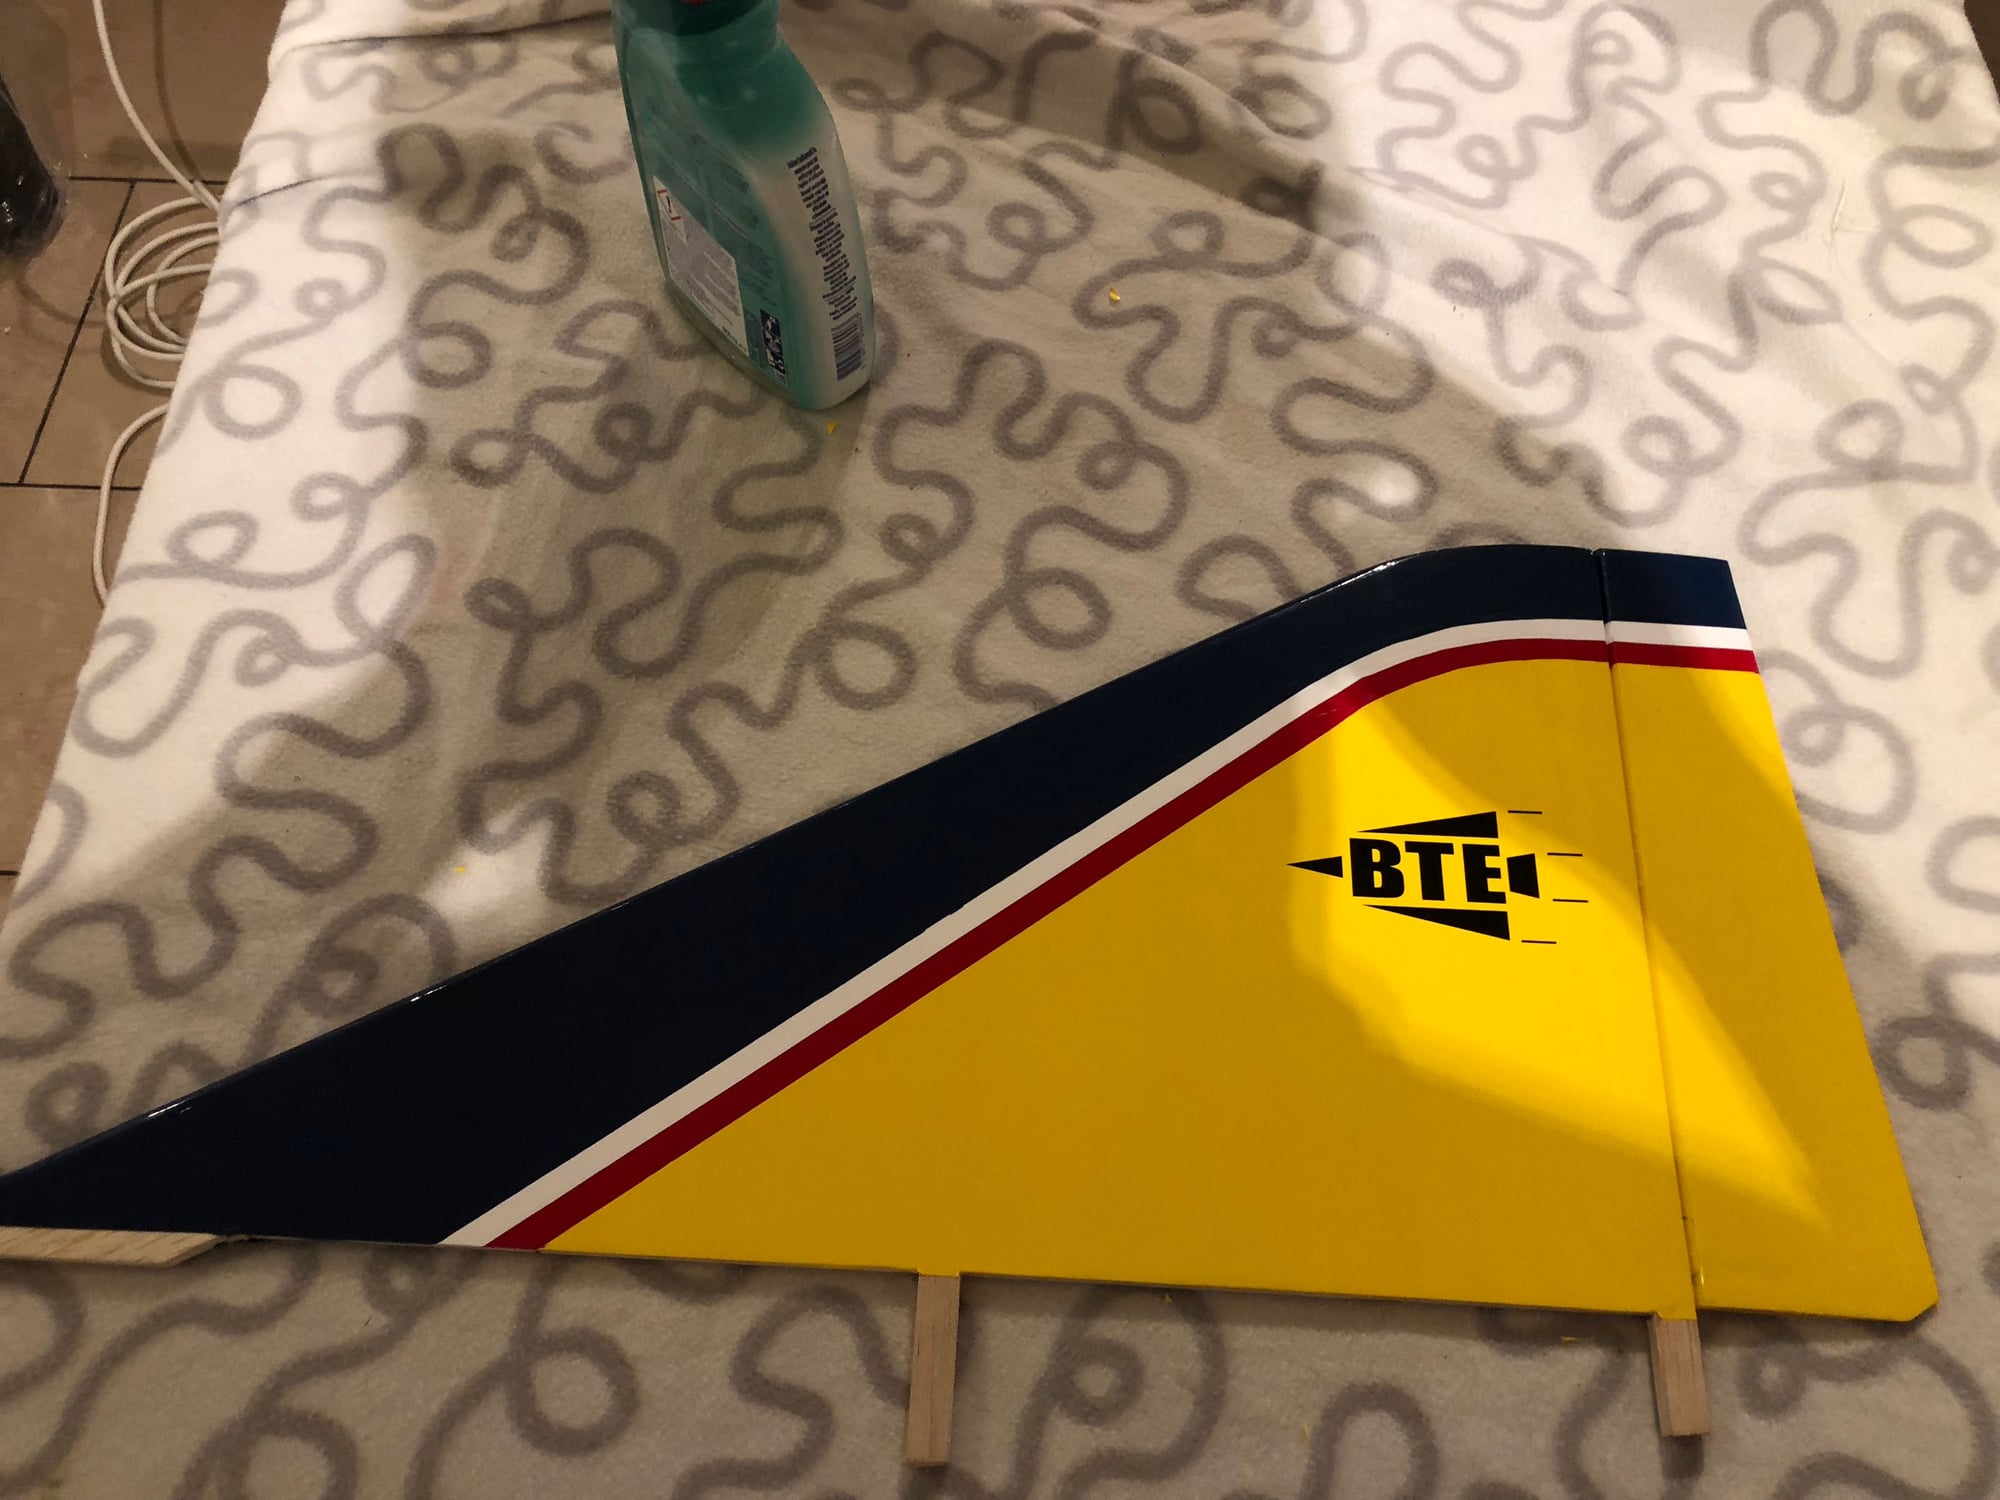
The wing is almost finished. Ran out of International Orange Ultrakote - more is on the way, hopefully will be here by Friday.


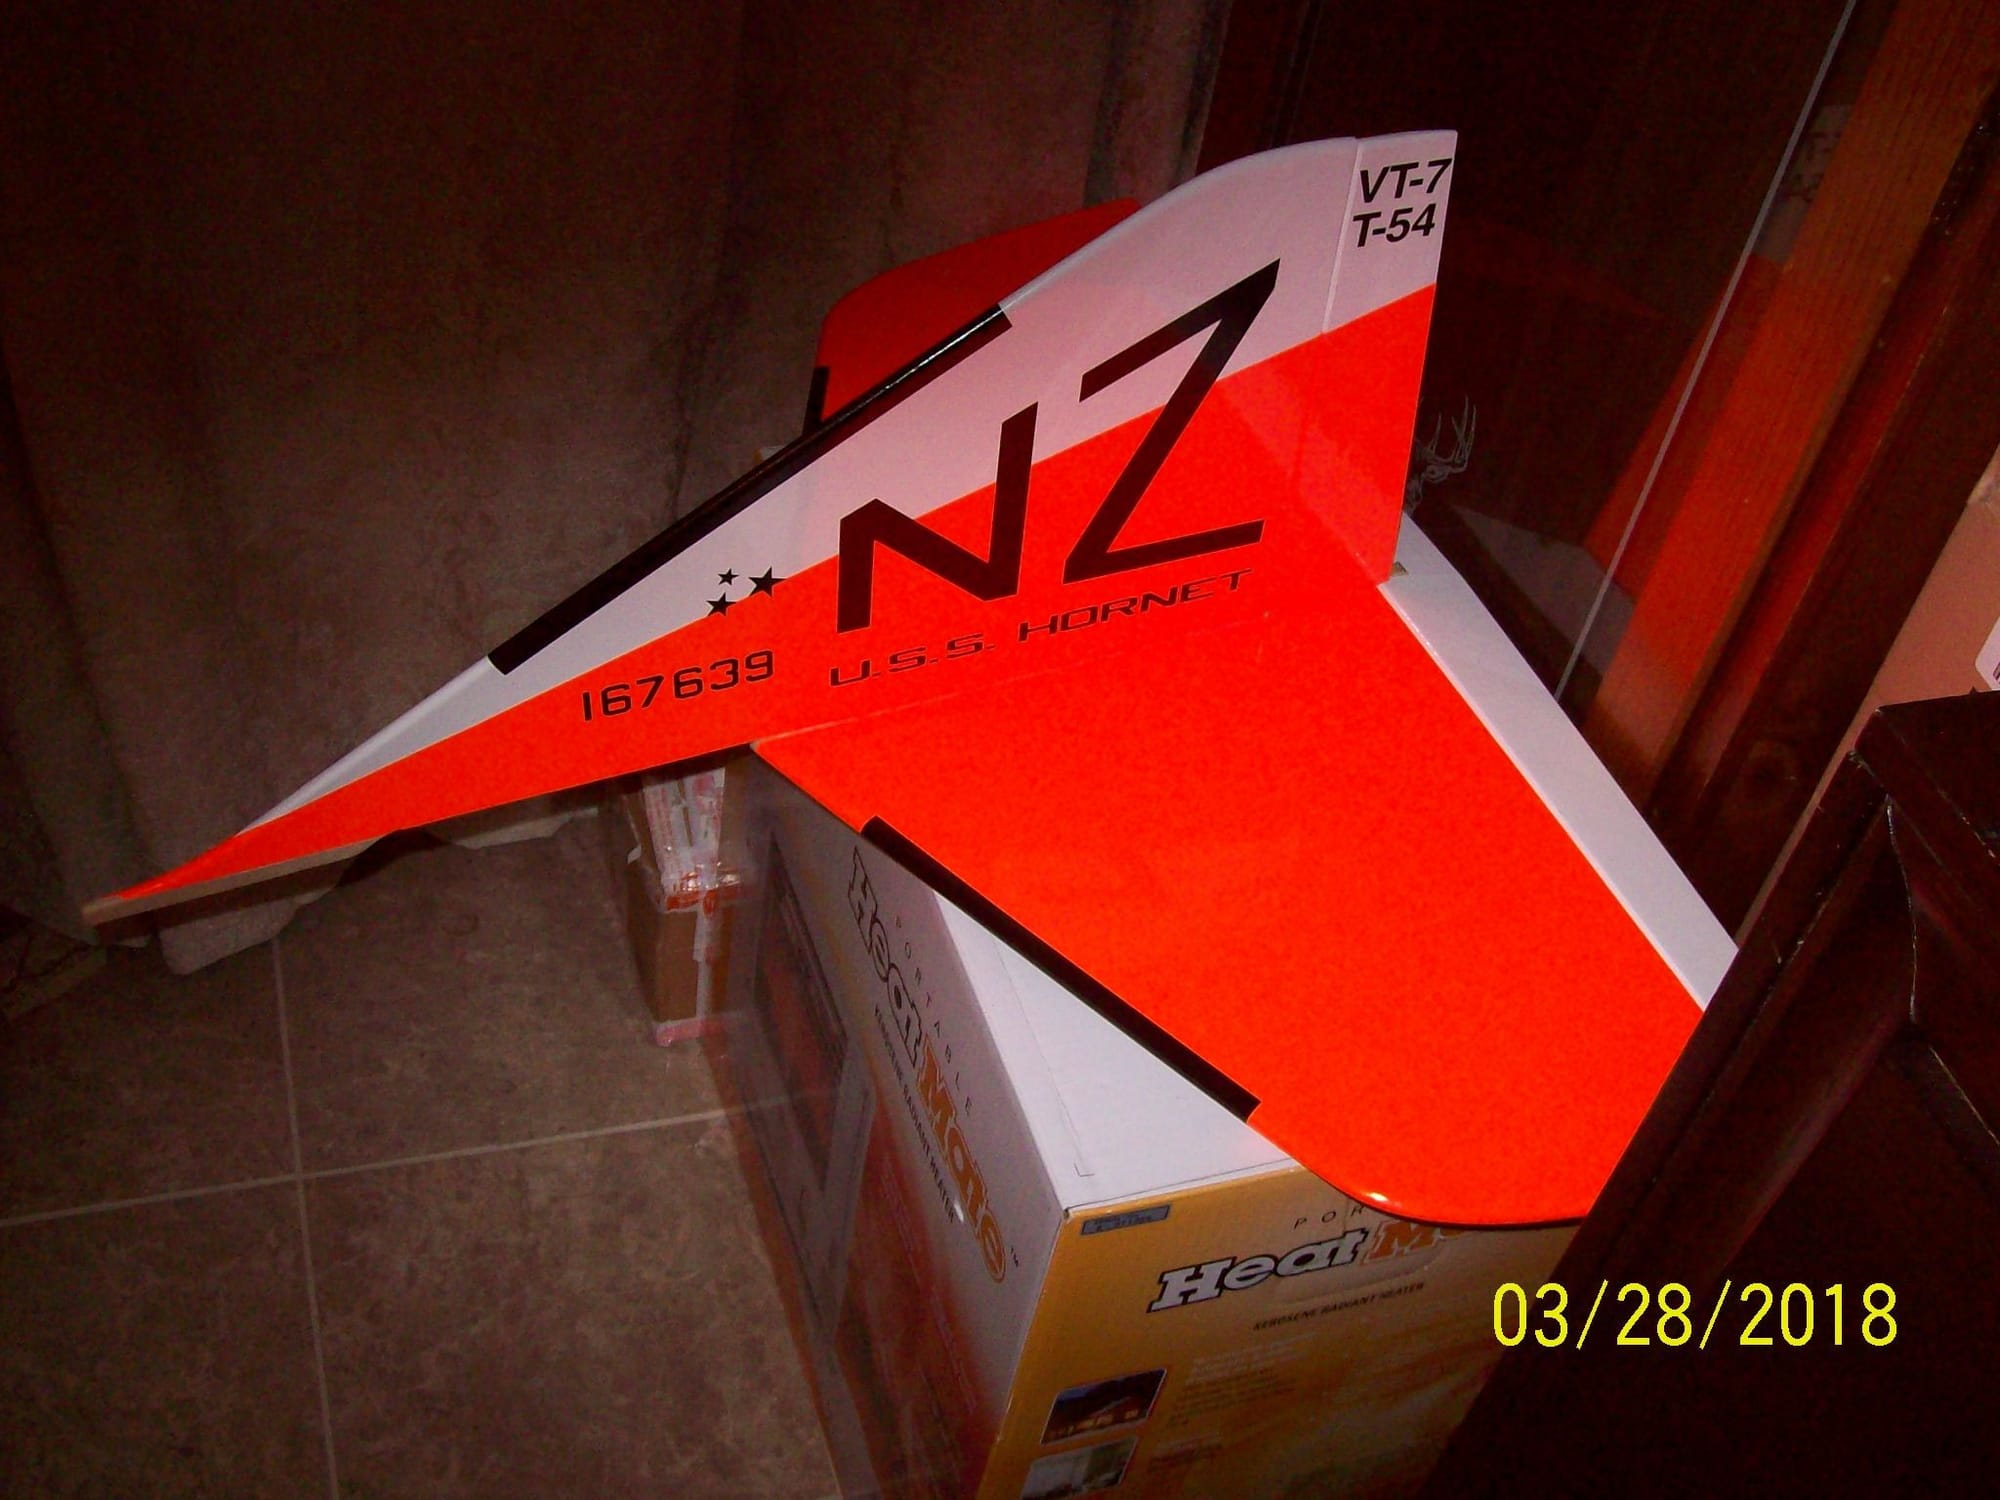
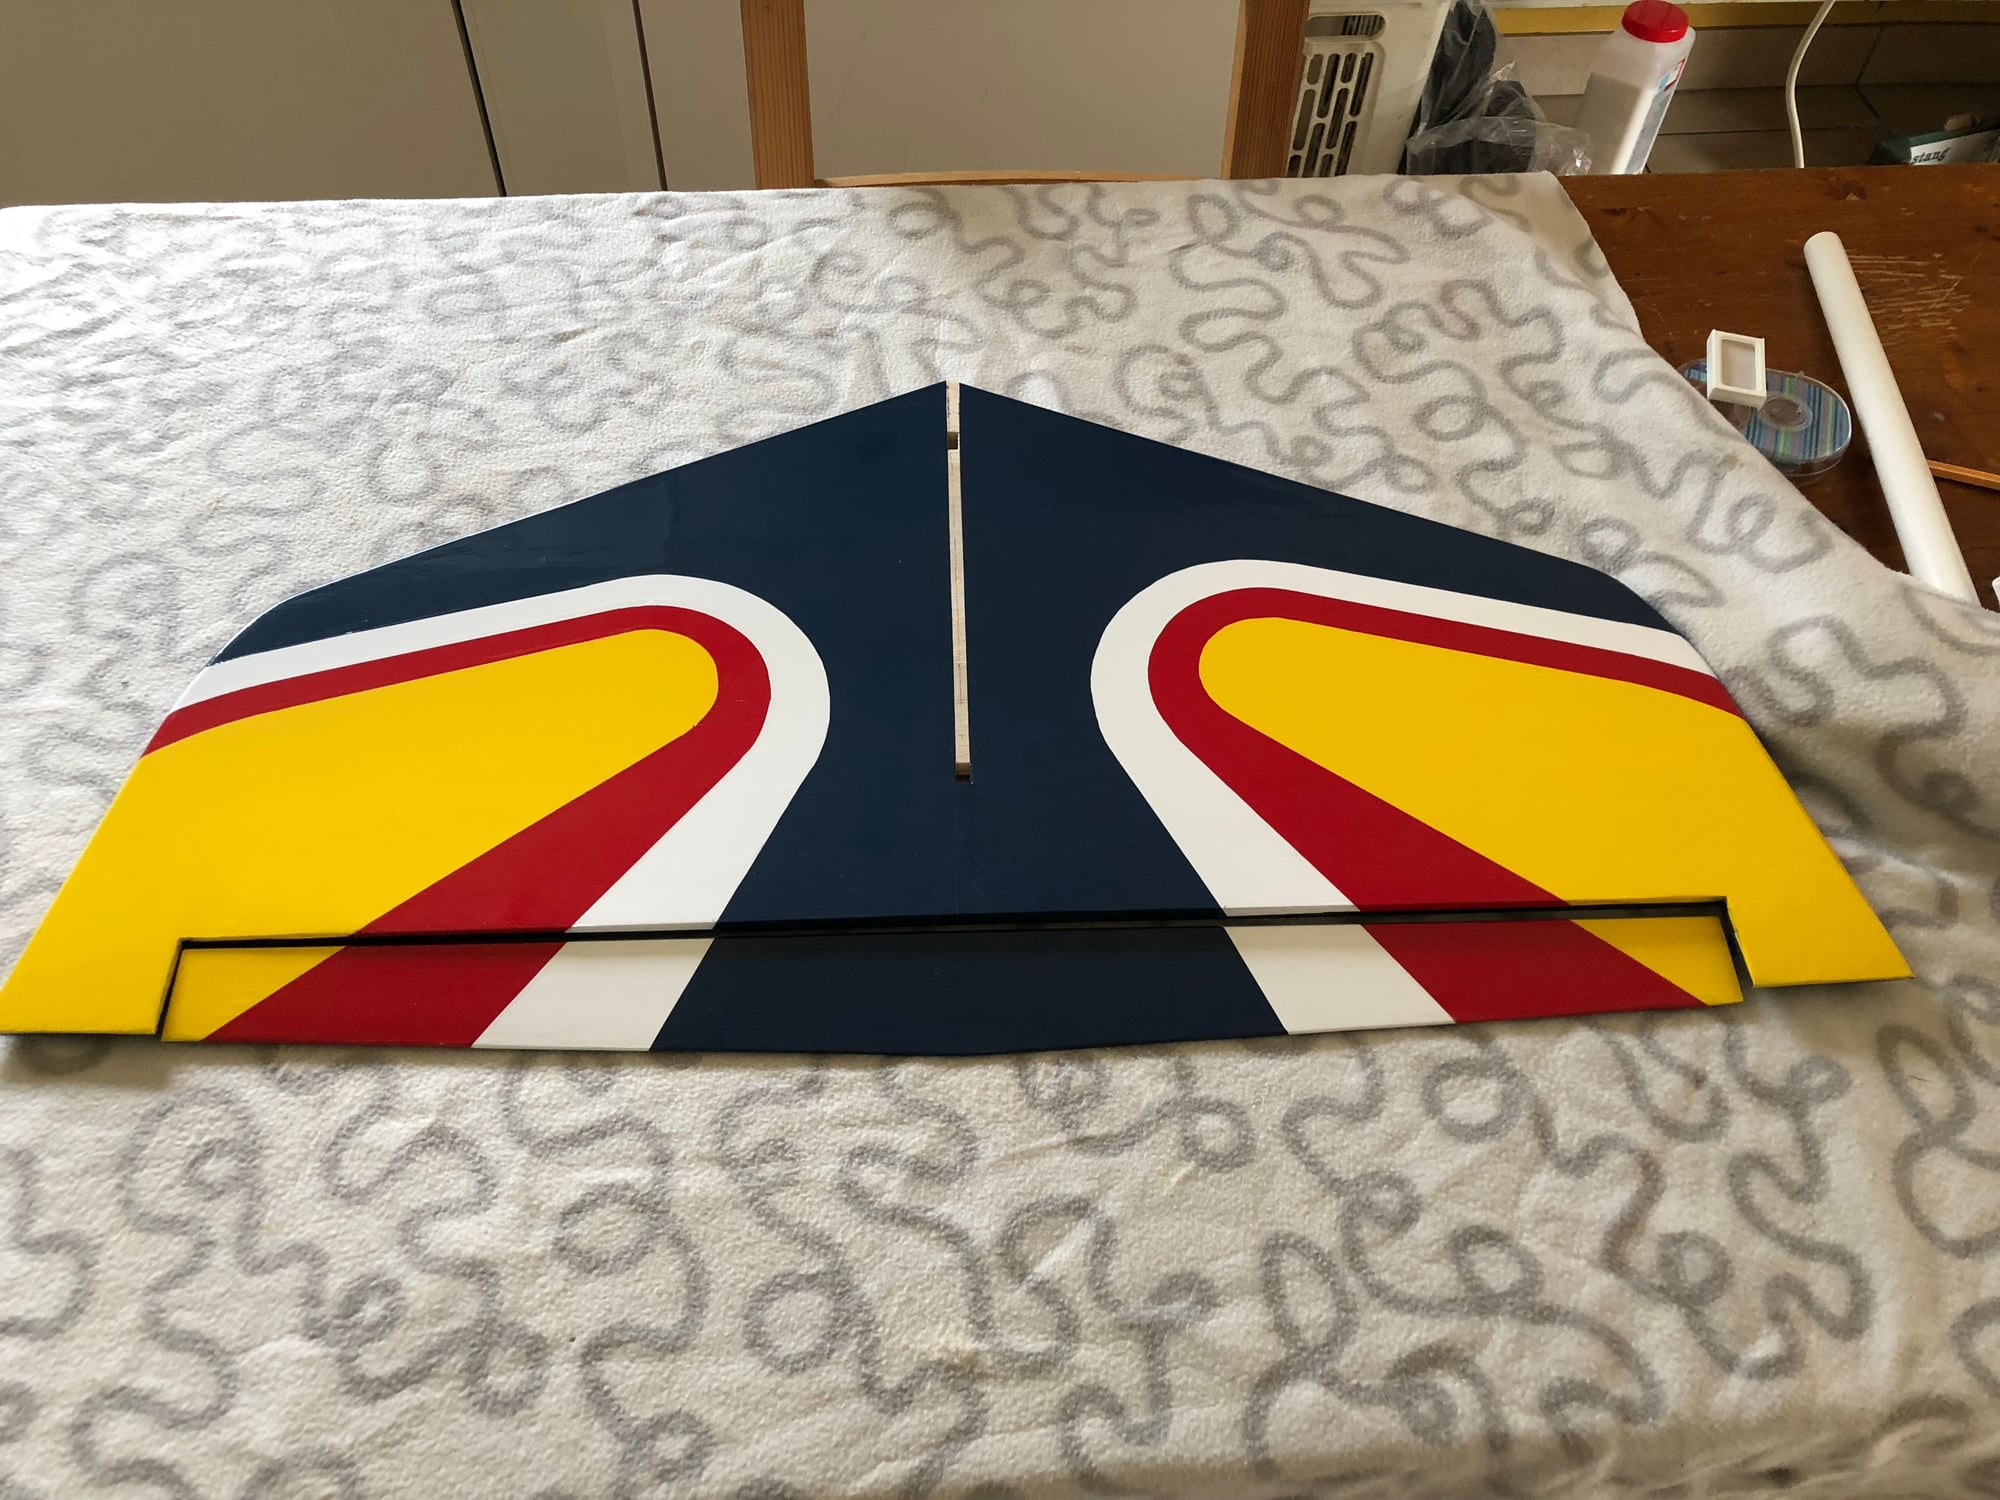
Tail group is finished. Reday to be glued to the fuselage.
Progress Update
The tail group is done and the wing is almost completely finished, I am waiting on a shipment of International Orange from Horizon. I expect to have the fuselage done, ready to cover either tomorrow night or at the latest by Friday night.

Last edited by N99JH; 03-28-2018 at 04:11 PM. Reason: Adding pictures
Old 03-28-2018, 05:07 PM
  #3839  
redtail
My Feedback: (15)
 
redtail's Avatar
 
Join Date: Oct 2002
Location: Alexandria, VA
Posts: 2,625
Received 6 Likes on 6 Posts
Default

Classic Color Scheme. Chic
Old 03-28-2018, 08:33 PM
  #3840  
CARS II
My Feedback: (7)
 
CARS II's Avatar
 
Join Date: Oct 2002
Location: Sacramento CA
Posts: 6,589
Received 123 Likes on 106 Posts
Default

Very nice!
Old 03-29-2018, 10:03 PM
  #3841  
CARS II
My Feedback: (7)
 
CARS II's Avatar
 
Join Date: Oct 2002
Location: Sacramento CA
Posts: 6,589
Received 123 Likes on 106 Posts
Default


This week I was supposed to do a lot of work on the Reaction but it end up been the week that I did the least, oh well.
I will keep working on it here and there till it is done

Sheeted the botton side of the wing, some more work to be done tomorrow.

Last edited by CARS II; 03-30-2018 at 04:45 PM.
Old 03-30-2018, 04:36 PM
  #3842  
CARS II
My Feedback: (7)
 
CARS II's Avatar
 
Join Date: Oct 2002
Location: Sacramento CA
Posts: 6,589
Received 123 Likes on 106 Posts
Default


Some of the work done today, prepared and glued the bottom skin.

Last edited by CARS II; 03-30-2018 at 04:43 PM.
Old 03-30-2018, 09:36 PM
  #3843  
CARS II
My Feedback: (7)
 
CARS II's Avatar
 
Join Date: Oct 2002
Location: Sacramento CA
Posts: 6,589
Received 123 Likes on 106 Posts
Default

The right wing is build according to the manual, time to build the left wing.
Old 03-31-2018, 10:29 PM
  #3844  
SALMONBUG
My Feedback: (1)
 
SALMONBUG's Avatar
 
Join Date: Feb 2003
Location: kampenhout, BELGIUM
Posts: 1,396
Likes: 0
Received 2 Likes on 2 Posts
Default

progress on mine, will turn out stock except for inside positioning of elements and it will wear the prototype clothes


Last edited by SALMONBUG; 03-31-2018 at 10:59 PM.
Old 04-03-2018, 08:22 AM
  #3845  
SALMONBUG
My Feedback: (1)
 
SALMONBUG's Avatar
 
Join Date: Feb 2003
Location: kampenhout, BELGIUM
Posts: 1,396
Likes: 0
Received 2 Likes on 2 Posts
Default

i am happy that the stab ironing job is behind me, took me 15 hrs effective work

Old 04-03-2018, 09:07 AM
  #3846  
redtail
My Feedback: (15)
 
redtail's Avatar
 
Join Date: Oct 2002
Location: Alexandria, VA
Posts: 2,625
Received 6 Likes on 6 Posts
Default

Beautiful film iron work on the Stab/Elevators. Chic
Old 04-03-2018, 10:04 AM
  #3847  
SALMONBUG
My Feedback: (1)
 
SALMONBUG's Avatar
 
Join Date: Feb 2003
Location: kampenhout, BELGIUM
Posts: 1,396
Likes: 0
Received 2 Likes on 2 Posts
Default

Originally Posted by redtail
Beautiful film iron work on the Stab/Elevators. Chic
Thanks, but I have to say I couldn't have done it without the use of the optional BTE templates.

next, the fuse. I keep the wings for the end

Last edited by SALMONBUG; 04-03-2018 at 10:08 AM.
Old 04-05-2018, 04:42 PM
  #3848  
CARS II
My Feedback: (7)
 
CARS II's Avatar
 
Join Date: Oct 2002
Location: Sacramento CA
Posts: 6,589
Received 123 Likes on 106 Posts
Default


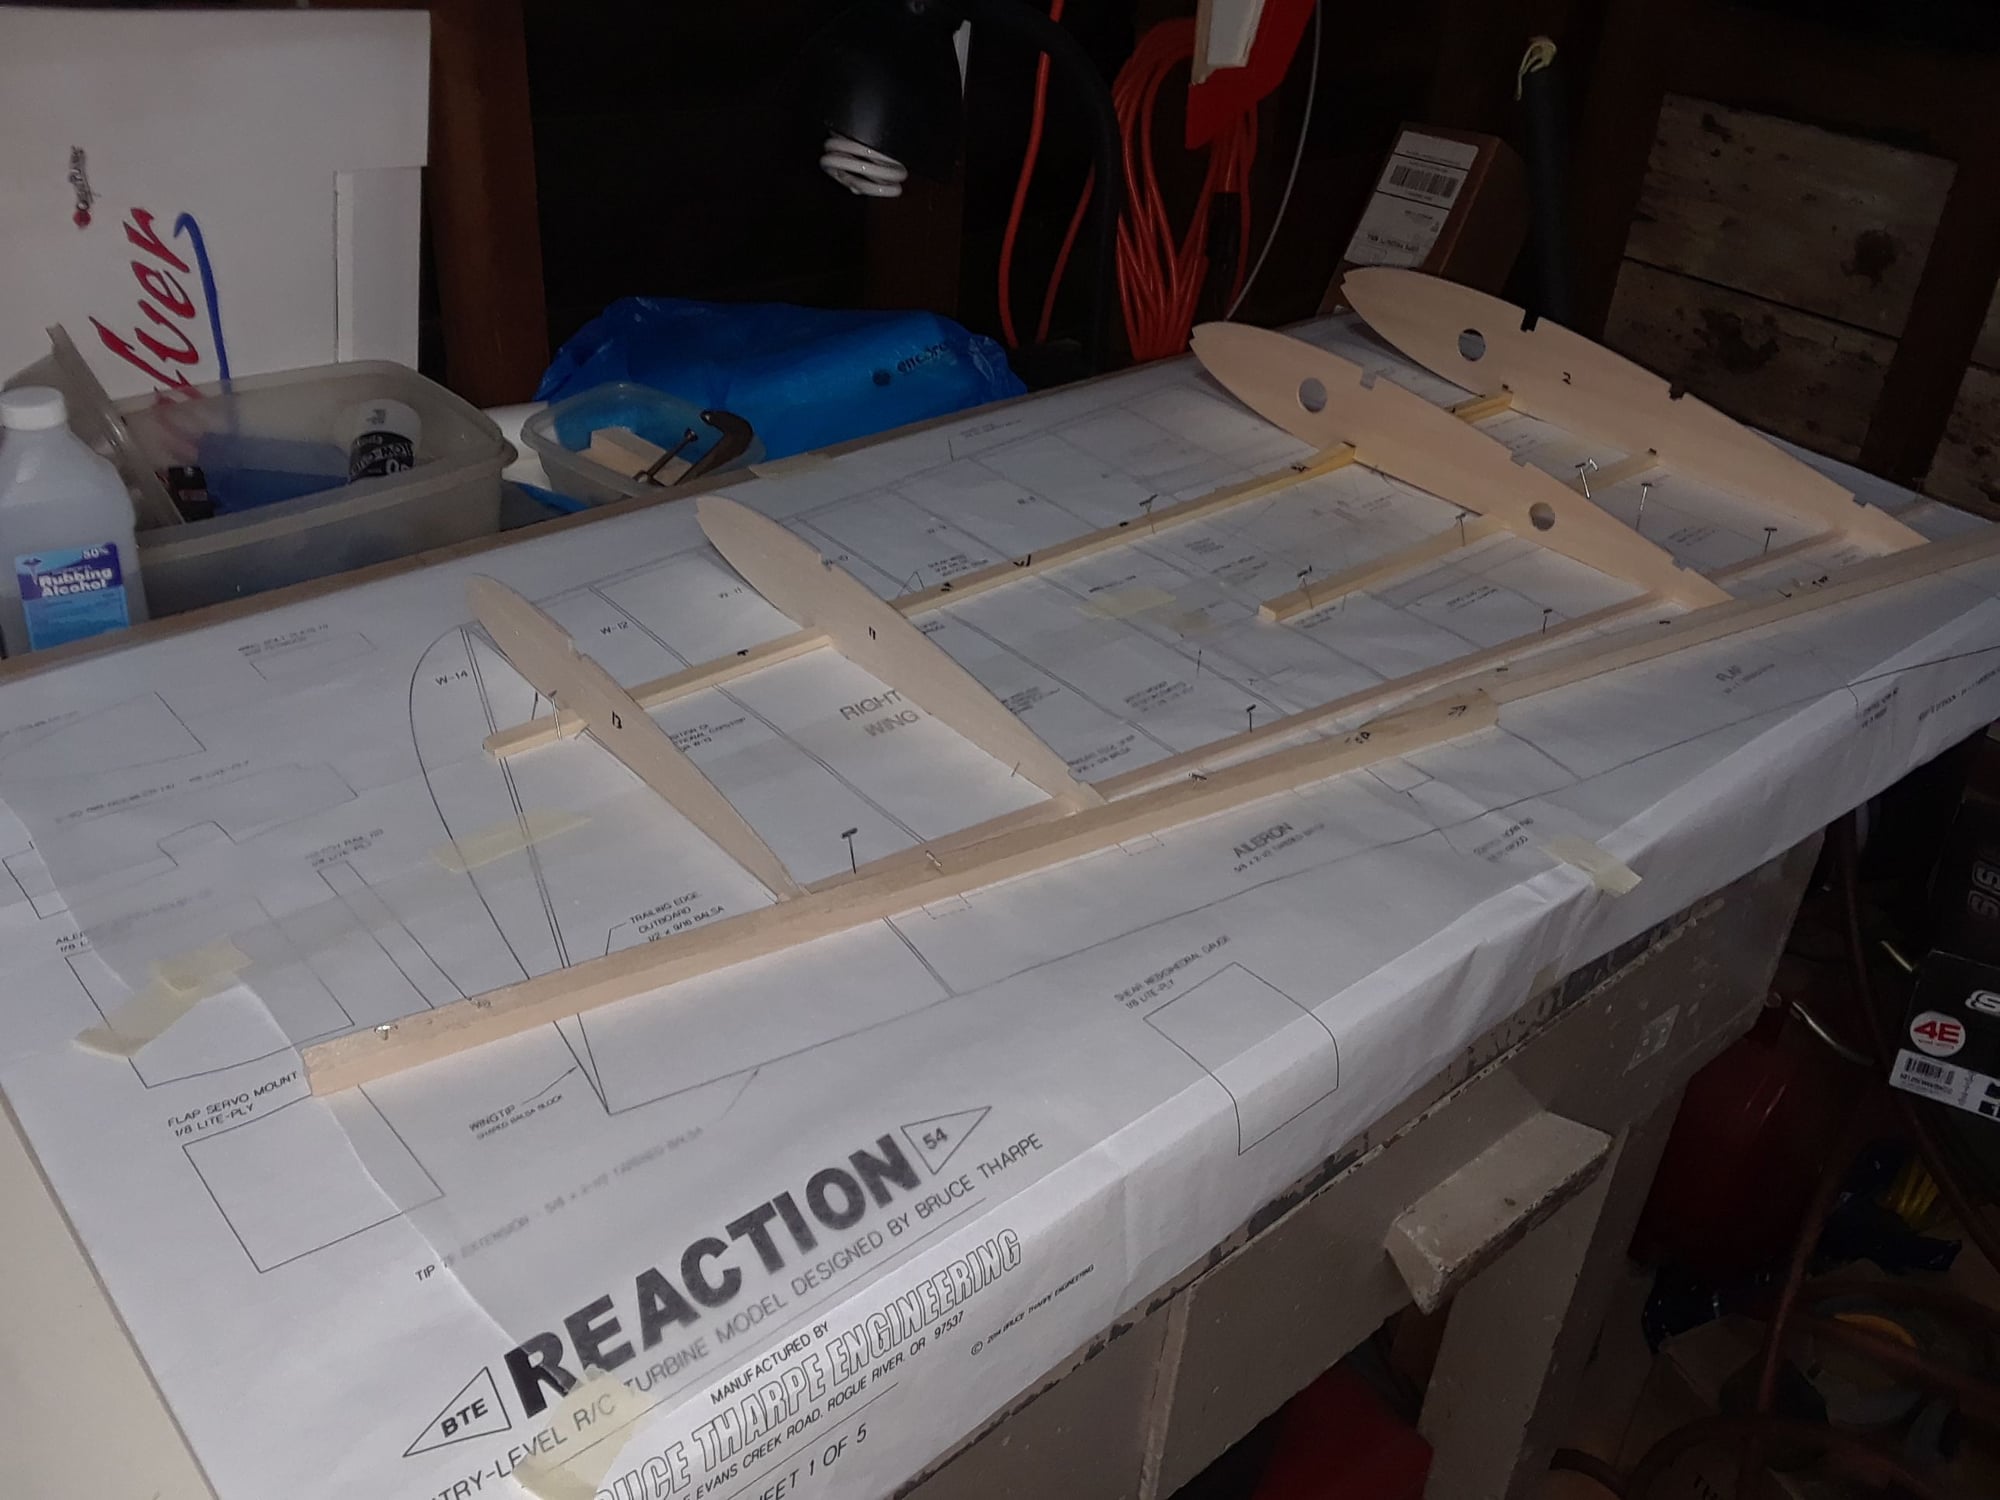
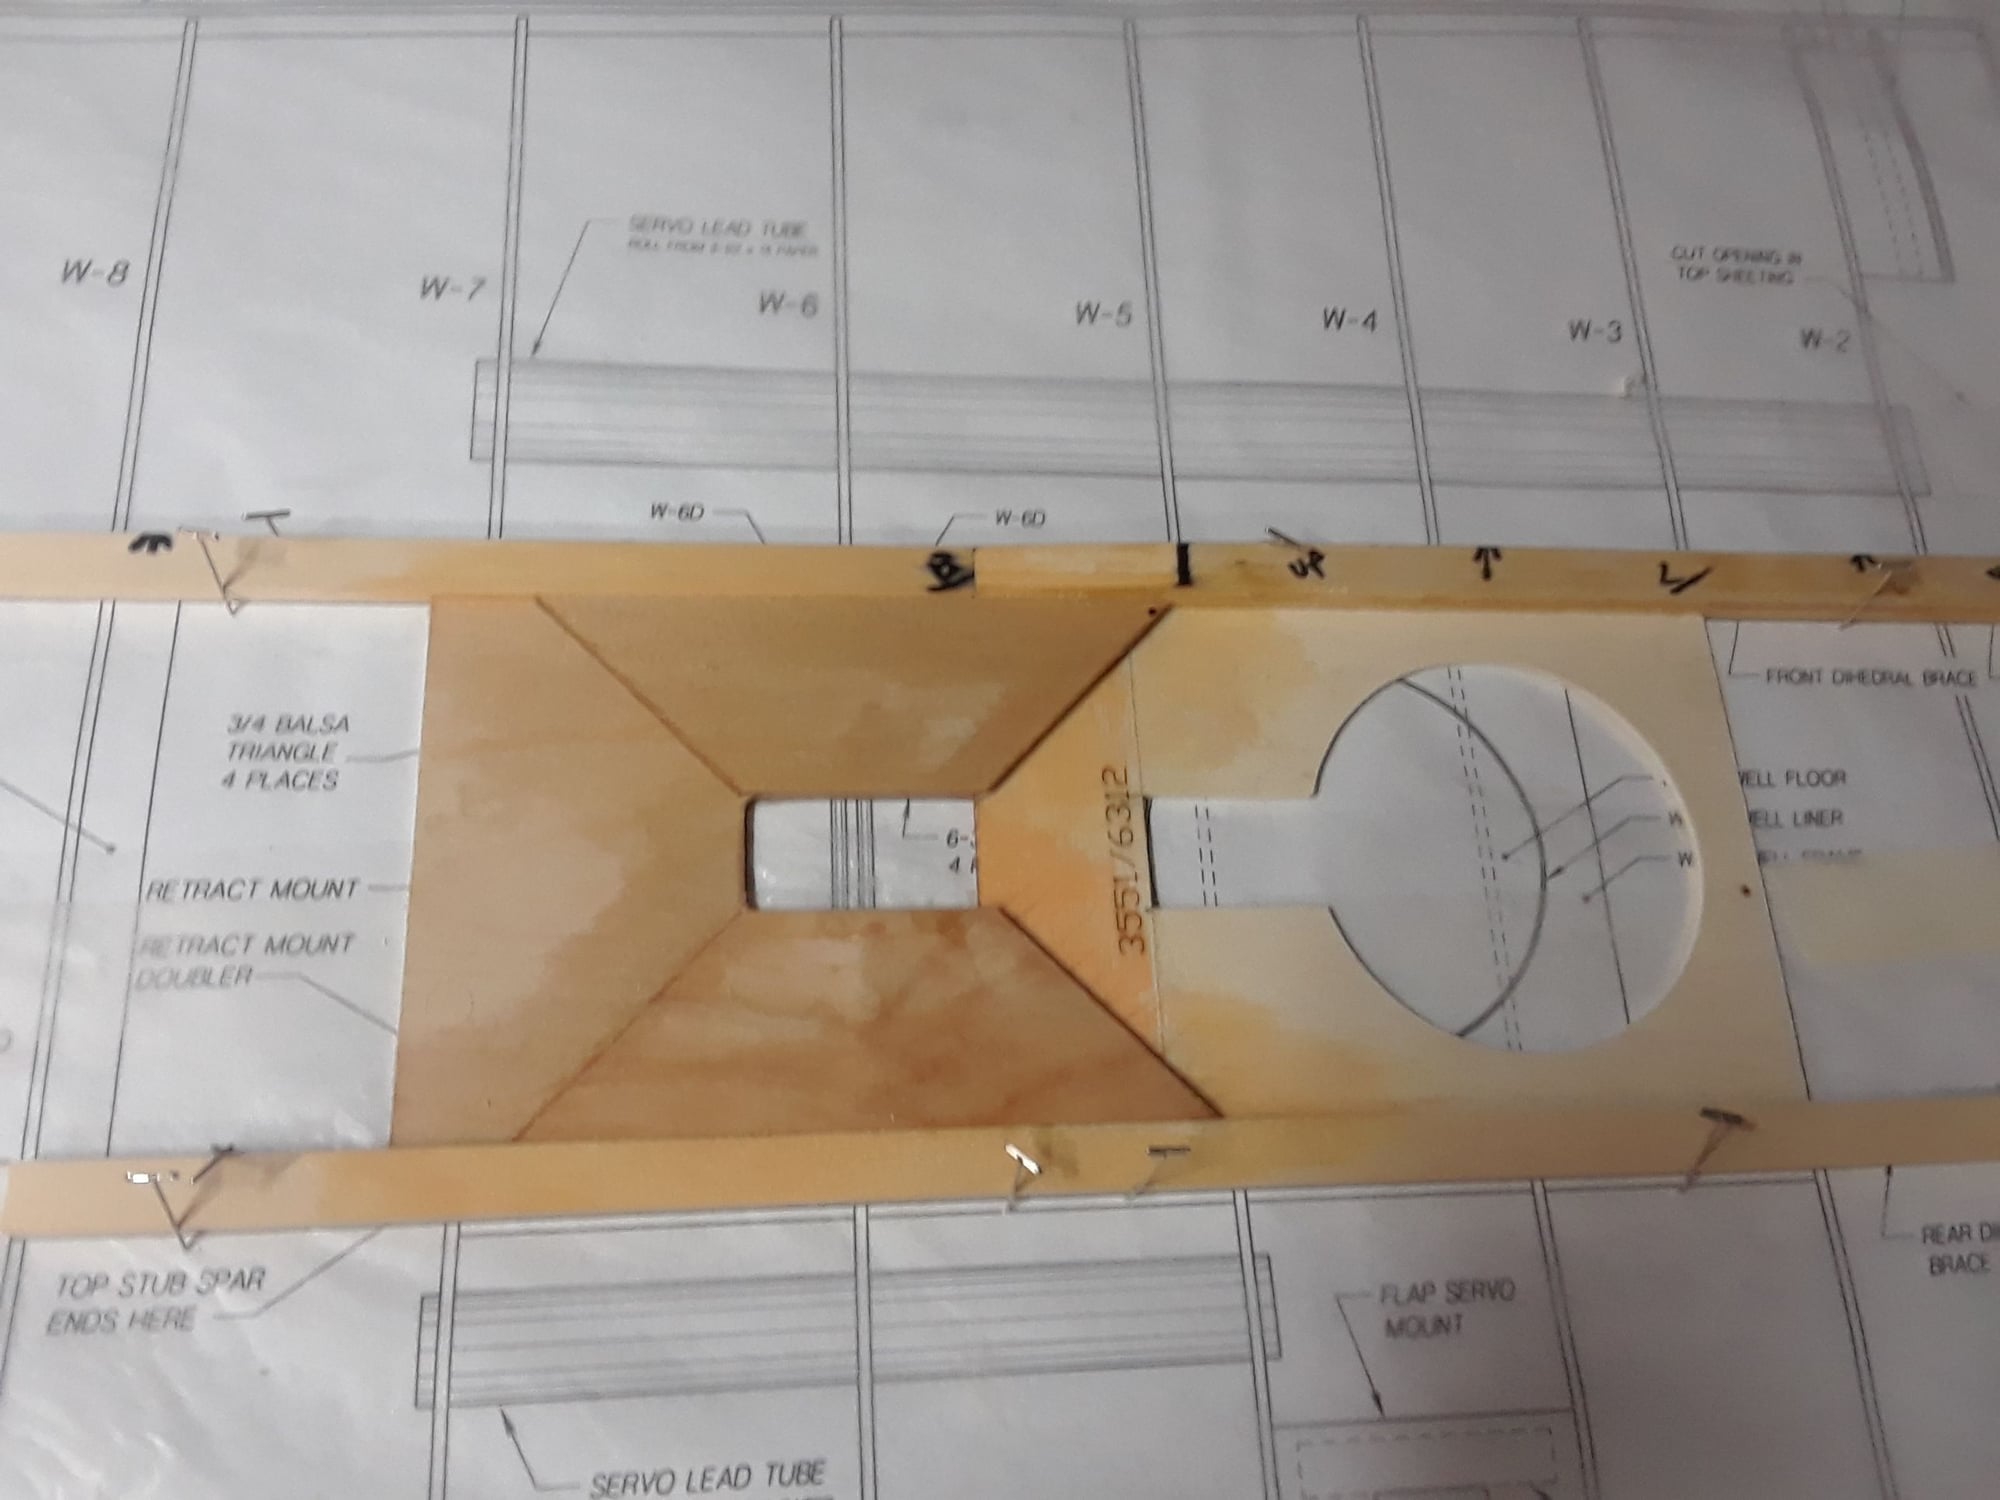
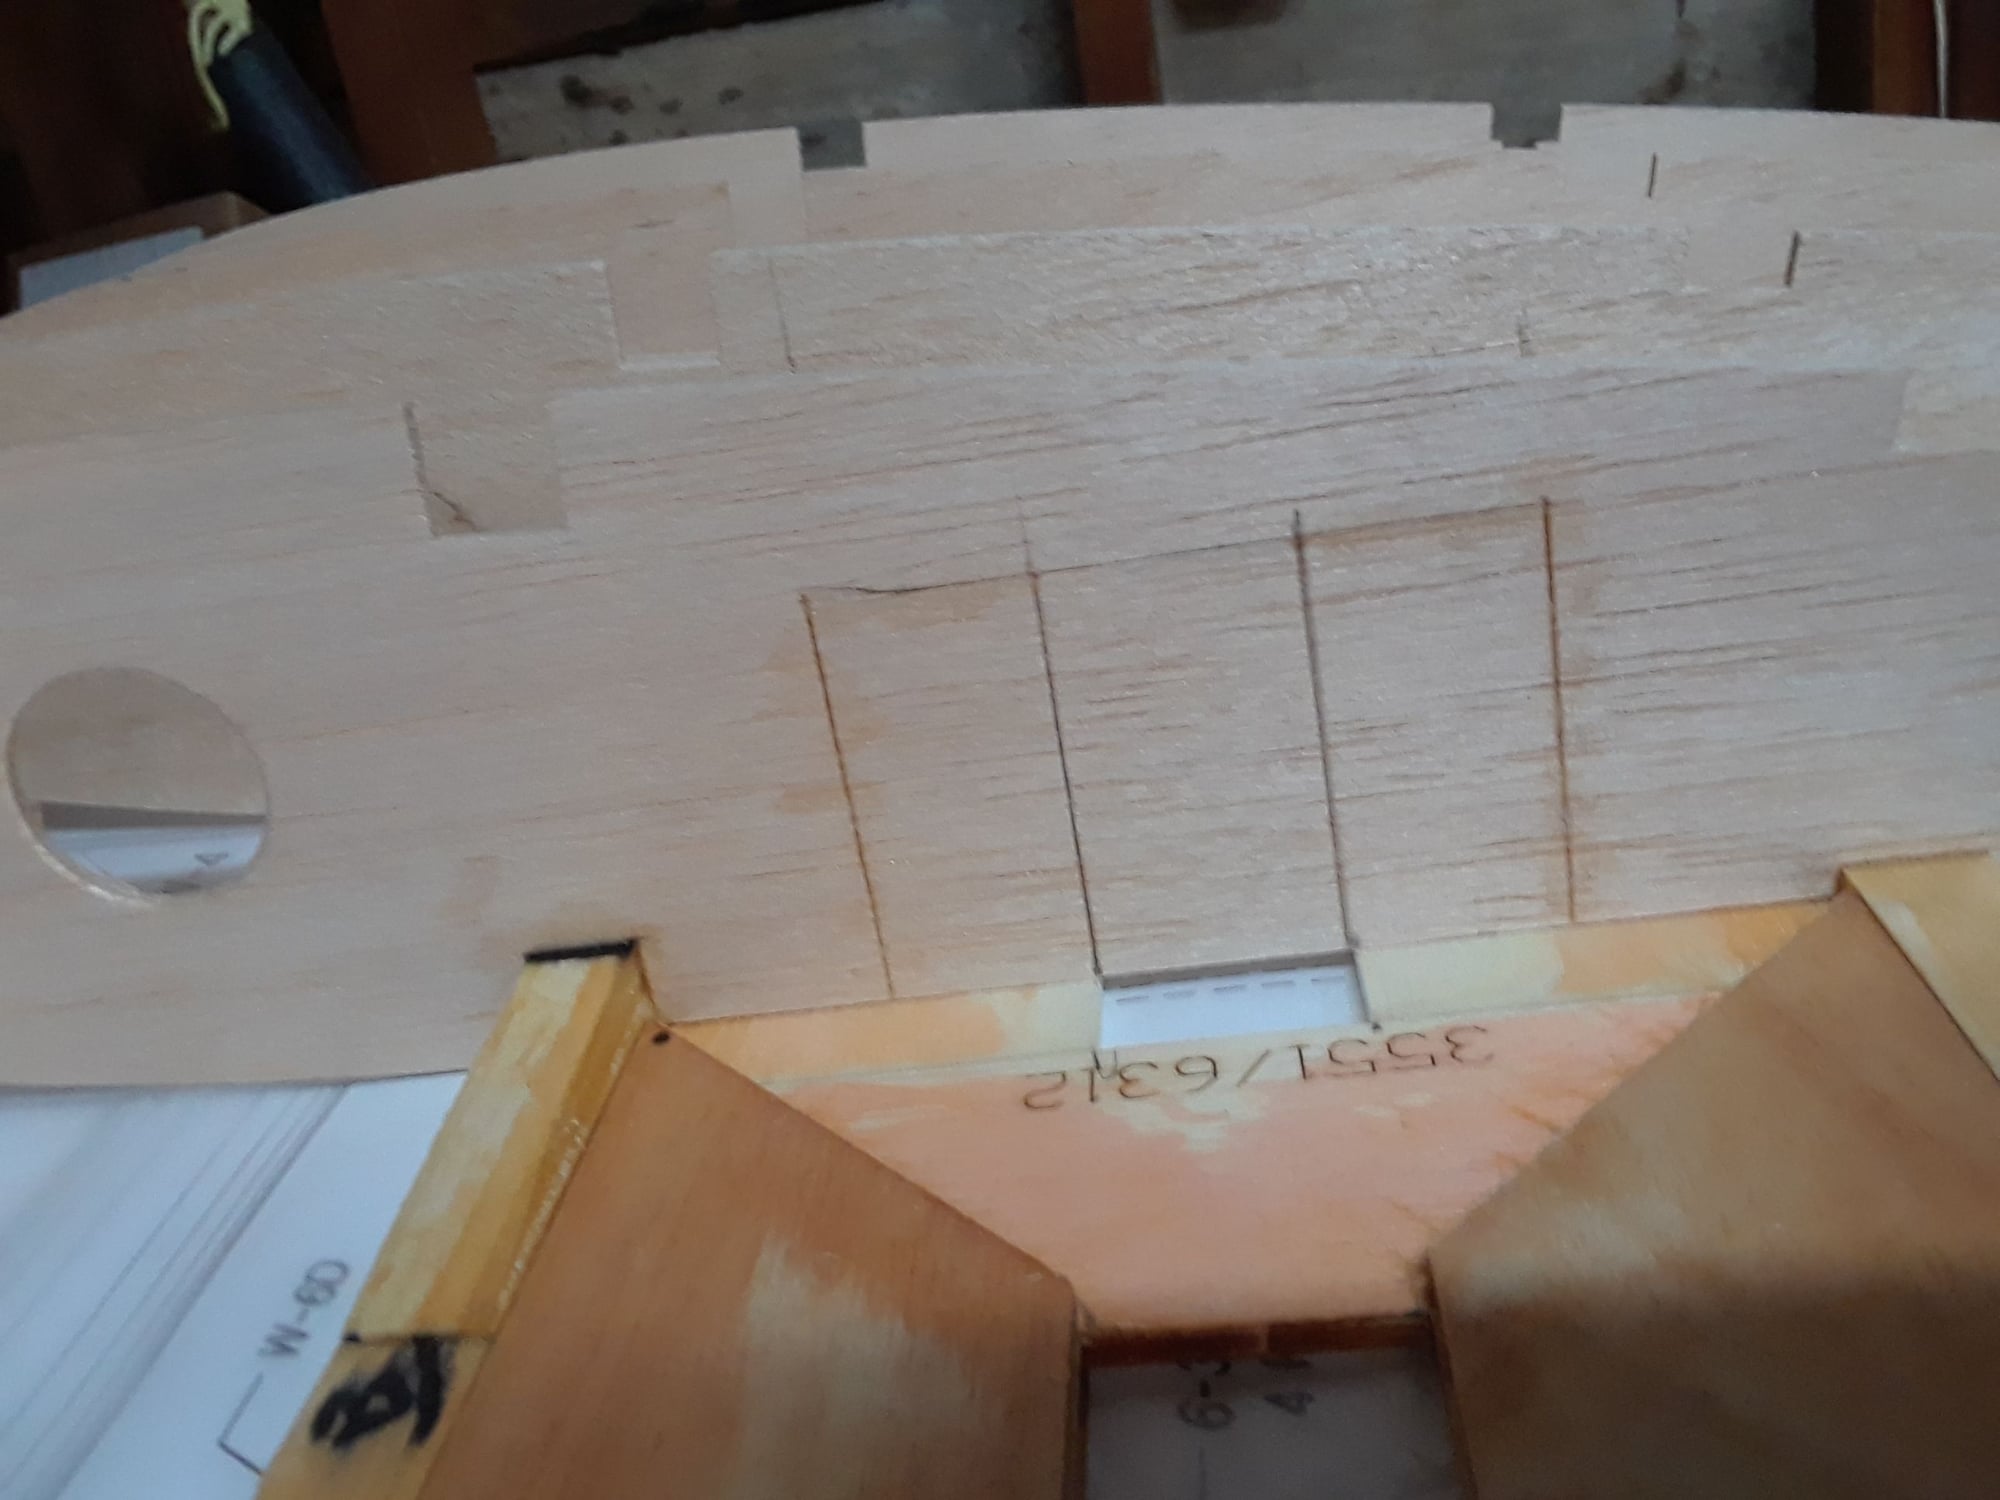
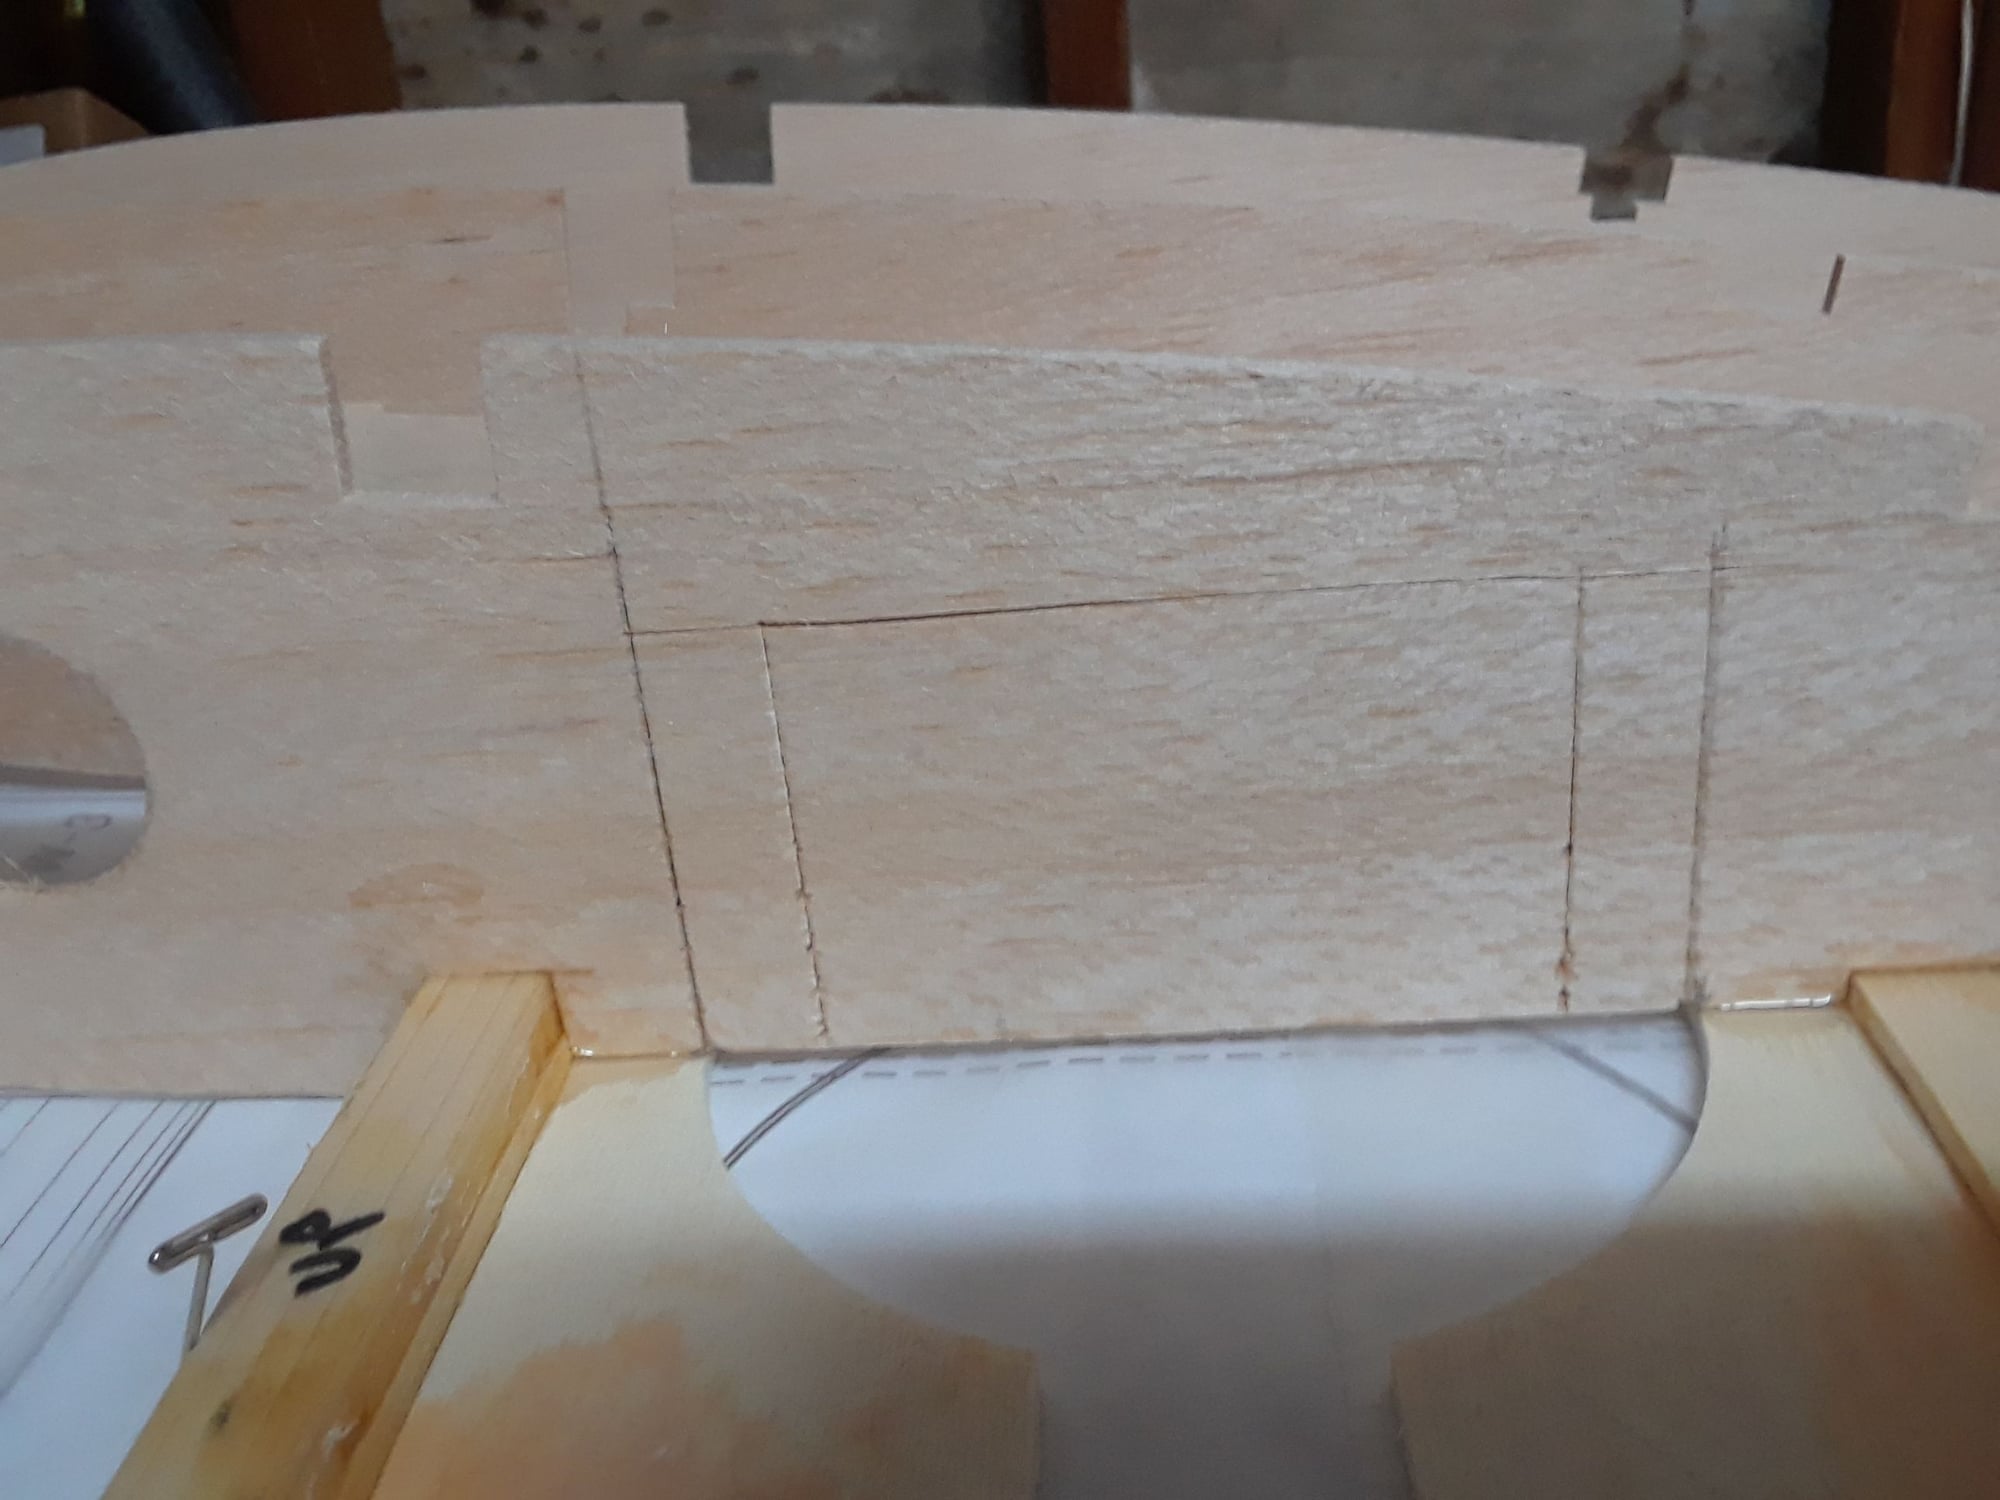
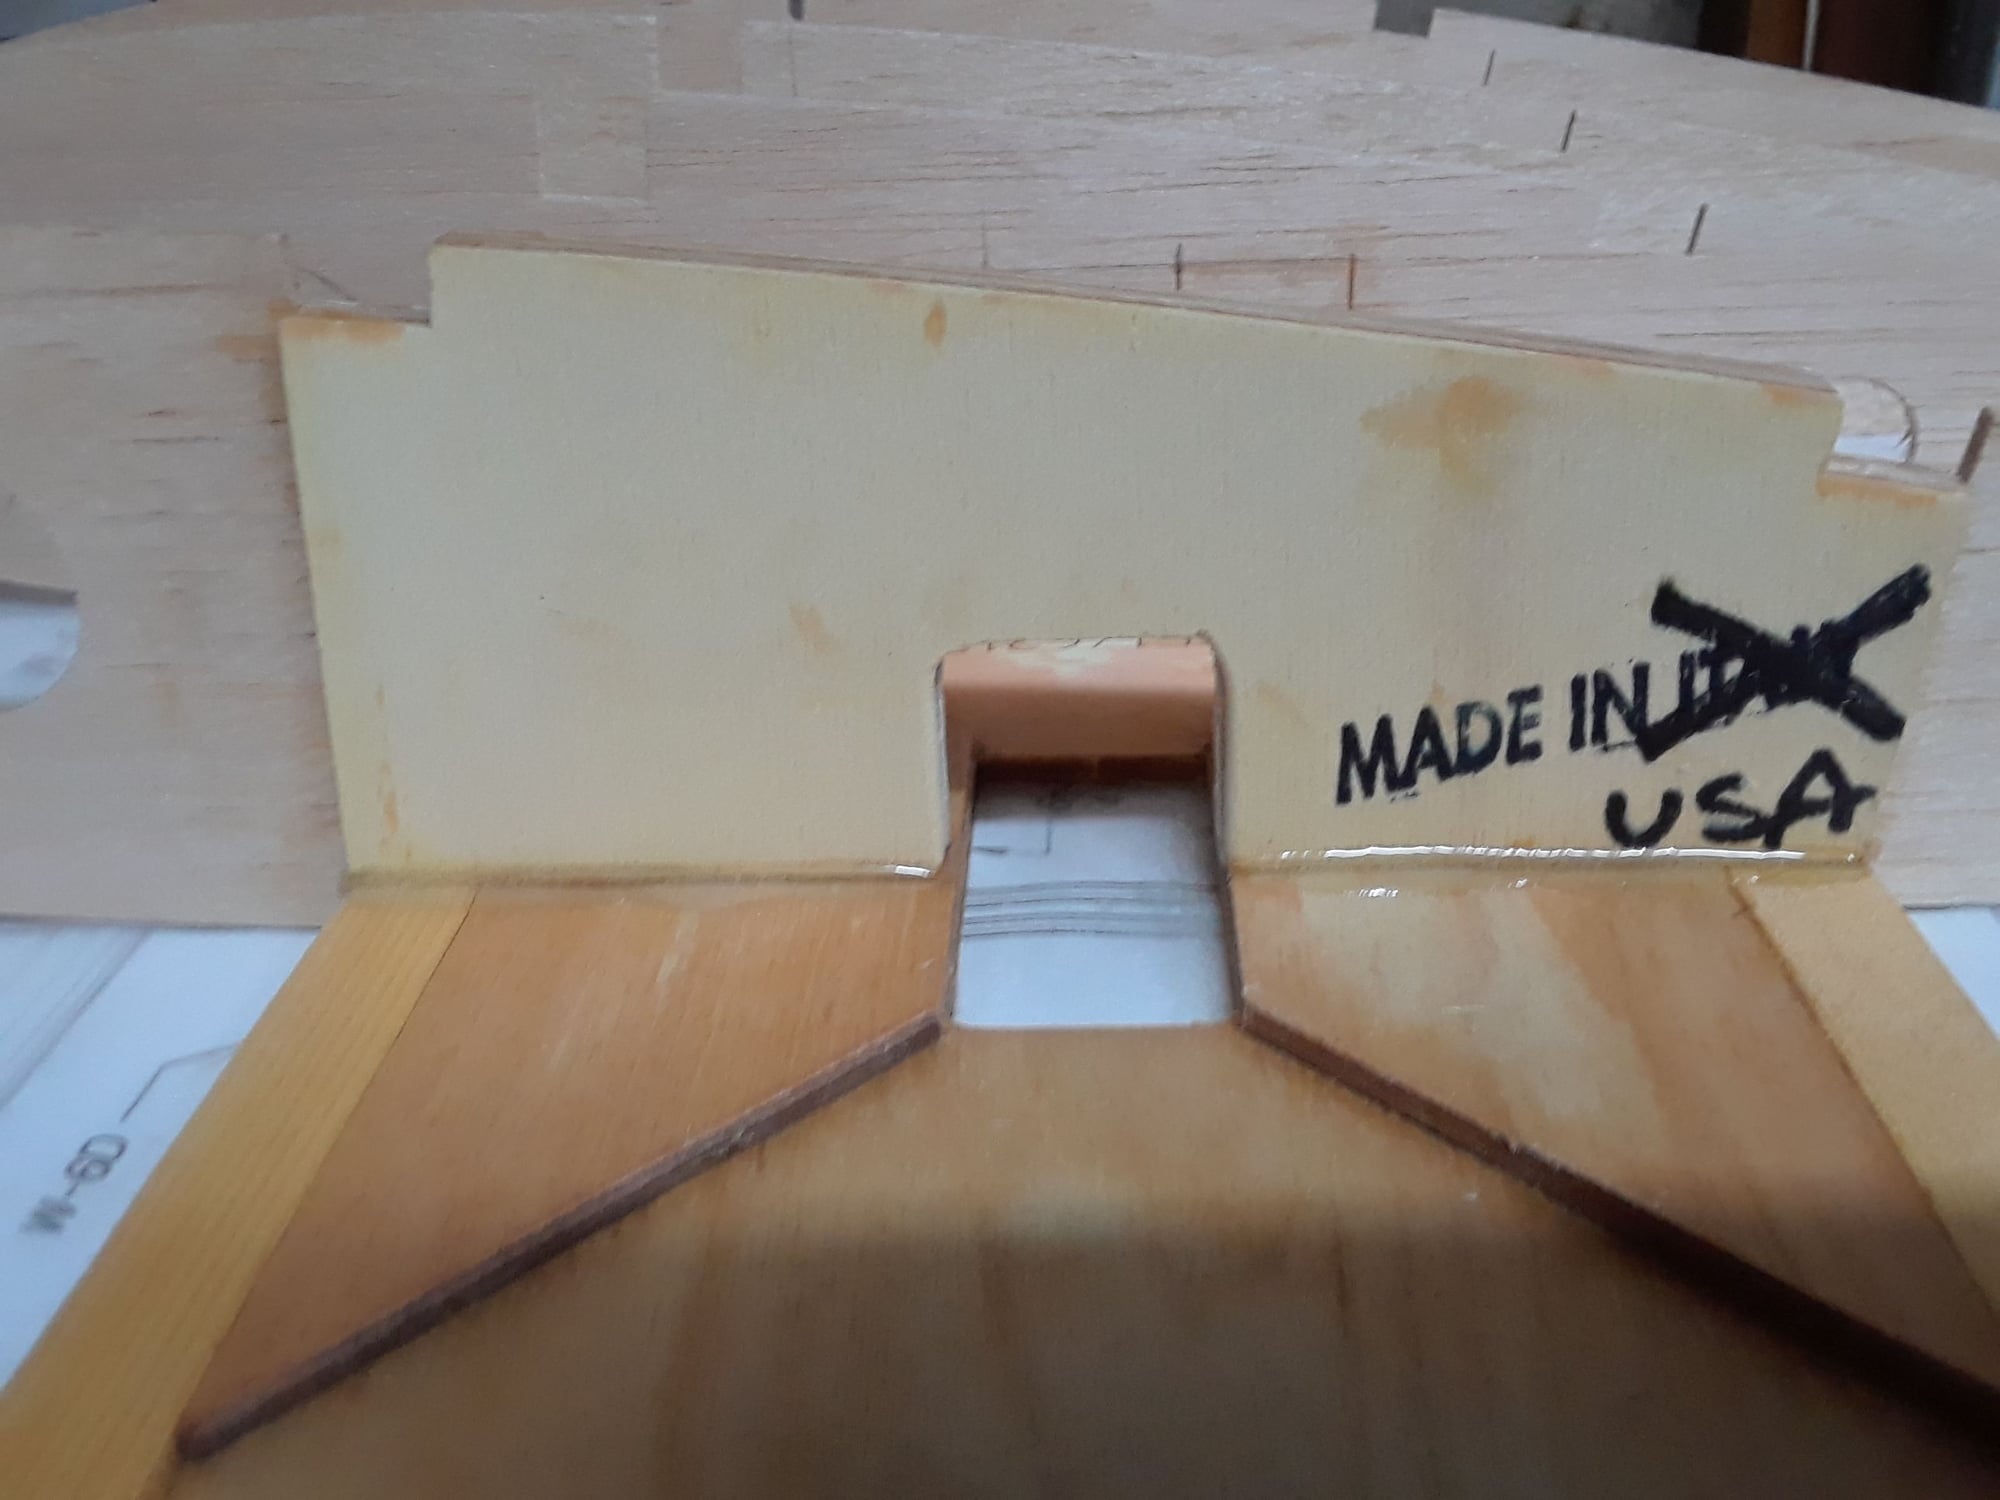
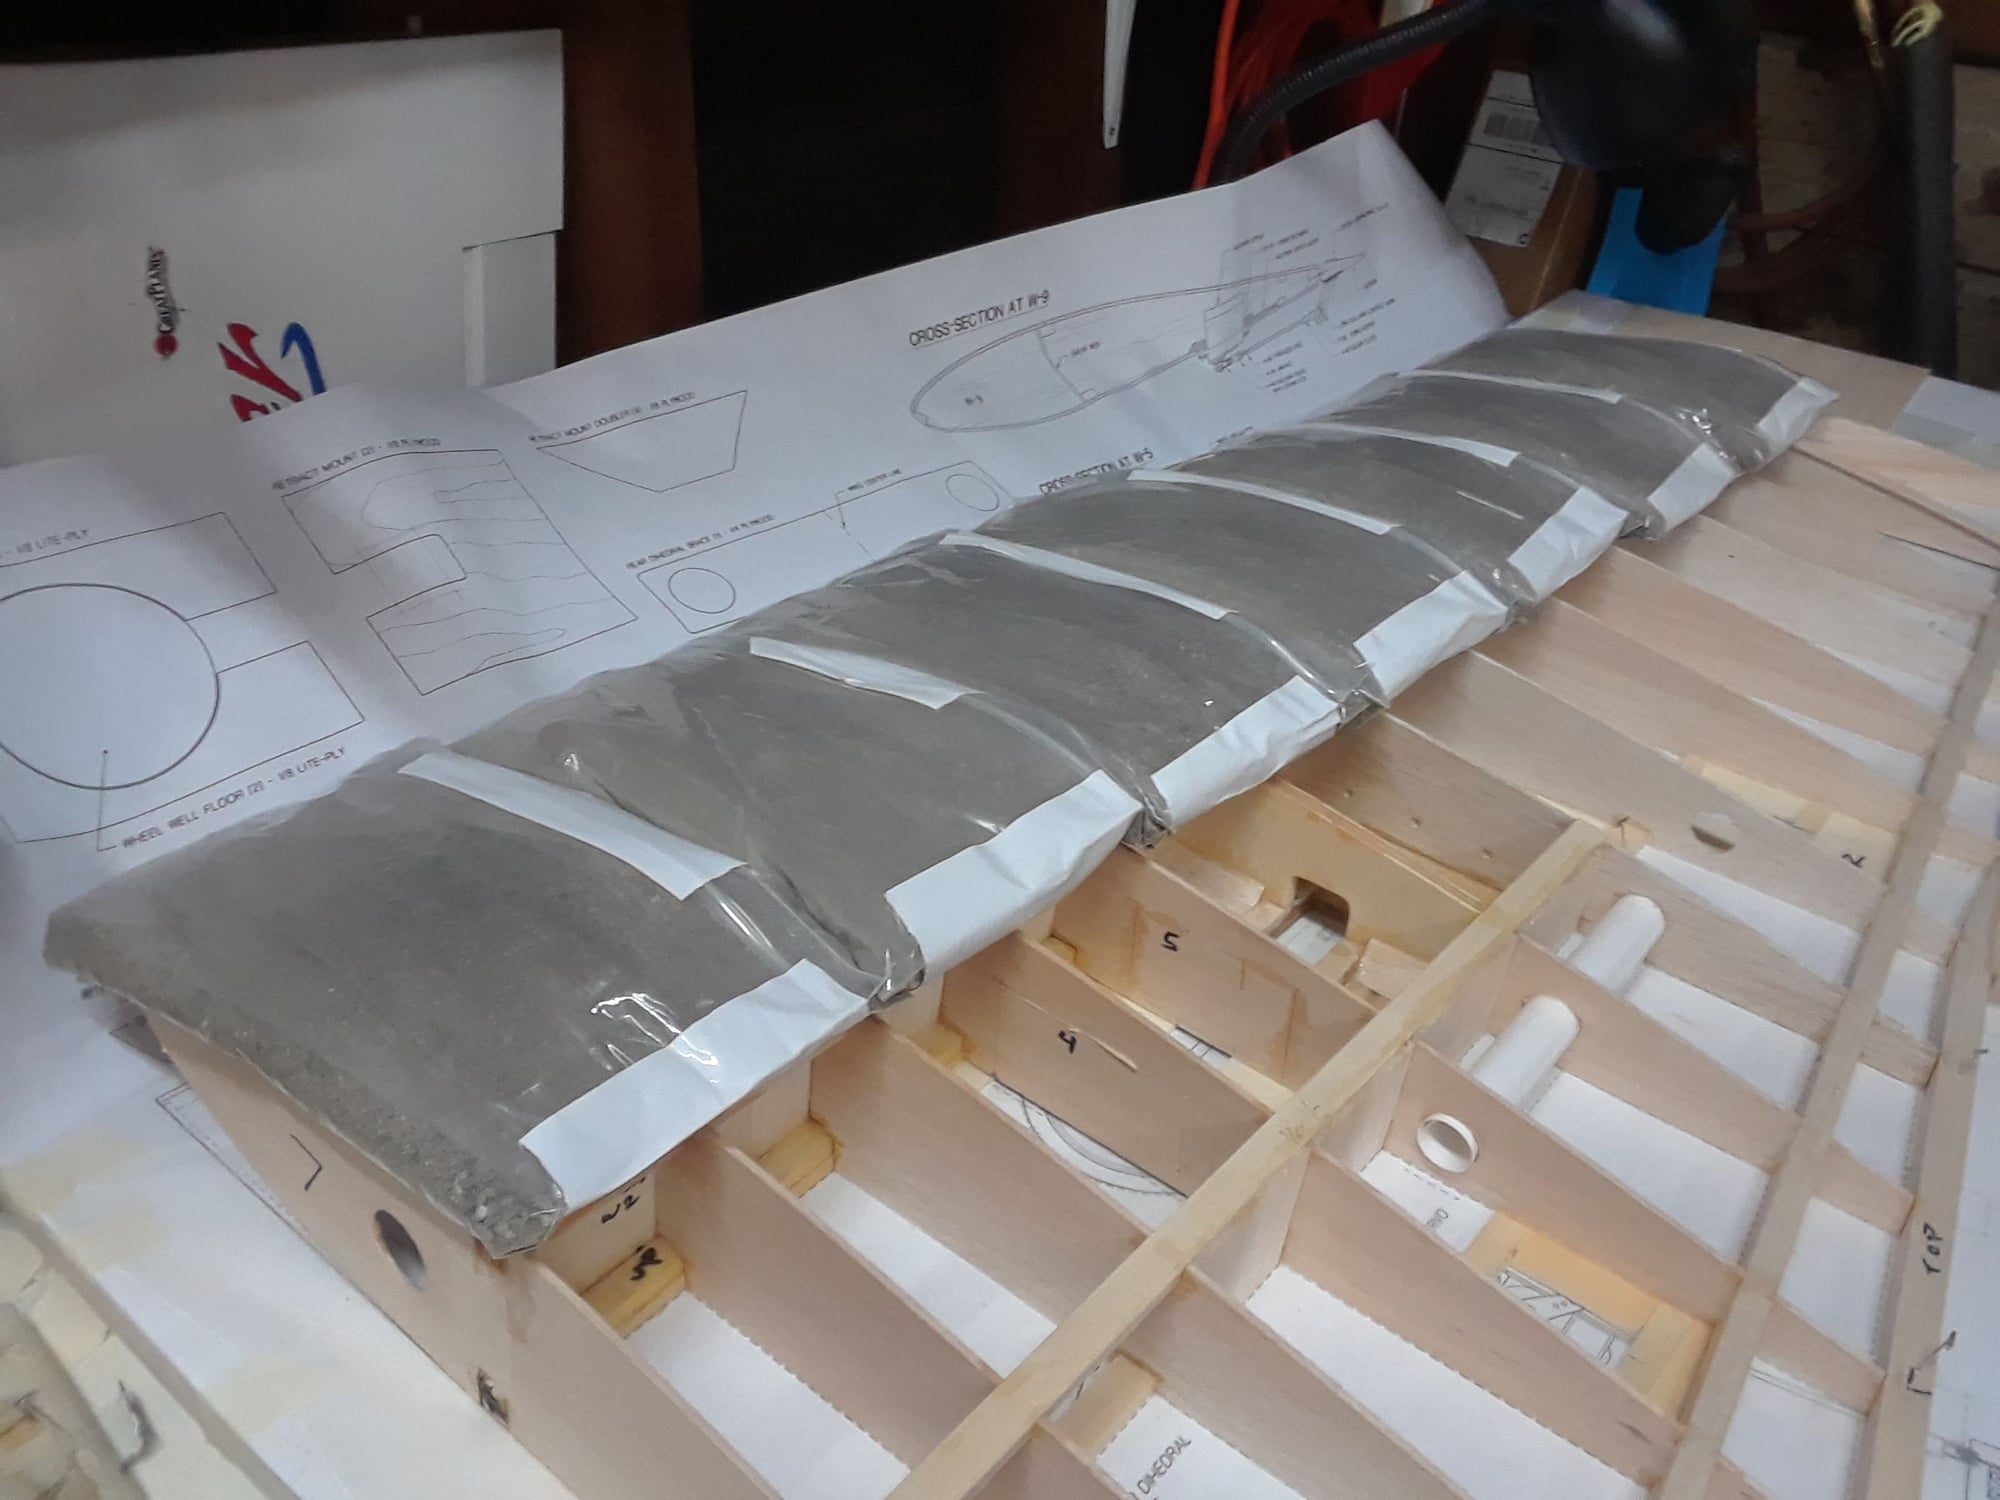
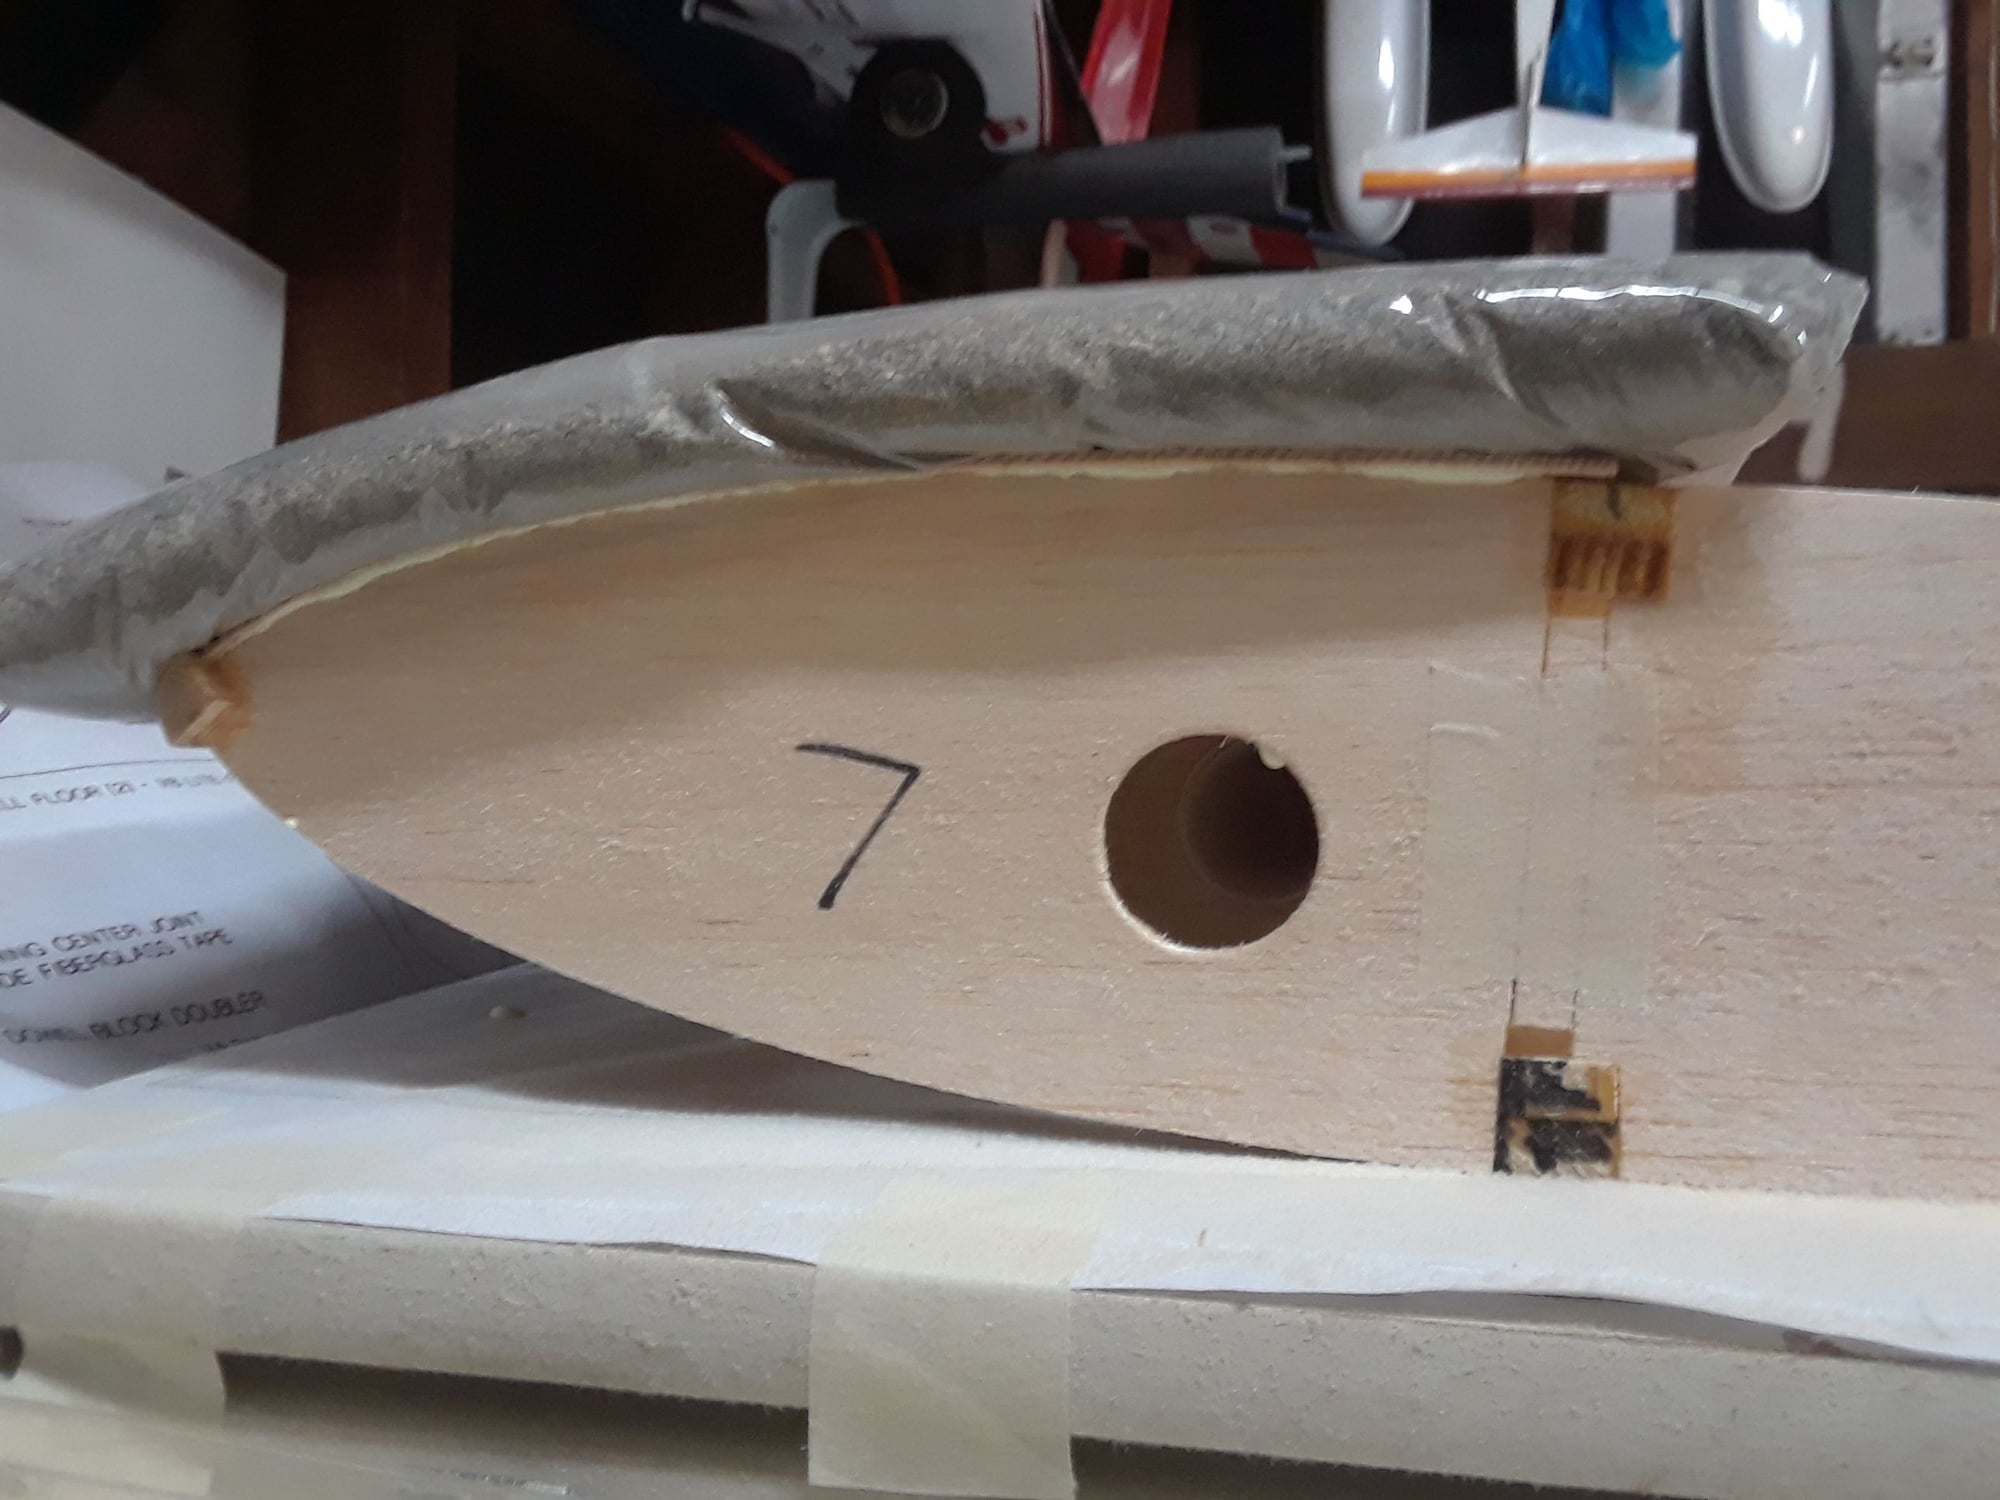
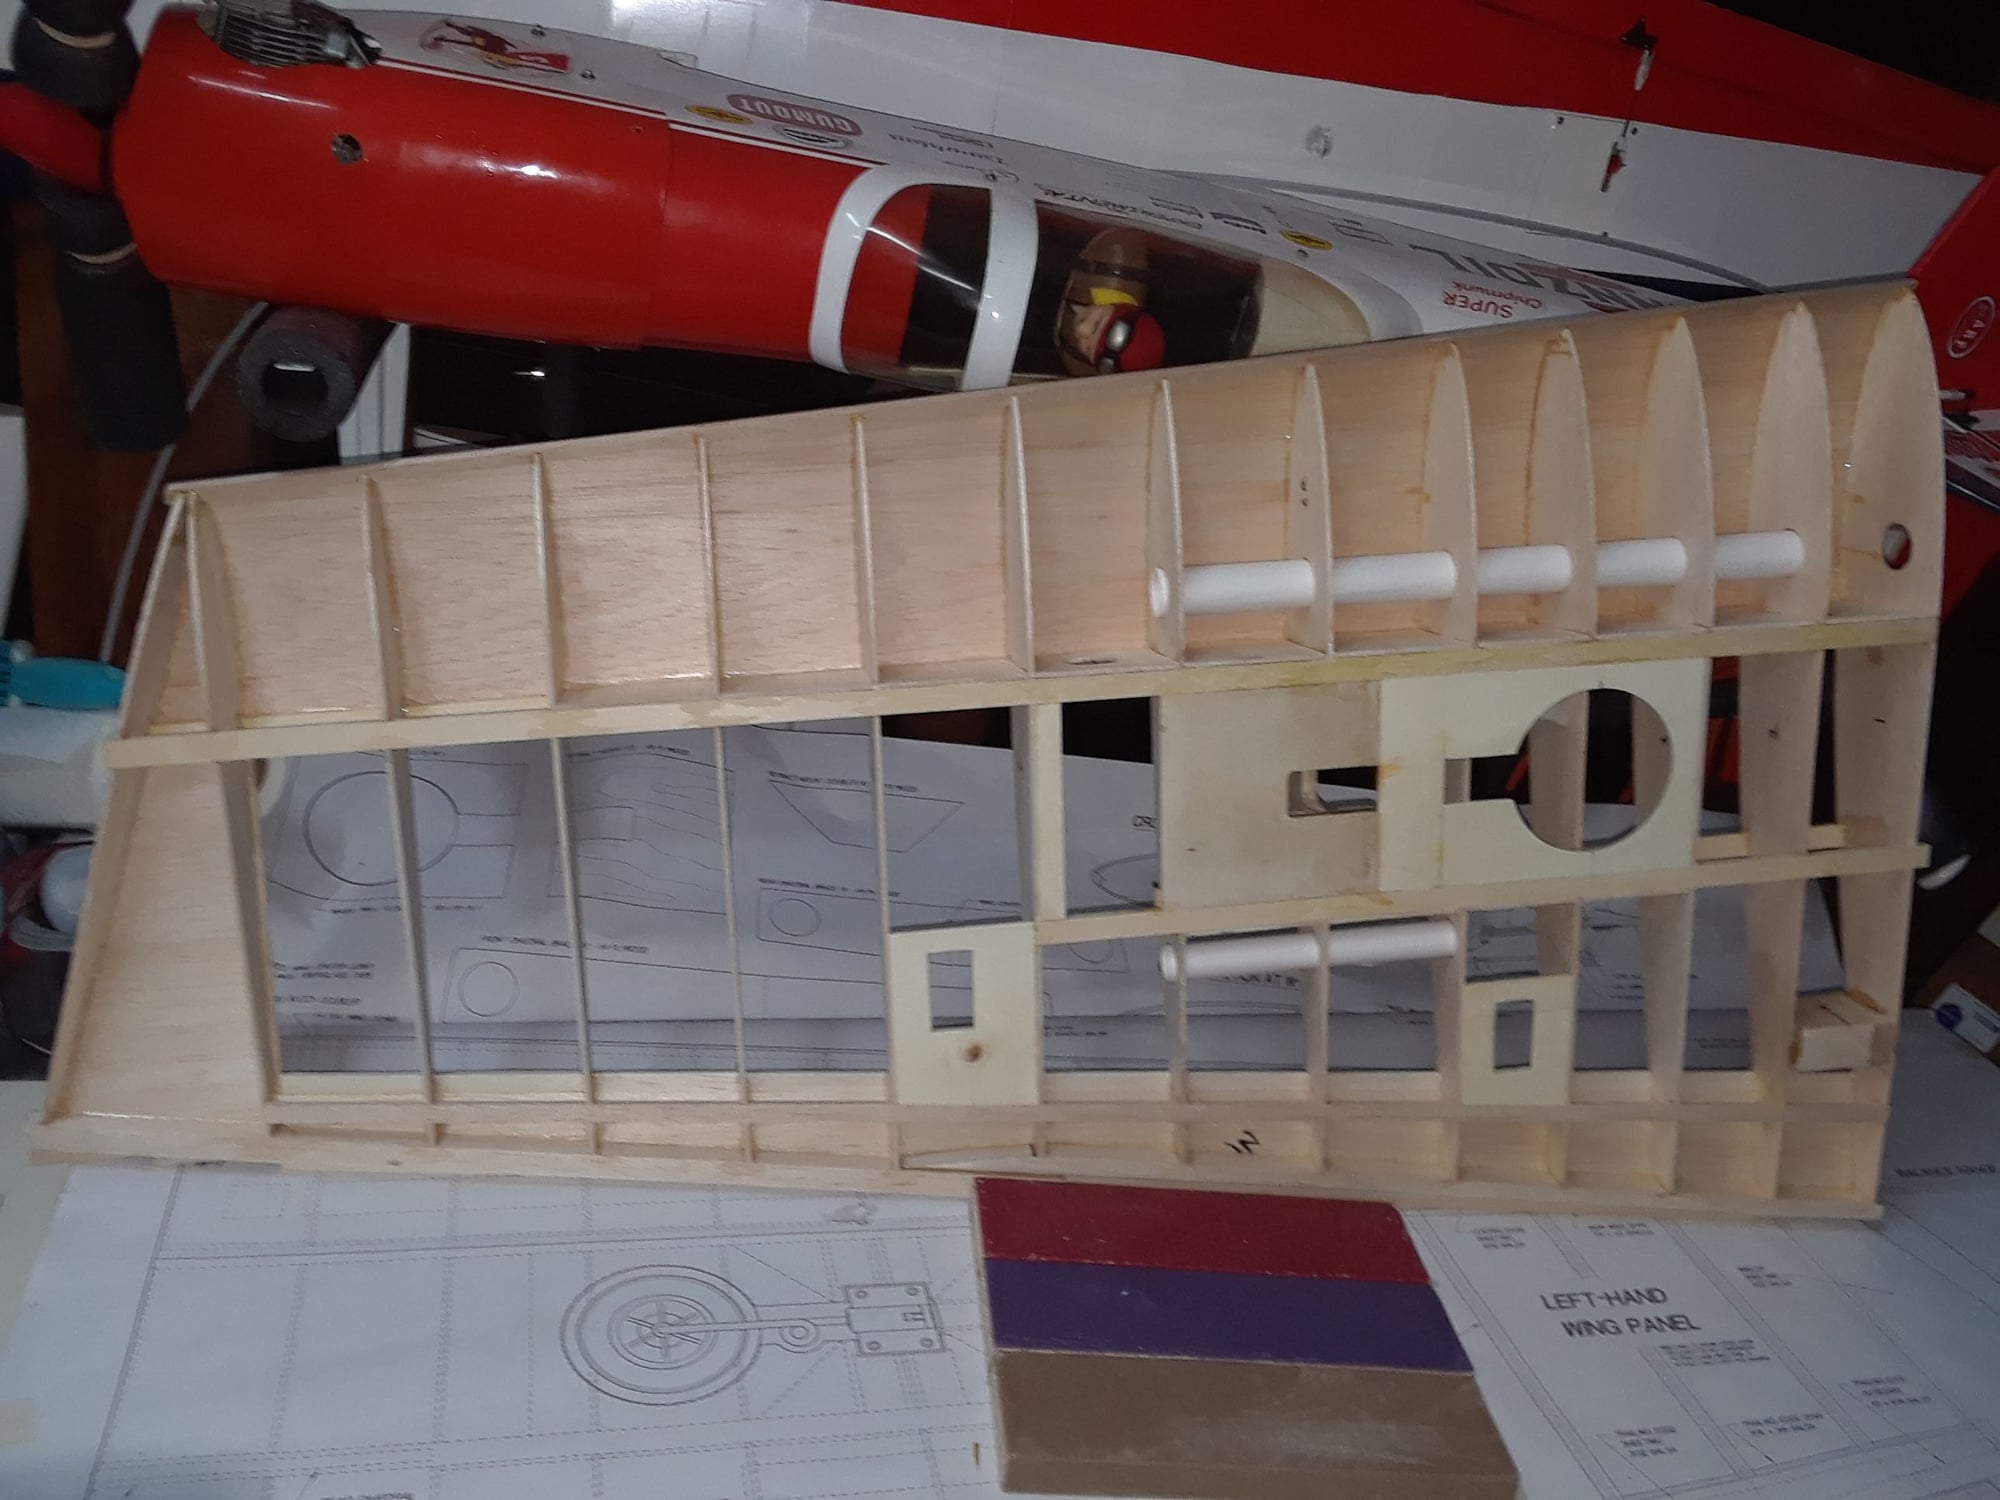
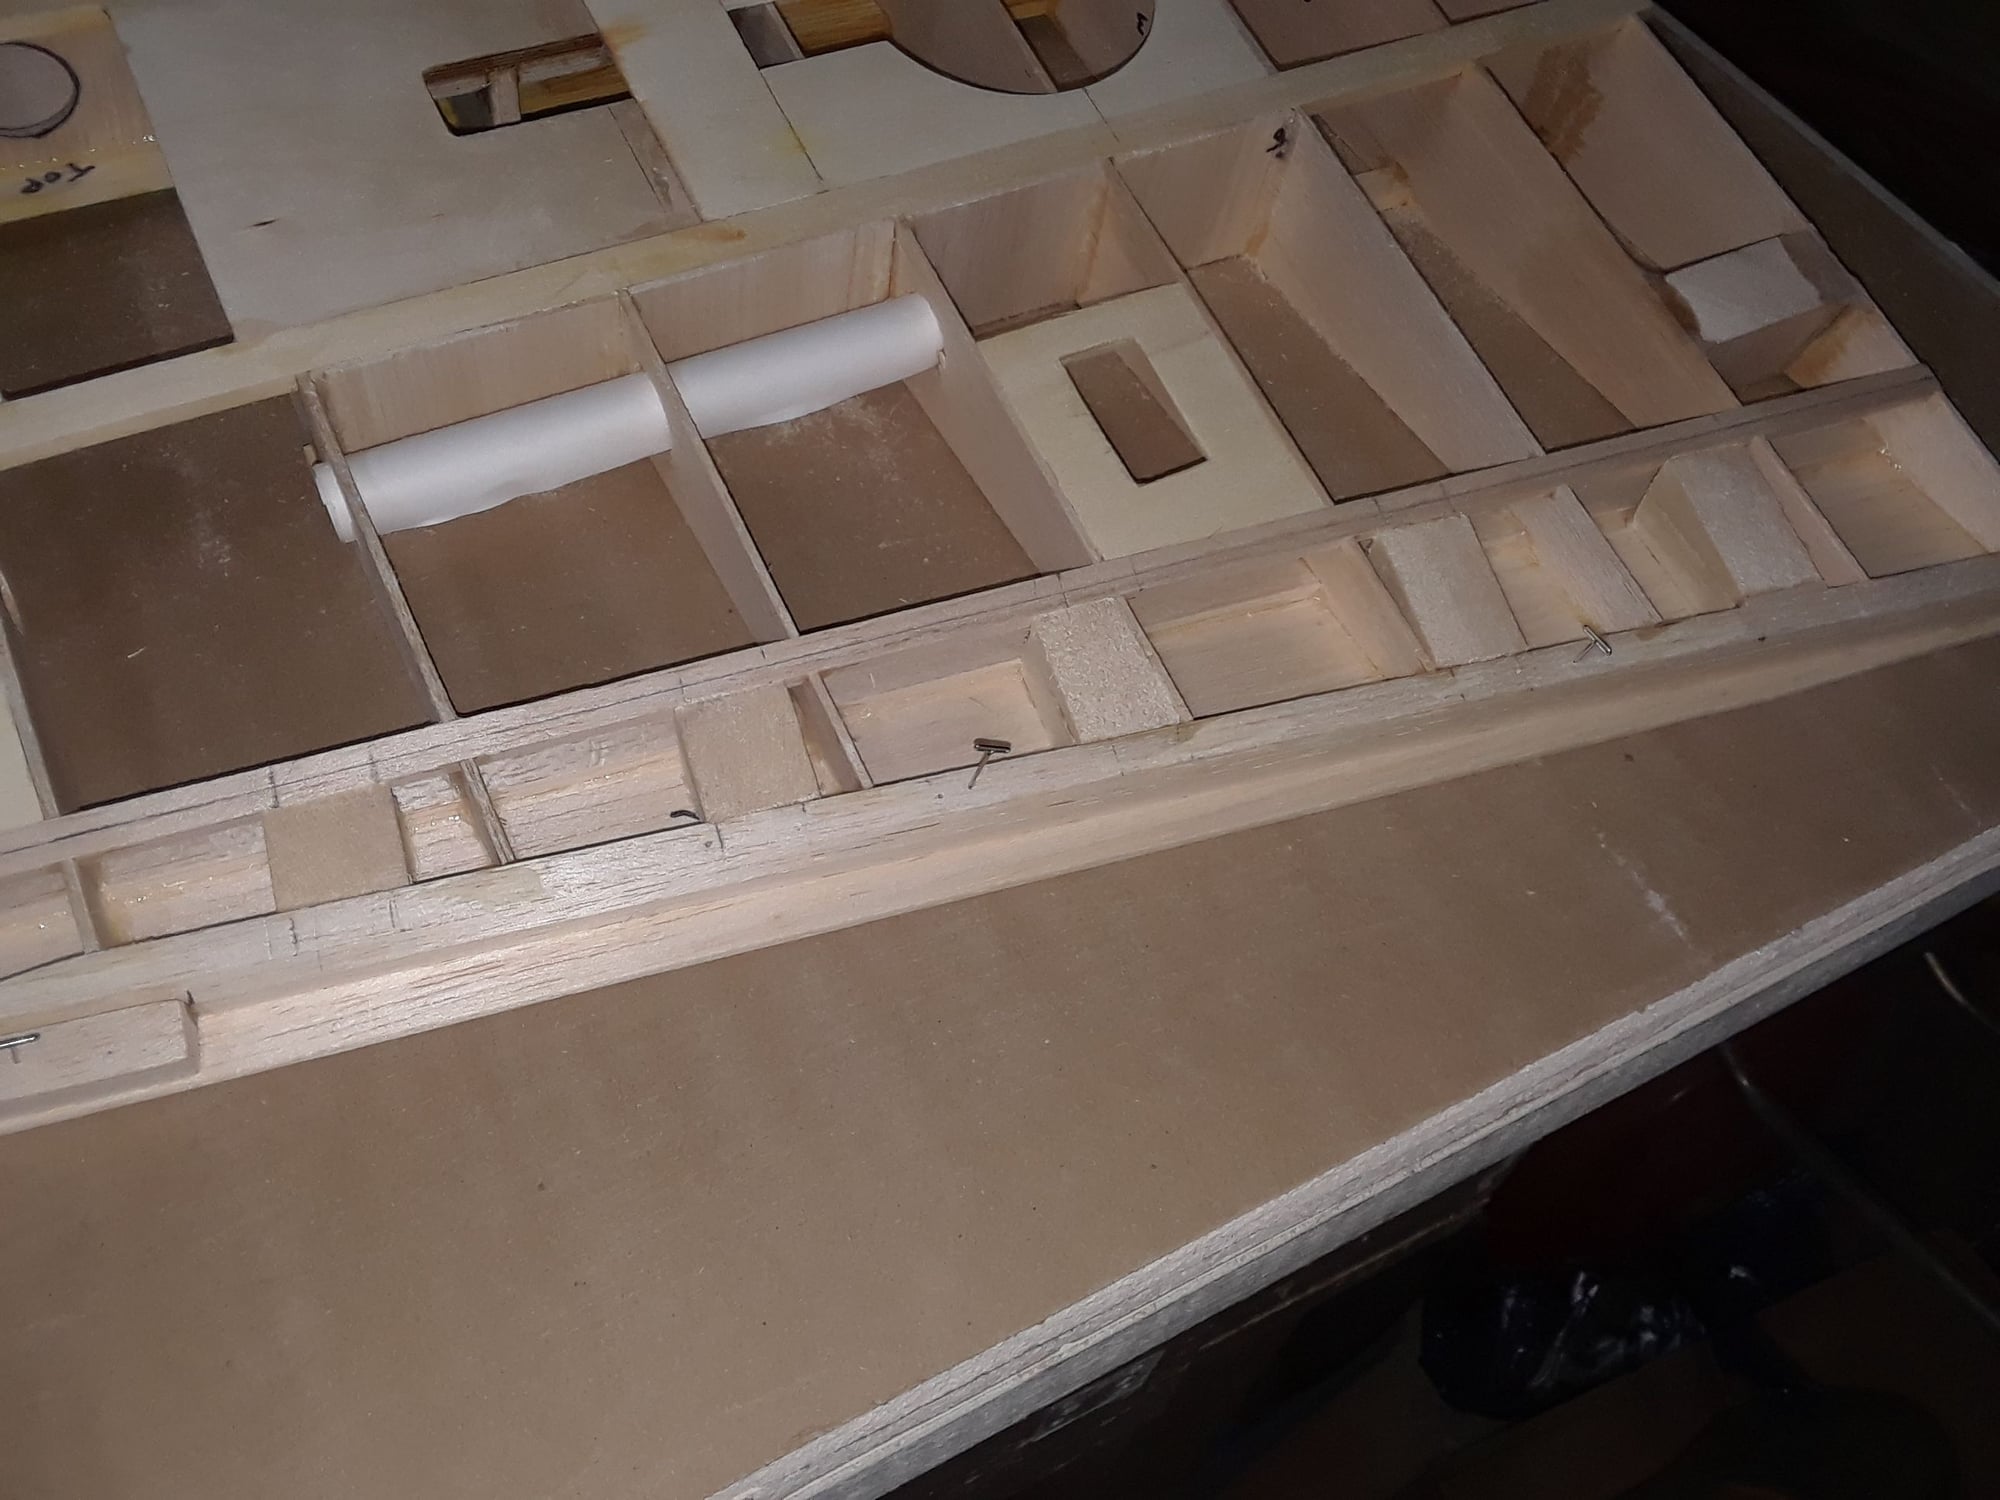
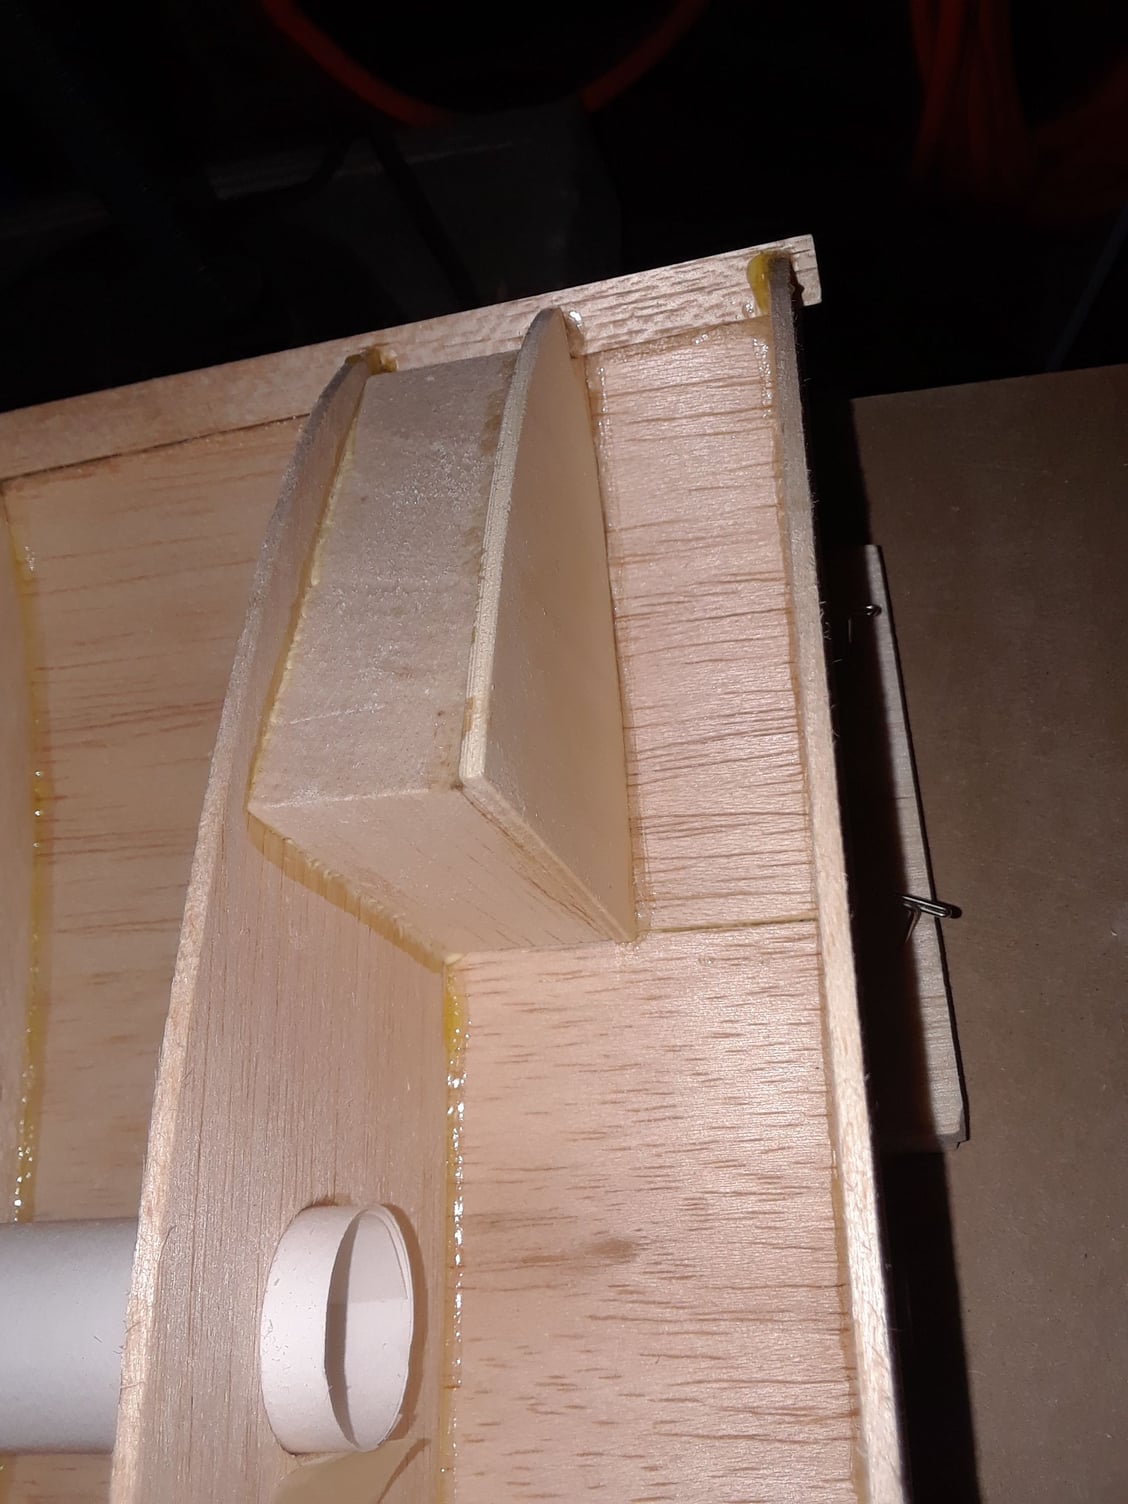
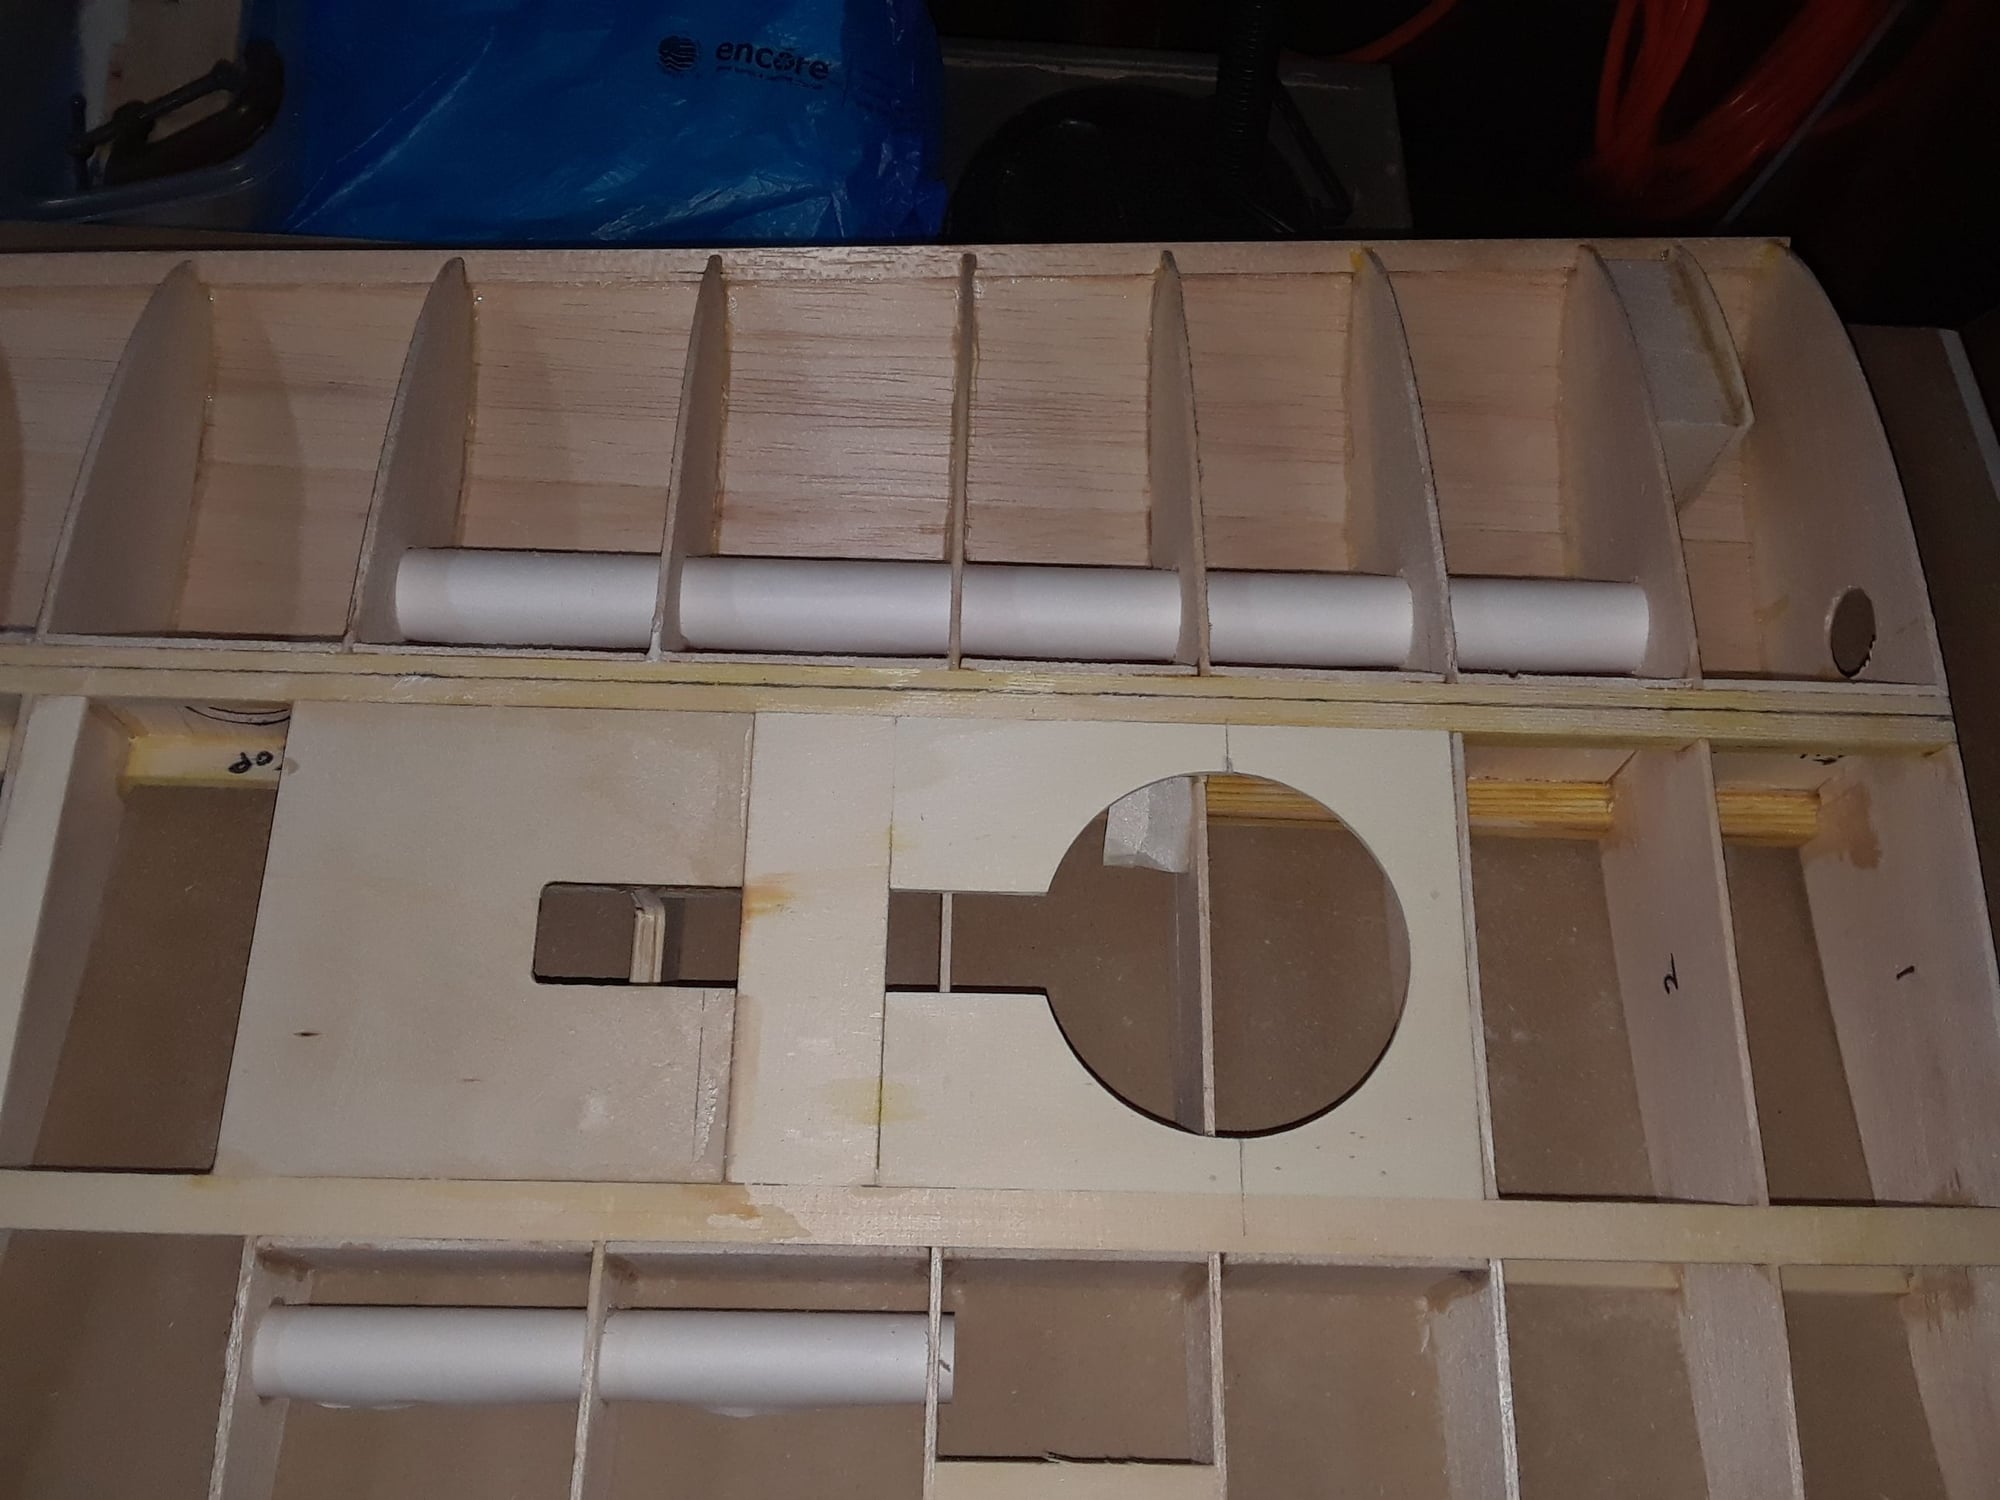
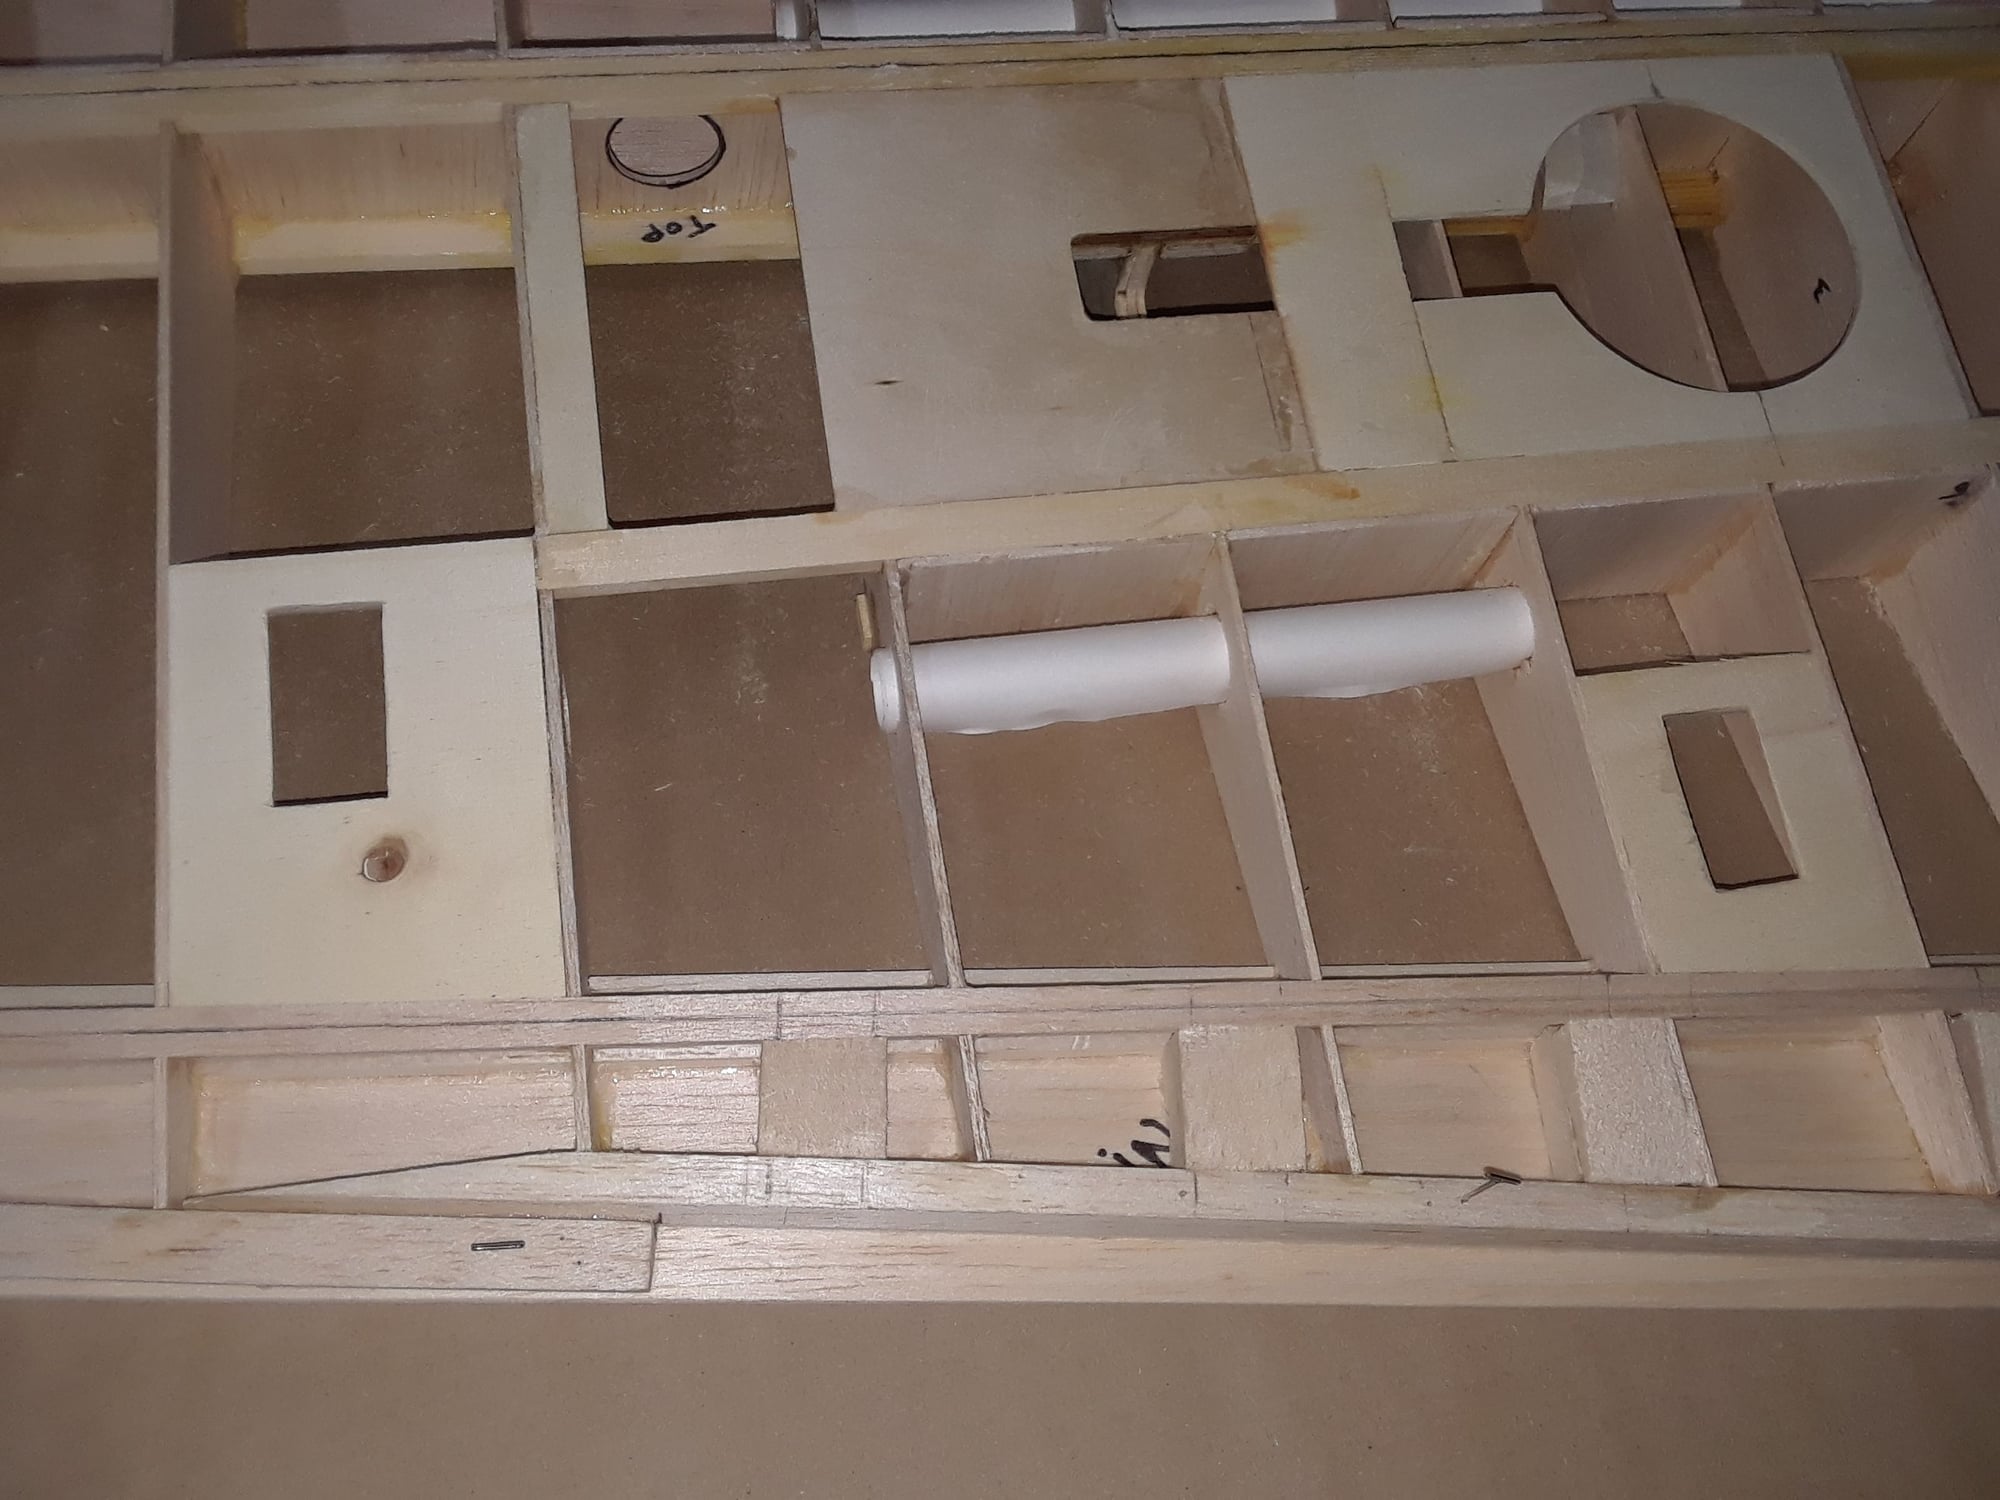
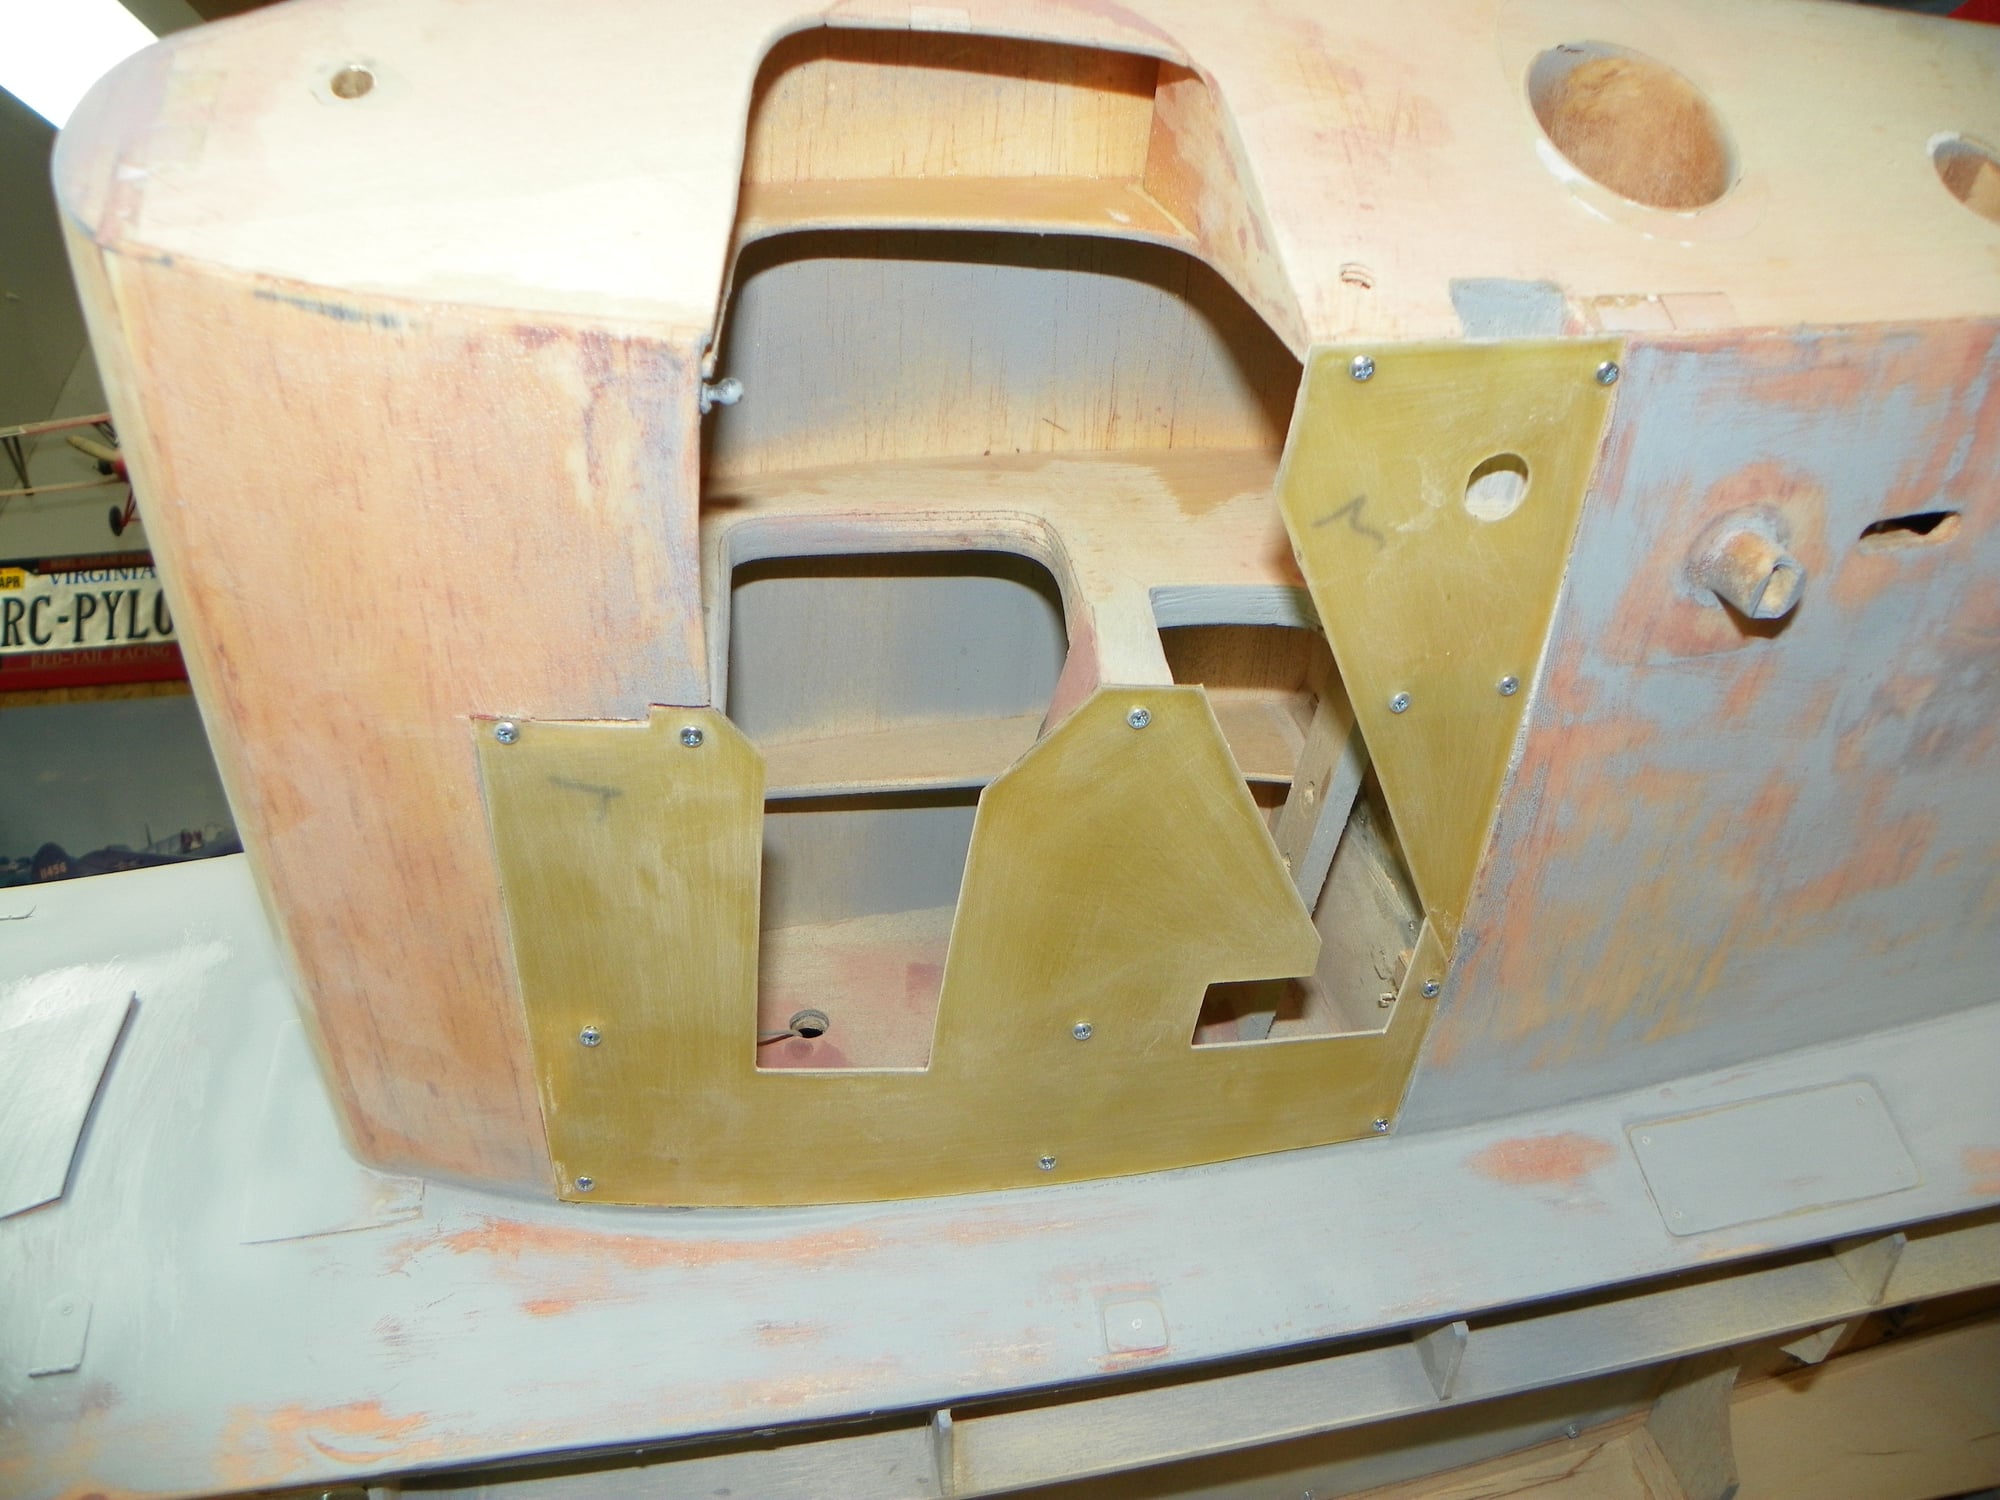
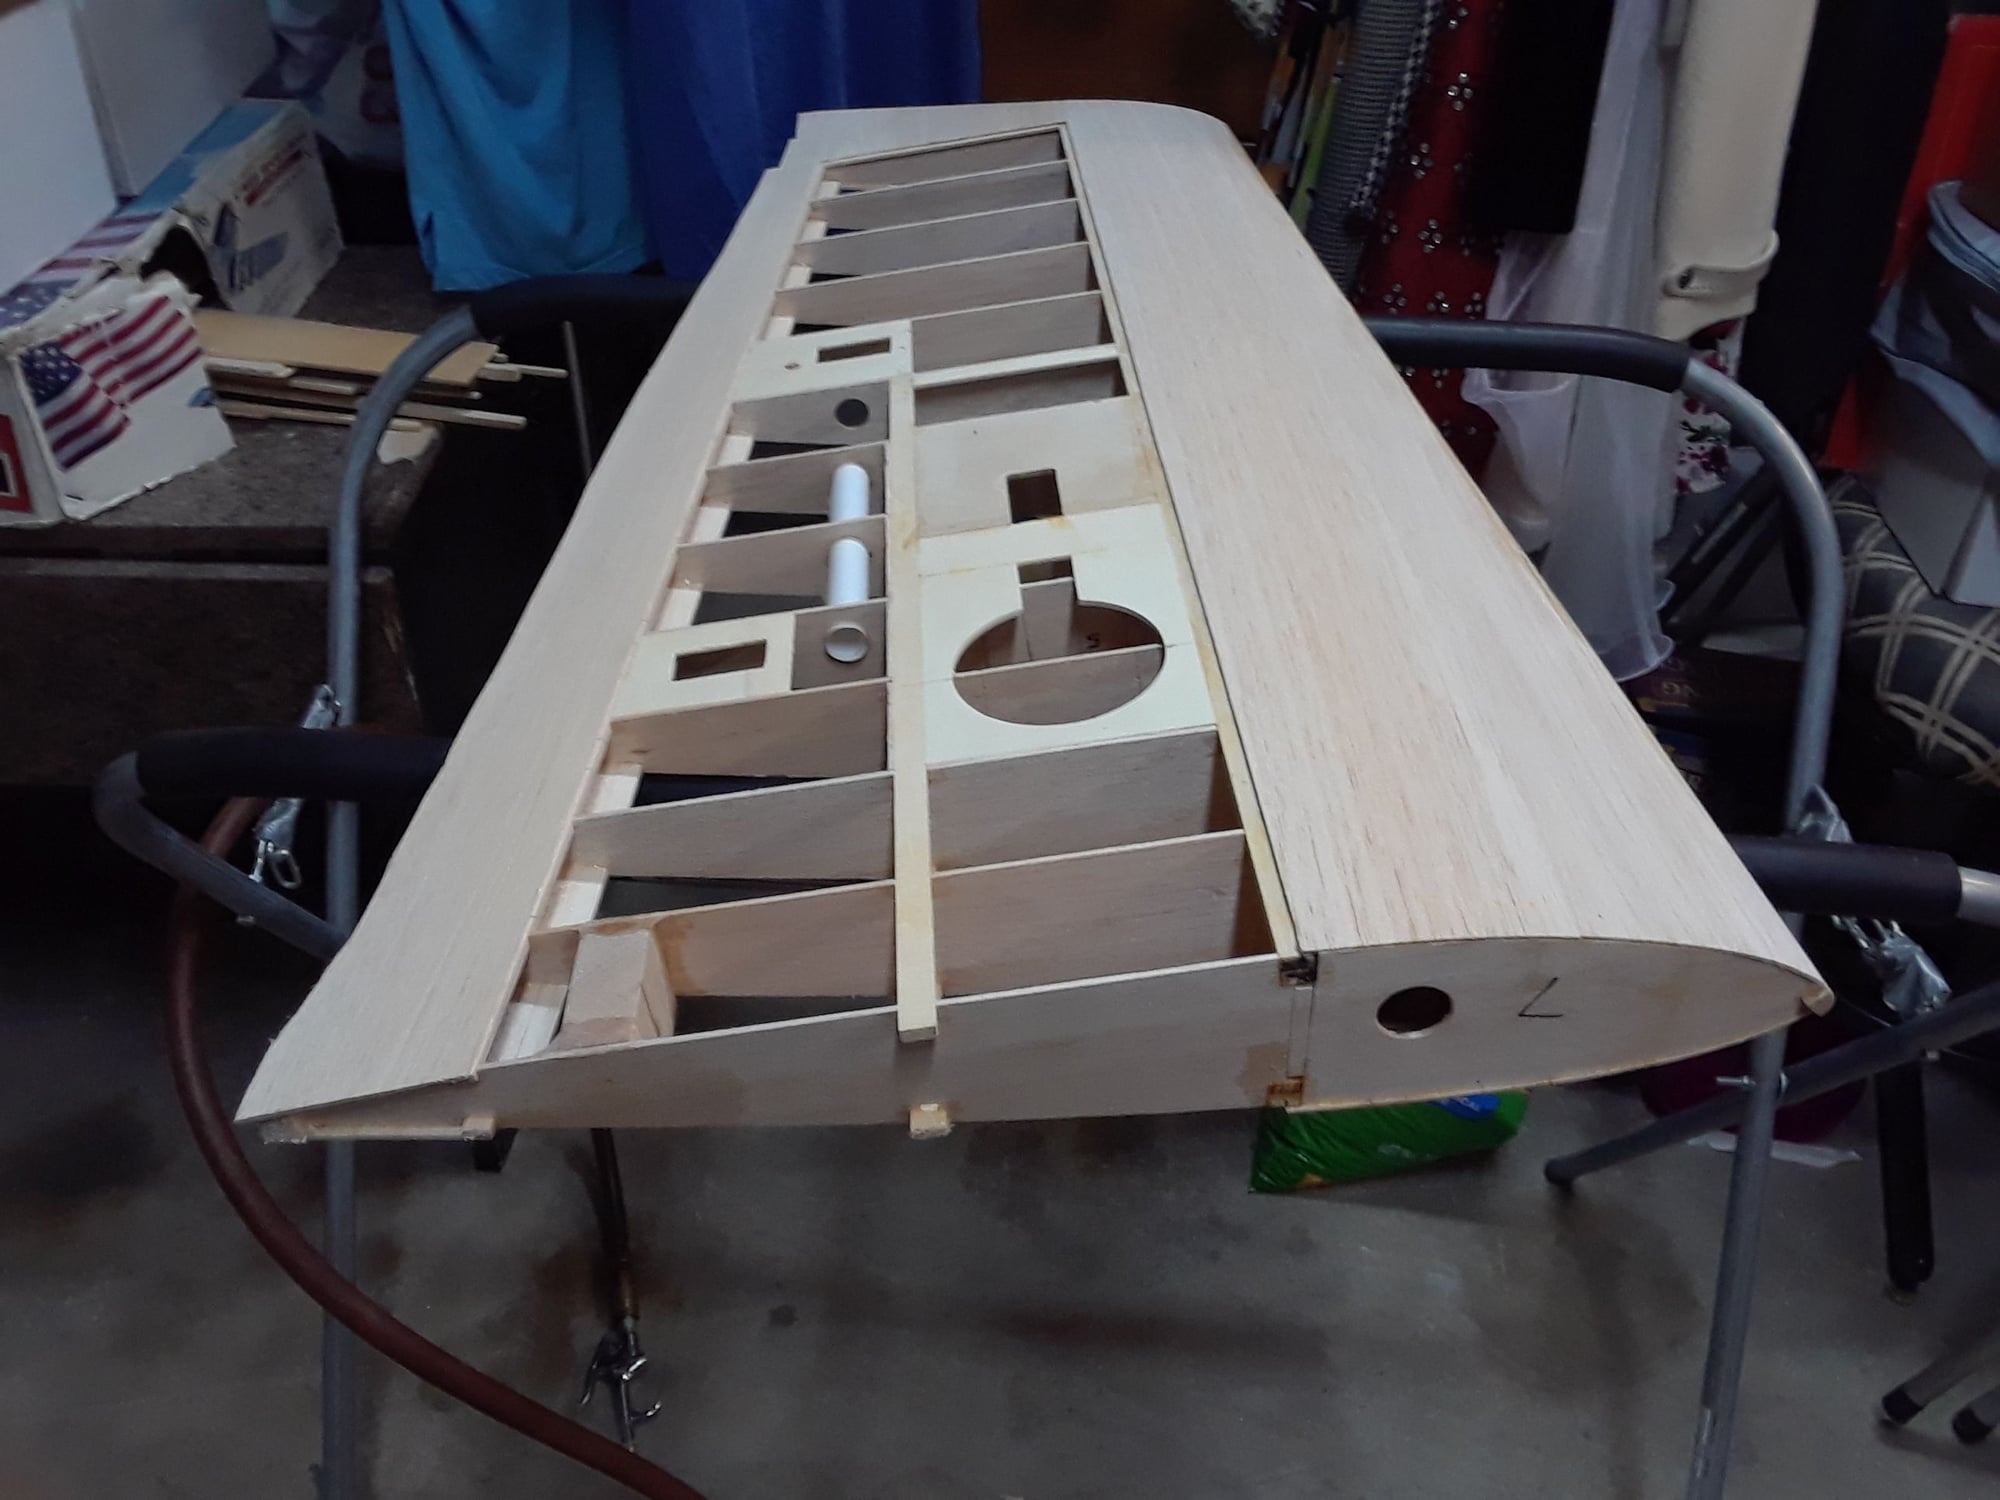
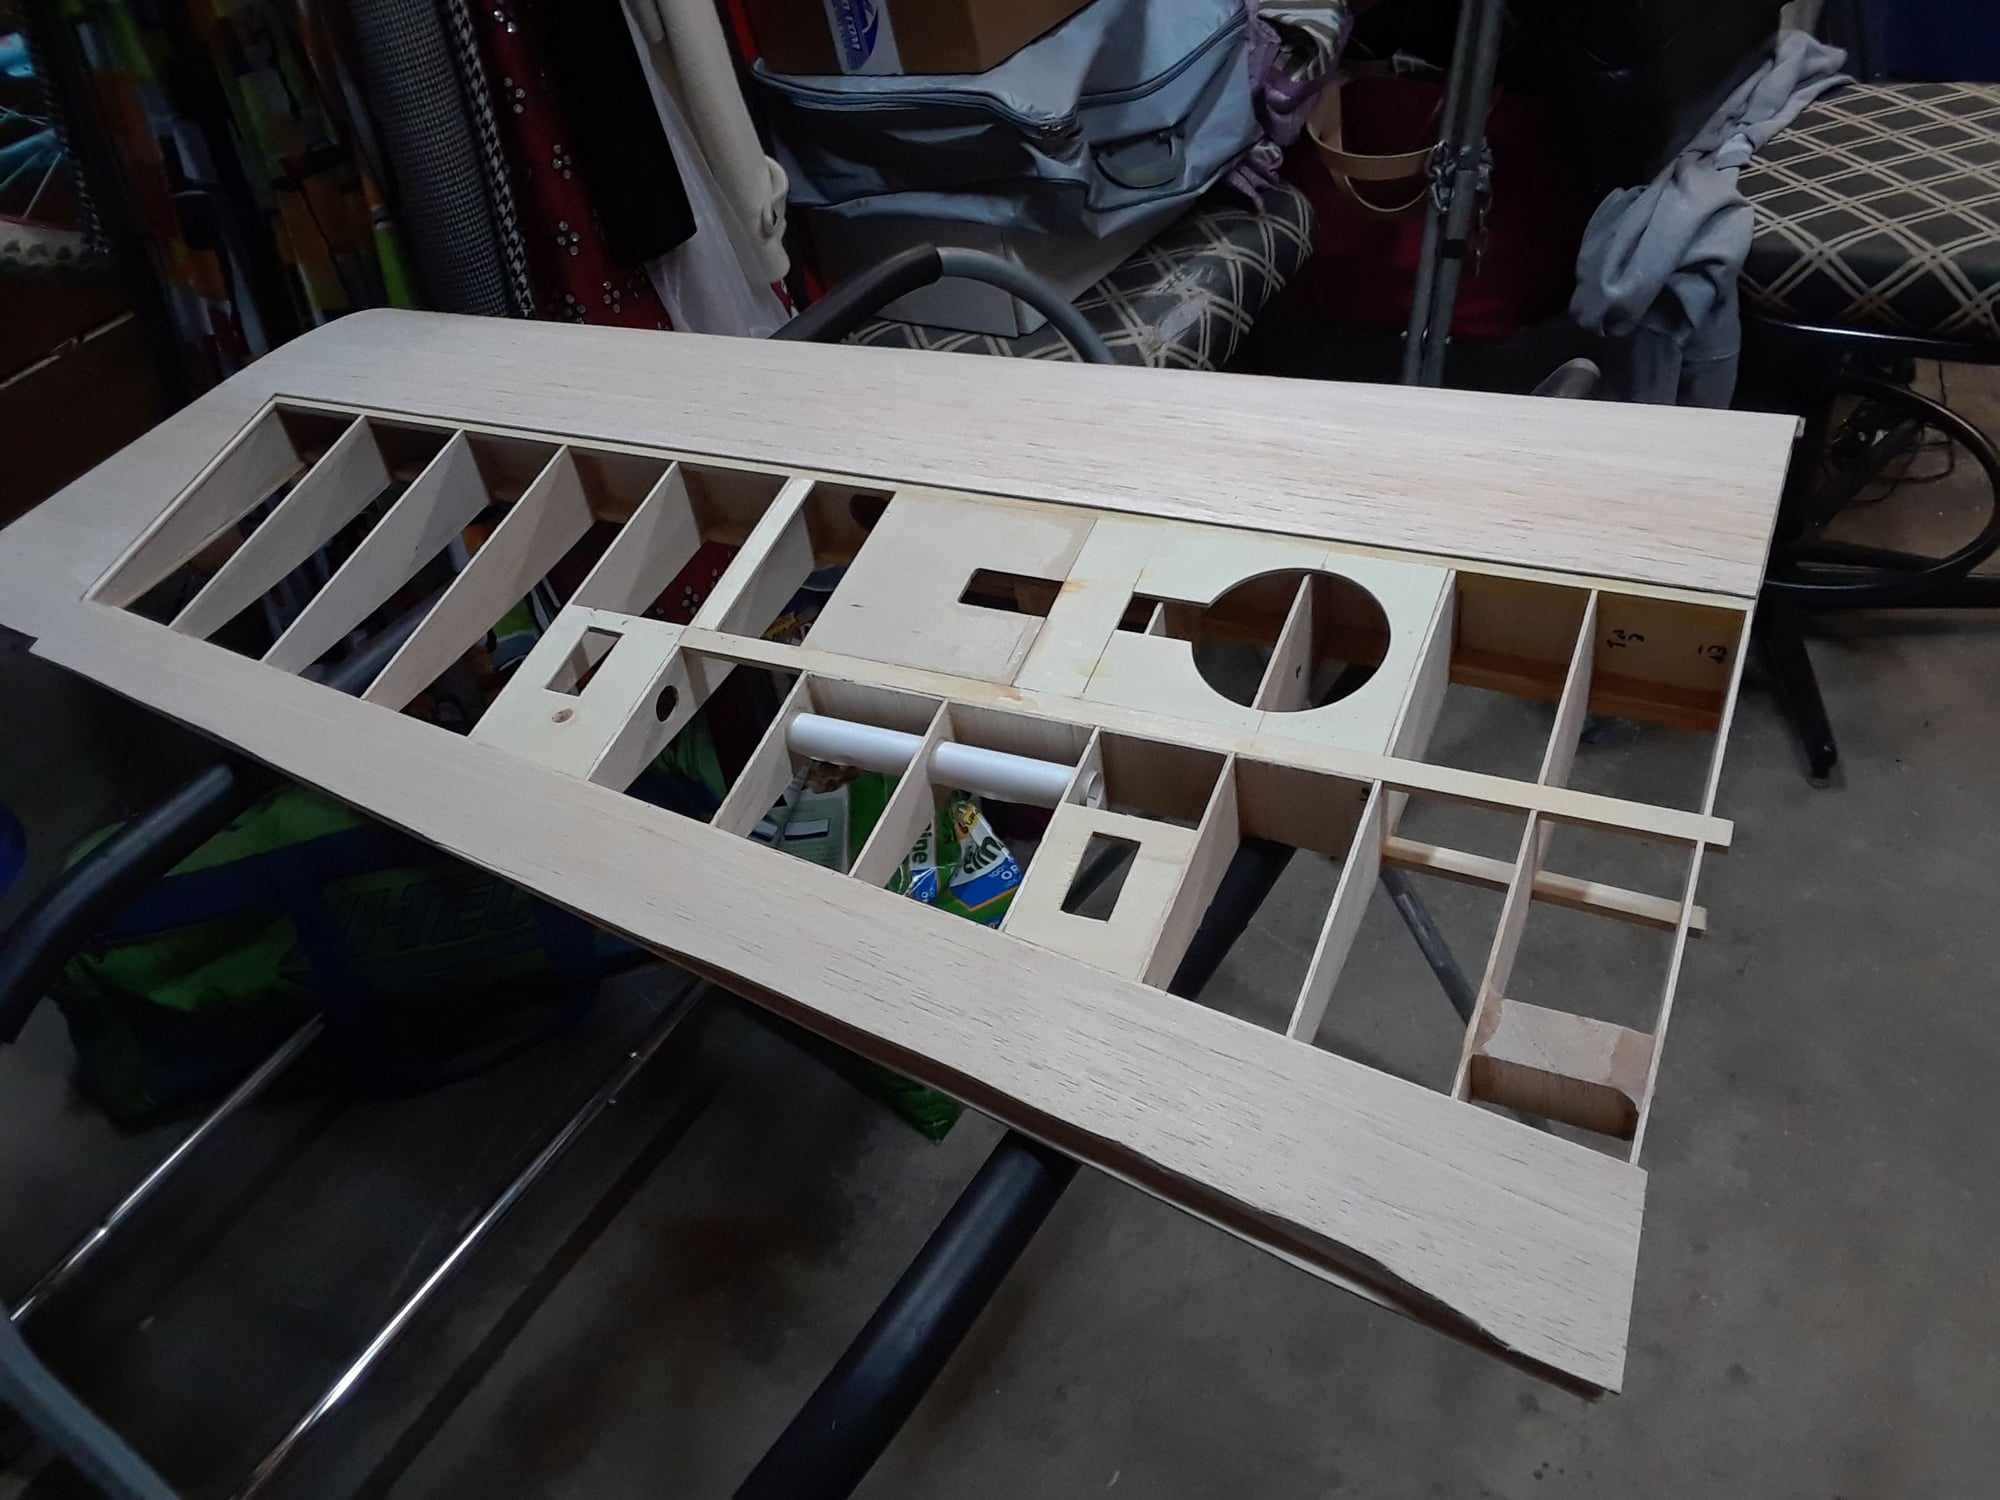
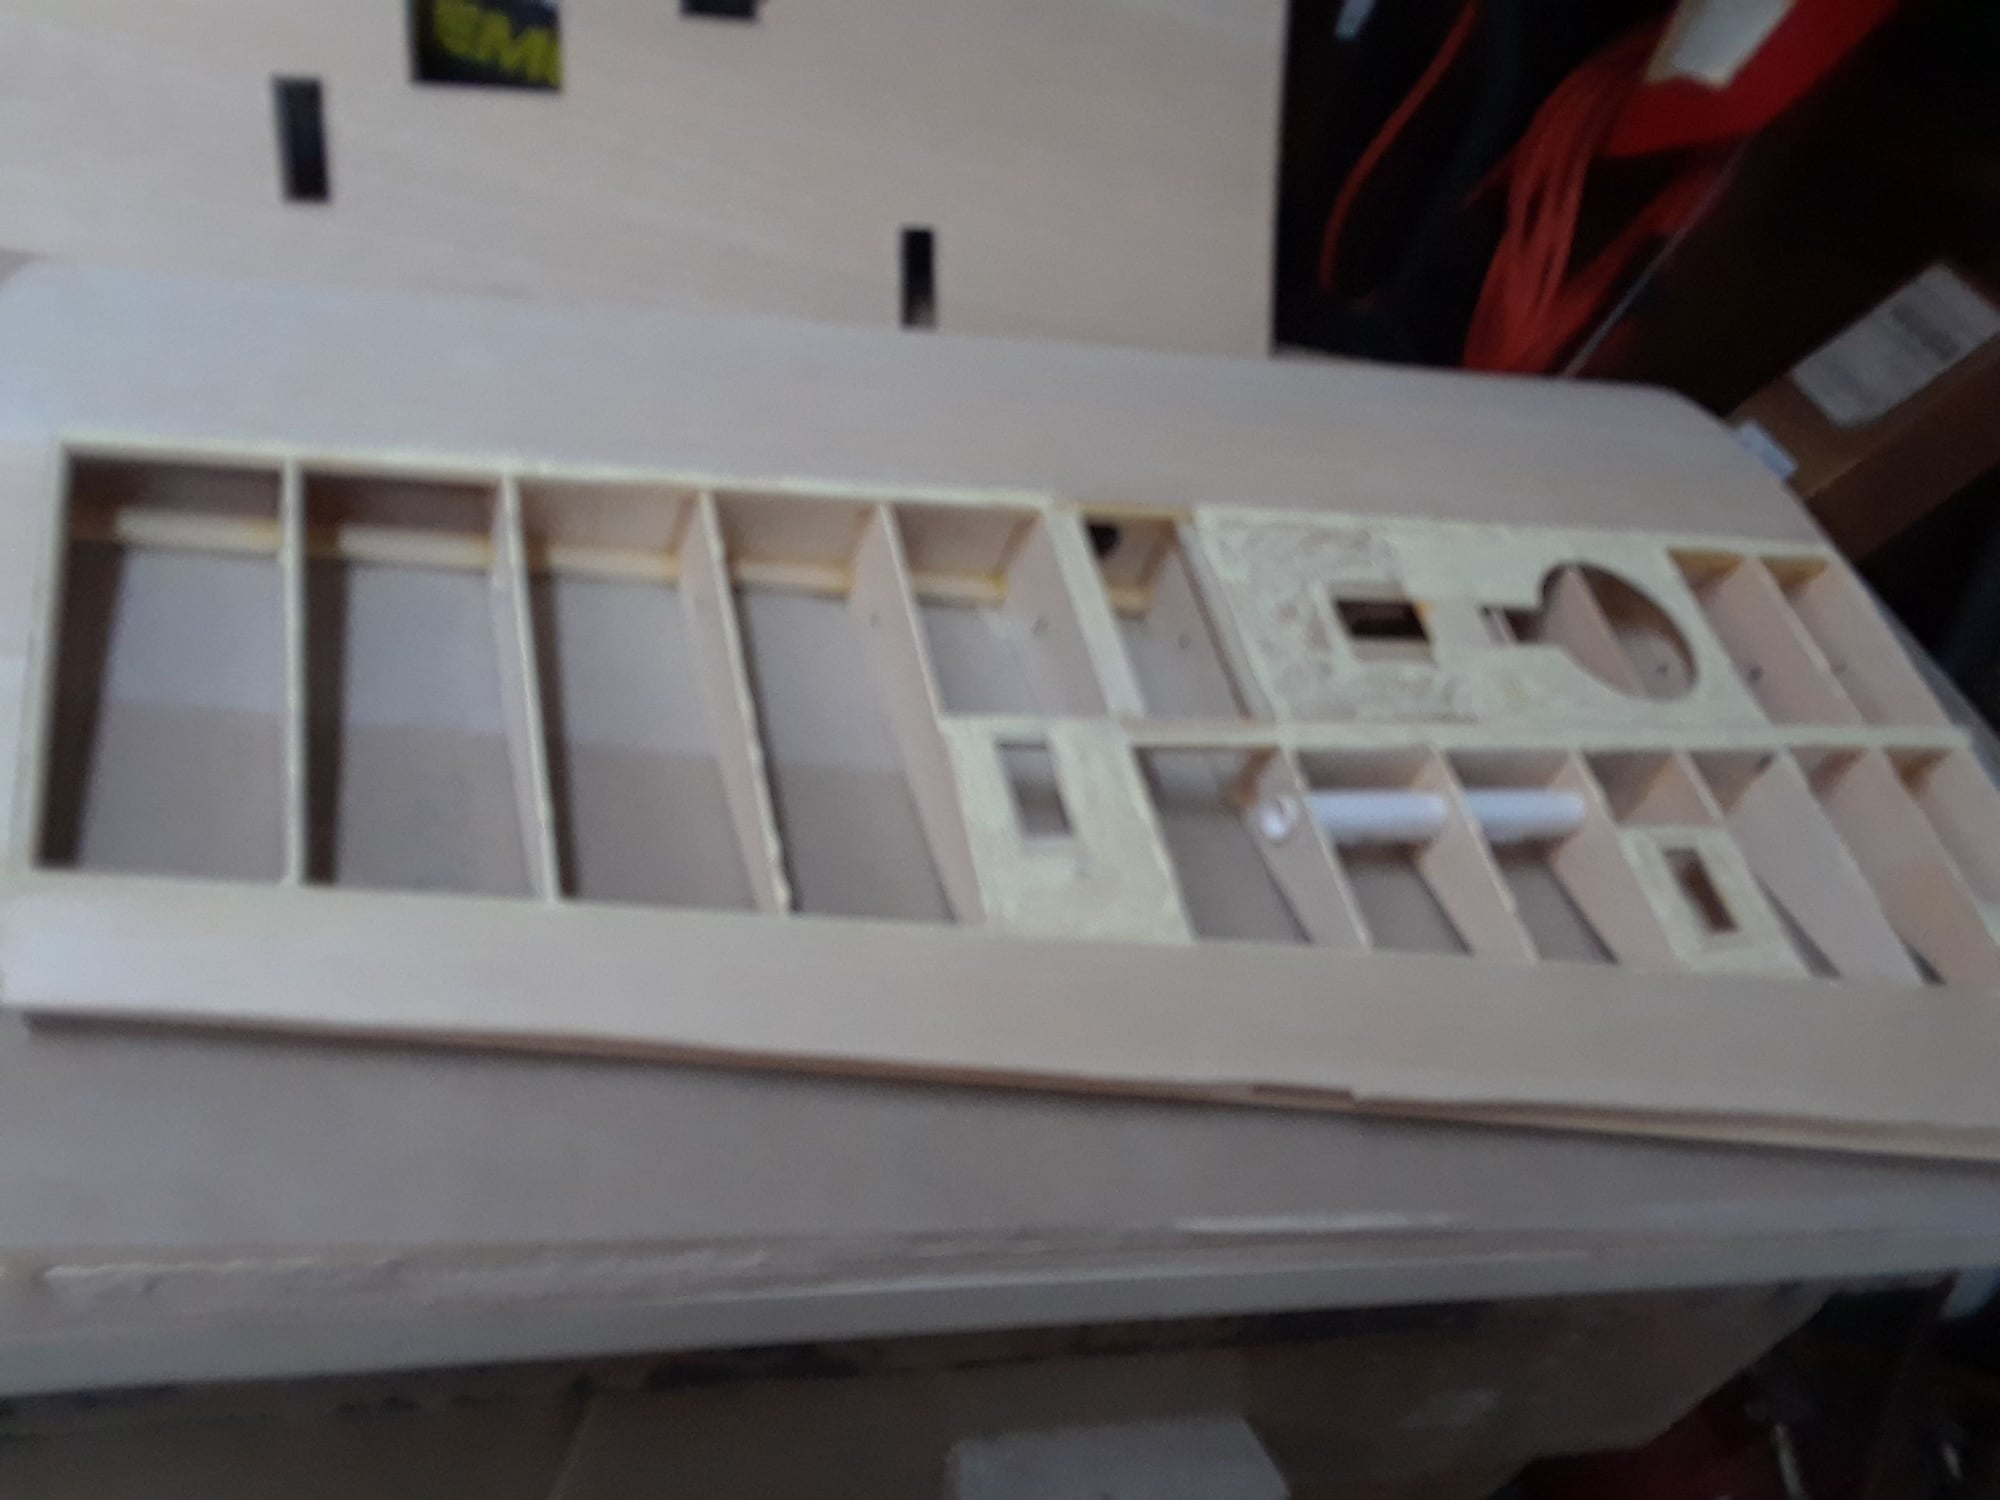
Work on the left wing has started, the wheel well has been moved closer to the center of the wing to use the Pro Link struts, epoxy has been used to glue the retracts mounts and doublers, thick CA was used for the wheel well, just enough glue to glue it, don't over do it, more CA glue will be added when the wing is removed from the table.

Last edited by CARS II; 04-05-2018 at 05:41 PM.
Old 04-05-2018, 05:43 PM
  #3849  
CARS II
My Feedback: (7)
 
CARS II's Avatar
 
Join Date: Oct 2002
Location: Sacramento CA
Posts: 6,589
Received 123 Likes on 106 Posts
Default

Double post.

Last edited by CARS II; 04-05-2018 at 07:05 PM.
Old 04-05-2018, 05:44 PM
  #3850  
CARS II
My Feedback: (7)
 
CARS II's Avatar
 
Join Date: Oct 2002
Location: Sacramento CA
Posts: 6,589
Received 123 Likes on 106 Posts
Default


Some of the changes to ribs 4 and 5, rib 6 was glued with epoxy to the gear mount.


Contact Us - Archive - Advertising - Cookie Policy - Privacy Statement - Terms of Service -

Copyright © 2024 MH Sub I, LLC dba Internet Brands. All rights reserved. Use of this site indicates your consent to the Terms of Use.