Go Back  RCU Forums > RC Airplanes > RC Jets
Reload this Page >

Reaction 54 Jet Kit

Notices
RC Jets Discuss RC jets in this forum plus rc turbines and ducted fan power systems

Reaction 54 Jet Kit

Old 04-05-2018, 06:13 PM
  #3851  
CARS II
My Feedback: (7)
 
CARS II's Avatar
 
Join Date: Oct 2002
Location: Sacramento CA
Posts: 6,589
Received 123 Likes on 106 Posts
Talking


Work continues, the paper tubes have been added.
The kit box is half way empty.

Last edited by CARS II; 04-05-2018 at 06:18 PM.
Old 04-05-2018, 07:01 PM
  #3852  
CARS II
My Feedback: (7)
 
CARS II's Avatar
 
Join Date: Oct 2002
Location: Sacramento CA
Posts: 6,589
Received 123 Likes on 106 Posts
Default


Done for tonight, tomorrow is going to rain all day so, I will be building some more tomorrow, probably continue working on the wings to the detail section.

Last edited by CARS II; 04-05-2018 at 07:08 PM.
Old 04-06-2018, 01:01 PM
  #3853  
CARS II
My Feedback: (7)
 
CARS II's Avatar
 
Join Date: Oct 2002
Location: Sacramento CA
Posts: 6,589
Received 123 Likes on 106 Posts
Default


Moving forward nicely lunch break.
Old 04-06-2018, 08:08 PM
  #3854  
CARS II
My Feedback: (7)
 
CARS II's Avatar
 
Join Date: Oct 2002
Location: Sacramento CA
Posts: 6,589
Received 123 Likes on 106 Posts
Default


Waiting for the yellow glue to dry then the wing will be removed from the table.

Last edited by CARS II; 04-06-2018 at 09:11 PM.
Old 04-07-2018, 08:58 PM
  #3855  
CARS II
My Feedback: (7)
 
CARS II's Avatar
 
Join Date: Oct 2002
Location: Sacramento CA
Posts: 6,589
Received 123 Likes on 106 Posts
Default


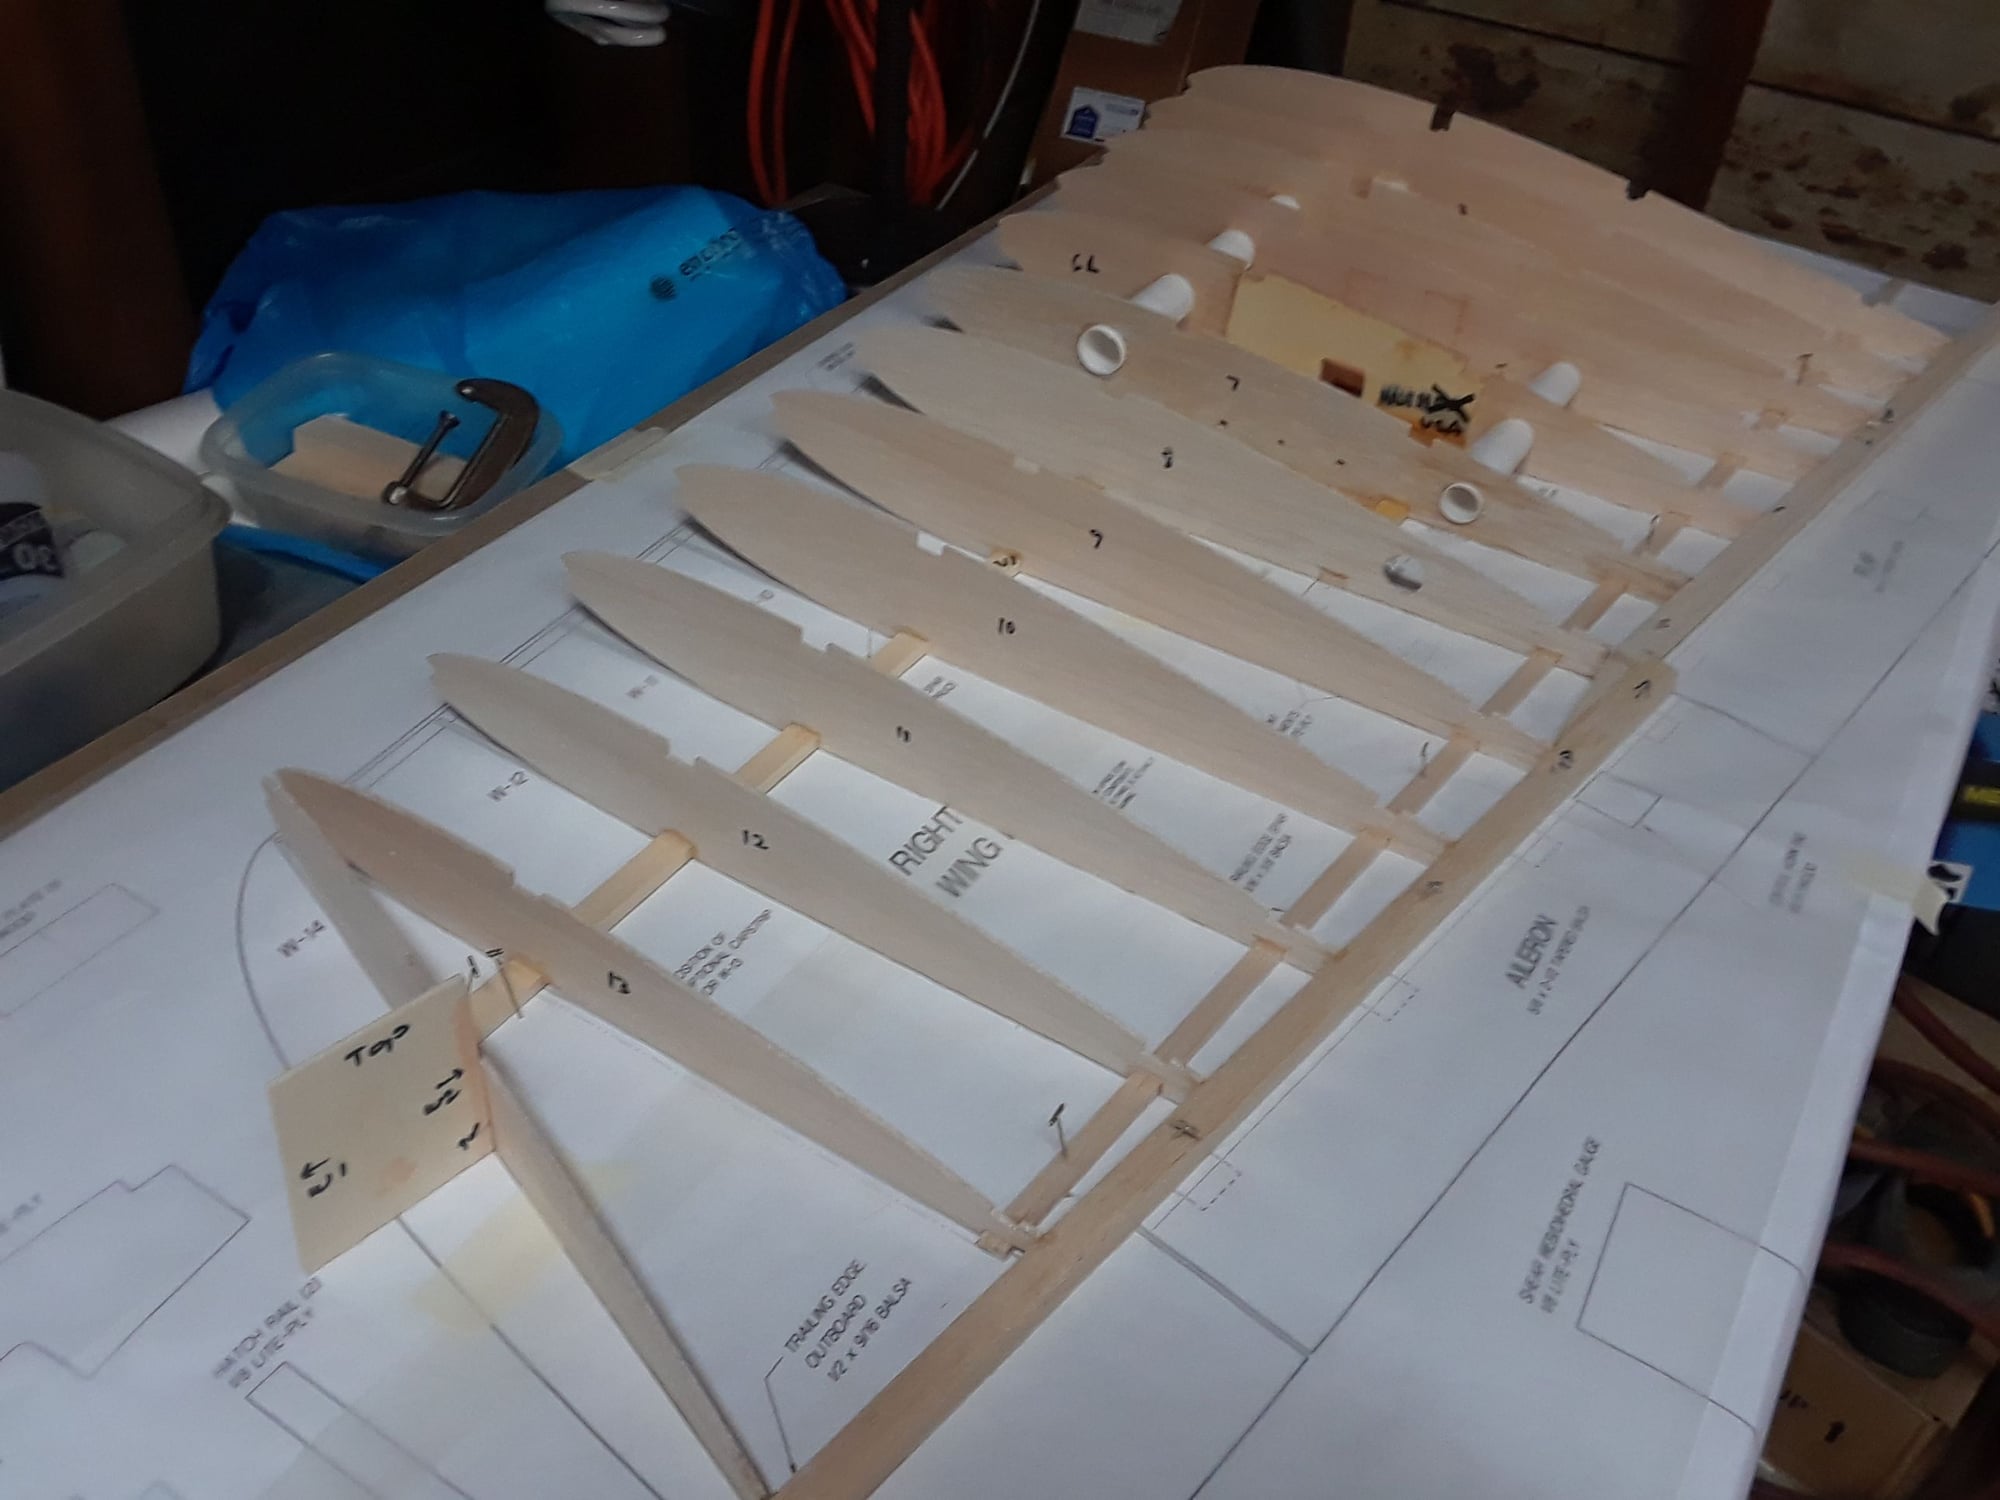
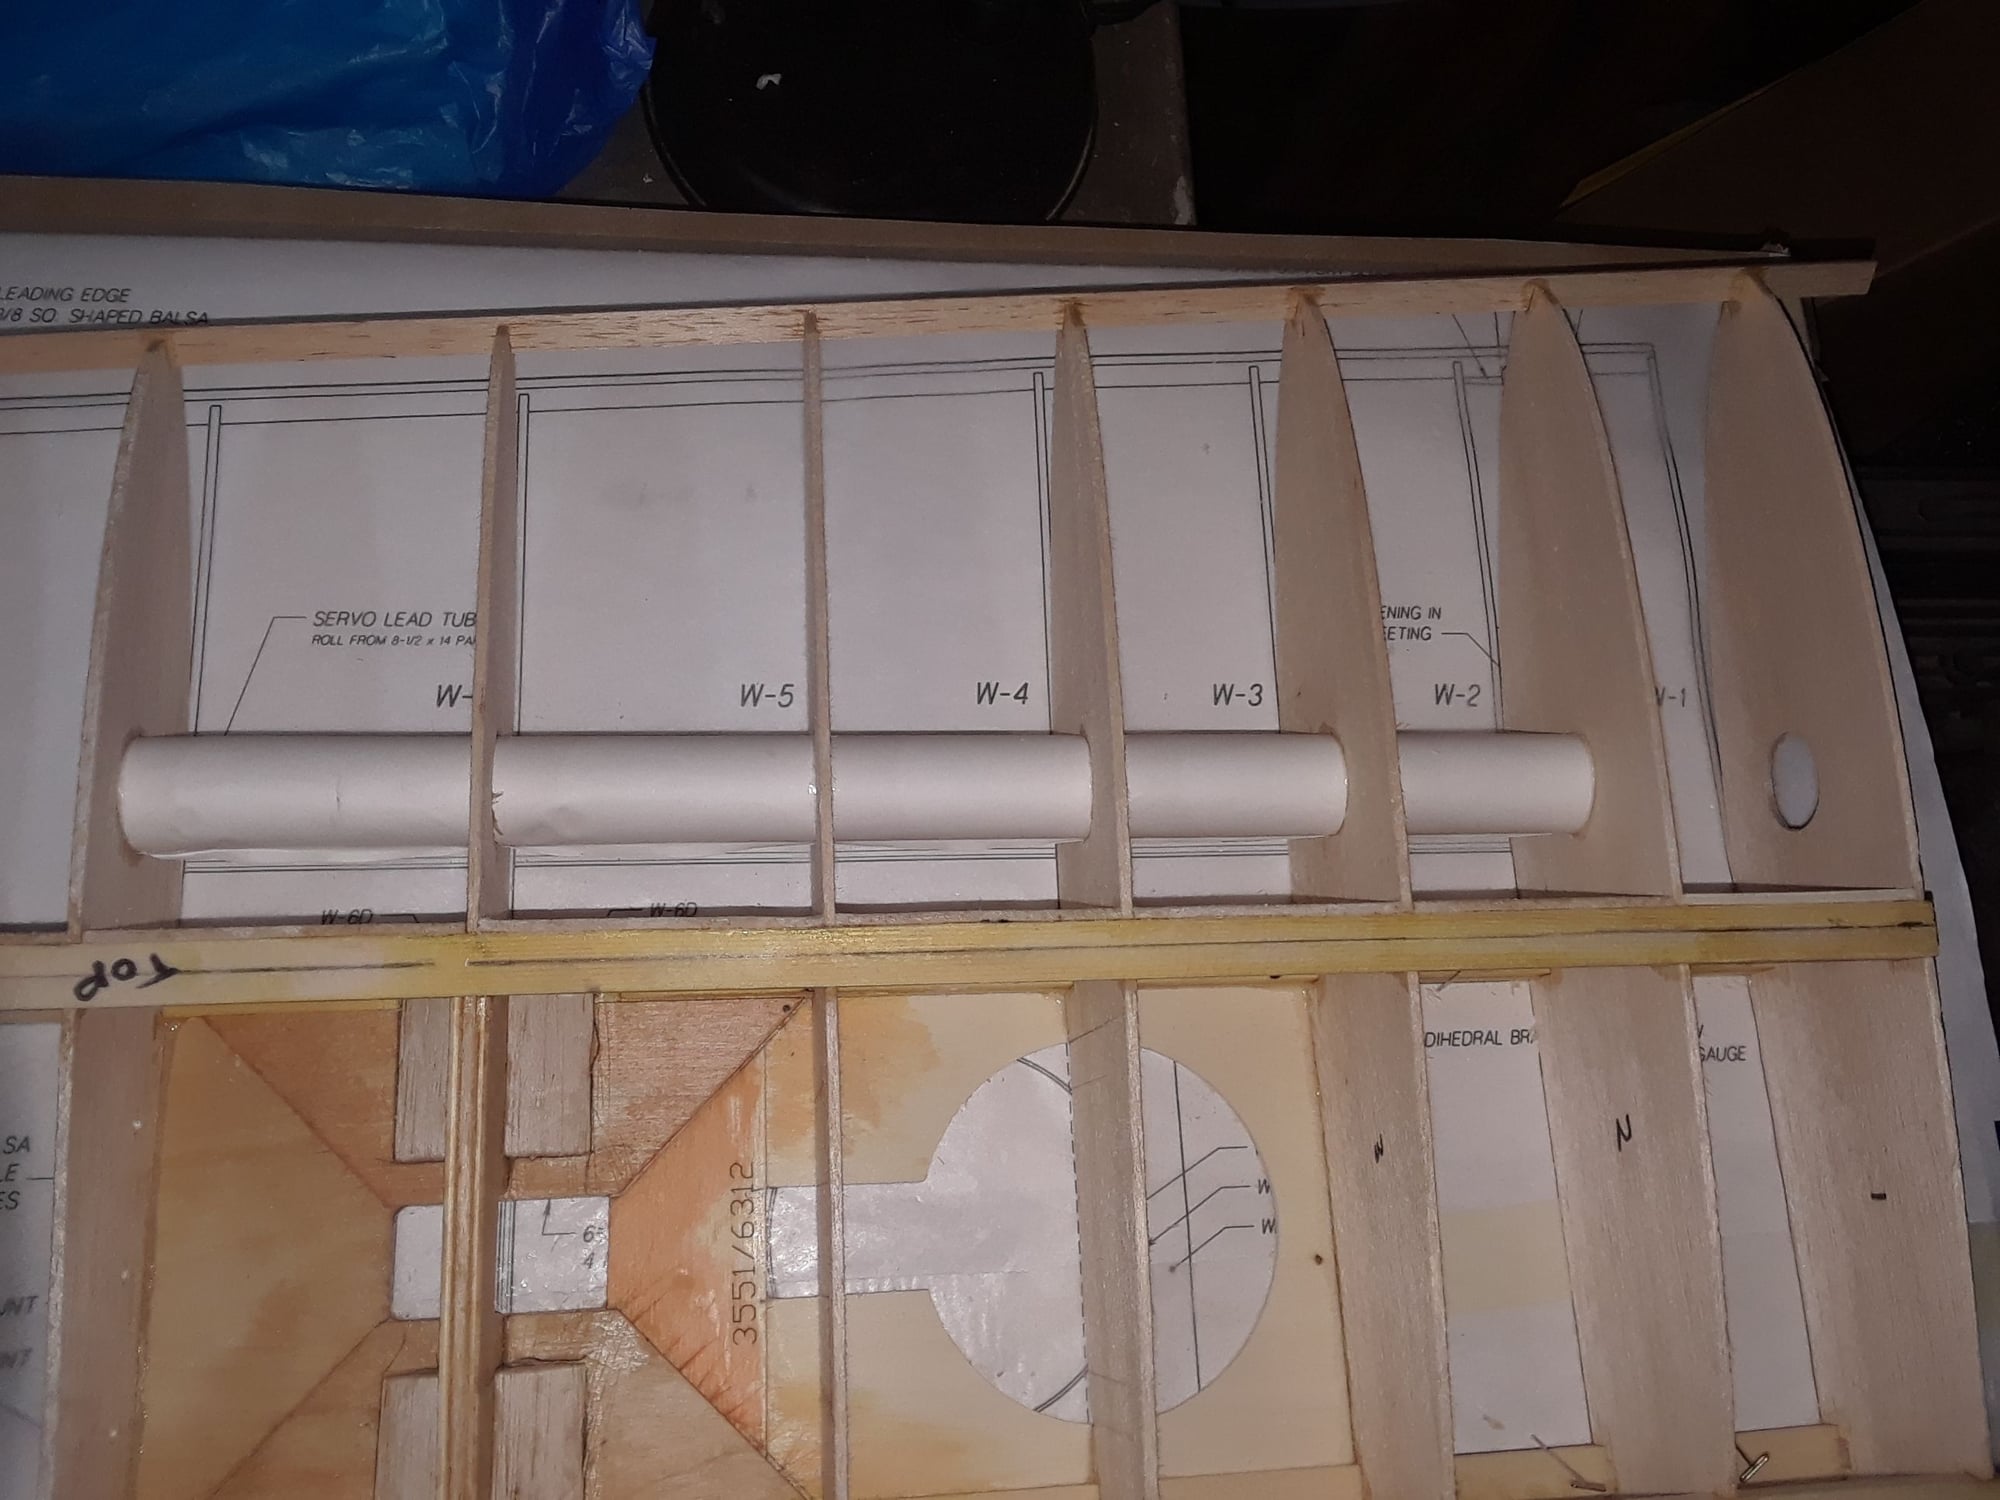
The wing is off the table, the bottom has been sanded down and mid CA has been added all over all the joints, this wing came out much better than the first one, when gluing the LE sheeting I decided to add thick CA to the front of the LE sheeting then position it on the LE and sprayed accelerator from above of it, it worked much better this way.

Last edited by CARS II; 04-07-2018 at 09:03 PM.
Old 04-07-2018, 10:38 PM
  #3856  
CARS II
My Feedback: (7)
 
CARS II's Avatar
 
Join Date: Oct 2002
Location: Sacramento CA
Posts: 6,589
Received 123 Likes on 106 Posts
Default

Done for tonight, tomorrow I will add the anchor blocks for the TJ flap hinges, so far this kit has been easy to build, if you ever build a GP trainer kit then this kit is almost no difference, that easy.
Old 04-07-2018, 10:40 PM
  #3857  
CARS II
My Feedback: (7)
 
CARS II's Avatar
 
Join Date: Oct 2002
Location: Sacramento CA
Posts: 6,589
Received 123 Likes on 106 Posts
Default


Done for tonight, tomorrow I will add the anchor blocks for the TJ flap hinges, so far this kit has been easy to build, if you ever build a GP trainer kit then this kit is almost no difference, that easy.
Old 04-08-2018, 04:32 AM
  #3858  
SALMONBUG
My Feedback: (1)
 
SALMONBUG's Avatar
 
Join Date: Feb 2003
Location: kampenhout, BELGIUM
Posts: 1,396
Likes: 0
Received 2 Likes on 2 Posts
Default

fuse ironing job complete. All I could say about my choice of making the factory color scheme is that if you are in a rush to go fly your R54 you could consider to make a other color scheme. It's not really difficult, but it's a long process. I have stab/elev and the fi/rudder done, I will tale a break in the ironing job and finish the fuse before ironing the wings . I am a bit fed up of cutting templates and apply monokote


Last edited by SALMONBUG; 04-08-2018 at 04:53 AM.
Old 04-08-2018, 10:20 AM
  #3859  
CARS II
My Feedback: (7)
 
CARS II's Avatar
 
Join Date: Oct 2002
Location: Sacramento CA
Posts: 6,589
Received 123 Likes on 106 Posts
Default

Looking good SB, yep! Some times it is best to walk away for a moment
Old 04-08-2018, 12:30 PM
  #3860  
redtail
My Feedback: (15)
 
redtail's Avatar
 
Join Date: Oct 2002
Location: Alexandria, VA
Posts: 2,625
Received 6 Likes on 6 Posts
Default

WOW - you have your own Juke Box. Well alright. Beautiful film job. Chic
Old 04-08-2018, 12:49 PM
  #3861  
SALMONBUG
My Feedback: (1)
 
SALMONBUG's Avatar
 
Join Date: Feb 2003
Location: kampenhout, BELGIUM
Posts: 1,396
Likes: 0
Received 2 Likes on 2 Posts
Default

Originally Posted by redtail
WOW - you have your own Juke Box. Well alright. Beautiful film job. Chic

where did you see a juke ?

Old 04-08-2018, 01:19 PM
  #3862  
redtail
My Feedback: (15)
 
redtail's Avatar
 
Join Date: Oct 2002
Location: Alexandria, VA
Posts: 2,625
Received 6 Likes on 6 Posts
Default

Post 3858. That is a Juke Box behind the 54 fuse. Smile Chic
Old 04-08-2018, 01:34 PM
  #3863  
SALMONBUG
My Feedback: (1)
 
SALMONBUG's Avatar
 
Join Date: Feb 2003
Location: kampenhout, BELGIUM
Posts: 1,396
Likes: 0
Received 2 Likes on 2 Posts
Default

Originally Posted by redtail
Post 3858. That is a Juke Box behind the 54 fuse. Smile Chic
I know, I was just jocking., the juke is a1959 seeburg 222, the very first stereophonic juke , it need some carefull maintenance, but still work just fine
Old 04-08-2018, 08:27 PM
  #3864  
CARS II
My Feedback: (7)
 
CARS II's Avatar
 
Join Date: Oct 2002
Location: Sacramento CA
Posts: 6,589
Received 123 Likes on 106 Posts
Default


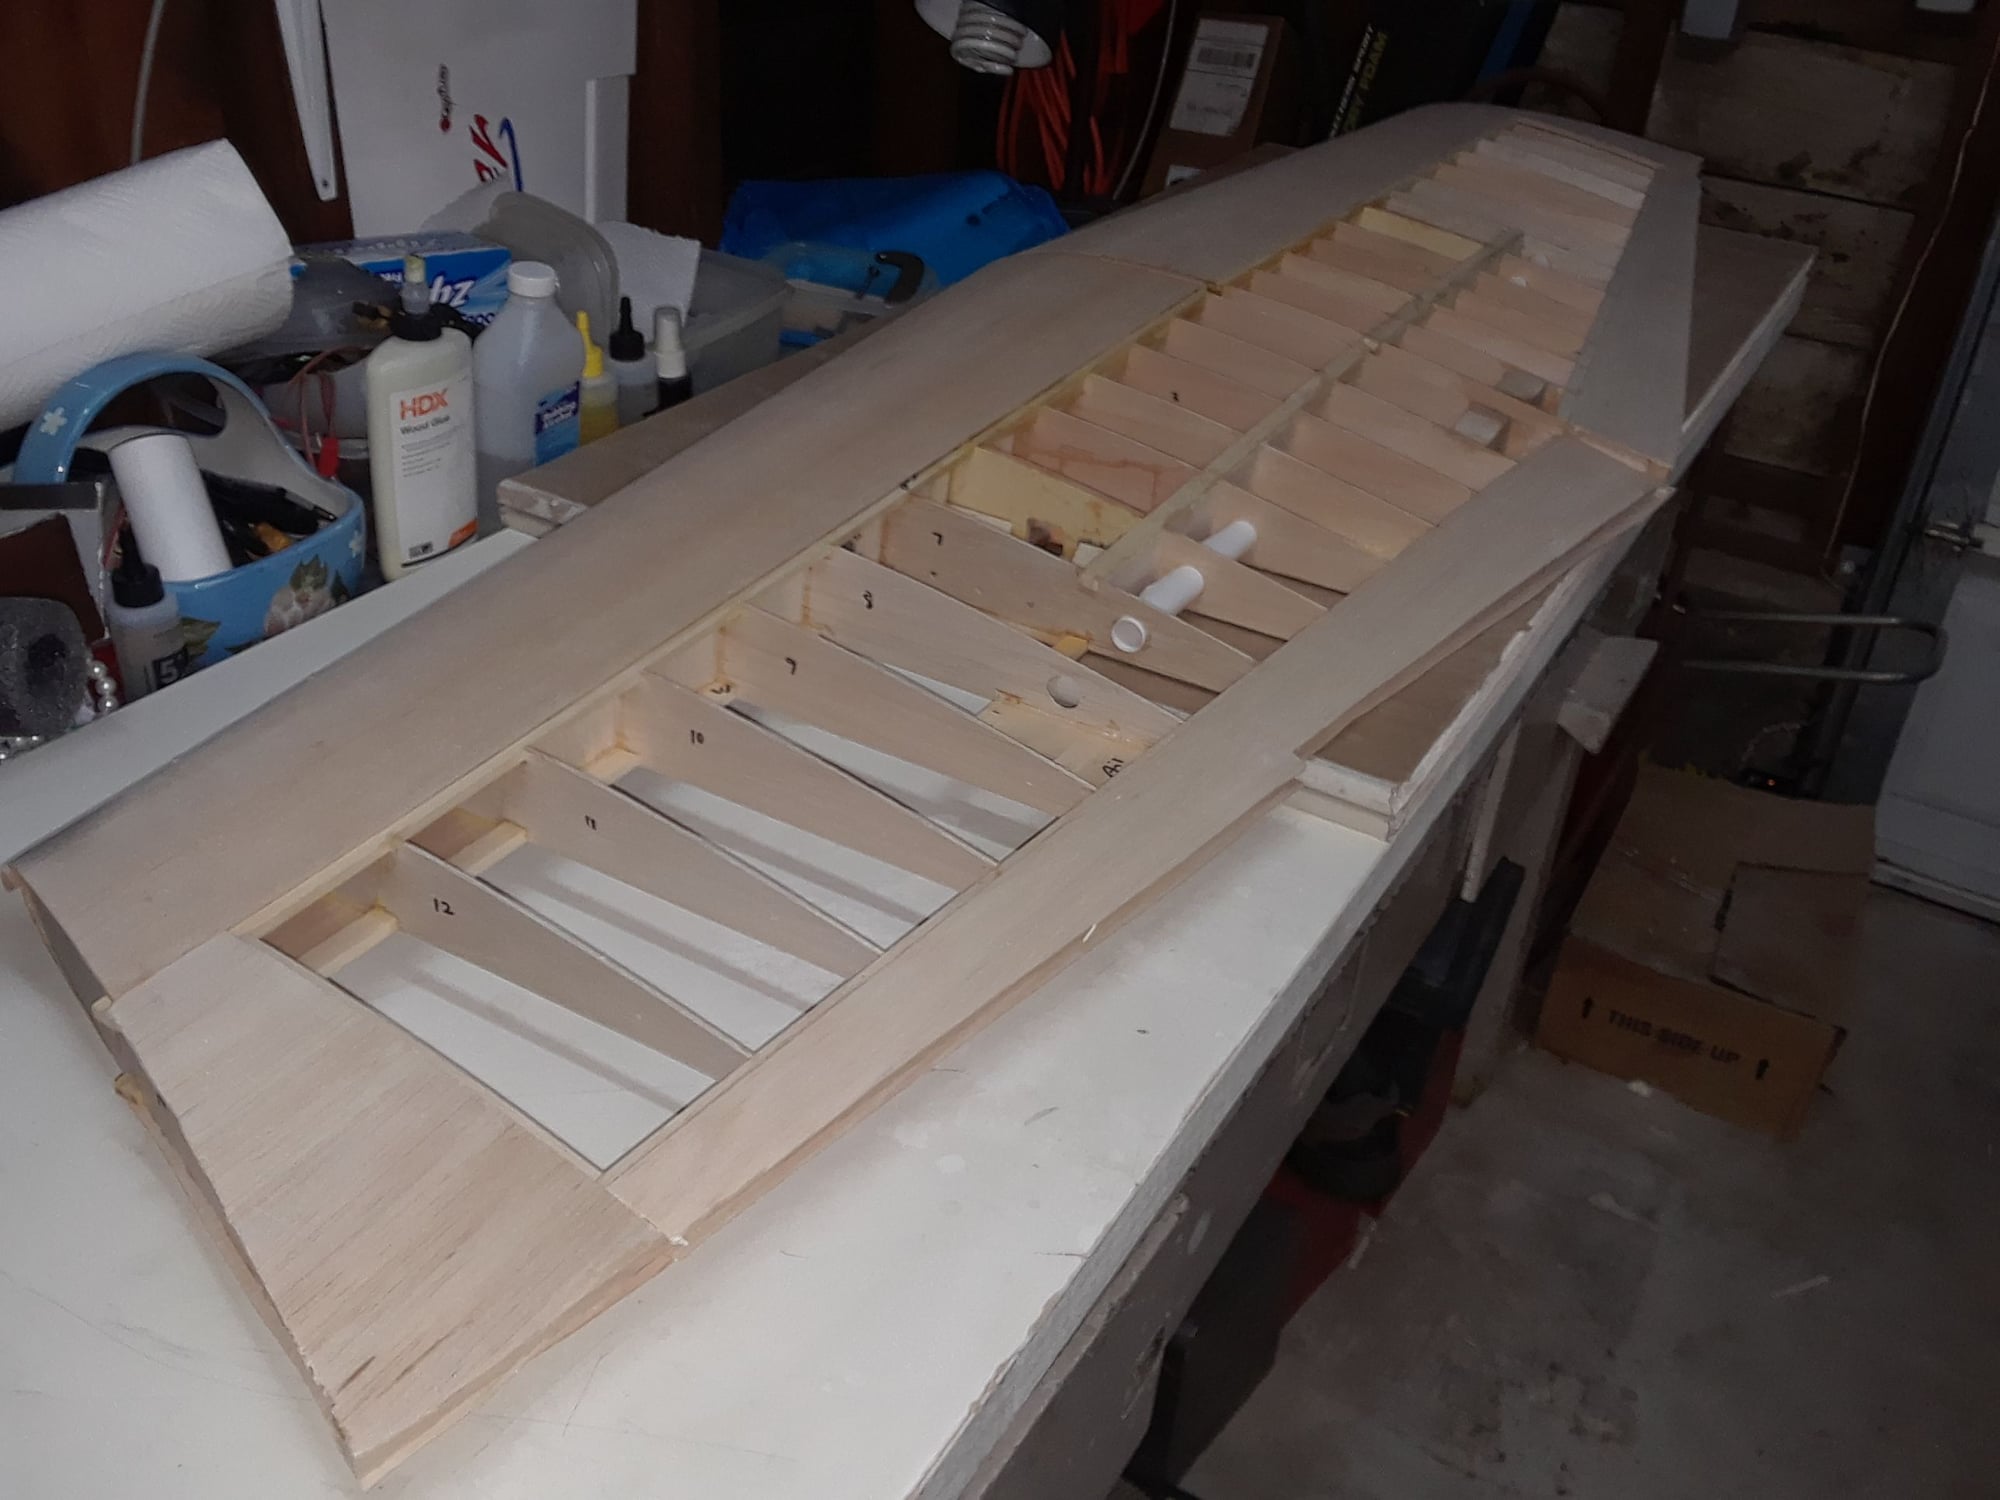
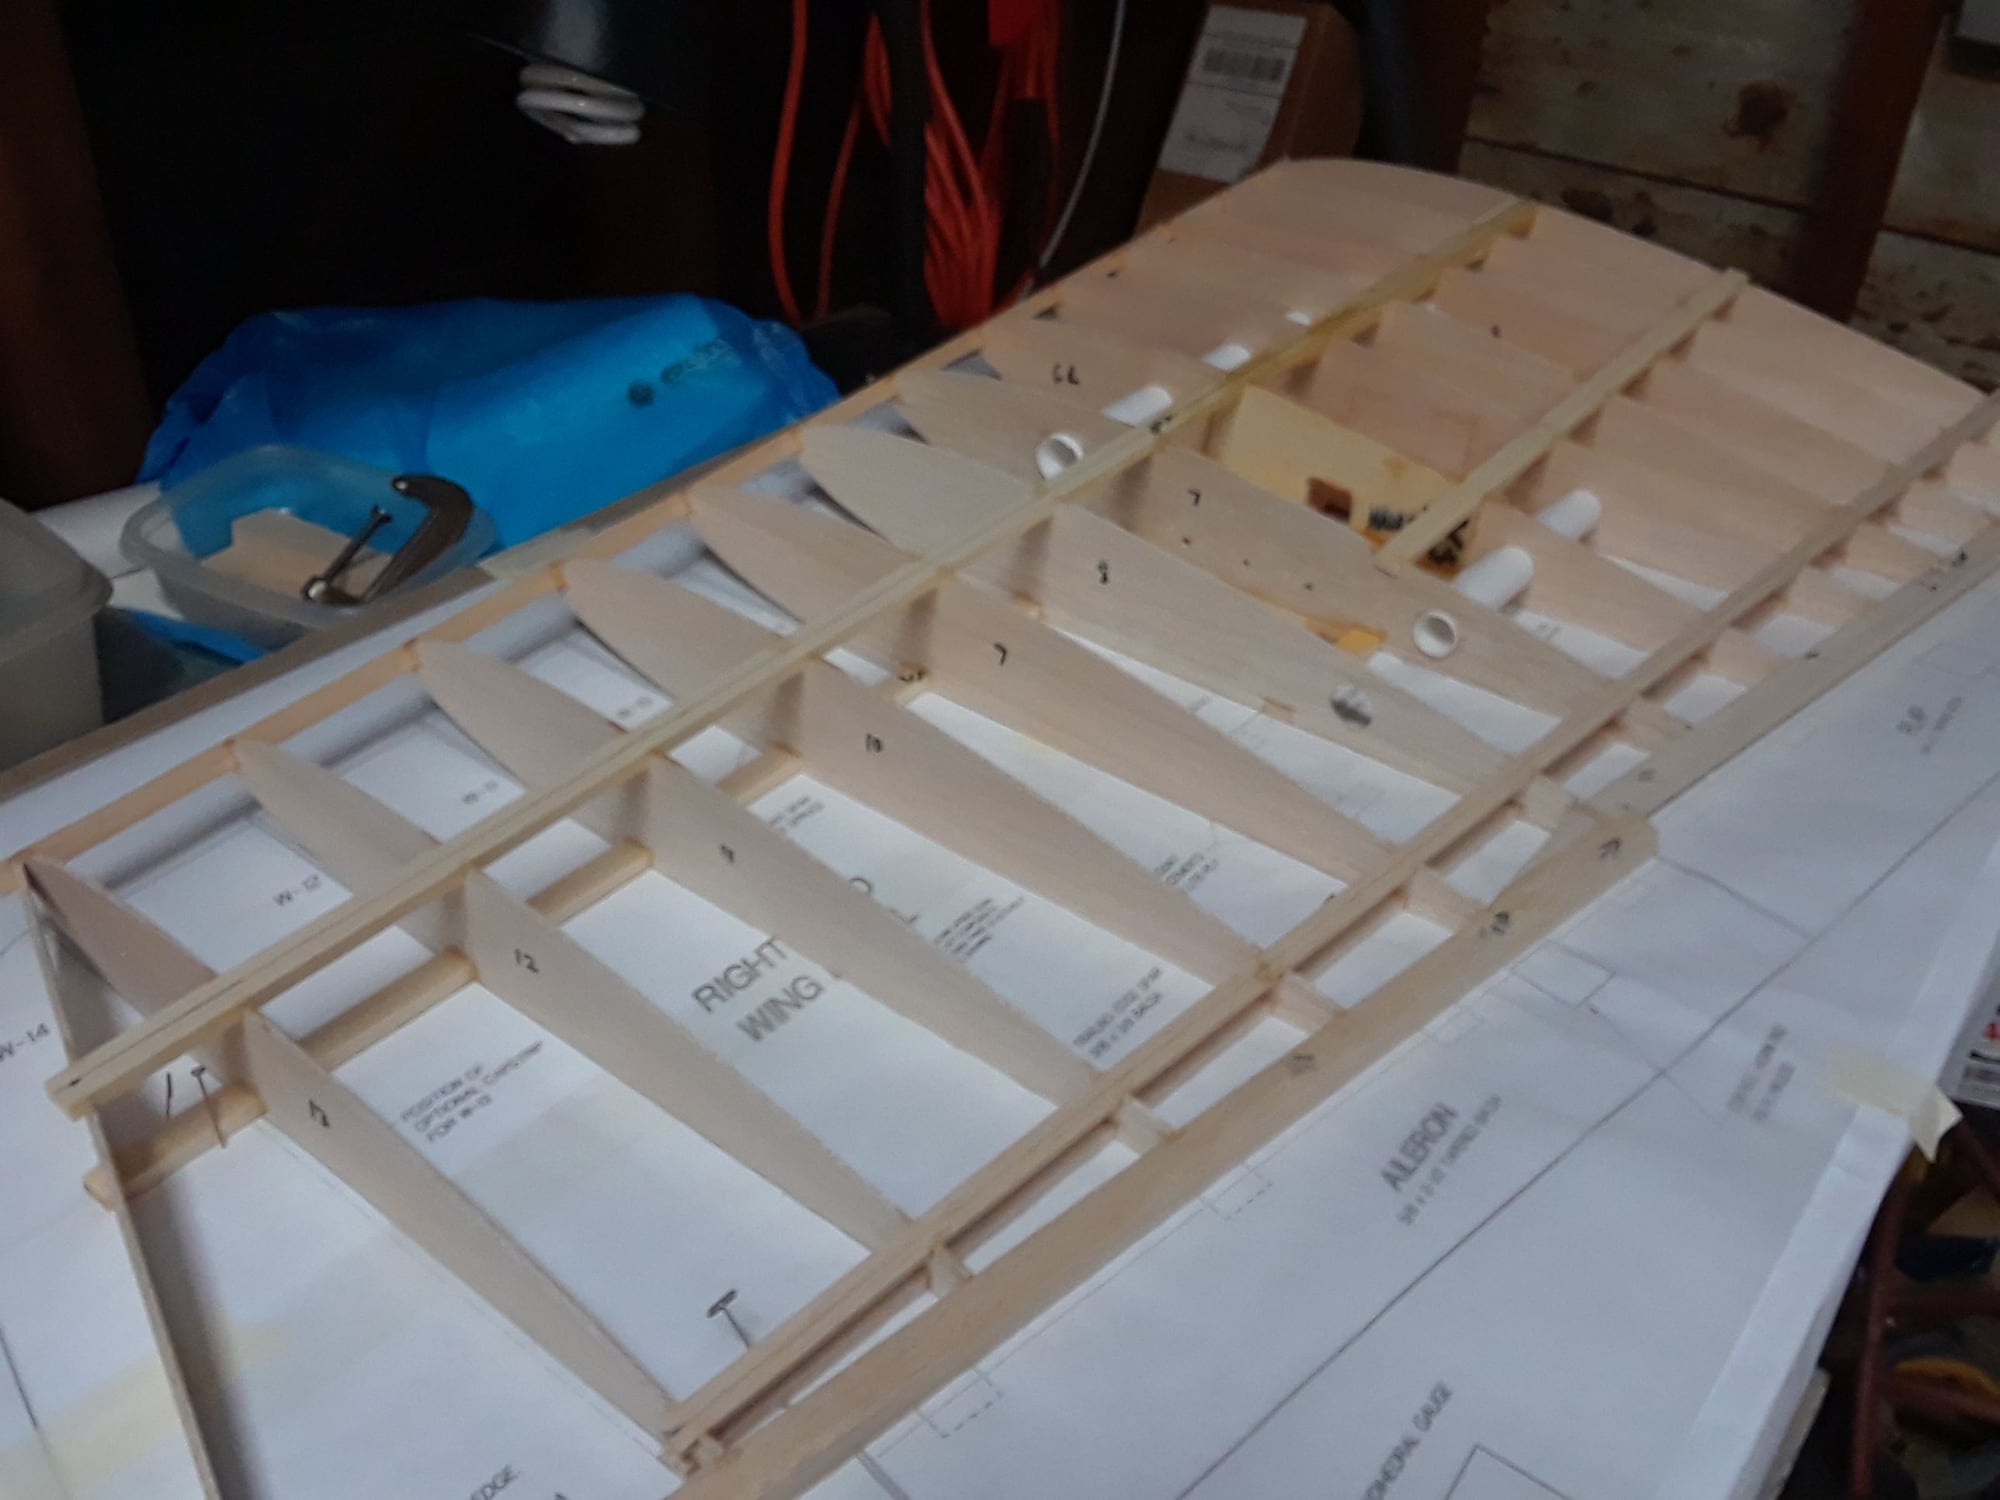
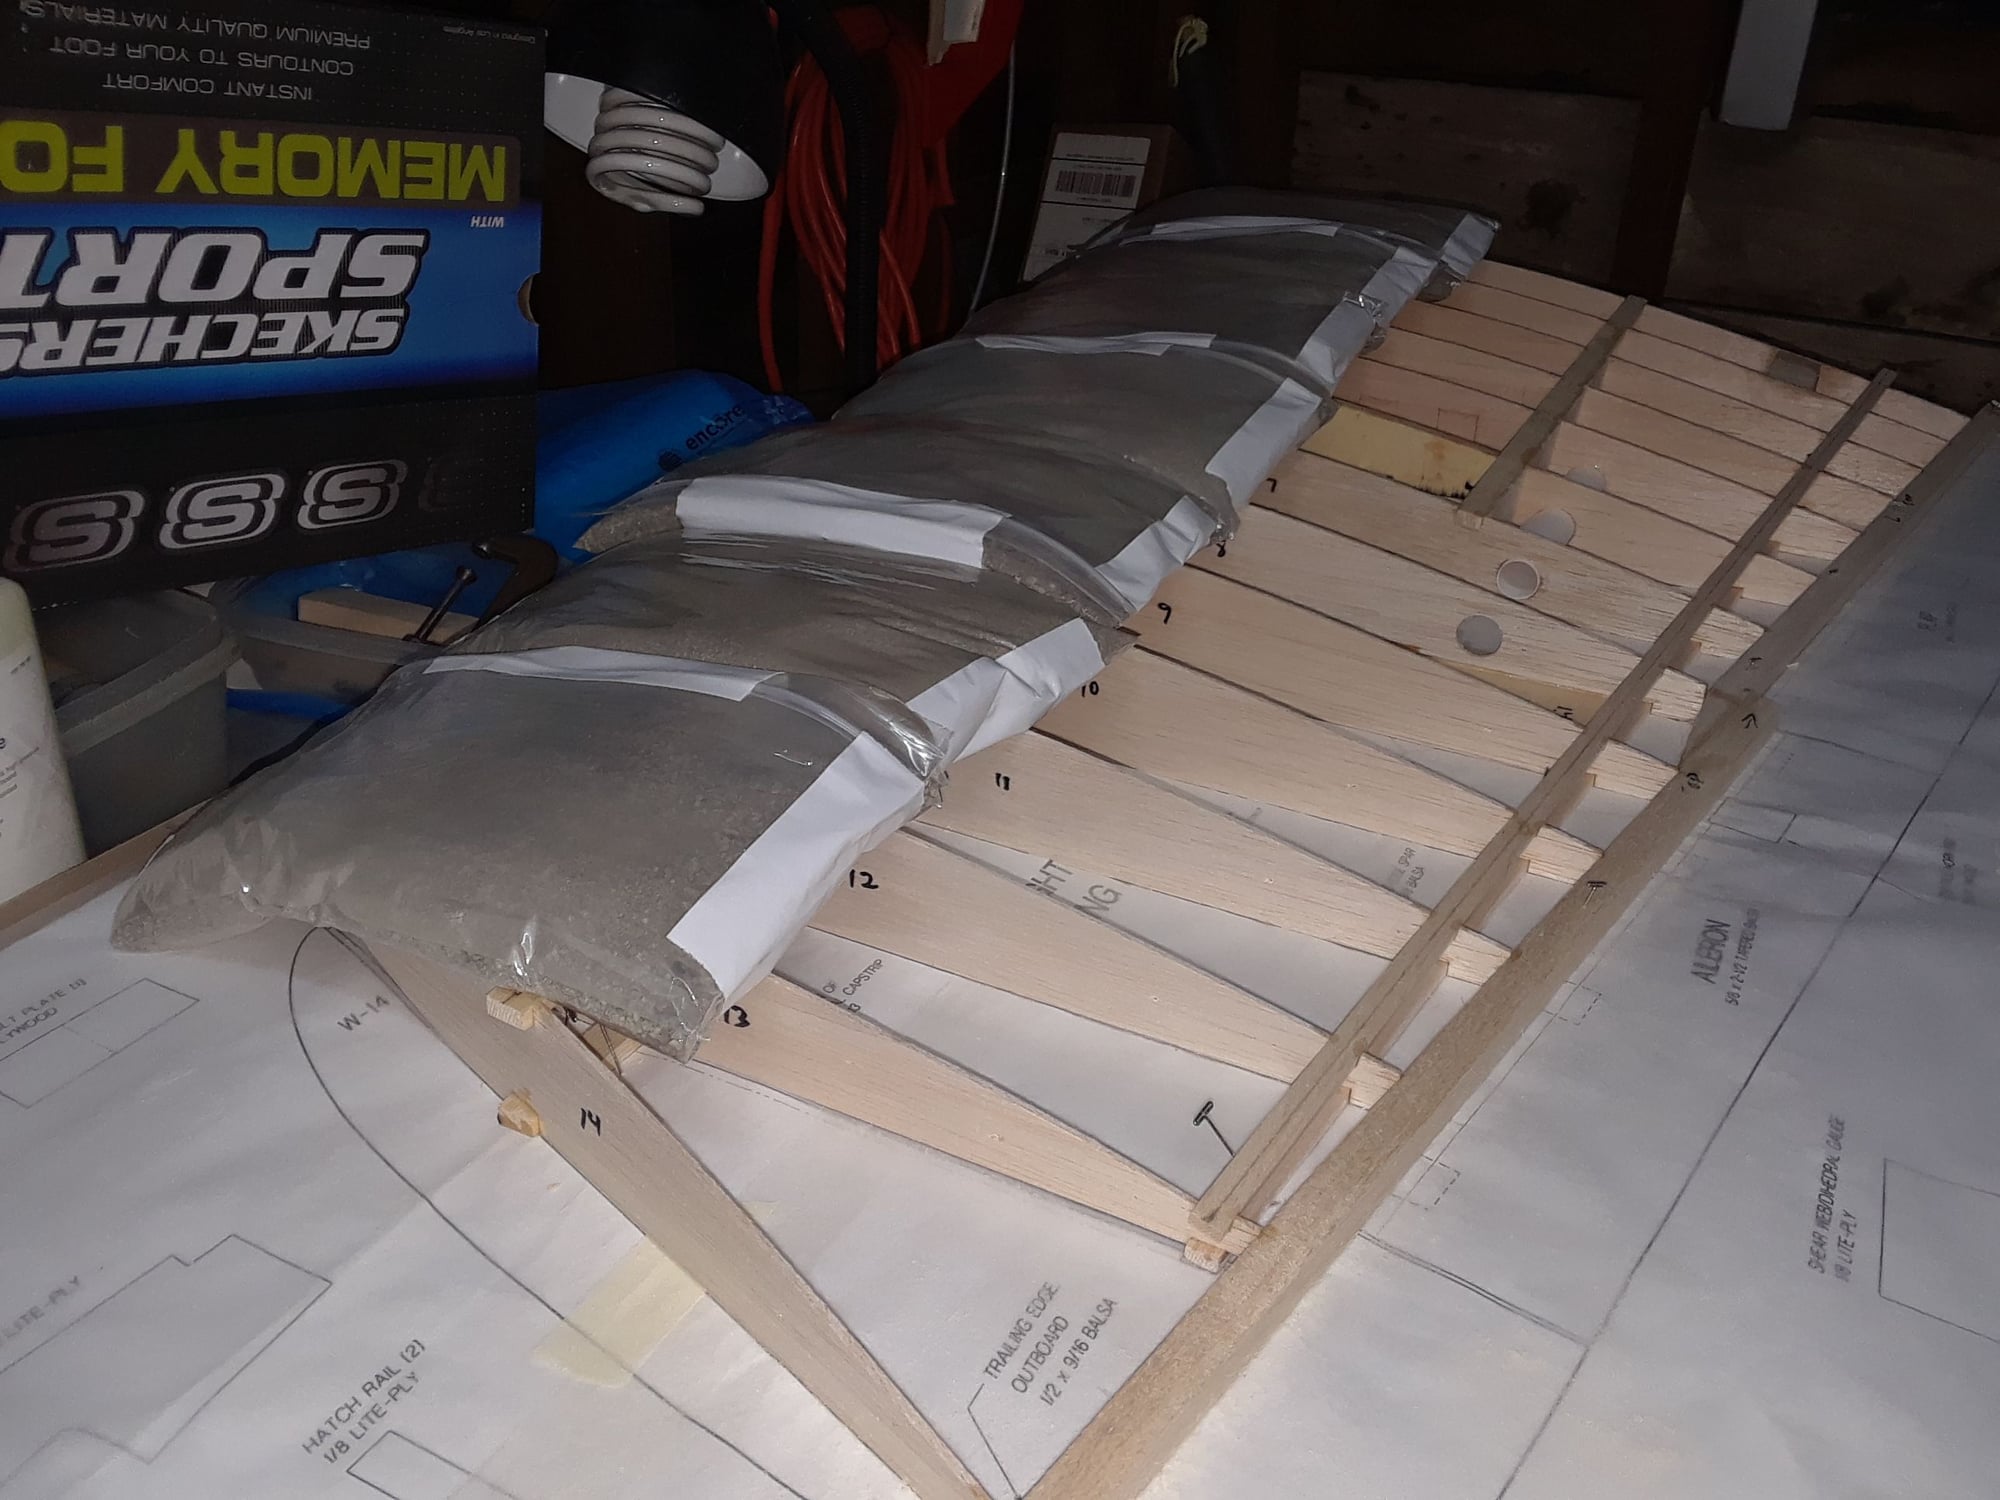
Second wing nearly complete, will continue next Wenesday, getting there, this is, what? About two weeks of light work

Question, when do you know you are going too fast?
Answer, look at the Chipmunk's left horizontal stab

Last edited by CARS II; 04-08-2018 at 08:39 PM.
Old 04-08-2018, 10:24 PM
  #3865  
SALMONBUG
My Feedback: (1)
 
SALMONBUG's Avatar
 
Join Date: Feb 2003
Location: kampenhout, BELGIUM
Posts: 1,396
Likes: 0
Received 2 Likes on 2 Posts
Default

Originally Posted by CARS II


Question, when do you know you are going too fast?
Answer, look at the Chipmunk's left horizontal stab

seems that when you rush , dumbs mistakes are visible on stab only, look mine
Ok ok, it's not easy to see, but a stupid flagrant mistake is visible on the joined pic. ( need the plans to see it)

Old 04-09-2018, 09:05 AM
  #3866  
SALMONBUG
My Feedback: (1)
 
SALMONBUG's Avatar
 
Join Date: Feb 2003
Location: kampenhout, BELGIUM
Posts: 1,396
Likes: 0
Received 2 Likes on 2 Posts
Default

start to look like a airplane. I never saw a R54 in real before and I am a bit surprised, it look more sportsy in real ( I should say less boxy) than on the pictures.

Old 04-09-2018, 09:07 AM
  #3867  
redtail
My Feedback: (15)
 
redtail's Avatar
 
Join Date: Oct 2002
Location: Alexandria, VA
Posts: 2,625
Received 6 Likes on 6 Posts
Default

Beautiful, Beautiful. She will fly just as well. Chic
Old 04-09-2018, 09:29 AM
  #3868  
causeitflies
 
causeitflies's Avatar
 
Join Date: Jan 2003
Location: EASTERN OHIO
Posts: 2,435
Received 42 Likes on 32 Posts
Default

When I built my plane I used extra large triangle stock in the fuse so I could round it off more than normal.
Old 04-11-2018, 02:07 PM
  #3869  
CARS II
My Feedback: (7)
 
CARS II's Avatar
 
Join Date: Oct 2002
Location: Sacramento CA
Posts: 6,589
Received 123 Likes on 106 Posts
Default


Second wing is build, center sheeting is drying. Next is the wing details section .
Old 04-11-2018, 02:32 PM
  #3870  
joeflyer
My Feedback: (48)
 
Join Date: Dec 2001
Location: Plymouth, MI
Posts: 2,957
Likes: 0
Received 16 Likes on 14 Posts
Default

Originally Posted by causeitflies
When I built my plane I used extra large triangle stock in the fuse so I could round it off more than normal.
Me too. It makes the plane look a little less boxie.
Old 04-11-2018, 04:26 PM
  #3871  
CARS II
My Feedback: (7)
 
CARS II's Avatar
 
Join Date: Oct 2002
Location: Sacramento CA
Posts: 6,589
Received 123 Likes on 106 Posts
Default

Thanks for the tip, something to consider when building the fuse.
Old 04-12-2018, 01:42 AM
  #3872  
SALMONBUG
My Feedback: (1)
 
SALMONBUG's Avatar
 
Join Date: Feb 2003
Location: kampenhout, BELGIUM
Posts: 1,396
Likes: 0
Received 2 Likes on 2 Posts
Default

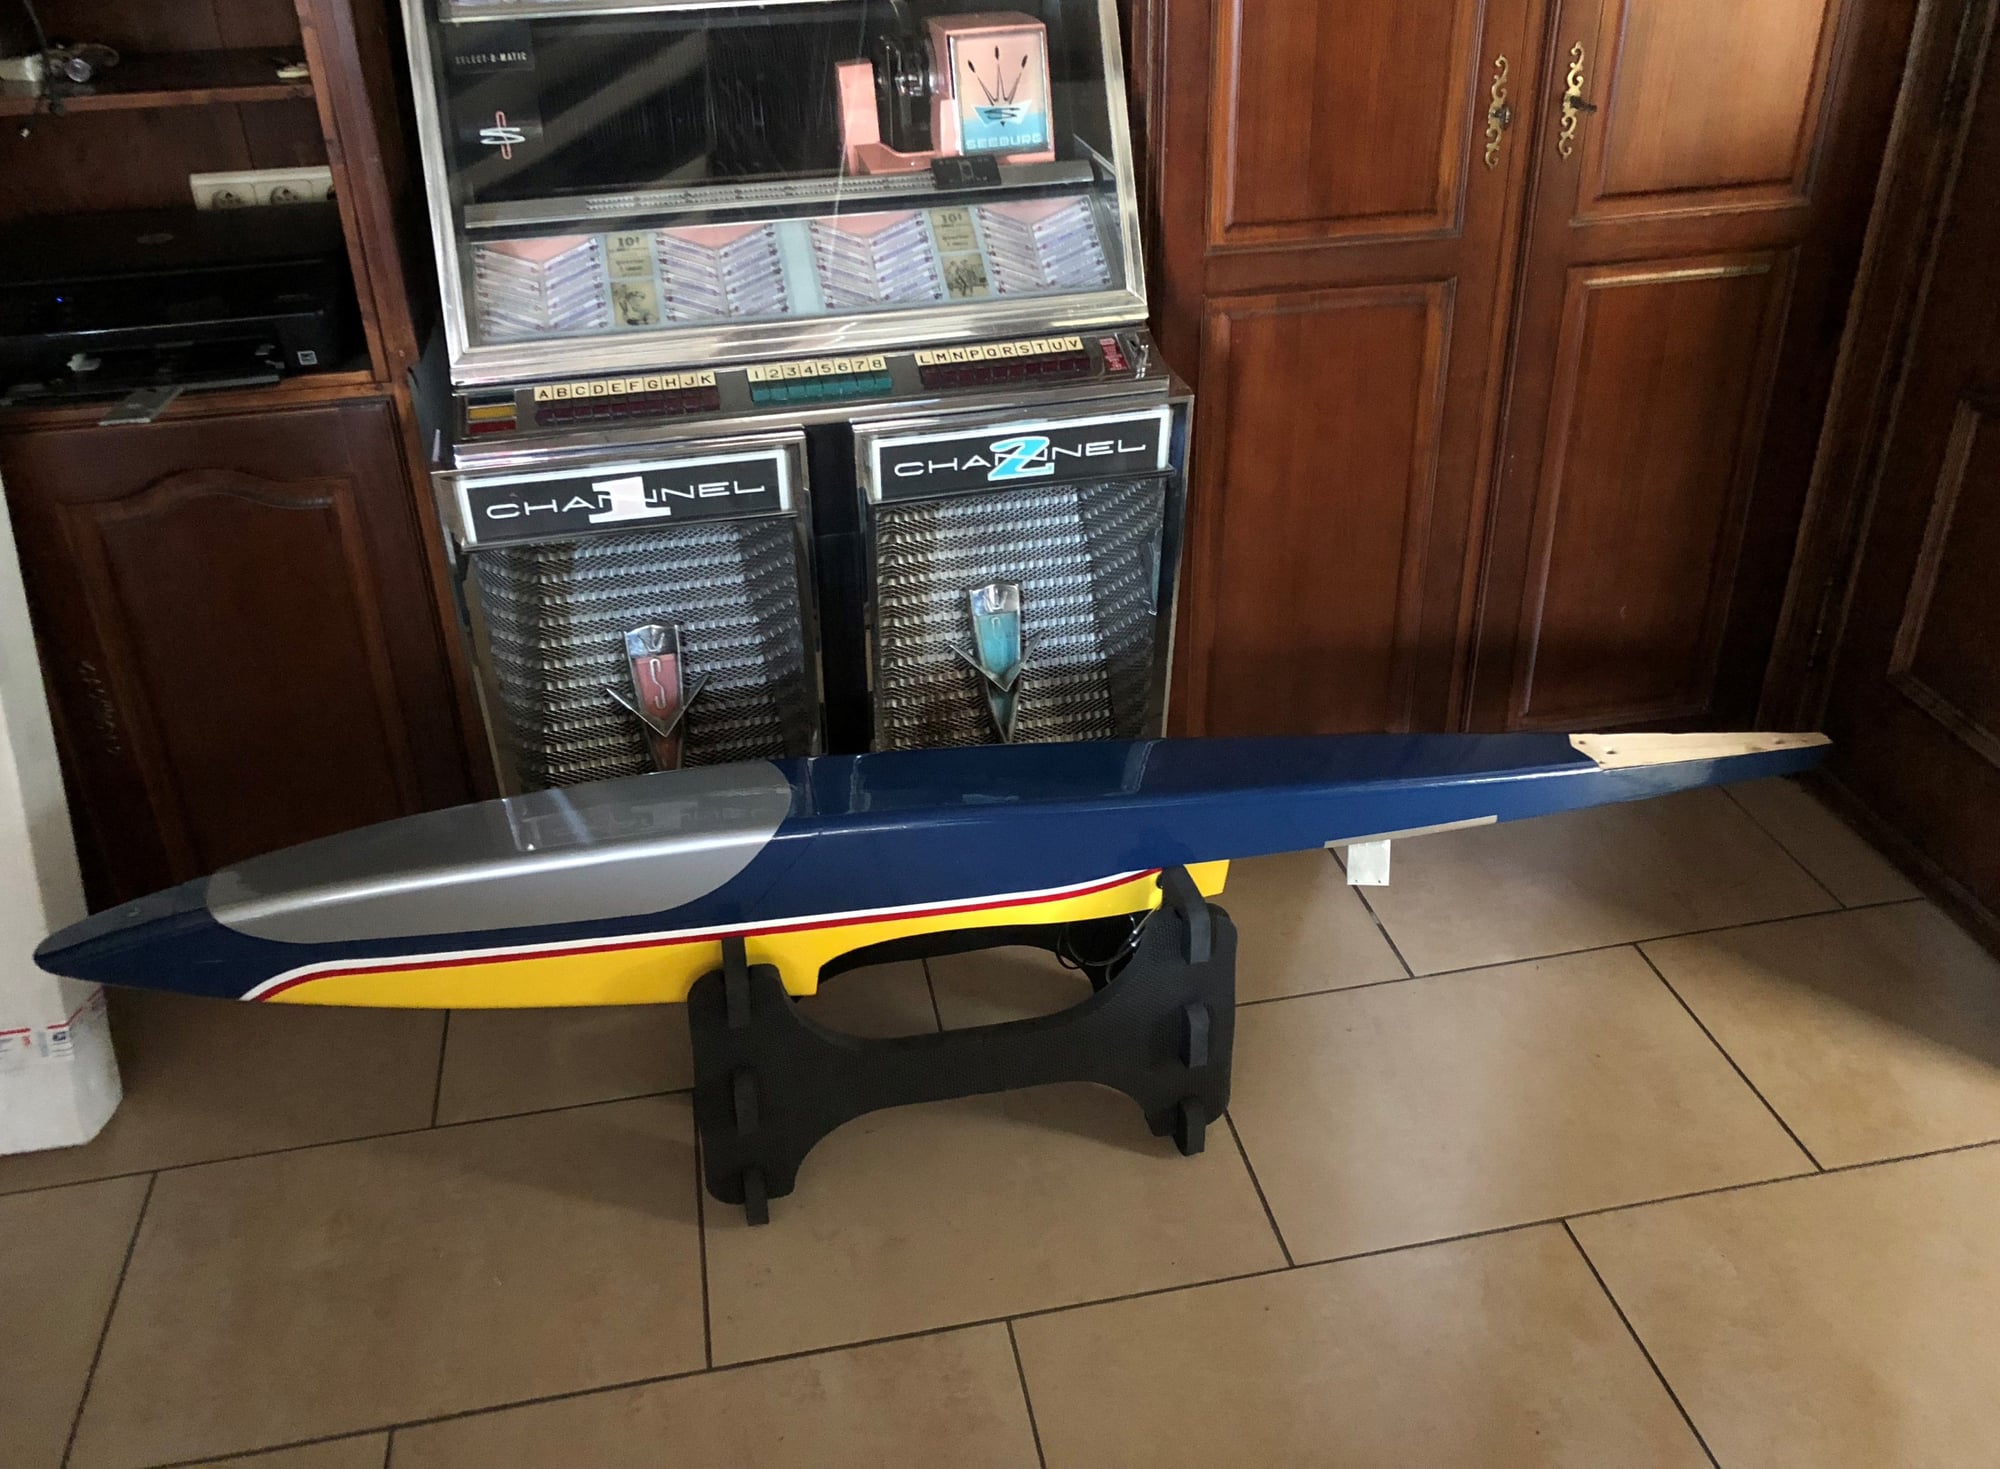
Fuse assembly is easy, the only think I could say is to take particular attention when gluing cables housing. Glue them eveywhere you can all along. I say that because on mine, I ended up the flight controls setup with a very very small loosy ( Hope you understand what I try to say) rudder condition. When pushing with the hand on the rudder, I can ear the housing mooving slightly somewhere in the fuse and I have something like half millimeter loosy rudder.
fotunatly my elevator is fine.

here is a pic of my finished fuse
Next, wing ironing........

Old 04-12-2018, 03:13 AM
  #3873  
redtail
My Feedback: (15)
 
redtail's Avatar
 
Join Date: Oct 2002
Location: Alexandria, VA
Posts: 2,625
Received 6 Likes on 6 Posts
Default

Really great "Build". Chic
Old 04-12-2018, 09:47 AM
  #3874  
SALMONBUG
My Feedback: (1)
 
SALMONBUG's Avatar
 
Join Date: Feb 2003
Location: kampenhout, BELGIUM
Posts: 1,396
Likes: 0
Received 2 Likes on 2 Posts
Default

a view inside my r54, of the partialy completed eqipement setup.

Old 04-12-2018, 12:24 PM
  #3875  
rhklenke
My Feedback: (24)
 
rhklenke's Avatar
 
Join Date: Jun 2002
Location: Richmond, VA
Posts: 5,998
Likes: 0
Received 34 Likes on 21 Posts
Default

Originally Posted by SALMONBUG
a view inside my r54, of the partialy completed eqipement setup.
One small comment - if you can, its best to mount the JetCat fuel filter vertically, i.e., pointing up. That way, if you have any small bubbles that get into the fuel line, they will pass through the filter upon entry. If you have it on its side like that, I've been told that it is possible for the small bubbles to accumulate and once the bubble becomes large enough, it can "burp" out, potentially causing a flameout...

Bob

Thread Tools
Search this Thread

Contact Us - Archive - Advertising - Cookie Policy - Privacy Statement - Terms of Service -

Copyright © 2024 MH Sub I, LLC dba Internet Brands. All rights reserved. Use of this site indicates your consent to the Terms of Use.