


2008 the year of the Turbinator


 04-21-2014, 05:20 AM
#327
Senior Member
My Feedback: (1)
Join Date: Jan 2004
Location: Cape TownN/A, SOUTH AFRICA
Posts: 258
Likes: 0
Received 0 Likes
on
0 Posts
Hi Guys
It has been a very long time,since I did any work on the fuselage. Managed to complete the sheeting,but the fin area was not easy at all,where it goes onto the F-13 former. I strip planked that area and it worked okay. Just traced out the stab formers,but will cut it later in the week,as I have to go away on a work related job.
Regards
Craig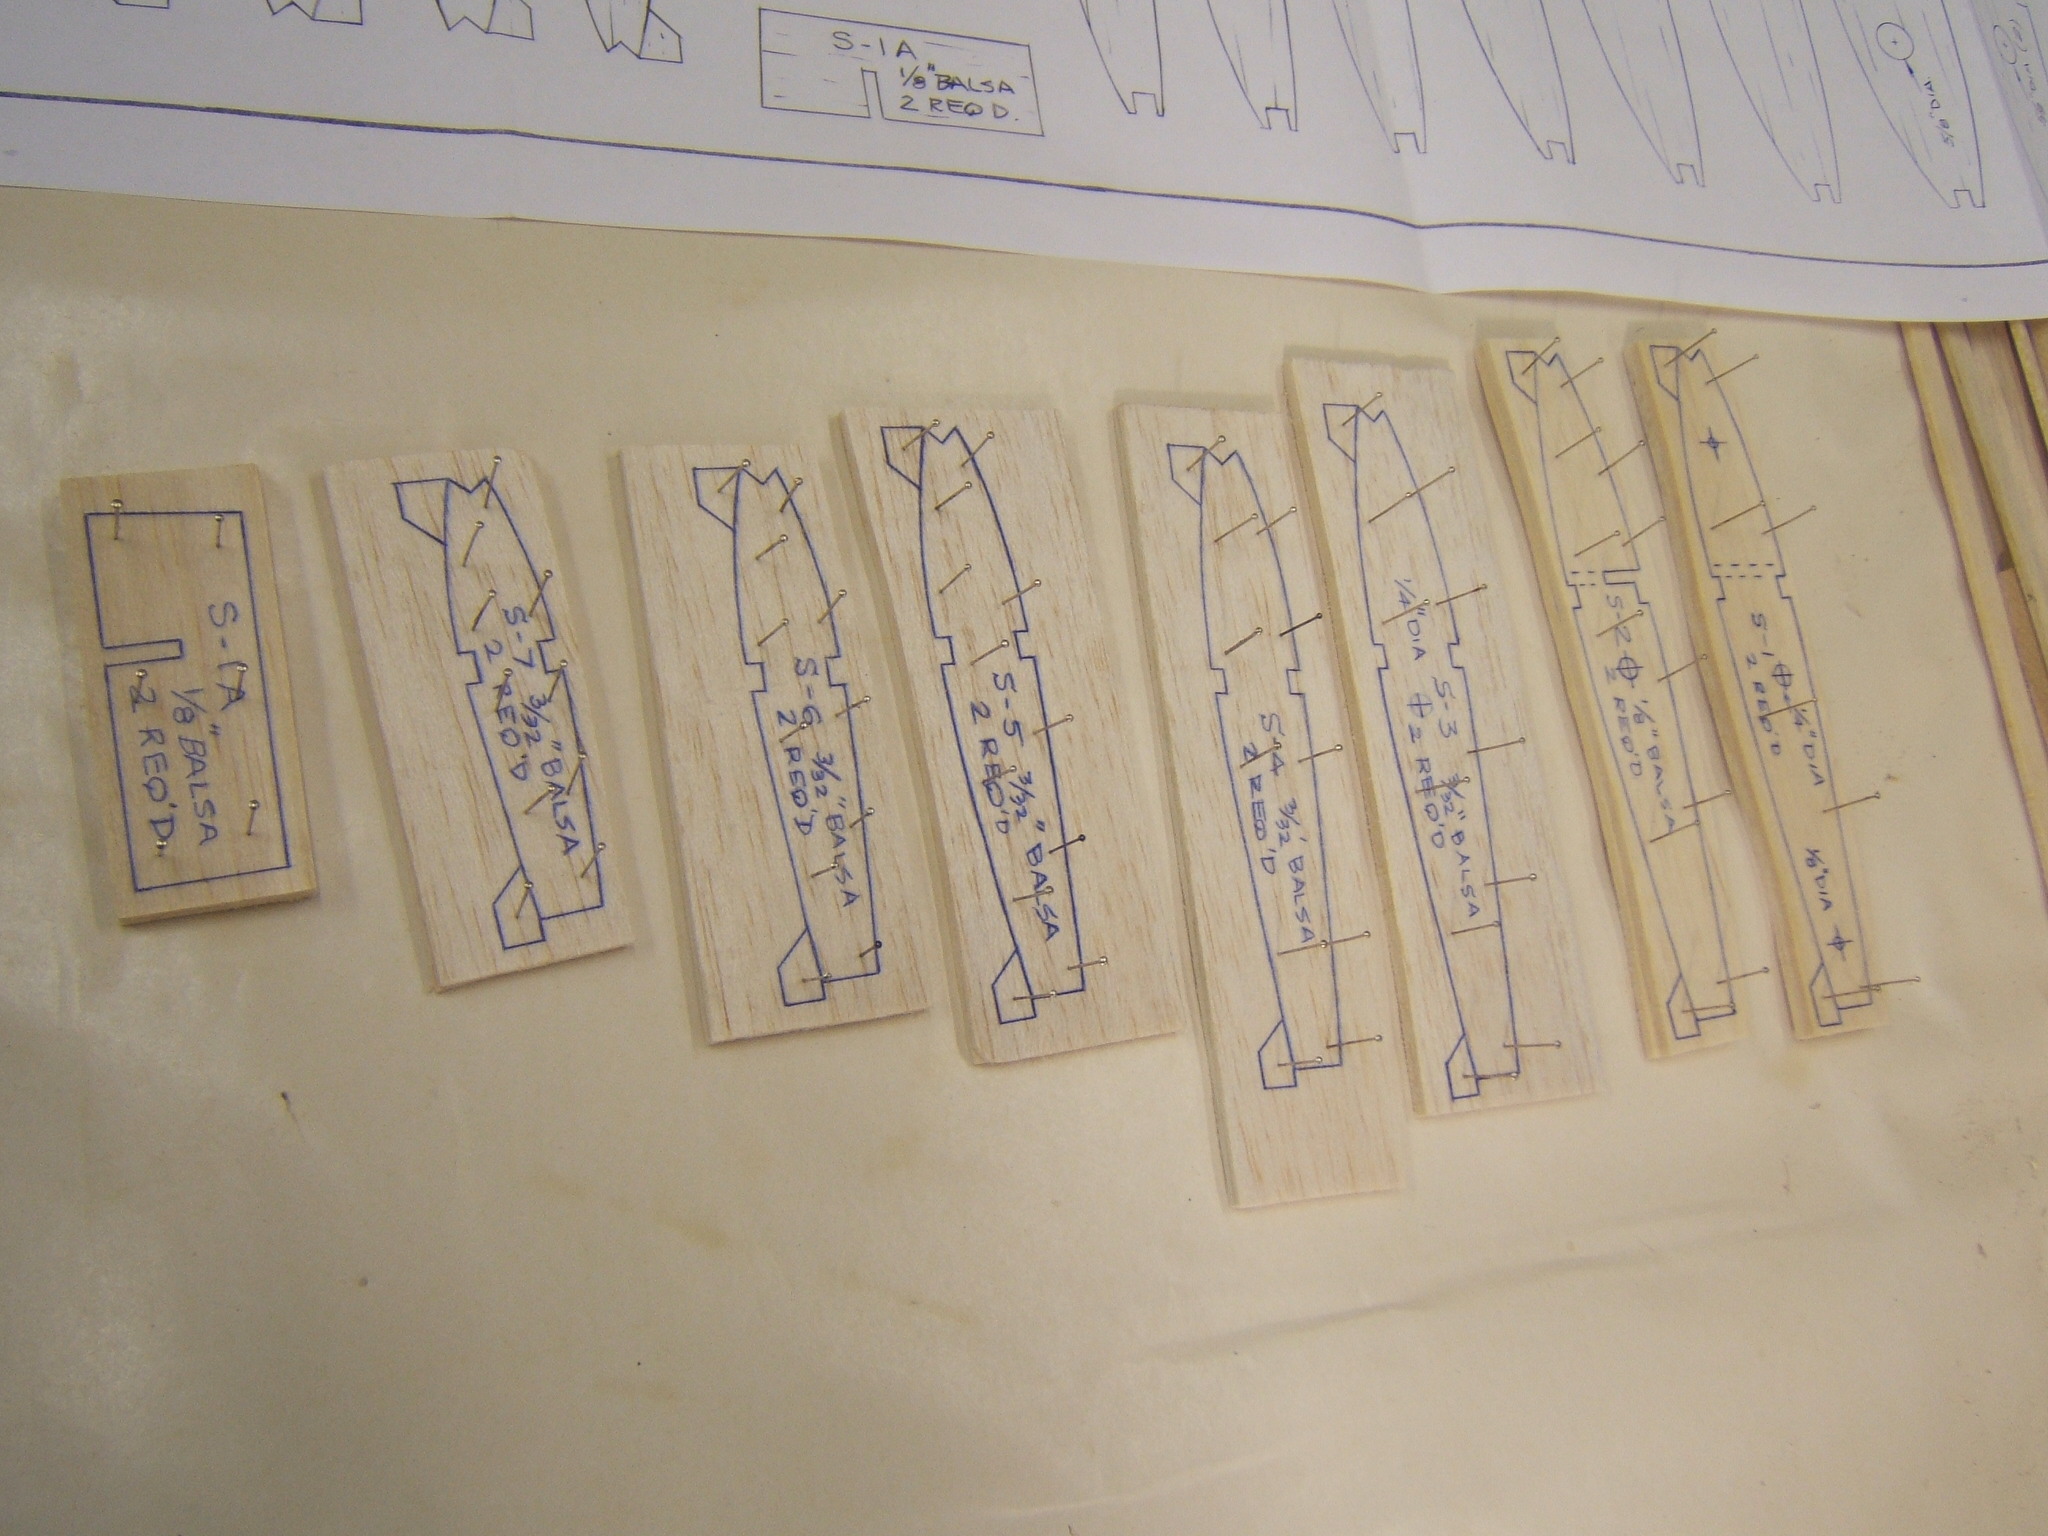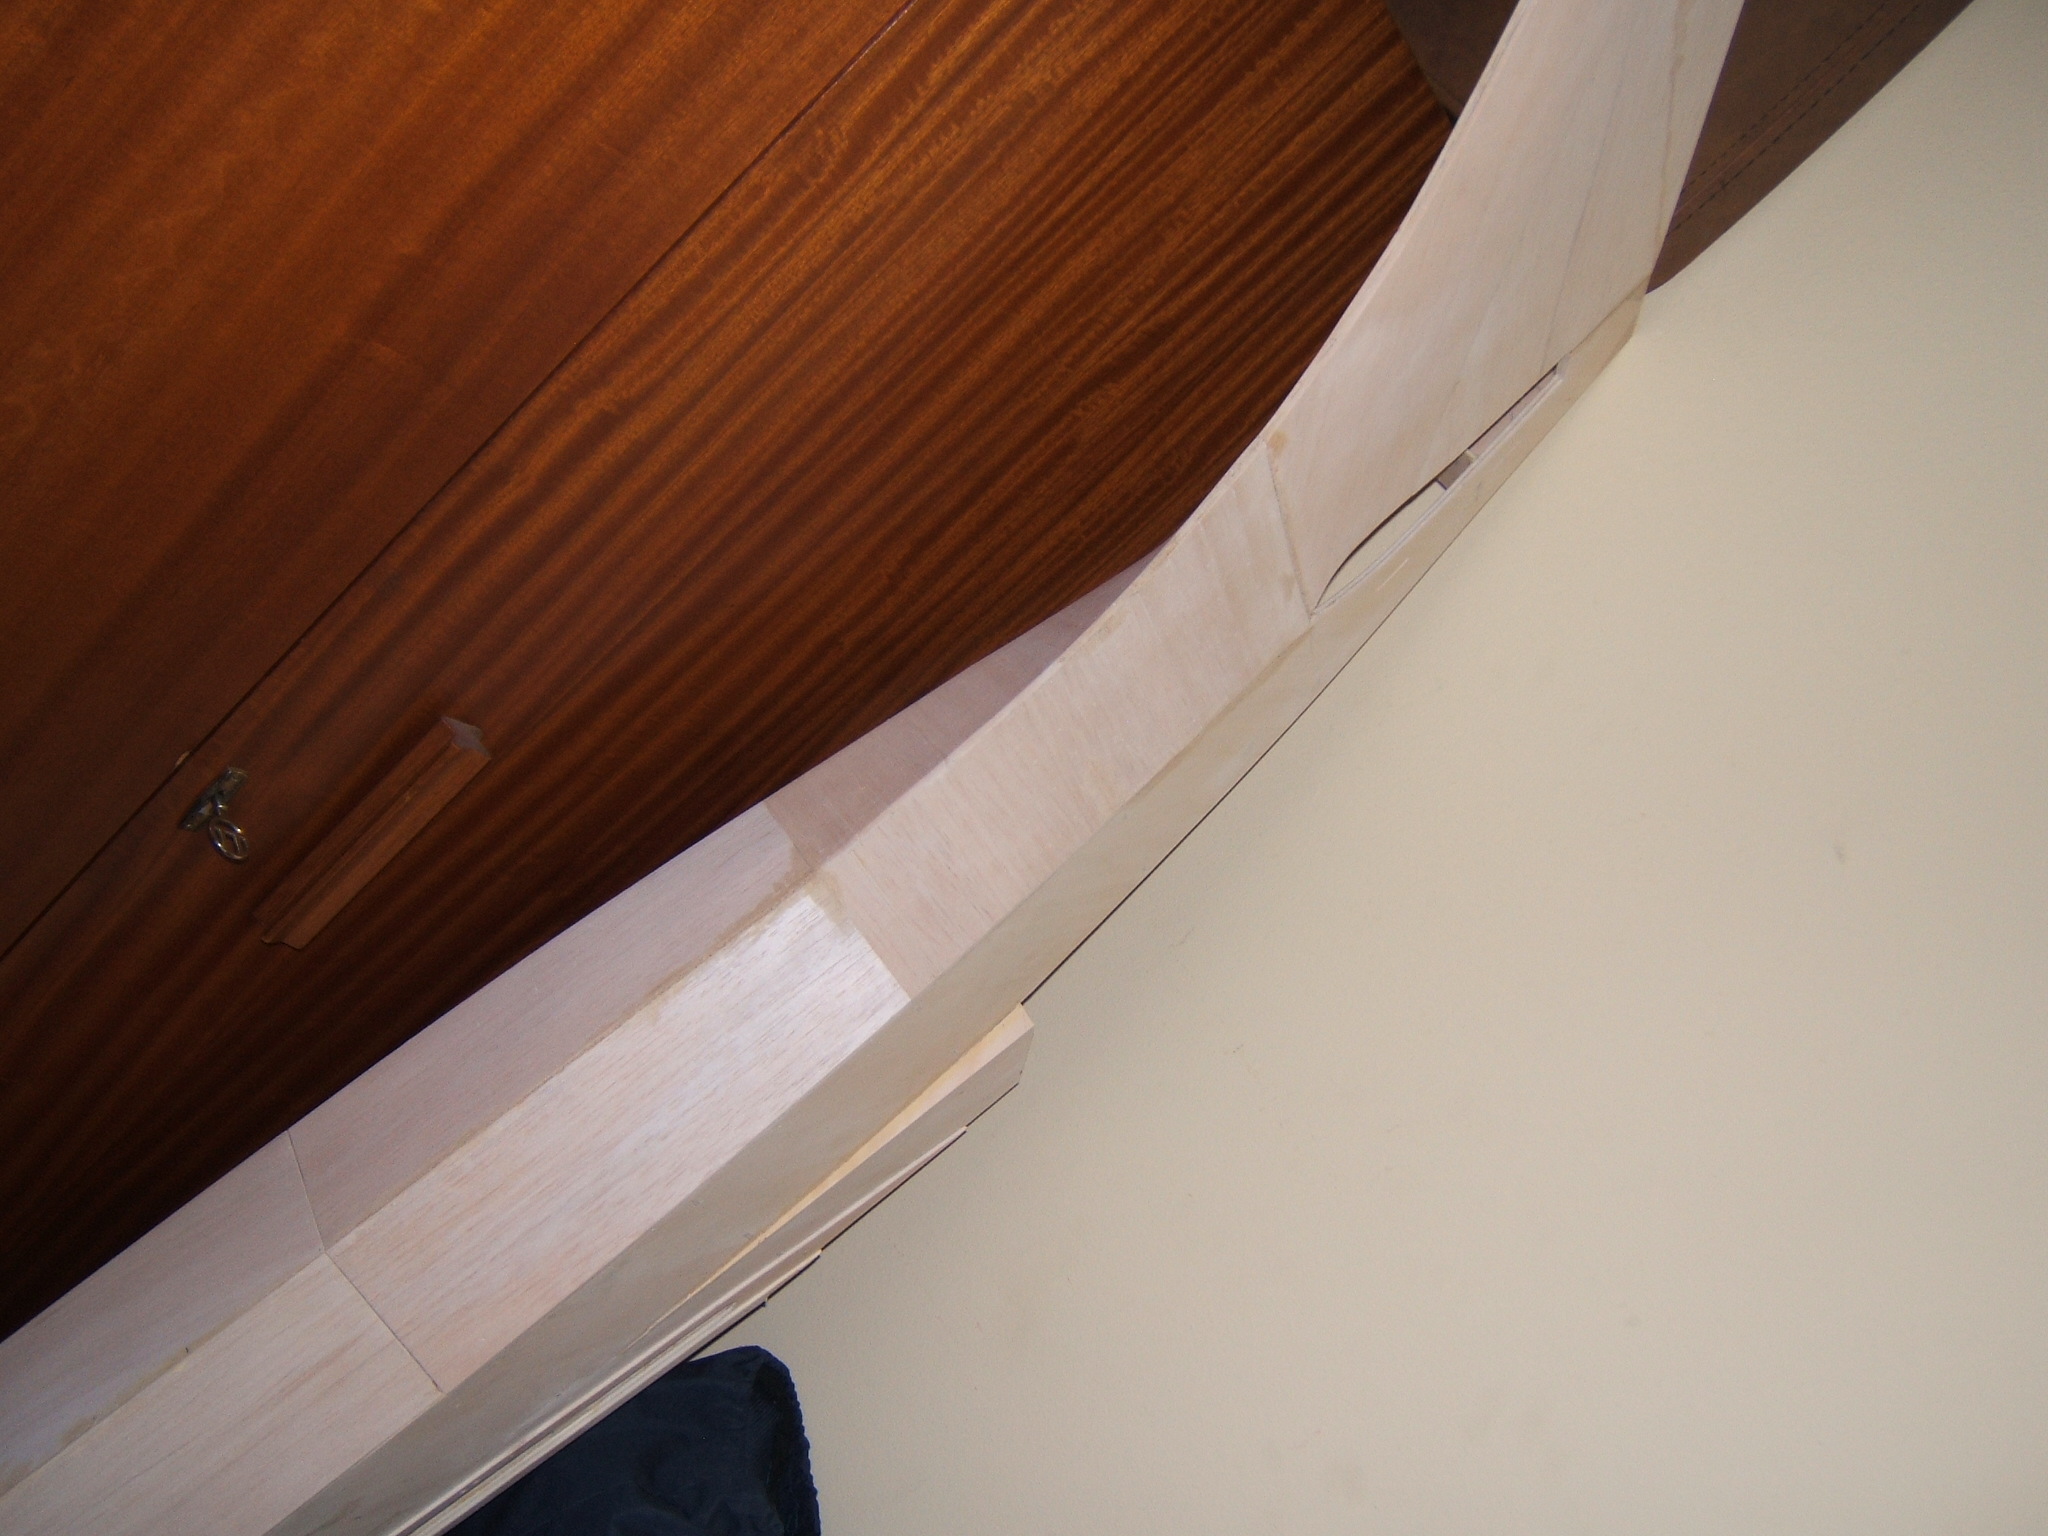
05-26-2014, 11:26 AM
#328
Senior Member
My Feedback: (1)
Join Date: Jan 2004
Location: Cape TownN/A, SOUTH AFRICA
Posts: 258
Likes: 0
Received 0 Likes
on
0 Posts
Hi Guys
Just a quick update.I cut out all of the ribs for the stab yesterday and and this evening,I filed the slots in the ribs,for a correct fit of the L/E and spars.As this is a new model,I also bought a DX18 for it and have a new K80-E to install into it.Its our beginning of our Winter Season and the Carp and Bass fishing is poor at the moment.So I`ll be building again.
Regards
Craig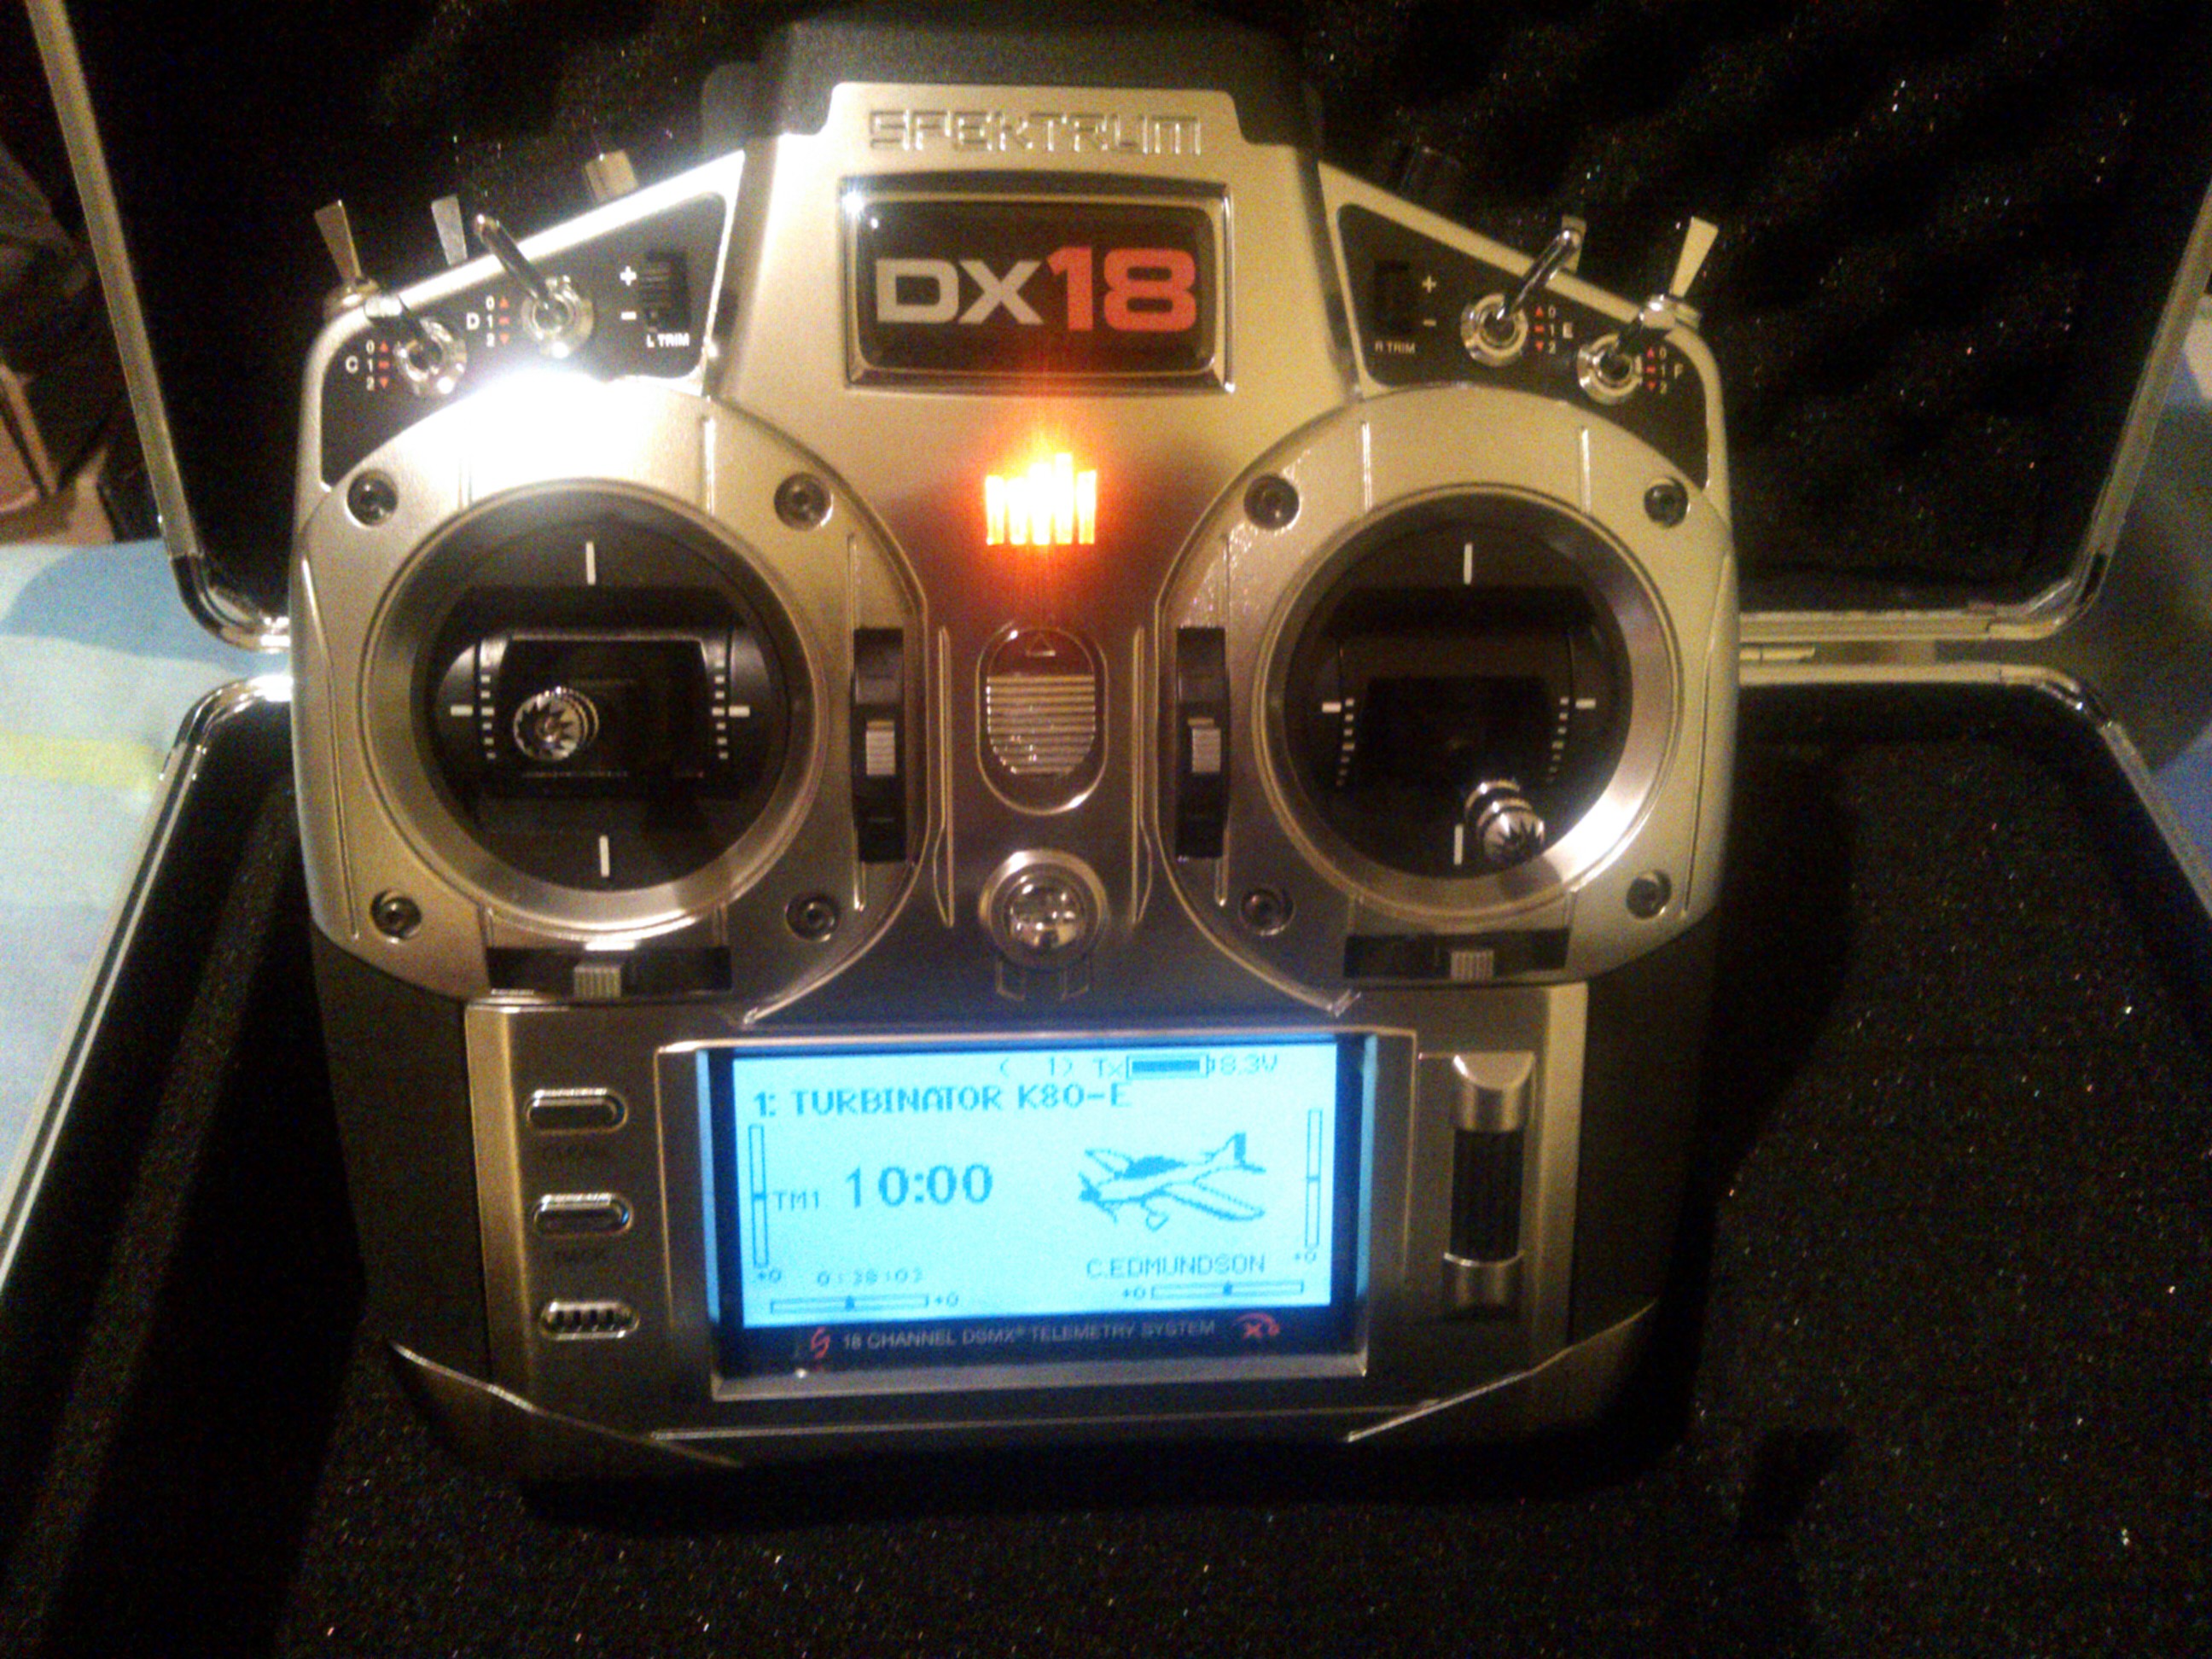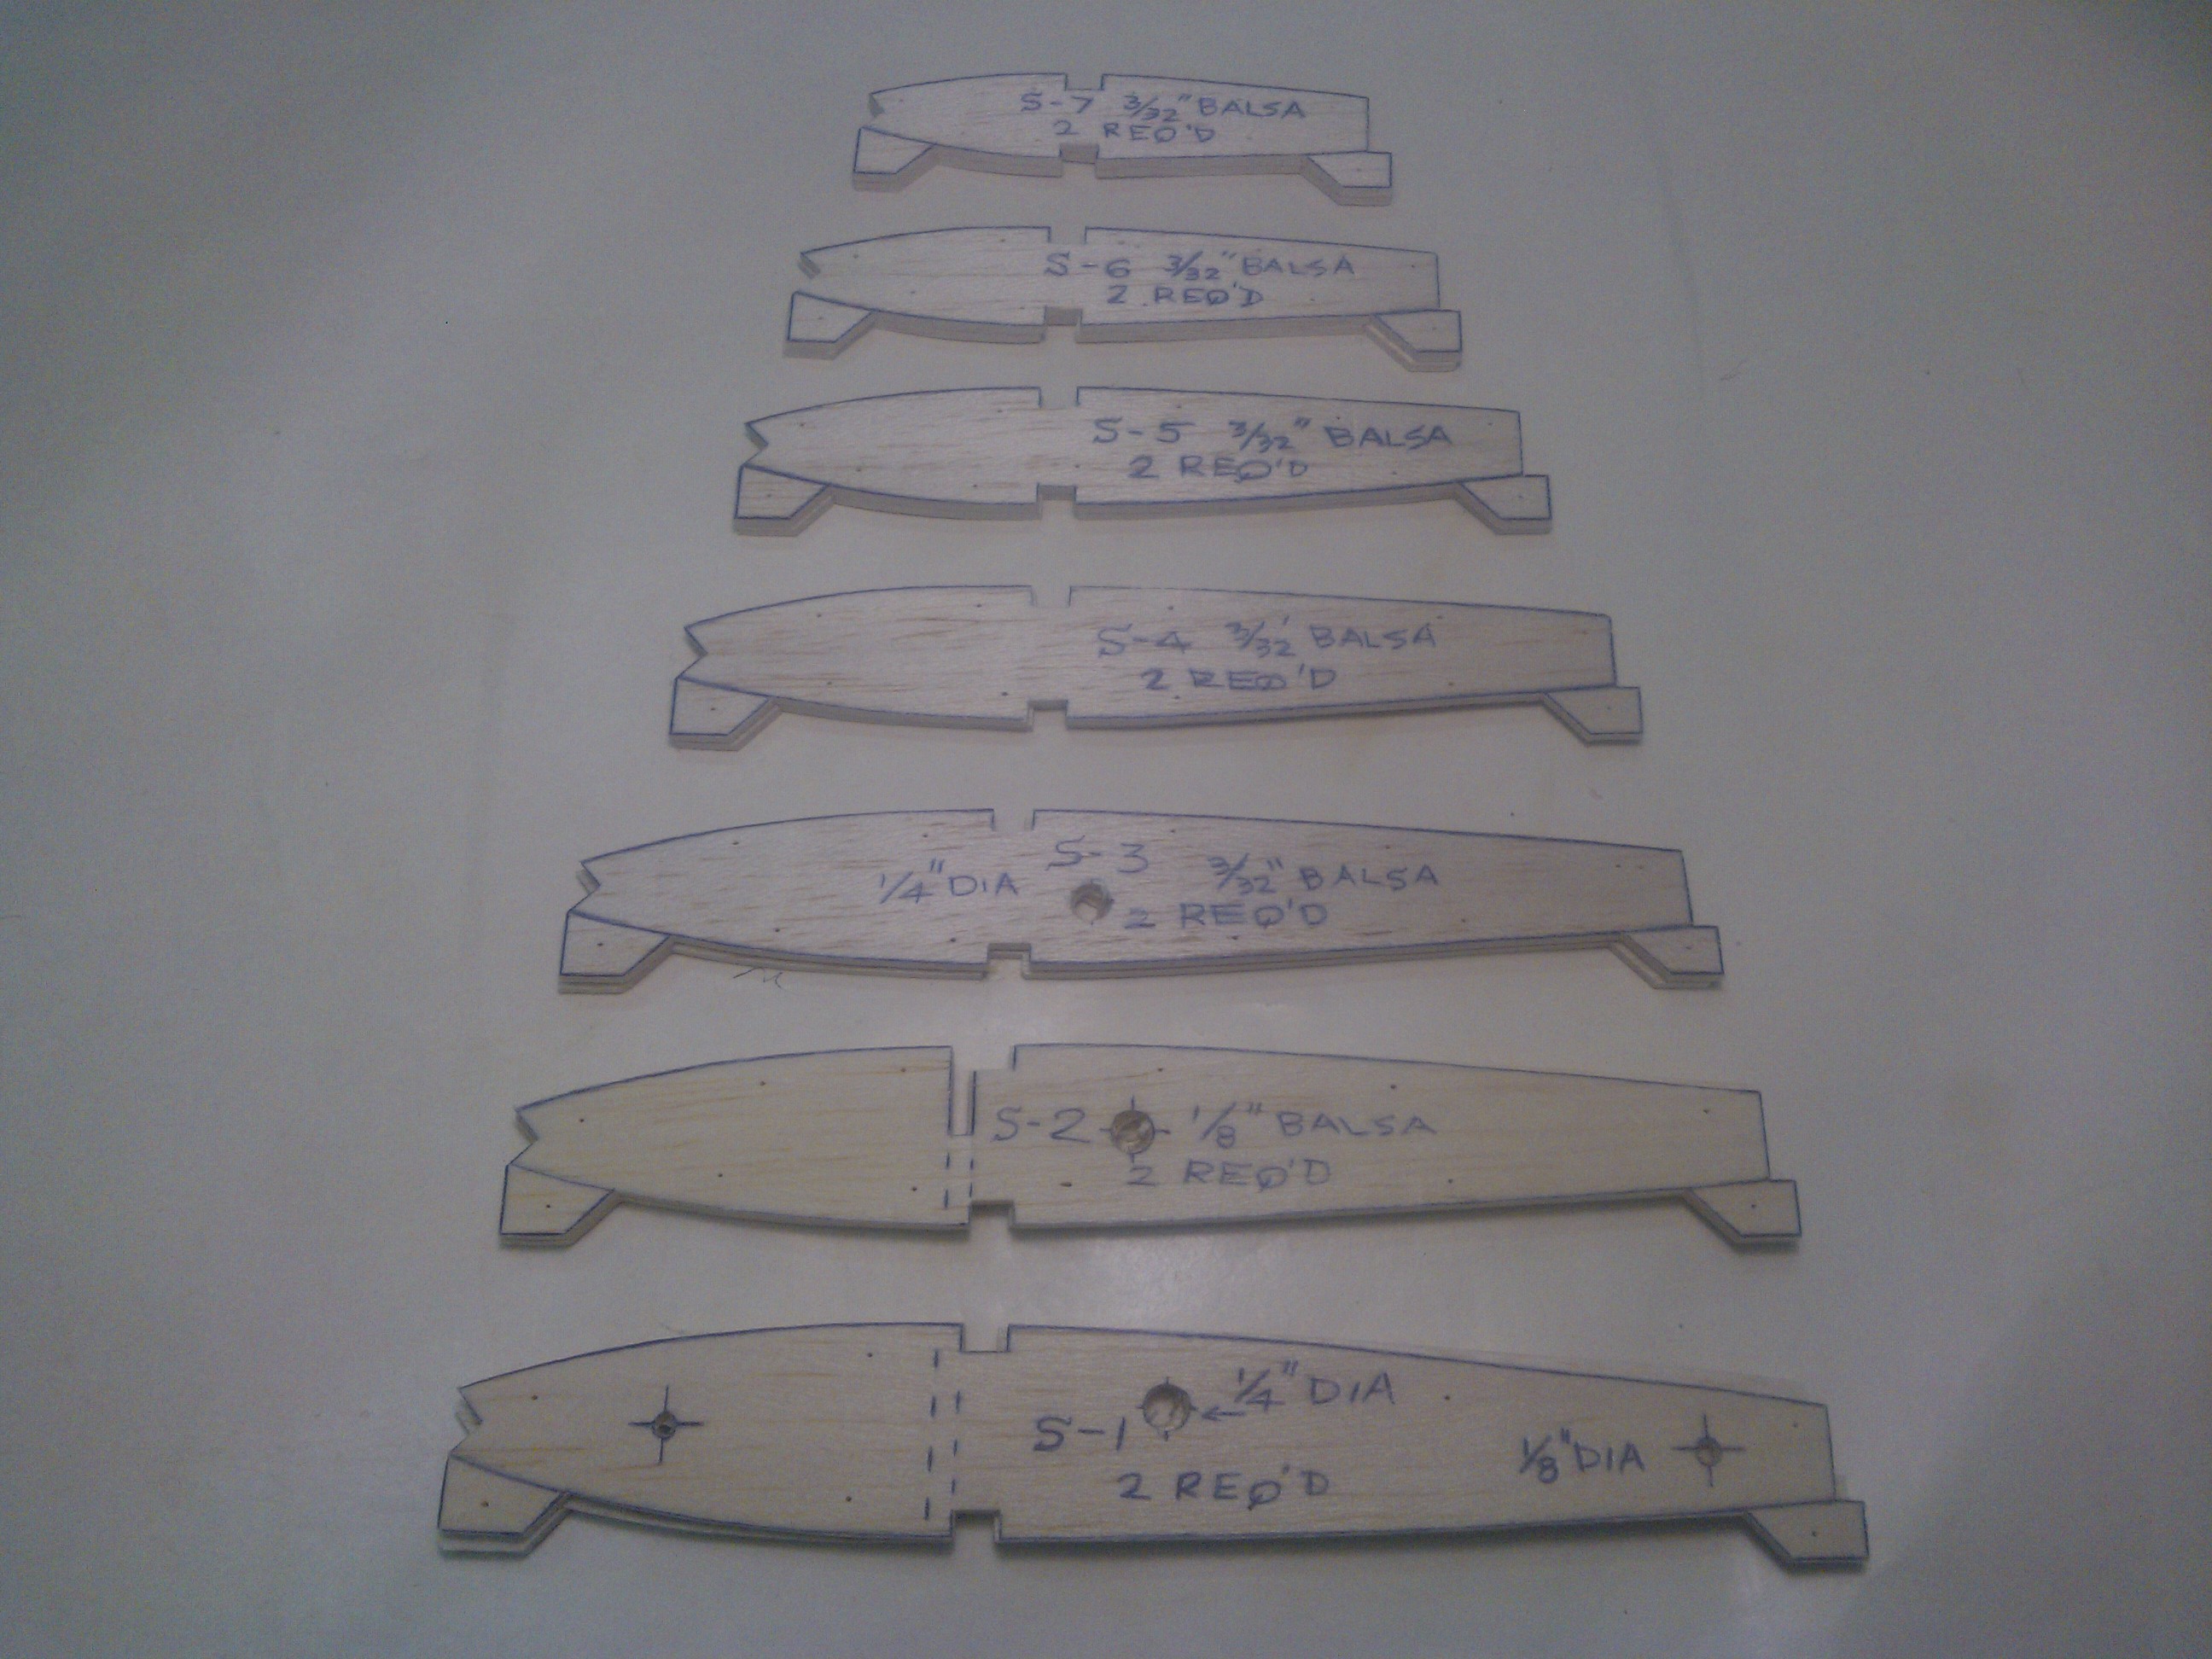
05-27-2014, 11:42 AM
#329
Senior Member
My Feedback: (1)
Join Date: Jan 2004
Location: Cape TownN/A, SOUTH AFRICA
Posts: 258
Likes: 0
Received 0 Likes
on
0 Posts
Hi
I placed the stab ribs on the drawing,as per instructions and this is the start of the assembling process. Just align the trailing edge side of all the ribs,with the trailing edge on the drawing. My stab ribs,do not align exactly with the drawing. So use the trailing edge as a reference. There is a photo of the page,that refers to S-AG,which must be inserted into a slot in S-2. This places S-1 on the correct angle. I don`t see this S-AG on my drawings at all. It must be a printing error? This is not the 1st error that I found.
Regards
Craig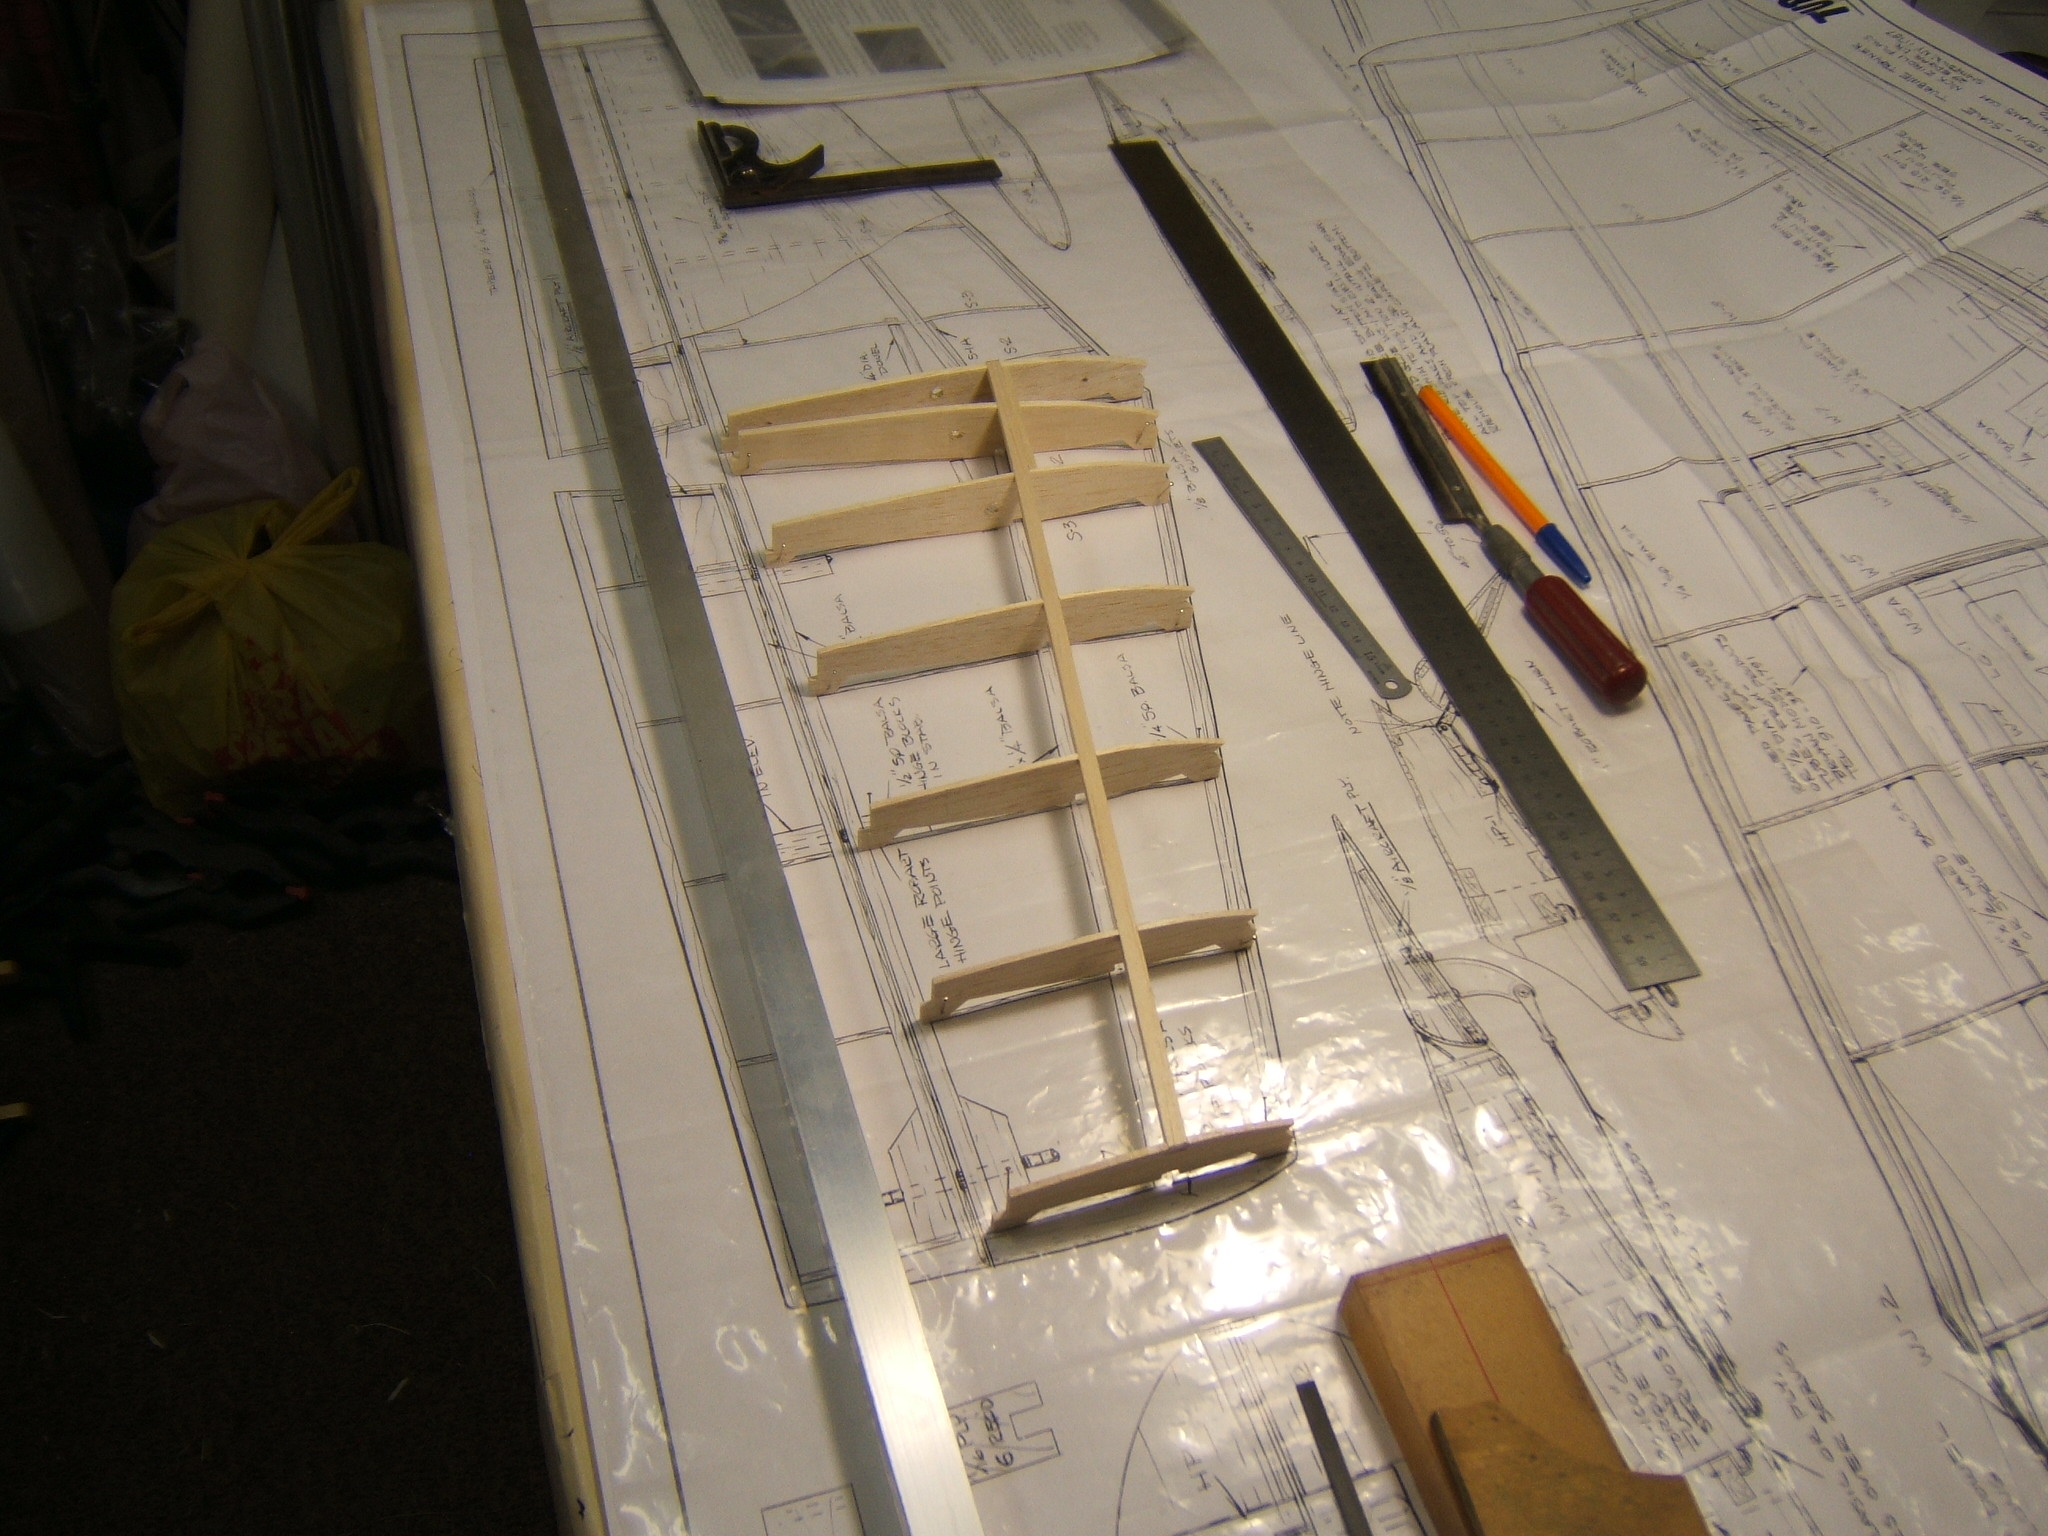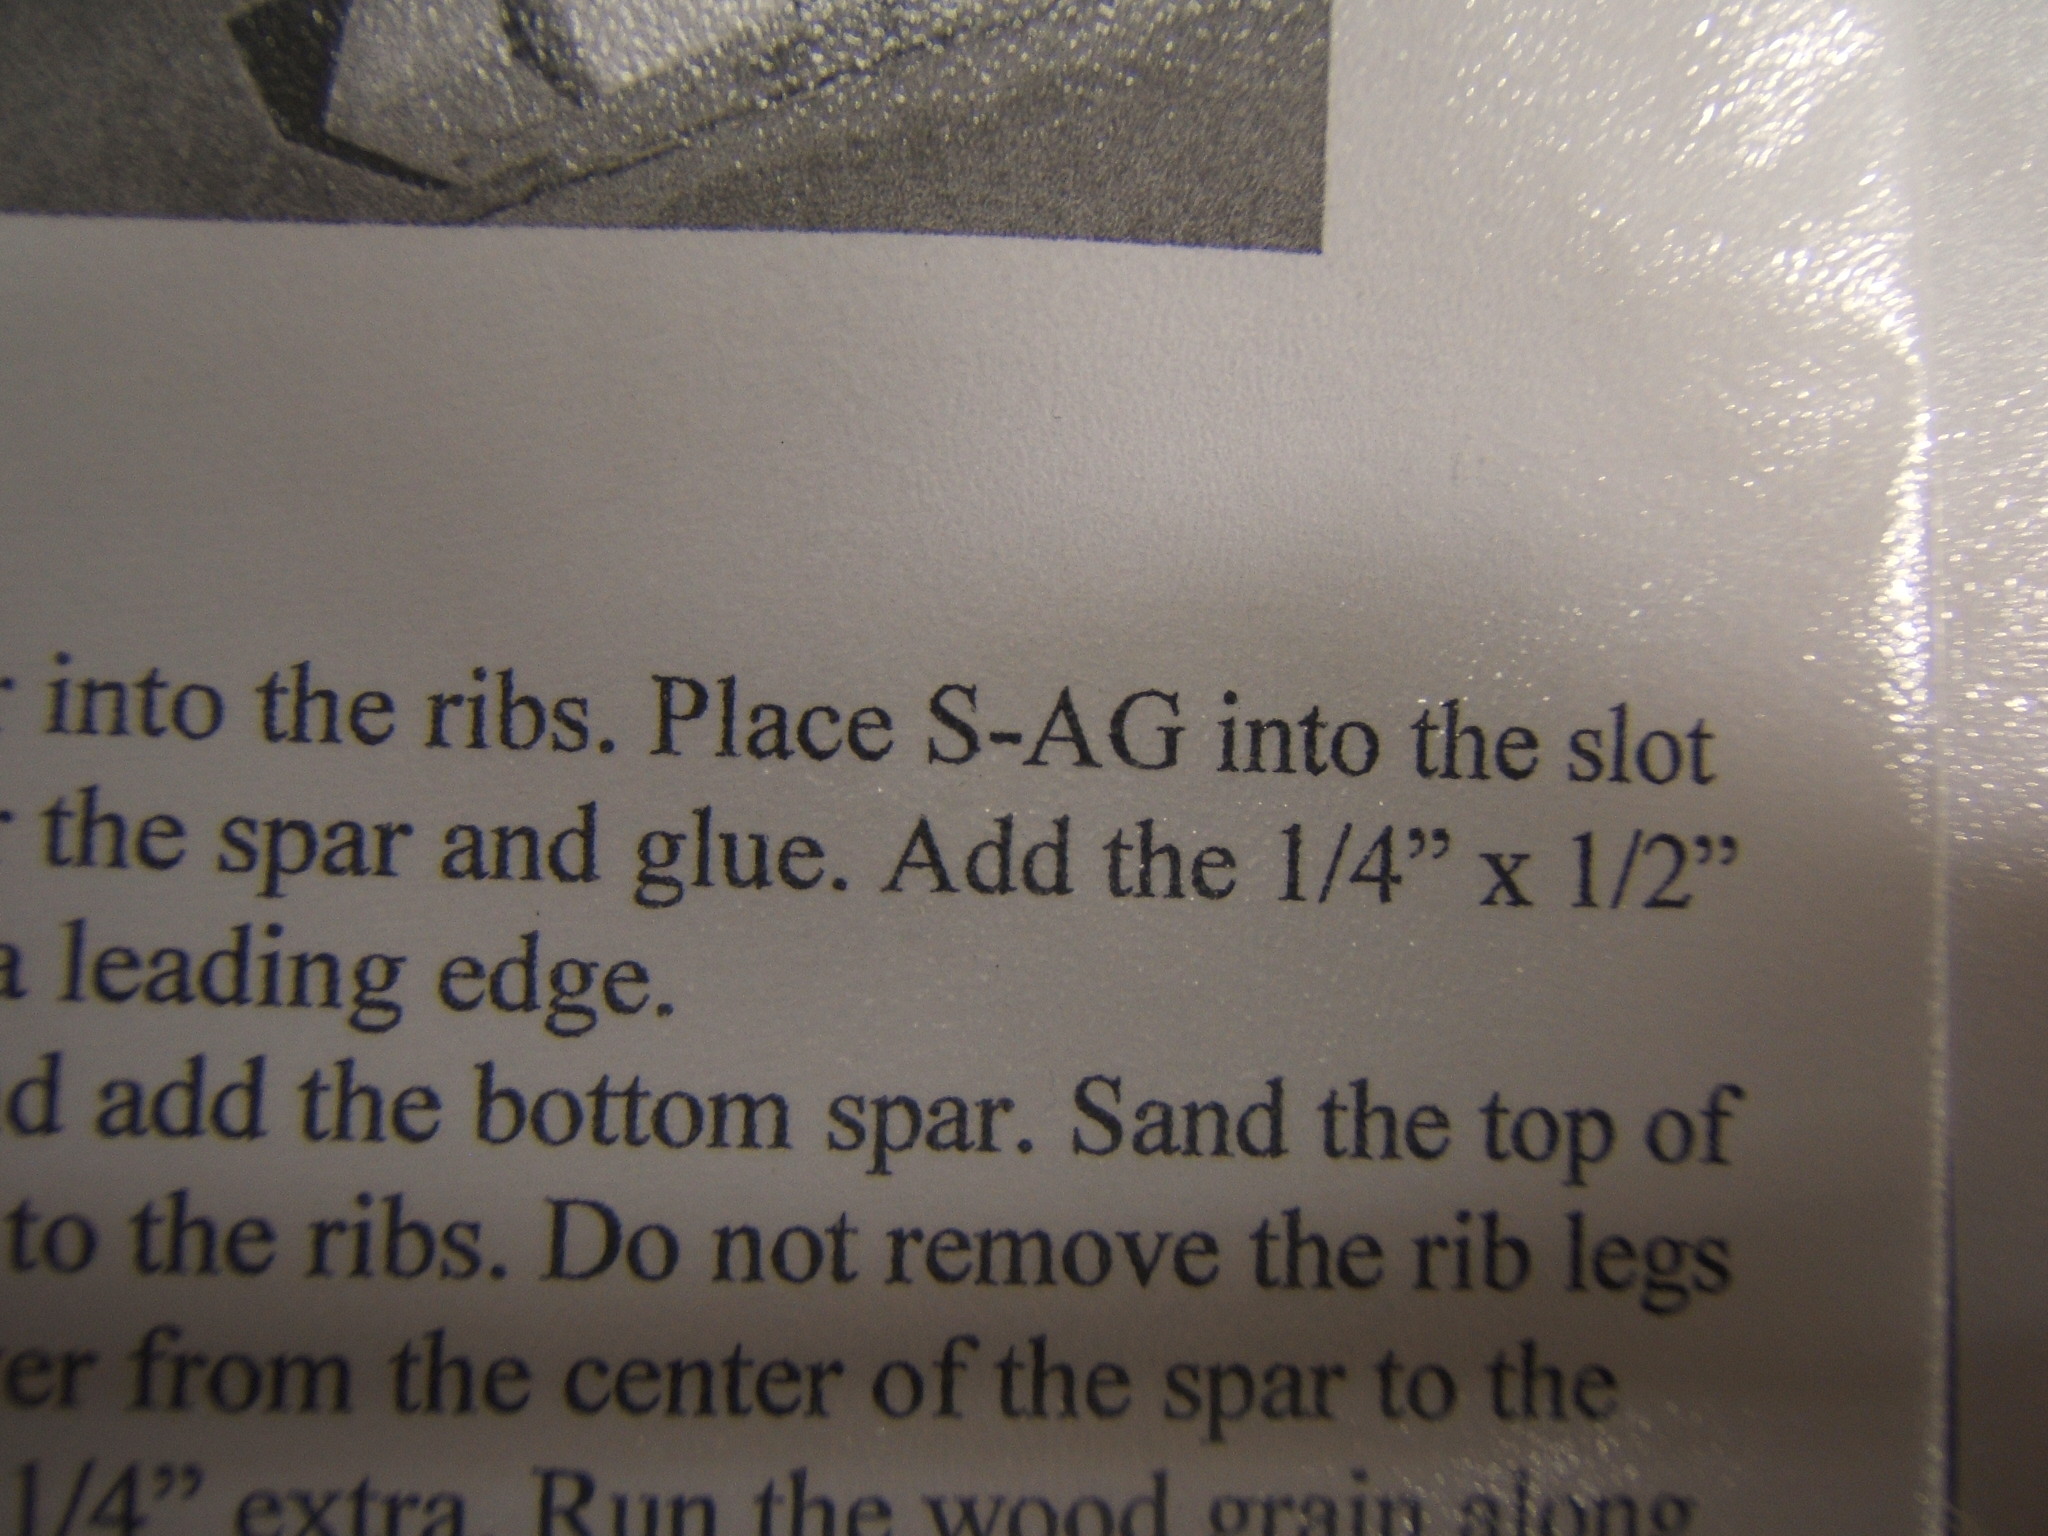
05-28-2014, 11:19 AM
#331
Senior Member
My Feedback: (1)
Join Date: Jan 2004
Location: Cape TownN/A, SOUTH AFRICA
Posts: 258
Likes: 0
Received 0 Likes
on
0 Posts
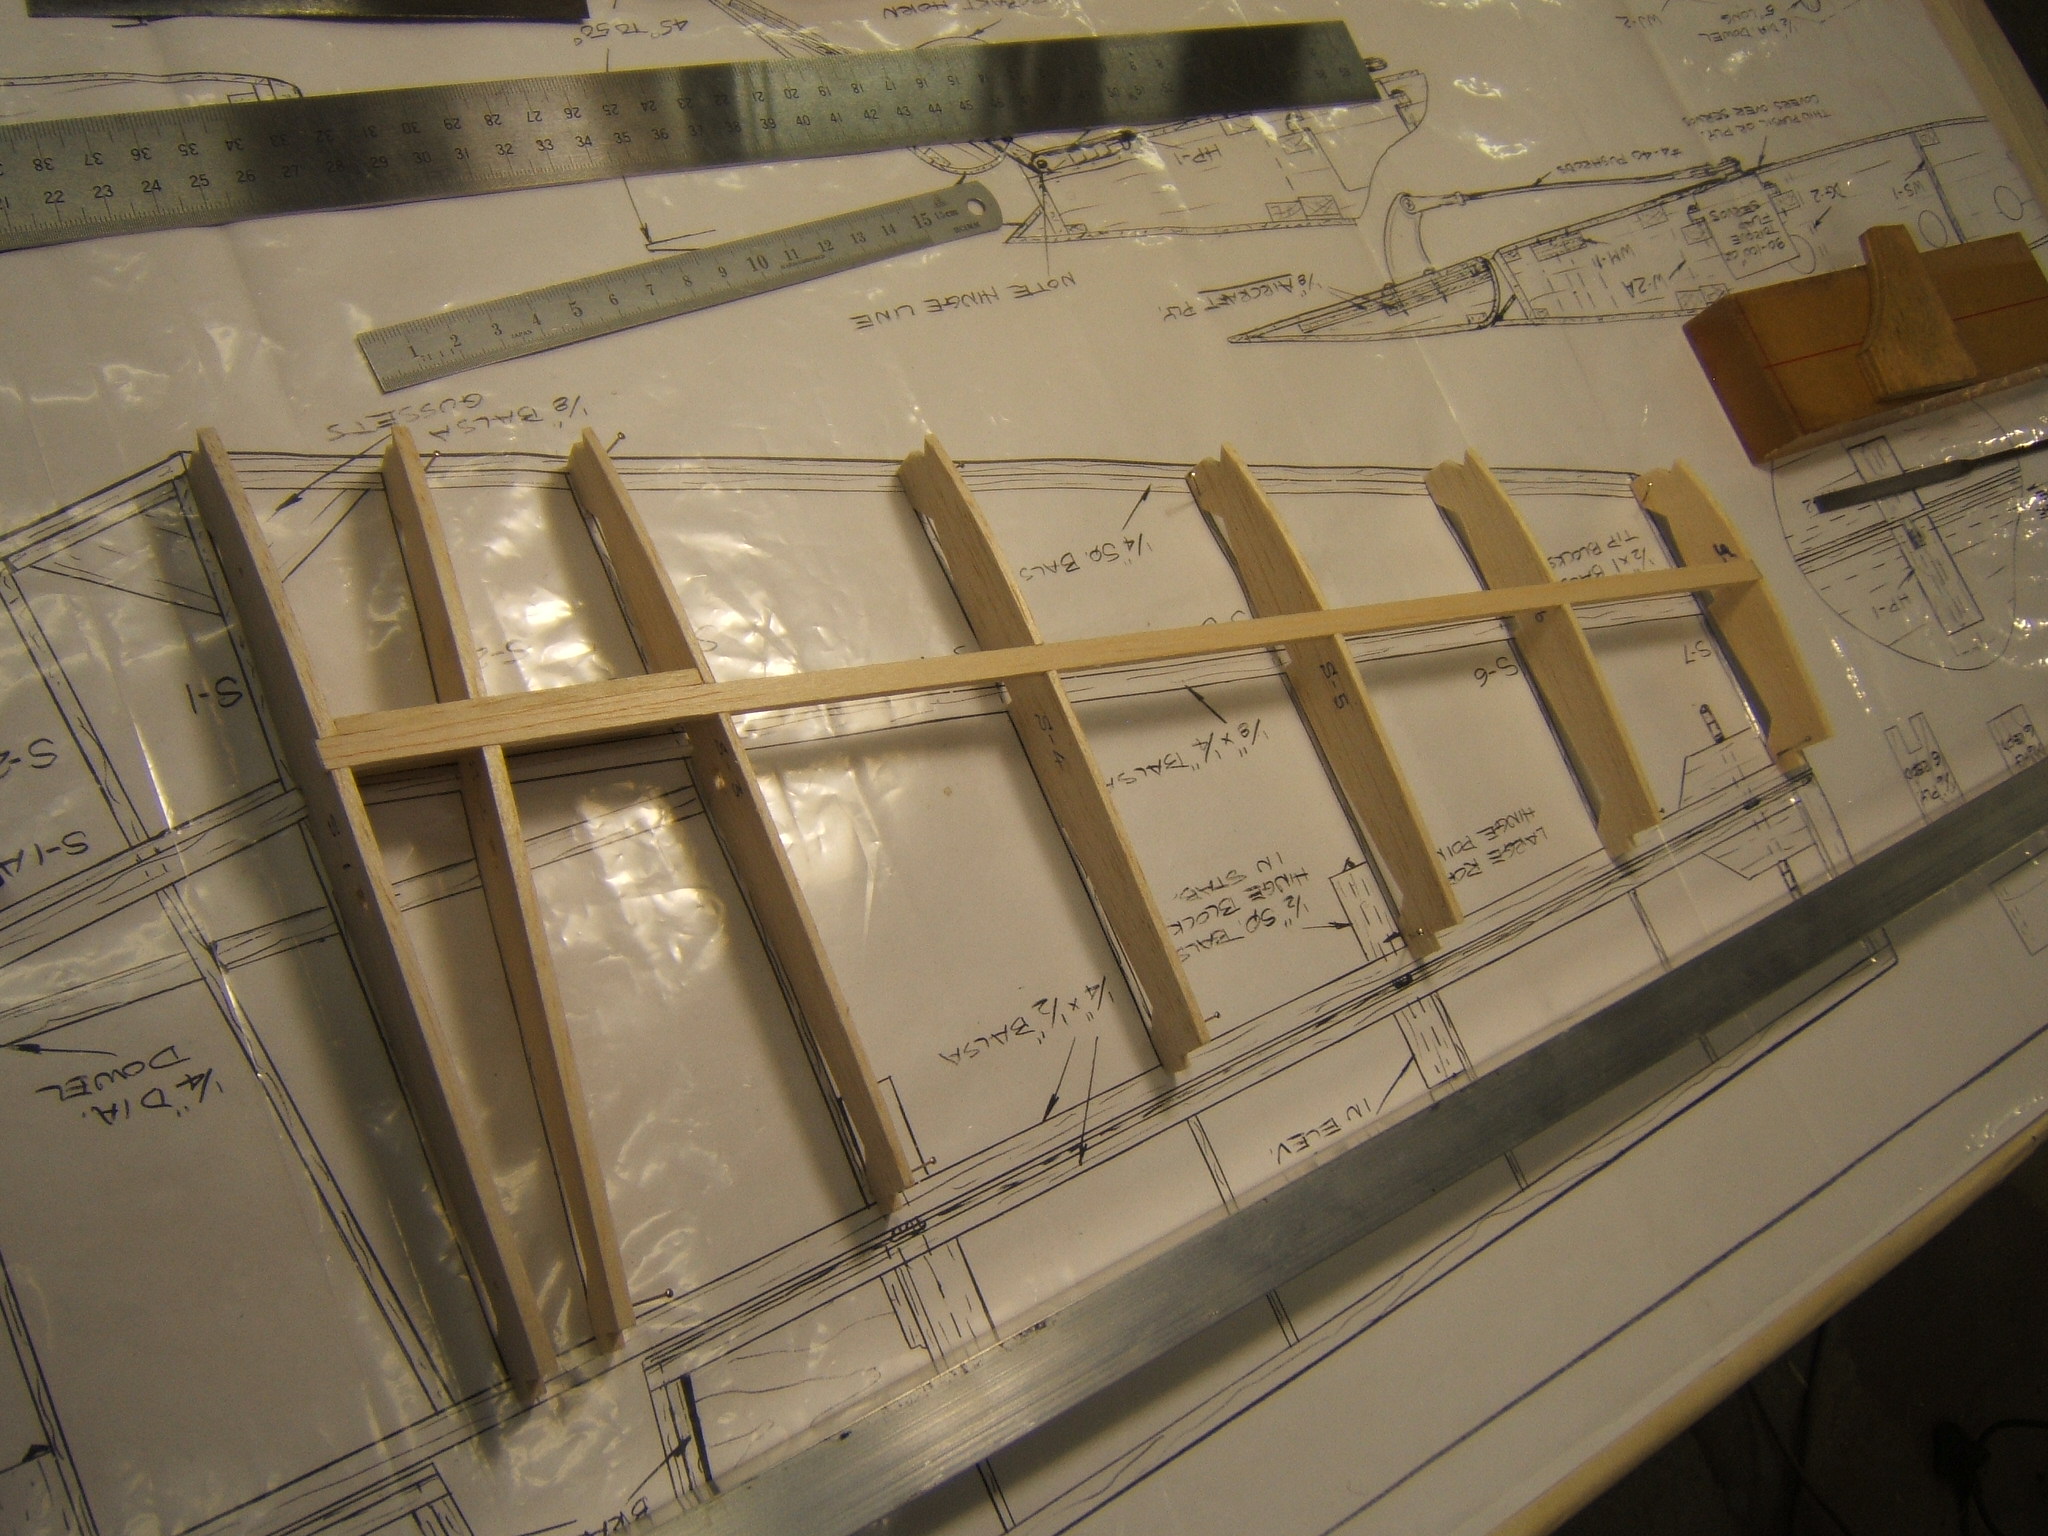
Yes,that is what I figured out. It could also be referred to as S-1A.
Just added the top spar,trailing edge and leading edge.
Regards
Craig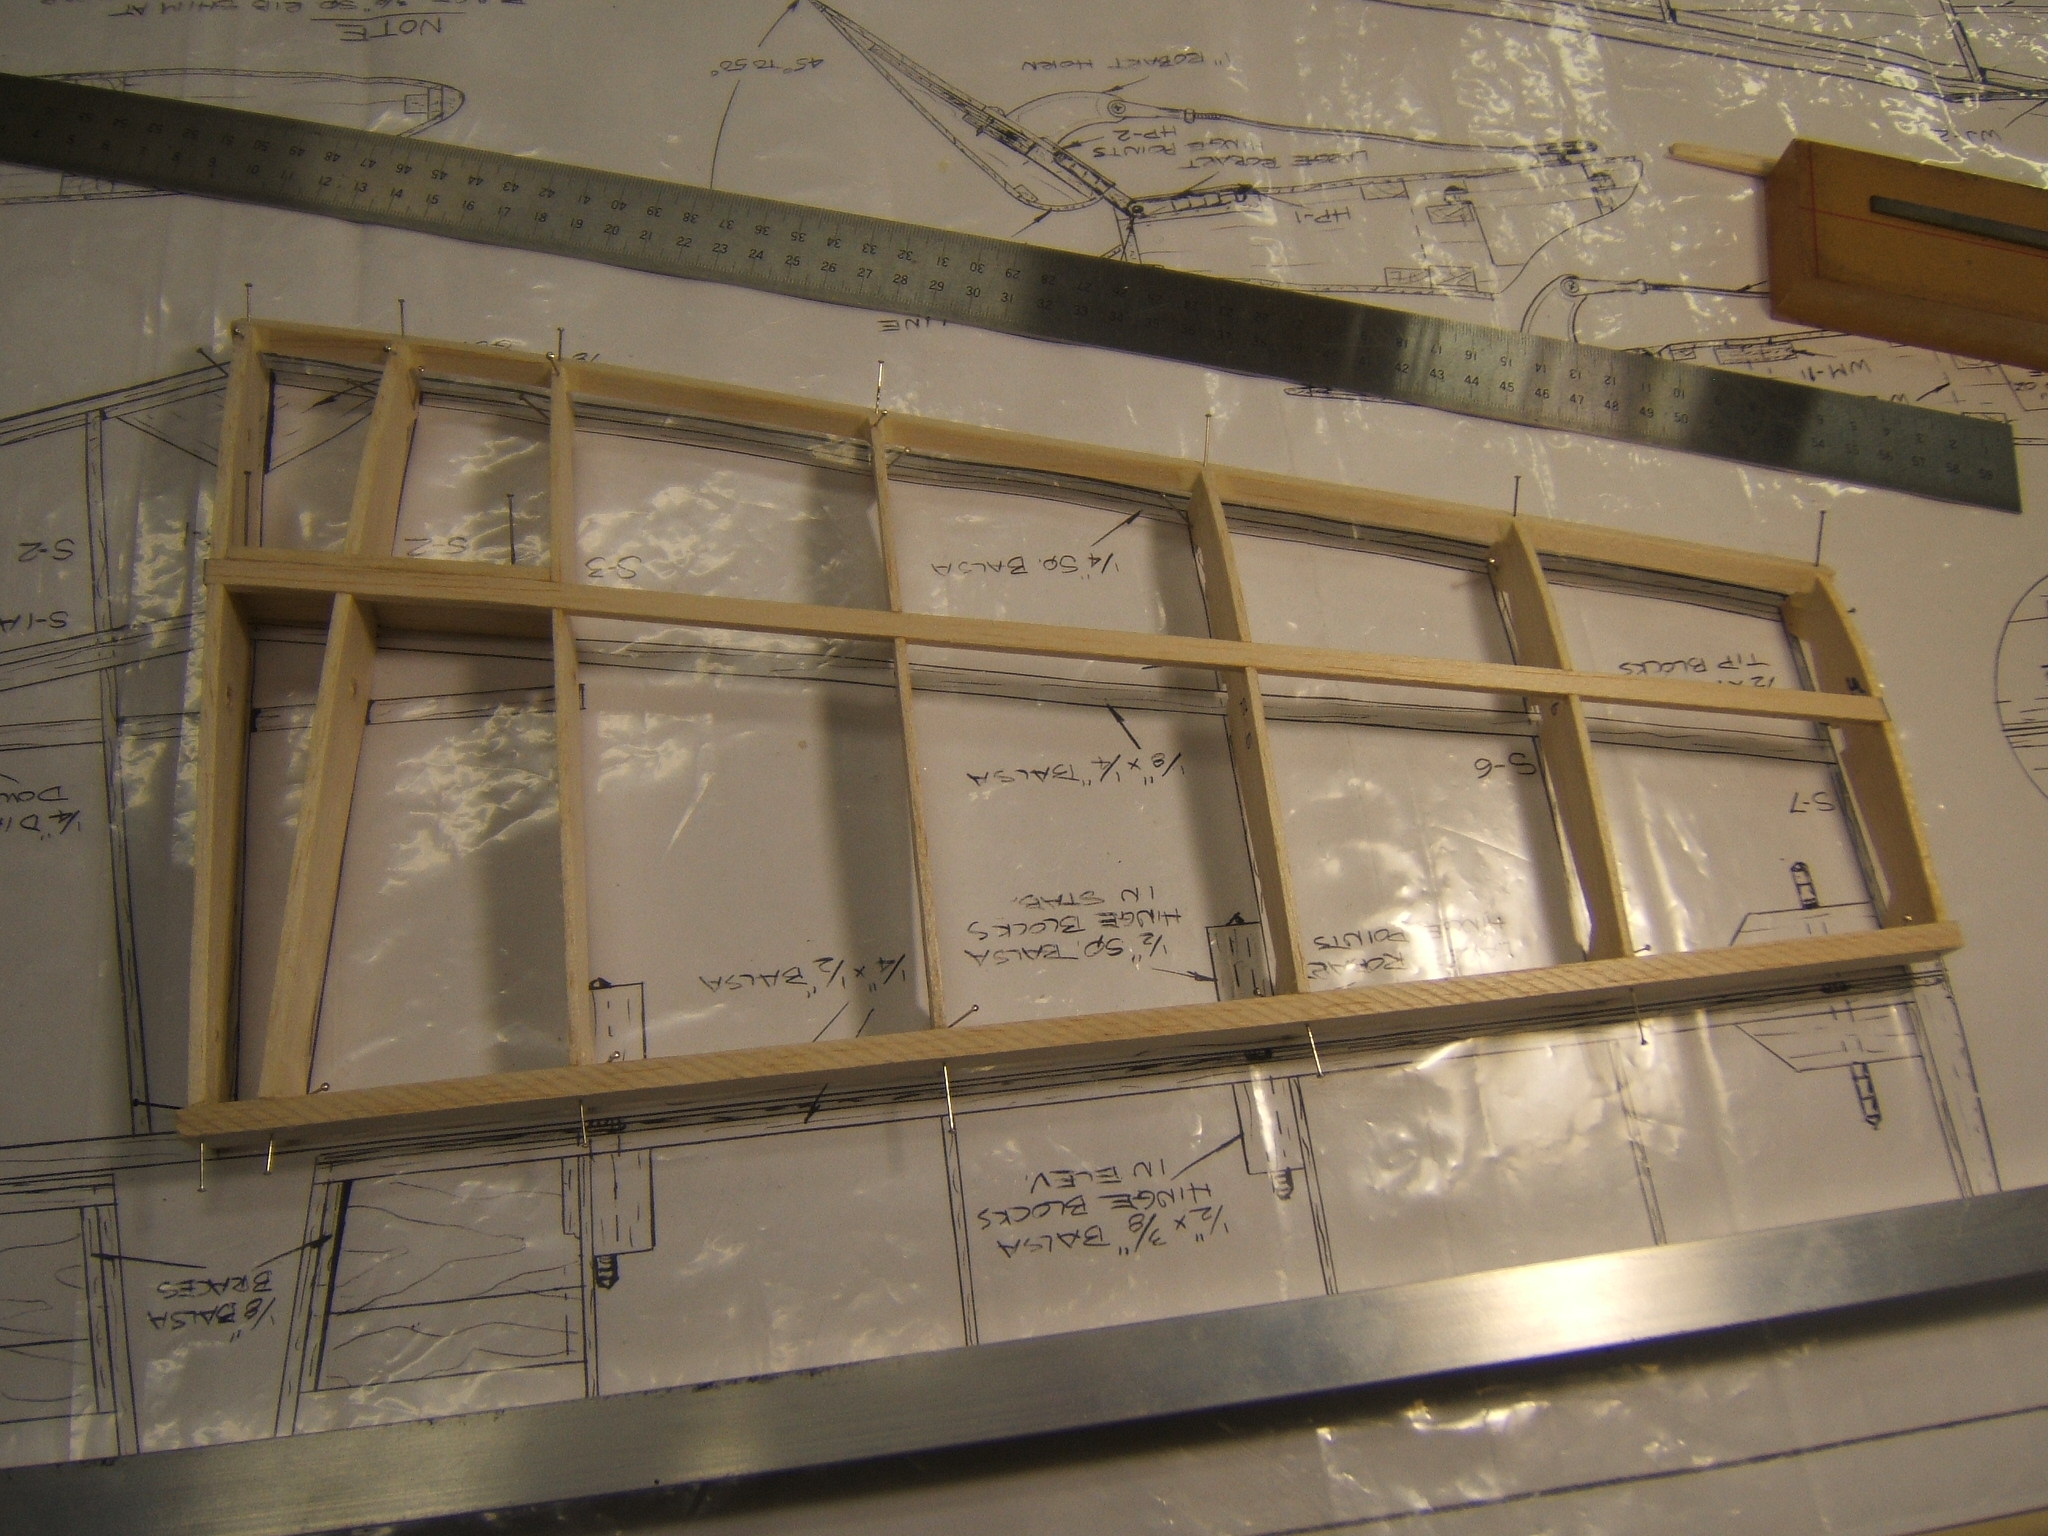
Just added the top spar,trailing edge and leading edge.
Regards
Craig
05-29-2014, 11:43 AM
#332
Senior Member
My Feedback: (1)
Join Date: Jan 2004
Location: Cape TownN/A, SOUTH AFRICA
Posts: 258
Likes: 0
Received 0 Likes
on
0 Posts
Hi Guys
I removed the RH side stab from the drawing and added the lower spar. Then I built the LH side stab and will add the lower spar tomorrow. Used the RH panel as a reference,to get the LH panel exactly the same.
Regards
Craig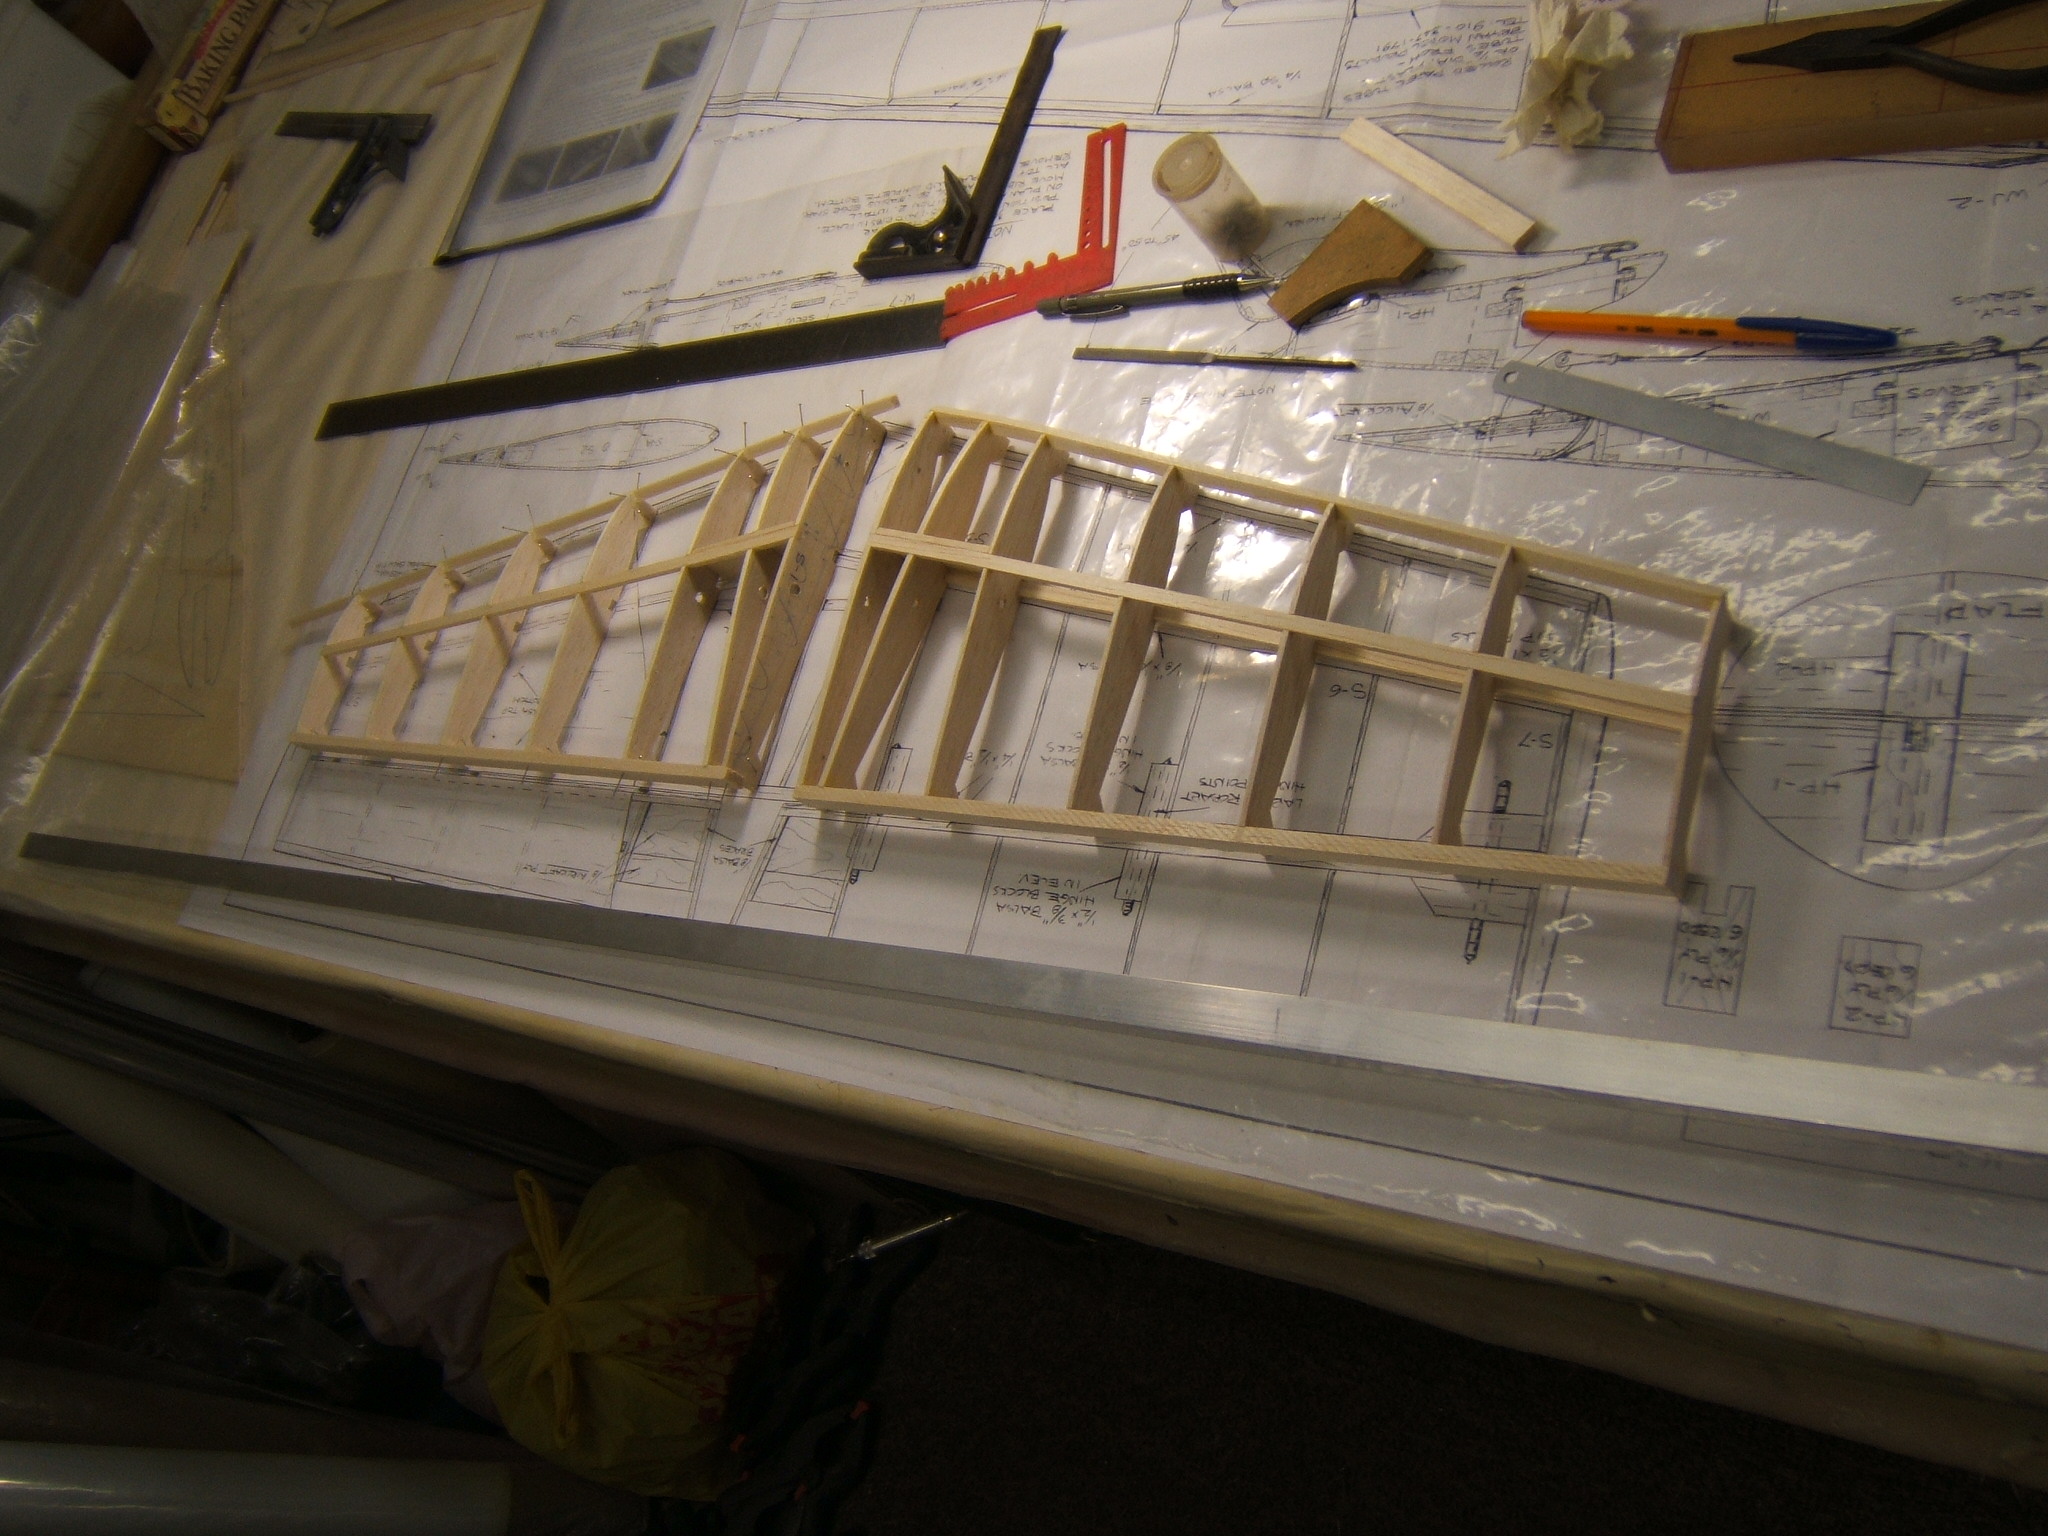
I removed the RH side stab from the drawing and added the lower spar. Then I built the LH side stab and will add the lower spar tomorrow. Used the RH panel as a reference,to get the LH panel exactly the same.
Regards
Craig
06-08-2014, 07:41 AM
#334
Senior Member
My Feedback: (1)
Join Date: Jan 2004
Location: Cape TownN/A, SOUTH AFRICA
Posts: 258
Likes: 0
Received 0 Likes
on
0 Posts
Hi Guys
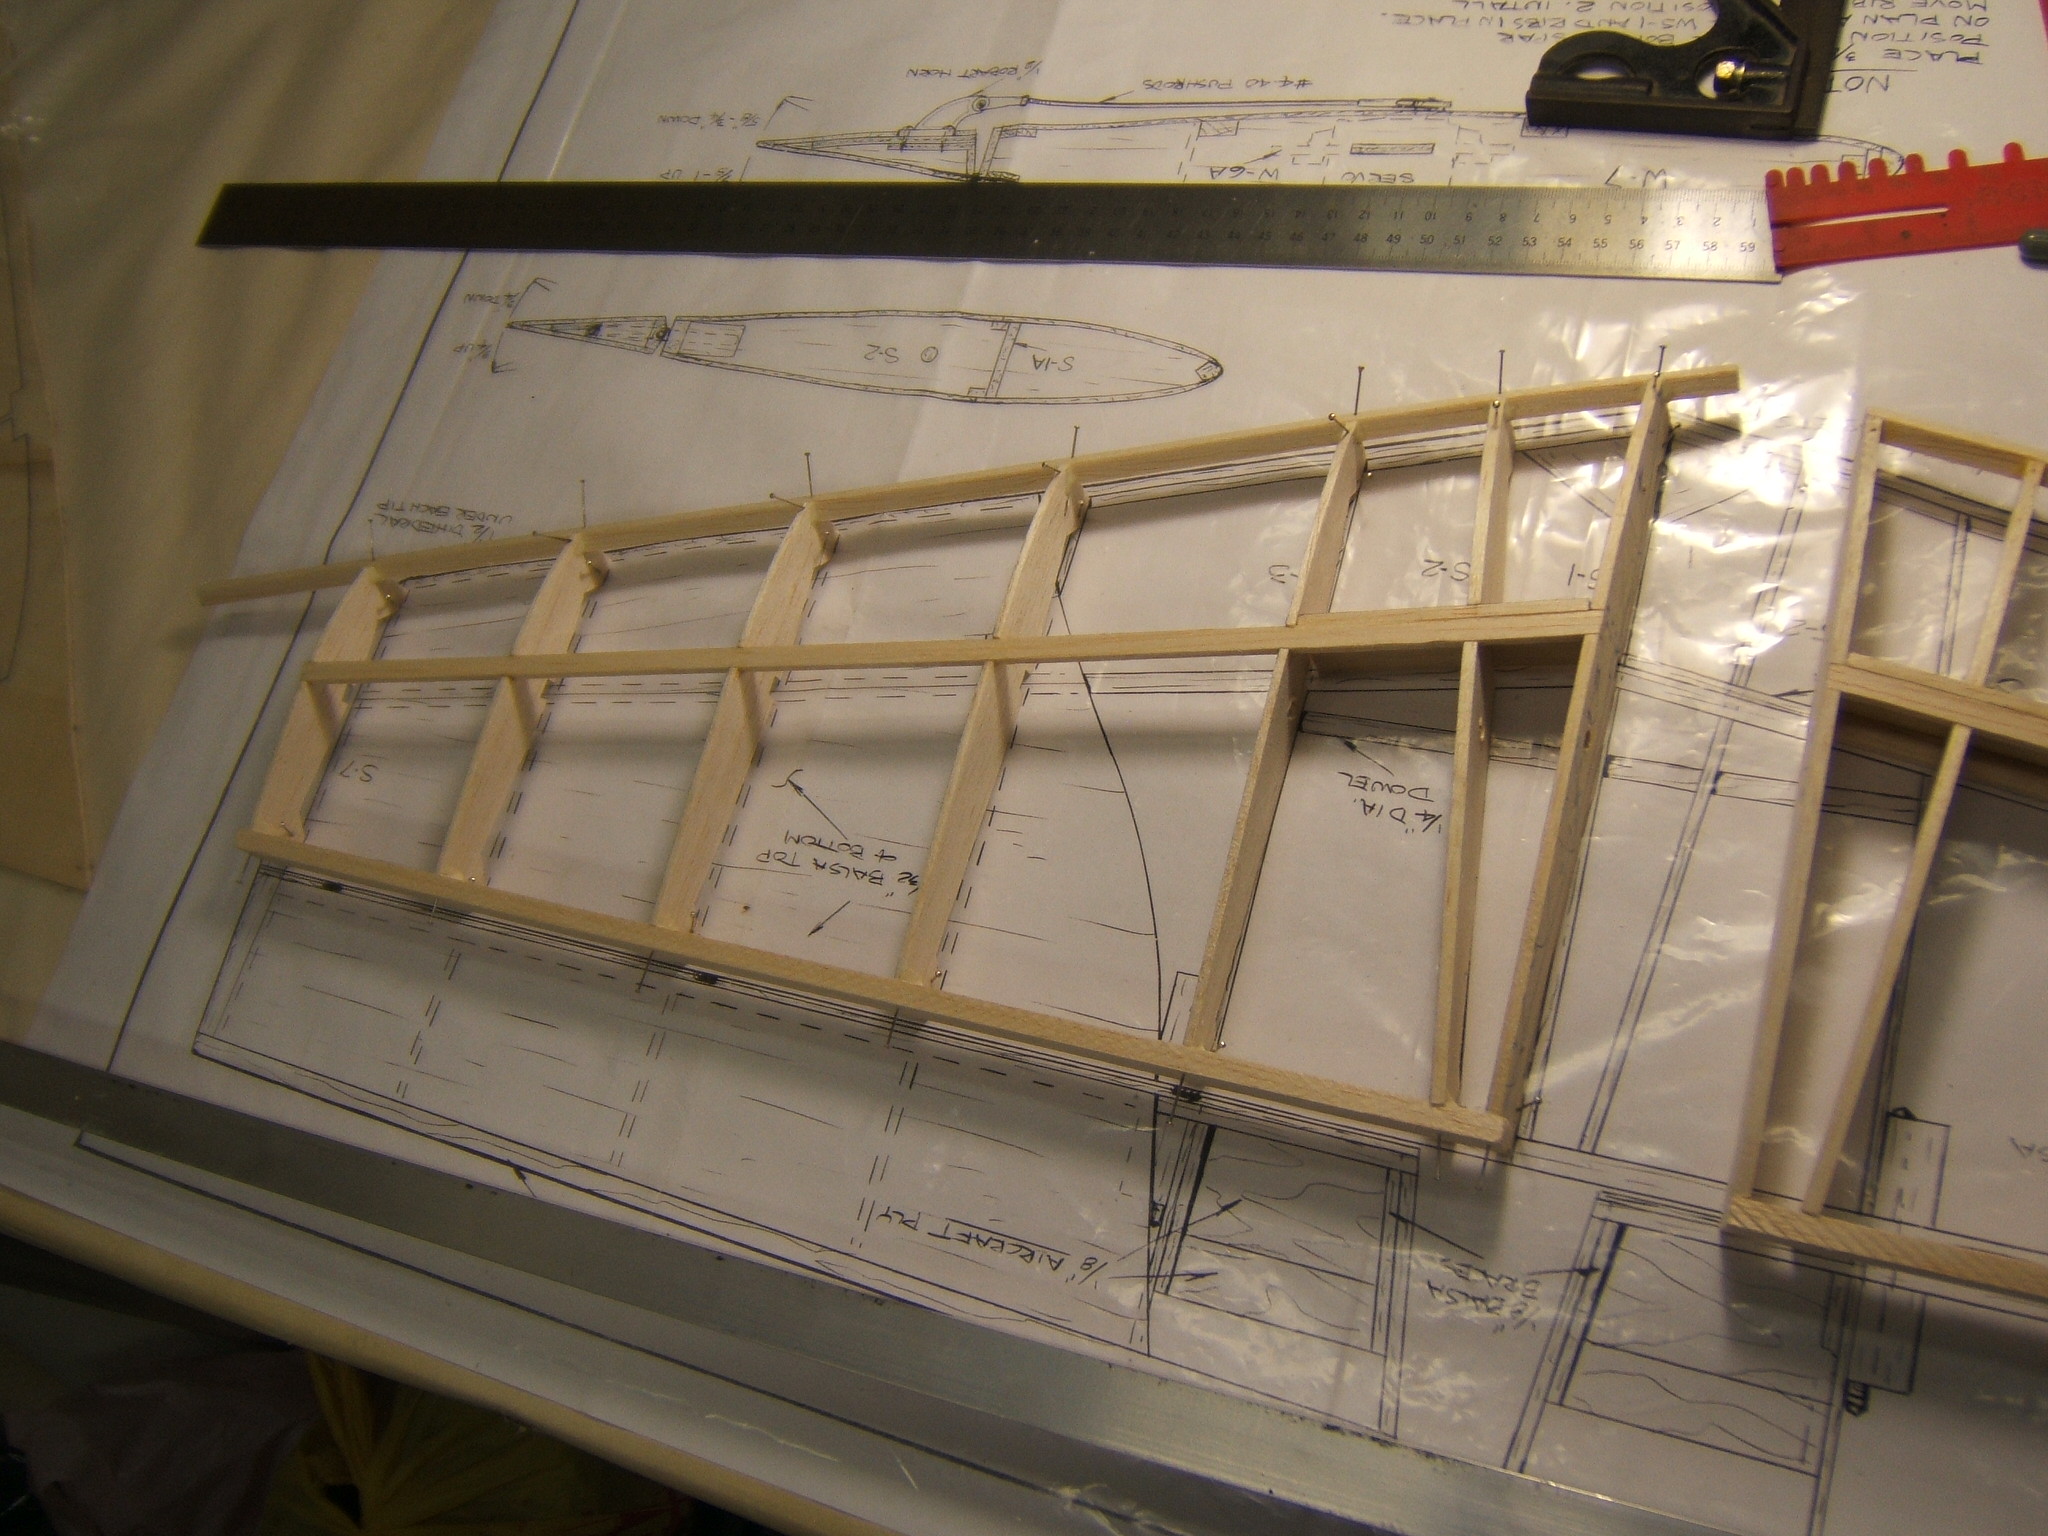
I have started the sheeting of the stab and left a 1/4" overhang on the TE side. This will be used to locate the correct hinge positions and later will be trimmed off.
Regards
Craig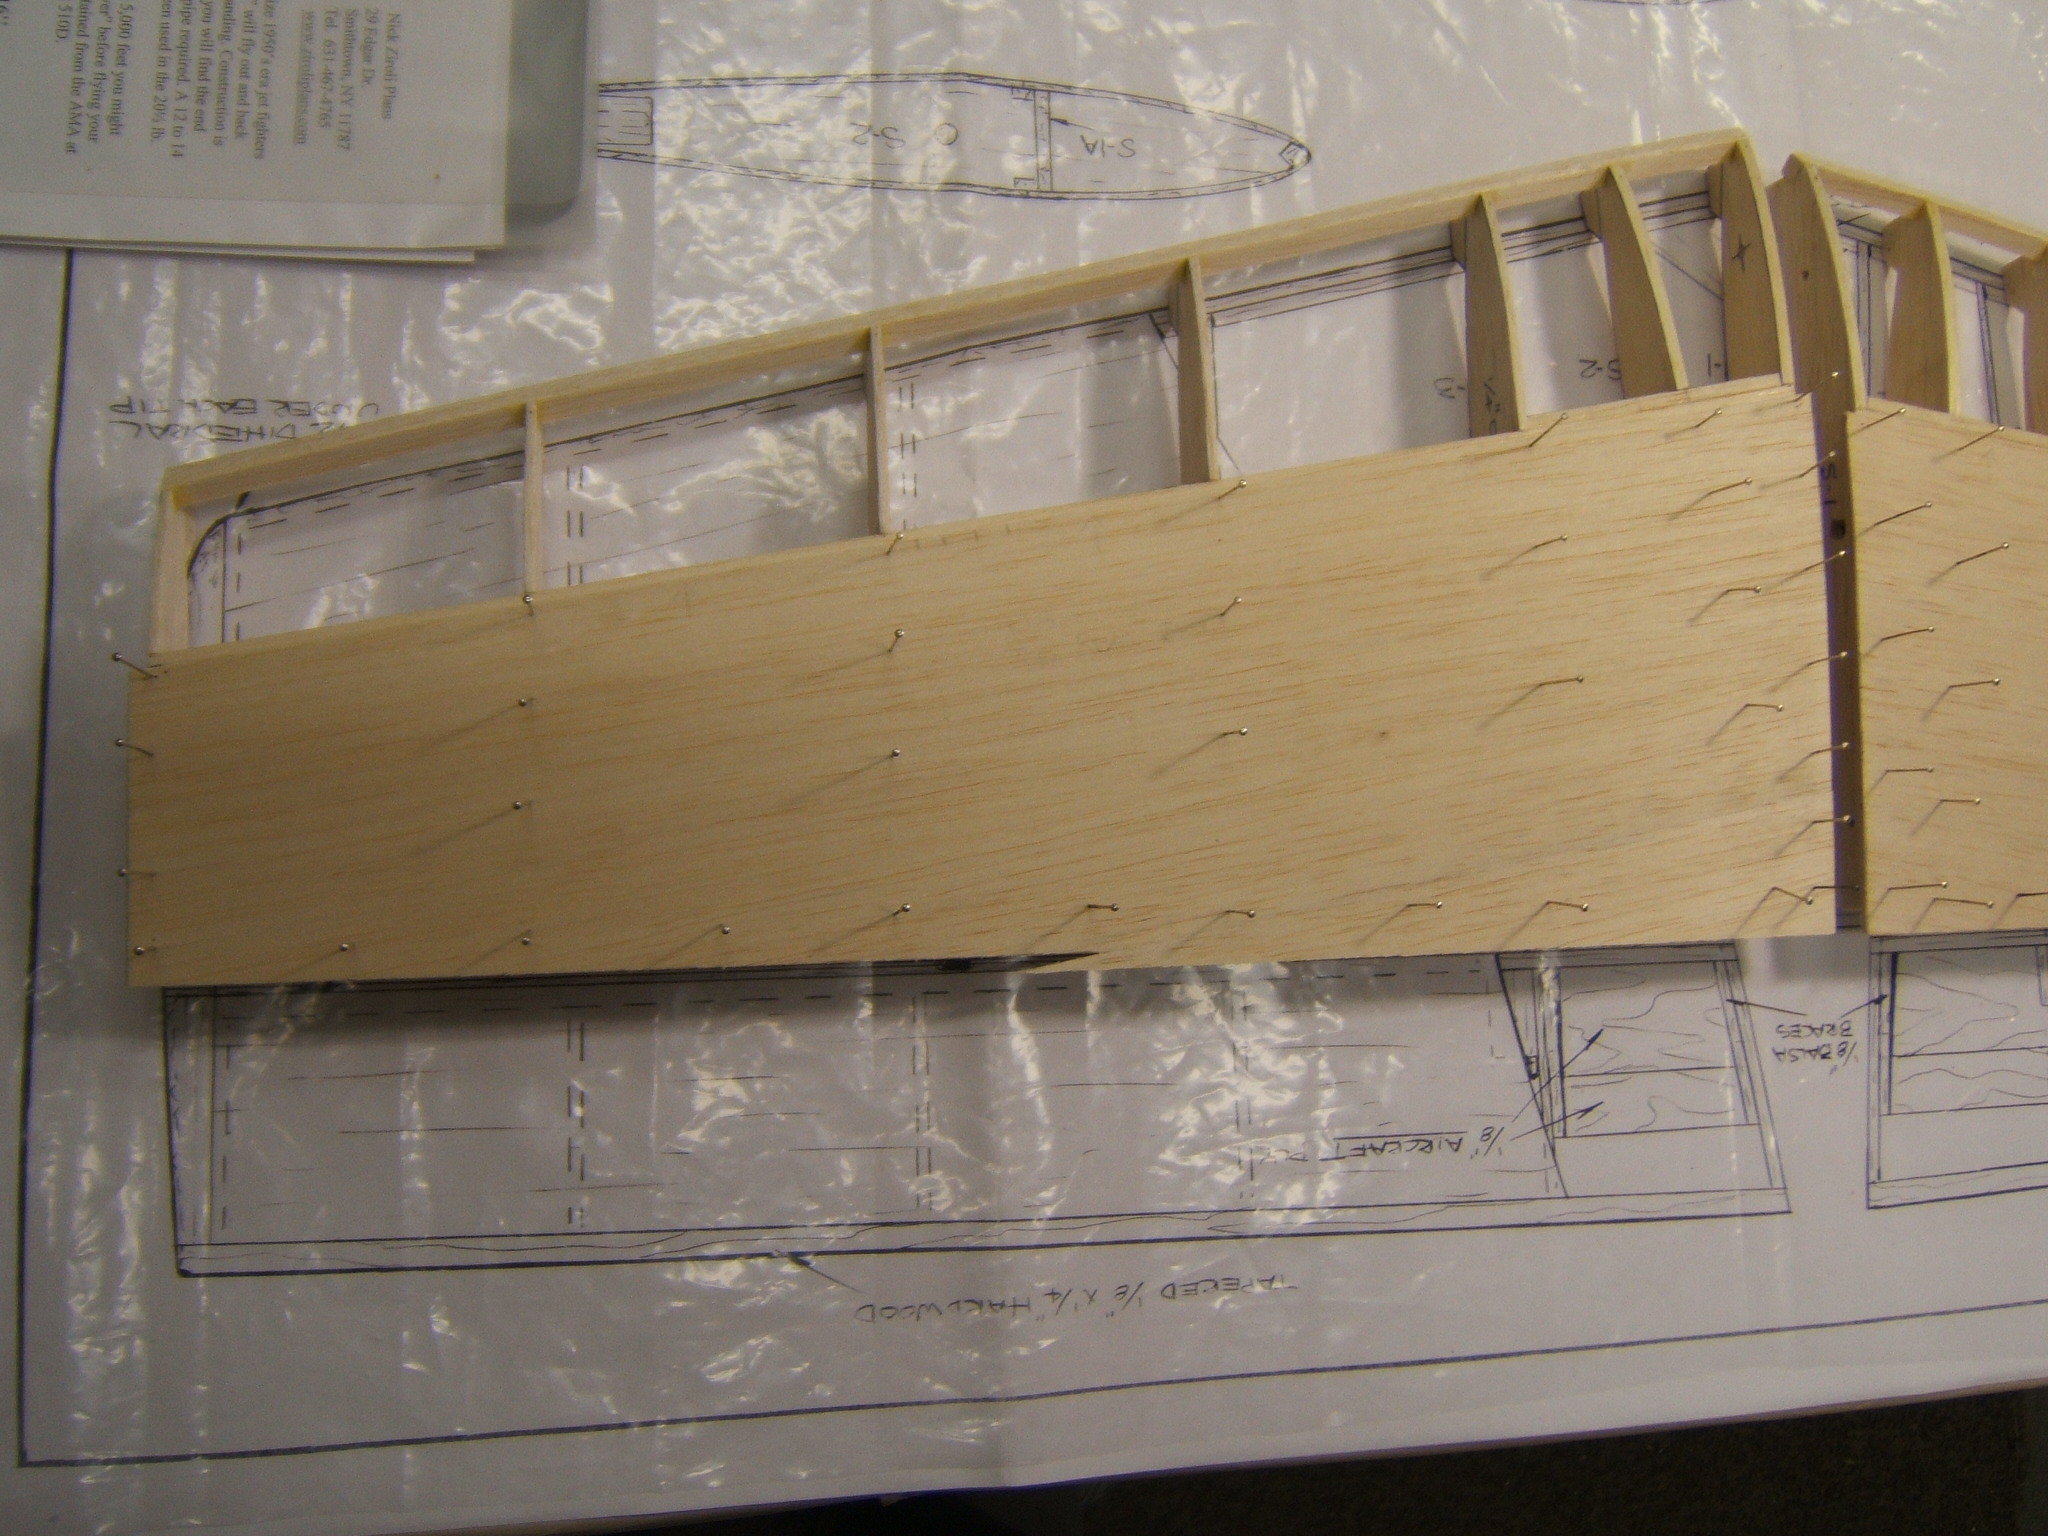
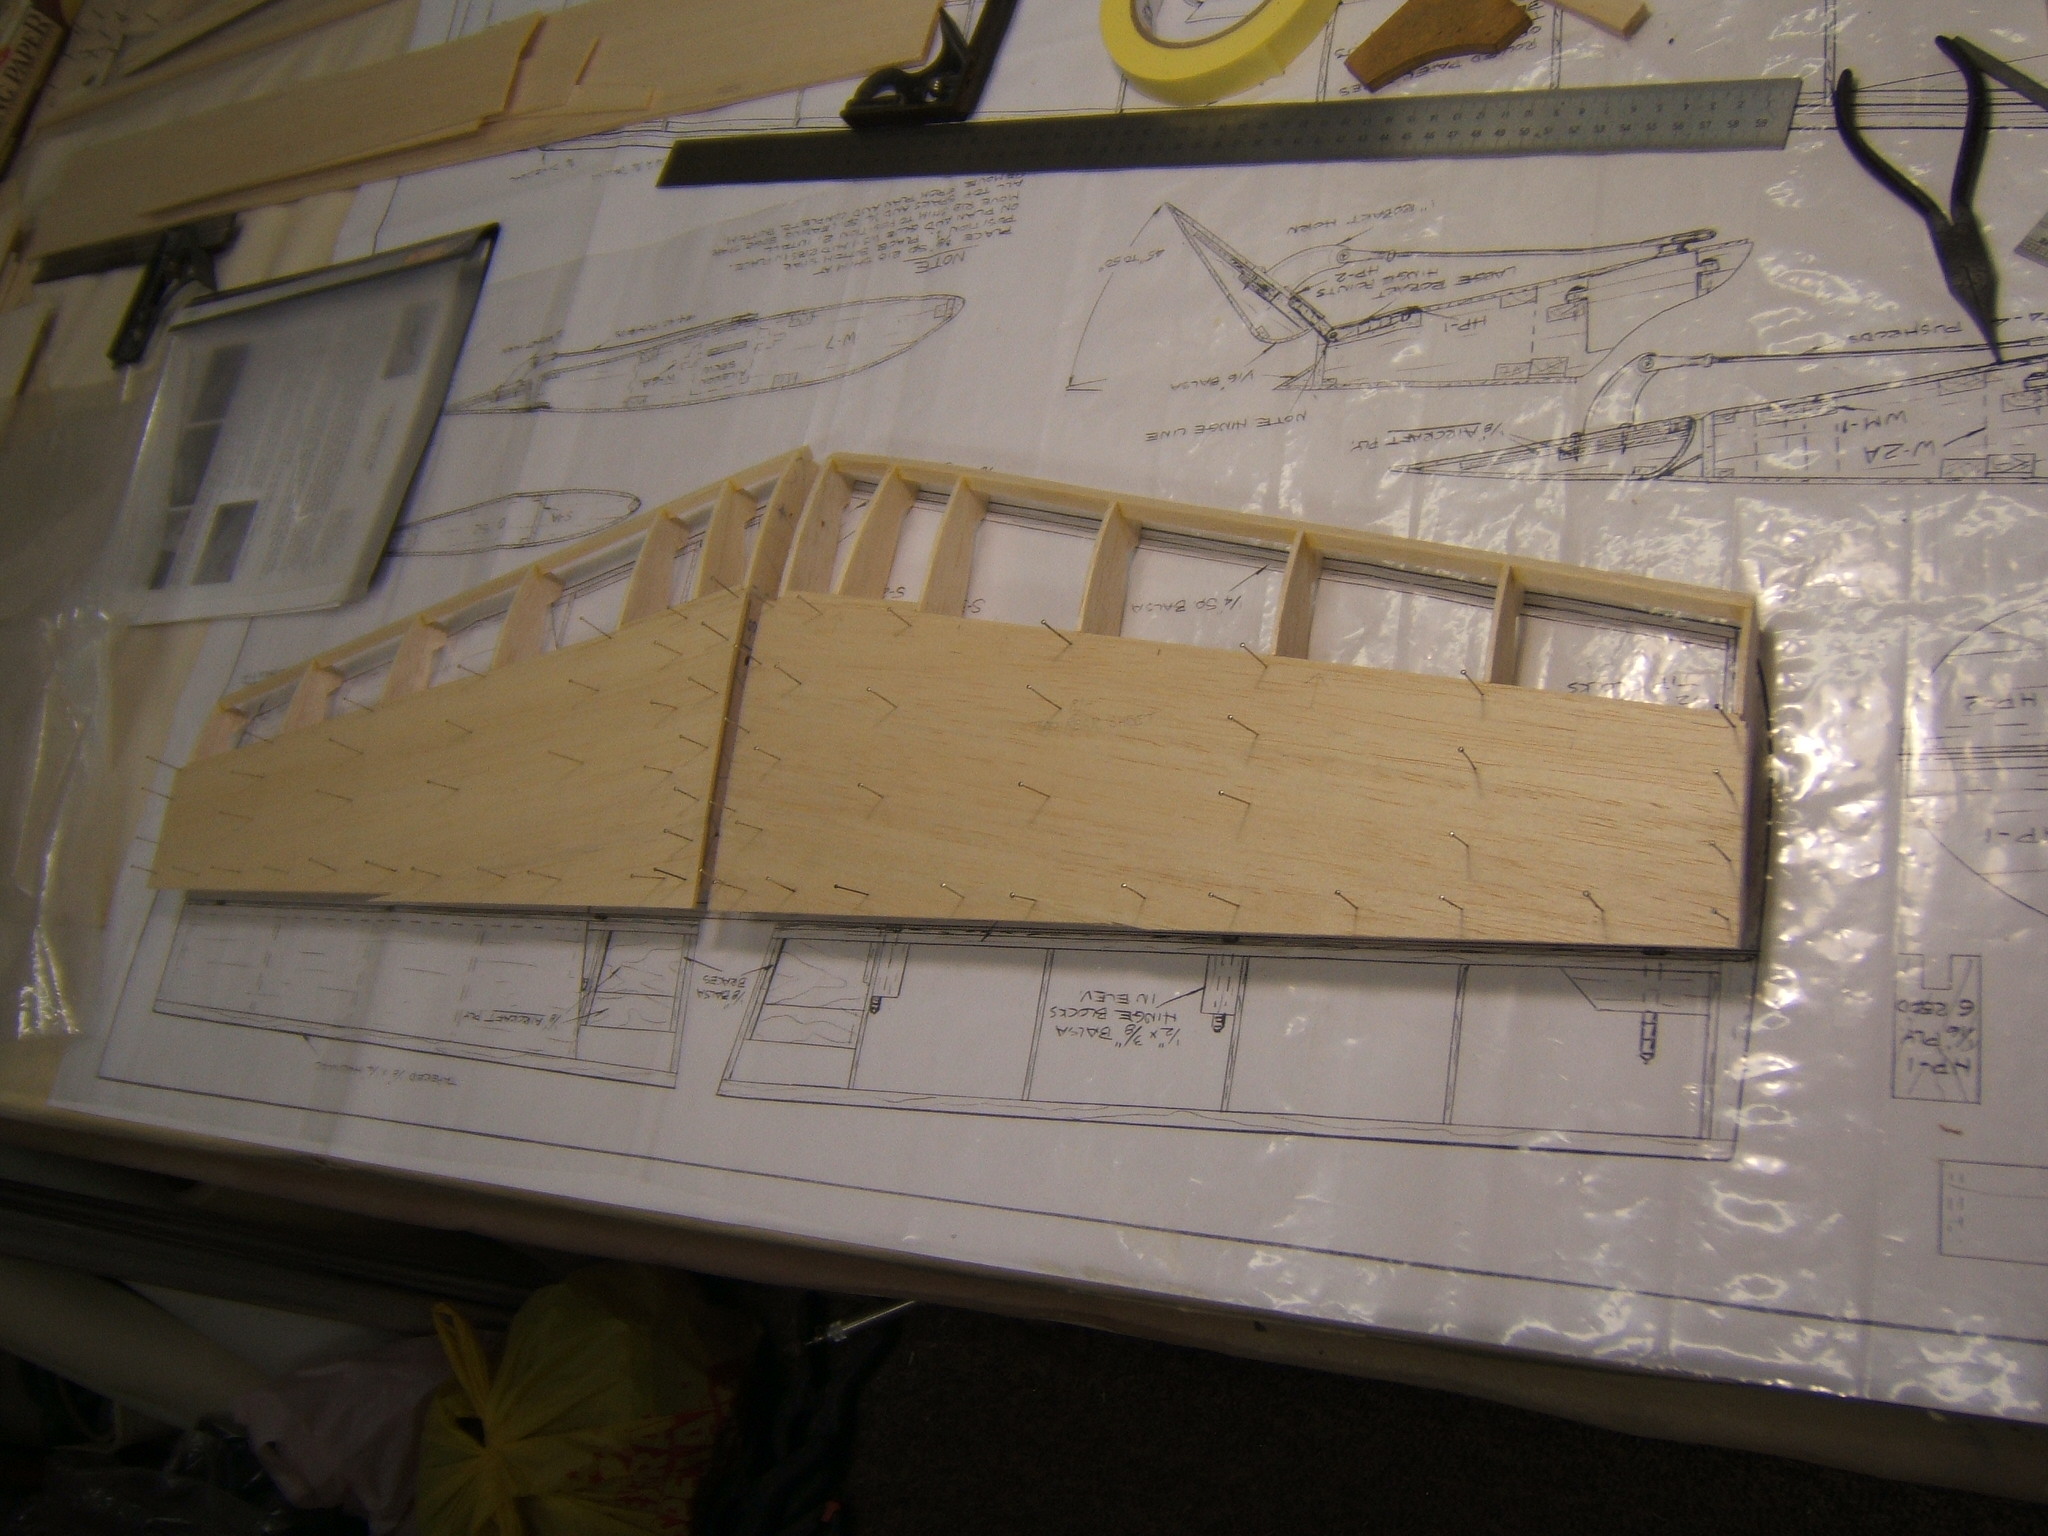
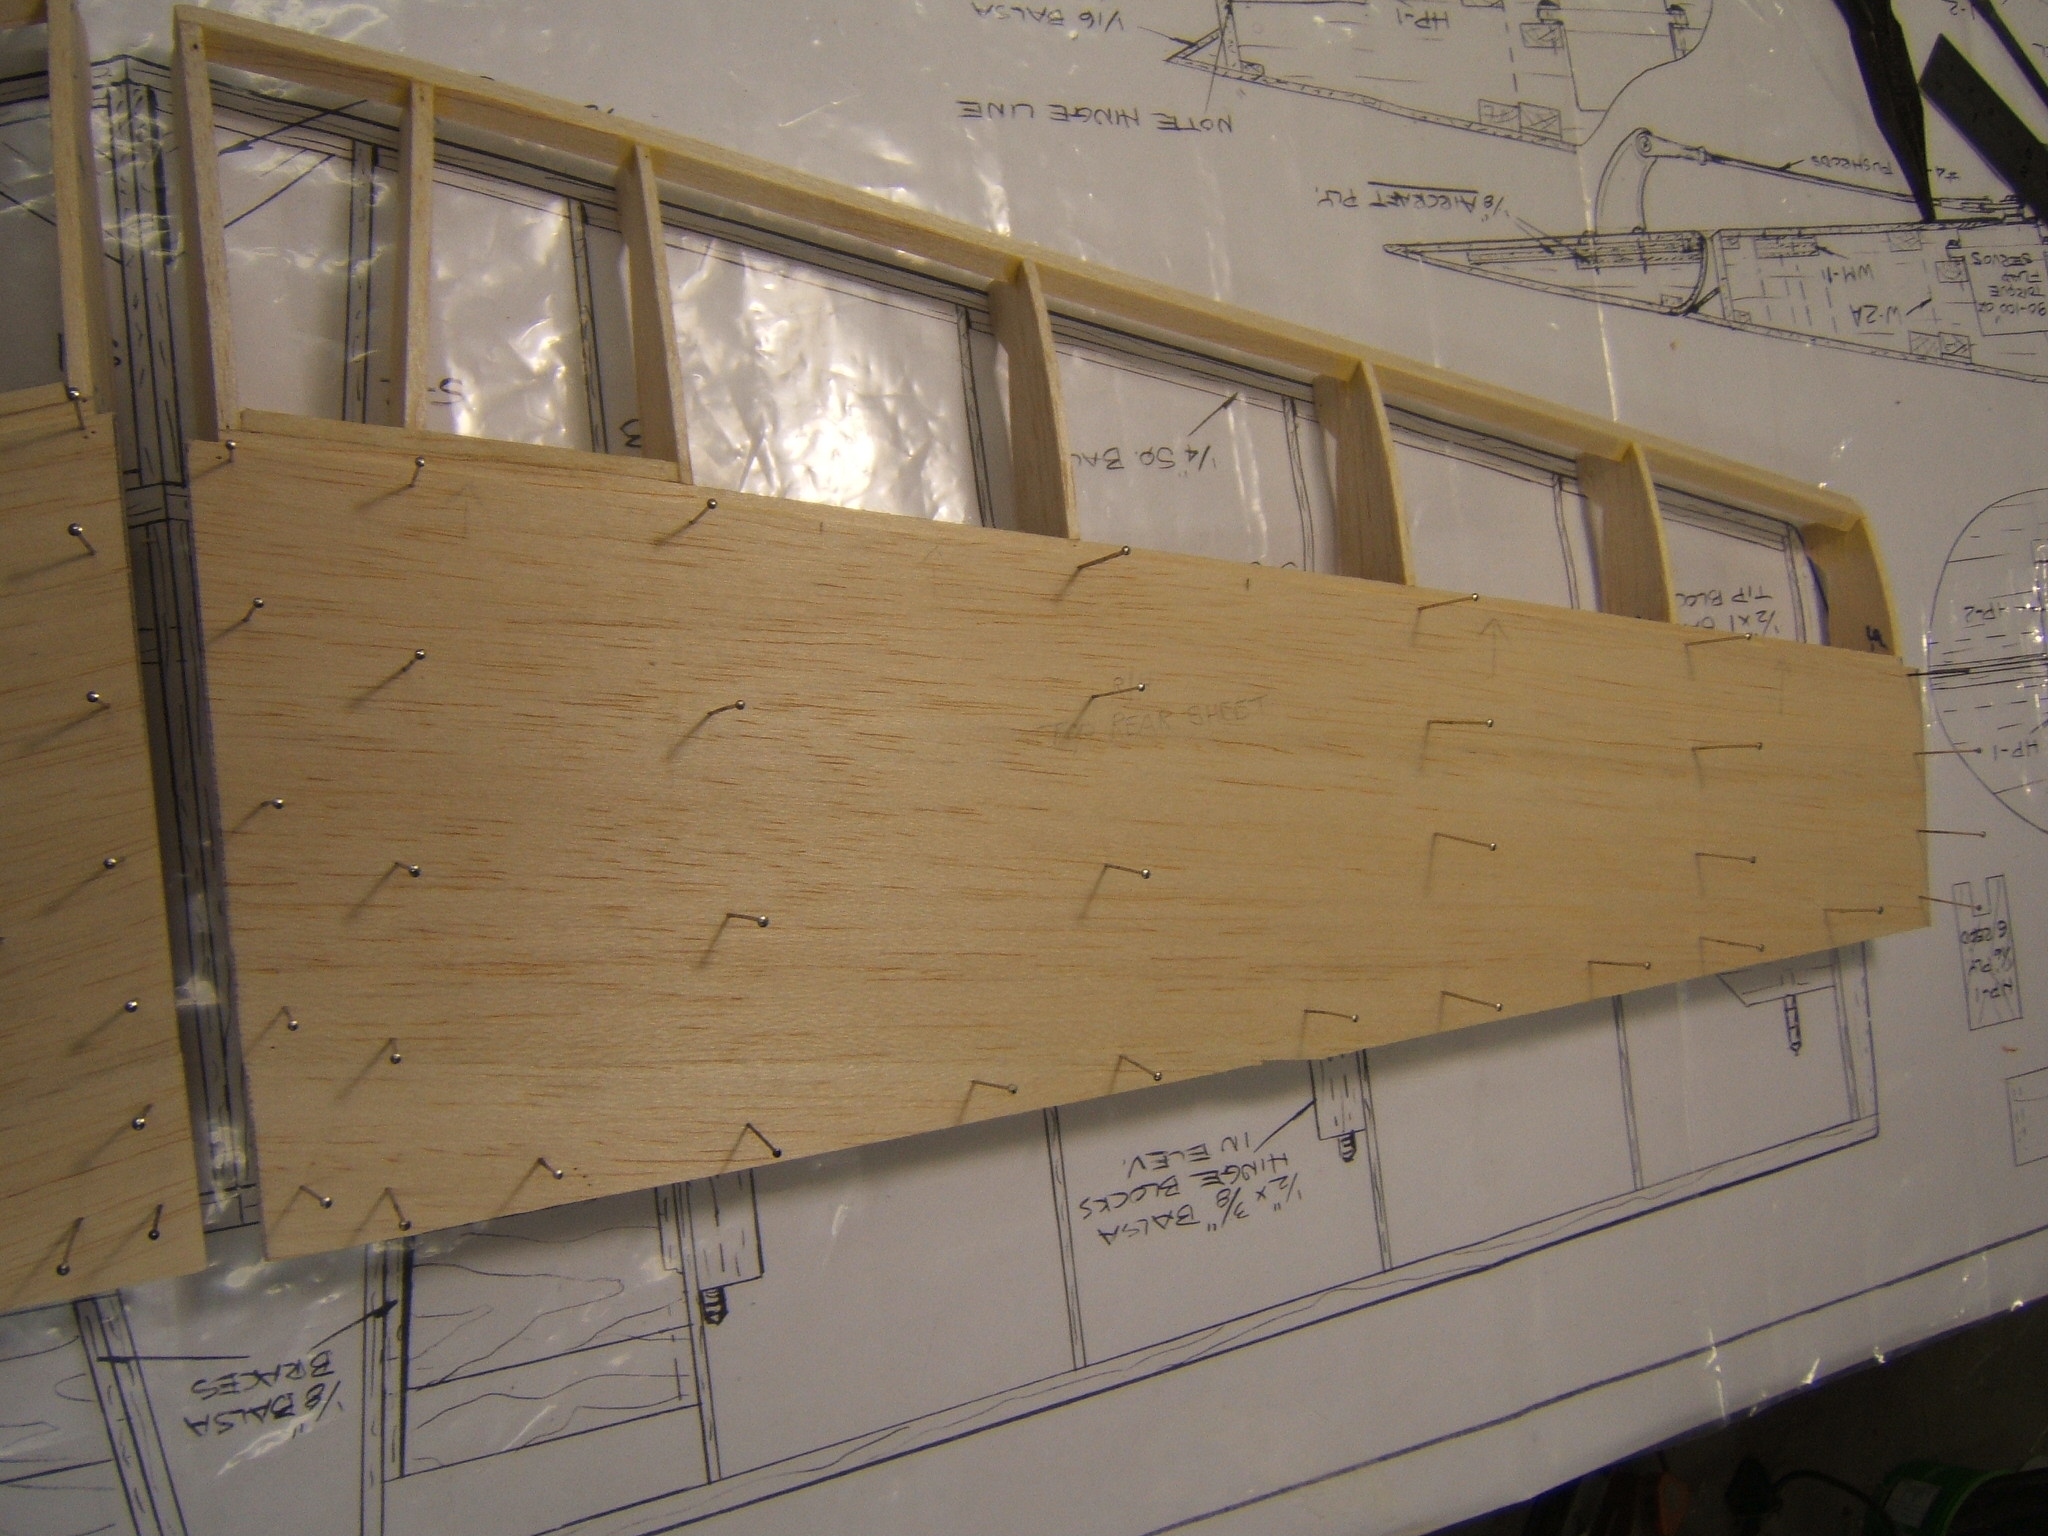
I have started the sheeting of the stab and left a 1/4" overhang on the TE side. This will be used to locate the correct hinge positions and later will be trimmed off.
Regards
Craig
06-09-2014, 11:17 AM
#335
Senior Member
My Feedback: (1)
Join Date: Jan 2004
Location: Cape TownN/A, SOUTH AFRICA
Posts: 258
Likes: 0
Received 0 Likes
on
0 Posts
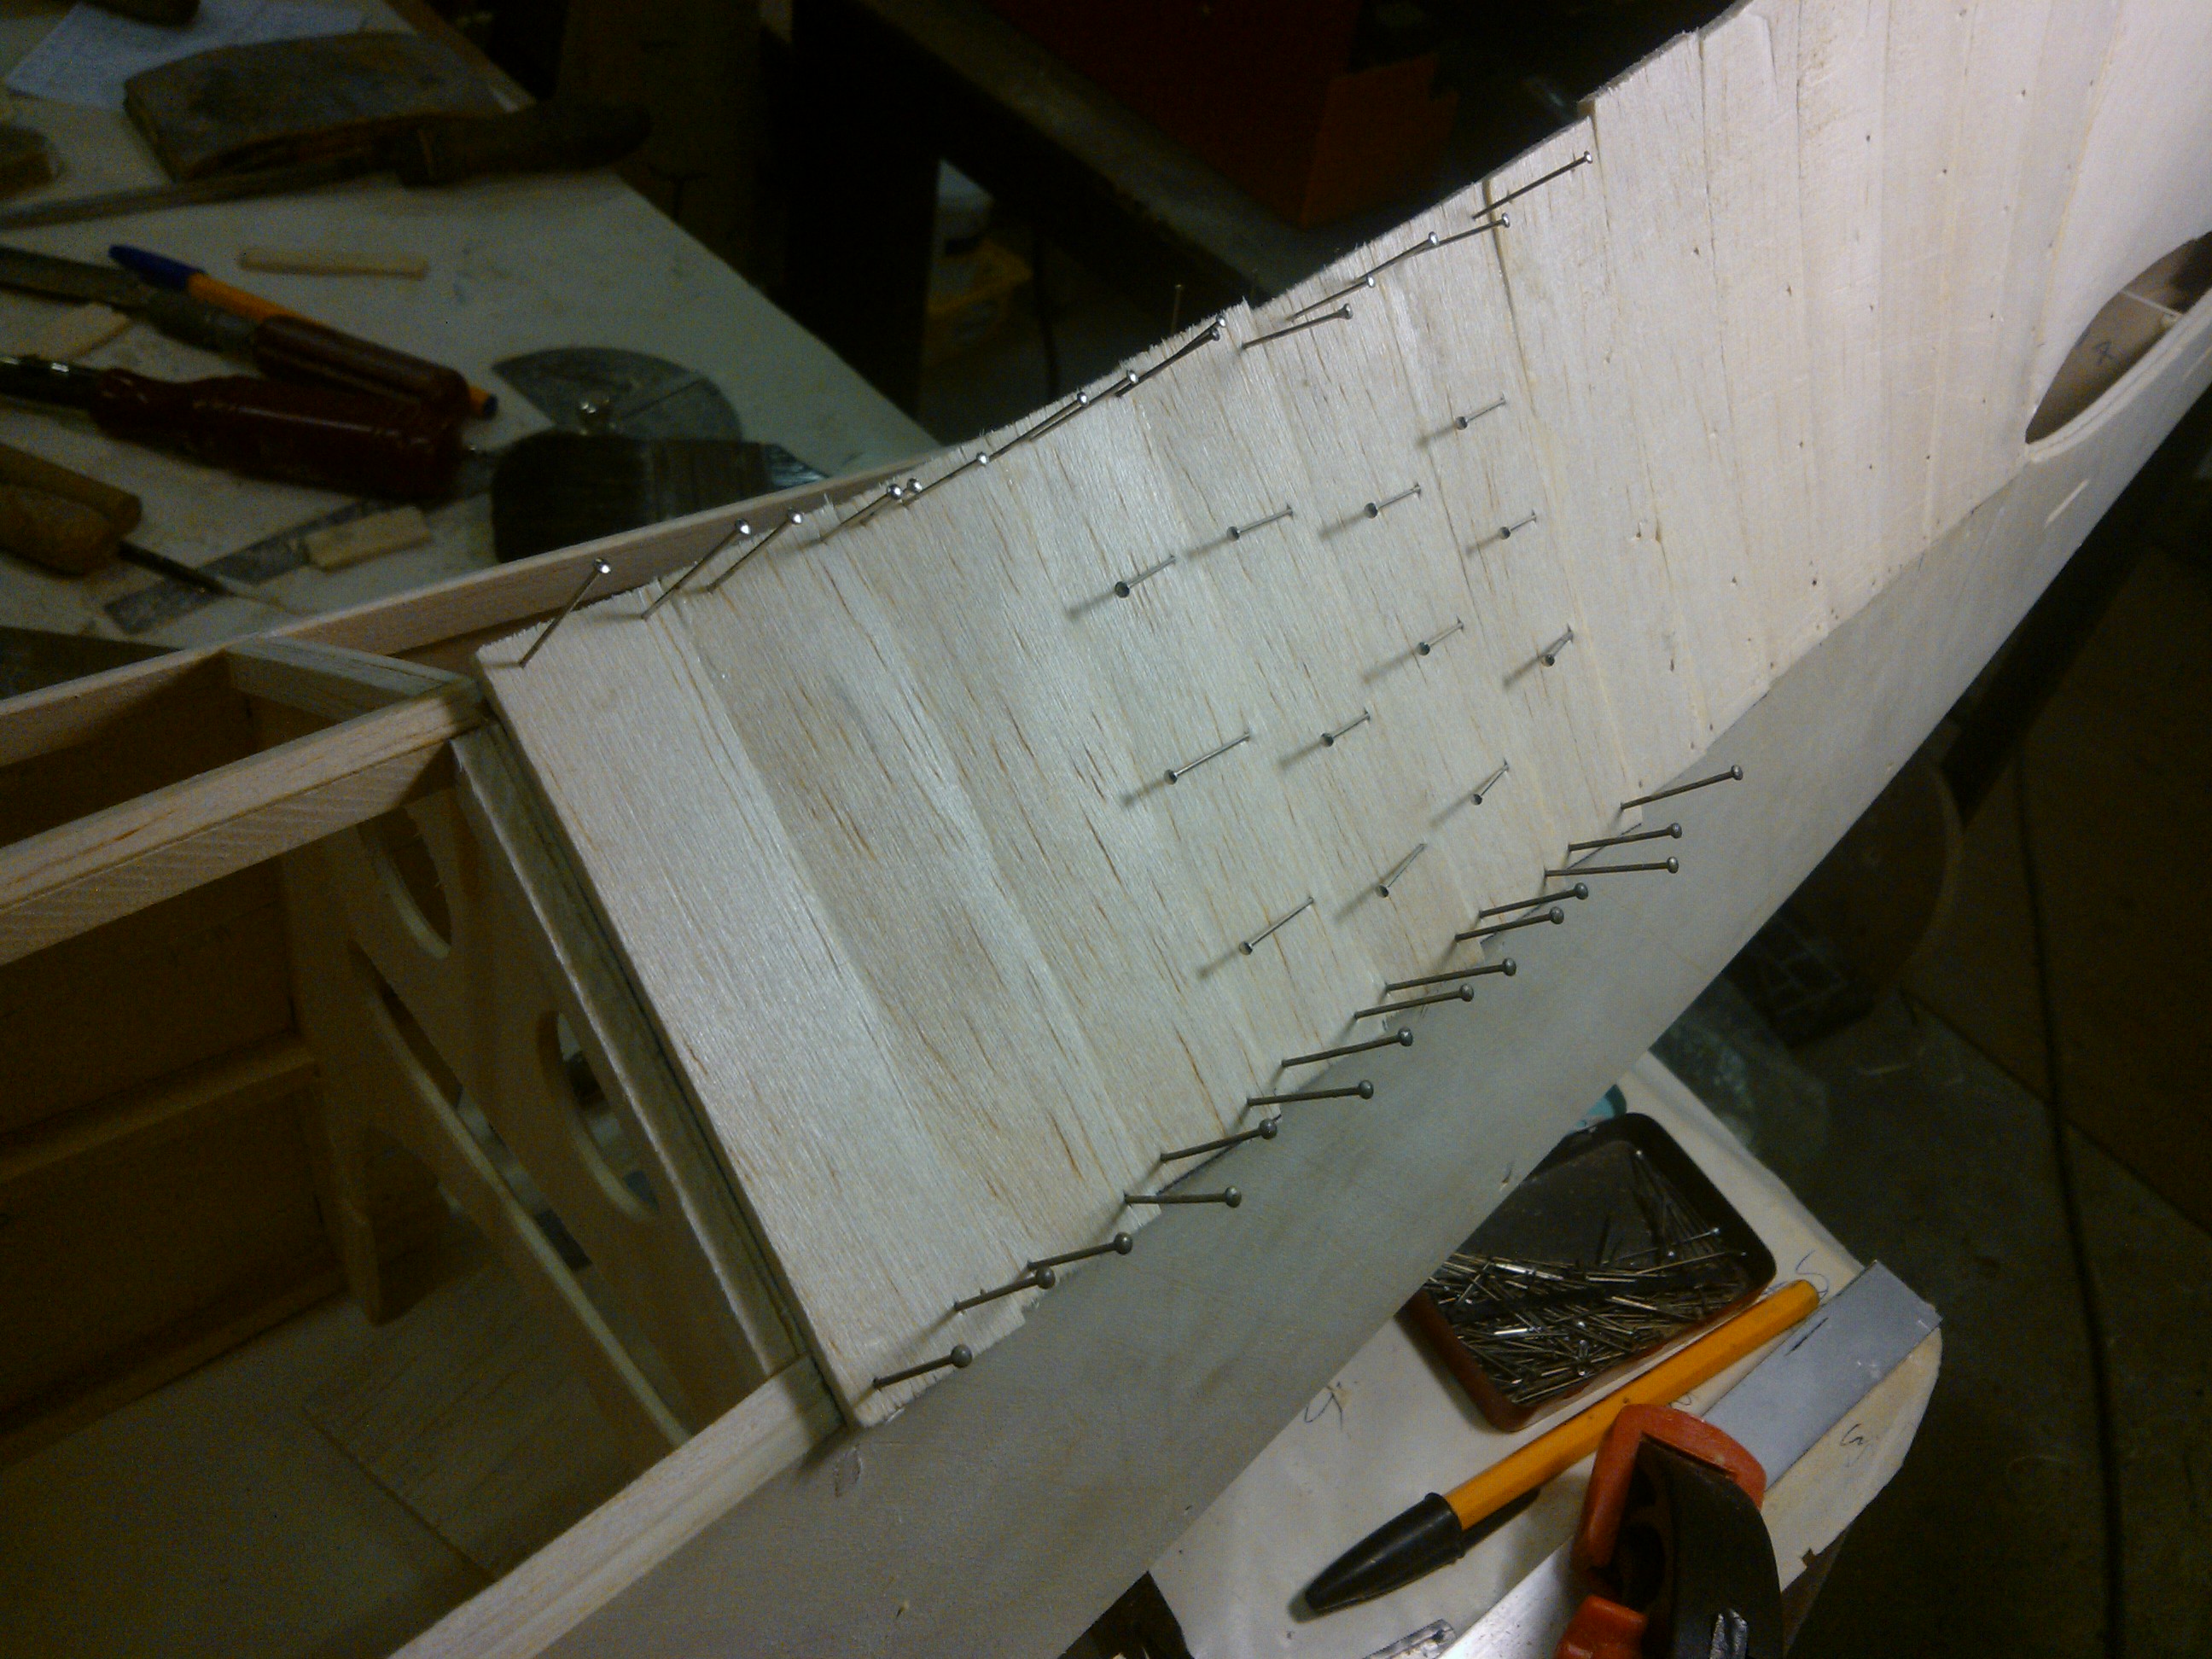
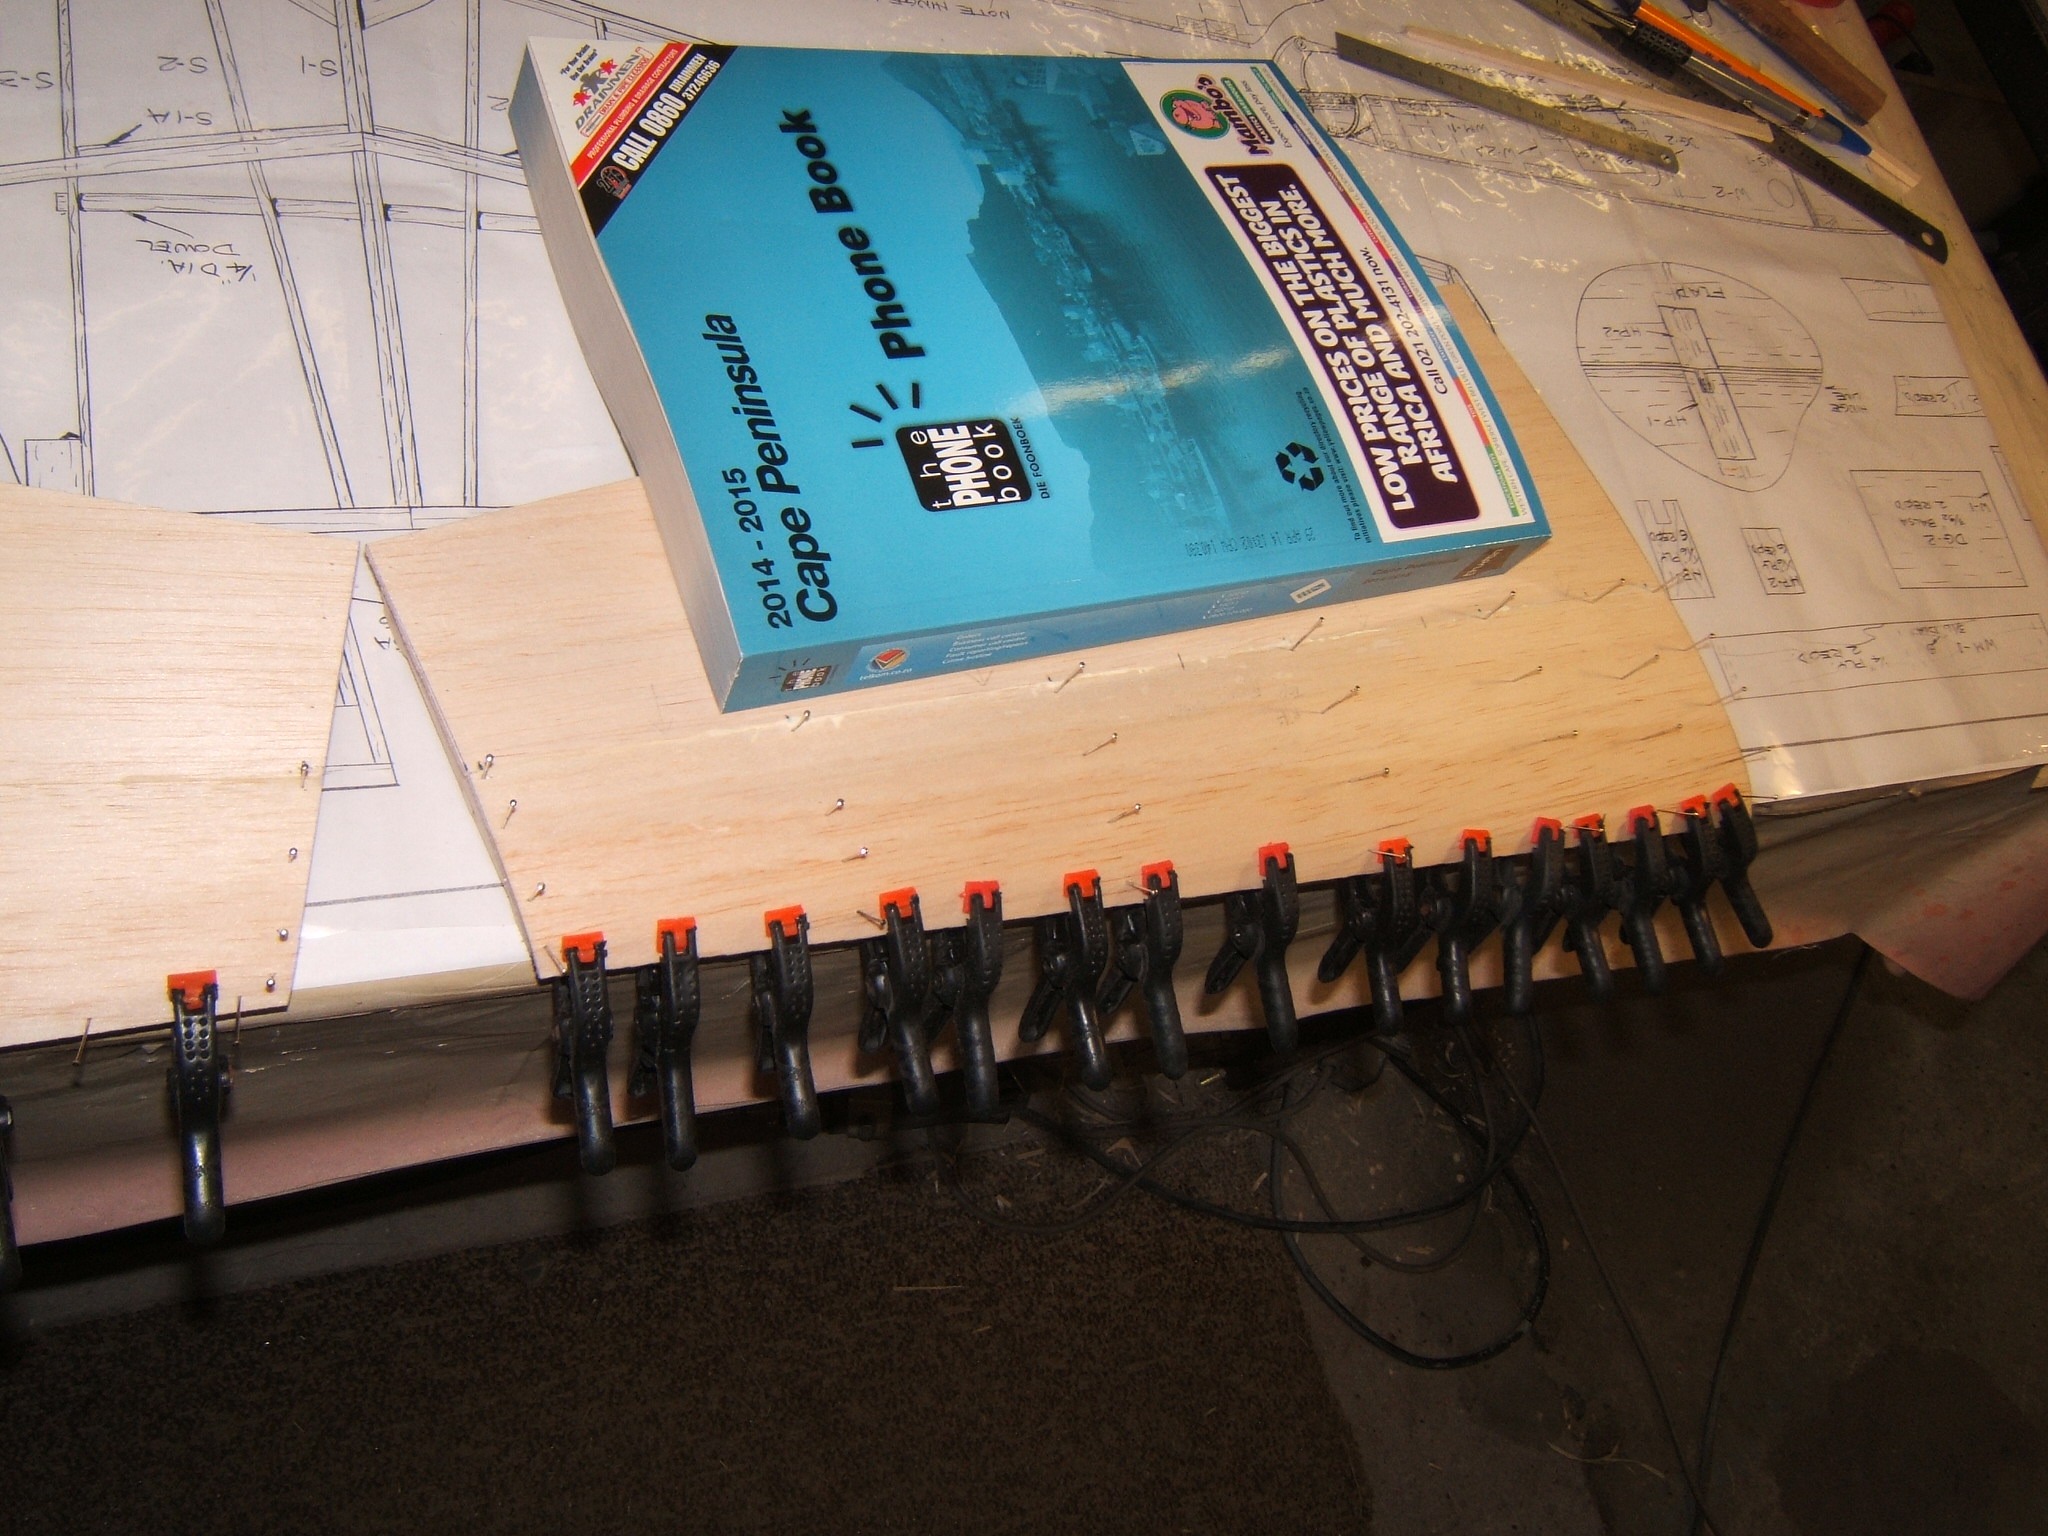
The forward section on the top sheeting has just been applied. The balsa wood was a little hard and although it was wet with amonia/water mix,it didn`t want to be held in place with pins along,on the LE. So clamps were used and the whole thing placed under paper weight. This would aid in keeping it straight.
Regards
Craig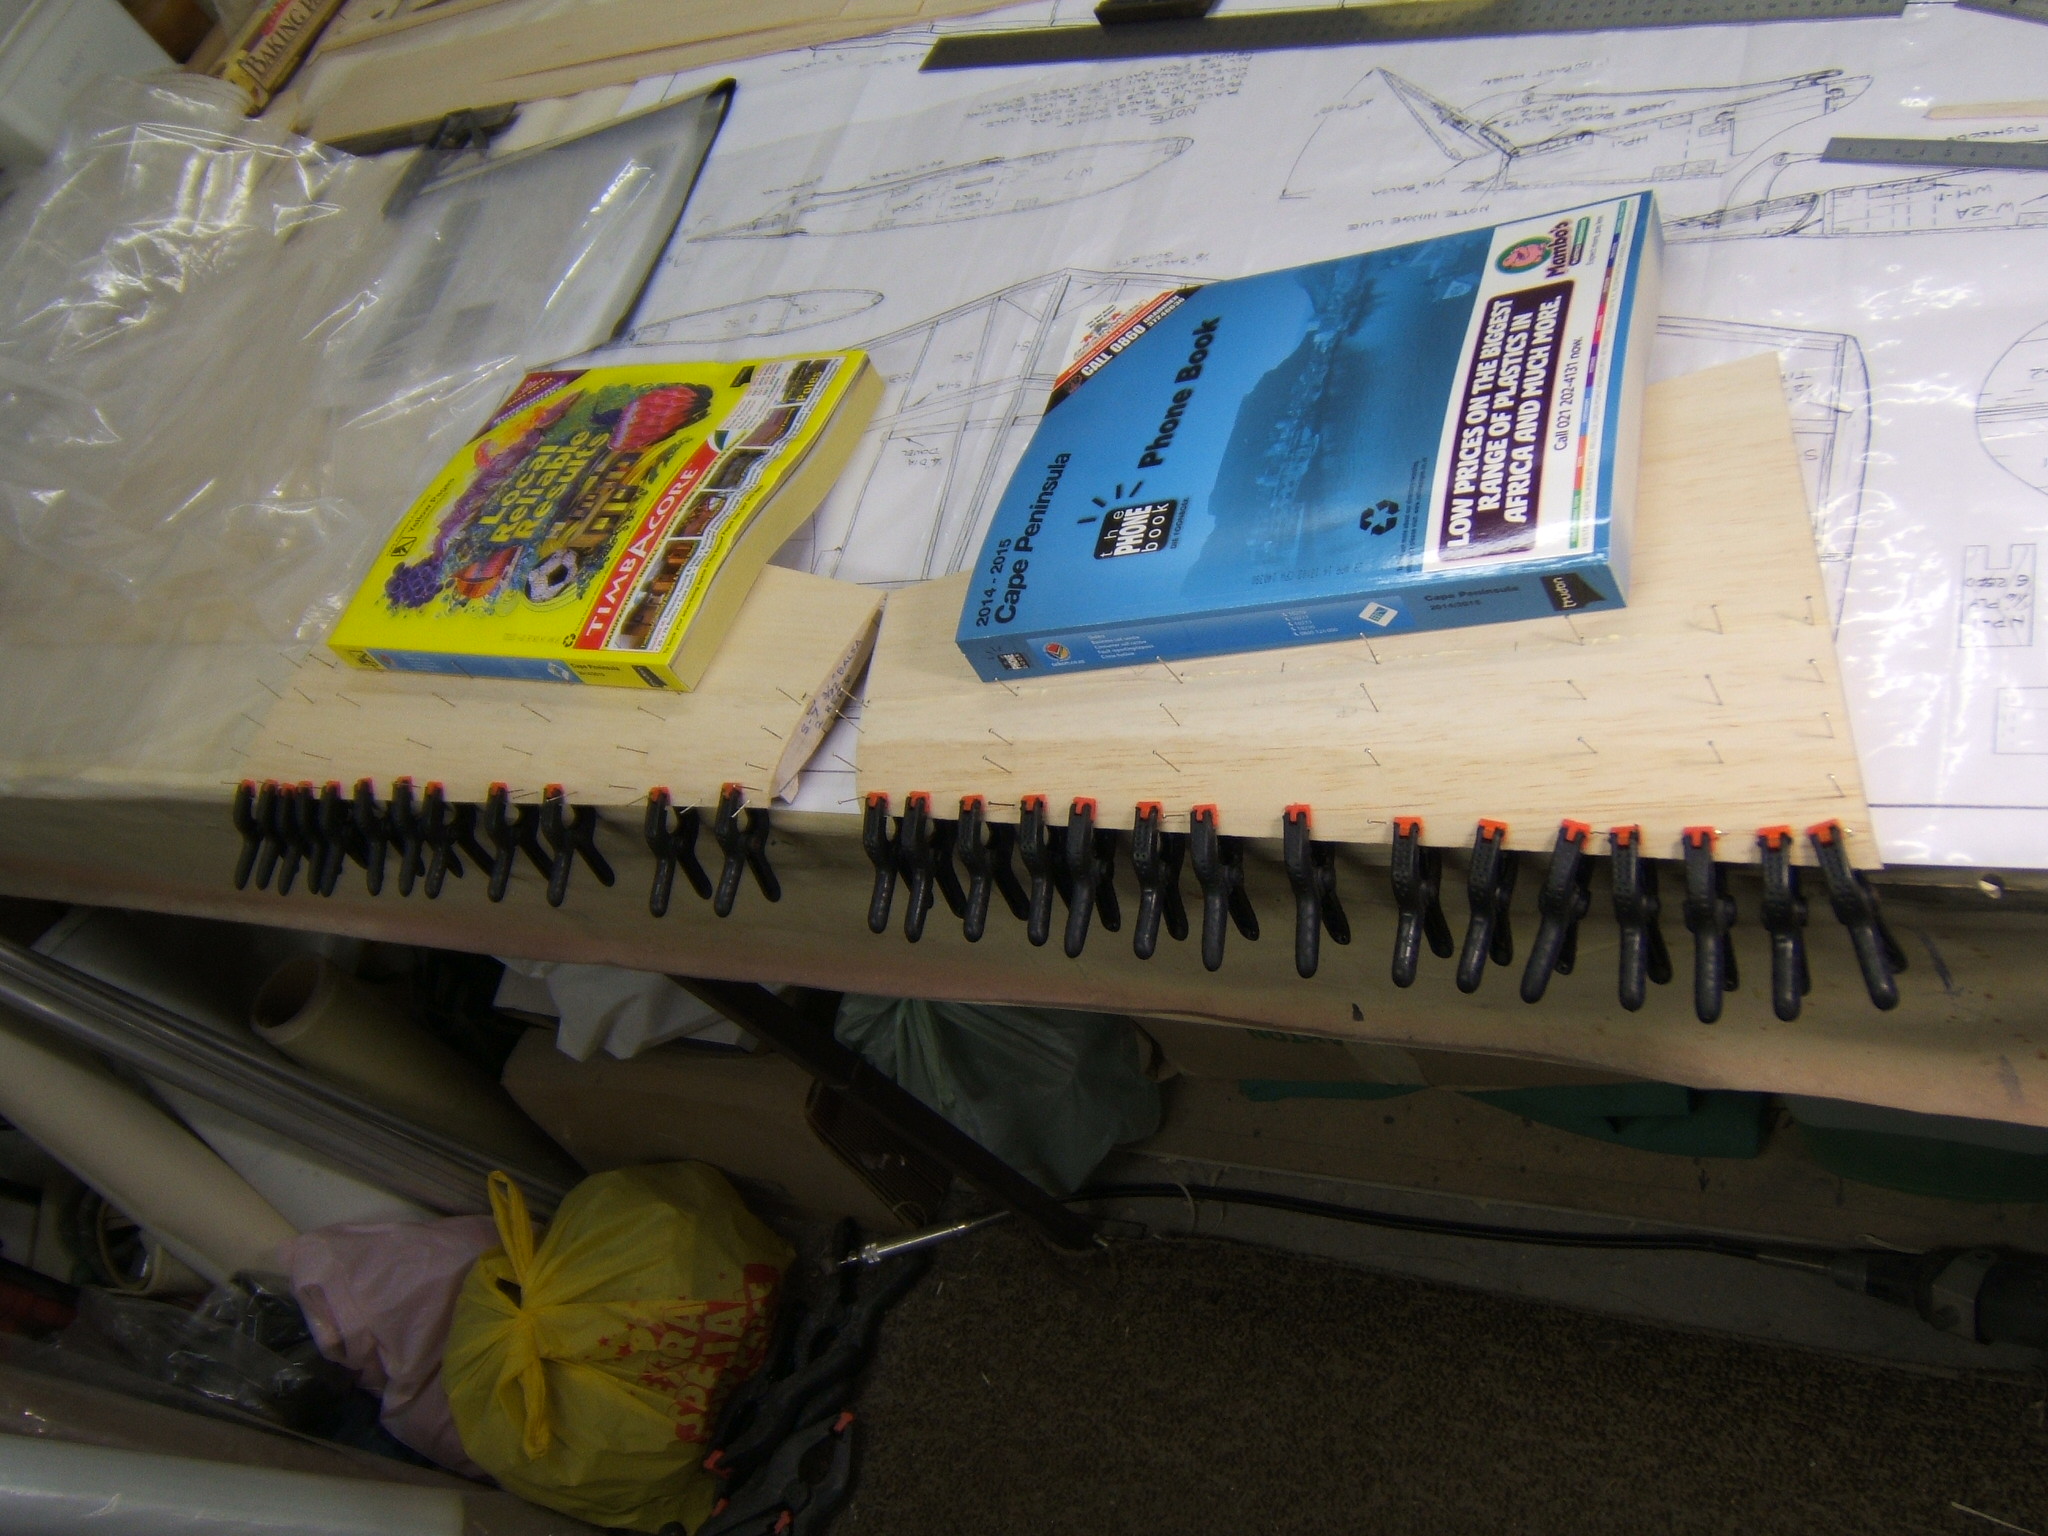
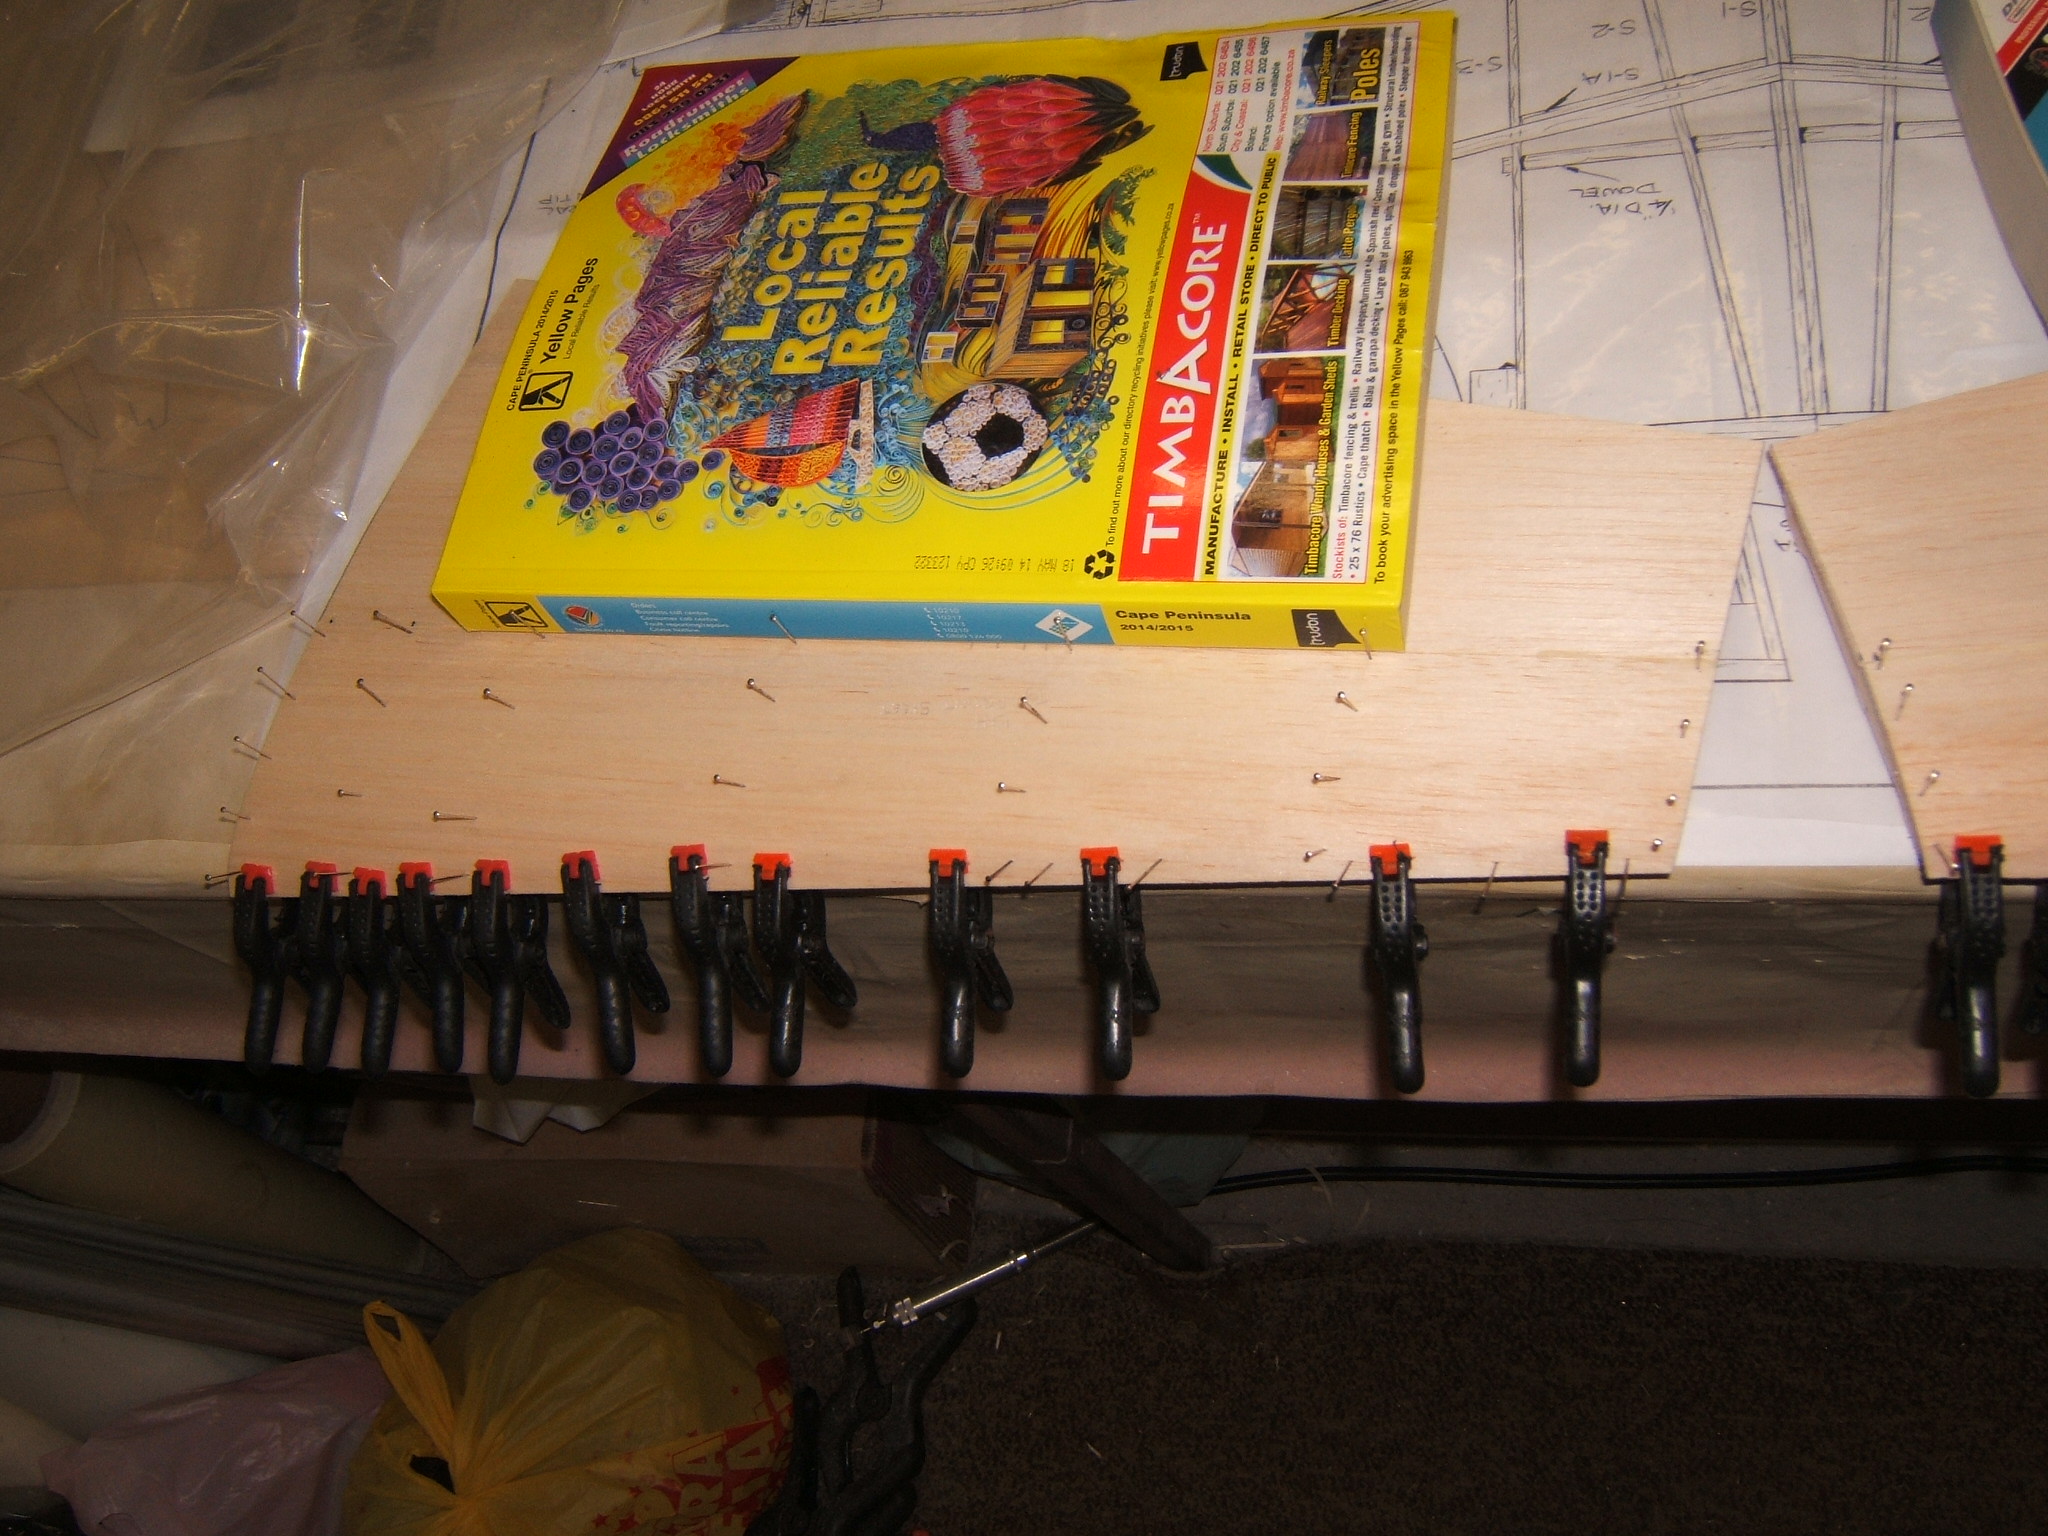
Regards
Craig
06-12-2014, 11:29 AM
#339
don't know what l did with those pretty straight forward build like his other planes....might have to try bending it to see how much it flex's...l did go with 1/8 sheeting on the bottom instead of the 3/32...
06-12-2014, 11:37 AM
#340
Senior Member
My Feedback: (1)
Join Date: Jan 2004
Location: Cape TownN/A, SOUTH AFRICA
Posts: 258
Likes: 0
Received 0 Likes
on
0 Posts
The instructions state that 1/16" balsa is used for the webs in vertical grain placement. I used 3/32",which was left over from the top sheeting.
06-30-2014, 03:50 PM
#341
Member
Join Date: Jun 2014
Location: Arizona
Posts: 44
Likes: 0
Received 0 Likes
on
0 Posts
My friend Andy, who lives in England, built this Turbinator (pictured with him) from a laser kit in my shop over the last 2 years working on the occasional weekends he would be in this country on business. I got to test fly it and eventually earned my Turbine waiver. It flies really well. it uses an older Jetcat P80, JR 11X and a mix of Futaba, JR and Spektrum high end servos. I decided after flying RC for 40 years, I needed my own.
I didn't want the same thing but wanted to build something. I decided I would try the 83% Turbinator using a Laser Design Services short kit. Limey Bob did a good job. It was packaged well, complete, and arrived quickly. I modified the tail and forward fuselage slightly to accomodate the canopy and lengthen the hatch. Its loosely based on an Edwards Chase scheme with the bottom being all insignia blue. Its all Monokote including the graphics. Its about done. I'll wait for the Fall to get the motor and fly it. Its too hot in AZ right now I'm planning on a K60. It has a JR 9303, Spektrum AR9000, and 821 servos. It uses Two Lipo's for RX power thru a Powerbox switch. It has the E-Flite 120 electric retracts and some cheap electric brakes I thought I would try. It weighs just under 10 pounds with everything but a motor and ECU. I would be glad to share build photos or answer any questions other builders have. It was a lot of fun and I look forward to flying it one day
I didn't want the same thing but wanted to build something. I decided I would try the 83% Turbinator using a Laser Design Services short kit. Limey Bob did a good job. It was packaged well, complete, and arrived quickly. I modified the tail and forward fuselage slightly to accomodate the canopy and lengthen the hatch. Its loosely based on an Edwards Chase scheme with the bottom being all insignia blue. Its all Monokote including the graphics. Its about done. I'll wait for the Fall to get the motor and fly it. Its too hot in AZ right now
I'm planning on a K60. It has a JR 9303, Spektrum AR9000, and 821 servos. It uses Two Lipo's for RX power thru a Powerbox switch. It has the E-Flite 120 electric retracts and some cheap electric brakes I thought I would try. It weighs just under 10 pounds with everything but a motor and ECU. I would be glad to share build photos or answer any questions other builders have. It was a lot of fun and I look forward to flying it one day
07-20-2014, 12:10 PM
#342

My Feedback: (35)
All,
I hope it is okay to ask a question about mine:
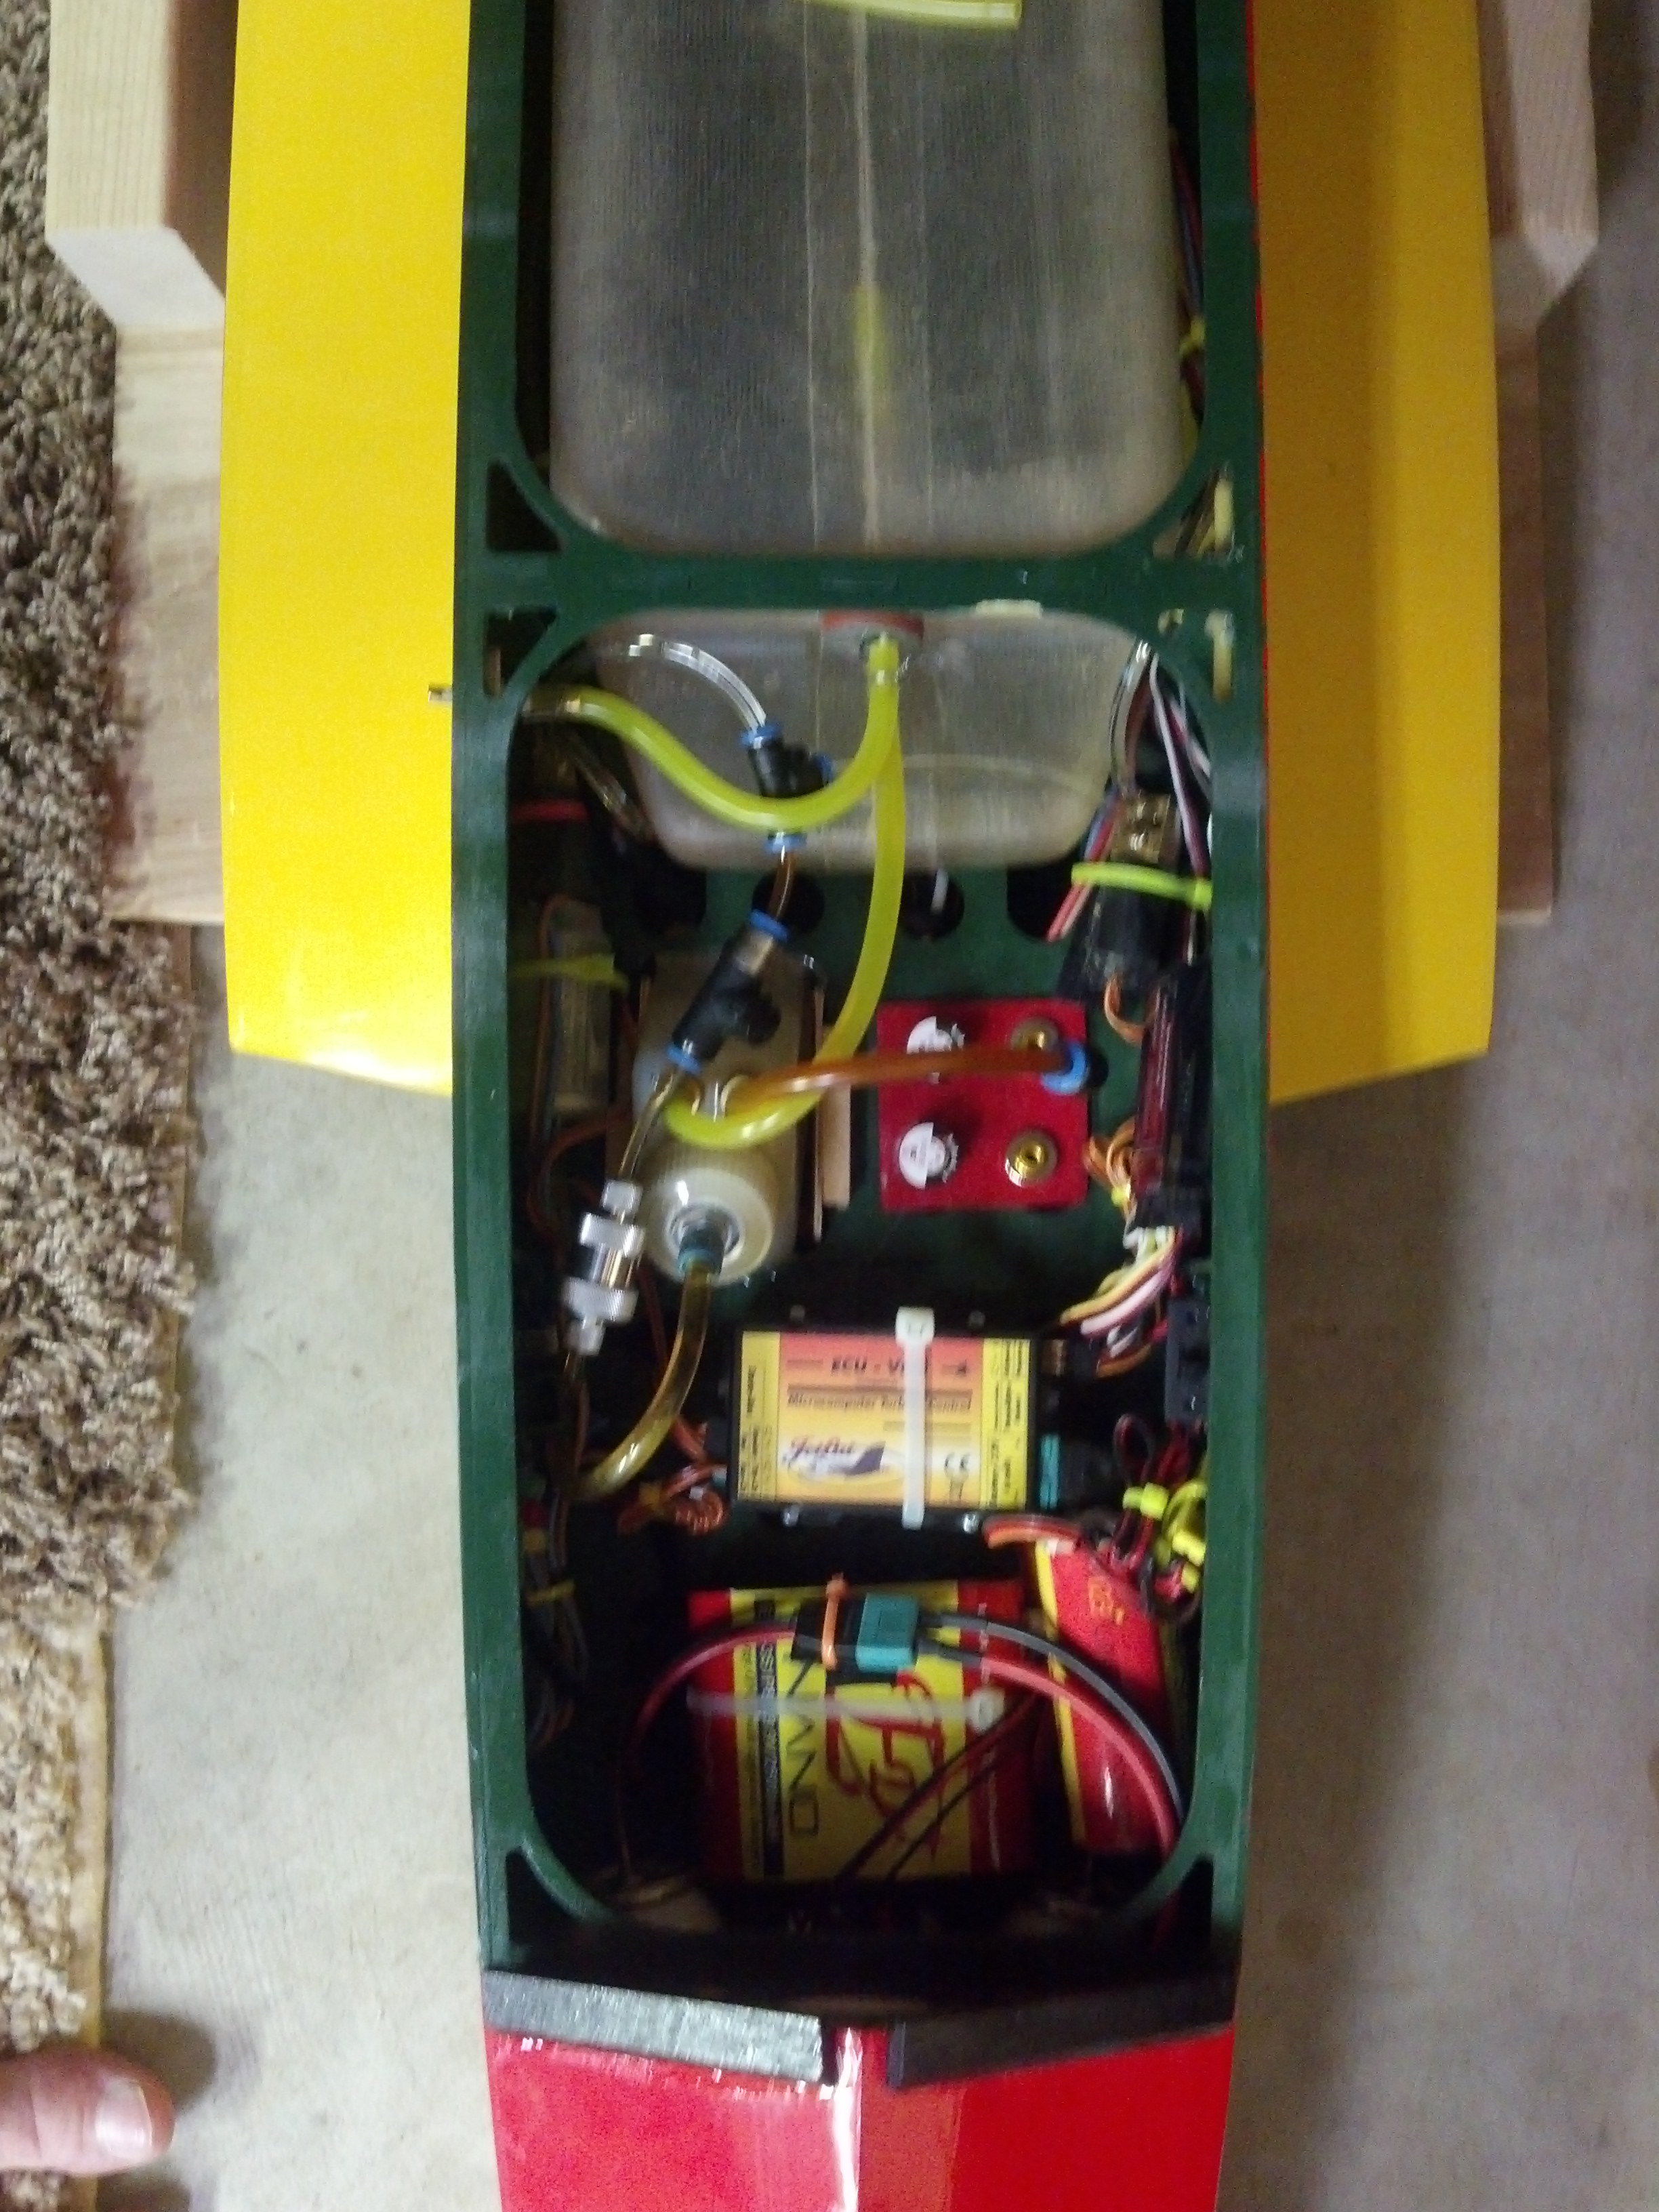
I was testing everything out yesterday (7-19-14) and had an issue. I could not fill my tank up because of the way I vented it. Needless to say I could not use an auxiliary tank to keep the main tank full. I decided not to try and maiden until I have corrected the problem.The main tank would also not empty into the auxiliary tank very well. Here is a picture in my install.
Please offer any suggestions:
I hope it is okay to ask a question about mine:
I was testing everything out yesterday (7-19-14) and had an issue. I could not fill my tank up because of the way I vented it. Needless to say I could not use an auxiliary tank to keep the main tank full. I decided not to try and maiden until I have corrected the problem.The main tank would also not empty into the auxiliary tank very well. Here is a picture in my install.
Please offer any suggestions:
07-20-2014, 12:42 PM
#343

Hi, I not understand it, because the installation look fine, if you fill for the Festo UAT, the kero go to the main tank and when is full the kero go out for the ventil, I will install my own tank, but the same installation.
good luck !
good luck !
07-20-2014, 03:49 PM
#346
My Feedback: (35)
I do not want to steel the thread, but I am only speaking of the exit flow from the tank to the overflow. If I fill the main tank start the engine and pull the overflow tank fuel poors out the vent because the fuel level is not below the femtocell fuel line inside the tank. I think I need some type of fitting the glues or screws to the top of the tank effectively raising the vent line above the main tank.
I would love love to see what others have done or if there is a suggestion in the plans as I bought an ARF
Thanks scott
I would love love to see what others have done or if there is a suggestion in the plans as I bought an ARF
Thanks scott
07-21-2014, 02:36 AM
#347

My Feedback: (12)
Join Date: Dec 2001
Location: reisterstown, MD
Posts: 1,864
Likes: 0
Received 0 Likes
on
0 Posts
What you are see ones the vent working once you pull the overflow tank line off. The fuel line is full of fuel and working as a syphon until the fuel level goes below the inlet level of your vent line. No way to stop that from happening that I know of if you engine is not running per than having the outlet line exit higher than your tank.
07-22-2014, 02:46 PM
#348
My Feedback: (57)
I have the same exact problem; and even after adding a large vent to the top of the tank, it still does not work properly with an "over flow" tank plugged in. I haven't looked into further after adding the large vent. I just quit using the Aux tank for filling or taxiing, and adjust my flight time accordingly if I get stuck at the flight line.
08-04-2014, 10:25 AM
#349
Senior Member
My Feedback: (1)
Join Date: Jan 2004
Location: Cape TownN/A, SOUTH AFRICA
Posts: 258
Likes: 0
Received 0 Likes
on
0 Posts
Hi Guys
The stabiliser halves are almost complete and just installed the hinge block on the T/E side. On the plan,there is a 1/4" dia hardwood dowel,which goes into the S1-S3 ribs on each side. Problem is how to glue it in there,with the balsa sheeting on either side on the stab halves? Each tip of the stab is raised by 1 1/2" and the dowel is there to strengthen the joint of the two halves.
Any advice will be appreciated.
Regards
Craig
08-04-2014, 03:05 PM
#350
My Feedback: (12)
Join Date: Dec 2001
Location: reisterstown, MD
Posts: 1,864
Likes: 0
Received 0 Likes
on
0 Posts
Hi Guys
The stabiliser halves are almost complete and just installed the hinge block on the T/E side. On the plan,there is a 1/4" dia hardwood dowel,which goes into the S1-S3 ribs on each side. Problem is how to glue it in there,with the balsa sheeting on either side on the stab halves? Each tip of the stab is raised by 1 1/2" and the dowel is there to strengthen the joint of the two halves.
Any advice will be appreciated.
Regards
Craig
The stabiliser halves are almost complete and just installed the hinge block on the T/E side. On the plan,there is a 1/4" dia hardwood dowel,which goes into the S1-S3 ribs on each side. Problem is how to glue it in there,with the balsa sheeting on either side on the stab halves? Each tip of the stab is raised by 1 1/2" and the dowel is there to strengthen the joint of the two halves.
Any advice will be appreciated.
Regards
Craig