


Reaction ARF - PST/BTE All-Composite Sport Jet
 09-25-2014, 11:43 AM
#1026

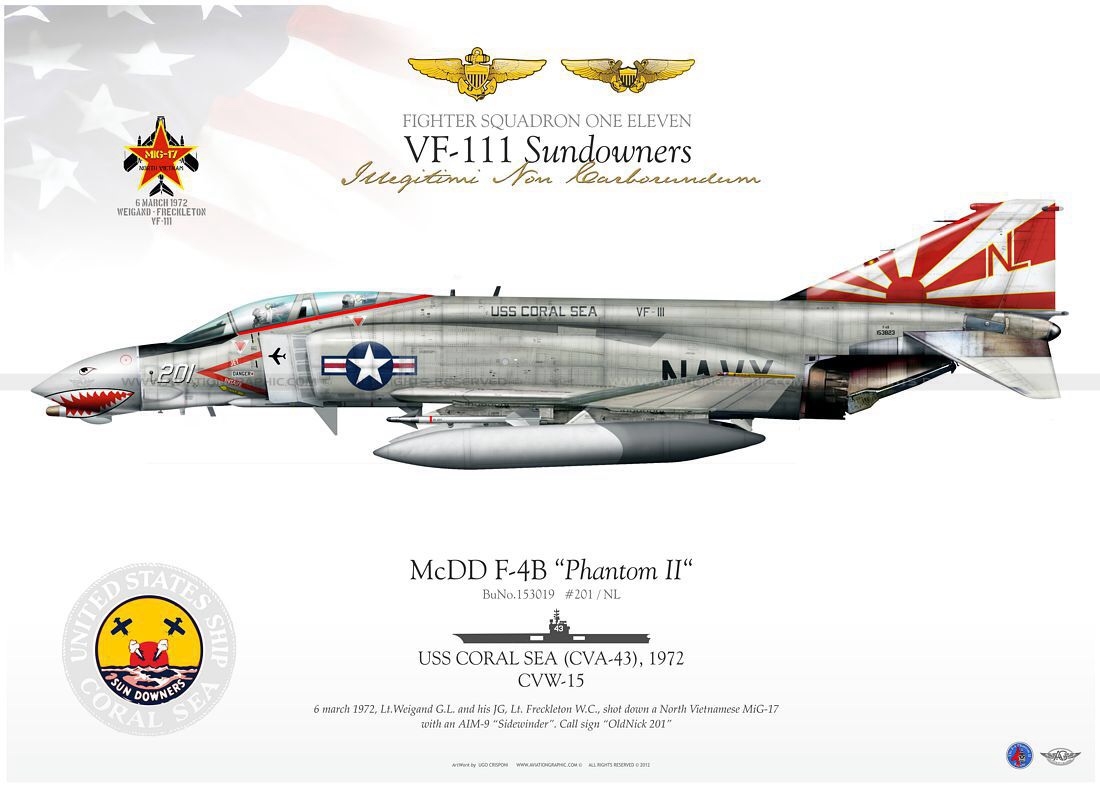
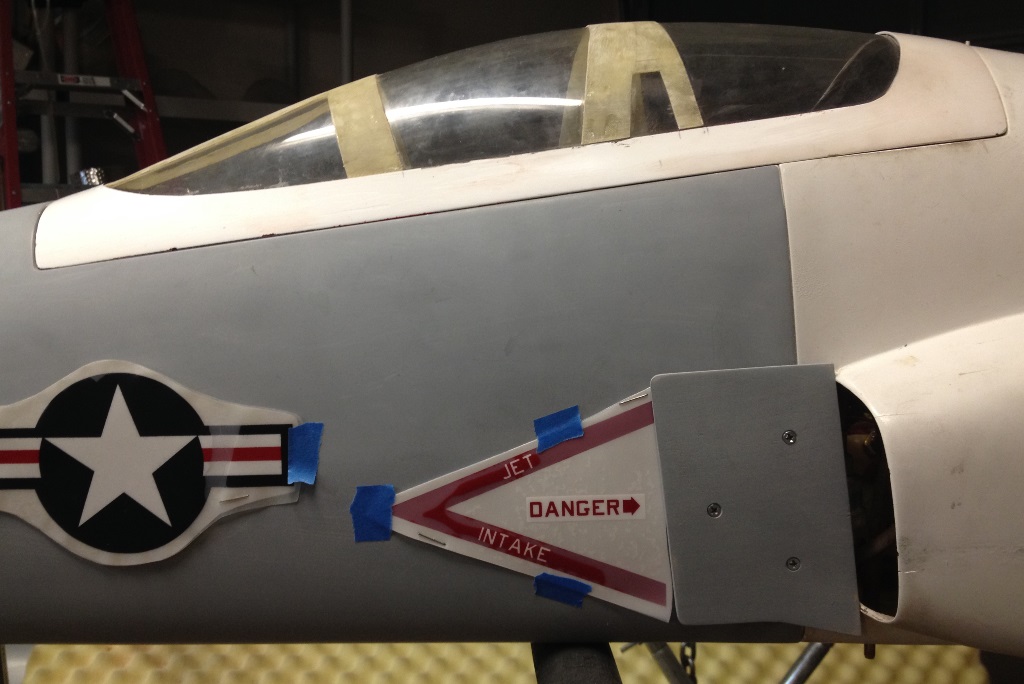
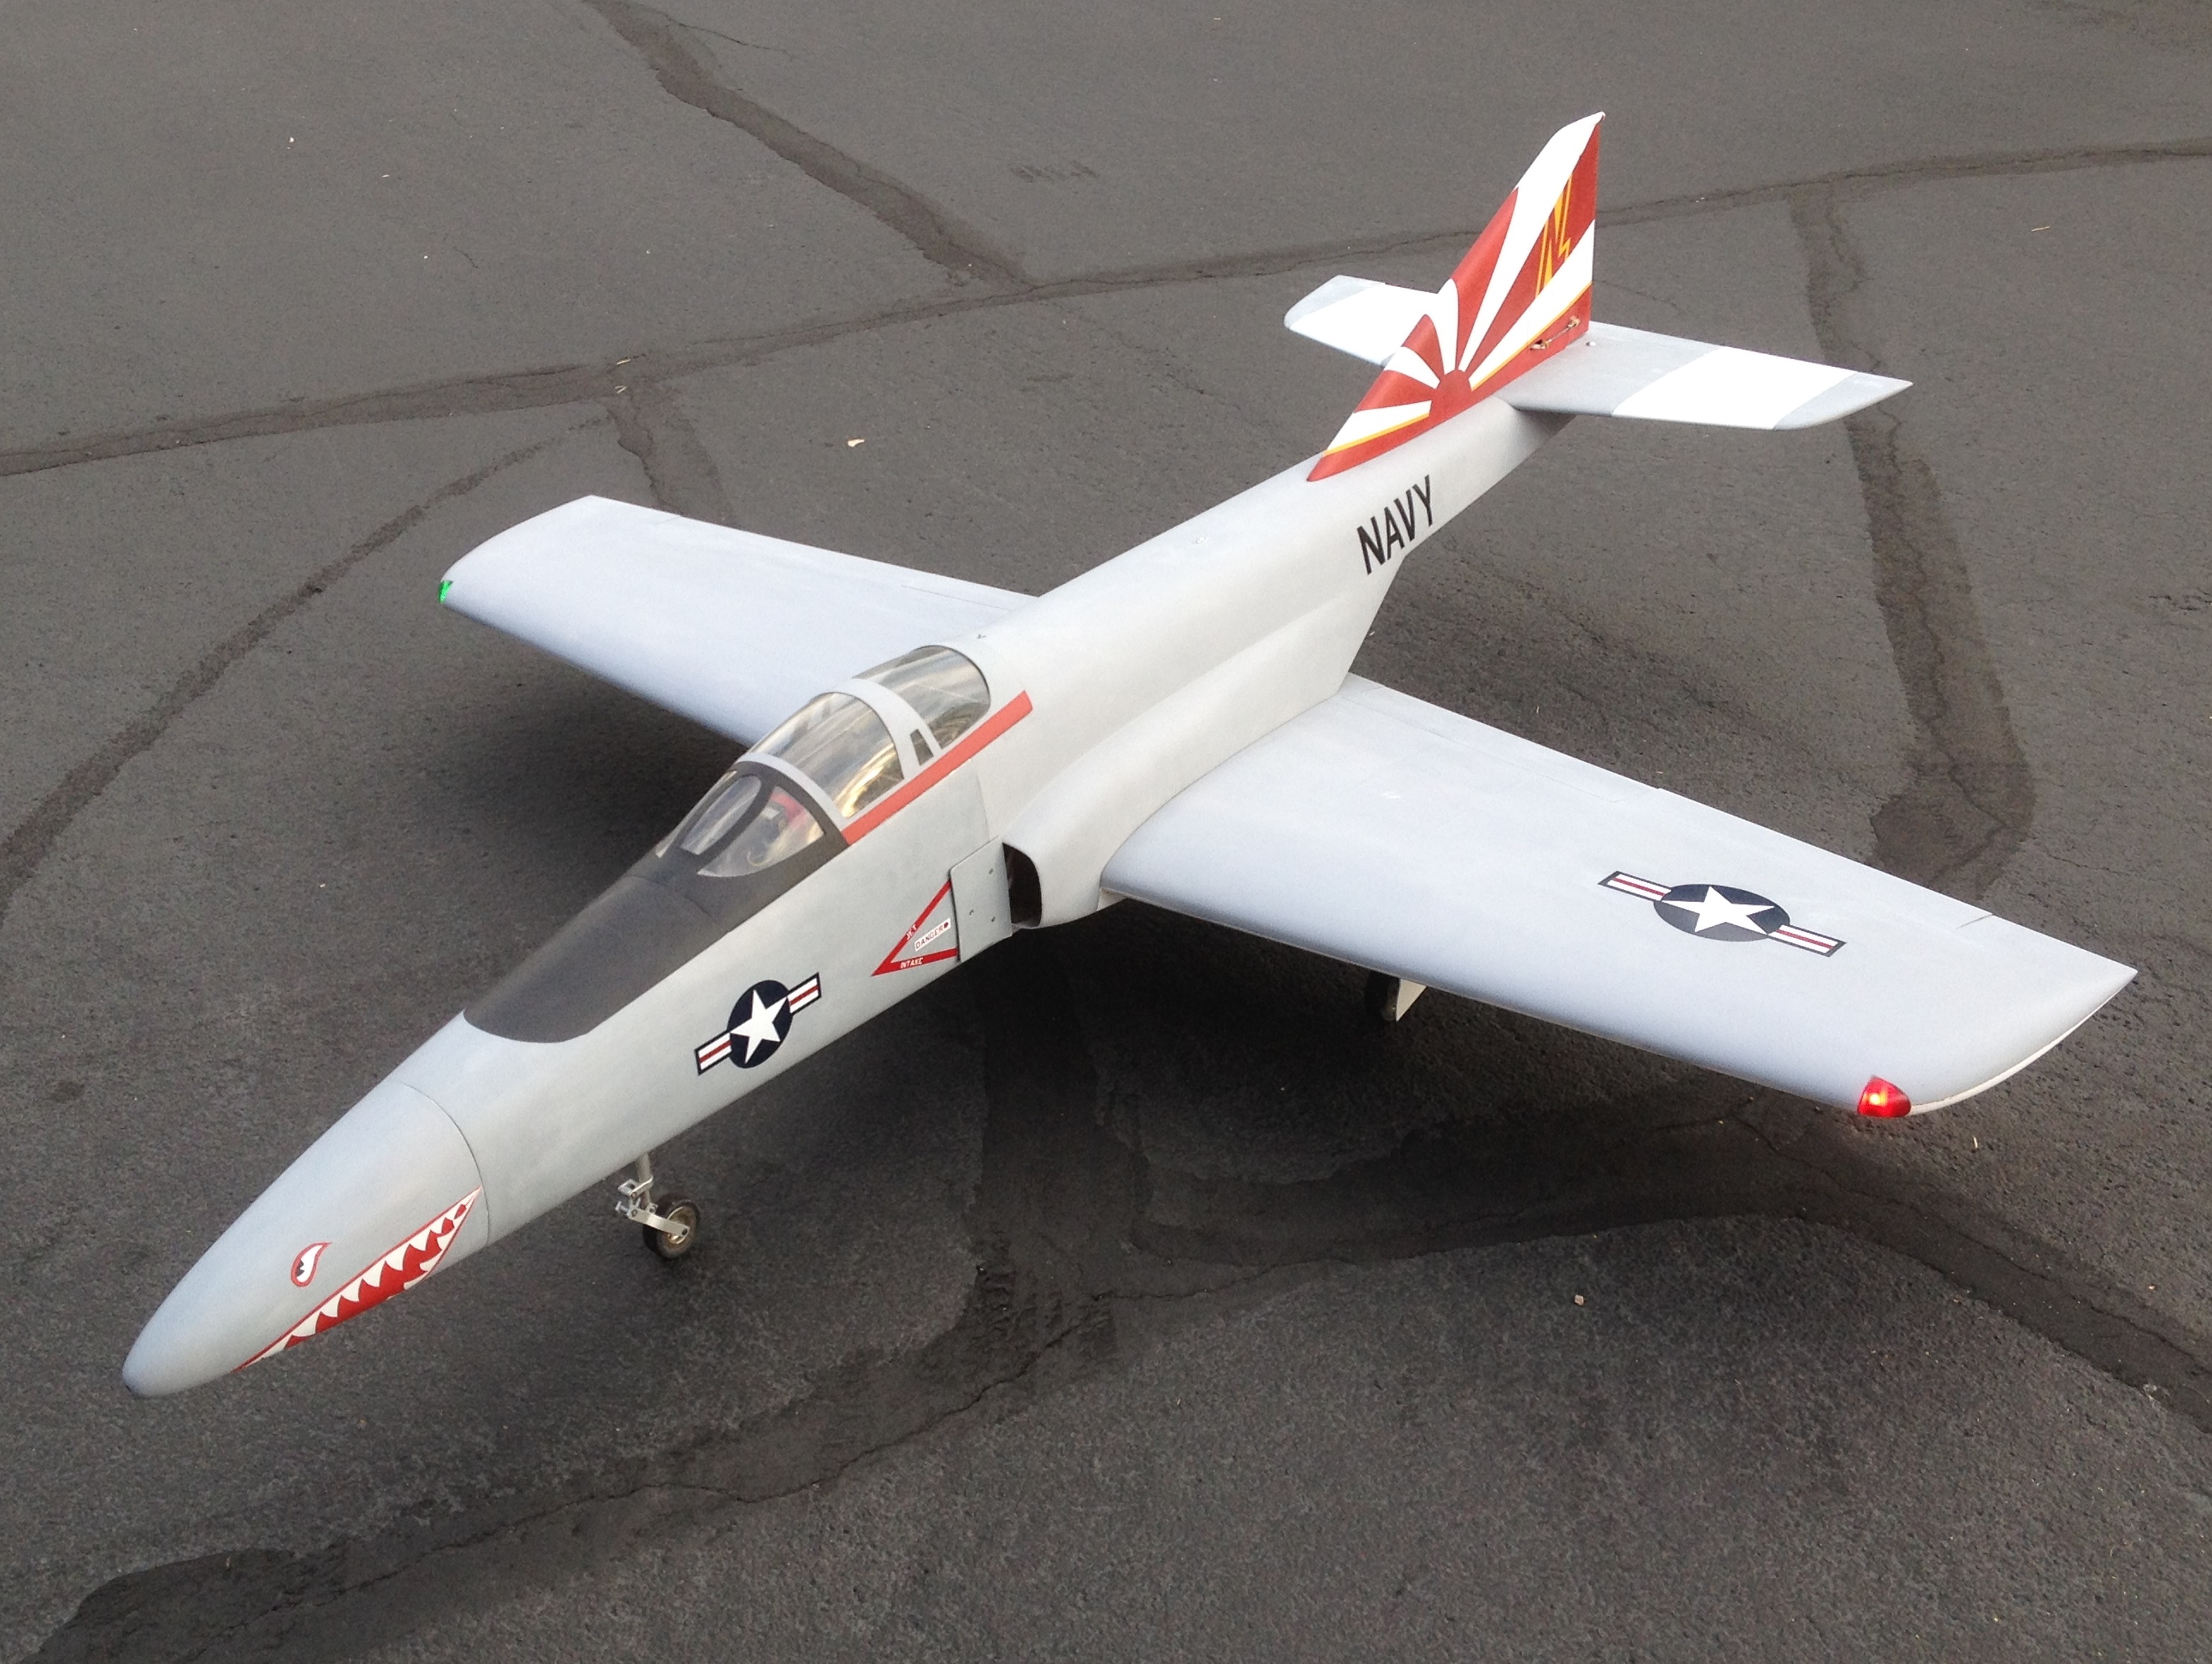
I've done over 350 flights on my Reaction (and there were two previous owners) so the bird is showing her age and it's time for an overhaul. John Weaver repainted his short nosed Reaction in a VF-84 "Jolly Roger" scheme and added some F-4ish details and it looks really good so I thought I'd do a VF-111 "Sundowners" Reaction long nose.
These are the modifications that are planned/in progress. IR sensor/blister under nose, two pilot cockpit with canopy frame, air inlet splitter plates, gear doors on the main gear struts, forward door for nose gear, molded in nav lights in the wingtips and fin, molded in landing lights in the wing leading edge, beacon lights on the dorsal and belly, drop tanks under the wings, Sundowners paint scheme with Fed-Std paints, and an anhedral stab.
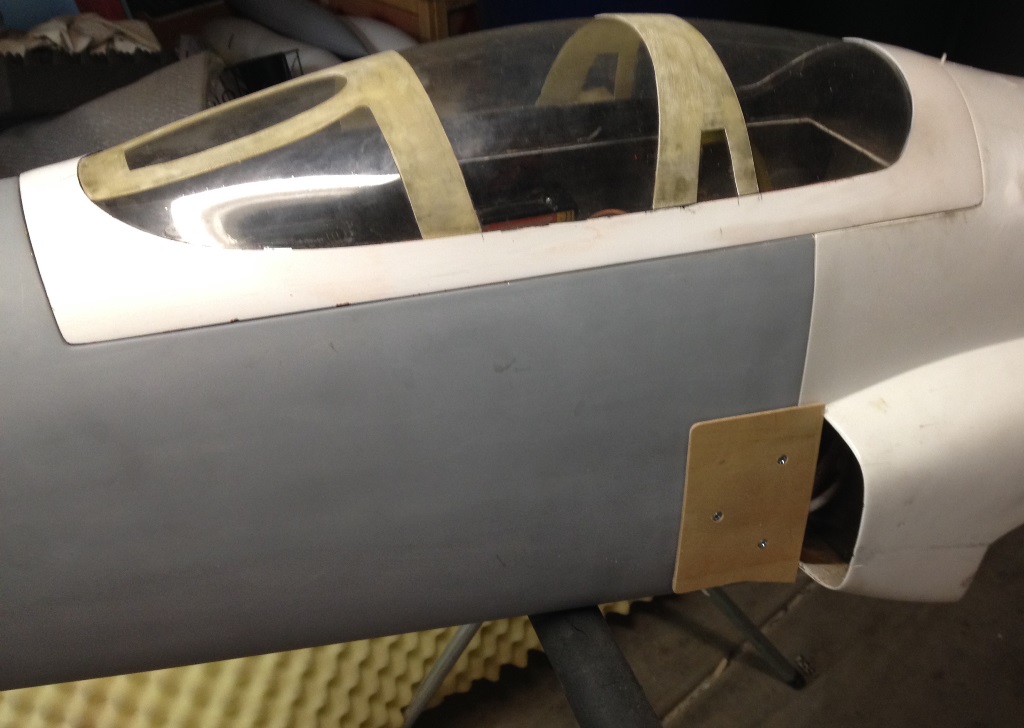
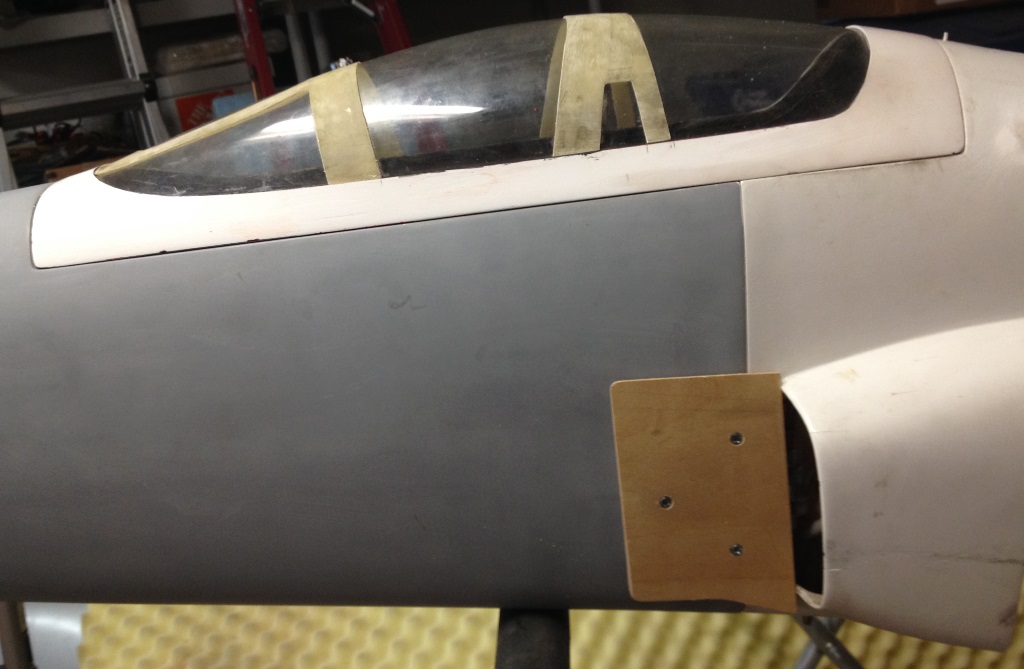
I got the canopy frame molded, paint is on order, the lights arrived from Electrodynamics yesterday, a used stab to modify arrives Friday, and half the plane has been stripped and primed. It'll be a busy next few weeks to have it ready for Best In The West. I'll add some more photos of the mods over the next few weeks. Here's the canopy frame and paint scheme.
Regards,
Jim

These are the modifications that are planned/in progress. IR sensor/blister under nose, two pilot cockpit with canopy frame, air inlet splitter plates, gear doors on the main gear struts, forward door for nose gear, molded in nav lights in the wingtips and fin, molded in landing lights in the wing leading edge, beacon lights on the dorsal and belly, drop tanks under the wings, Sundowners paint scheme with Fed-Std paints, and an anhedral stab.
I got the canopy frame molded, paint is on order, the lights arrived from Electrodynamics yesterday, a used stab to modify arrives Friday, and half the plane has been stripped and primed. It'll be a busy next few weeks to have it ready for Best In The West. I'll add some more photos of the mods over the next few weeks. Here's the canopy frame and paint scheme.
Regards,
Jim
 09-26-2014, 09:47 PM
#1030
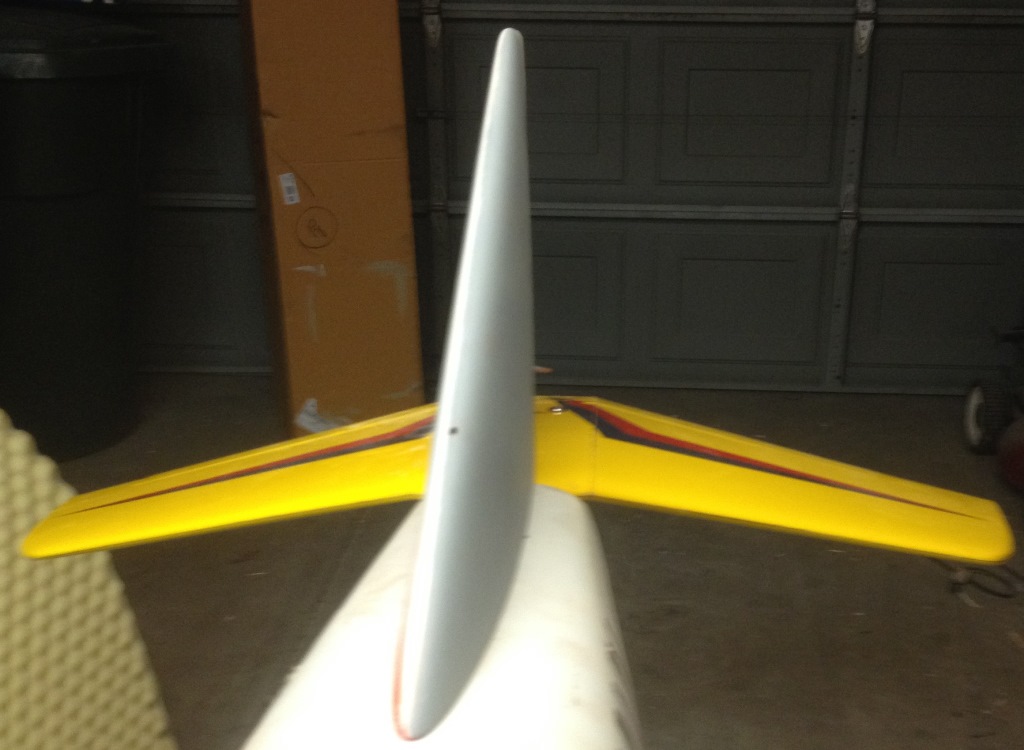
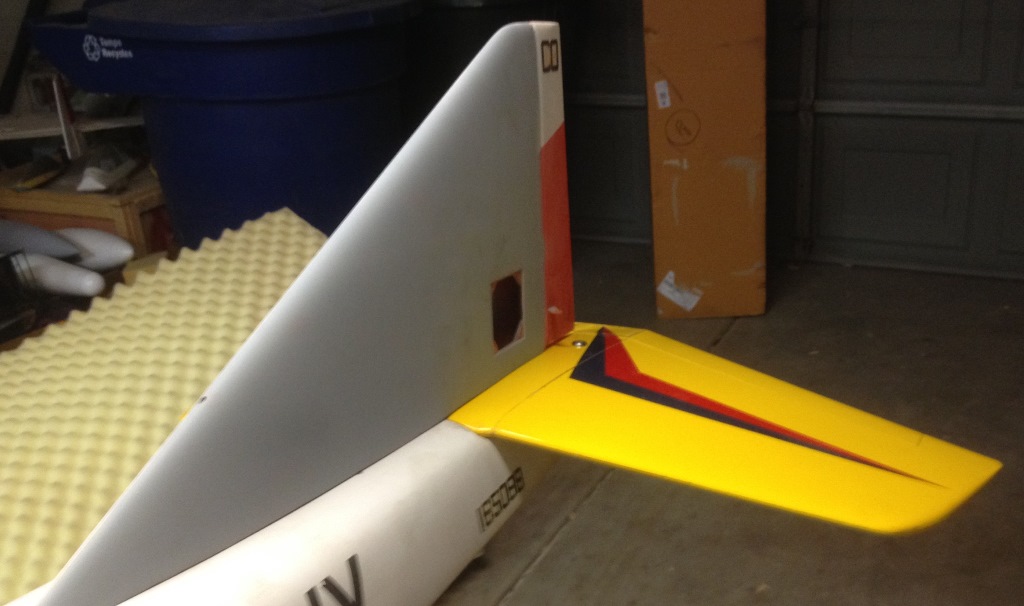
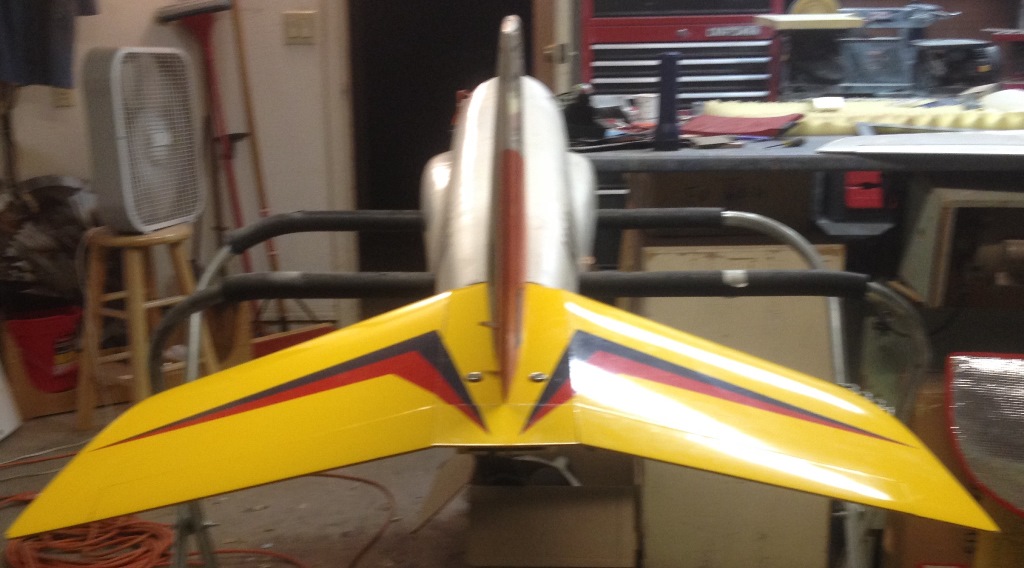
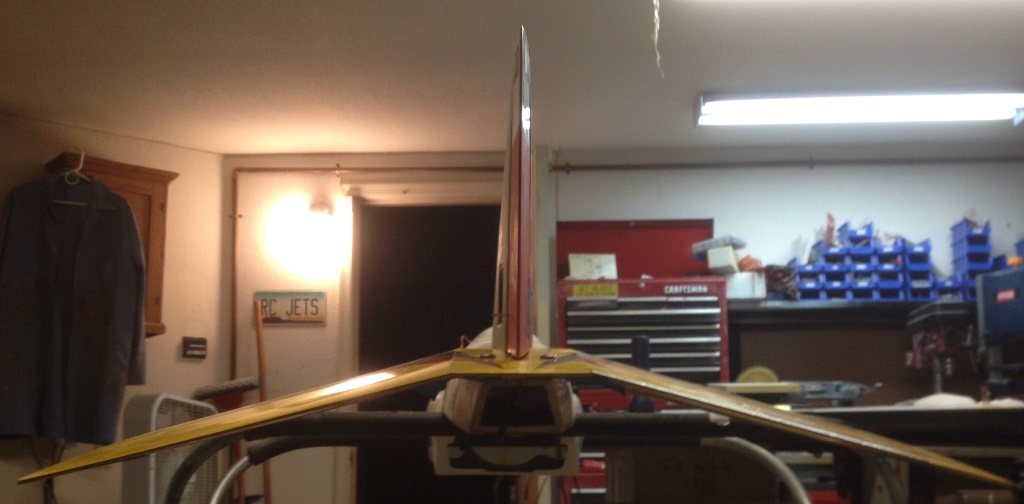
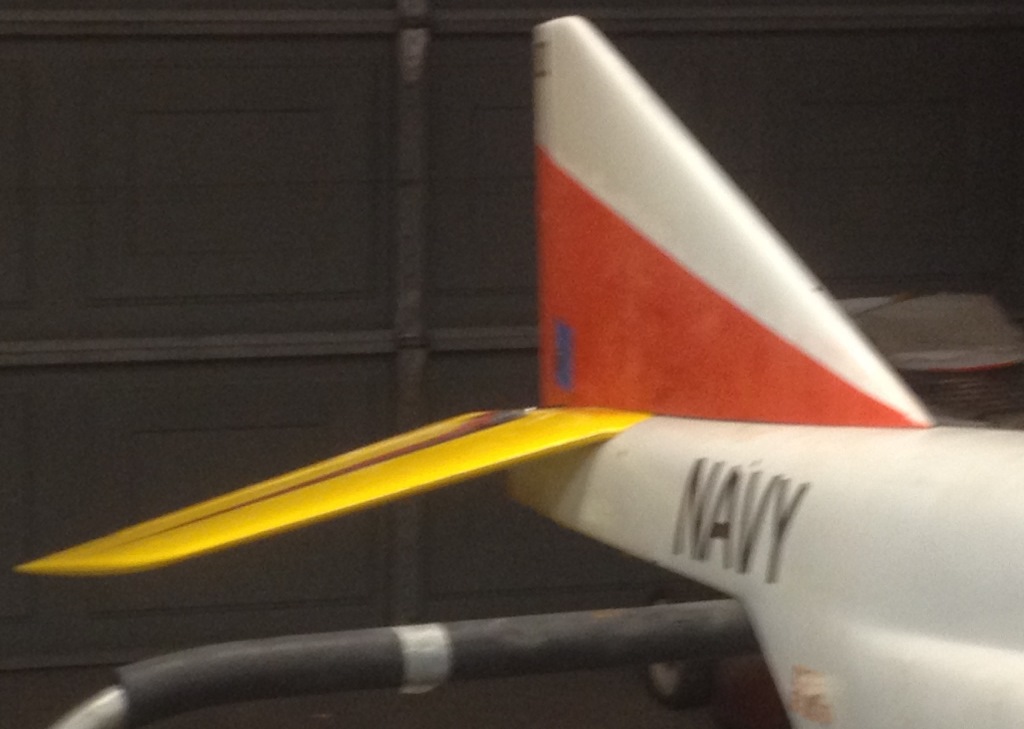
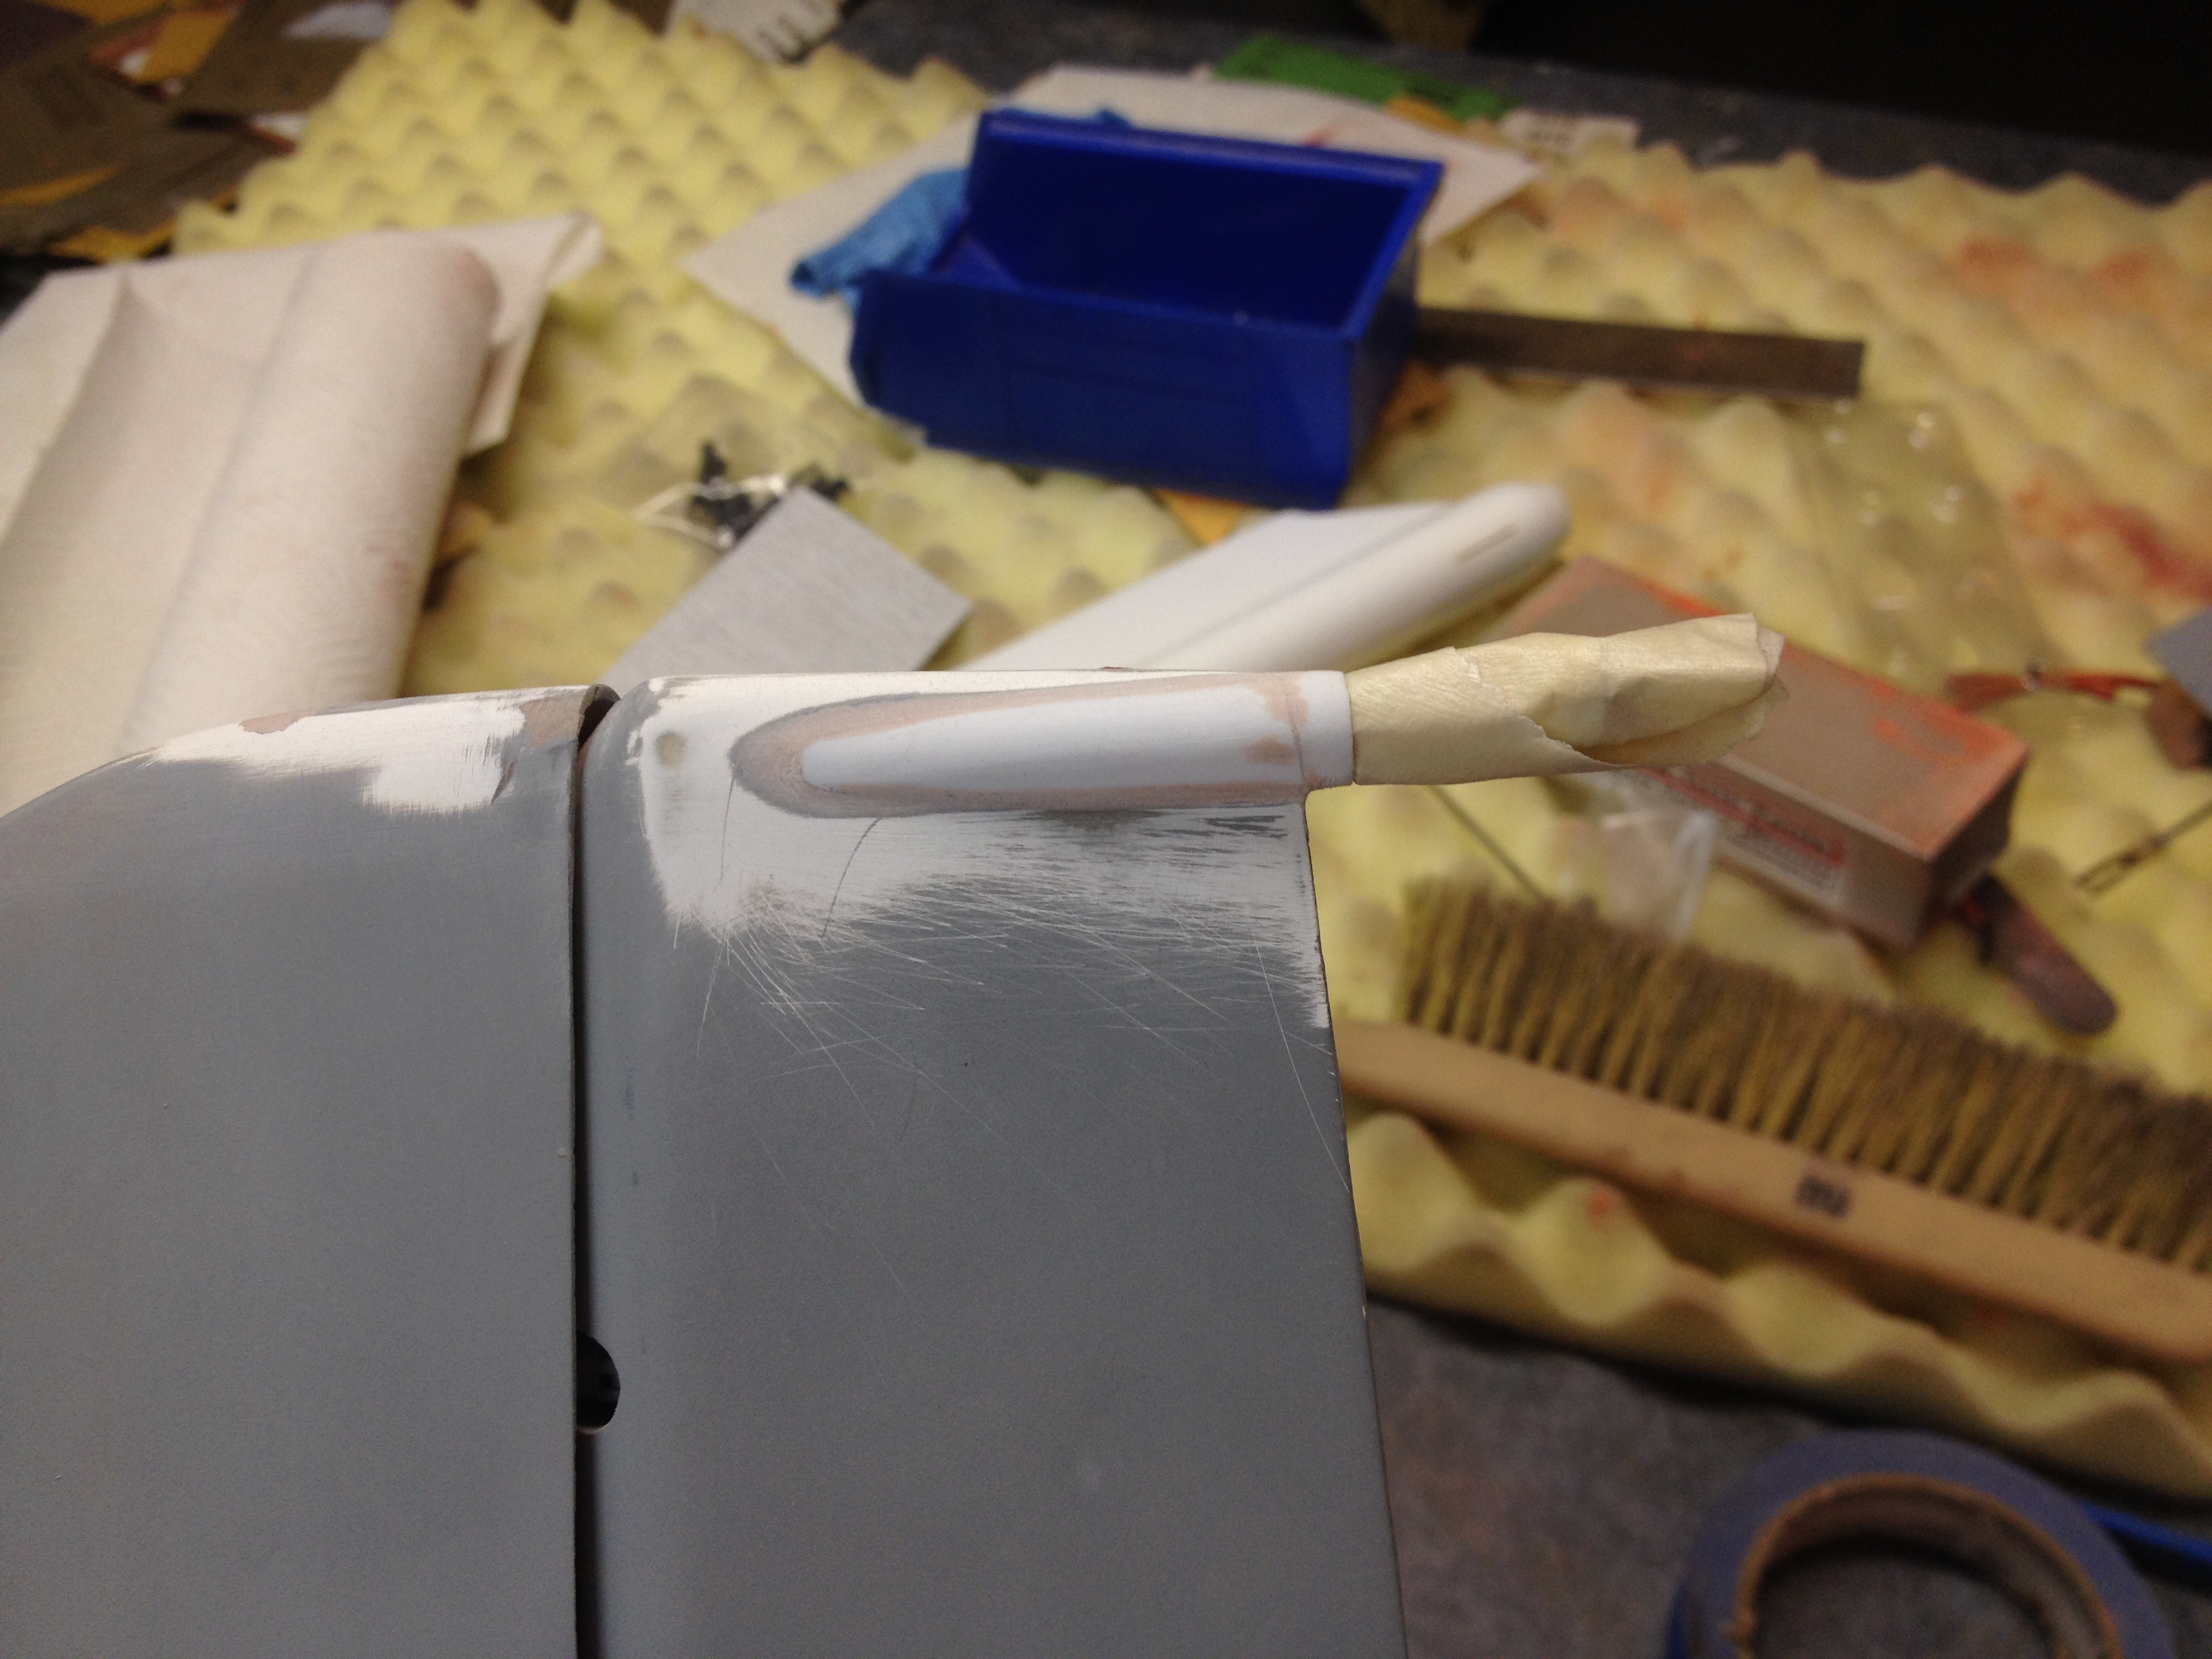
Got some work done on the anhedral stab tonight. 15 degrees anhedral shouldn't change the flight characteristics too much (just some coupling) but I think it will add a lot of personality to the jet, especially after it is painted to match. Three plywood/carbon fiber spars help keep it all together; shear webs have been on either side of the spars to distribute the load from the skins into the spars, and the skins will be glassed with tape across the joints.
Regards,
Jim
Regards,
Jim
Last edited by rcjets_63; 09-27-2014 at 03:43 PM.
09-27-2014, 03:42 PM
#1033
It's raining here in Phoenix so no flying today :-( So it was a day in the shop of stripping paint (messy and boring) but I did whip up the air inlet splitter plates. Hopefully the paint will arrive this week and I can paint next weekend and get the dry transfers applied.
Regards,
Jim
Regards,
Jim
10-05-2014, 06:03 PM
#1034
I got a bit bored with paint stripping, sanding, priming, sanding, priming, etc so I decided to work on something else for a bit of fun and inspiration. I used a length of 3/8" plastic tubing to create a fairing on the rudder for the white navigation light. To snake the wires through the fin, I cut a hole in the top of the fin about 1-1/2" from the rear and a hole through the rib over the rudder servo and ran the wires down to the servo area.
The Model Master acrylic paint arrived so I set to work painting the Sundowner scheme on the fin/rudder. Hopefully that will motivate me as there isn't a lot of time left until BITW.
Regards,
Jim

The Model Master acrylic paint arrived so I set to work painting the Sundowner scheme on the fin/rudder. Hopefully that will motivate me as there isn't a lot of time left until BITW.
Regards,
Jim
Last edited by rcjets_63; 10-05-2014 at 06:07 PM.
10-05-2014, 09:48 PM
#1036
2FAS,
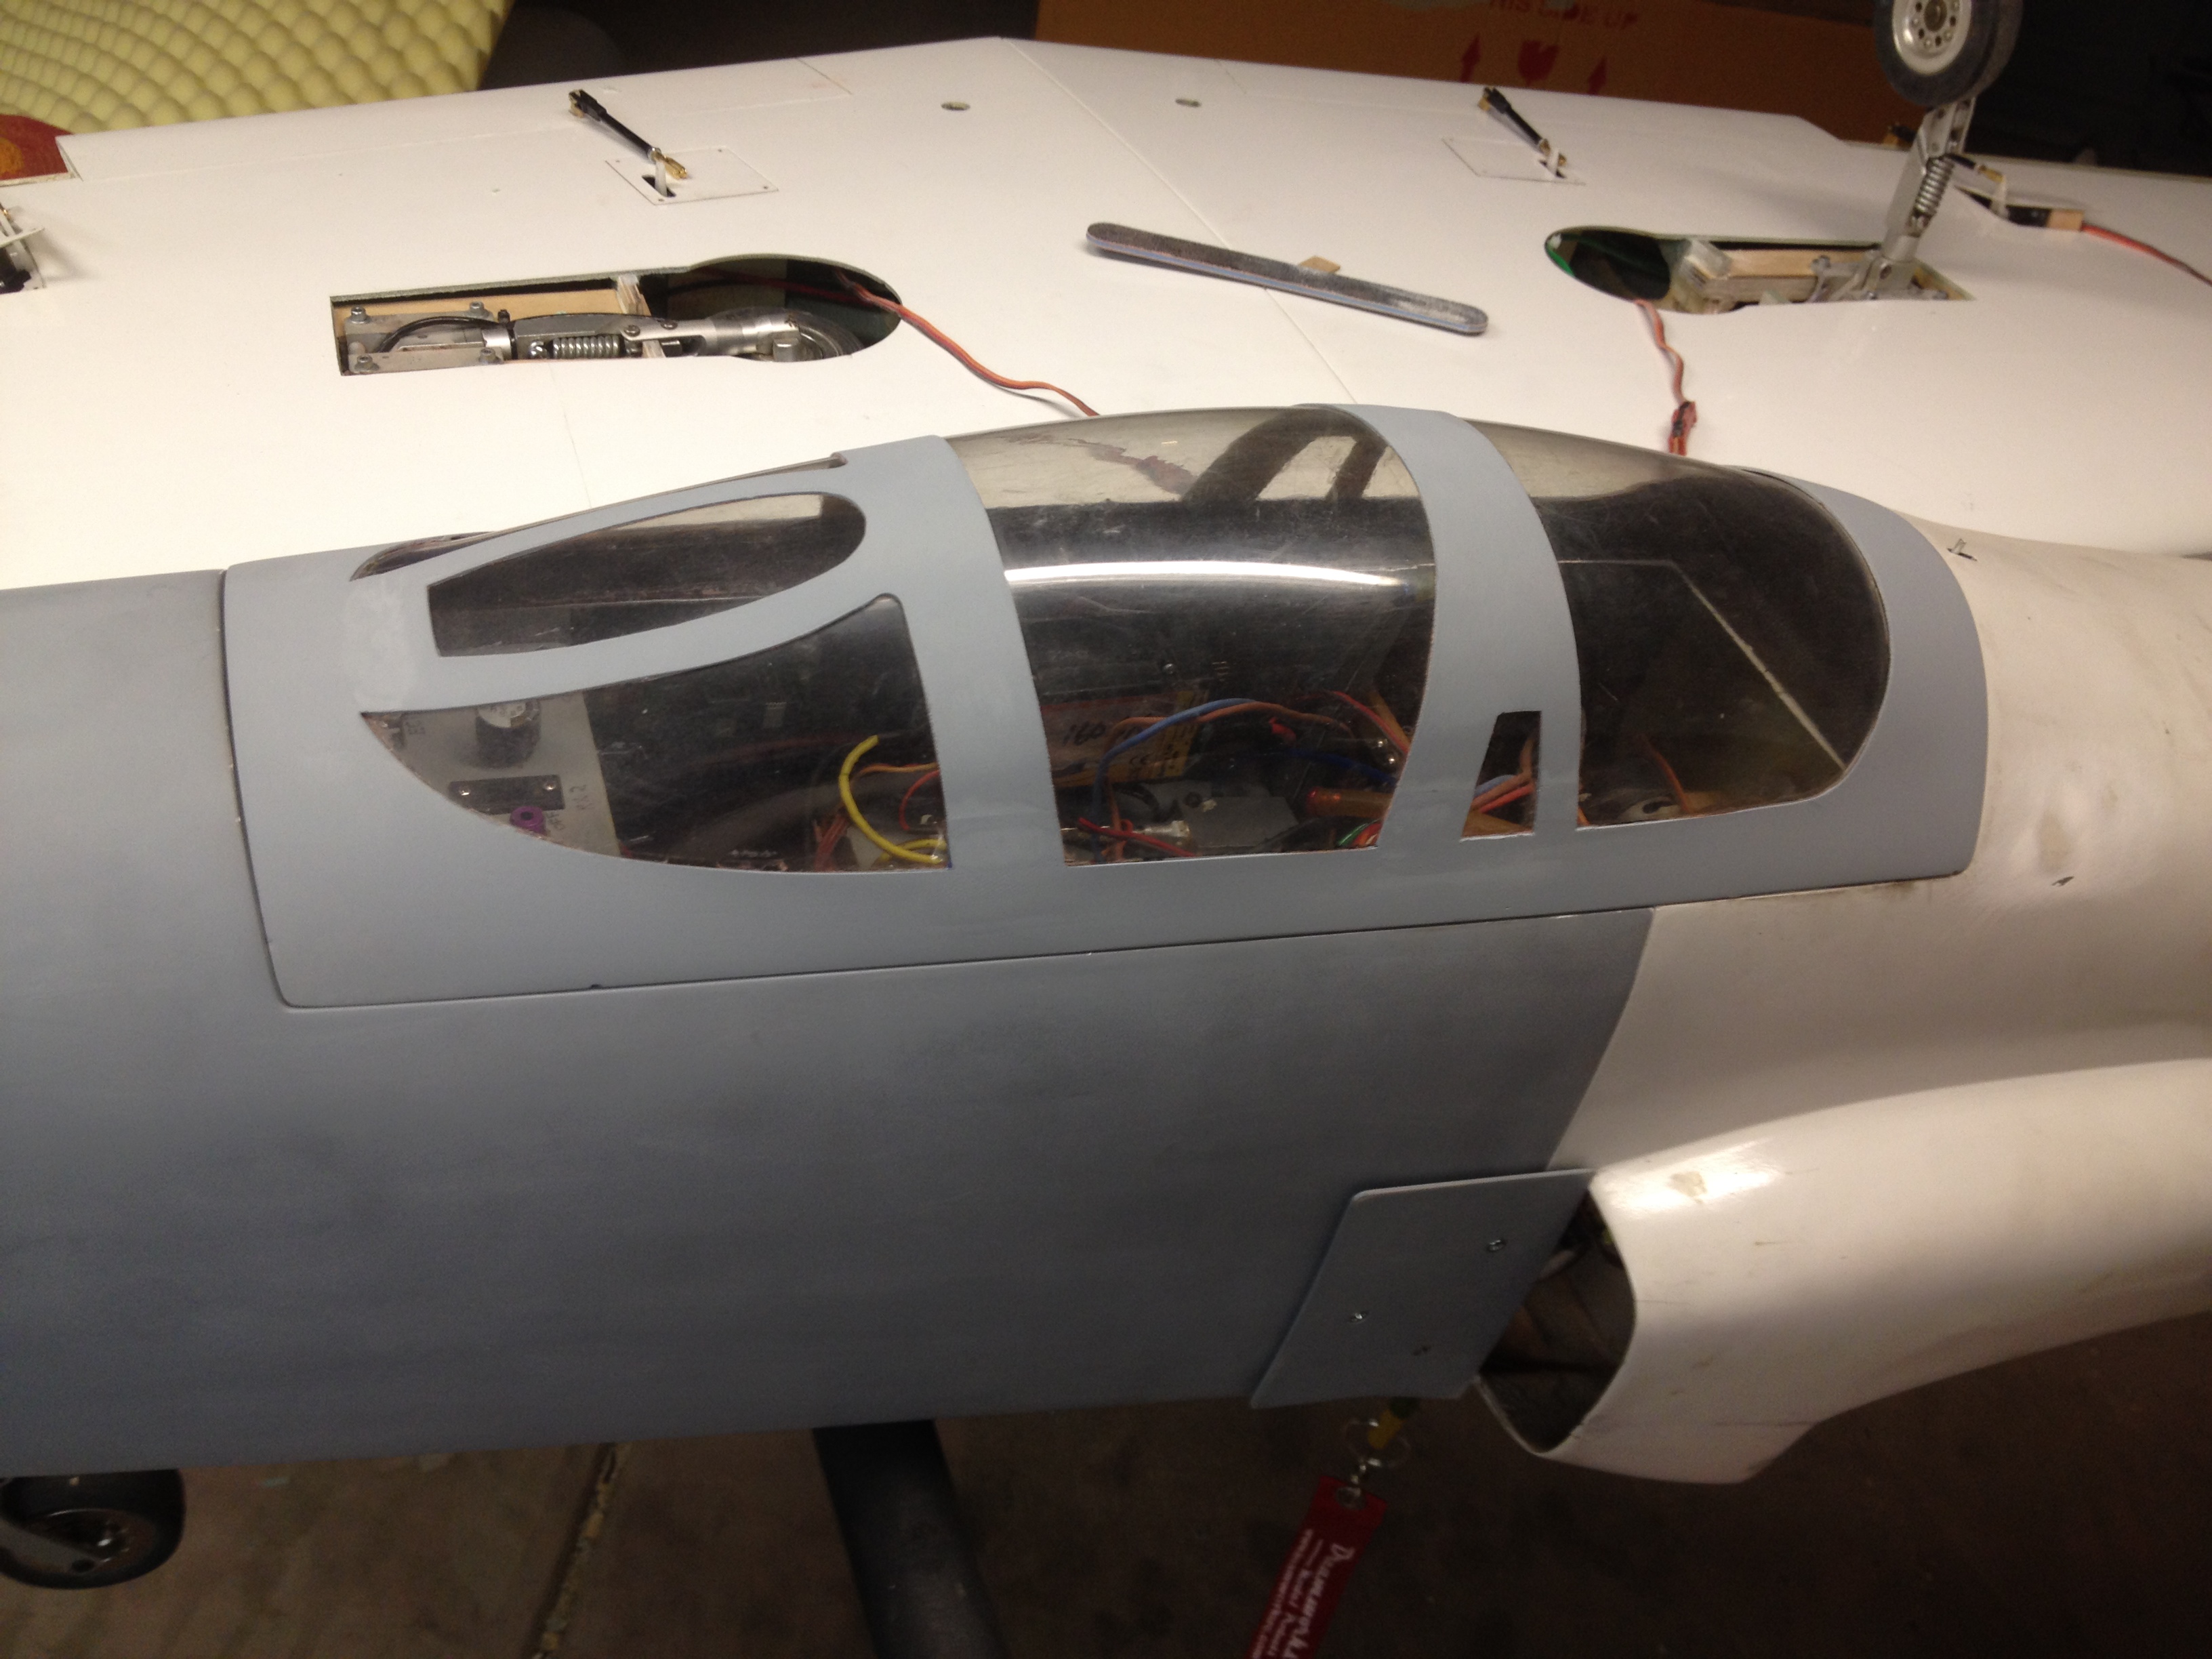
Thanks, I'm looking forward to having it done too as I have a couple of other projects that need attention. Yes, the plane is fitted with DreamWorks Taurus retracts and DreamWorks Pro-Link trailing link struts fitted with Interairco wheels and brakes.
Installation of the gear doors was pretty simple as the door is mounted on the flat outer face of the upper strut. This evening I installed the belly fairing which I had modified to remove the unsightly gluing flange, and I added balsa supports to keep the fairing from "oil canning".
Regards,
Jim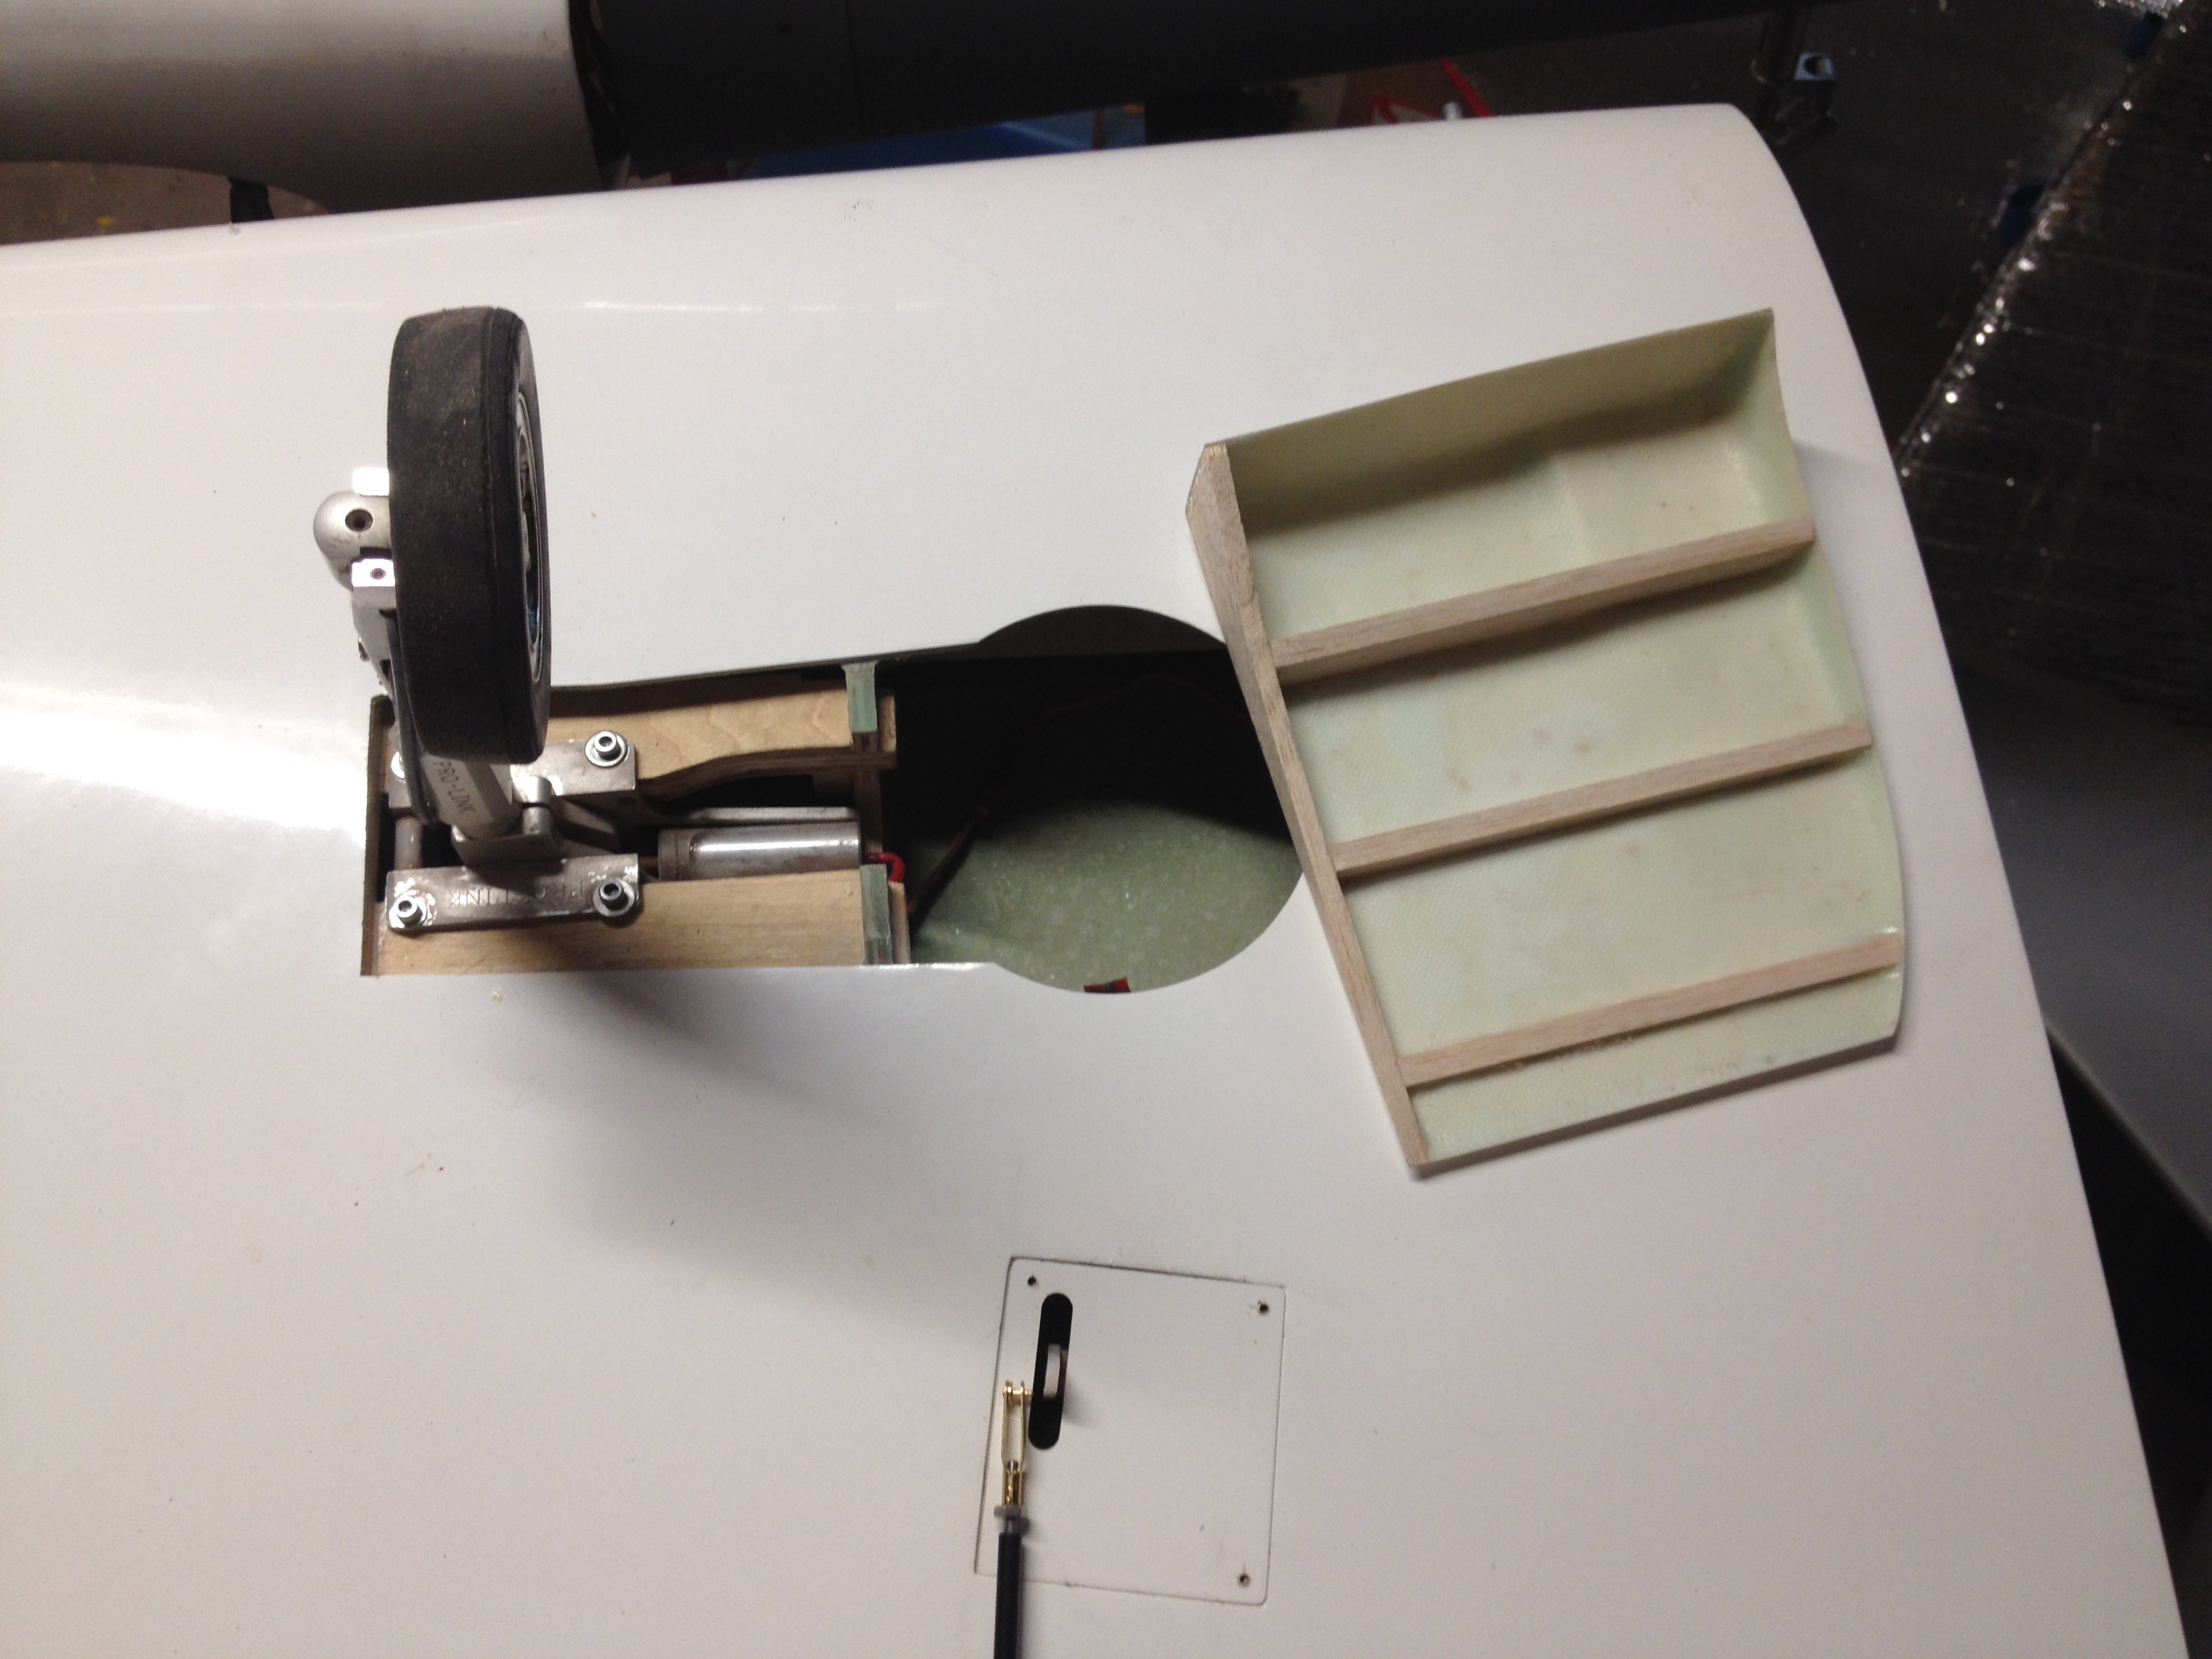
10-06-2014, 03:26 AM
#1037

My Feedback: (5)
Join Date: Jun 2010
Location: cypress,
TX
Posts: 81
Likes: 0
Received 0 Likes
on
0 Posts
I purchased the Dreamworks electric retracts and brakes for mine. I'm trying to keep it simple and the weight down. I have had mixed advice on if a Kingtech k100g is enough power so I'm keeping it light. It think it will be fine. This is my second jet. The first was the Tornado and that relationship started out Bad. For me the Tornado would always bounce on landing.
300 flights on your airframe is very impressive. God willing I can say that one day. I want an easy flying, must be Air Force and reliable everyday jet. I think the Reaction is it. If only I had more time to work on it
Take care,
2FAS
300 flights on your airframe is very impressive. God willing I can say that one day. I want an easy flying, must be Air Force and reliable everyday jet. I think the Reaction is it. If only I had more time to work on it
Take care,
2FAS
10-11-2014, 10:13 PM
#1038
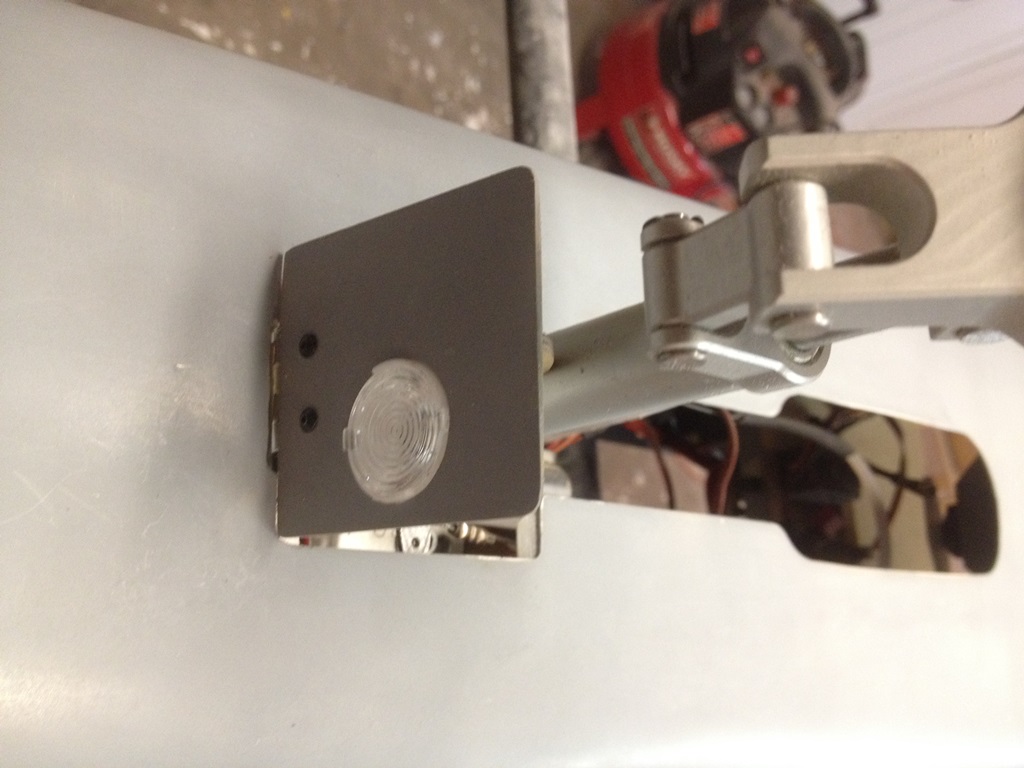
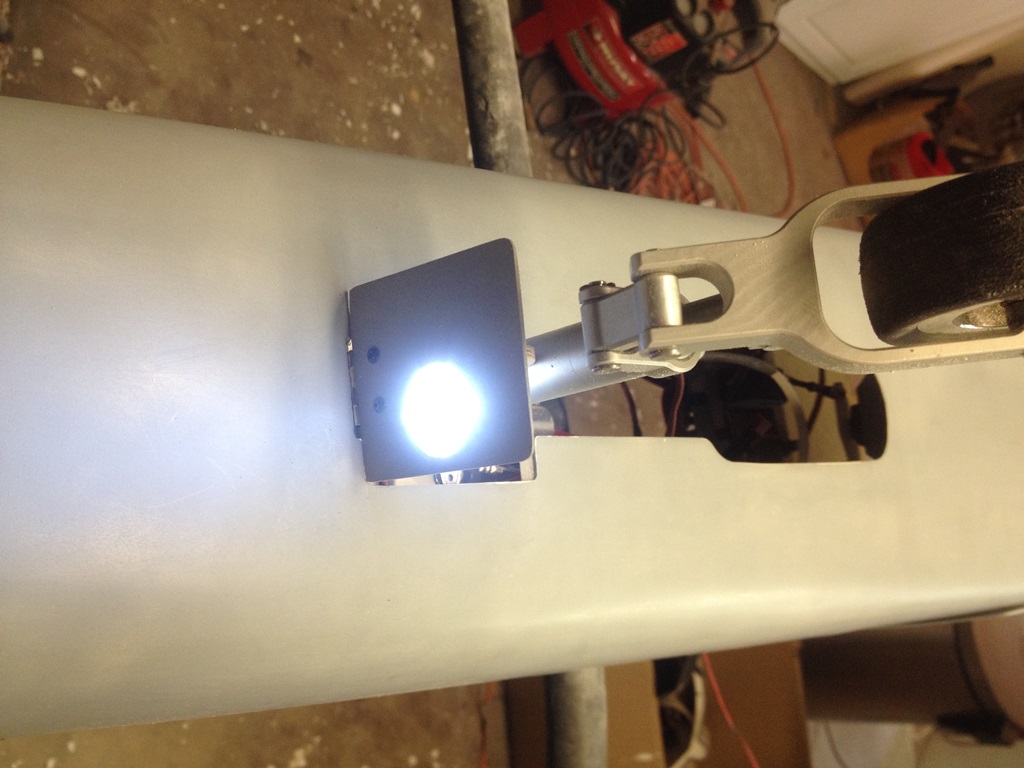
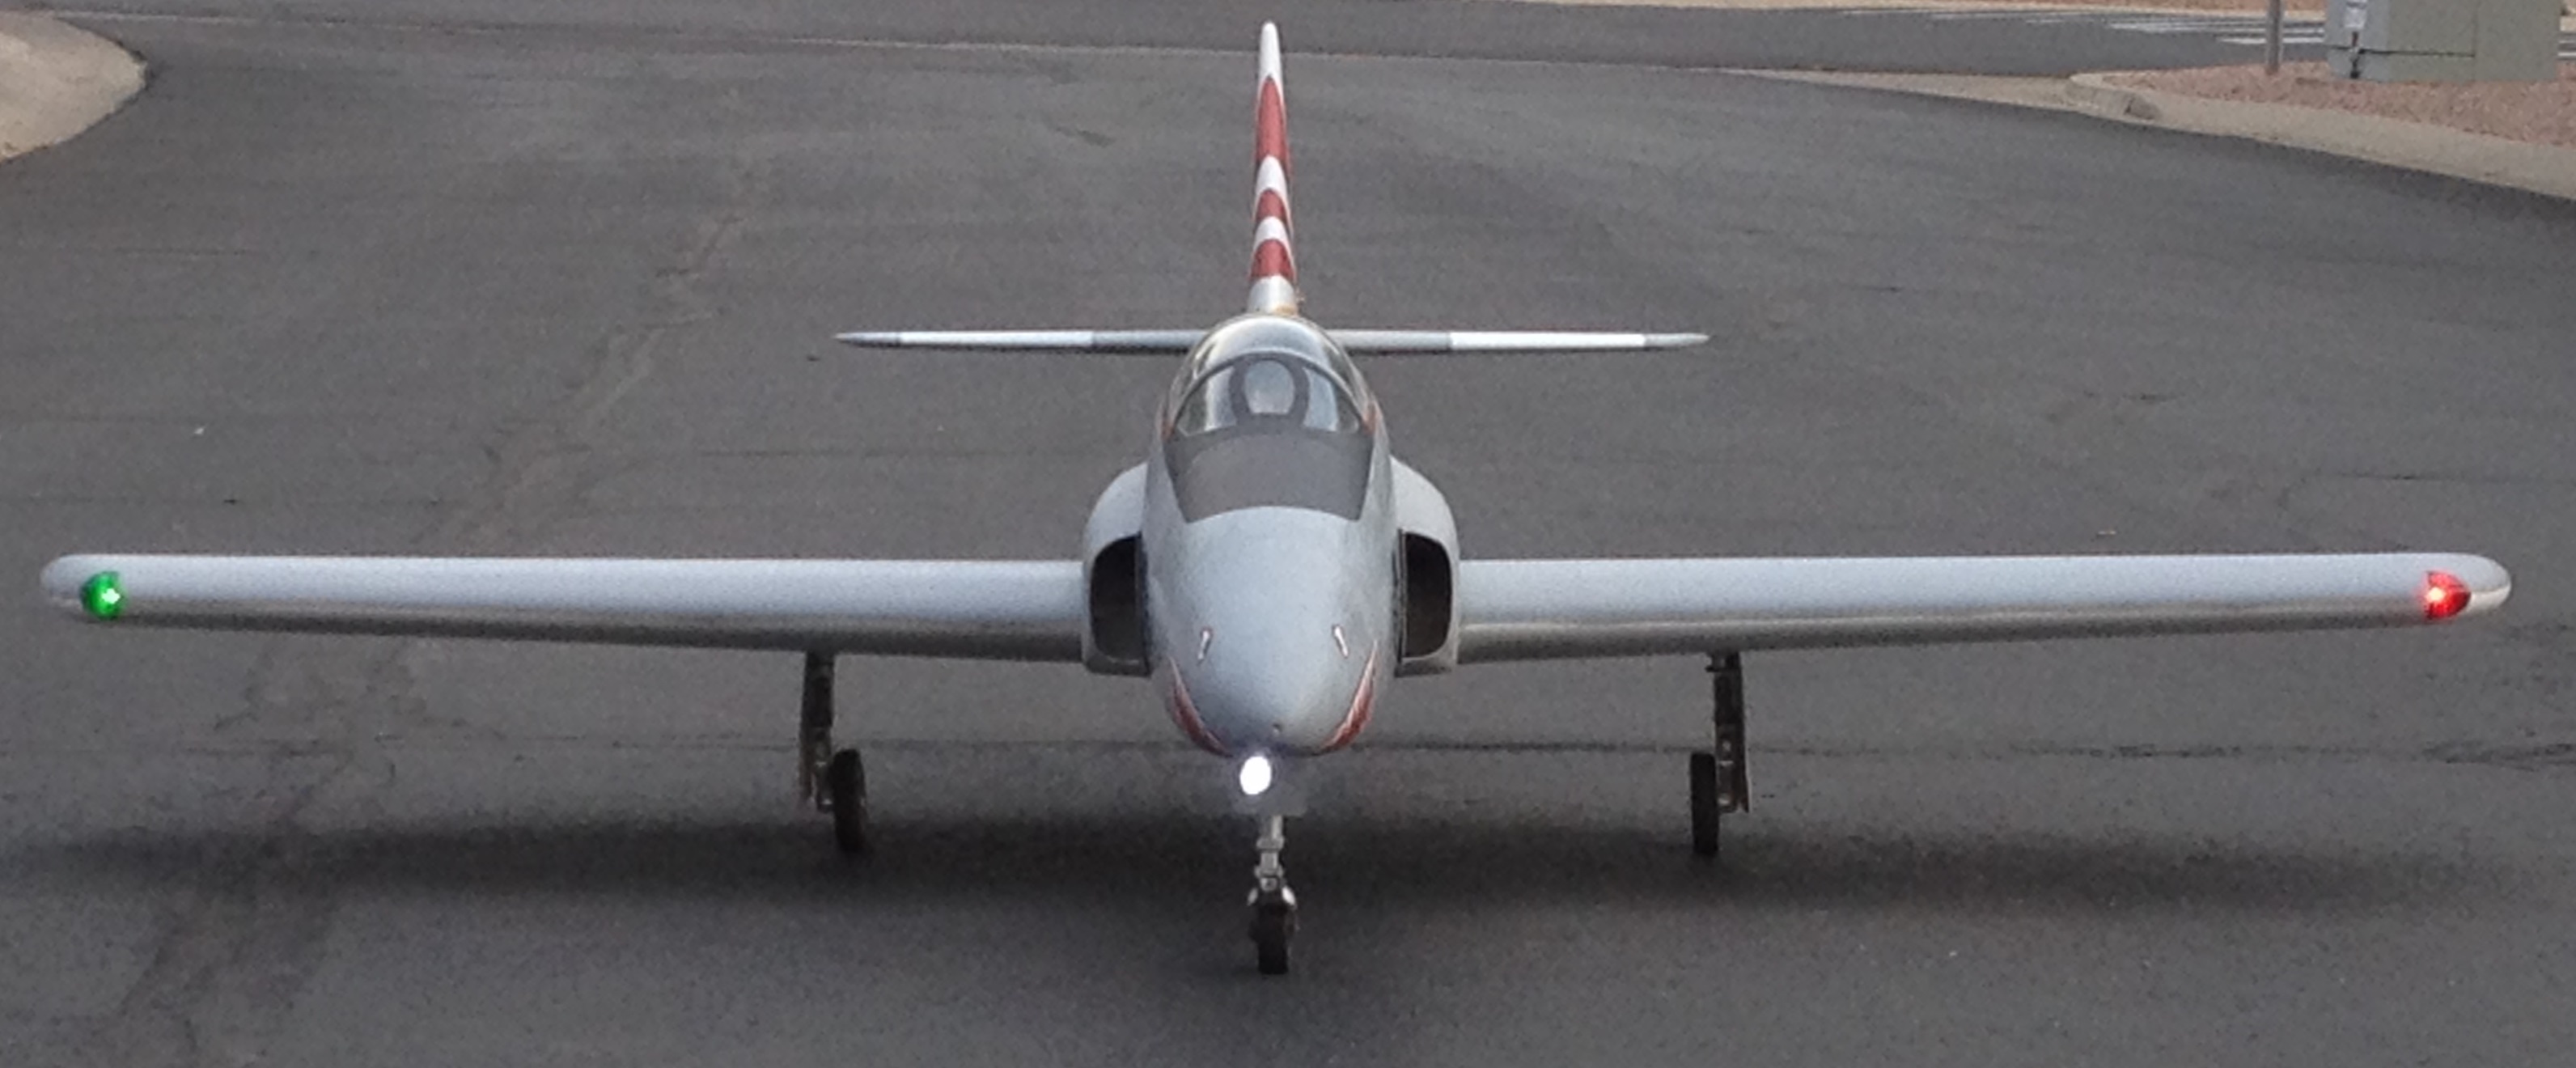
To go along with the white navigation light on the tail, I added molded-in navigation lights (red/green) on the wingtips. The F-4 had much small wingtip lights, but it also had a comparatively thinner wing. I figured that I'd just make them to blend into the Reaction's rather thick wing. Here's how it's done in case someone wants to try it:
Photo 1: Mark the extents of the molded lens on the wing in pencil.
Photo 2: Cut a piece of Lexan oversized and glue a couple of wood strips to either side as grips. Heat up the Lexan with a heat gun (both sides) and pull it over the wingtip. It may take a few iterations (and a surprising amount of pull force), but keep at it until the Lexan is pulled past the pencil lines. Using a NON-PERMANENT marker, trace the pencil lines onto the Lexan
Photo 3: Cut away the Lexan about 1/4" beyond the pencil lines
Photo 4: Line the cutout in the wing with 1/8" plywood. Glue the plywood such that half the thickness is within the wing and the other half forms the gluing surface for the lens. Carefully sand away the Lexan to fit into the cutout then put it aside.
Prime/paint the plywood and mount the LED. I used Electrodynamics lights so it was a simple matter to drill a 1/4" thru hole and glue the light in position with Zap-A-Gap-A-Goo
Photo 5: Paint the inside of the molded lens with translucent paint and glue it into place with canopy glue.
Photos 6 - 8: The final result seems well worth the effort.
Regards,
Jim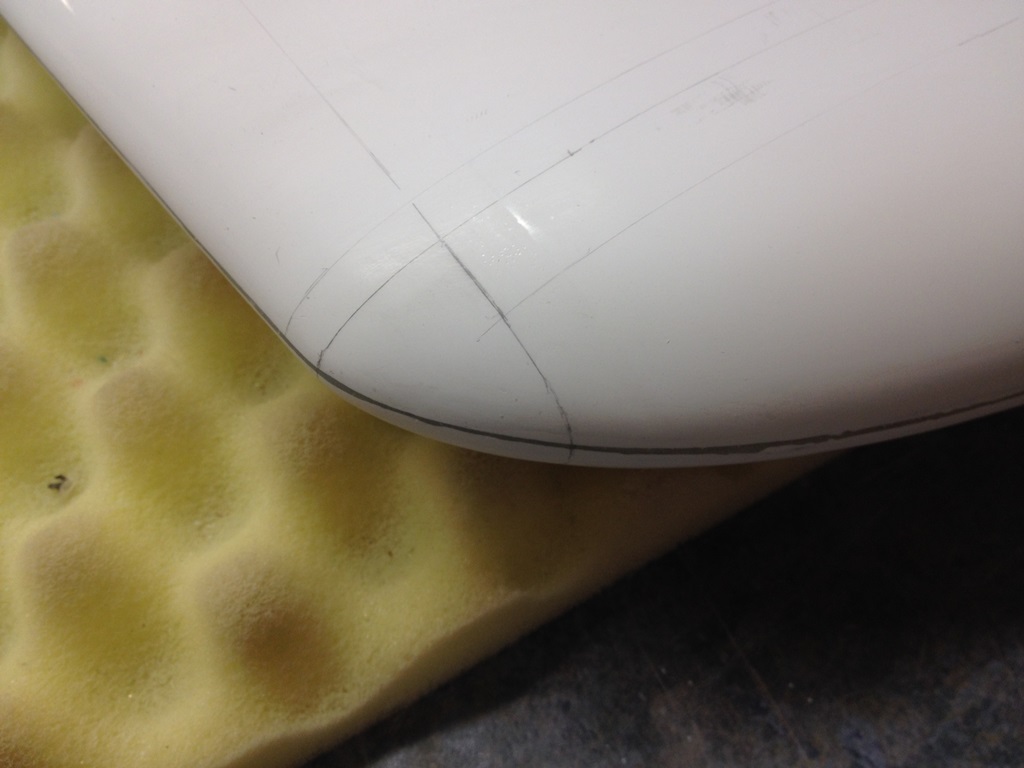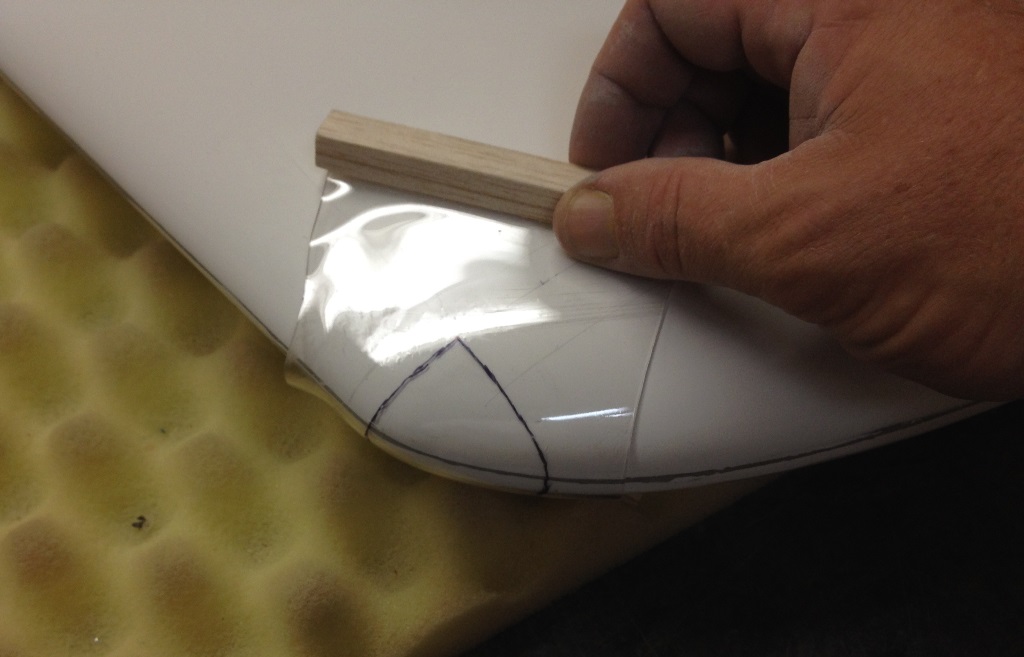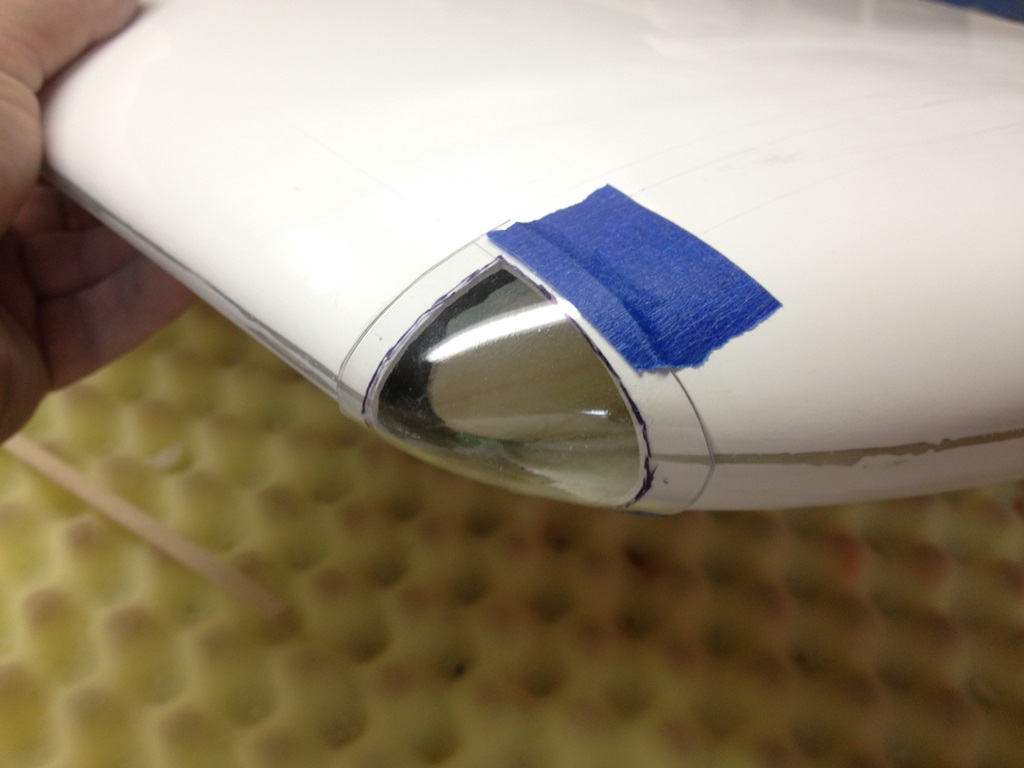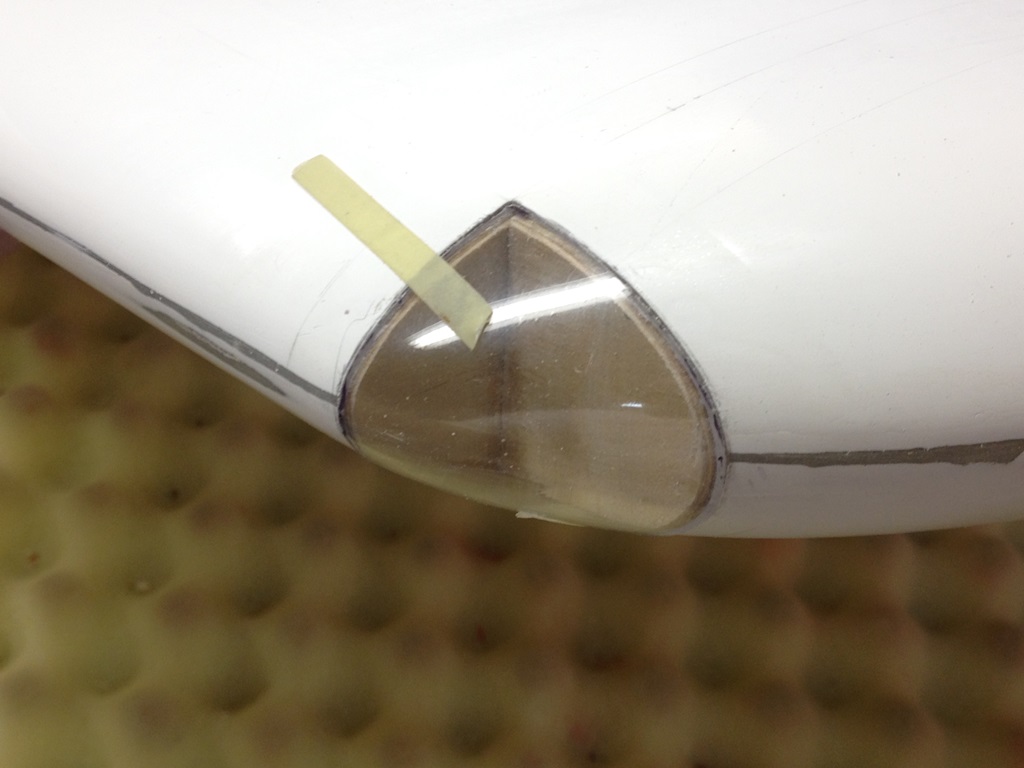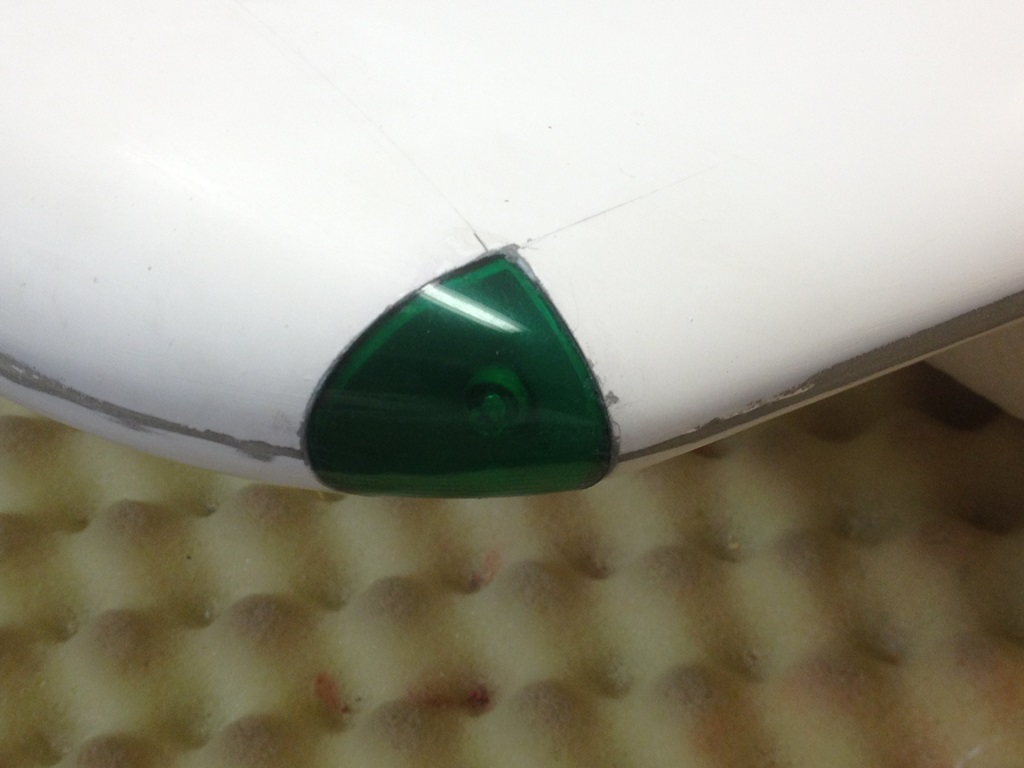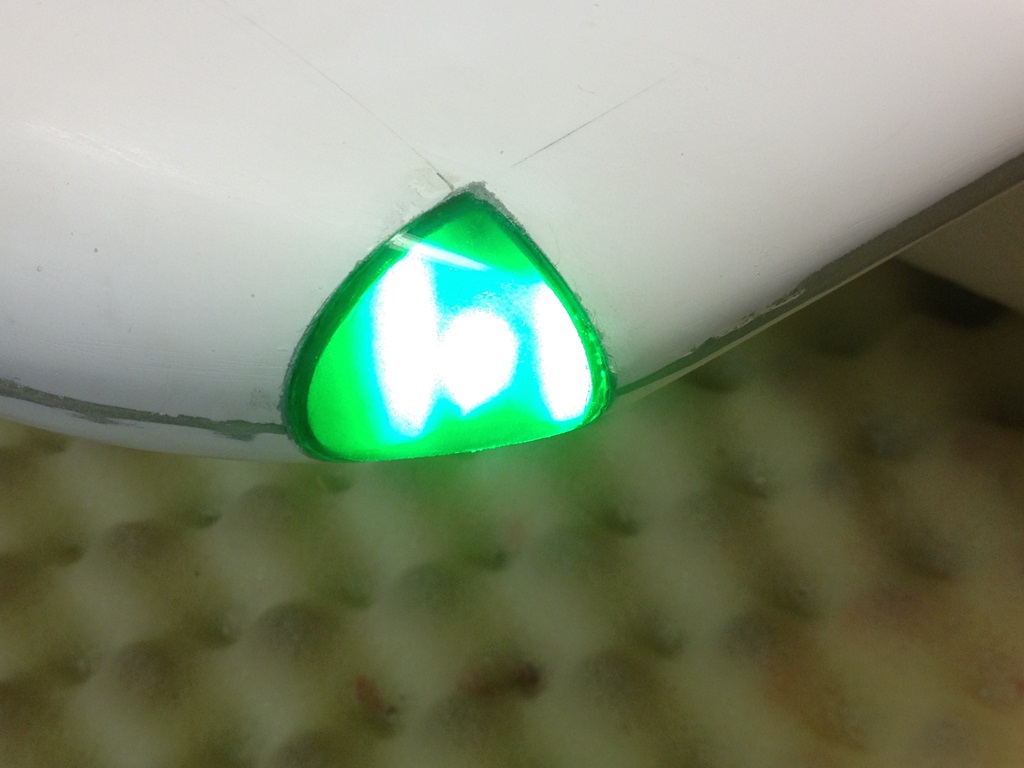
Last edited by rcjets_63; 10-21-2014 at 04:35 PM.
10-11-2014, 10:23 PM
#1039
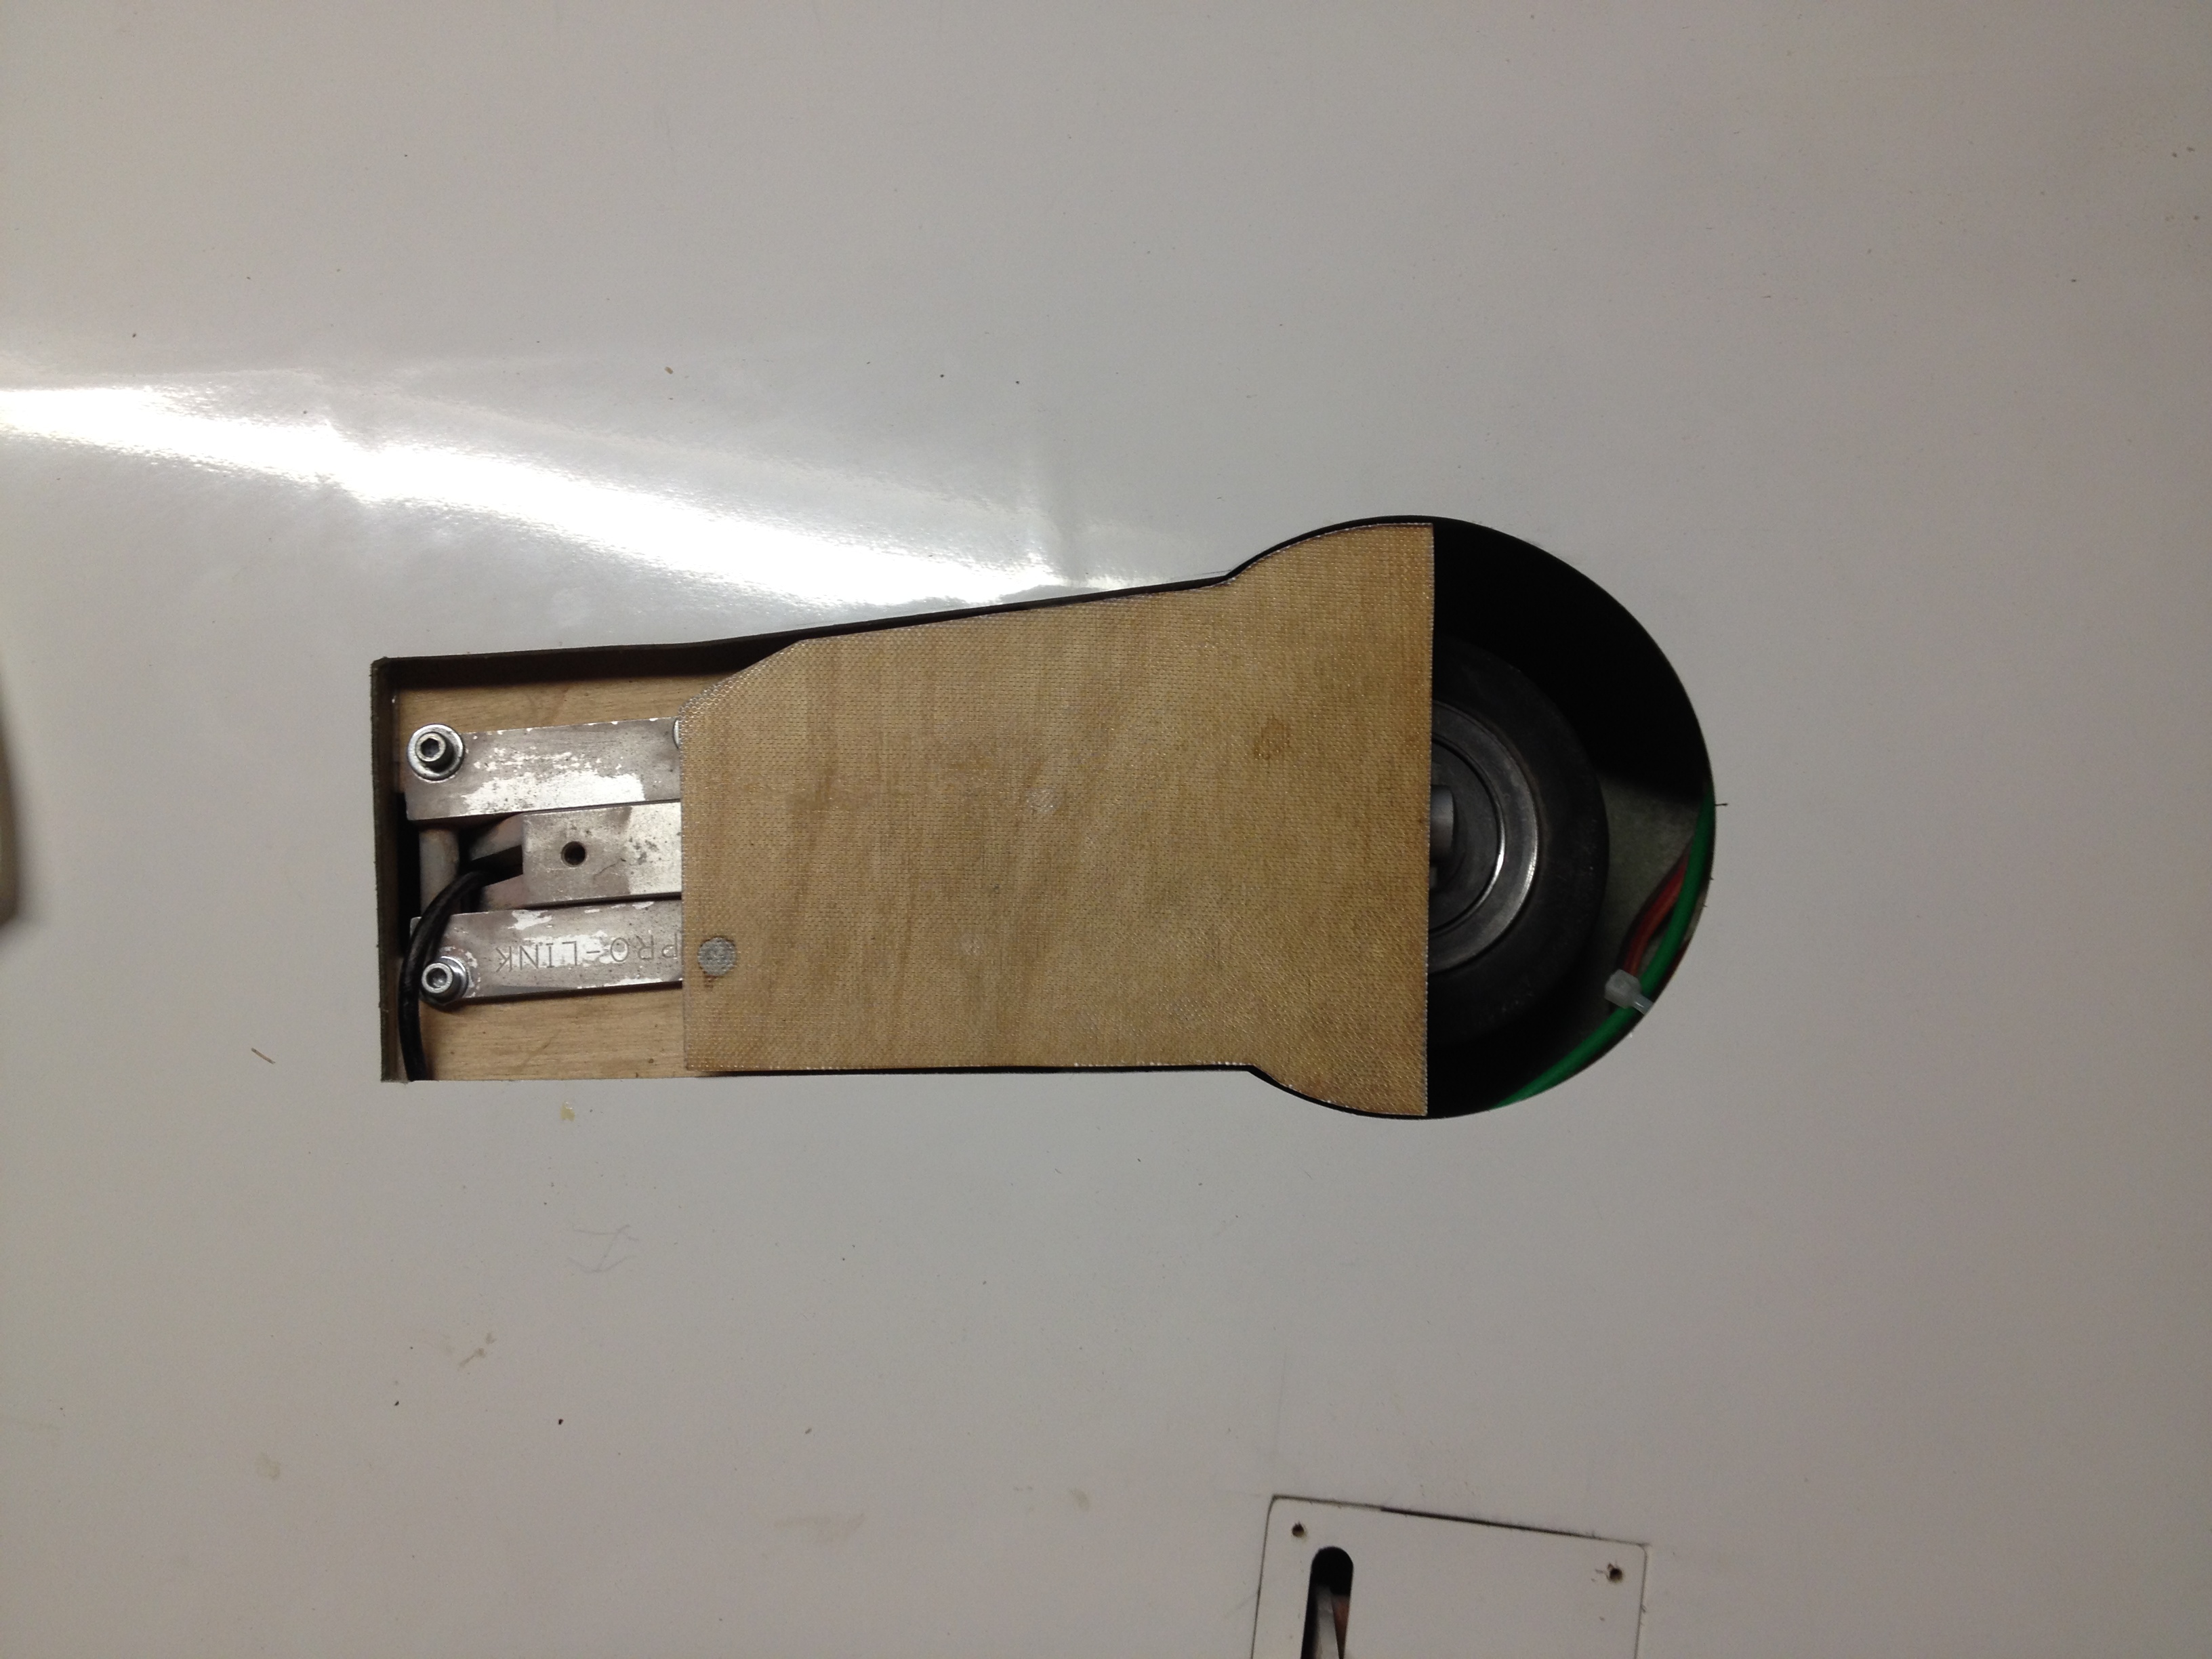
I also added landing lights. Originally I was going to do molded-in lights at the wing leading edge, but the F-4 has a single landing light mounted on the nose gear door. I'm running out of time until BITW, and I guessed it would be faster to make a nose door than molded-in lights, so I went with the nose door mounted light.
The door was cut from a piece of an old wreck I had laying around so it was just a matter of cutting the piece to size and installing a hinge. The LED light is mounted in a white plastic holder available from Electrodynamics and comes with a bezel to focus the light forward. The holder is glued into a hole in the door with Zap-A-Gap-A-Goo, and the wire routed in Tidi-strips to prevent it from snagging anything. A 1/2" radius plywood semi-circle is glued to the back of the door (on the centerline) to slide along the strut as the gear extends.
Regards,
Jim
10-12-2014, 03:01 AM
#1041
My Feedback: (5)
Join Date: Jun 2010
Location: cypress,
TX
Posts: 81
Likes: 0
Received 0 Likes
on
0 Posts
Jim, the lights are very impressive, great job. I would love to add lights but I don't have the nerve to cut a hole in the wings yet. Maybe after I have gotten some flights on it.
10-12-2014, 06:45 AM
#1042

Those are the kinds of little improvements that really make this hobby fun for me! Great job in the thinking, planning and execution of your lights, Jim! This Reaction ARF is a great platform for a little imagination.
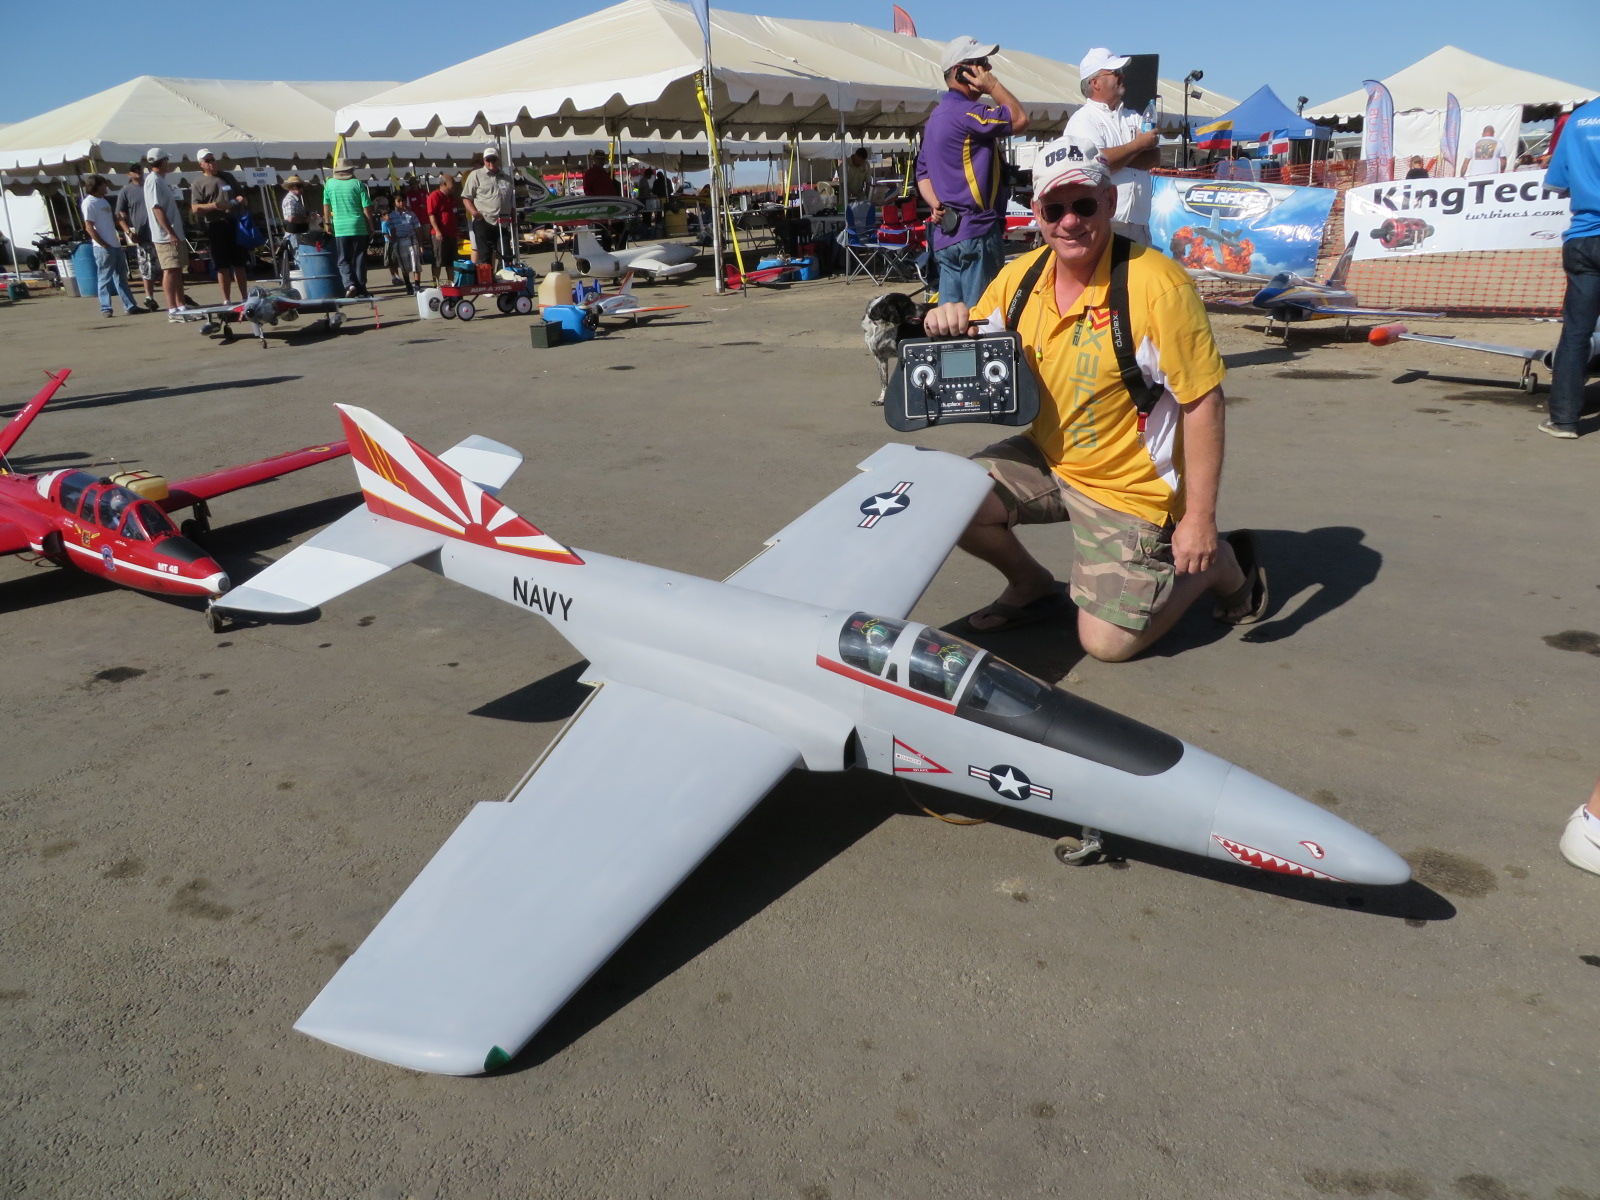
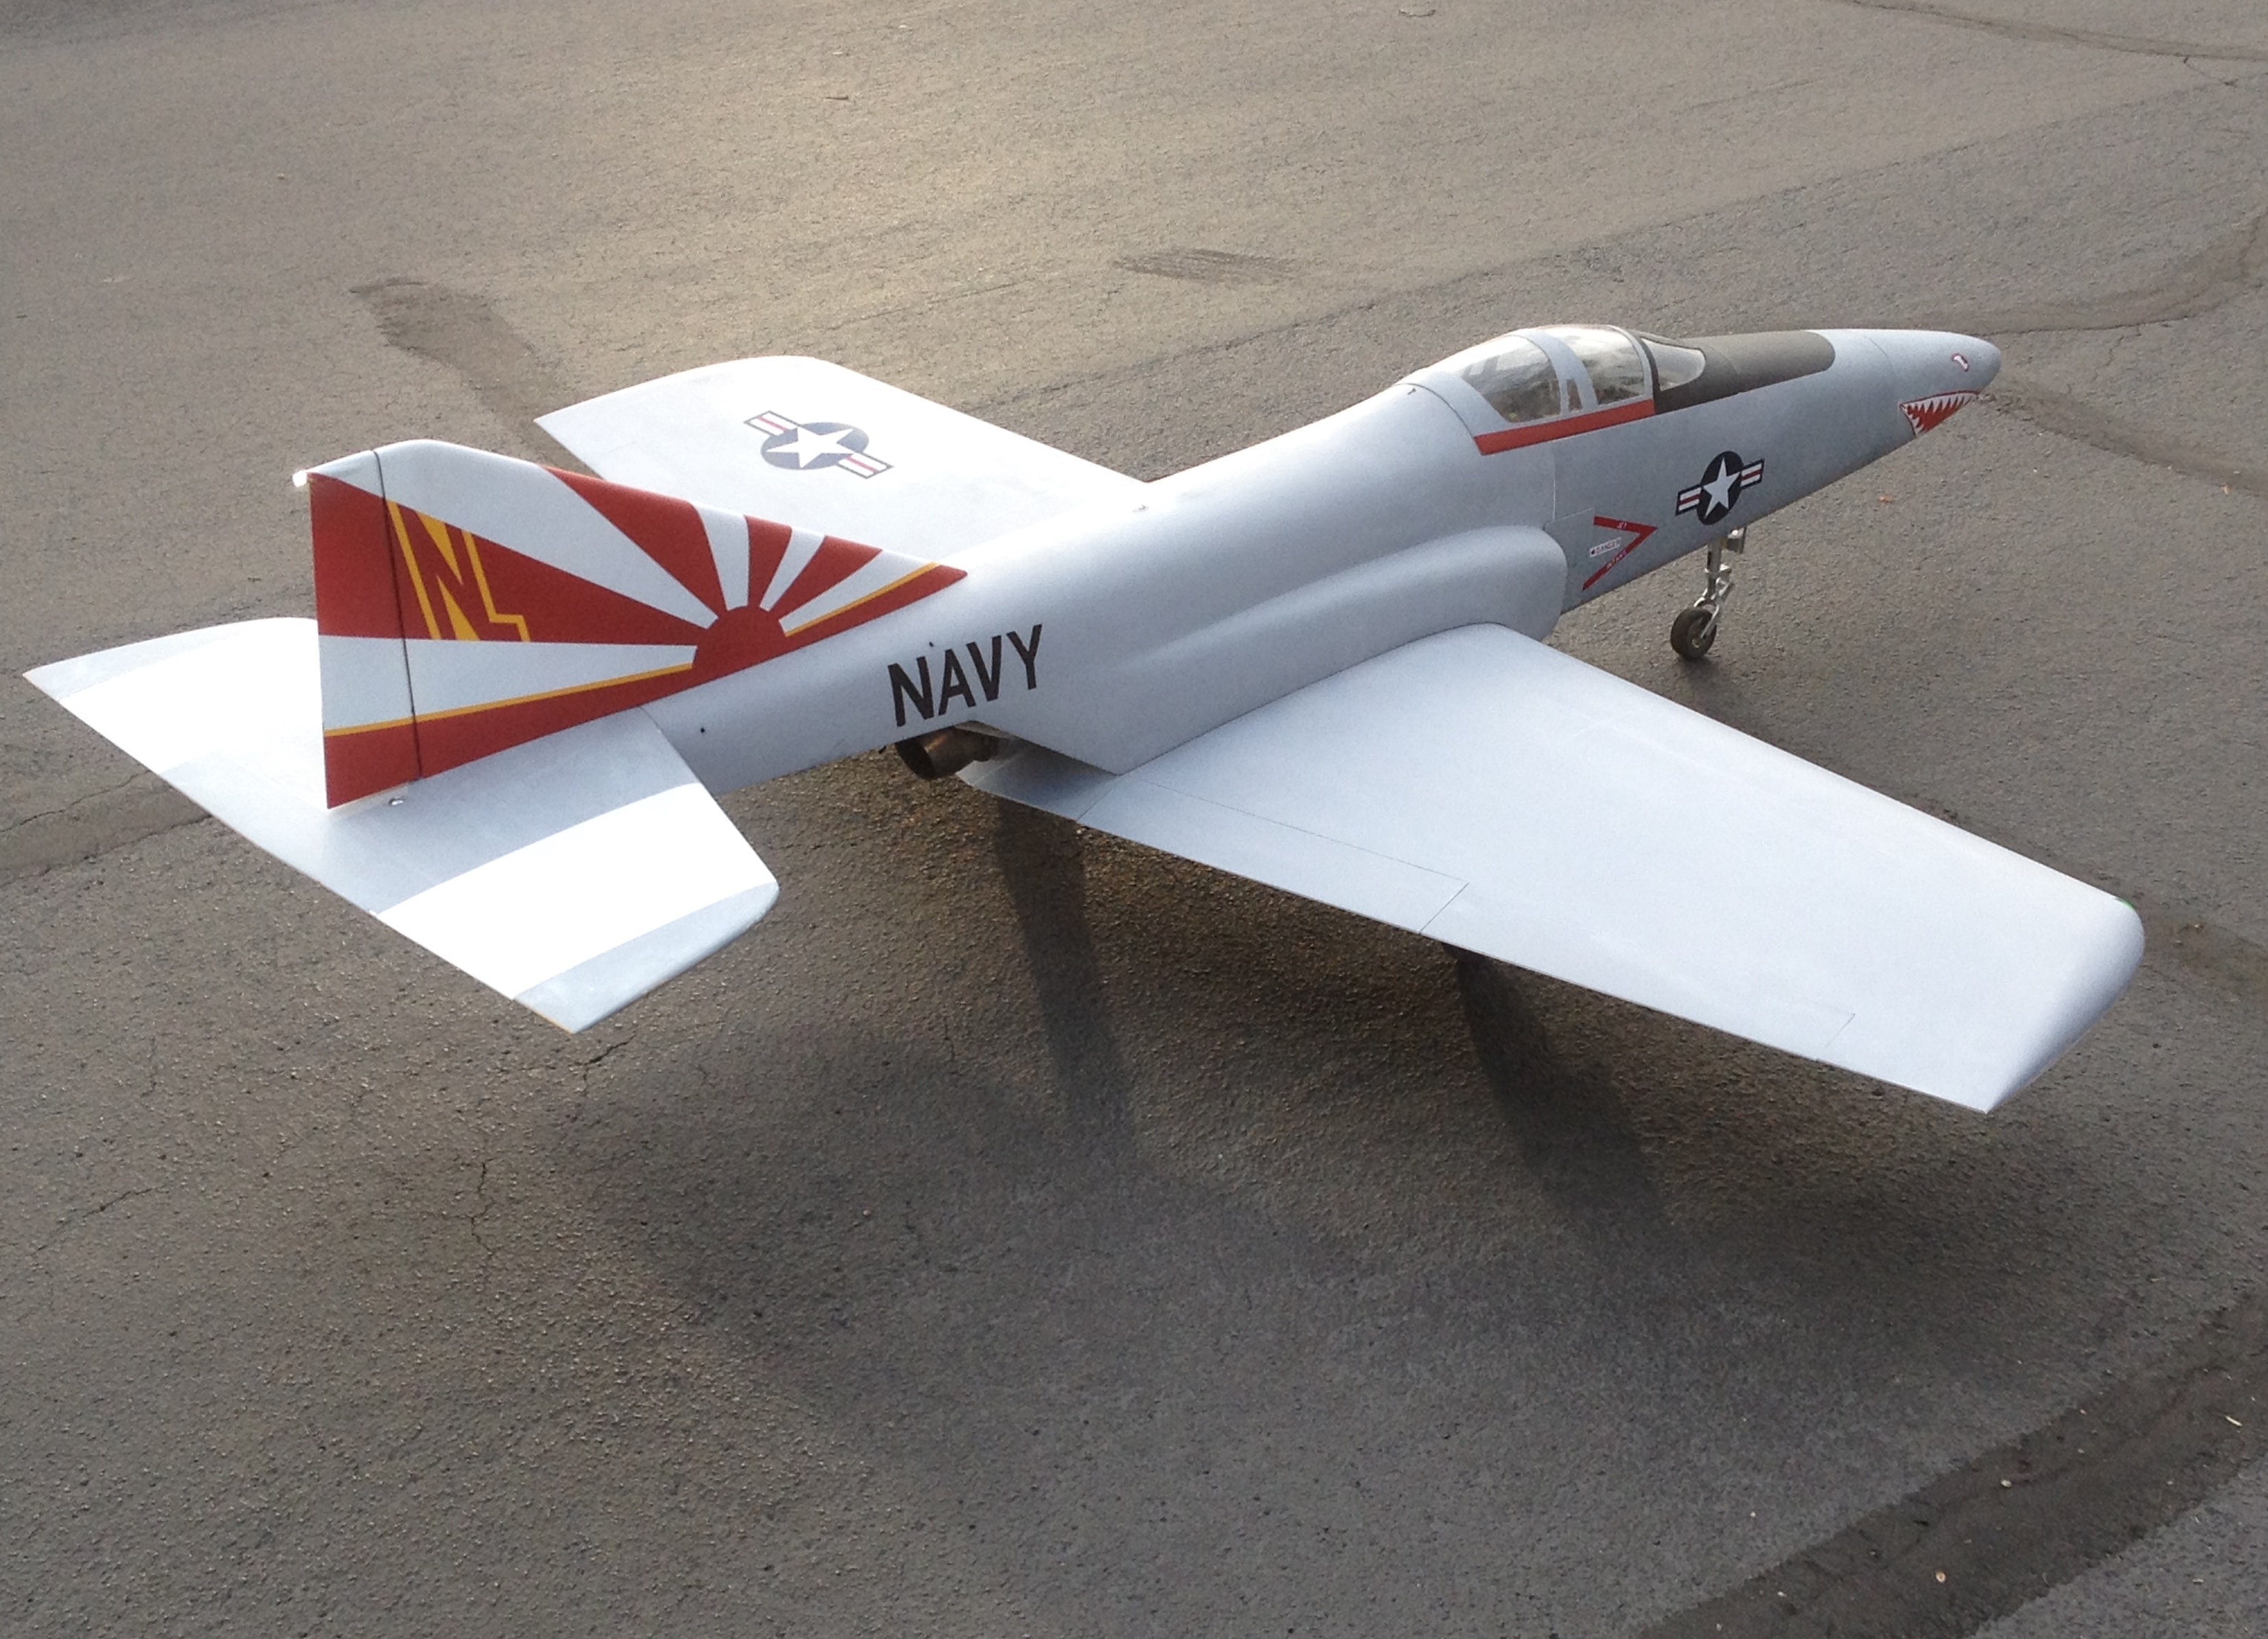
Here is my new Reaction that I've been working on and off over the past year. I have to admit I was inspired by another modeler's Reaction 54 earlier in this thread. I also found a full scale series of photos of the unusual Hawker SeaHawk that provided a clearer goal for me. I ordered my Reaction in all white and took a Scotch Brite pad to the finish prior to paint. Sea grey paint is PPG Omni auto finish. Red paint is from a rattle can. Vinyl decals from Callie Graphics and details from Pro Mark Graphics. Turbine is Jet Cat P-90RXi, a great power match!
.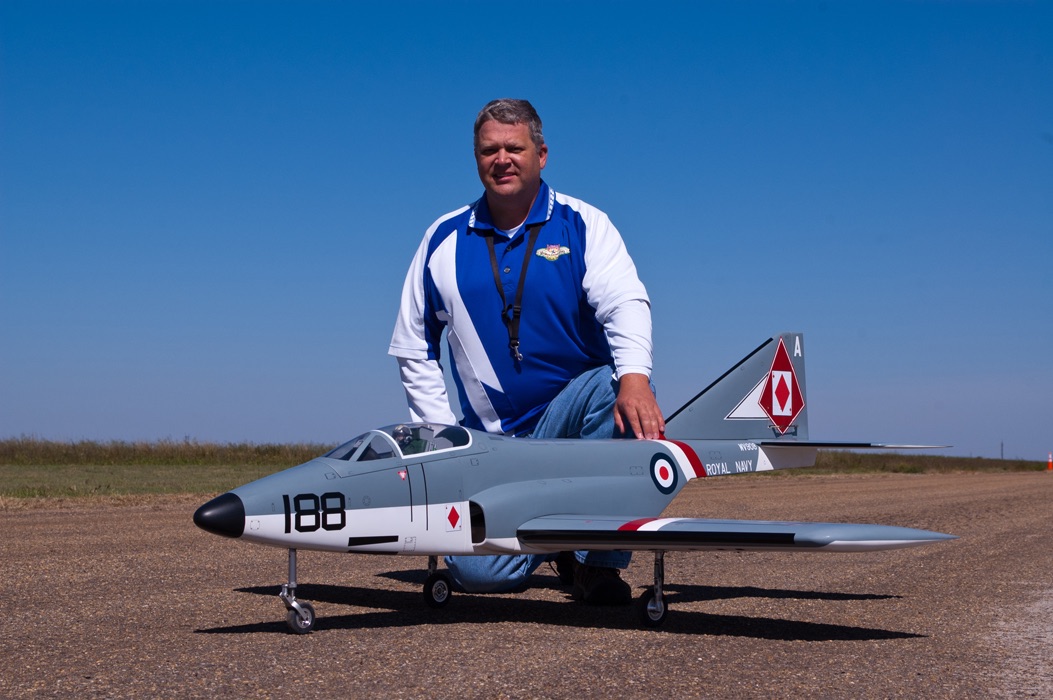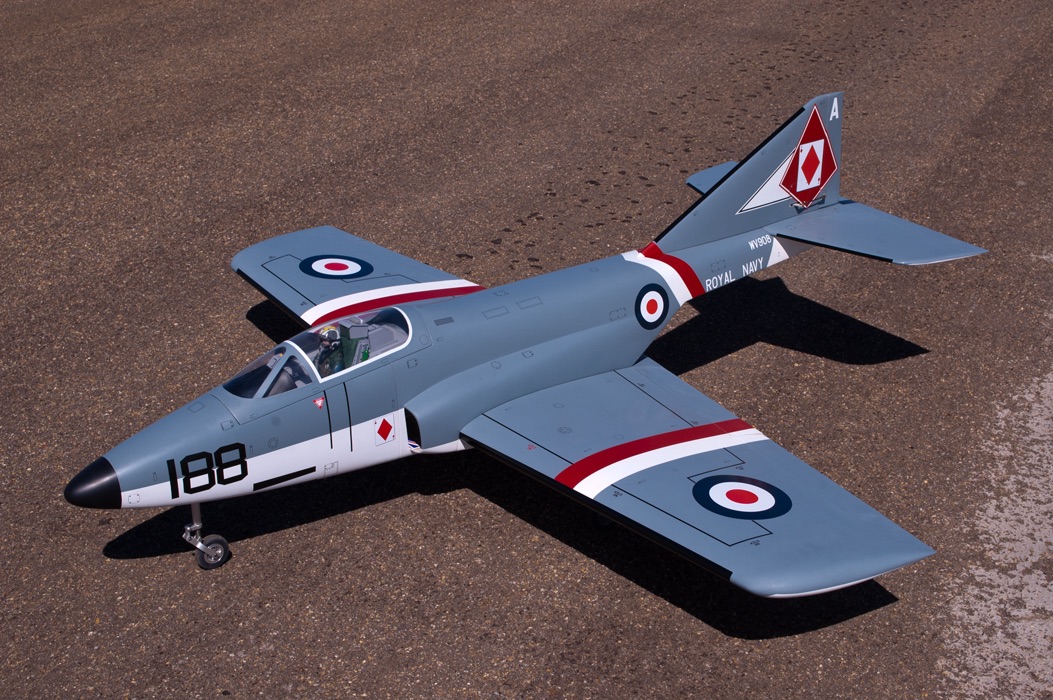
Last edited by Bryan McLarty; 10-12-2014 at 06:47 AM.

 10-21-2014, 10:46 AM
#1045
Senior Member
My Feedback: (4)
Join Date: May 2002
Location: kanata,
ON, CANADA
Posts: 138
Likes: 0
Received 0 Likes
on
0 Posts
Great job on the mods there Jim. It’s definitely taking on the Phantom-ish look you spoke of. Thanks for sharing the tip on making the lens covers. I usually try to find a pop bottle that has the right curves, but this I a better way for sure. Same great taste but a lot less filling.

 10-21-2014, 04:02 PM
#1048
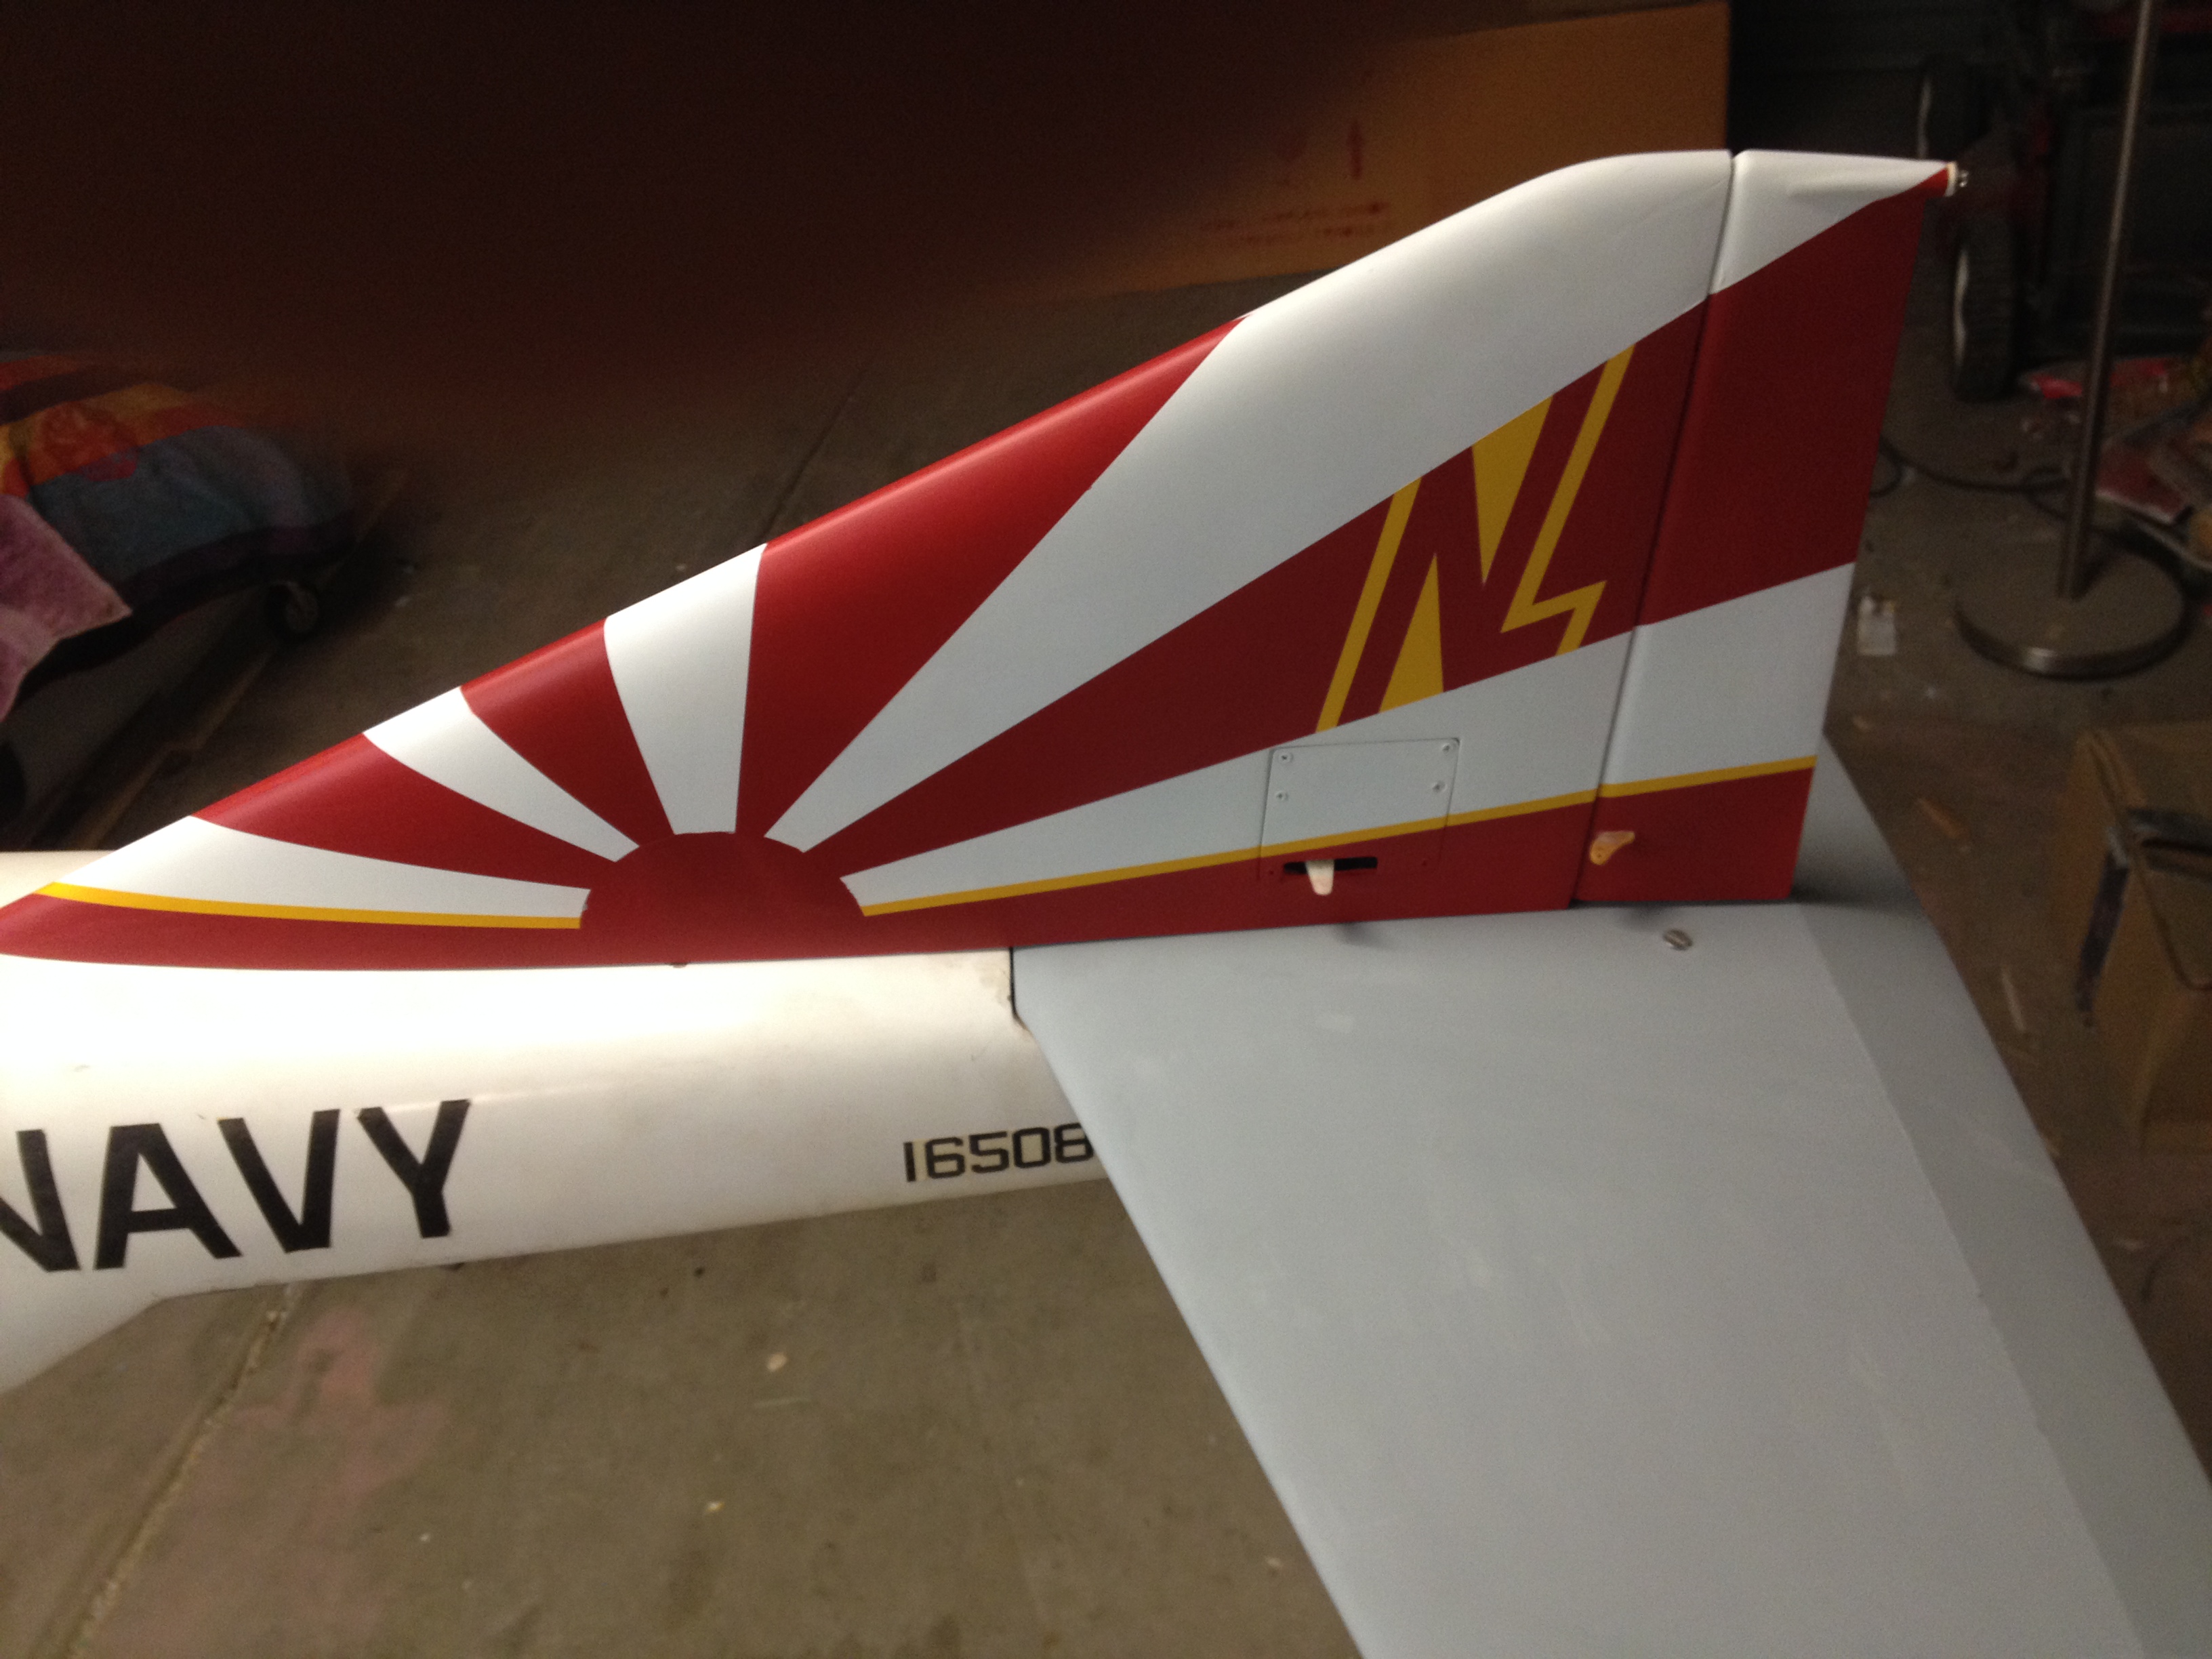
Here is a pic of the plane at BITW. I ran out of time before the event so the paint and graphics aren't quite done. I also chose not to test fly the anhedral stab at an event. With some luck, it will be complete for the AZ Jet Rally next month.
Regards,
Jim
Regards,
Jim
Last edited by rcjets_63; 10-21-2014 at 04:34 PM.


