


Composite ARF Mig29

 11-05-2018, 03:26 PM
#452

My Feedback: (44)

Join Date: Sep 2004
Location: Wilmette,
IL
Posts: 439
Likes: 0
Received 0 Likes
on
0 Posts
Hi John you need to email them and they will contact you with a price including shipping I paid $485 I think it worked perfect that your system is one piece is it to install any work good
11-06-2018, 02:57 AM
#454
Craig yours is looking awesome mate. Not long now.
Nick I’ve got 25 flights on mine now over the last few years. Just flew it last weekend at a charity air show and it still gets maximum attention after all these years. It’s really a special model and apart from a single engine flame out it’s been nothing but a pleasure to fly for me. As David said I set my timer for 6 minutes and have plenty of fuel for go around. I have P140RXs and I’m using the two smaller tanks for one turbine and the larger tank for the other. Both set ups are almost identical in capacity.
Here are my settings:
Ailerons- all you can get
Elevator- 50 mil measured at elevator point next to bottom of fin
Full flap- 50 mil
Rudder- 30 mil each way
LEF- 20 mil full down
CG- 20 mil forward of the leading edge of the main wing spar, dry- gear down- headers full
I”ve played around with lots of different settings but have found these work best for me. However you could mix in some tailerons with aileron to improve roll authority.
You’ll love this old lady mate ��
11-06-2018, 05:41 AM
#456

Nick, my Mig has jetcat 140 engines and I set the timer for 6 minutes which allows ample reserves for a couple of go arounds. You may be able to add a couple of minutes with experience.
The Mig flies beautifully with tailerons so do let us know how it goes with ailerons.
Nice paint scheme and good luck with flying.
Craig, your gear looks perfect, please advise pump/ battery combo as it�s faster than my setup.
Mine me will be flying again soon with the superb Futaba servos you recommended.
Thanks for the tip !
D.
ps you guys might be advised to glue the tyres to the wheel hubs. The original tyres expand with centrifugal force and almost leave the hubs.
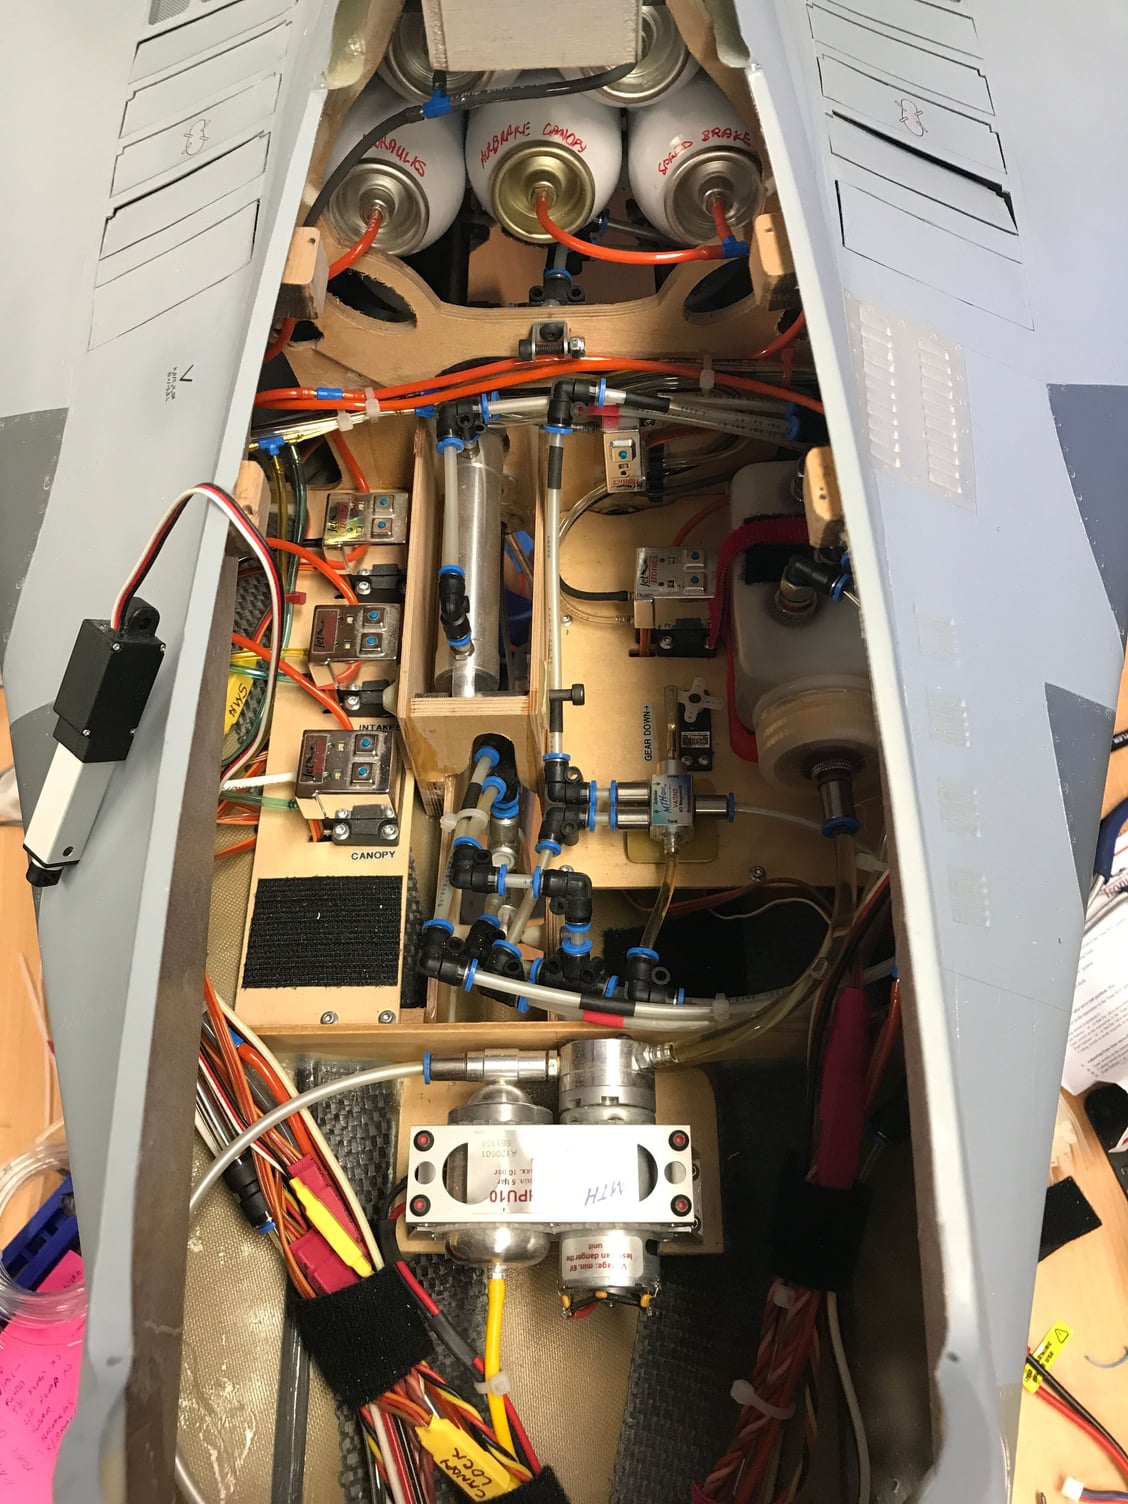
Thanks for your comments. I am using the H�usl pump with the pressure accumulator... the all in one unit that is mounted in the aluminium housing. I am running it off a 2 cell lipo at 10bar. I have two cylinders on the nose. The scale one is good for down lock but has poor geometry for retraction. The top cylinder in the nose retract is good for retraction but not great for down lock so I have the best of both worlds there. I am pretty sure Levi has the same set up.
I will see if I can find a pic of my layout in the front.
 11-06-2018, 05:56 AM
#459
 11-06-2018, 06:34 AM
#461
its great to see some life back in this thread. Such an awesome model. Nothing like it around.
 11-06-2018, 06:42 AM
#462
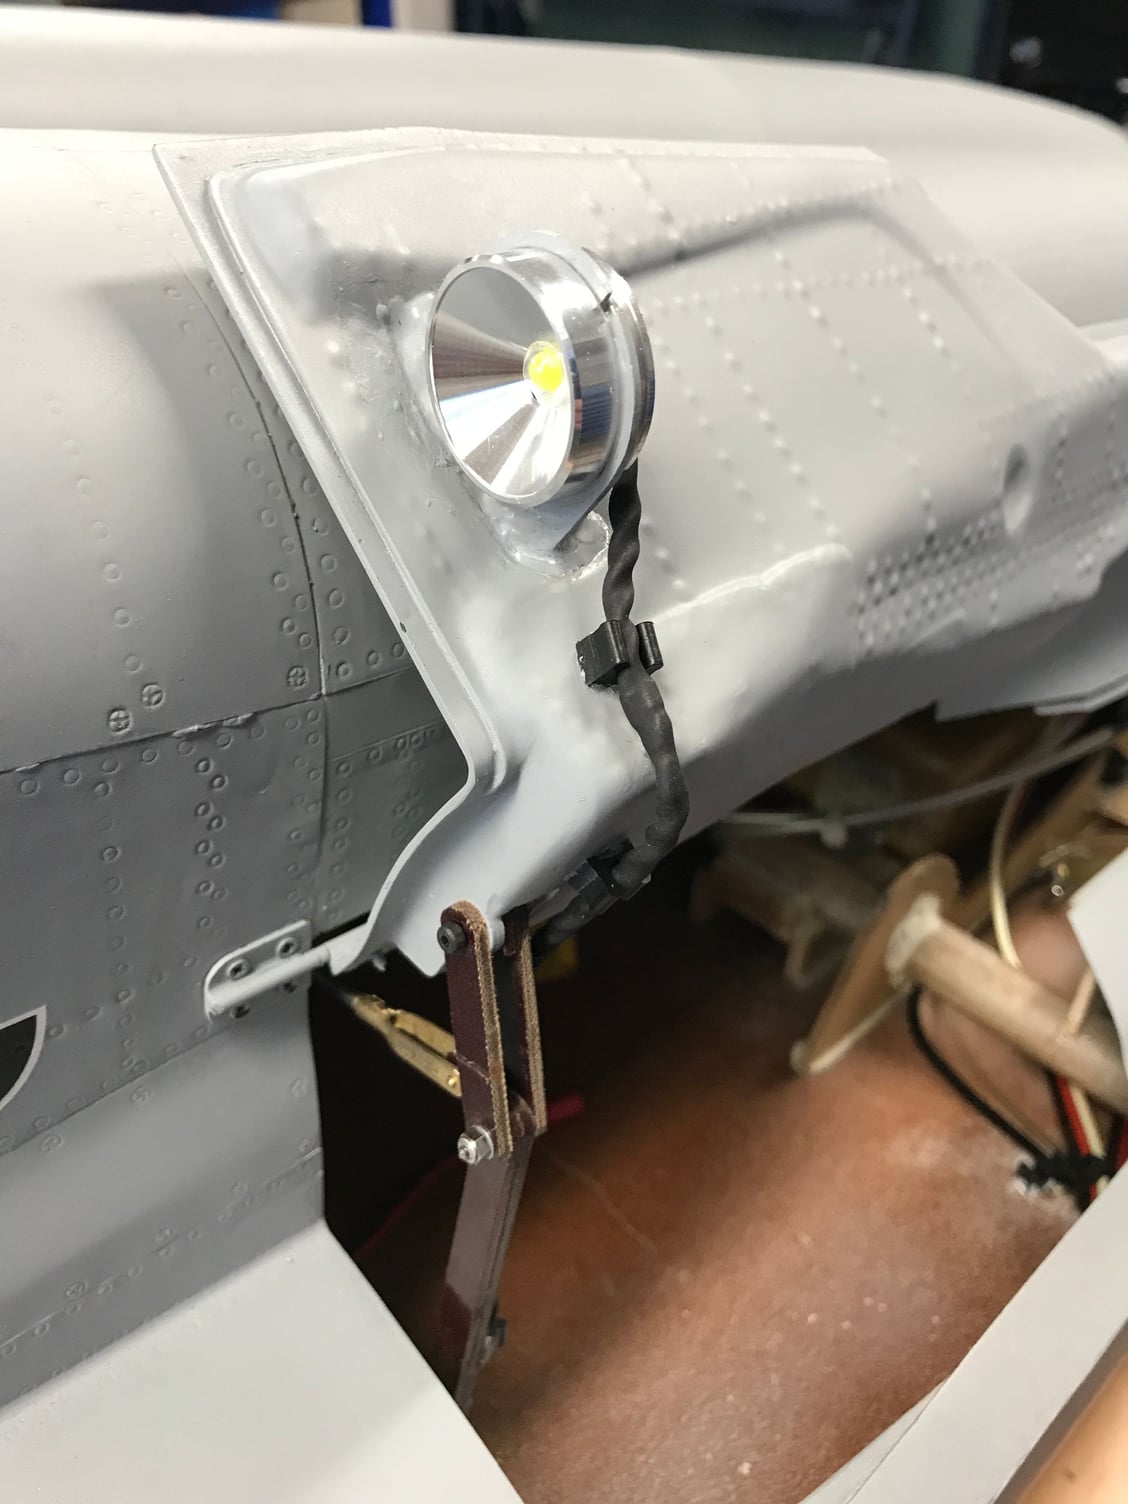
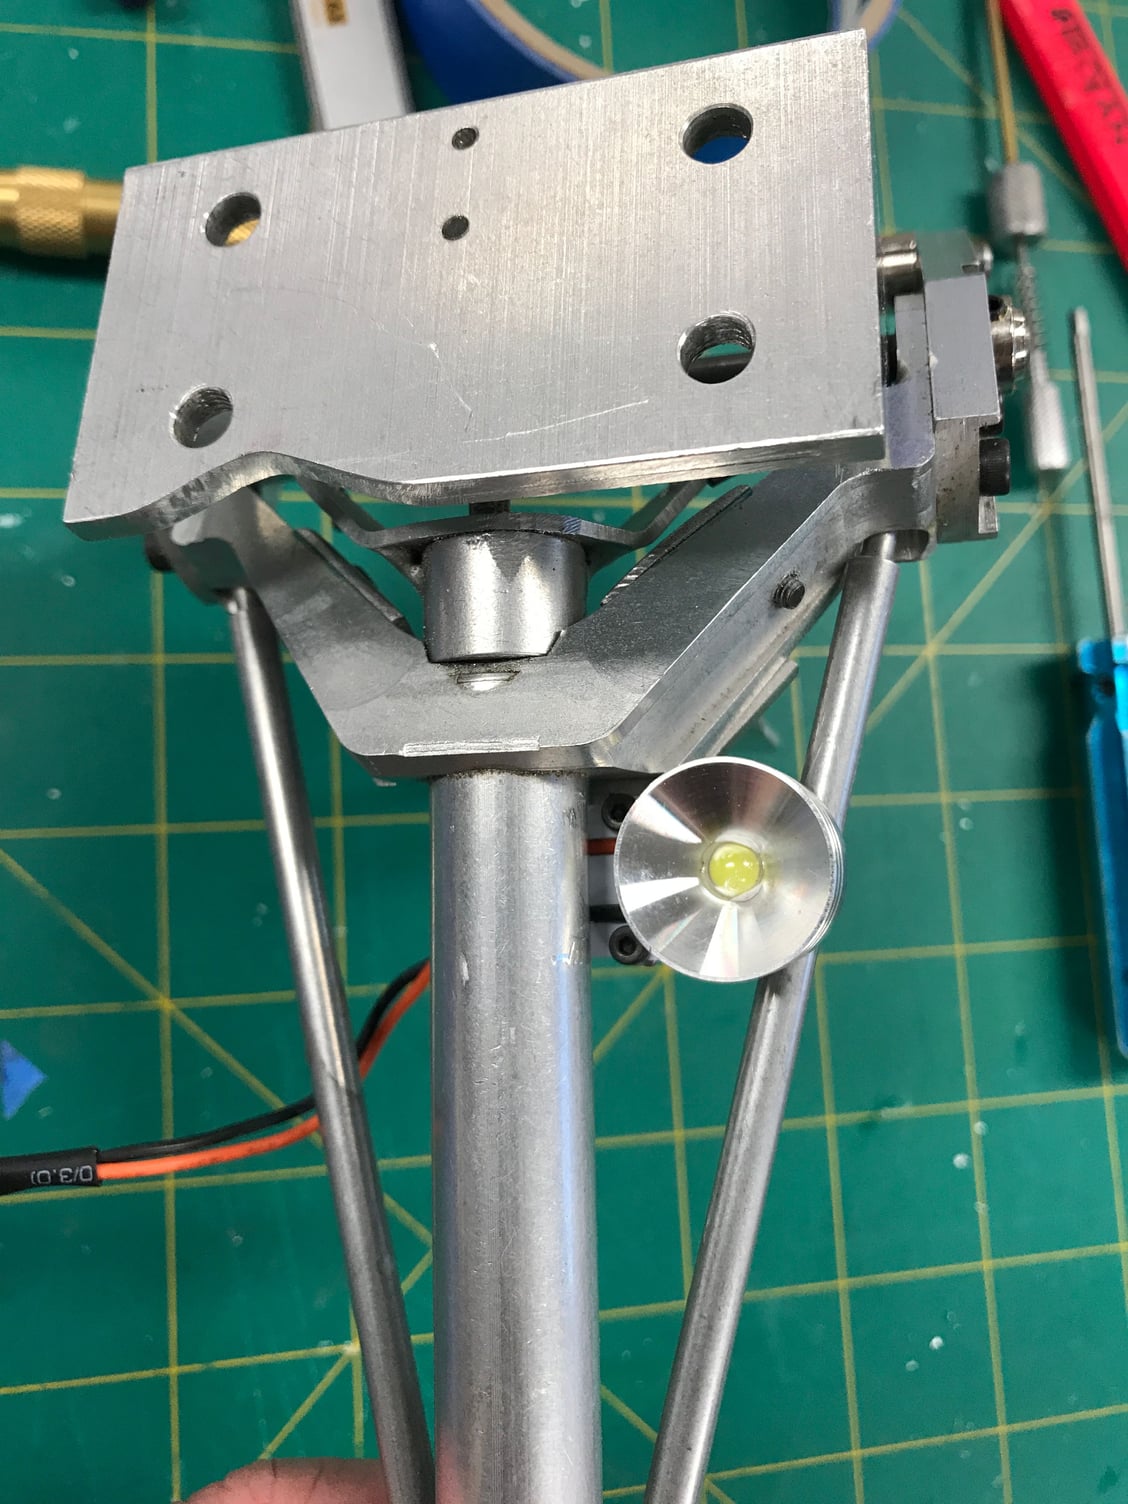
Don�t look too closely at my Ali mount for the nose leg light....it has not been smoothed off and is not that flash but I could not be bothered remaking it at this stage..... gotta get this thing in the air. Main light mounts I made out of G10.
 11-06-2018, 02:17 PM
#464
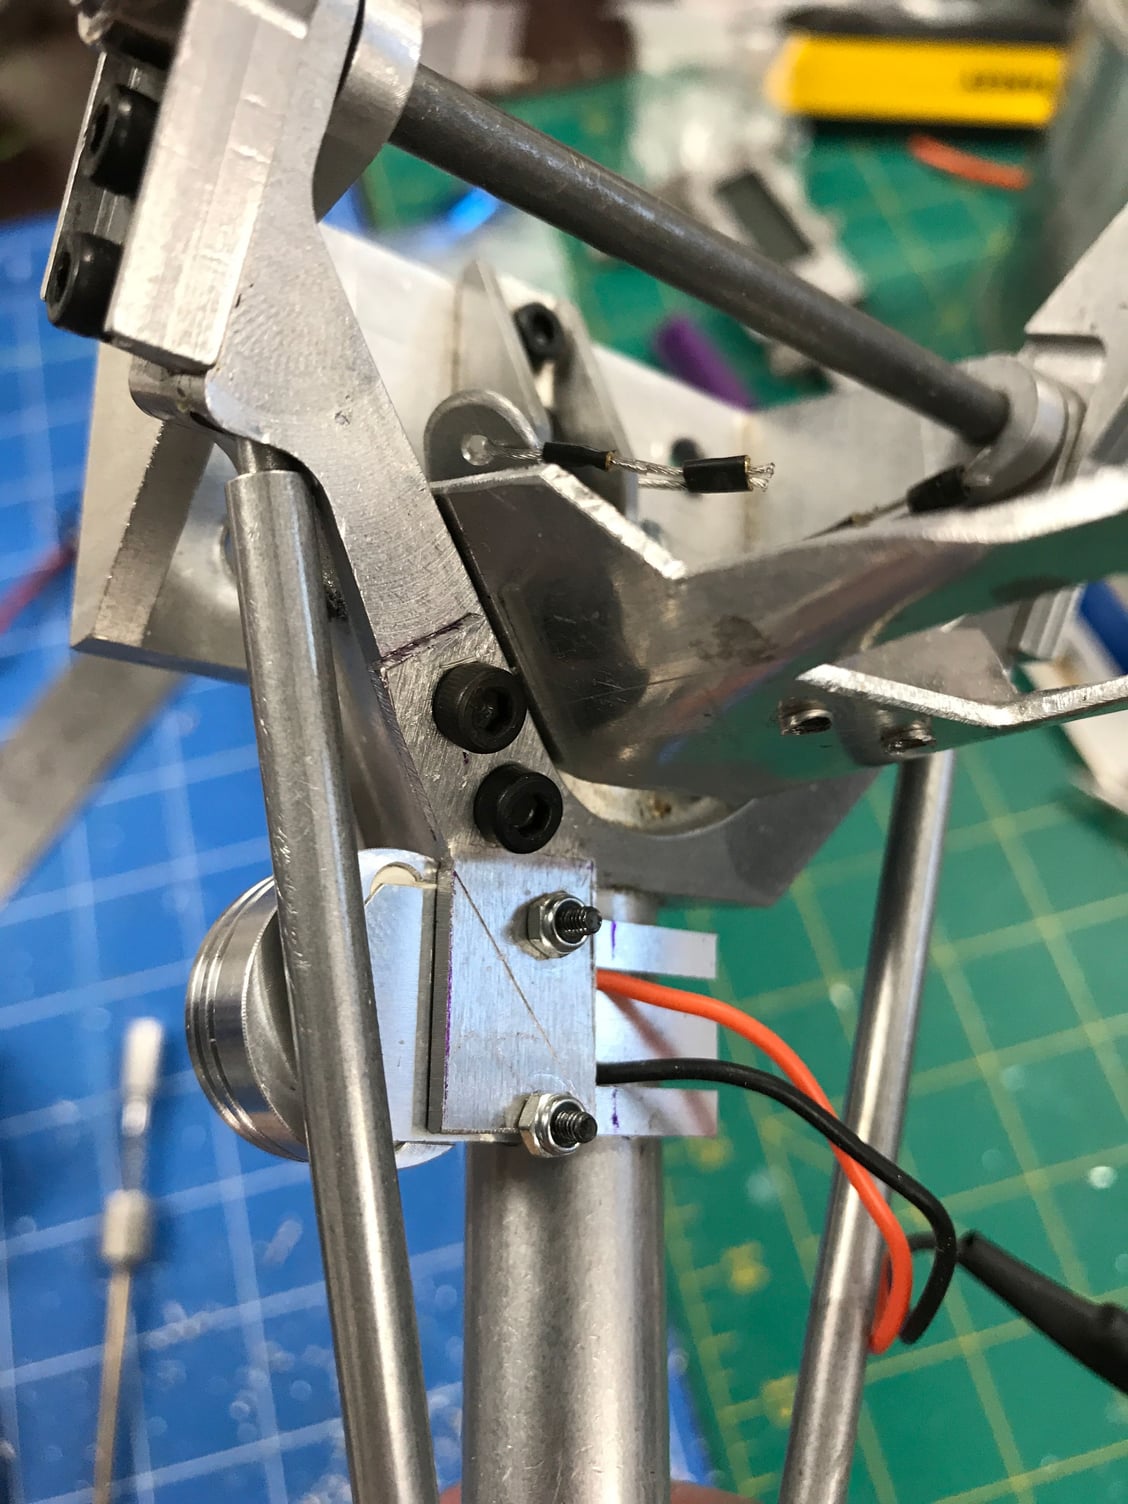
Not yet Matt. Can you clarify where that should be? I vaguely recall the need to weld the ends of the side stays ( they seem only epoxied to the main struts at this stage).
David, Nick and Levi, what did you guys do on yours?
Re the lights, Levi and Nick have the scale housings on theirs that I think look much better but I am satisfied with what I ended up with. Sometimes you just have to draw a line in the sand right?
David, Nick and Levi, what did you guys do on yours?
Re the lights, Levi and Nick have the scale housings on theirs that I think look much better but I am satisfied with what I ended up with. Sometimes you just have to draw a line in the sand right?
Last edited by Craig B.; 11-06-2018 at 02:22 PM.
11-06-2018, 02:36 PM
#465
Thanks Levi, she is getting there mate. Great info on the throws etc. thanks for getting that out there for us.
I have put functional ailerons on ons on mine but have set her up with tailerons in the igyro and have mixed in the ailerons on their own channel. Gyro will only work on the tail but I think that will be ok. I guess if I programmed the pwm nodes for the 8911s on the ailerons to listen to the aileron channel I could achieve gyro control of them too but I have the ailerons on their own channel for ease of adjustment at this stage.
11-07-2018, 03:02 AM
#467
Alex if you line up the elevator with the recess bit moulded into the fuse that�s a good starting point. You won�t need much if any trim from there.
I don�t have any taileron mix so can�t help you there. I suggested to Craig mixing some taileron in with aileron would improve roll authority when slow. Mine is fine but my ailerons are maxed out. I don�t want to change anything now as I�m happy with the set up but if starting again I would add some taileron.
Craig your lights look great mate. Your overall set up is all class. I made my lights out of maglight torch lenses and an aluminium housing. They look good but a lot of mucking around.
Alex don�t forget to set your aileron neutral point deflecting up about 2 mil both sides.
11-07-2018, 05:07 AM
#469
Join Date: May 2002
Location: Washington,
MI
Posts: 221
Likes: 0
Received 0 Likes
on
0 Posts
Craig
Did you use the carbon doors from Peter? I installed the original doors and the really don’t fit well. I have the doors from Peter but have to get motivated to start over.
HP tech replied to my email so now I can order my pump.
Im sure glad this thread is active again. The only thing missing is Ro building another Mig. Come on Ro, jump back in with another Mig.
Nick, good luck this weekend on your first flight.
John
11-07-2018, 11:25 AM
#472
Not yet Matt. Can you clarify where that should be? I vaguely recall the need to weld the ends of the side stays ( they seem only epoxied to the main struts at this stage).
David, Nick and Levi, what did you guys do on yours?
Re the lights, Levi and Nick have the scale housings on theirs that I think look much better but I am satisfied with what I ended up with. Sometimes you just have to draw a line in the sand right?
David, Nick and Levi, what did you guys do on yours?
Re the lights, Levi and Nick have the scale housings on theirs that I think look much better but I am satisfied with what I ended up with. Sometimes you just have to draw a line in the sand right?
I got one side main retract to go, using the Hausl system, and Peter's CF doors, then I took a break to rest, I think this was in 2006. I should be rested and ready to restart the other side in about 2020.
Last edited by mr_matt; 11-07-2018 at 11:32 AM.
11-07-2018, 01:11 PM
#473
If you think the side stays are the pieces that connect the rams to the legs, great.
What I did after the settings were made and the extensions locked was to form a fillet of aeropoxy around the joint.
So far this has stood up to all landings.
For first flights: With the c of G and control throws set , I found that holding about 1/3 up elevator gave a smooth rotation and lift off when the jet was ready.
After that the modell is a *****cat to fly and land.
If if you lose an engine feed in full opposite rudder, it’s totally controllable.
Good luck, guys !
PS Matt, there are two things in life you just can’t rush, finishing the Mig is the other one !
11-08-2018, 06:29 AM
#474
Craig
Did you use the carbon doors from Peter? I installed the original doors and the really don�t fit well. I have the doors from Peter but have to get motivated to start over.
HP tech replied to my email so now I can order my pump.
Im sure glad this thread is active again. The only thing missing is Ro building another Mig. Come on Ro, jump back in with another Mig.
Nick, good luck this weekend on your first flight.
John
11-08-2018, 06:33 AM
#475
Hi David, Matt was referring to the nose leg where it exits the yolk....is yours welded there?