


Wing Tip Tanks
 05-03-2009, 11:48 PM
#1

Thread Starter
My Feedback: (10)

Join Date: Oct 2004
Location: Las Vegas,
NV
Posts: 1,944
Likes: 0
Received 0 Likes
on
0 Posts
Guys,
I am finishing up my MB339 wings. The version I am doing has tip tanks. The question I have is should I make the tip tanks removable or permanently attach them? If I make them removable, what method should I use to to attach the tanks?
I am finishing up my MB339 wings. The version I am doing has tip tanks. The question I have is should I make the tip tanks removable or permanently attach them? If I make them removable, what method should I use to to attach the tanks?
 05-04-2009, 03:50 AM
#3

I'm scratch building one & am going to make them detachable. The Macchi has a narrow undercarriage track so I can see the tip tanks getting scraped all the time so I figure they would be easier to repair & paint if they can be removed.
I have built my wings with an extra rib bay & a 3mm ply rib at the tip. The idea was to slide the tank over the end of the wing & screw into the ply rib which would be under the outer surface of the tank.
Originally I was going to fit 2 small air tanks in the wings rather than one large one in the fuselage as space is a bit tight. I cannot get these to fit where I was going to fit them. I'm now looking to fit them in the tip tanks but I can see that being a problem with how I was going to slide the tanks over the tips. It's a work in progress I guess. - John.
05-04-2009, 07:09 AM
#4
My MB-339 has the tanks located under the wing and they were installed in a way that you can take them out easily if you want. Since day one, it was flown withe the tanks installed.
This past weekend, I noticed that one of the tanks was a little bit loose so we decided to take them out. WOW...... what a change in the plane. With the tanks installed, my MB-339 has the tendency to drop a little bit the nose when turning and you need to work more with the radio to keep flying at the same level. Now and without the tanks, the airplane doesn't drop the nose and it's so easy to keep in a level flight even during a tight turn. The only downside to this, is that now it is more difficult to slow down the plane for landing.
My decision ? To take out the tanks and leave the plane without them for future flights. For shows, for sure the plane looks nicer with the tanks installed.
All of this to tell you that you should try to make them detachable so that you can use them whenever you want. Try flying you plane with and without them to see if there are any noticeable differences and go from there.
02-13-2014, 07:05 AM
#6
Junior Member
Join Date: Feb 2014
Posts: 2
Likes: 0
Received 0 Likes
on
0 Posts
I am working in a Cessna 310 Bud Nossen, I trying to build the wing tip tanks, but I would like to have some pictures , I have no clue to do it. If you can help me I am going to be very happy Thanks. I need the nose gear for the same plane.
 02-13-2014, 11:05 AM
#9

Join Date: Nov 2003
Location: Curitiba, Parana, BRAZIL
Posts: 4,289
Likes: 0
Received 14 Likes
on
11 Posts
HI Rafael, the original kit tip tank was a oval shaped box of wood with rounded corners.. this days you can do the same faster and cheaper using pink or blue foam (extruded poliestirene) used in walls as insulation. After getting the correct shape you can fiberglass and paint it. Making them removable is a good idea. You can use the countless pictures and plans on the web for replicating them as accurately as you want them to be.
or...
http://www.fiberglassspecialtiesinc....ES/BUD%20NOSEN
or...
http://www.fiberglassspecialtiesinc....ES/BUD%20NOSEN
02-13-2014, 04:23 PM
#10
My Feedback: (1)
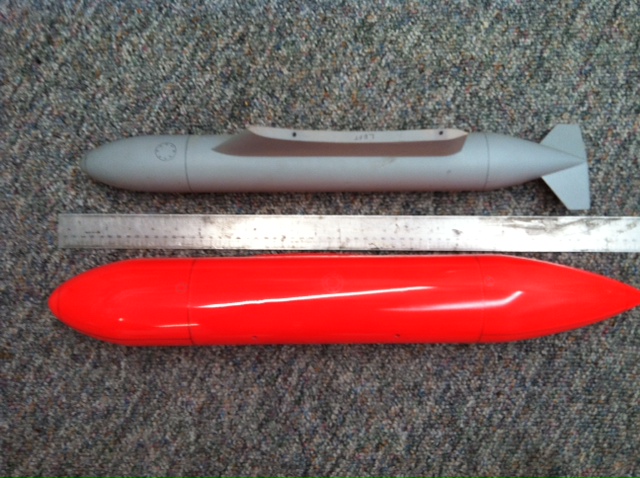
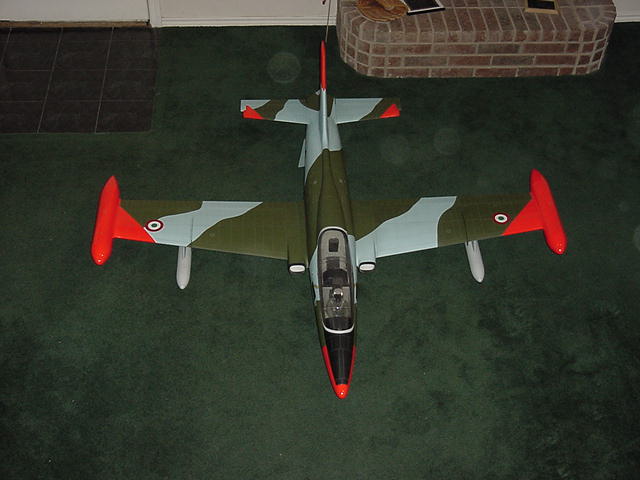
I molded my own removeable tip tanks for my MB-339.
I layed up fiberglass over about 2" of the wing tips to create a "cup" that fit exactly, then I glued that cup inside the molded tip tanks and created a small fillet all the way around.
The tanks attached to the wings with two 4-40 screws. I glued in a guide made from outer nyrod sleeve to keep from losing the screws inside the tank.
I'll look and see if I can find any pictures.
BTW, I made the plugs for the tip tanks (and underwing tanks) from PVC pipe.
Edit:
Found a couple of pics.
Last edited by Kevin_W; 02-13-2014 at 05:03 PM.
