


BOOMERANG ELAN - New Build & Setup Thread!

 02-05-2018, 07:50 PM
#477

My Feedback: (6)
Hi Cyre
Sorry to hear that your Elan got damaged in the shipment. Over the years I have been lucky by not having more aircraft damaged by shipping, but have only had the shipping boxes damaged and not the contents.
As far as the Elan center spar section not fitting properly, this happened to me too. I got a new one just last summer and finally just got it all together last month. I have had 3 Elans before and this one I have noticed that they have included a thicker wall removable spar. But the center section receiver is not done properly. On mine I tried several times to sand it out like you suggested by wrapping sand paper around the dowel. I seemed to take out a lot of material, but was not making any head way. Looks like they have significantly undersized the receiver. I am lucky to have an extra spar left from my old one and that fit in. Be careful when you are sanding and not completely ruin the receiver spar.
Larry needs to get this fixed. I don't know if it was a bad batch. I'm sure he wouldn't have had all the receiver spars fit with that close of a tolerance.
Good Luck
AKB
02-05-2018, 08:11 PM
#478

My Feedback: (15)
Join Date: Jun 2004
Location: Bartlett,
TN
Posts: 174
Likes: 0
Received 0 Likes
on
0 Posts
Tag, I have a set of electric gear in a rookie II I am going to "borrow" them out for this project. Not sure of the make at the moment.
and AKB, looks like I may have my work cut out for me to fit the tube.
Larry indicated there is a change of mfg probably on the new batch. I saw someone earlier in this thread talking about re-tooling for the build.
Will update on my progress.
C
and AKB, looks like I may have my work cut out for me to fit the tube.
Larry indicated there is a change of mfg probably on the new batch. I saw someone earlier in this thread talking about re-tooling for the build.
Will update on my progress.
C
02-07-2018, 08:57 AM
#480
My Feedback: (15)
Join Date: Jun 2004
Location: Bartlett,
TN
Posts: 174
Likes: 0
Received 0 Likes
on
0 Posts
BE, Yep, Just when I thought I would have all the "stuffing" for the bird I will have to get a set of gear. Might have fit the small boomer.
Now looking for complete gear set. It would have to be NIB or very near NIB. Would try electric but willing to use air. If anyone has any leads please let me know. I will check classifieds and post wanted.
ANYone have experience with QX servos? I have 6 of the 8 total QX-53015M. 202 oz 6v 218 7v. and a couple of HS985 seems to be a bushing output shaft version of the 5645 which has bearing output shaft.
I want to use some of my collection to avoid new spending and put them to use.
C
02-08-2018, 02:59 PM
#481
My Feedback: (15)
Join Date: Jun 2004
Location: Bartlett,
TN
Posts: 174
Likes: 0
Received 0 Likes
on
0 Posts
Rudder bias, rudder is not as tall as end of boom. I am guessing I should bias it up to help with take off clearance?
Planning to use dubro flat plastic 2 piece hinges with so I can pull pins and remove rudders in case I ever decide to ship. Wont fit in box with rudders mounted. Some of this may be why I saw several boomer ads that would not ship.
Also, do you glue the tail skid springs or just twist to rear?
Thank you
Charles
02-08-2018, 03:34 PM
#482

Rudder bias is to allow sufficient elevator movement, carful you don't compromise this, leave the tail skid free they then swivel if you inadvertently touch them on landing or taxying, its a long way back from the wheels which is the pivot point.
Mike
Mike
02-10-2018, 03:09 PM
#483
My Feedback: (15)
Join Date: Jun 2004
Location: Bartlett,
TN
Posts: 174
Likes: 0
Received 0 Likes
on
0 Posts
Would be obvious but I like to check:
Mounting Prolink gear - the servo part seems to be angled upward some compared to the center-line of the gear leg and hits gear well before trunnion seated, inboard edge almost 1/4 above seat. Just cut out gear well? Will I have to cut some out of the ribs? Any strength issues?
Thank you
I have been getting Prolink info on another thread.
02-11-2018, 03:52 PM
#485
My Feedback: (15)
Join Date: Jun 2004
Location: Bartlett,
TN
Posts: 174
Likes: 0
Received 0 Likes
on
0 Posts
My kit had a set of long screws maybe 4-40 ish that appear to be the control horns especially compared to manual. However I also got another pack that has large screws, anodized Al standoffs and very thick horns for the screws. But, the plastic horn screw hole to clevis hole is about 3/4inch. That would push the screws off the back of the built in mounting pads.
Anyone have problems with the smaller screws for horns???
may have been a pack for a different kit. Looks very large 3D plane ish.
Anyone have problems with the smaller screws for horns???
may have been a pack for a different kit. Looks very large 3D plane ish.
03-03-2018, 08:15 AM
#486
My Feedback: (15)
Join Date: Jun 2004
Location: Bartlett,
TN
Posts: 174
Likes: 0
Received 0 Likes
on
0 Posts
Turbine mounting: I am about to mount a Jet Munts 90. I can see I need to shim it up to get the nozzle centered vertical in the fuselage outlet.
Please give me some recommendations on the lateral position relative to the back of the fuselage. My initial urge was to move as far back as possible but that may close off cooling air flowing outside of the turbine can.
Do I understand correctly that these planes tend to come out nose heavy?
??
Thank you
Charles
PS; LG retracts, I disassembled the retracts cleaned the grease and grunge off and serviced with graphite. I have one warped drive screw and a replacement in the mail. Also ordered a new set of main struts as rookie gear too short.
03-03-2018, 10:11 AM
#487
Yes they do come out nose heavy, however I had a P120 in my last one and putting all the batteries in the back just in front of one of the rear bulkheads I did not need any nose weight, the P120 is heavier than the Jet Munt P90 which I have in my Sprint which does require nose weight , but that has a much shorter nose.
Mike
Mike
03-03-2018, 11:44 AM
#488
you should be able to get your fingers around the tailpipe in the outlet.. about an inch or 1.25 so it can draw air from the fuselage .
The way I solve the nose heavy is the following:
Pull the tank tray.. its held in by 6 glue points.
Make a tray UNDER the tank mount on the fuselage bottom.
Mount the fuel pump, smoke pump and Air trap under there. It will fit
Put the turbine battery on a tray right behind the tank, in front of, and even with the canopy. Put the ECU on the gear well..
Then put all your radio gear on the back of the tray.
I run all the air lines in one piece up to the front tray. Then in the hole put the couplers.
This will allow you to put 2 batteries up in the nose where they belong, and might even need a touch of nose weight.
The elan should sit on its tail with an empty gas tank and a full trap..
The elan is quite different than the other boomers.. It flies much better towards the back end of the CG scale.. and lands easier with 45 degrees of flap and 3/8 inch crow.
This is from about 700 flights on 5 different boomers, from sprints to XL's
goose.
03-03-2018, 11:45 AM
#489
you should be able to get your fingers around the tailpipe in the outlet.. about an inch or 1.25 so it can draw air from the fuselage .
The way I solve the nose heavy is the following:
Pull the tank tray.. its held in by 6 glue points. Glue the tank to the tray with goop..
when you put the tank into position, strap it down to the longitudinal braces with 24 inch loop straps.(3)
Make a tray UNDER the tank mount on the fuselage bottom.
Mount the fuel pump, smoke pump and Air trap under there. It will fit
Put the turbine battery on a tray right behind the tank, in front of, and even with the canopy. Put the ECU on the gear well..
Then put all your radio gear on the back of the tray.
I run all the air lines in one piece up to the front tray. Then in the hole put the couplers.
This will allow you to put 2 batteries up in the nose where they belong, and might even need a touch of nose weight.
The elan should sit on its tail with an empty gas tank and a full trap..
The elan is quite different than the other boomers.. It flies much better towards the back end of the CG scale.. and lands easier with 45 degrees of flap and 3/8 inch crow.
This is from about 700 flights on 5 different boomers, from sprints to XL's
goose.
03-03-2018, 08:11 PM
#490
My Feedback: (15)
Join Date: Jun 2004
Location: Bartlett,
TN
Posts: 174
Likes: 0
Received 0 Likes
on
0 Posts
Thanks "yall" I picked up some gear mounting screws and making progress.
Will pick the turbine spot tomorrow.
But another question, I know it will aggravate the nose heavy issue but, I like the nose gear leg forward look from the sport jets. The wood beam to hold the nose gear goes all the way to the fwd end of the gear well?
Will the forward section hold up the plane and take landing bounces?
Thank you
Charles
03-04-2018, 08:12 AM
#491
Thanks "yall" I picked up some gear mounting screws and making progress.
Will pick the turbine spot tomorrow.
But another question, I know it will aggravate the nose heavy issue but, I like the nose gear leg forward look from the sport jets. The wood beam to hold the nose gear goes all the way to the fwd end of the gear well?
Will the forward section hold up the plane and take landing bounces?
Thank you
Charles
Will pick the turbine spot tomorrow.
But another question, I know it will aggravate the nose heavy issue but, I like the nose gear leg forward look from the sport jets. The wood beam to hold the nose gear goes all the way to the fwd end of the gear well?
Will the forward section hold up the plane and take landing bounces?
Thank you
Charles
03-06-2018, 01:18 PM
#492
My Feedback: (15)
Join Date: Jun 2004
Location: Bartlett,
TN
Posts: 174
Likes: 0
Received 0 Likes
on
0 Posts
Well another "green horn" mistake I will share in case someone else encounters it. I wanted to leave as much of the rib we have to grind out to mount the Pro Link landing gear mains and thought I was in good shape. During checking and operating the LG I noticed the LH gear kept sounding like a bind about 1/2 stroke. Take it out, no problems with gear, put back in and torque mounting screws bind comes back. I finally noticed that the screw drive motor has to move up and down while the drive nut is moving in an arc. Duuuh, cleared more rib out and no more bind. Still glad I am using a low chg 4.8 batt for bench power.
Since this thing needs a spacer block for the nose gear, has anyone built it in as a break out? I was thinking 1/4 or 3/8 ply with T nuts and Allen screws for the retract frame and screw each end to the stock gear rails, total height + at least .5 inch. Good for a BMV might be good for a Boomer.
Any thoughts?
Also; the main rails follow the angle of the wing ie the mains splay out some. Anyone bother to shim vertical?
Only advantage I can think of is in a low wing bounce the splay would tend to make the force more straight on the gear than side load?
Construction update: my flaps will move almost 90 degrees free falling. I modified to use Robart flat hinges epoxied in with a common hinge pin across all three hinges. L bend on OB end of hinge pin will be taped and definitely held in by boom. Also did the rudders that way so I can pull the common pin and the booms will still fit back in the shipping crate. (I noticed "no shipping" on several Boomers for sale.)
Charles
03-19-2018, 03:26 PM
#493
My Feedback: (15)
Join Date: Jun 2004
Location: Bartlett,
TN
Posts: 174
Likes: 0
Received 0 Likes
on
0 Posts
Since I have located all of my elect boxes and pony gas tank just ahead of the fuel tank I suspect I will need to get as much else as possible to the rear.
There are former cutouts just behind the wheel wells on each side that would receive a 2600 Mah lipo. If I use a metal foil outside balsa or foam heat shield toward the turbine would that seem to work or just too hot an area for batteries? I plan to run one for the turbine and one for the gear/brakes. And prob 123 for the receiver.
Should I also disable the red wire for the extensions from the RX to the ECU and wheel Brake units to prevent getting 7.2 back into the receiver? Some 6v max servos in plane.
Thank you
Charles
08-15-2018, 04:21 PM
#494
My Feedback: (15)
Join Date: Jun 2004
Location: Bartlett,
TN
Posts: 174
Likes: 0
Received 0 Likes
on
0 Posts
My 3 week Elan project is just about ready to test run turbine 7 months later.... Life gets in the way of hobbies...
Horz stab washer trimming.
I saw some flyers have put washers under the front or rear bolts to set a horz trim instead of all in the elevator.
I was about to drill and tap the al tabs that project from the bottom of the stab into the vert stabs. Does this cause a problem if I decide to change the incidence of the stab? Seems like if I put a spacer under a bolt it would raise the position of the hole.
(also one of my tabs was so far out of line that the hole is almost off the edge)
Thank you
Charles
PS as to former post I will actually have to add nose weight.
08-15-2018, 05:25 PM
#495
Join Date: Jun 2008
Location: Tobaccoville , NC
Posts: 50
Likes: 0
Received 0 Likes
on
0 Posts
Hi Charles,
i have built 4 Elans and all of them needed up trim without washers under the aft elevator bolts. I always install them before drilling the holes in the tabs. I have also used JC Rabbits in all of them and never added any weight to balance.
not sure why one of your tabs is that far off. Never had that problem and I can’t visualize how that could be. I would investigate that before final assembly. Are you certain that the boom is fully inserted into the stab?
Ken
08-15-2018, 06:42 PM
#496
My Feedback: (15)
Join Date: Jun 2004
Location: Bartlett,
TN
Posts: 174
Likes: 0
Received 0 Likes
on
0 Posts
Hi Ken!
Yes the verticals are fully inserted into the horz stab. I did a caliper measurement of the vert wells at the deepest point in the stab and marked the verticals to that depth and it matched. I had a few other areas I had to clear stray wood out of.
When I turn the horz stab upside down and look across it the al tabs do not align with each other. And the drill mark I made from the outside holes on the verticals confirms this.
What is the thickness of the washers you put under the aft bolts?
I am running a Jetmunts 90 gas start and put everything I could on the platform ahead of the fuel tank.. Even with the batteries on the platform over the nose retract I still need several oz of lead to balance. I may could have put the turbine a little further back but I wanted a 1/2 or so clearance for air to move around the turbine. I can just barely not put my finger through the clearance.
Thank you for your reply
Charles


 12-19-2018, 03:36 PM
#498
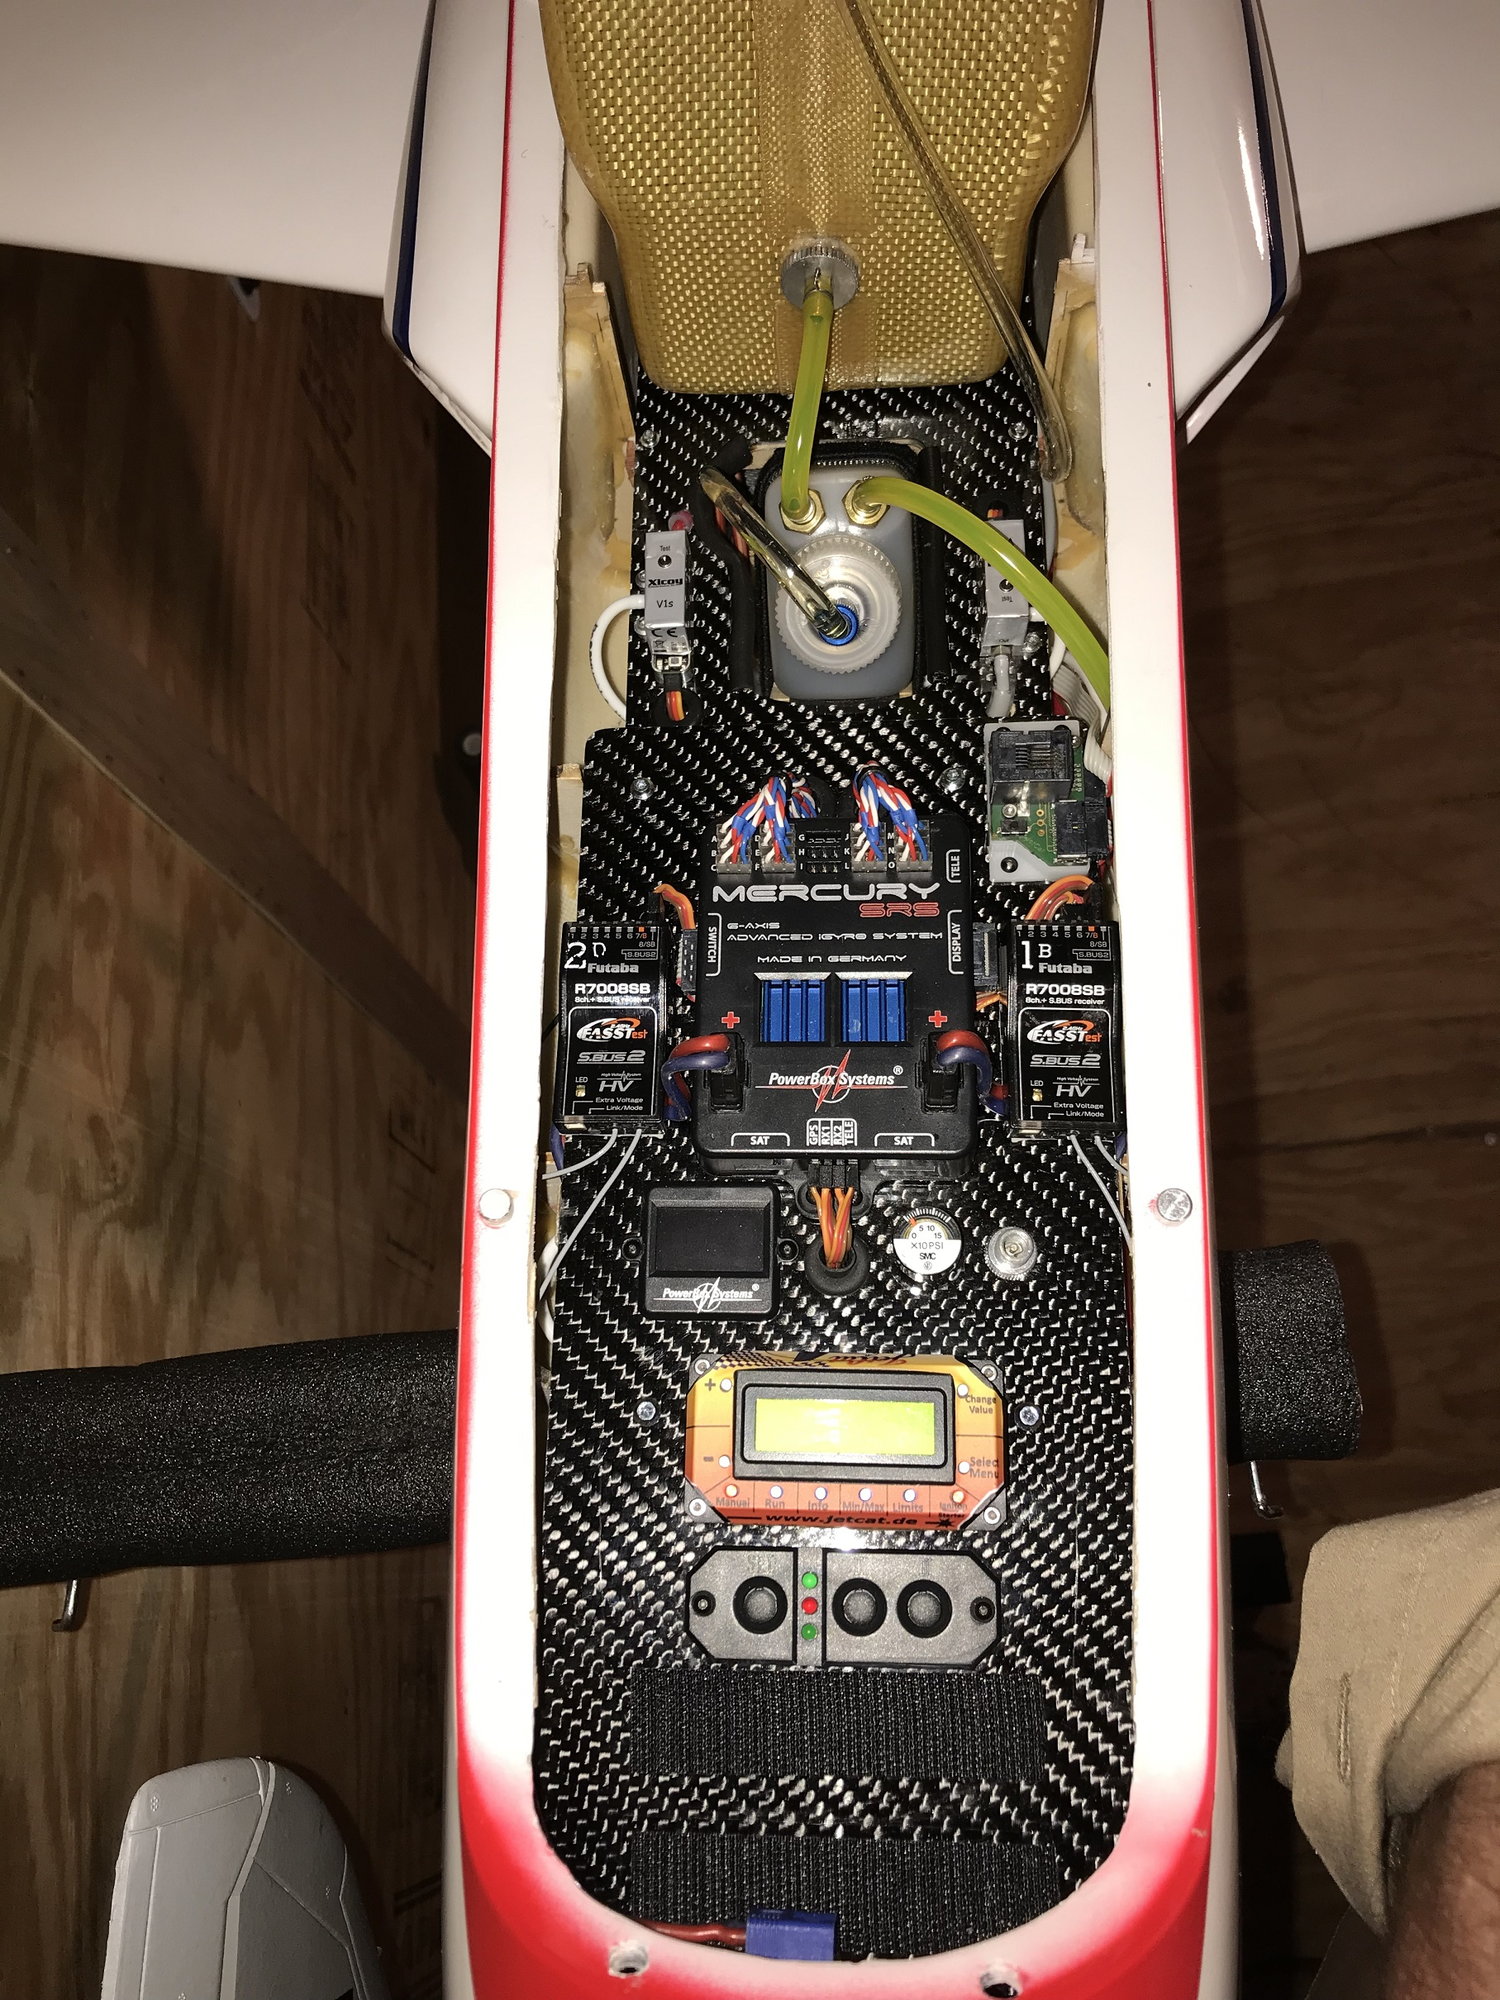
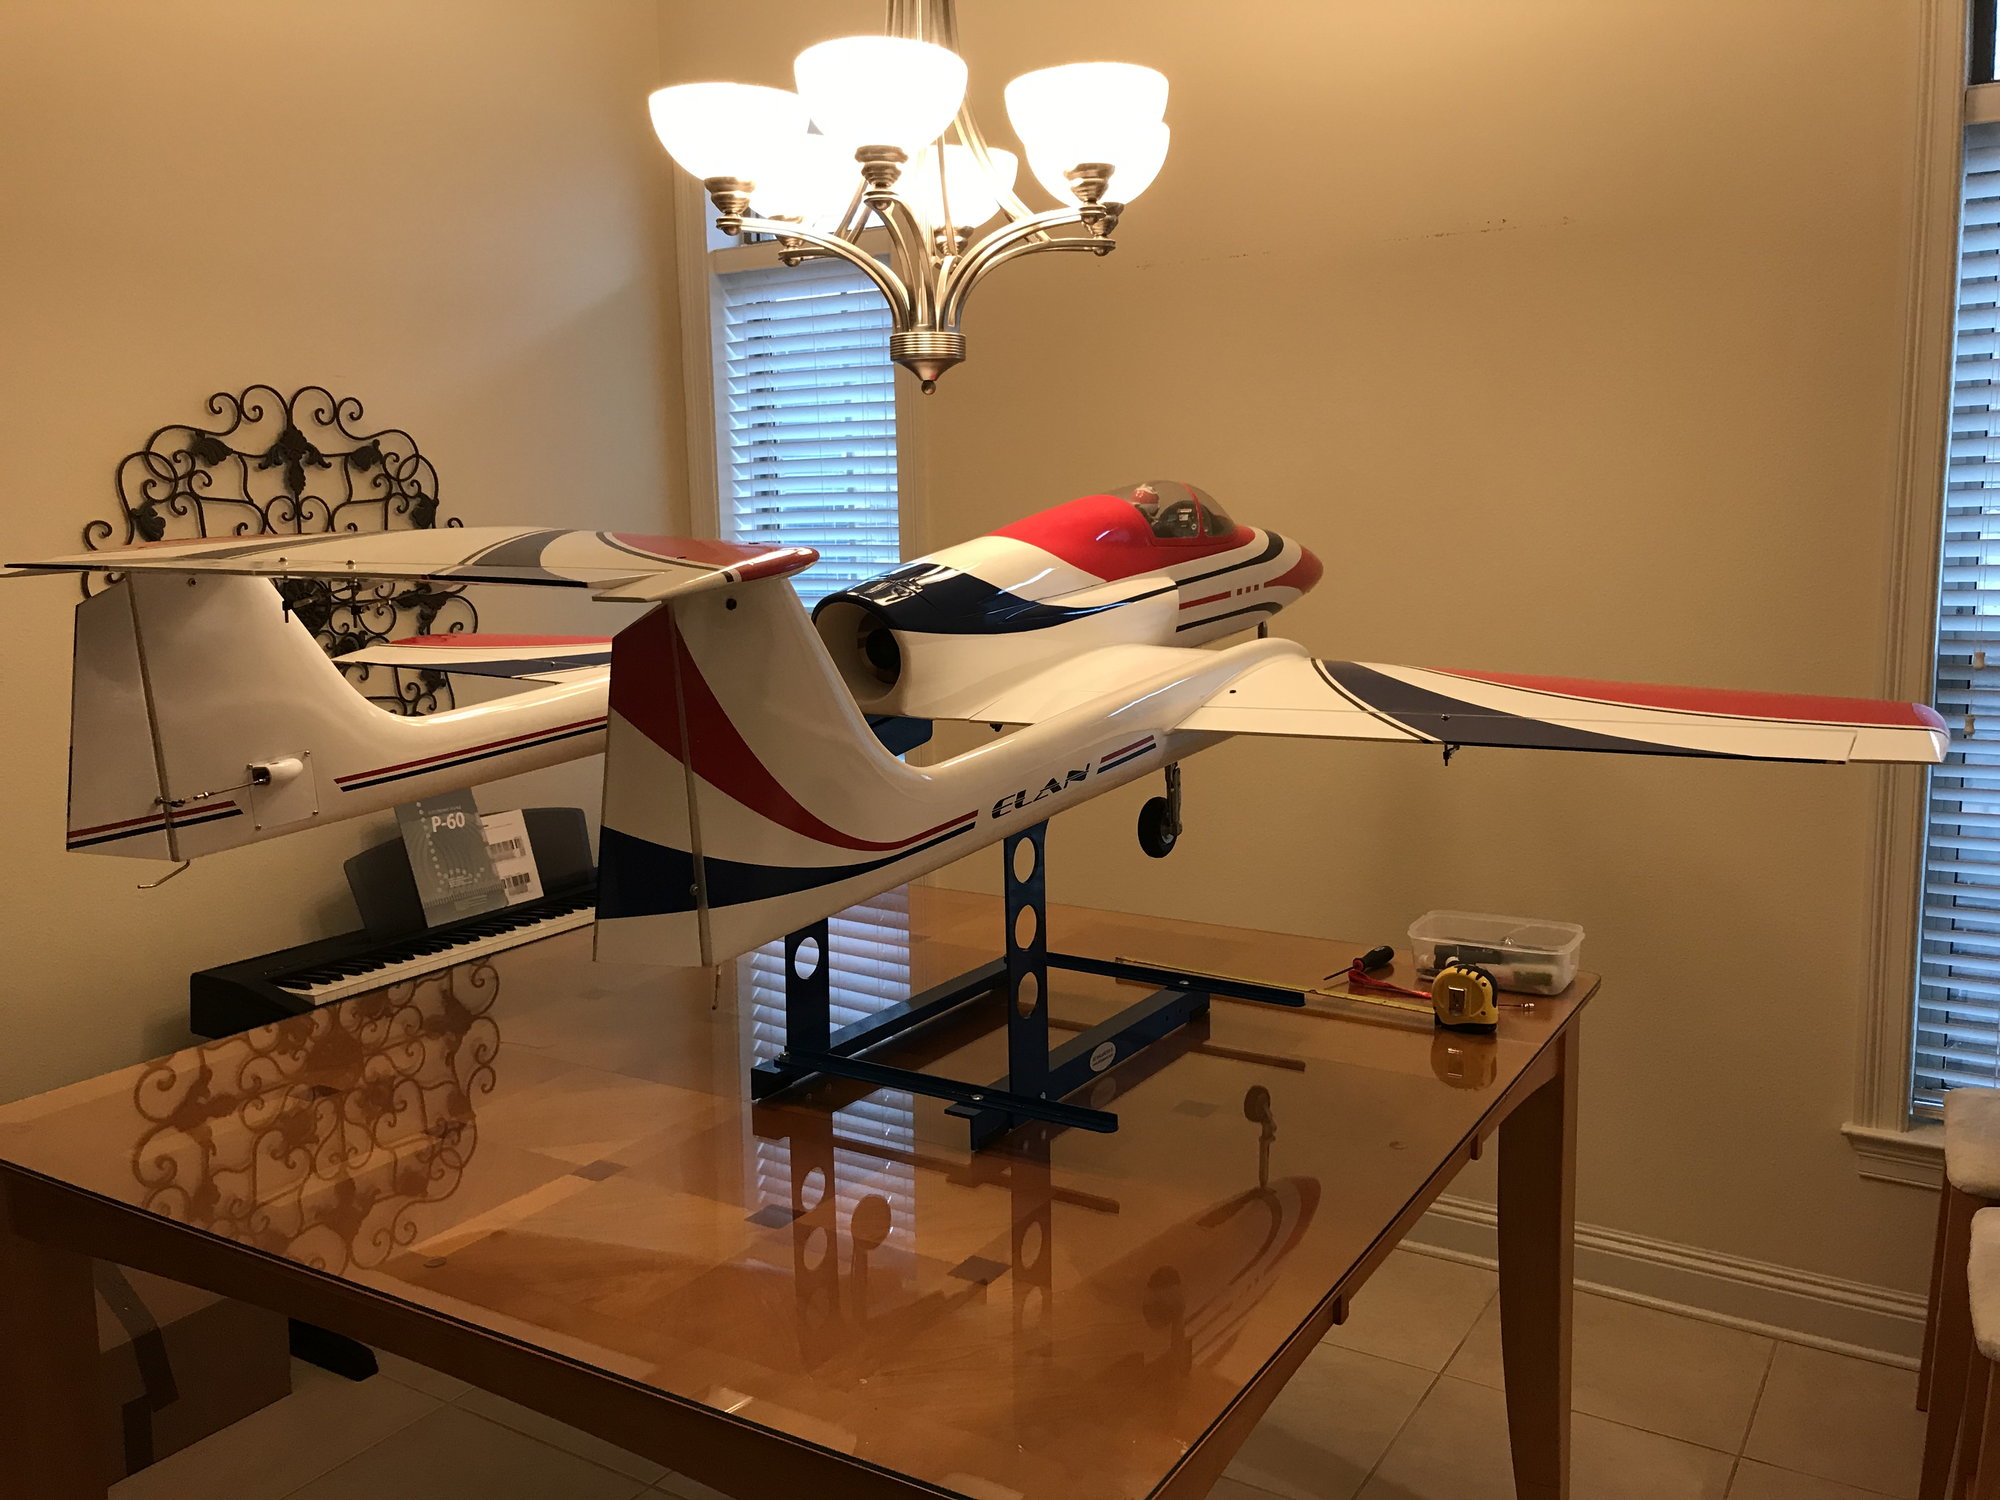
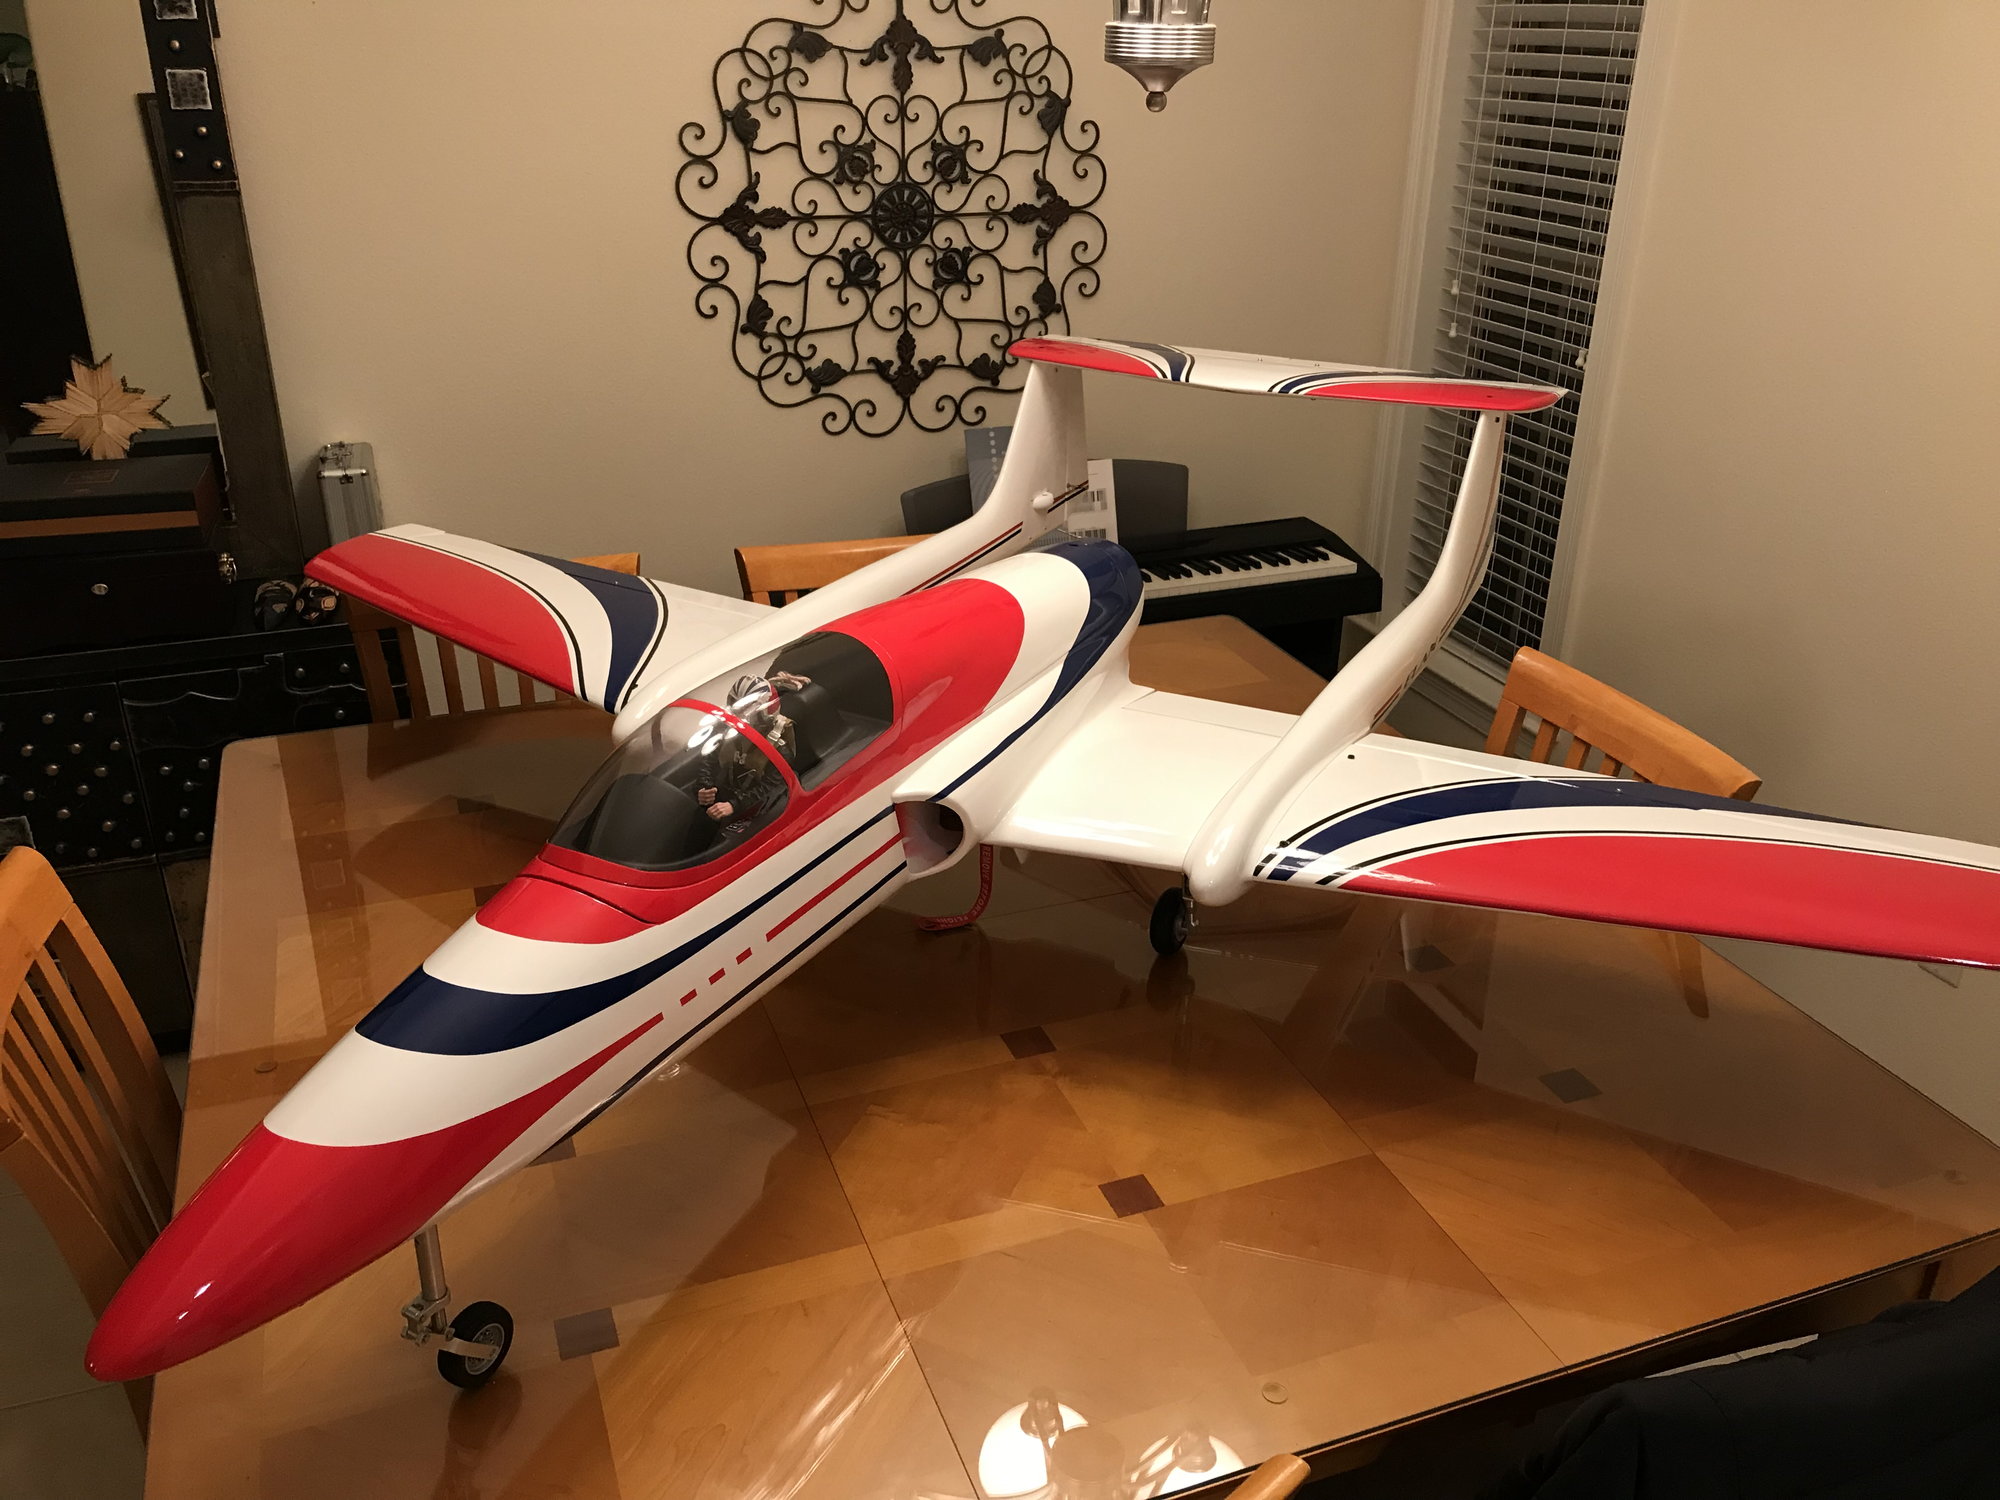
Flew the maiden last weekend and more flights on Monday. What an awesome, easy, stable jet to fly! Mine has a JetCat P-100RX, Jet Tech single-cell tank, Jet 1A retracts, Powerbox Mercury SRS, 2 x Futaba R7008 Rx, 2 x Pulse 2550 LiPos for Rx and one Pulse 5000 LiPo for the ECU. The retracts and brakes are controlled with Xicoy V1S single action electronic valves. The retract valve operates in on/off mode and brake valve in proportional, pulsed anti-lock mode. I shimmed the rear stab mount with a washer, as suggested, and had no pitch trim issues. The Jet Tech tank keeps coming back full, so I think we're making fuel during flight... I would guess I could set my timer to 13 minutes and still have 1/4 tank remaining.
Can't wait to get out and fly it some more!
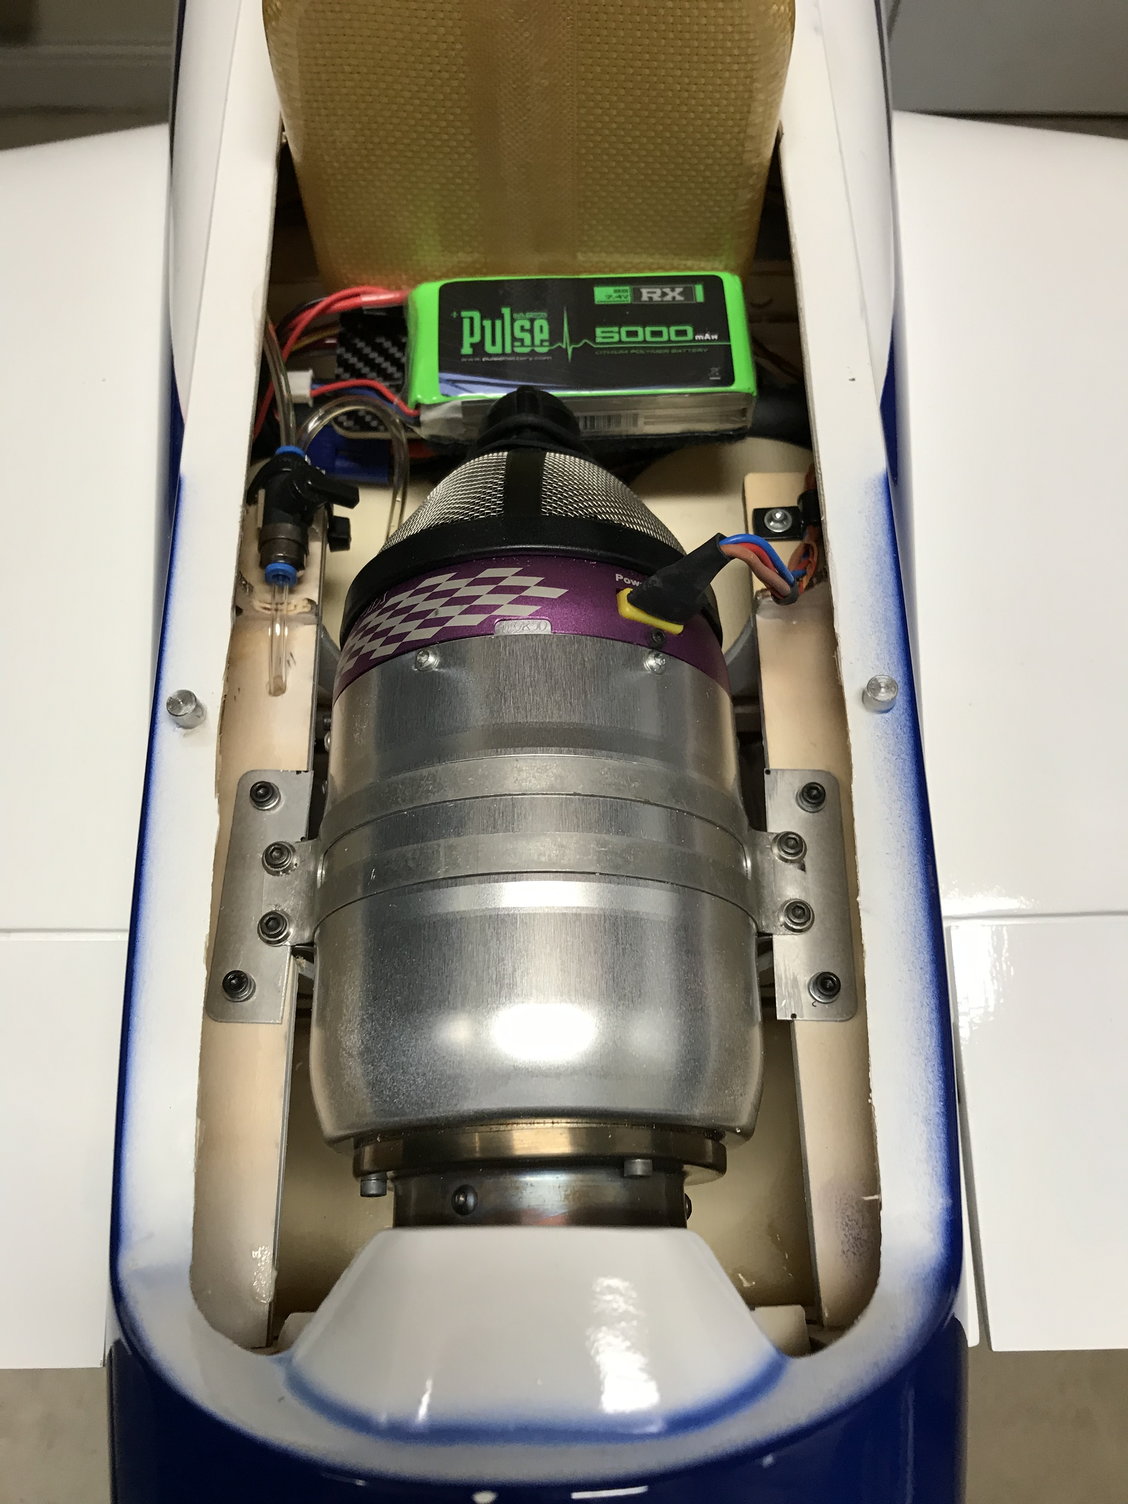
Didn't have to move anything to balance it at 250mm from trailing edge of flap. ECU and fuel pump are behind the CG, mounted under the rear of the tank.
Last edited by patniven; 12-19-2018 at 03:46 PM.
