


Building an RC Bike from a toy
 02-12-2009, 06:23 AM
#26
Senior Member
Thread Starter

Join Date: Sep 2007
Location: Oldham, UNITED KINGDOM
Posts: 215
Likes: 0
Received 0 Likes
on
0 Posts
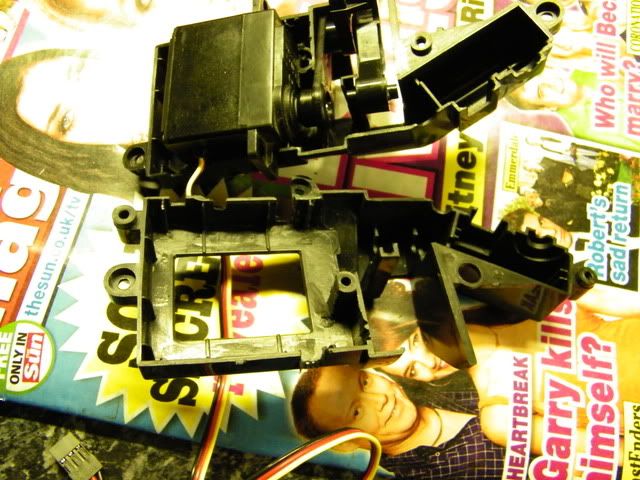
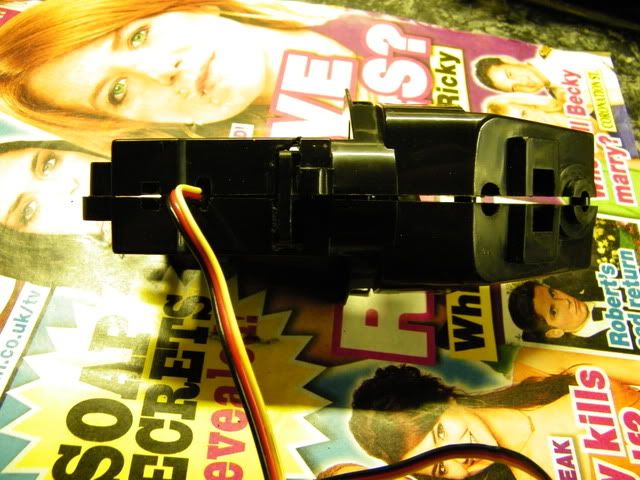
Quick update.
We have now bench tested the original motor with the new ESC and a cheap 2 channel receiver.
After resetting the ESC for end and neutral points, its working well.
I have connected the BLUE from the motor to the BLUE on the ESC and the RED from the motor to the YELLOW from the ESC.
For forward, when the throttle is returned to centre, the motor is allowed to coast.
In reverse (I know, wont be used on a bike), when the throttle is centred, the rear wheel locks up. Drag brake style, so this wont be any good for the bike.
So far I am happy that I have progressive control over the speed.
Next step is locating the steering servo, may need to make a mounting bracket.
Then need to put it all back together, get a decent dry day, and run some proper tests.
 02-13-2009, 11:22 AM
#27
Senior Member
Thread Starter
Join Date: Sep 2007
Location: Oldham, UNITED KINGDOM
Posts: 215
Likes: 0
Received 0 Likes
on
0 Posts
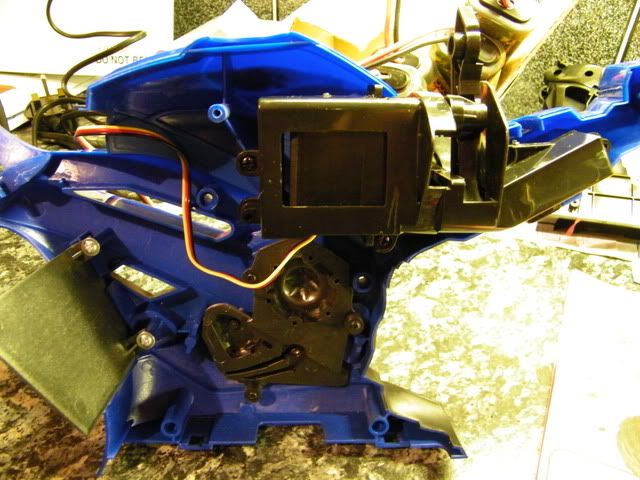
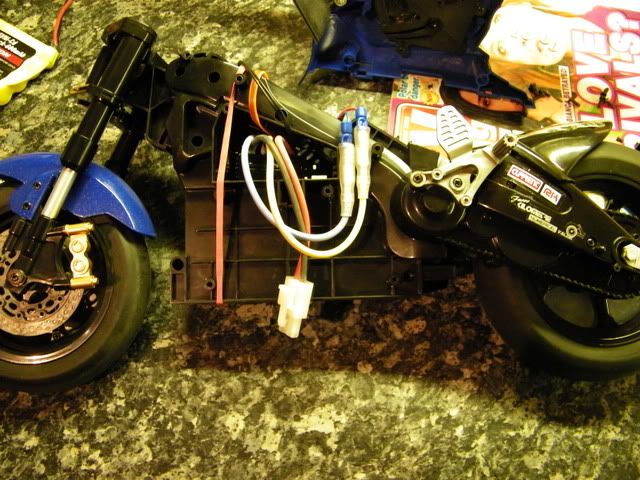
Rebuild pictures:

Have used a car steering servo (995) for the rider movement - mainly because it fits the housing and has the same length control arm.
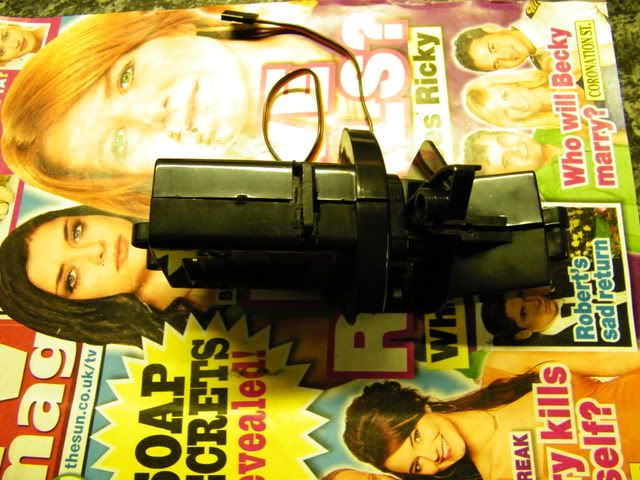
Had to use the dremel to allow the servo mounts to poke out the holder.
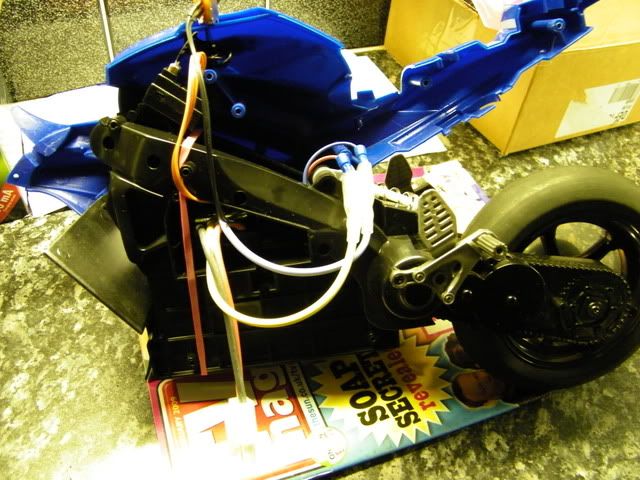
The ESC is in the hole, will be hard to reset, but made sure I did it before assembly.
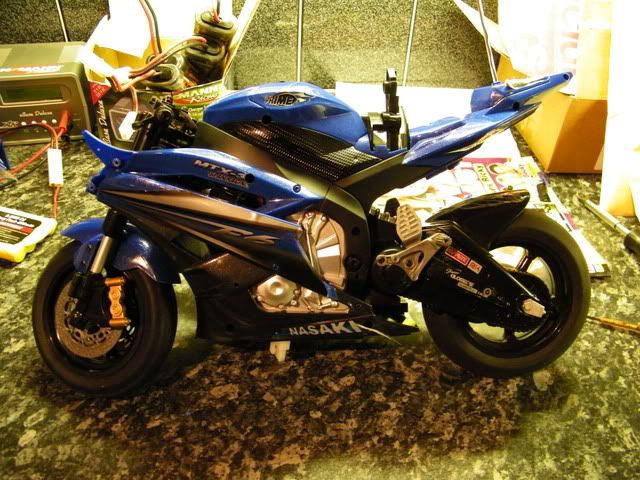
Still got the front fairing and rider to put back on, will do that later tonight.
Then we are ready for a test run.
Have moved the on/off switch from under the seat, to the fuel filler cap, for ease of use.
Hope to get some pictures when done, and may even try to video a test run.
Have used a car steering servo (995) for the rider movement - mainly because it fits the housing and has the same length control arm.
Had to use the dremel to allow the servo mounts to poke out the holder.
The ESC is in the hole, will be hard to reset, but made sure I did it before assembly.
Still got the front fairing and rider to put back on, will do that later tonight.
Then we are ready for a test run.
Have moved the on/off switch from under the seat, to the fuel filler cap, for ease of use.
Hope to get some pictures when done, and may even try to video a test run.
 03-02-2009, 01:25 AM
#30
Senior Member
Thread Starter
Join Date: Sep 2007
Location: Oldham, UNITED KINGDOM
Posts: 215
Likes: 0
Received 0 Likes
on
0 Posts
Finally managed to get out and have a test ride of this modified bike.
Wow, need to do some work to stabilise it, but it performed excellently.
The motor is not mad fast, but quick enough for a beginner.
This is my first proper try at controlling an RC bike (other than a Silverlit in the house).
Found that the rider came loose, so was not moving correctly, I need to put a longer screw through the servo arm, where it fastens to the bottom of the rider.
Also, when cornering, the front wheel gets all shaky?
May need to add a steering damper?
Or is it something else?
Had fun, will do some work on it this week, the look forward to the next test.
I do have some brief video, but its hard to film and control the bike at the same time....
Will post it later tonight.
03-02-2009, 03:31 AM
#31
Senior Member
Thread Starter
Join Date: Sep 2007
Location: Oldham, UNITED KINGDOM
Posts: 215
Likes: 0
Received 0 Likes
on
0 Posts
Here is my first test video...
Sorry about the quality, its hard to record and control a bike...
http://www.youtube.com/watch?v=o-rQG...eature=channel
Did much better once the camera was put away.
Need to resolve the front wheel shake when cornering, and fasten the rider in properly, he kept coming loose on one side.
Great fun and cant wait for the next test.
If anyone has any ideas on the front wheel wobble while cornering, I would really appreciate it.
Cheers.
03-03-2009, 07:01 AM
#32
Senior Member
Thread Starter
Join Date: Sep 2007
Location: Oldham, UNITED KINGDOM
Posts: 215
Likes: 0
Received 0 Likes
on
0 Posts
After this weekends successful test, a few things have been highlighted that need more work.
The headstock has too much movement at the top, so is allowing the forks to move side to side, causing the wobble when cornering.
To resolve this I have put a shim to tighten it up.
Not tested yet, but it has slowed the free movement of the forks a little.

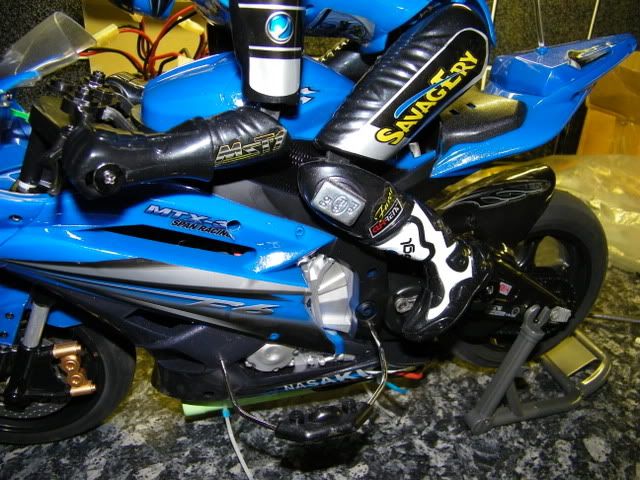
Also added metal knee sliders - well, ok, wheel weights - thanks to Rcphreak for the suggestion.
Need to test this, see if it helps with cornering.
Also been looking for better batteries - as standard the bike used 9.6v 600 or 650 mah.
Been toying with the idea of running full size 7.2v 2500mah...
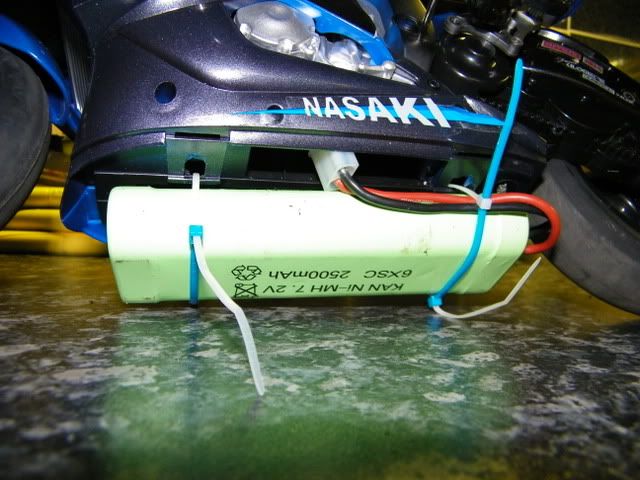
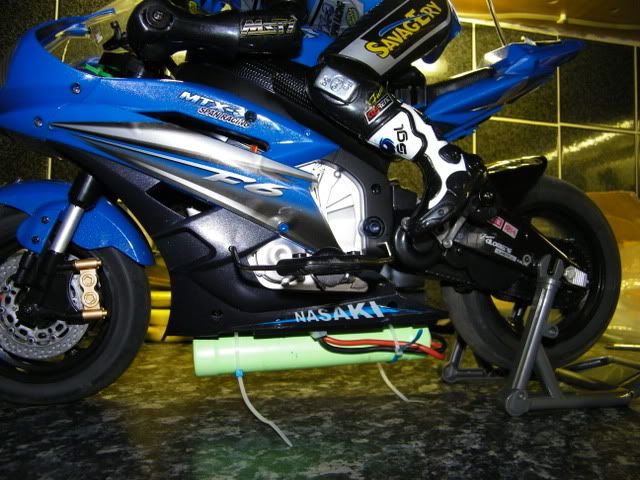
Although there is not much clearance, and when the suspension is compressed, they could catch on the ground.
The bigger battery seems to make the motor run faster, even though it is a lower voltage (I don't know enough about these things to comment further, but it seems faster to me)
If this works out ok, may dremel out some of the battery slot to allow the bigger batteries to tuck inside.
Should definitely get longer run times from the bigger batteries -
Thanks for reading, and will try to get more video of the next test run.
Drew
The headstock has too much movement at the top, so is allowing the forks to move side to side, causing the wobble when cornering.
To resolve this I have put a shim to tighten it up.
Not tested yet, but it has slowed the free movement of the forks a little.
Also added metal knee sliders - well, ok, wheel weights - thanks to Rcphreak for the suggestion.
Need to test this, see if it helps with cornering.
Also been looking for better batteries - as standard the bike used 9.6v 600 or 650 mah.
Been toying with the idea of running full size 7.2v 2500mah...
Although there is not much clearance, and when the suspension is compressed, they could catch on the ground.
The bigger battery seems to make the motor run faster, even though it is a lower voltage (I don't know enough about these things to comment further, but it seems faster to me)
If this works out ok, may dremel out some of the battery slot to allow the bigger batteries to tuck inside.
Should definitely get longer run times from the bigger batteries -
Thanks for reading, and will try to get more video of the next test run.
Drew
03-04-2009, 11:14 AM
#33
Banned
Join Date: Jan 2009
Location: london, UNITED KINGDOM
Posts: 757
Likes: 0
Received 0 Likes
on
0 Posts
hey drew looks great bro this model has come a long way , on the batterie i know its exstra cost but you would be much better of with a lipo . lot less weight , would also give more run time , just a idea nice work ..

03-04-2009, 11:44 AM
#34
Senior Member
Thread Starter
Join Date: Sep 2007
Location: Oldham, UNITED KINGDOM
Posts: 215
Likes: 0
Received 0 Likes
on
0 Posts
ORIGINAL: yaleforscale
hey drew looks great bro this model has come a long way , on the batteries i know its extra cost but you would be much better of with a lipo . lot less weight , would also give more run time , just a idea nice work ..
hey drew looks great bro this model has come a long way , on the batteries i know its extra cost but you would be much better of with a lipo . lot less weight , would also give more run time , just a idea nice work ..
http://www.rcscale.co.uk/eshop/prodd...od=LIPO-7-2200
And had confirmation they have been dispatched today....
Should be good with those in - the 7.2v seems to produce a higher top speed on the bench.
Hope to get out again at weekend for another test run.
I tell you, for a cheap as chips bike, it handles really well.
Just don't think it would do so well in a crash, the plastic does not feel that tough.
Thanks,
Drew
03-05-2009, 01:00 PM
#35
Banned
Join Date: Jan 2009
Location: london, UNITED KINGDOM
Posts: 757
Likes: 0
Received 0 Likes
on
0 Posts
very cool drew those lipo should make a difference .. i understand the plastic on toy grade does not seem as strong as hobby grade . i had to reinforce the weak points on my creations with alloy plate and some times use fiberglass matting to strengthen other parts . . it seemed to work ok thanks drew ..
03-05-2009, 02:27 PM
#36
Senior Member
Thread Starter
Join Date: Sep 2007
Location: Oldham, UNITED KINGDOM
Posts: 215
Likes: 0
Received 0 Likes
on
0 Posts
Taking it easy, as still learning to control the bike, but I do have another that can be cannibalised for spares....
Just hope the weather stays fine, so I can have another test run with the 7.2v scraping the floor...
Thanks
Just hope the weather stays fine, so I can have another test run with the 7.2v scraping the floor...
Thanks
03-16-2009, 01:27 AM
#37
Senior Member
Thread Starter
Join Date: Sep 2007
Location: Oldham, UNITED KINGDOM
Posts: 215
Likes: 0
Received 0 Likes
on
0 Posts
Quick update:
Took the bike to a track yesterday, and it struggled.
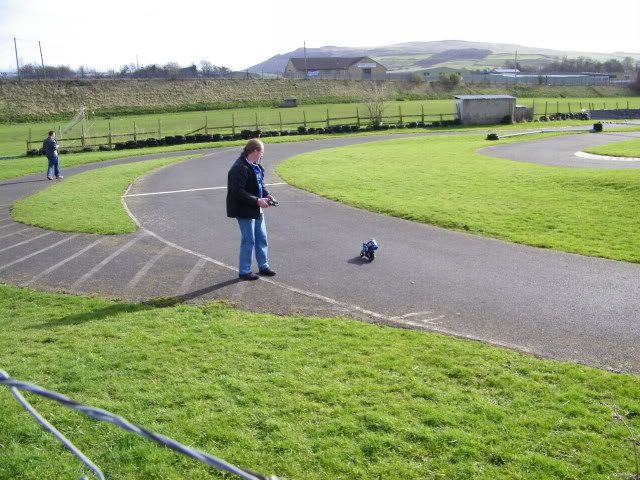
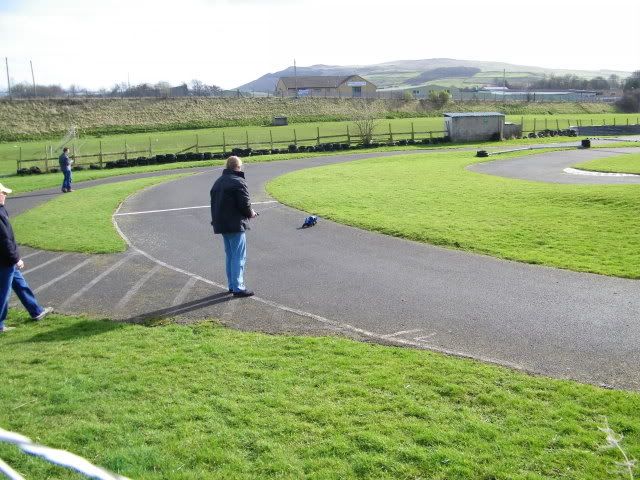
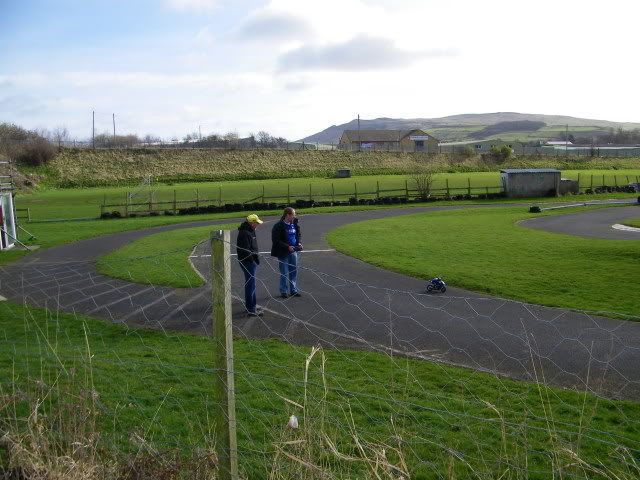
Found the grass more than the track, but that was my fault, not the bikes.
The 7.2v battery did not work well stapped to the bottom, it was too low, and when the suspension compressed, grazed the floor.
Also the bike did not take tumbles in the grass very well either, and had to be retired when the rider stopped moving.
I am probably going to try running it on a Lipo next, as this will fit in the battery compartment.
Overall, the bike was good in an open carpark, but not so good on a track, and would have been way too slow to race.
Took the bike to a track yesterday, and it struggled.
Found the grass more than the track, but that was my fault, not the bikes.
The 7.2v battery did not work well stapped to the bottom, it was too low, and when the suspension compressed, grazed the floor.
Also the bike did not take tumbles in the grass very well either, and had to be retired when the rider stopped moving.
I am probably going to try running it on a Lipo next, as this will fit in the battery compartment.
Overall, the bike was good in an open carpark, but not so good on a track, and would have been way too slow to race.
04-28-2009, 06:14 AM
#38
Senior Member
Thread Starter
Join Date: Sep 2007
Location: Oldham, UNITED KINGDOM
Posts: 215
Likes: 0
Received 0 Likes
on
0 Posts
Latest Update:
Rebuilt the rider movement mechanism, it had come loose during the last tests and a guide had come out.
This is now fixed and ready for another run.
I need to reprogram the esc, as I had it on default settings, need to look at enabling punch, and getting the brakes setup better.
Wish there was some way of protecting the rider, they seem quite fragile, and dont think they would do so well in crash.
They are a good scale, but a little flimsy.
It also needs a better motor, more weight adding to the rider to aid turning and then we may have a better bike.
06-06-2009, 07:10 PM
#39
Junior Member

Join Date: Apr 2006
Location: Mayer, AZ
Posts: 23
Likes: 0
Received 0 Likes
on
0 Posts
Hi Drew,
I am doing the same mods to my Nikko Kawasaki Ninja. It is basicly the same bike as yours. I have installed a Futaba receiver and Novak Speed control for proportional control. I am still running the stock motor but have a brushless motor that I hope to install soon. I am running a 11,1v Lipo battery. The 11.1v battery gave it a considerable boost in top speed and quickness.
I am experiencing the front end wobble like you did. Did taking the slop out of the top of the steering head help the wobble? I imagine it would...but if your steering head is like mine...it is actually flared at the top allowing even more slop. This leads me to think it was designed this way for a reason. Maybe allowing it to turn better or something. Please let me know if cleaning up the slop had any adverse effects.
Also I will be adding weight to the riders legs to improve high speed turning.
Thanks,
Bill
06-07-2009, 01:37 AM
#40
Senior Member
Thread Starter
Join Date: Sep 2007
Location: Oldham, UNITED KINGDOM
Posts: 215
Likes: 0
Received 0 Likes
on
0 Posts
Hi Bill,
You are correct, removing the slop helped alot - now Idont get the wobble when turning.
It is sluggish turning, as you say the slop probably was there to speed up turns, but would rather it did not wobble so much.
I got some 7.4v lipos, which gave it a speed boost over the stock battery. And increased the run time considerably.
I would be careful of the BL motor and 11.1v, simply because the nylon gears in the drive would nothandle too much speed.
Good luck with your mods, and post some pictures and progress.
Cheers,
Drew
06-07-2009, 02:08 PM
#41
Junior Member
Join Date: Apr 2006
Location: Mayer, AZ
Posts: 23
Likes: 0
Received 0 Likes
on
0 Posts
I found this link last night and I have made both the mods.
http://www.rcgroups.com/forums/showp...9&postcount=75
I found a couple weaker springs and replaced the 2 SUPERSTIFF springs in the front forks. I think my springs came from an old Tamiya buggy shock springs. I had to add a plastic tubular spacer for preload in each fork leg because the springs were shorter and weaker than the original. I also added a couple drops of silicon oil in each fork leg for smoother action. Now I have almost 3/4 inch of travel when I had NONE before.
I removed the rear shock and used a shock from an old Tamiya buggy. I used the original spring but I have less preload with the adjustment that is allowed by the new shock. The original shock., with no adjustablity, had to much preload and was to stiff. (See photo of rear shock).
I glued 2 1/3 oz. fishing weights to each leg of the rider. I glued the weights inside the leg at the hip joint. This definately allows the biker to turn sharper at speed. A whole new bike.
With these simple mods my bike is much better. I didnt get the front end wobble as much, but did get it a couple times. Still it is better and I will be looking into this problem. The slop in the top of the steering head I believe is there for better turning. Maybe with the weight in the rider...this slop can now be removed. More testing needed.
I only ran a quick test with these mods but the bike is better.
Lets keep up the ideas on these 1:5 scale toy bikes. I think we may be the only 1:5 HOR Bikers. I would hope to see more 1:5 HOR bikes in the future. I like the realism of the rider moving side to side and the size of 1:5 scale.
Regards,
Bill
06-07-2009, 04:08 PM
#42
Senior Member
Thread Starter
Join Date: Sep 2007
Location: Oldham, UNITED KINGDOM
Posts: 215
Likes: 0
Received 0 Likes
on
0 Posts
Looks great Bill,
I also moved the on/off switch to sit in the tank refuel cap....
Great idea and agree the riders are a good proportional size. Just wish Icould make him a little tougher.
I also moved the on/off switch to sit in the tank refuel cap....
Great idea and agree the riders are a good proportional size. Just wish Icould make him a little tougher.
05-07-2014, 08:06 AM
#43
Member
Join Date: Mar 2013
Location: TewkesburyGloucestershire, UNITED KINGDOM
Posts: 40
Likes: 0
Received 0 Likes
on
0 Posts
Very interesting.
I am thinking of trying to convert an old Action Man BSA into a radio controlled bike.
Nothing fast or complicated just forward, reverse(?) and steer left and right.
I don't need suspension or even a chain drive come to that so I will keep watching and learning.
I am thinking of trying to convert an old Action Man BSA into a radio controlled bike.
Nothing fast or complicated just forward, reverse(?) and steer left and right.
I don't need suspension or even a chain drive come to that so I will keep watching and learning.
05-16-2014, 10:28 AM
#44
Senior Member

Join Date: Aug 2008
Location: Fremont,
CA
Posts: 598
Likes: 0
Received 0 Likes
on
0 Posts
Reminds me of my Kyosho HOR. The rider moves when steering the bike. I used a 800mah 2s lipo on my HOR and the battery was small enough to fit in the battery compartment. I also added some stick on lead weights (great planes) to help keep the bike planted. This might help your build.
Here is my old build thread there might be some useful info in it since these are similar builds http://www.rcuniverse.com/forum/rc-m...nda-build.html
Here is my old build thread there might be some useful info in it since these are similar builds http://www.rcuniverse.com/forum/rc-m...nda-build.html
Last edited by grimgard; 05-16-2014 at 10:34 AM.
