


Painted wing, stabs and advanced graphics
 05-31-2016, 07:37 AM
#326

Thread Starter
 05-31-2016, 09:43 AM
#327
My Feedback: (132)
Join Date: Feb 2002
Location: Mt. Pleasant,
PA
Posts: 206
Likes: 0
Received 0 Likes
on
0 Posts
OK I'll take a stab at it (Pun intended). The middle axe (??what ever it's called) appears brighter in the second photo and shaded in the first. If the light is coming from the LE, the beveled edge of the axe would appear brighter.
What did I win?
P.S. Thanks for the education and inspiration. My next plane will have at least two colors:-) Normally I only use one! And it's plastic:-(
What did I win?
P.S. Thanks for the education and inspiration. My next plane will have at least two colors:-) Normally I only use one! And it's plastic:-(
Last edited by Champ-RCU; 05-31-2016 at 09:54 AM.
05-31-2016, 10:26 AM
#328
Thread Starter
OK I'll take a stab at it (Pun intended). The middle axe (??what ever it's called) appears brighter in the second photo and shaded in the first. If the light is coming from the LE, the beveled edge of the axe would appear brighter.
What did I win?
P.S. Thanks for the education and inspiration. My next plane will have at least two colors:-) Normally I only use one! And it's plastic:-(
What did I win?
P.S. Thanks for the education and inspiration. My next plane will have at least two colors:-) Normally I only use one! And it's plastic:-(
 05-31-2016, 11:46 AM
#331

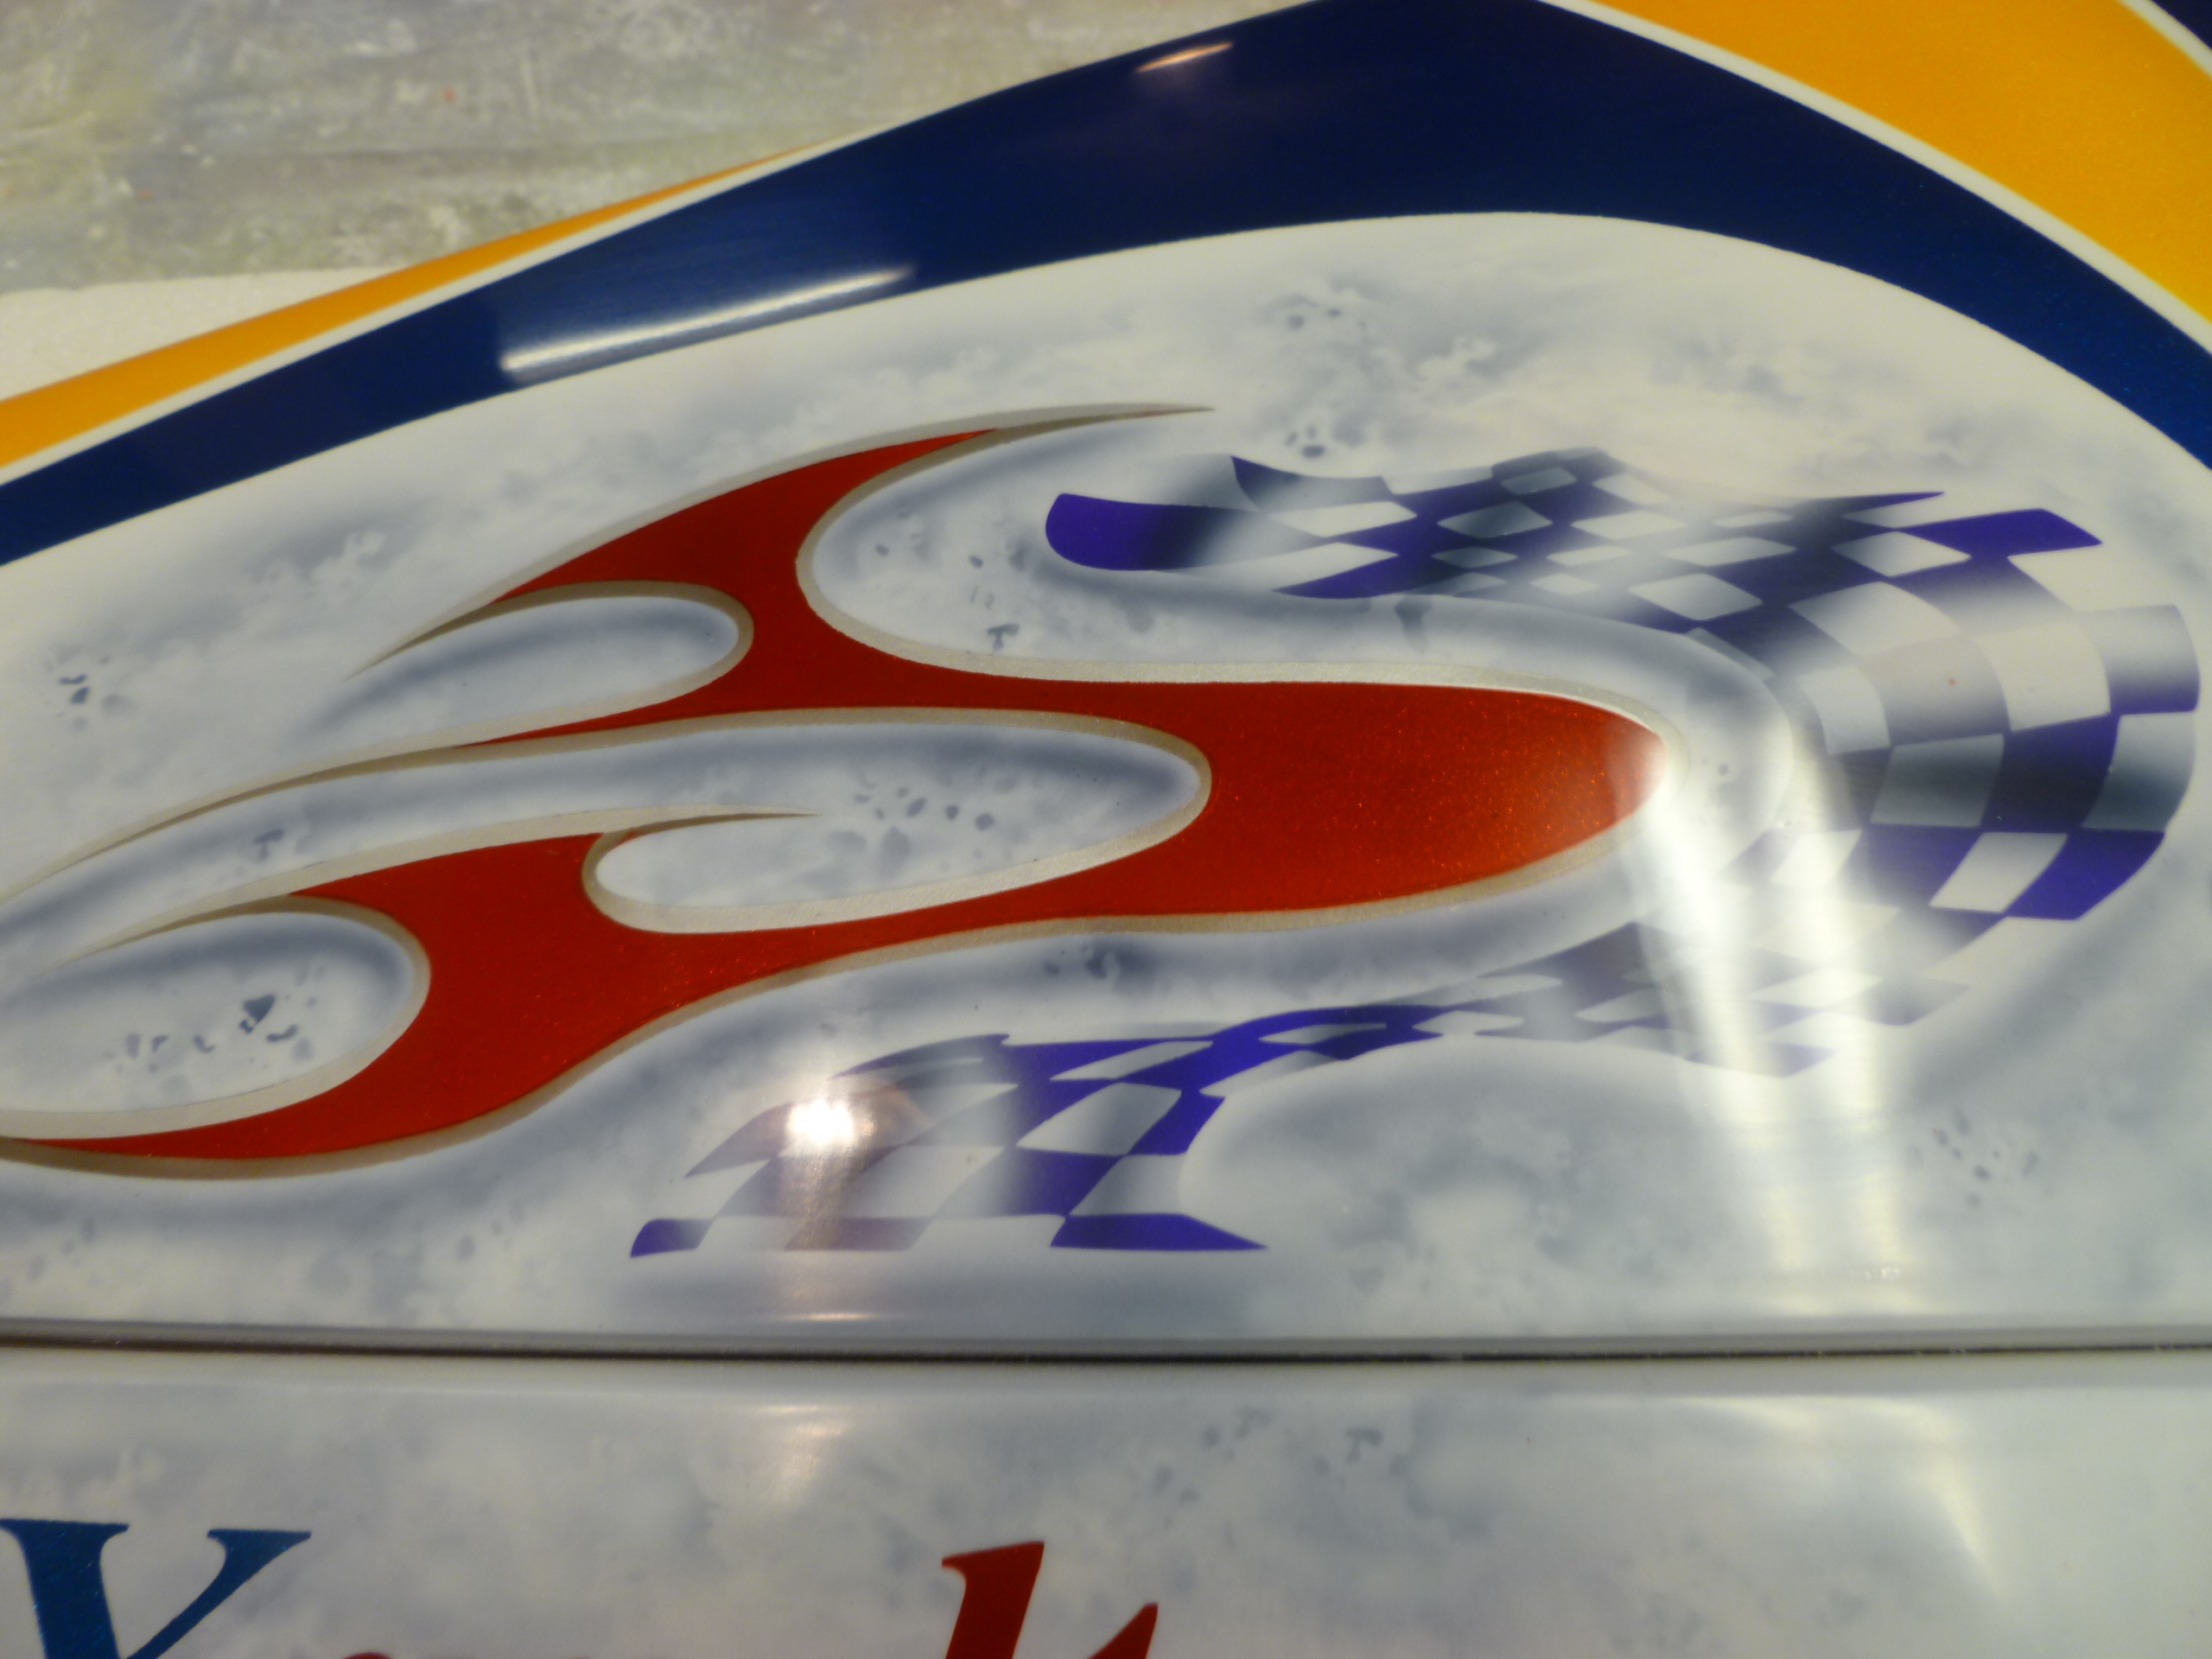
OK boys, I made a very minor mistake in painting the left stab versus the right. Trust me, it's ultra subtle, so you have to look really close. Here is the left stab with the error.
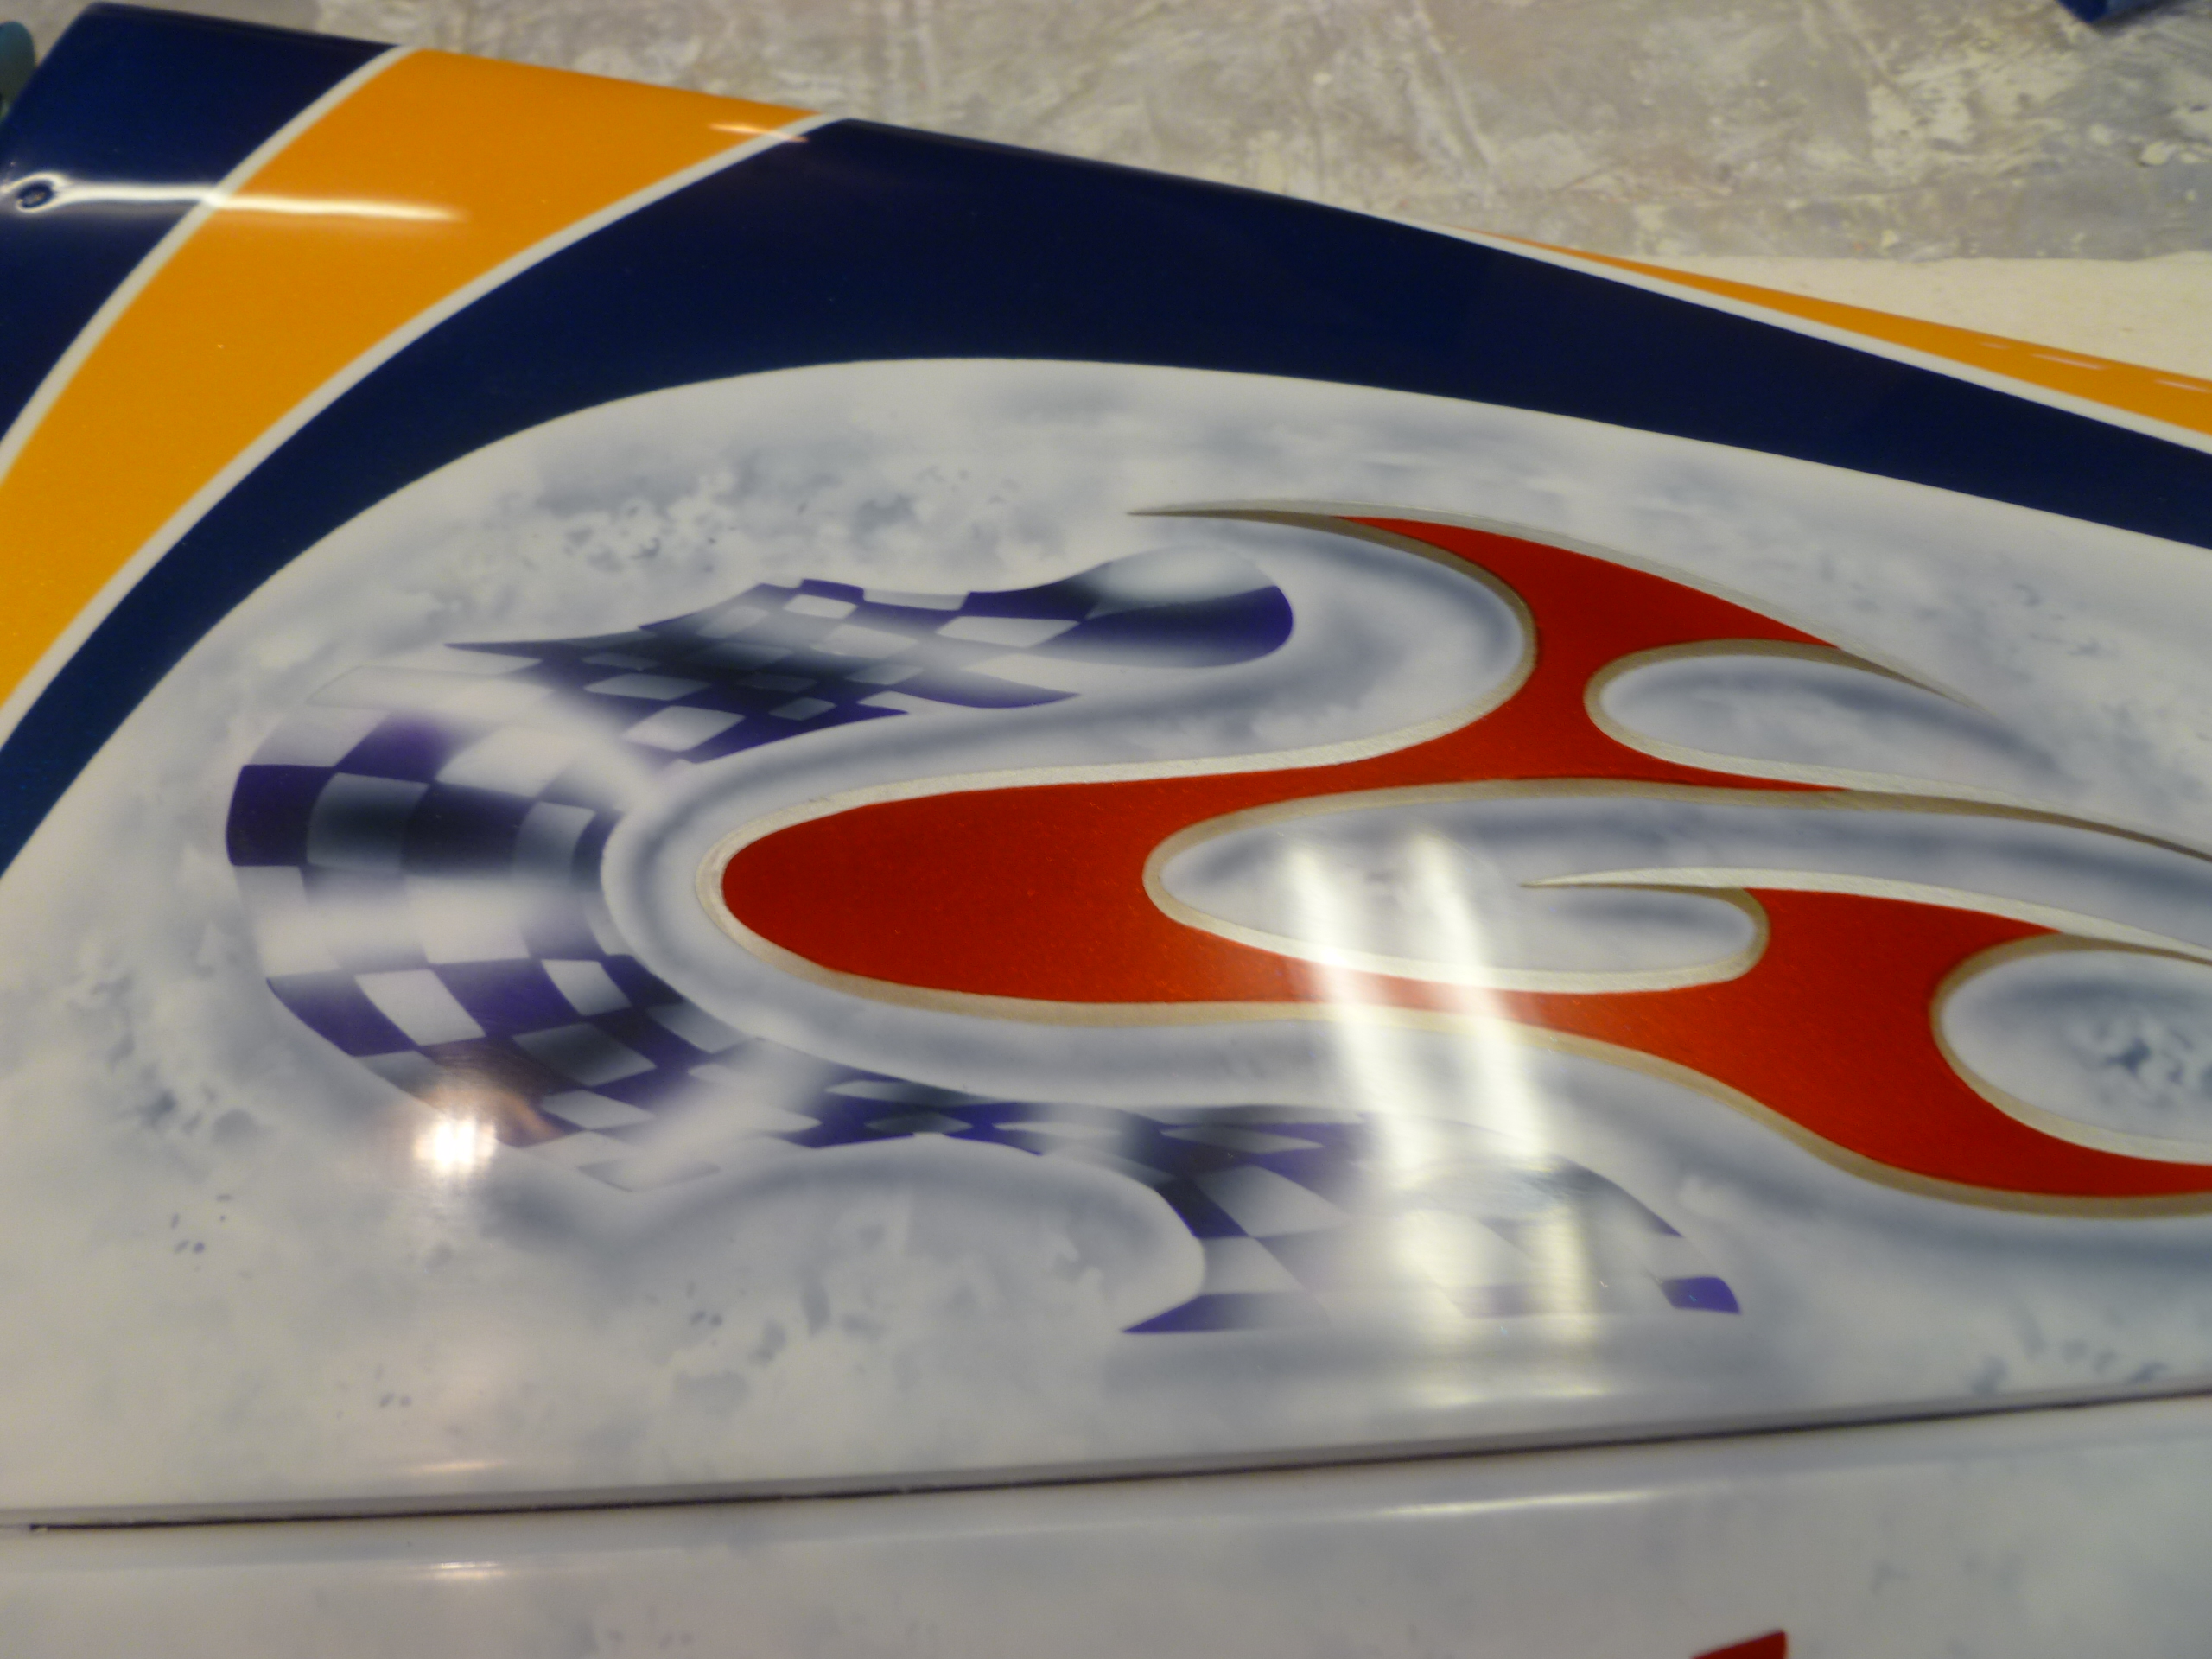
Here is the right stab that was painted correctly:
Anyone see it! Clue...it's in the red graphic.
Here is the right stab that was painted correctly:
Anyone see it!
Clue...it's in the red graphic.
05-31-2016, 12:13 PM
#332
Thread Starter
Your eyes are too good!  There is a little bit of overspay on the spot and yes it does show up a hair, but that wan't the obvious mistake. Keep in mind, that beveled edge you are seeing is less than 1/8 inch wide. It shows in the picture a lot more than in person, so you are half correct!
There is a little bit of overspay on the spot and yes it does show up a hair, but that wan't the obvious mistake. Keep in mind, that beveled edge you are seeing is less than 1/8 inch wide. It shows in the picture a lot more than in person, so you are half correct!
05-31-2016, 12:25 PM
#333
Thread Starter
Ding, ding, ding...Ken's the winner! Yep, you got it. Take a look at the picture drac1 (Scott) posted and you will see the shadow is missing on the small portion of the blade.
You guys realize that my eye is going to go to that microscopic bit of red overspray every time I look at it don't you?...Thanks a lot!
Take a look at the other stab and the pictures of the wings and you will see the shadow. A Persian rug must have a flaw if it is to be deemed, according to old proverb, perfectly imperfect and precisely imprecise, so there you go. I made those two mistakes with a purpose.
05-31-2016, 01:01 PM
#334
My Feedback: (132)
Join Date: Feb 2002
Location: Mt. Pleasant,
PA
Posts: 206
Likes: 0
Received 0 Likes
on
0 Posts
I'm Sorry. Send it to me and you'll never have to see that red spot again;-) The whole plane not just the stab.
I'd bet a Persian rug maker would make the mistake much larger than what we see here.
Again, Thanks, Mark
I'd bet a Persian rug maker would make the mistake much larger than what we see here.
Again, Thanks, Mark
05-31-2016, 04:42 PM
#335
I agree..... The whole thing should go the dumpster for such a GLARING mistake. Just let me know which dumpster and what time it goes in so so can practice my diving routine.

Ken

 06-01-2016, 08:57 AM
#337
Thread Starter
Thank you for your kind words. What's interesting is my eyes are terrible at distances, but are excellent close up. Not the best combination for a pattern pilot. Your eyes are perfectly fine, I have seen you fly!
 06-03-2016, 07:02 PM
#339
Thread Starter
06-08-2016, 04:45 AM
#340
Senior Member
Pat, my System 51 and 3" griots orbital came yesterday. I used it briefly on a stab and results were less than stellar. Obviously there is technique that you have learned. Rather than going through the same experiments, would you mind letting me know what exactly you do to polish?
which pad with which system 51? The blue, orange and red came with the kit.
how much product? Just a drop in the middle or do you cover the pad?
how long or what do you look for when polishing?
do you polish until the polish gets dry? And squeeks?
the clear is already very shiny....can you just polish the paint without sanding cutting?
what speed do you polish at? I used 2 and later 3 but don't think it was enough
how easy is it to cut through the corners?
thanks
06-08-2016, 09:26 AM
#341
Thread Starter
Pat, my System 51 and 3" griots orbital came yesterday. I used it briefly on a stab and results were less than stellar. Obviously there is technique that you have learned. Rather than going through the same experiments, would you mind letting me know what exactly you do to polish?
which pad with which system 51? The blue, orange and red came with the kit.
how much product? Just a drop in the middle or do you cover the pad?
how long or what do you look for when polishing?
do you polish until the polish gets dry? And squeeks?
the clear is already very shiny....can you just polish the paint without sanding cutting?
what speed do you polish at? I used 2 and later 3 but don't think it was enough
how easy is it to cut through the corners?
thanks
which pad with which system 51? The blue, orange and red came with the kit.
how much product? Just a drop in the middle or do you cover the pad?
how long or what do you look for when polishing?
do you polish until the polish gets dry? And squeeks?
the clear is already very shiny....can you just polish the paint without sanding cutting?
what speed do you polish at? I used 2 and later 3 but don't think it was enough
how easy is it to cut through the corners?
thanks
Yes it is a long learning curve, but I will shorten it up for you.
First off: can you just buff the clear without sanding (cutting) it back. Yes. but the whole concept of cutting and buffing is to take the surface back to level (cutting) and then bring back the gloss level. As you are aware, with the type of equipment we use to shoot clear, it is virtually impossible to avoid getting orange peel. Long story short, if you want the best finish, we need to level the surface before we buff it back. As I said before I start in most cases with 600, then 1,000, 1,500 and finish with 2,000 all sanded wet before buffing. You may remember my discussion of "reflection" versus "refraction". Refraction is what we are after, which requires a flat, level surface. That's why high grade mirrors in telescopes cost so much...they are ultra smooth and reflect without distortion.
OK next...you want to start with the Blue pad for the first level of System 51 compound. It is designed for cutting with compounds. The cool thing about the pads you have is how they line up perfectly with the System 51 system....three levels of compound and three pads in the kit. I use a pretty good amount of the first level of compound (Number one), I would say about the size of a quarter. I apply it to the surface, not the pad, but both methods work fine. I work the compound into the pad before I turn on the buffer. Be sure and have the buffer lightly on the surface before you turn it on or it will fling compound all over the place. For that matter, don't lift the buffer off the surface before you turn it off or it will do the same thing.
I was pretty hesitant to use the high speed settings on the buffer when I first got it. I was concerned if I ran it too high it might catch an edge and fling the wing or stab across the room. Trust me, that is not an issue if you always keep the pad on the surface with a bit of tension (not a lot). Take your 3 inch buffer and turn it on without it touching the surface and it will just spin. As soon as you touch it to the surface the rotations will slow. If you put too much pressure on it, the rotations will stop and it will just be an orbital buffer at that point. That is not what you want. You want the pad to always be spinning, but not too fast...something like once every second or so. So if we don't use enough compound, it starts to dry, or if we use too much pressure it will stop the pad from rotating. I do not let the compound dry. In fact the nice thing about System 51 being water based is I can just add a bit of water to the surface if it dry's too much. Bottom line is I run my 3 inch buffer at level 5 or 6 (the highest) all the time.
With level one compound I may buff for about five minutes in one medium sized area always keeping the buffer moving before I clean it off with a clean cloth to check the surface. If it needs more I will stay with level one for a bit more. If you have done it correctly, you will have a very glossy surface with just level one.
I then go to the Orange pad with level two using the same method as level one. I may use a little less compound as it is thinner than level one and is a little harder to keep it from flying all over the place. After I clean the surface, I now go to level three. I usually go longer with level three as you are mainly just trying to remove the swirl marks at this point. I use the red pad for level three.
The important issue with buffing is proper prep work. If you didn't get the 600 grit scratches out with 1,000 or the 1,000 out with 1,500 (on and on), no amount of buffing if going to bring back the gloss.
So in review...keep your buffer speed high. Use a good amount of compound and don't let it go dry. What you are looking for in each step of compounding is "did" it remove the last set of scratches. In other words, did level one compound remove the 2,000 grit sand paper scratches. on and on.
Interestingly I have had really good results with System 51 by buffing with level 1 and 2, but then going back and starting all over with level one and two compounds again. It doesn't make sense, but it seems to take the gloss to a bit higher level. One other thing to keep in mind. After you cut the surface with sand paper, you now have exposed softer clear. What I do is compound the surface right after I finish with 2,000. but if I wait a week or so and come back with level 2 and then 3, it really takes it to a show car level gloss.
As for cutting edges, I pretty much stay away from them with level 1 compound, but are fine with 2 and 3.
Last edited by Portlandflyer; 06-08-2016 at 11:02 AM.
06-08-2016, 09:57 AM
#342
Senior Member
Excellent..... I thought my quickie technique wasn't up to snuff.
the video that came with the orbital didn't give me any real info. Nothing on pads other than cleaning them after use and minimal on the speed. The guy of course pushed his own polishing compounds.
the video that came with the orbital didn't give me any real info. Nothing on pads other than cleaning them after use and minimal on the speed. The guy of course pushed his own polishing compounds.
 06-20-2016, 09:30 AM
#349
Thread Starter