


Painted wing, stabs and advanced graphics

 09-29-2016, 06:32 AM
#354

Pat
Sorry, Late follower, Earlier in the Thread there was a discussion about removing an existing finish and whether or not it is better to sand it off or chemically strip it. I believe you said strip it.
Can you recommend a process and products to strip an existing finish with minimum damage to the underlying structure. I have a composite fuse I need to strip and I am interested in if the process might change for a wing with prepared with Silkspan as you described.
09-29-2016, 09:01 AM
#355
Thread Starter
Pat
Sorry, Late follower, Earlier in the Thread there was a discussion about removing an existing finish and whether or not it is better to sand it off or chemically strip it. I believe you said strip it.
Can you recommend a process and products to strip an existing finish with minimum damage to the underlying structure. I have a composite fuse I need to strip and I am interested in if the process might change for a wing with prepared with Silkspan as you described.
Sorry, Late follower, Earlier in the Thread there was a discussion about removing an existing finish and whether or not it is better to sand it off or chemically strip it. I believe you said strip it.
Can you recommend a process and products to strip an existing finish with minimum damage to the underlying structure. I have a composite fuse I need to strip and I am interested in if the process might change for a wing with prepared with Silkspan as you described.
Sorry I don't know of any particular brand of strippers. I would contact your local auto paint suppliers. They should be able to help you out. I have heard guys on RCU talking about brands of strippers. You might do a search.
I would never use a stripper on a silkspaned surface. I can pretty much assure you it would take it all the way to the wood. In that case I would start with 220 if it was cleared and work it all the way to 600. Trust me, it's a ton of work. I know, I've done it.
09-29-2016, 02:20 PM
#356
Member
Join Date: May 2011
Location: SalemOR
Posts: 62
Likes: 0
Received 0 Likes
on
0 Posts
If you choose a stripper take off thin layers at a time. This is no time to get in a hurry. I�ve used an auto stripper that will go to bare metal in minutes. Ask at your auto paint store. You can get all your tape there, too.
Strippers will take off gel coat and could damage the layup epoxy, too. Get a water soluble stripper. The water neutralizes the stripper and that is a must or it will keep working.
You can remove the applied stripper using water and a scotch pad or use a putty knife to scrape it off in thin layers of stripper. Do not leave the stripper on for long. Start with small areas to get to know how it works in your application. To mush paint taken off at a time can result in gouges and uneven removal. You�ll see/know when you are getting through the paint. Wet sand at this point without the stripper and use plenty of water. Gel coat is good to sand for a smooth surface for your primer. Let stand to dry, then check for soft areas from the stripper and remove and dry. It goes really fast.
10-11-2016, 12:38 PM
#357
Pat
I am looking at Coast's web page trying to figure out how to get a near match for MonoKote Cub Yellow, I was wanting to do the bottom of the wings in Monokote and Fuse in a Yellow basecoat. What did you use and how close a match is it for MonoKote?
I am looking at Coast's web page trying to figure out how to get a near match for MonoKote Cub Yellow, I was wanting to do the bottom of the wings in Monokote and Fuse in a Yellow basecoat. What did you use and how close a match is it for MonoKote?
10-12-2016, 10:07 AM
#358
Thread Starter
That's one of the downsides to HOK paints...they don't do any color matching as virtually the whole line is custom. I talked to Coast a while back and said they would be more than happy to match a sample the best they can. You can send them a sample of the Monokote and they will give you a formula for the best match possible. You might give them a call and see what they have to say.
11-01-2016, 02:13 PM
#360
Thread Starter
I just add thinner until it makes it brush-able without leaving marks. I just use a two inch hair brush...nothing special. I tried to use a foam brush, but it melted!
 I would guess I thin it about 25 to 30%. apply two coats.
01-23-2017, 07:48 PM
I would guess I thin it about 25 to 30%. apply two coats.
01-23-2017, 07:48 PM
#361
Thread Starter
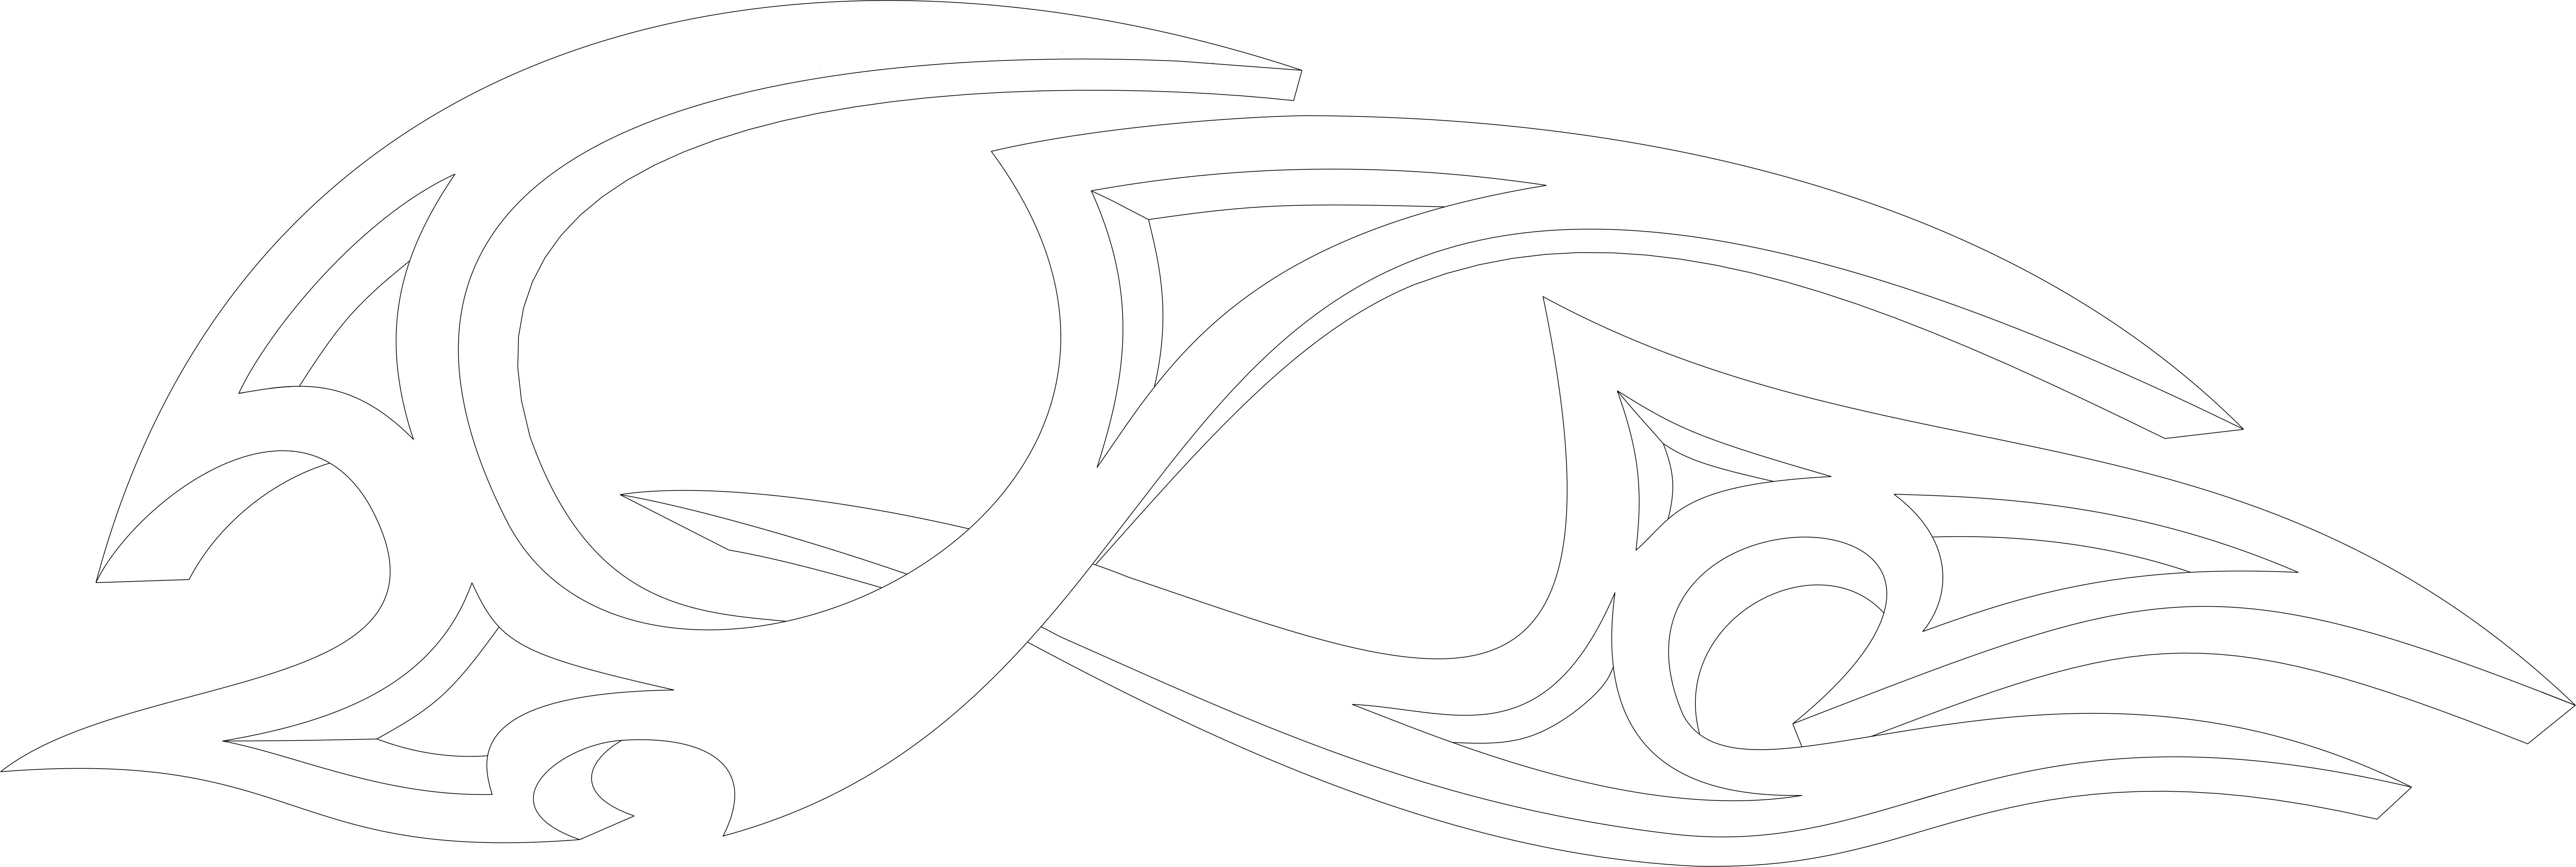
OK, it's time to resurrect this thread. I am building my second Austral bipe and have changed up the painting a bit. What I did was take the same graphic I used on my first one and reworked it a bit. In Corel Draw I just dropped out the two lines that create the double bevel in the original. I added some cutouts to the design and ran the file through the "Extrude" app in Corel Draw, that gives it a 3D look. The whole process took maybe 30 minutes, but will give it a whole different look. ;
Here is the original file

And the revised file
Here is the original file
And the revised file
01-23-2017, 08:03 PM
#362
Thread Starter
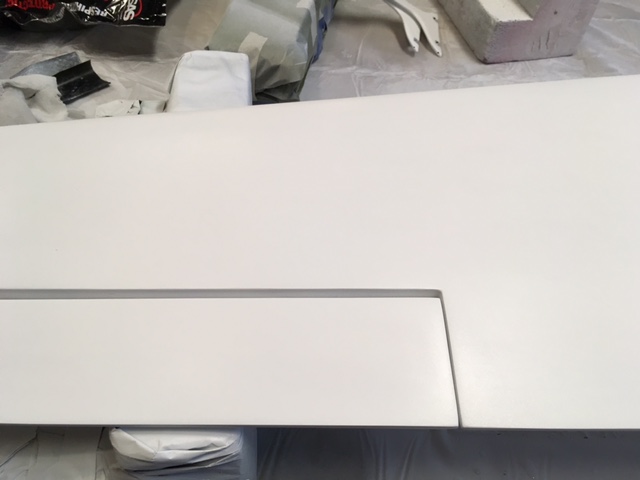
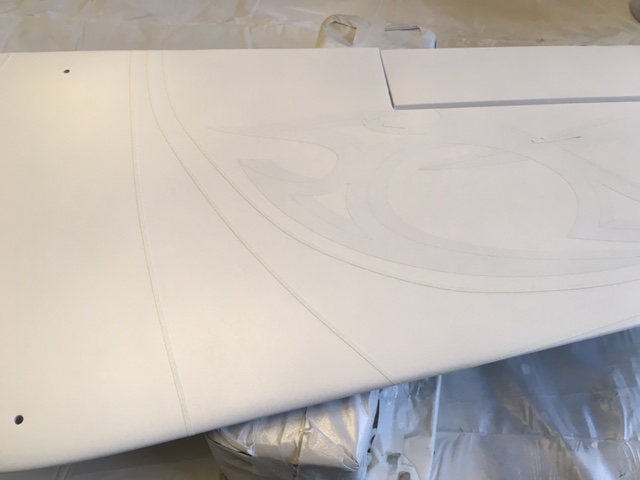
I first shot a light coat of white over the whole wing to block out the primer.
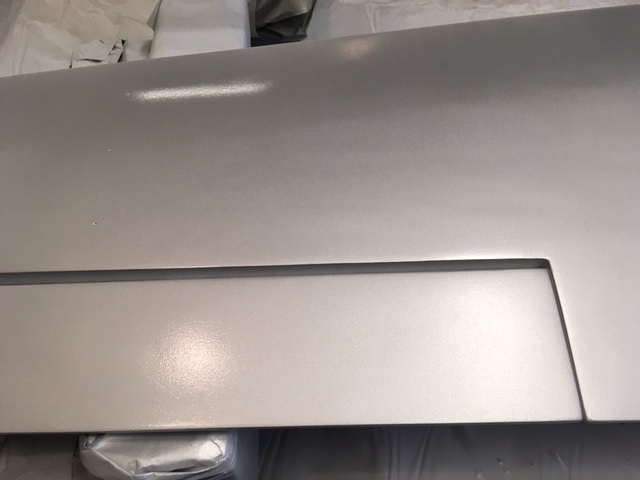
I then shot House of Kolor fine Metalume over the white. This silver will create the pinstripes and the 3D graphic.
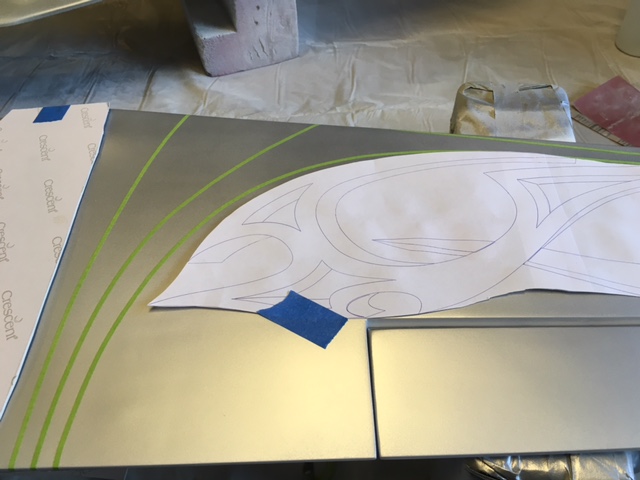
Here I use 1/8 inch fine tape that will create the pinstripes. I use a paper template to lay out the pinstripes around the graphic.
I now add the graphic paint mask.
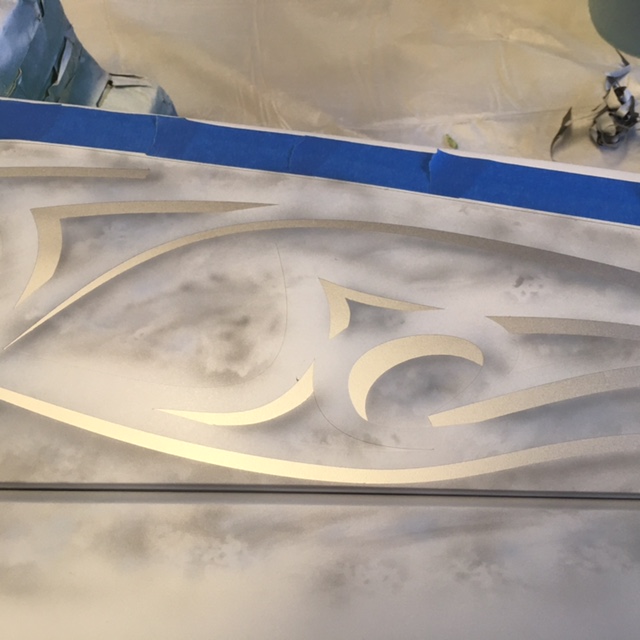
I now shoot a thin coat of white over the whole surface including the paint mask. Keep in mind that under the 1/8 inch tape and the paint mask is silver.
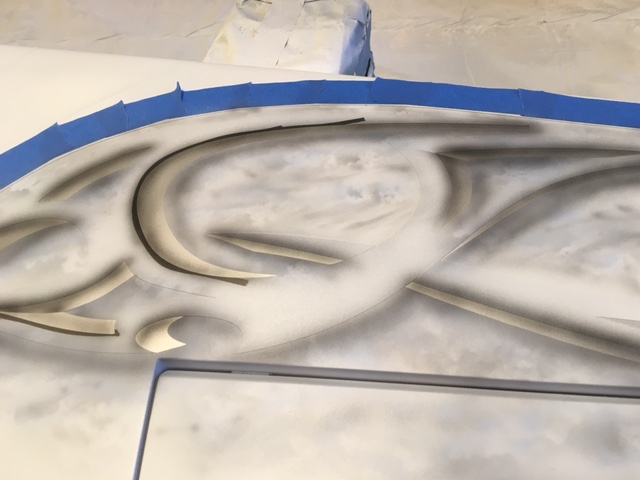
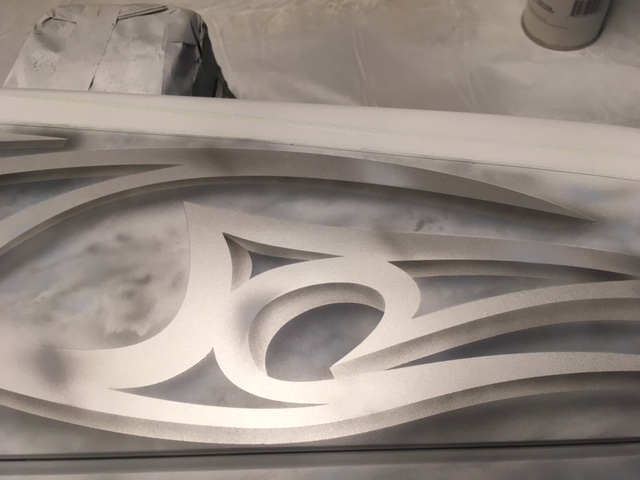
I now add some random texture with an airbrush to the area that will surround the graphic. This is done with blue added to black followed by some blue added to white. Nothing fancy. The more random, the better.

I now pull the masking film that will create the 3D part of the graphic.
I then shot House of Kolor fine Metalume over the white. This silver will create the pinstripes and the 3D graphic.
Here I use 1/8 inch fine tape that will create the pinstripes. I use a paper template to lay out the pinstripes around the graphic.
I now add the graphic paint mask.
I now shoot a thin coat of white over the whole surface including the paint mask. Keep in mind that under the 1/8 inch tape and the paint mask is silver.
I now add some random texture with an airbrush to the area that will surround the graphic. This is done with blue added to black followed by some blue added to white. Nothing fancy. The more random, the better.
I now pull the masking film that will create the 3D part of the graphic.
01-23-2017, 08:12 PM
#363
Thread Starter
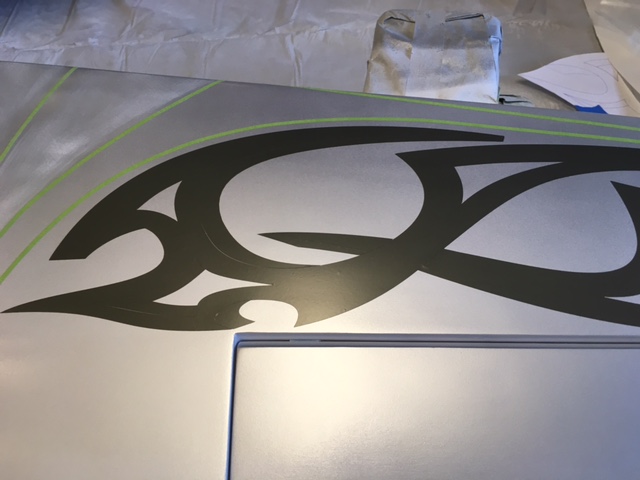
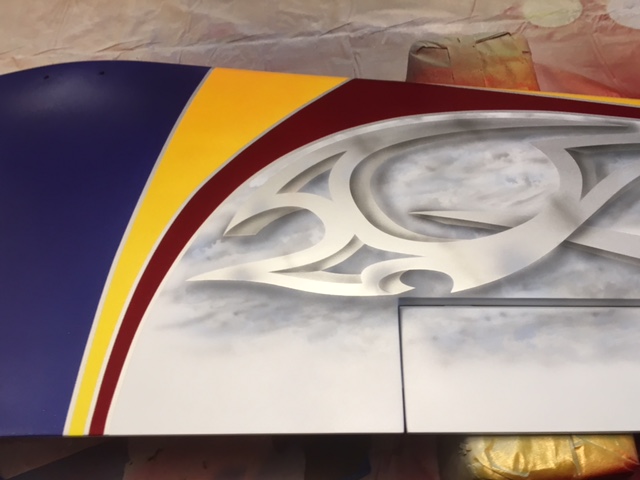
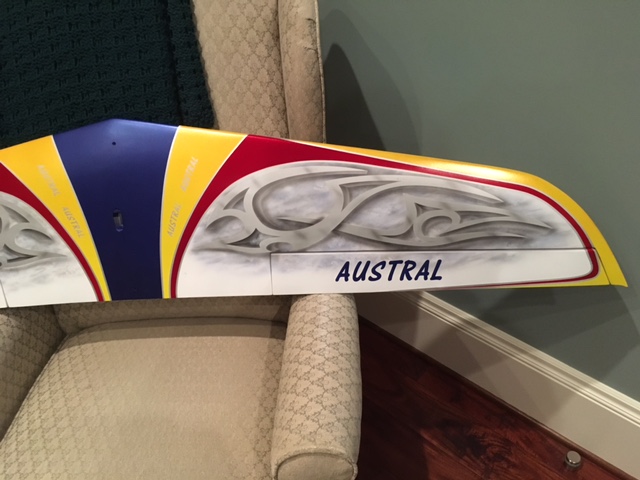
I then airbrushed some thinned black on the 3D part of the graphic and shot a light drop shadow onto the textured base to give it more of a 3D appearance.
Next I pulled the main graphic mask and shot a few lines onto the top of the graphic with thin black to give reflective highlights. I also shot a little bit of white in random areas for highlights.

Now the balance of colors were shot.


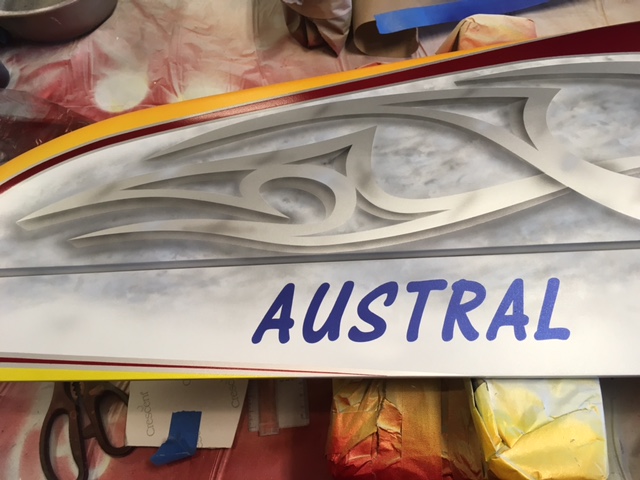
Austral name added.
Next I pulled the main graphic mask and shot a few lines onto the top of the graphic with thin black to give reflective highlights. I also shot a little bit of white in random areas for highlights.
Now the balance of colors were shot.
Austral name added.
Last edited by Portlandflyer; 01-23-2017 at 08:26 PM.
01-23-2017, 08:18 PM
#364
Thread Starter
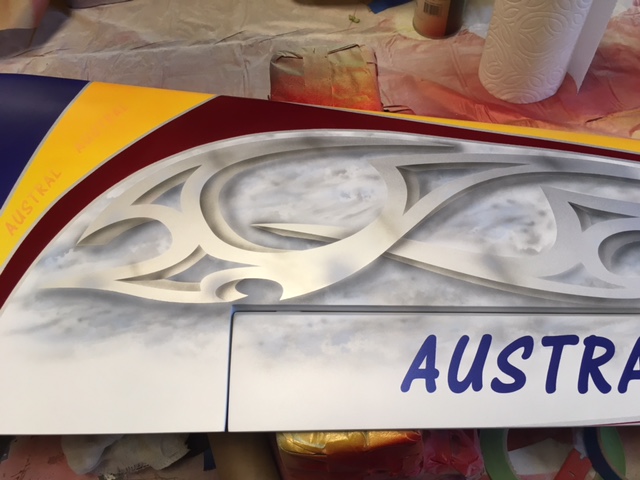
In the very last picture above you can see how I airbrushed two Austral logos onto the yellow band in orange. This shows how much flexibility you have using computer generated masking film. I didn't like the orange, so I cut additional mask and carefully applied them over the orange logos. I then airbrushed a bit of white over the orange logos and shot silver (Metalume) over the mask.

I shot House of Kolor Metajuls over all of the colors to give it a metal flake look. They will pop when the clear is shot.
I shot House of Kolor Metajuls over all of the colors to give it a metal flake look. They will pop when the clear is shot.
Last edited by Portlandflyer; 01-23-2017 at 08:21 PM.
01-24-2017, 04:50 AM
#365
Pat It looks fabulous as always.
Thanks for the update. I just finished my repaired Agenda . Everything was going well until it came to the clear. Go figure :-) Now I hate shooting Clear Coat too :-)
I shoot it using a 1.4 nozzle on a full size HVLP sprayer. And on the first coat I got a lot of orange peal, on the Fuse and wings, the stab and rudder was just regular orange peal, I should say it was Moon Craters not orange peal. It pulled together in to large blobs, and areas that had little to nothing.
I tried to smooth with another coat, but that didn't work so I added the final coat, hoping to prevent cutting through when I sanded it off.
Alas, I spent a lot of time sanding it off and sanded through anyway. :-).
After another attempt at a shooting clear over it all, the same thing happened, So I sanded it down again, and cut through again in places :-) So I gave up and went with a detail sprayer and airbrush to fix area's where I had cut through.
it came out really nice, but the weight increase from the clear, not counting Fuse (~180-200g) was about double what I had added with surface prep and color (~80-100g). Most likely because I didn't get it all off, as I was afraid of cutting through and having to start the color over.
I am going to practice some more with the graphics and graphic techniques you have shown here and try again with another plane. It may be a lot of work, but it is so satisfying when you see the final results.
Thanks again for doing the tread and getting me hooked.
Bill
Last edited by Bubblehead575; 01-24-2017 at 04:54 AM.
01-24-2017, 10:21 AM
#366
Thread Starter
Pat It looks fabulous as always.
Thanks for the update. I just finished my repaired Agenda . Everything was going well until it came to the clear. Go figure :-) Now I hate shooting Clear Coat too :-)
I shoot it using a 1.4 nozzle on a full size HVLP sprayer. And on the first coat I got a lot of orange peal, on the Fuse and wings, the stab and rudder was just regular orange peal, I should say it was Moon Craters not orange peal. It pulled together in to large blobs, and areas that had little to nothing.
I tried to smooth with another coat, but that didn't work so I added the final coat, hoping to prevent cutting through when I sanded it off.
Alas, I spent a lot of time sanding it off and sanded through anyway. :-).
After another attempt at a shooting clear over it all, the same thing happened, So I sanded it down again, and cut through again in places :-) So I gave up and went with a detail sprayer and airbrush to fix area's where I had cut through.
it came out really nice, but the weight increase from the clear, not counting Fuse (~180-200g) was about double what I had added with surface prep and color (~80-100g). Most likely because I didn't get it all off, as I was afraid of cutting through and having to start the color over.
I am going to practice some more with the graphics and graphic techniques you have shown here and try again with another plane. It may be a lot of work, but it is so satisfying when you see the final results.
Thanks again for doing the tread and getting me hooked.
Bill
Thanks for the update. I just finished my repaired Agenda . Everything was going well until it came to the clear. Go figure :-) Now I hate shooting Clear Coat too :-)
I shoot it using a 1.4 nozzle on a full size HVLP sprayer. And on the first coat I got a lot of orange peal, on the Fuse and wings, the stab and rudder was just regular orange peal, I should say it was Moon Craters not orange peal. It pulled together in to large blobs, and areas that had little to nothing.
I tried to smooth with another coat, but that didn't work so I added the final coat, hoping to prevent cutting through when I sanded it off.
Alas, I spent a lot of time sanding it off and sanded through anyway. :-).
After another attempt at a shooting clear over it all, the same thing happened, So I sanded it down again, and cut through again in places :-) So I gave up and went with a detail sprayer and airbrush to fix area's where I had cut through.
it came out really nice, but the weight increase from the clear, not counting Fuse (~180-200g) was about double what I had added with surface prep and color (~80-100g). Most likely because I didn't get it all off, as I was afraid of cutting through and having to start the color over.
I am going to practice some more with the graphics and graphic techniques you have shown here and try again with another plane. It may be a lot of work, but it is so satisfying when you see the final results.
Thanks again for doing the tread and getting me hooked.
Bill
Yep...good old clear coat. OK some thoughts. One of two things are likely happening. The first is your clear may not be fully atomizing with the gun you are using. 1.4 is on the small size for clear, but should be fine. You might try a 1.6 or 1.7. A couple of things to do. The first is to get your air pressure up. Be sure you have around 30 going into the gun. The second is a common mistake shooting clear is too great of a distance from the surface. It seems counter productive. In your mind you are thinking if I get too close, I will get runs, but you are in the sweet spot for atomizing the clear. Remember if you shoot too far away, the little drops of clear are reforming into bigger drops which will create peal. This one thing really helped me in shooting clear. I probably shoot about four inches from the surface.
I mentioned it before, but here is the trick. Be sure your compressor is not running. Hold you hand a foot or so in front of the gun. Pull full air and move your hand closer to the nozzle. When you hear a distinct change in sound, you are at the sweet spot for distance. It will likely be closer then you thought.
The other thing that could be the problem is the reducer you are using could be flashing too soon. If the reducer is too hot (flashes fast) it can flash as it's in the air and when the clear hits the surface it's already setting which will cause peal. You might try a slower reducer. HOK has three different reducers based on temperature. You might also try a retarder to slow down the flash point. In the old days when we shot lacquer, we would just add more thinner to get the stuff to flow out. With the clears on the market today, that can bite you. If you add too much reducer it can do the opposite and flash too fast.
Hope this helps.
Pat
01-24-2017, 02:31 PM
#367

Join Date: Nov 2007
Location: Boise,
ID
Posts: 14
Likes: 0
Received 0 Likes
on
0 Posts
Hey Pat, thanks again for sharing your expertise.I am getting close to painting my new Episode fuselage. I haven't settled on my design yet but I will keep it simple.I am getting my knee replaced in two weeks, so after and during rehab I plan to get the plane finished. See you soon and thanks again for your support and input.Kerry
01-24-2017, 02:39 PM
#368
Thread Starter
Hey Pat, thanks again for sharing your expertise.I am getting close to painting my new Episode fuselage. I haven't settled on my design yet but I will keep it simple.I am getting my knee replaced in two weeks, so after and during rehab I plan to get the plane finished. See you soon and thanks again for your support and input.Kerry
Good to hear from you. Hope you guys had a good holiday season. Good luck on the knee. I don't think I told you, but my wife has had both done. The re-had is the worse part, but you gotta do it.
Pat
01-25-2017, 03:32 PM
#370
Thread Starter
http://www.coastairbrush.com/products.asp?cat=753
This get's mixed into what they call "FX Base"
http://www.coastairbrush.com/products.asp?cat=748
In the case of the Metalume, it get's mixed into their " Trans Nedulae Carrier Base, which is clear. You then reduce that mixture by 1/3 and it's ready to spray.
01-28-2017, 09:50 AM
#371
Pat
I just want to be clear. So I need to get some FX Base to mix the Metalume Effects pack into, Or does it come already mixed.
I bought the Metalume Effects pack and it came in a small can, I used it straight from the can and mixed 50:50 with reducer. It was very prone to sanding through.
I just want to be clear. So I need to get some FX Base to mix the Metalume Effects pack into, Or does it come already mixed.
I bought the Metalume Effects pack and it came in a small can, I used it straight from the can and mixed 50:50 with reducer. It was very prone to sanding through.
01-28-2017, 10:20 AM
#372
Thread Starter
Bill,
Yes that's correct. All of the FX Packs are to be mixed into a Carrier Base.
Go to this link and you will see all the base colors. The one you mix the Metaliume FX into is the clear base called Trans Nebulae.
http://www.coastairbrush.com/products.asp?cat=748
Just below the clear version you will see a link for the Technical data sheet. You will see on the sheet that you mix 3 parts of base to one part FX pack (Metalume) and two parts reducer. When you mix it with the carrier base, it's tough as nails and very difficult to sand through. I have mixed the FX packs into HOK Intercoat clear and it seems to work fine as well.
The following users liked this post:
kregan (11-28-2021)
02-27-2017, 08:51 PM
#375
Thread Starter
Thank you. It is a challenge to keep coming up with new stuff, yet keep the basic colors I can see. For me, white, orange and yellow are the most visible.